| |
| |||||||
 |
| | LinkBack | Thread Tools | Display Modes |
 10-18-2015, 02:06 PM
| #1 |
| Rock Stacker Join Date: Jul 2008 Location: Austria close to Vienna
Posts: 99
|
Hi there! The white Hilux on the SCX10 chassis that I was running over 3 years is history now. I have dismembered it completely and the suspension parts were moved onto another chassis. I recently decided to go with a truggy build. My first truggy ever. I ordered a Hilux MAXI-PRO truggy chassis from rcmodelex. All metal parts I ever ordered from Martin came in high quality finish. So is the MAXI-PRO Chassis. Top notch hand made piece of a chassis. Worth each Cent. I also ordered the HPI gear reduction unit that rcmodelex is using for all their chassis. I also transfered the Novak 55T Motor. I will see if the speed is ok with this chassis. All suspension parts went straight under the new chassis. I only had to switch some of the solid links to make the wheelbase fit right. The Transfer case is an unused Killer TC from RC4WD that I had laying around. The transfer case mount is from a TF2 and fits very well into the chassis. The killer TC sits in an angle that reduce the drive shaft angle to a minimum. Everything turns smooth. Also it hides into the chassis and ground clearance of 6,5cm is very good considering I am using 90mm shocks and 1.55 tires with less than 105mm diameter. 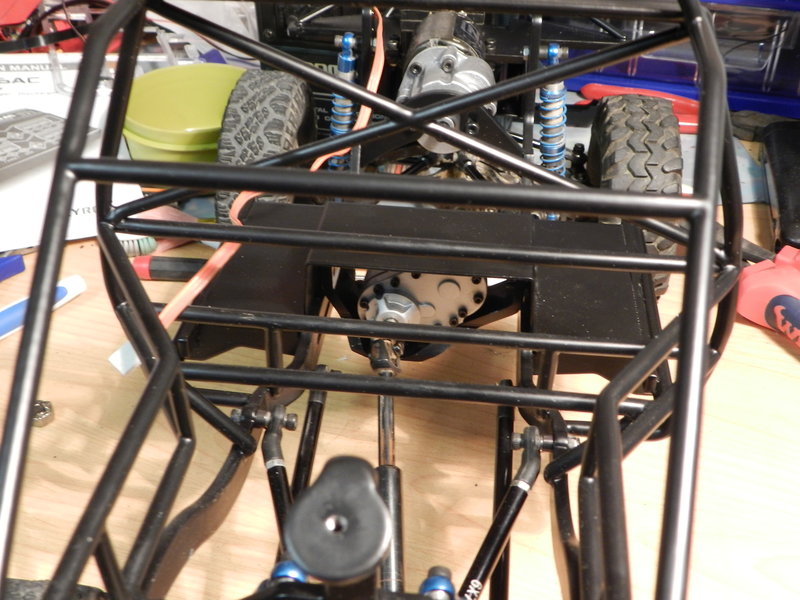  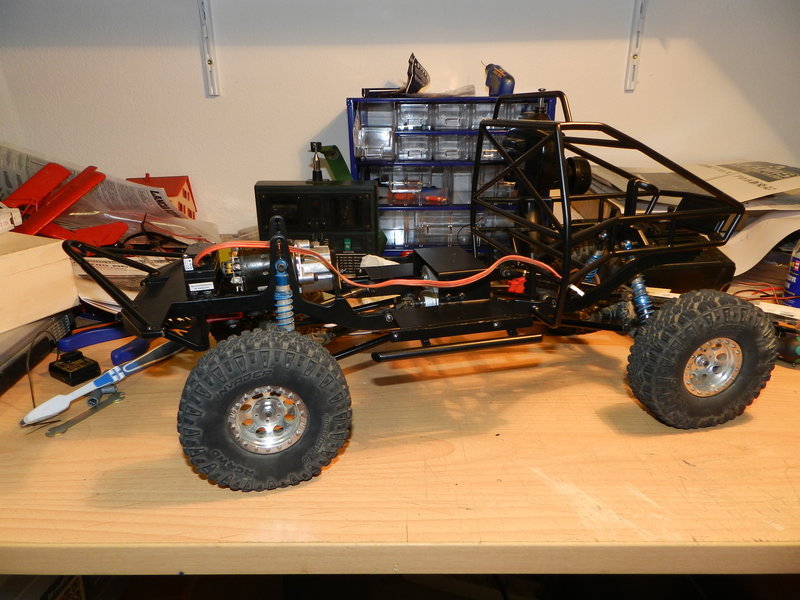      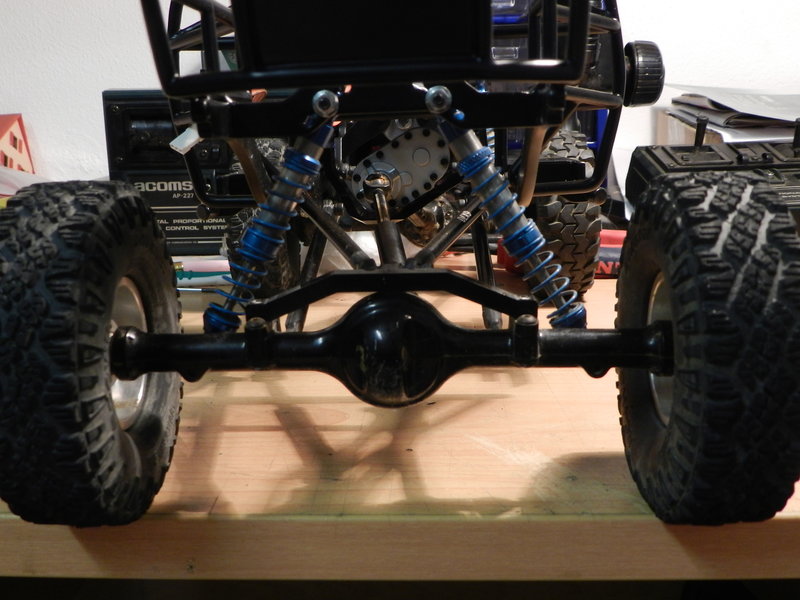 The Body: I always have enough Body parts in spare, so I could strait go ahead with the build of the body. I glued the rear wall from a TF2 kit that I had surplus and started to sand the body edges. Also modified the front fenders to match the front bumper.     Fit the Body to the chassis. Sits very nice on the chassis. I extended the wheelbase about 2cm unlike the rcmodelex version. I don't like the extreme short wheelbase Martin is using. Also with the longer wheelbase it is easier to attach the rear shocks without the need of using long spacers. I will see if the ramp angle becomes negative though. But I like the looks better. Wheel/tire Combo will be 1.55 Rock Stomper with black stock steelies like tested on front passenger. Originally the idea was to put 1.55 Iroks with 1.7 Mickey Thompson beadlocks on it but, I think they are to large.   Articulation is more than enough! 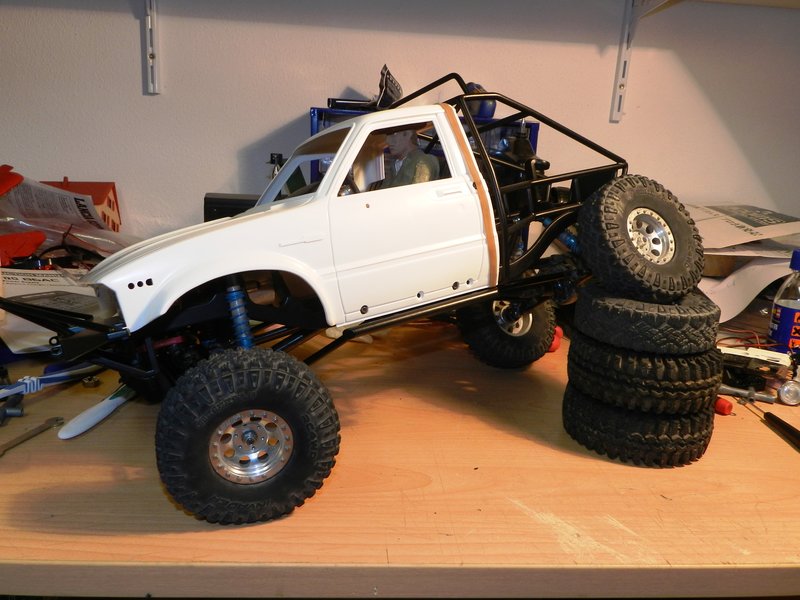  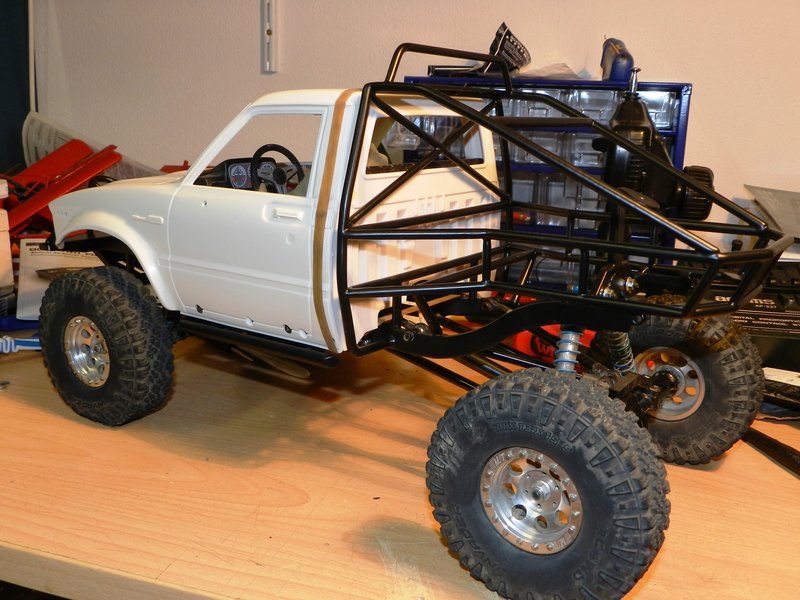 Sneak Peek for the TC. 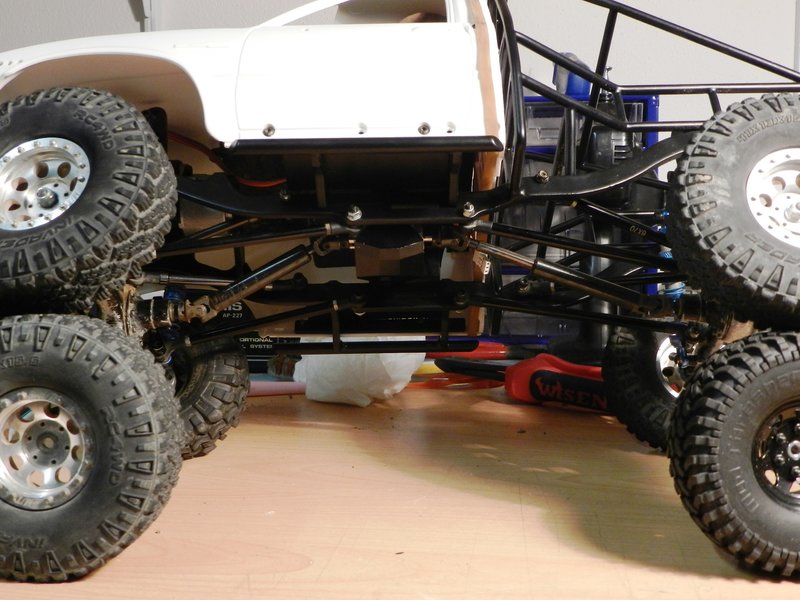 Speed controller will be used a small Tekin fx-r because I don't have much space under the body with seats. I also will be using two small 3s LiPo's one each side. Body work with styrene like inner fenders etc. will follow. Last edited by ThomasR; 10-18-2015 at 02:08 PM. |

|  |
| Sponsored Links | |
| | |
|
10-18-2015, 10:27 PM
| #2 |
| Rock Stacker  Join Date: Jun 2015 Location: Ontario
Posts: 82
|
This look's Great, she'll be a performer for sure  , I love the old Toyota's , I love the old Toyota's |
|
| |
|
10-24-2015, 02:13 PM
| #3 |
| Rock Stacker Join Date: Jul 2008 Location: Austria close to Vienna
Posts: 99
|
Did a little Progress. Made a compartment out of styrene to Keep elektronics inside clean. Bottom plate, battery holder to hold two 2200mAh 3s LiPo's, etc. Also made inside Fenders. Still alot to do on the styrene but I think you can guess the direction. 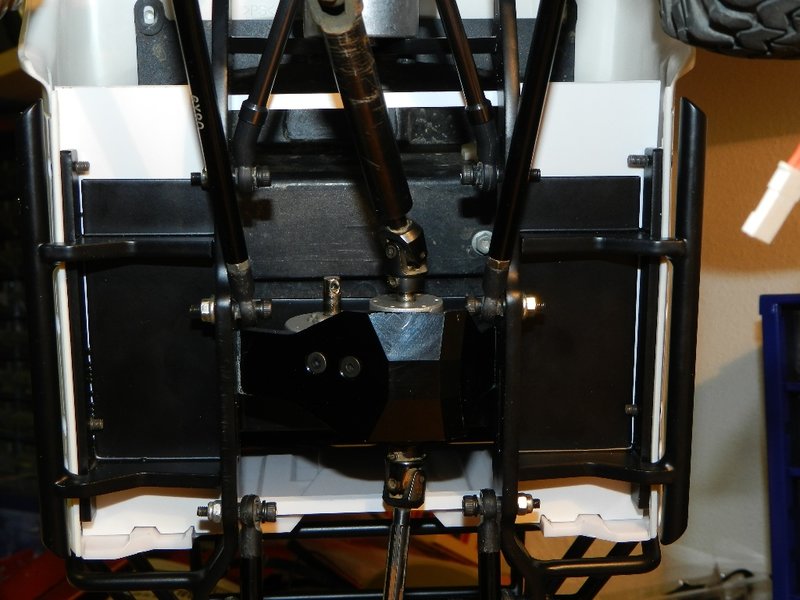   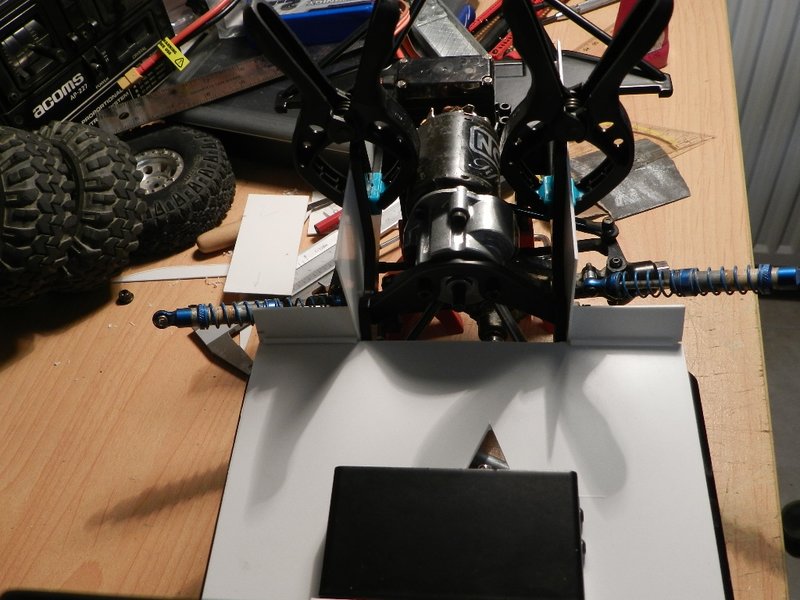    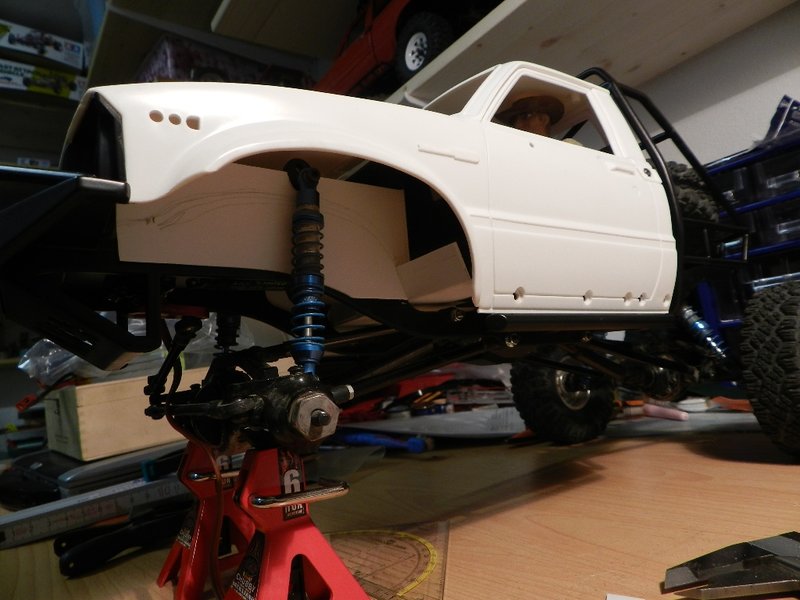 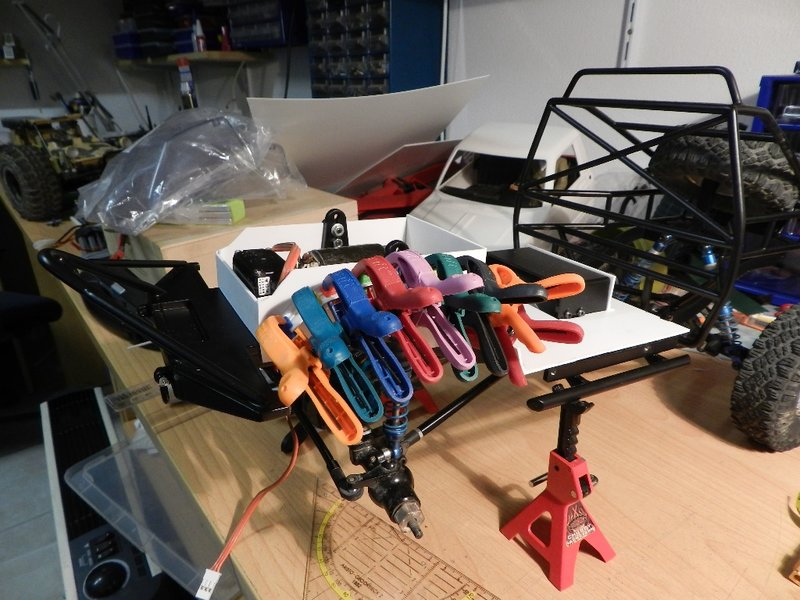 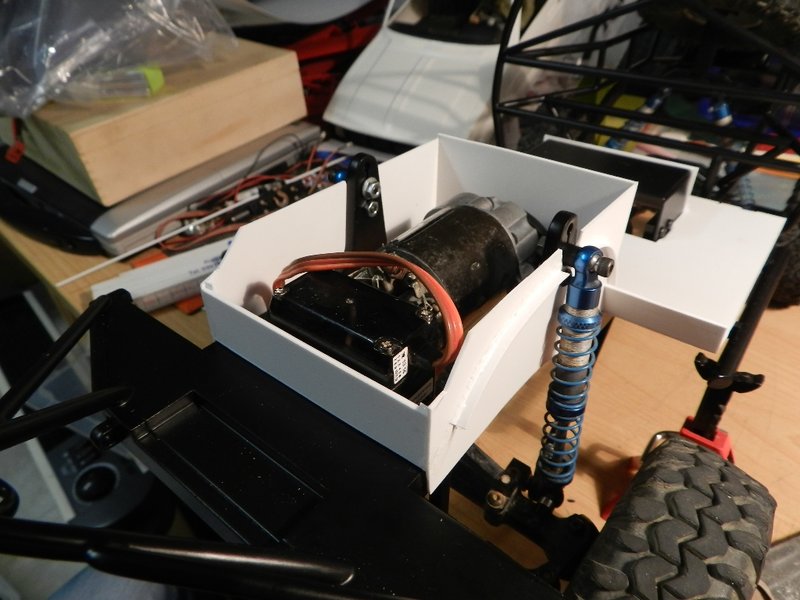  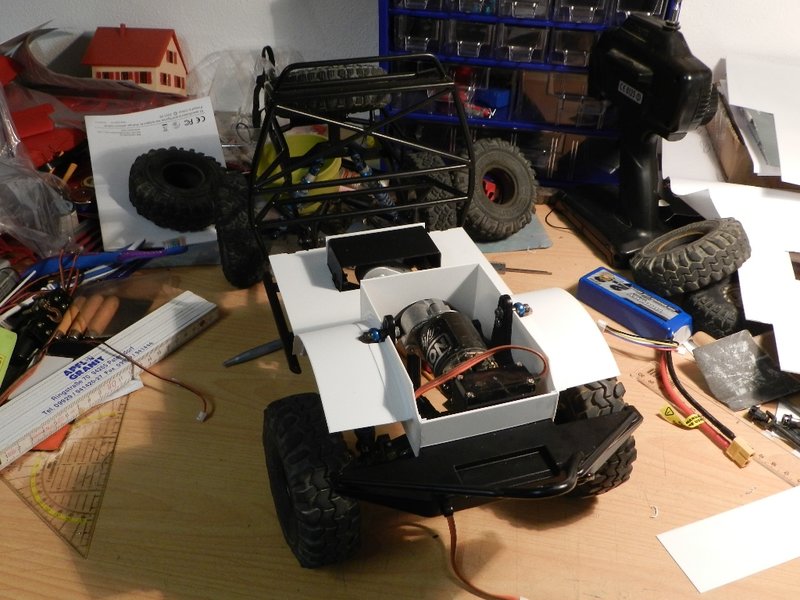   |
|
| |
|
10-26-2015, 07:09 AM
| #4 |
| Rock Stacker Join Date: Jul 2008 Location: Austria close to Vienna
Posts: 99
|
The short universal shaft from RC4WD did not arrive so far, so I cut a used scale universal shaft to fit the reduction and the TC. Now I could start with the "Transmission tunnel" in the floor pan. 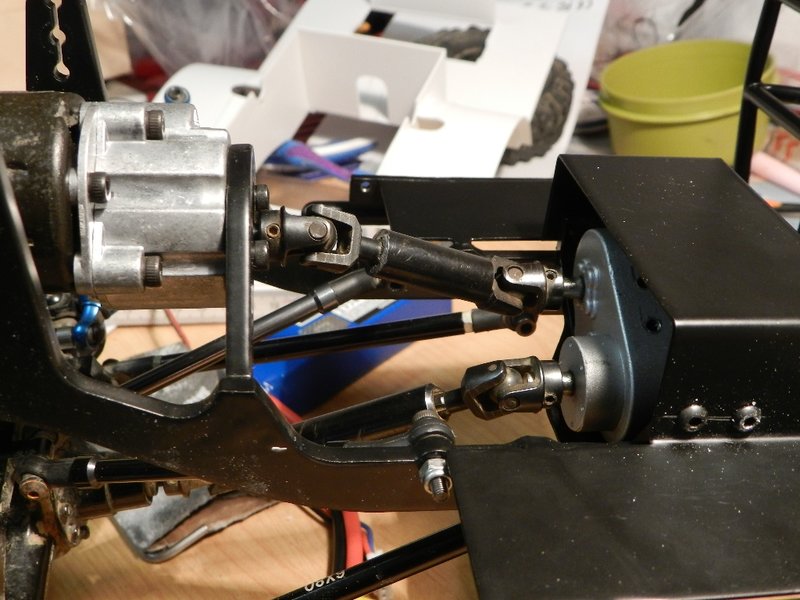 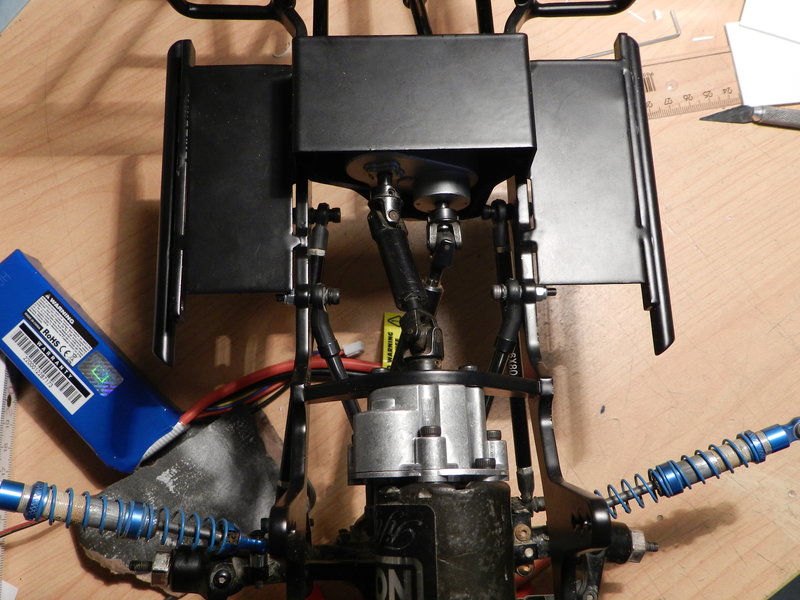     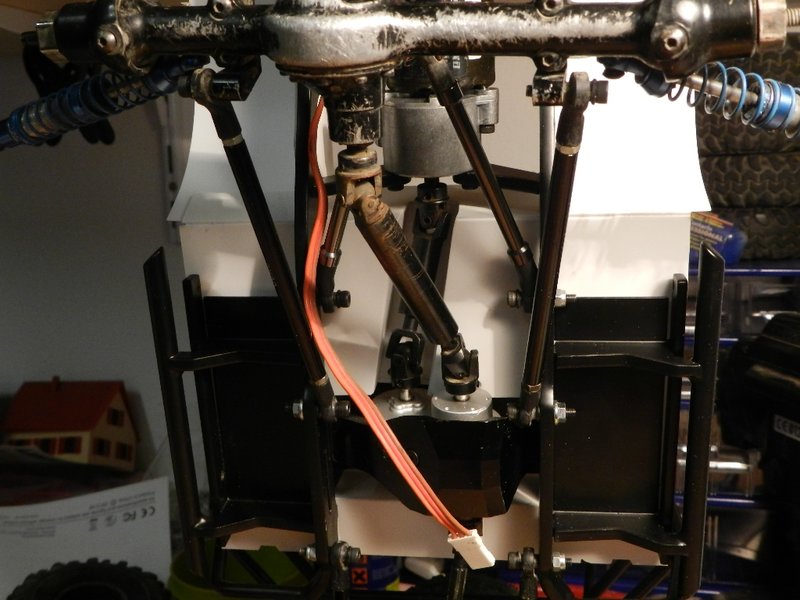 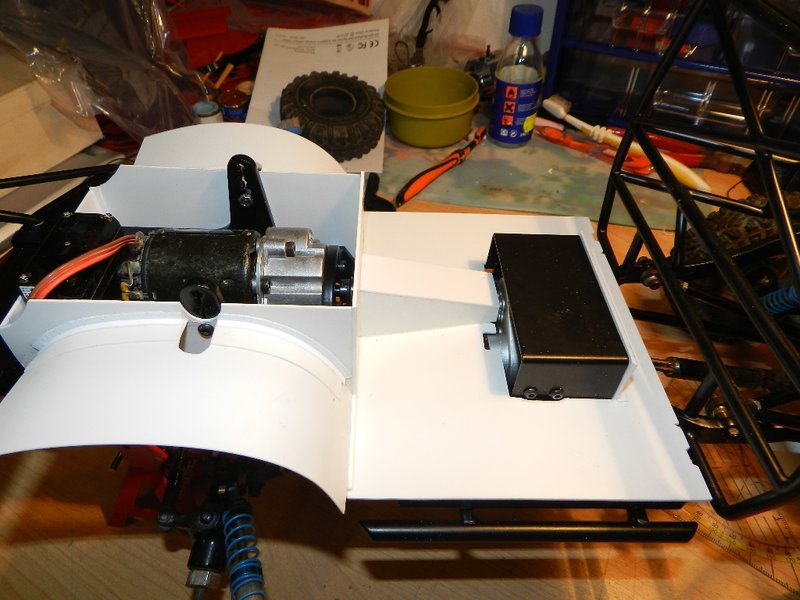 Here are the side Panels that will hold both batteries.  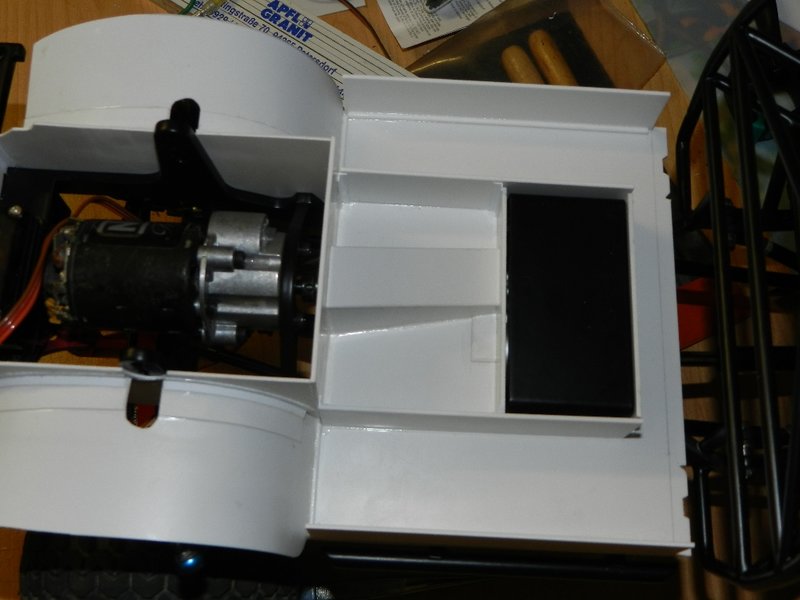   Between the batteries, the Receiver, esc and other electronics will have place. |
|
| |
|
11-01-2015, 01:50 AM
| #5 |
| RCC Addict Join Date: Jun 2004 Location: Bruiser Heaven!!!!
Posts: 1,463
|
Another start of an amazing build... I'll be watching this build close.. You have some amazing styrene skills!!!
|
|
| |
|
11-01-2015, 11:55 AM
| #6 | |
| Rock Stacker Join Date: Jul 2008 Location: Austria close to Vienna
Posts: 99
| Quote:
| |
|
| |
|
11-01-2015, 11:55 AM
| #7 |
| Rock Stacker Join Date: Jul 2008 Location: Austria close to Vienna
Posts: 99
|
Today I mounted the rear winch. I cut down a square steel tube and welded the mount between the frame rails. The winch sits beneath the spare tire and has plenty of room. The bottom plate will carry the fairllead. I just mad a Center hole where the fairlead will sit later.   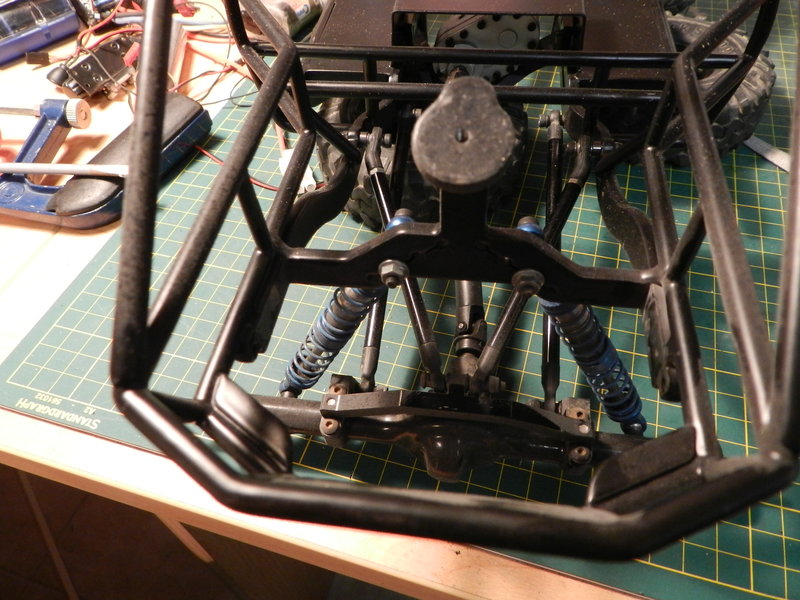 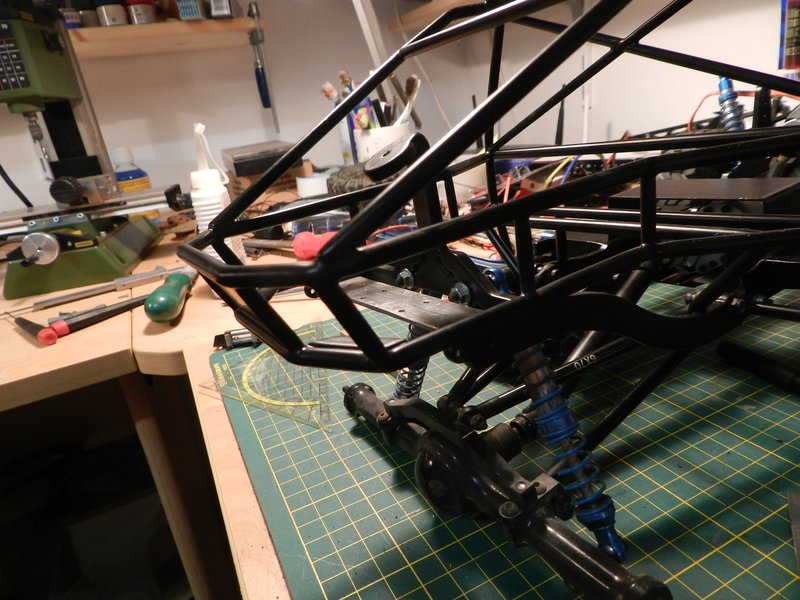  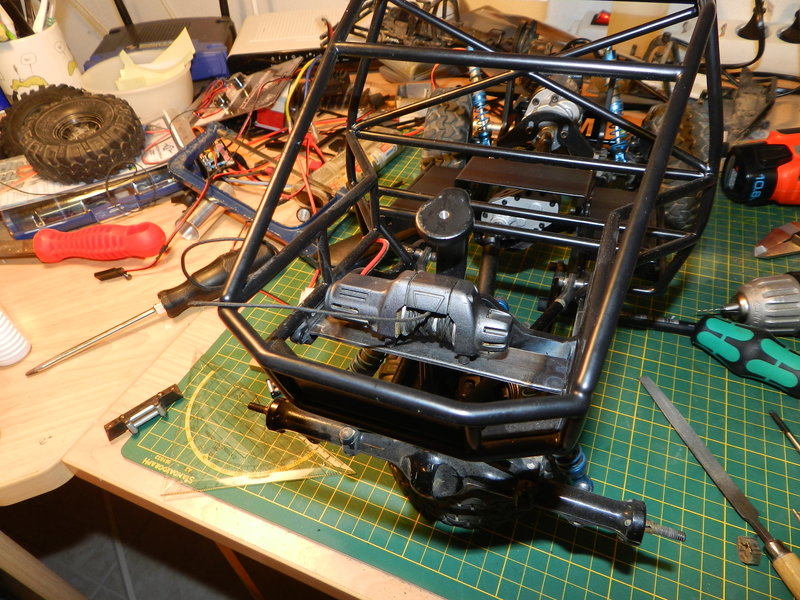  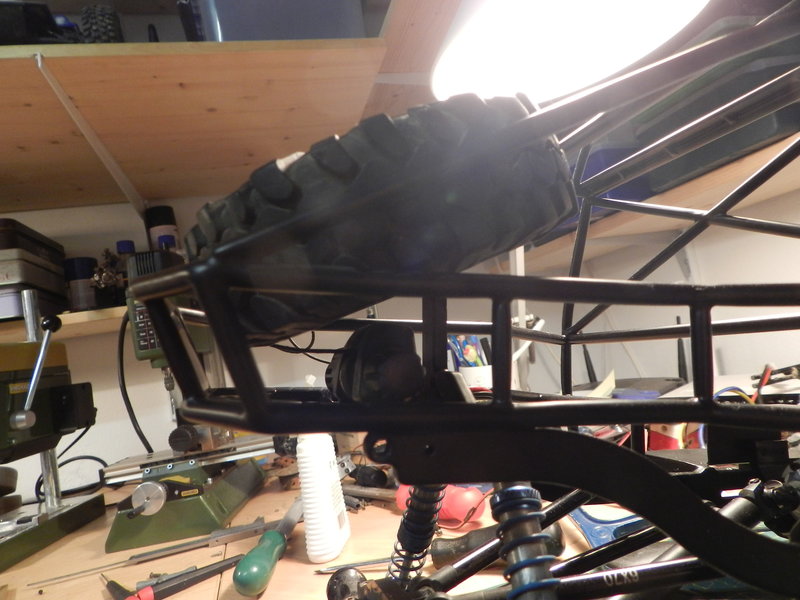   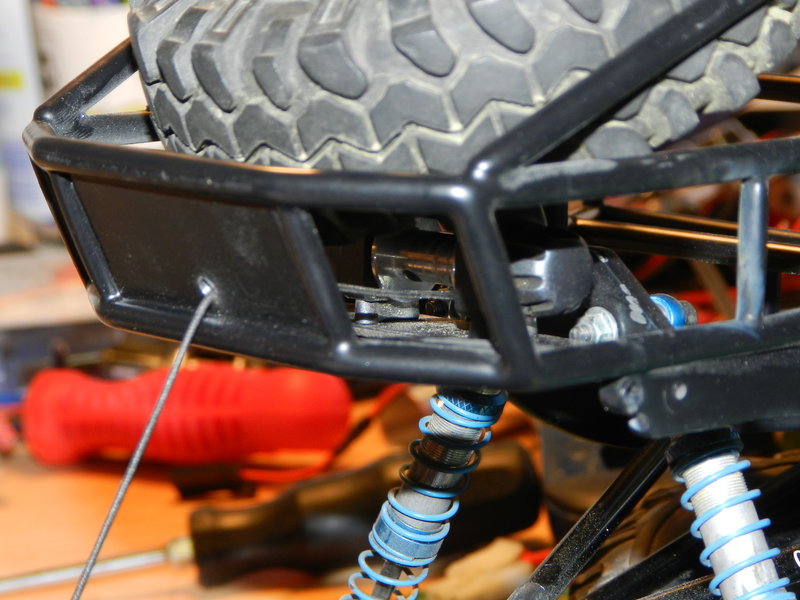  |
|
| |
|
11-07-2015, 01:18 PM
| #8 |
| Rock Stacker Join Date: Jul 2008 Location: Austria close to Vienna
Posts: 99
|
Friday I got some parts from RC4WD and my birthday present. Certainly something from Proxxon. :hippo: LHW grinder and cutter. Perfect tool for my Hobby. Handy, strong and easy to come into every Corner.   Next I had to decide which fairlead to use. Finally I decided for the Warn. It is flat and stronger. The classic fairlead with the rolls is easyer to damage.   Then the RC4WD exocage was modified with my new tool and fit to the chassis. 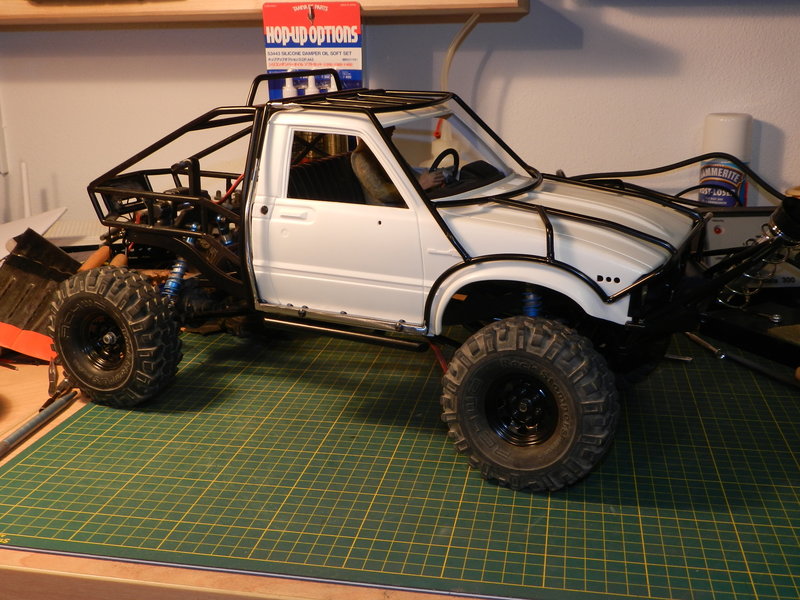     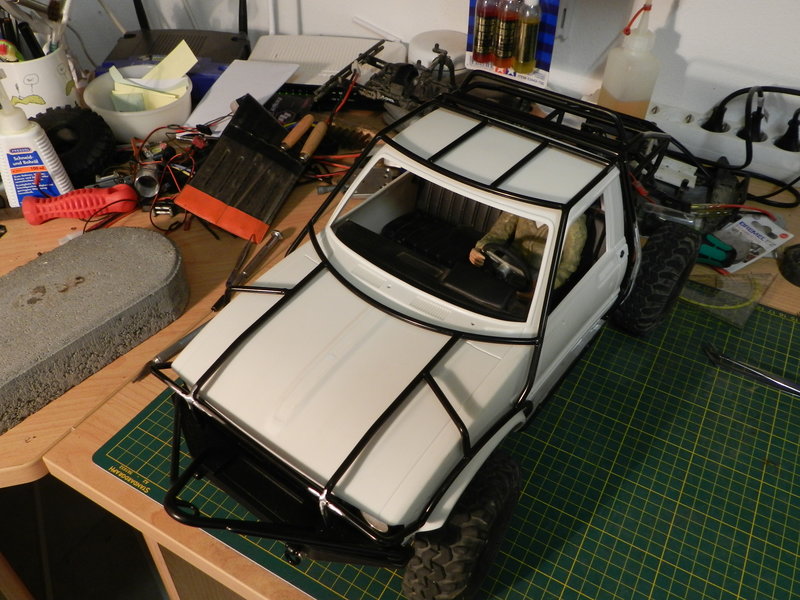 I am still waiting for some electronics parts and plugs to arrive. Until then I will continue with the Body work. |
|
| |
|
11-07-2015, 01:45 PM
| #9 |
| RCC Addict Join Date: Jun 2004 Location: Bruiser Heaven!!!!
Posts: 1,463
|
Looks really cool with the exo cage installed.. Are you going to add tubing to the front between the exo and front bumper to make it look it's one cage?
|
|
| |
|
11-07-2015, 05:01 PM
| #10 |
| Rock Crawler Join Date: Sep 2004 Location: Knoxville
Posts: 611
|
Fantastic build ! Really like what you've done under the body
|
|
| |
|
11-07-2015, 06:15 PM
| #11 |
| RCC Addict Join Date: Mar 2013 Location: Commerce Township
Posts: 1,594
|
Nice build, chassis may be well detailed out of the box, but your skills take it to another level. Nice styrene work.
|
|
| |
|
11-08-2015, 01:54 AM
| #12 |
| Rock Stacker Join Date: Jul 2008 Location: Austria close to Vienna
Posts: 99
|
Thanks! Yes, I think I will add tubes at front to virtually connect the exo with the bumper.
|
|
| |
|
11-14-2015, 01:55 PM
| #13 |
| Rock Stacker Join Date: Jul 2008 Location: Austria close to Vienna
Posts: 99
|
Little update: Closed the holes of the singal lights and in the doors. Also removed the Hilux 4WD Emblem on the Fenders. Filled and sanded everything.   Got electronic parts in the mail. Cut cables in correct lenght and soldered dean plugs to connect both batteries with the y-adabper. Also soldered the esc. So everything fits in its place the right way. 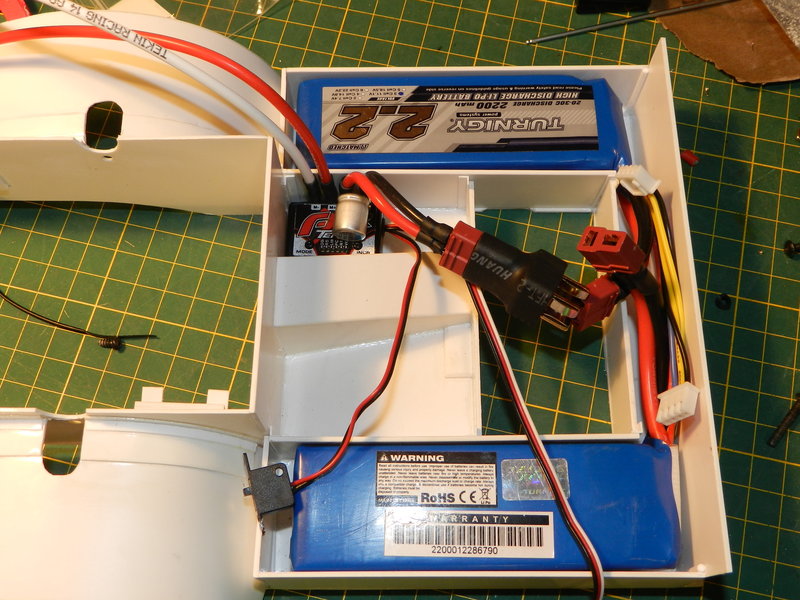 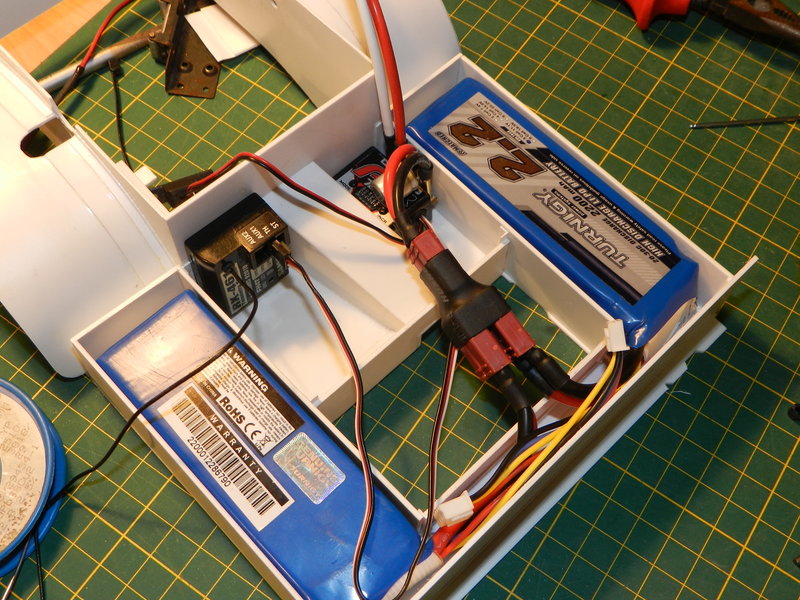 Finally I installed rock lights in front.   |
|
| |
|
11-30-2015, 03:25 AM
| #14 |
| Rock Stacker Join Date: Jul 2008 Location: Austria close to Vienna
Posts: 99
|
Hi again. Slow progress... I got some time to start with the carrier platform for the rear cage. The platform will carry fuel cell, starter batterie, Switches, power connectors for light and rear winch. It is a tight fit and slides from the side into ist position and will be secured by a counter part from the underside. 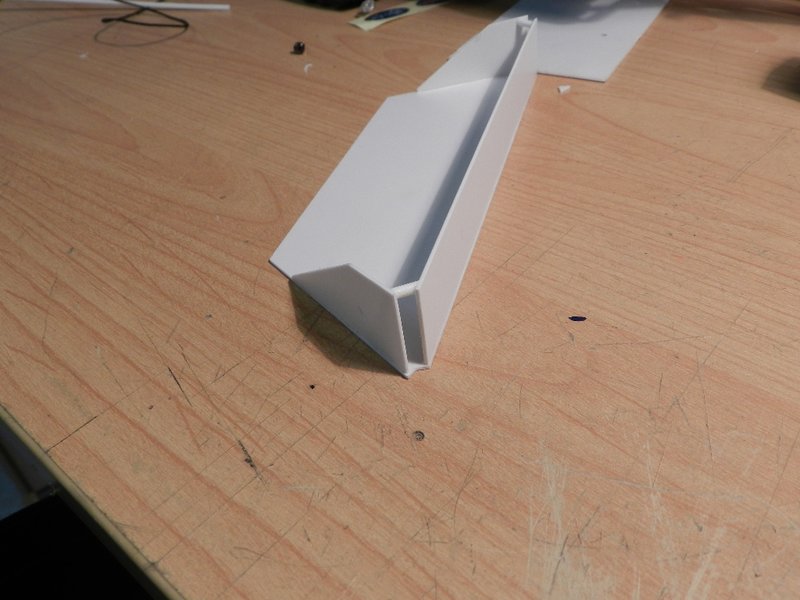  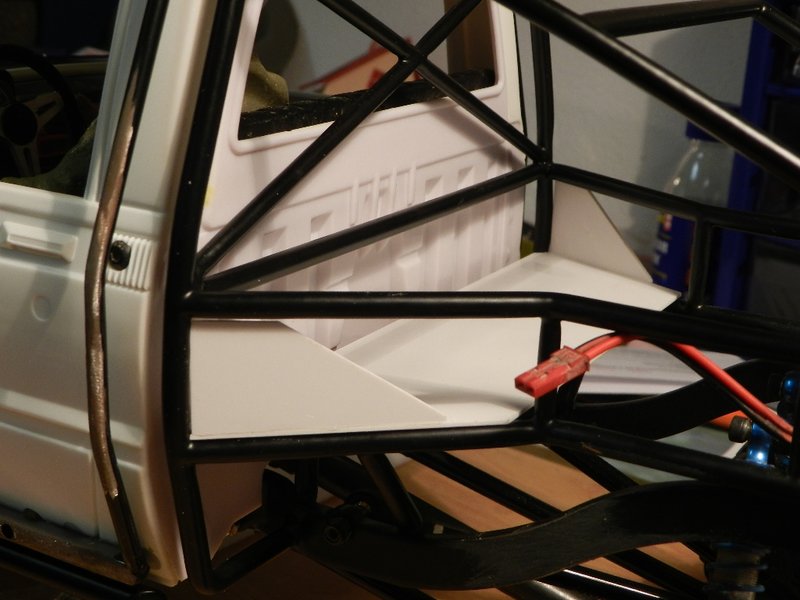  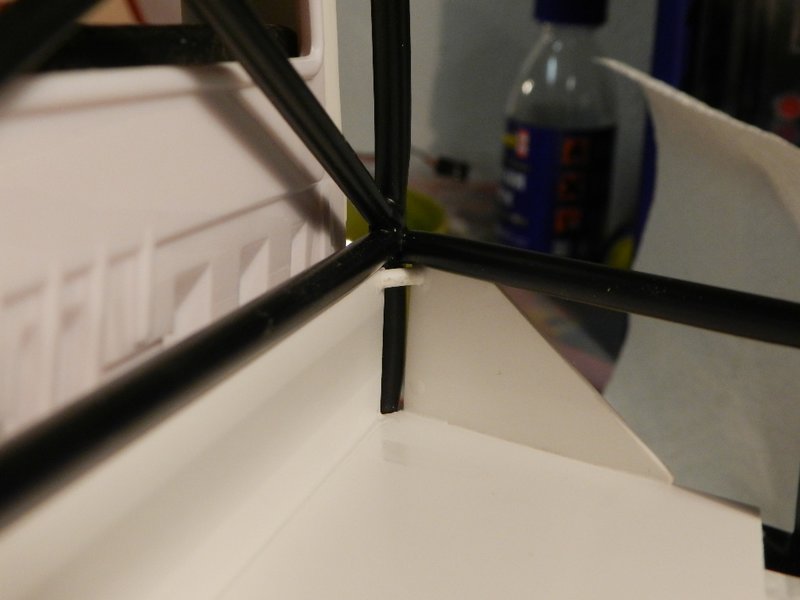  |
|
| |
|
11-30-2015, 06:03 AM
| #15 |
| Rock Stacker Join Date: Jul 2008 Location: Austria close to Vienna
Posts: 99
|
More done today. Made the lower counter part to attach the platform to the cage. It directly fits between the two cross members and secures from moving. The platform is screwed with two scale M2 screws to the counter part.   The platform slides into the cage and meets the counter parts. Fits exactly.     Then I drilled holes to the top cage and attached the Radiator with spacers. It is an Axial Radiator that has the fan attached to the opposite side. Done this I have the right angle to attach ich to the cage. Not sure wheather I will Keep the 90 degree fittings or go with direct fittings finally.   This is the plan how it should look like when finished.   |
|
| |
|
11-30-2015, 10:18 AM
| #16 |
| Rock Stacker Join Date: Jul 2008 Location: Austria close to Vienna
Posts: 99
|
Next thing. I made a mounting frame for the fuel cell. The fuel cell will be directy attached to the platform with screws and will fix the frame at same time. So no need to glue the frame to the platform.     |
|
| |
|
12-02-2015, 12:38 AM
| #17 |
| Rock Stacker Join Date: Jul 2008 Location: Austria close to Vienna
Posts: 99
|
Ahead it goes. Spent many hours with mindstorming, measuring, cutting, drilling, milling, filing and glueing. At the end, the platform with the Hi-Lift mount is finished and ready for painting.The Hi-Lift Mount consists of 6 pieces that are glued together. The mount is attached to the platform by 3 scale screws. Both the Hi-Lift mount as well as the Hi-Lift itself can be removed easily and individually. The Hi-Lift support is cut from solid styrene and the mount is milled and fits into the slot of the Hi-Lifts main bar. The support has a m2 nut pressed into from behind so that the Hi-Lift can be attached from the front. I also relocated the Fittings of the radioator and also switched to 90° Fittings on the platform (some pictures still show the old fittings). The sumbs on the radiotor will be removed later.     Relocated the fittings. Loogs more realistig.  Put everything together and mockup the complete unit. Looks okay.      90° fittings.  Easy removal even the platform is attached to the car.  Still the old fittings in.  Final version of the Hi-Lift mount. Removed some excessive material.  Put everything in the car and see if it fits and looks right. Yes is does.       All parts of the platform with Hi-Lift mount lined up. Looks less than it took time to build these...:head:  |
|
| |
|
12-16-2015, 08:25 PM
| #18 |
| Rock Crawler Join Date: Aug 2012 Location: 909 area
Posts: 936
|
Amazing work trucks looking awesome
|
|
| |
|
12-20-2015, 02:03 PM
| #19 | |
| Rock Stacker Join Date: Jul 2008 Location: Austria close to Vienna
Posts: 99
| Quote:
Added more light. It is attached with an Adapter to the fairlead mount of the winch. Sitting very good protected here and brighten up directly infront of the car.   | |
|
| |
|
01-20-2018, 01:06 PM
| #20 |
| Rock Stacker Join Date: Jul 2008 Location: Austria close to Vienna
Posts: 99
|
Forgot to add Pictures of the Progress of my Truggy. I made a crate of styrene. Inner Fenders, Motor compartment and side pods to carry two 2.2 mAh 3S Lipo packs. Also all electronics is well protected from dust and other dirt.     Body got a tan paint Job.     |
|
| |
|
 Hilux Truggy - rcmodelex chassis - Similar Threads
 | ||||
| Thread | Thread Starter | Forum | Replies | Last Post |
| RcModelex Toyota Hilux Maxi-Pro Truggy | FREEDOM83 | 1.9 Scale Rigs | 47 | 03-27-2015 12:23 PM |
| Rcmodelex Hilux Mex Truggy Adventure | ray2286 | Scale Videos! | 5 | 11-06-2012 04:26 PM |
| |


 Linear Mode


