| |||||||
Loading
 |
| | LinkBack | Thread Tools | Display Modes |
| |||||||
 |
| | LinkBack | Thread Tools | Display Modes |
| | #1 |
| Rock Crawler Join Date: Jan 2013 Location: Australia
Posts: 541
|
I joined the rest of the Scale RC world that pre ordered their LC70 bodies from Asia Tees and happily received delivery of mine today. Here in Australia, we of course can't follow along, so we call the ute the LC79. The Troopy is the LC78. The four door station wagon is the LC76. So to begin with we will take a look at the box, and it's contents. We all know what a box looks like, and let's be honest, we only care about what is inside the box anyway. Suprise, a fancy box!!! 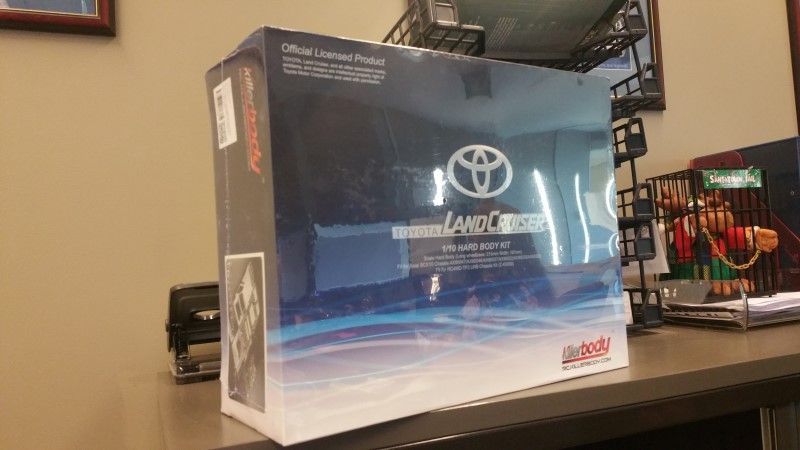 Seeing as I received the box at work, I had to wait until I got home before I could explore the contents. 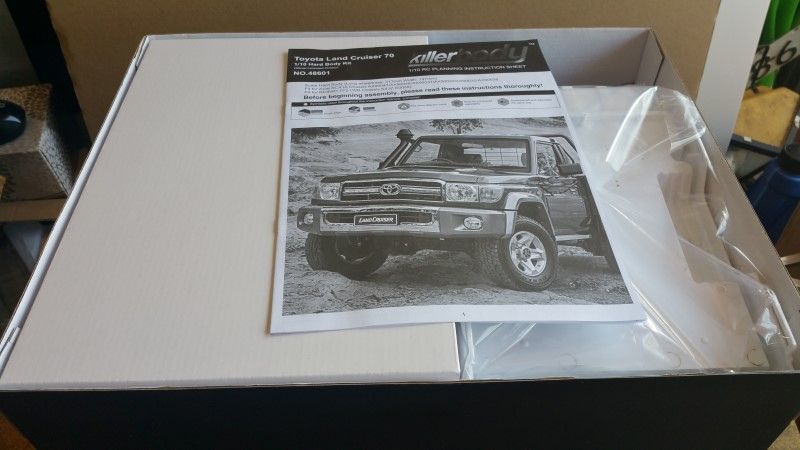 Neatly laid out and well packaged.  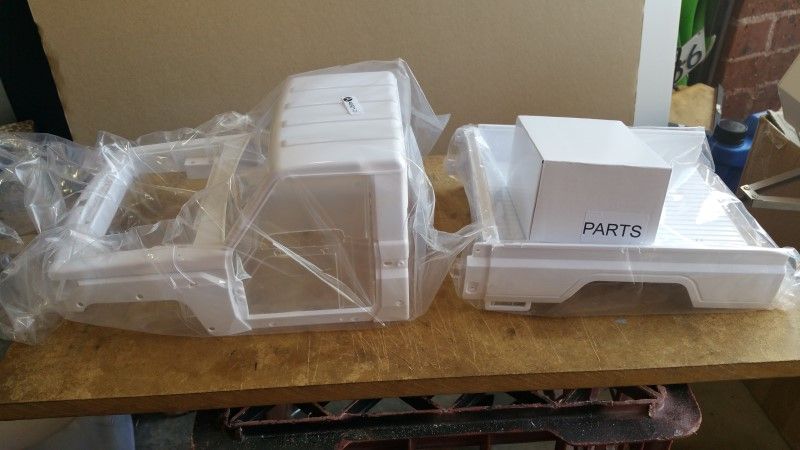 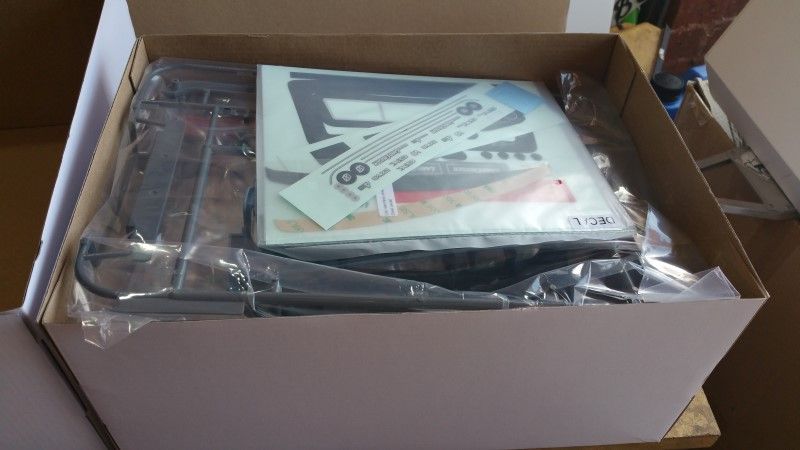 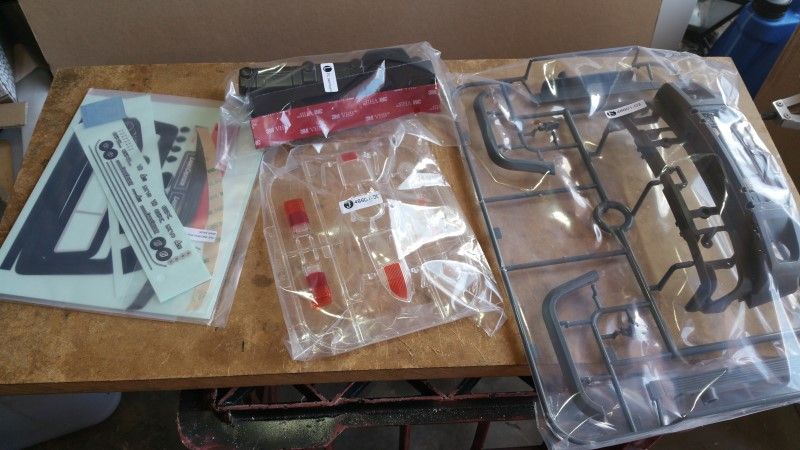 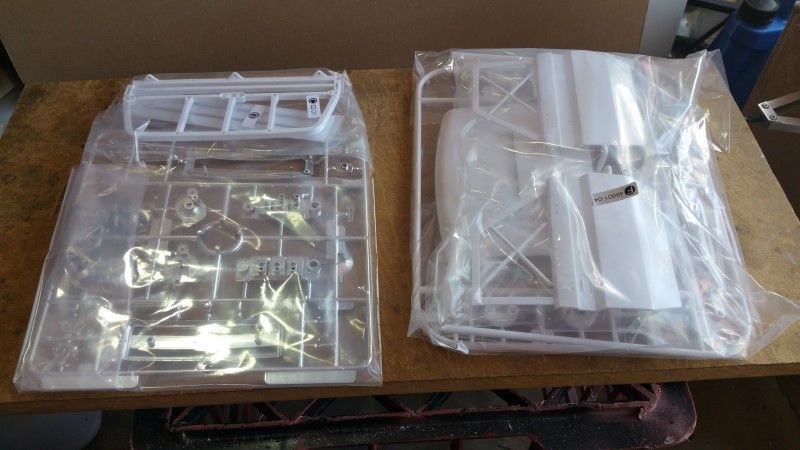 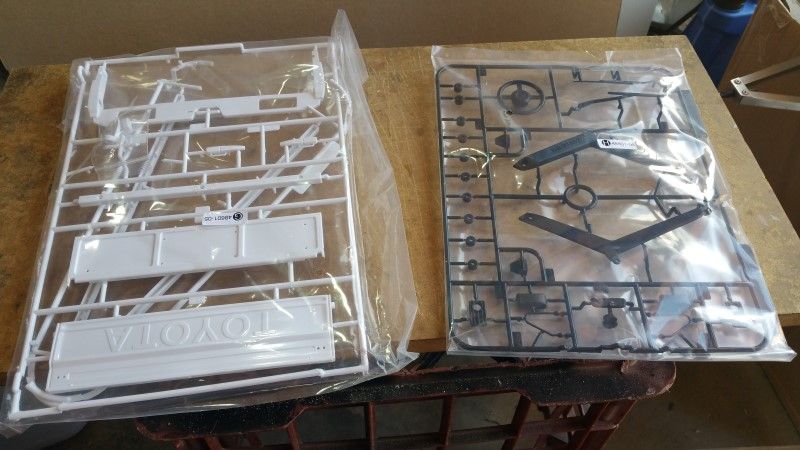 Of special note, the lenses are pre painted. 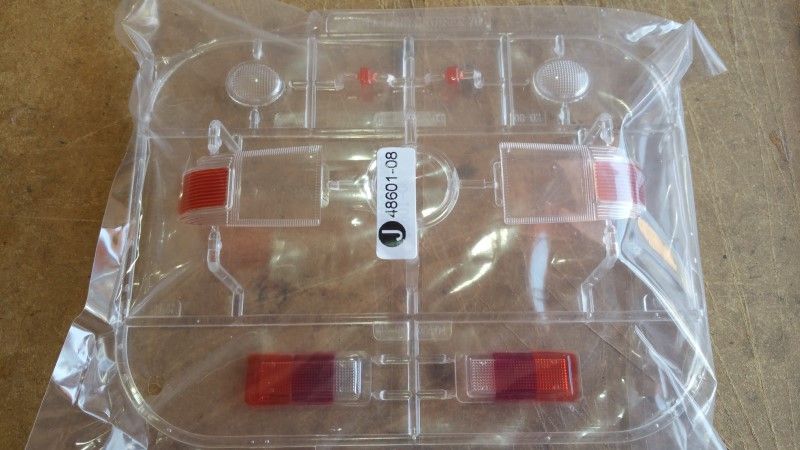 And you get a LHD and a RHD dash. 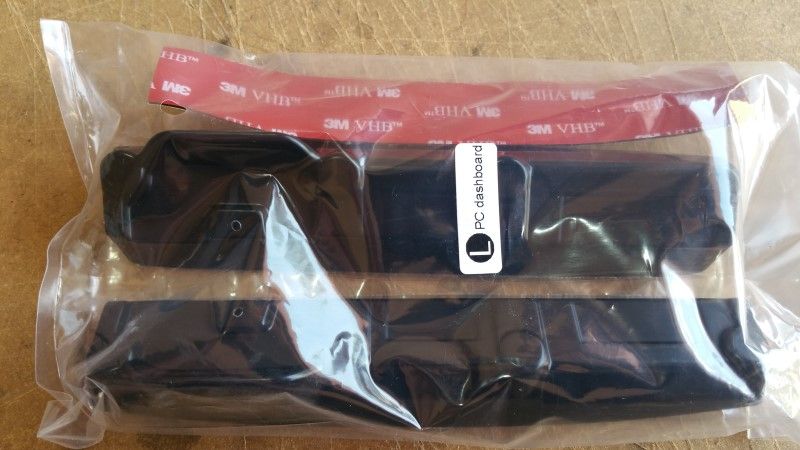 The hardware is neatly packed and labelled. And some of it really is tiny. 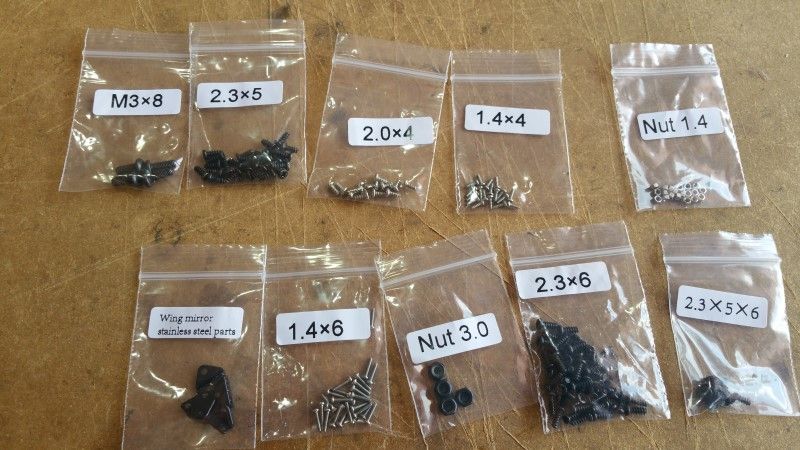 First impressions are good. The detail is very high, and almost feels like a plastic model kit. While I have no issues using this for a Class1 spec build, and driving it accordingly, I really do doubt it would last long bolted to an SCX10 and given a hard time. It isn't as big as I would have liked, and this will be made clearer in the next post. Cheers H2Micr0 |
| |  |
| Sponsored Links | |
| | #2 |
| Rock Crawler Join Date: Jan 2013 Location: Australia
Posts: 541
|
I started by bolting on the wheel arch flares and front bumper to get a better indication of size. Then I paired up the LC79 cab with a number of other bodies I have in the garage. This should give a good indication of the size. 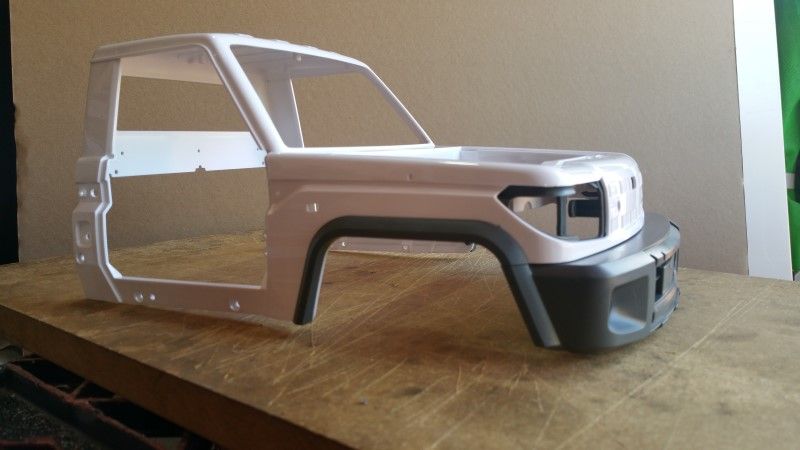 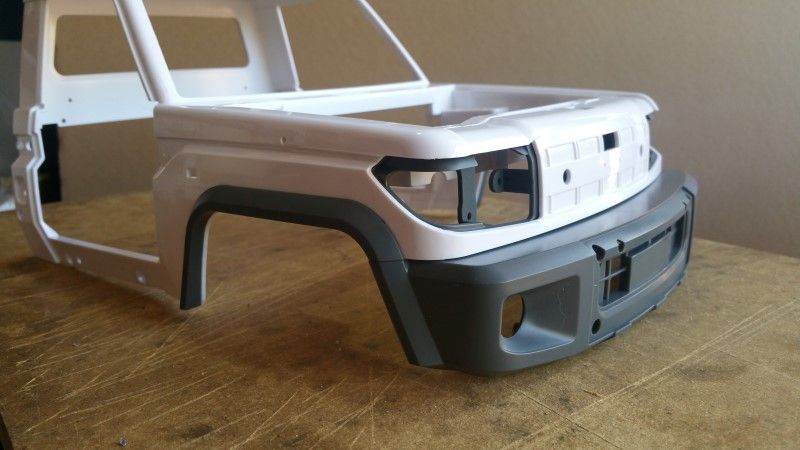 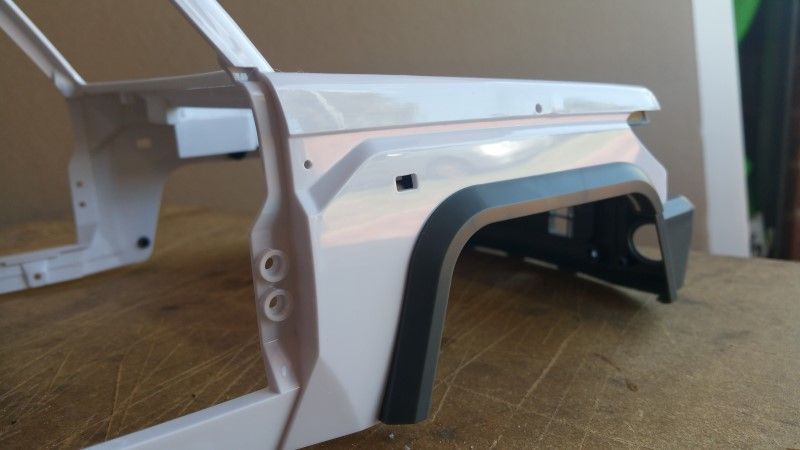 RC4WD Blazer 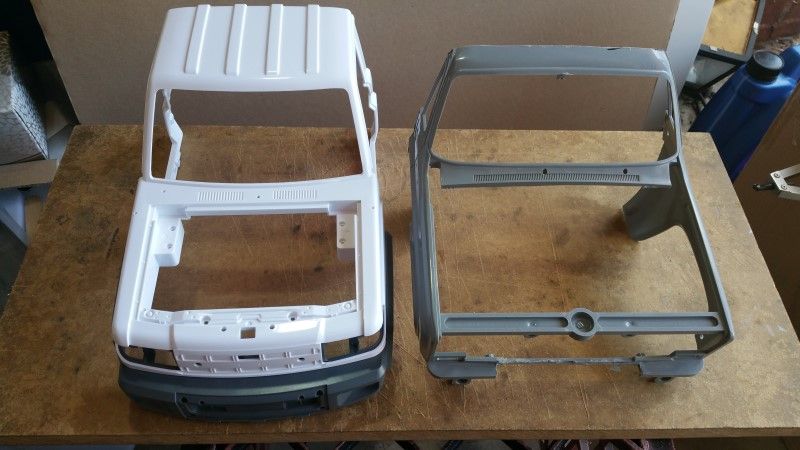 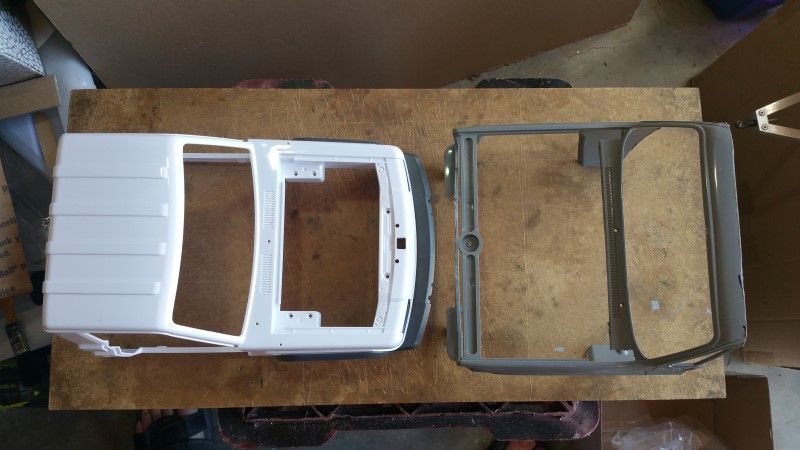 Defender 90 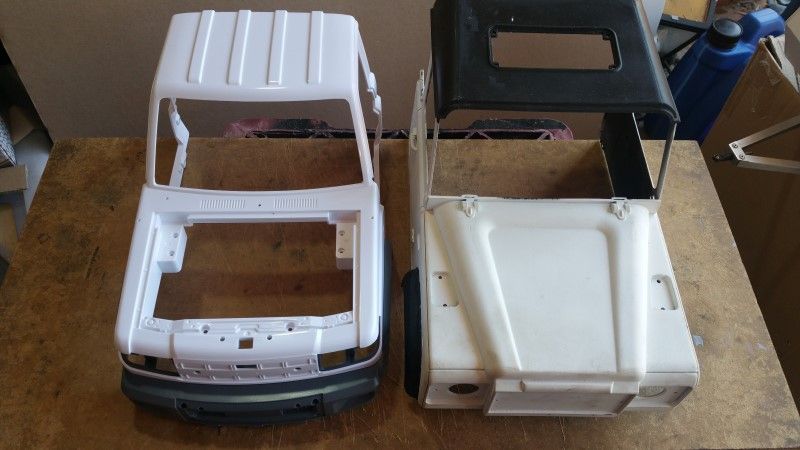 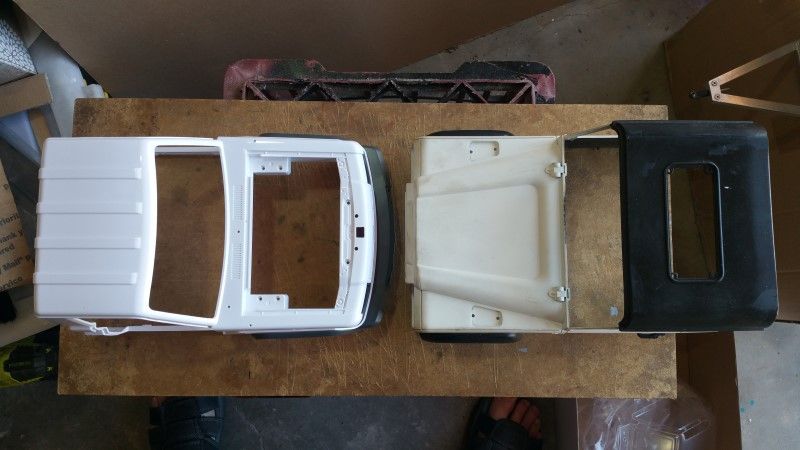 XJ Jeep Hardbody 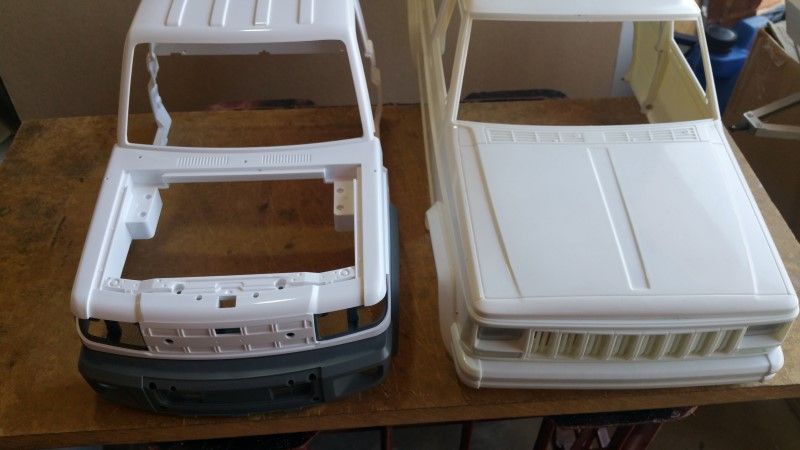 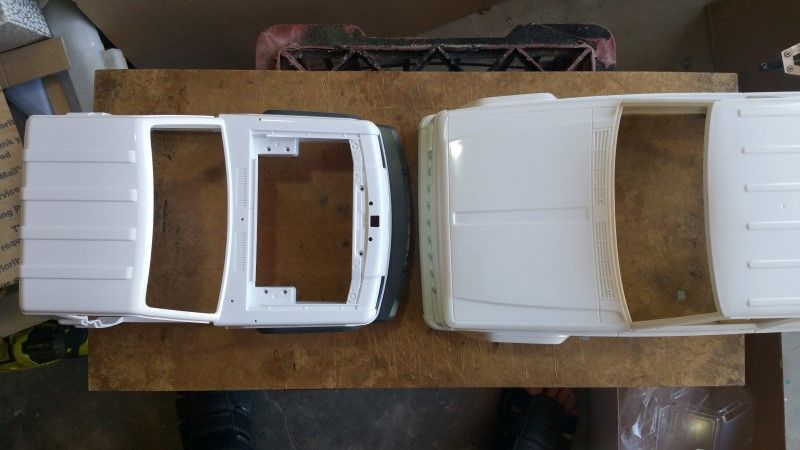 FJ45 Troopy, made from the Lexan FJ40 Tamiya bodies. 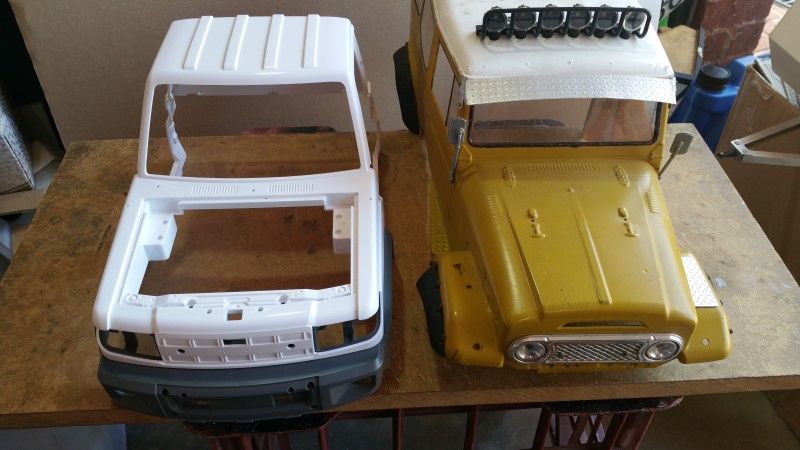 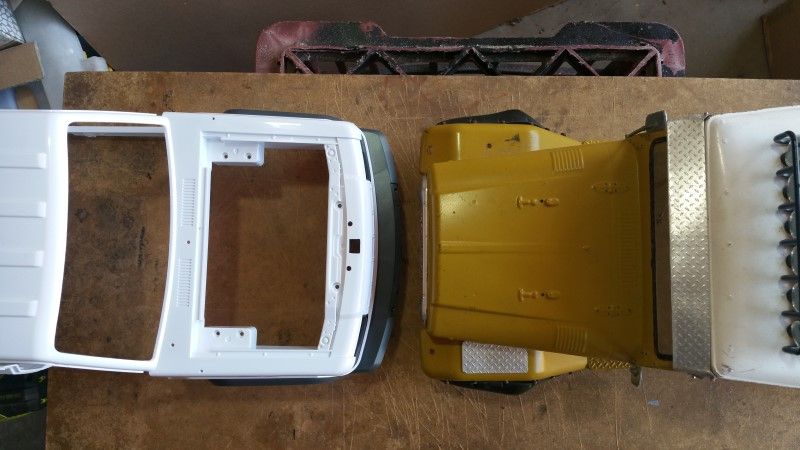 Unimog Hardbody Tray. 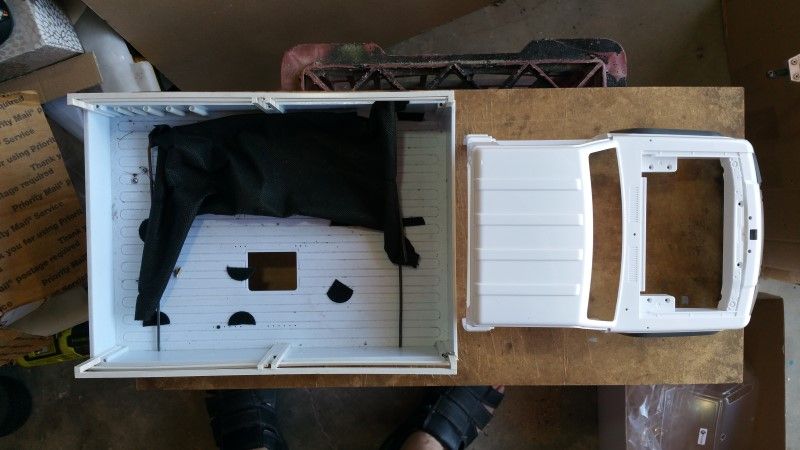  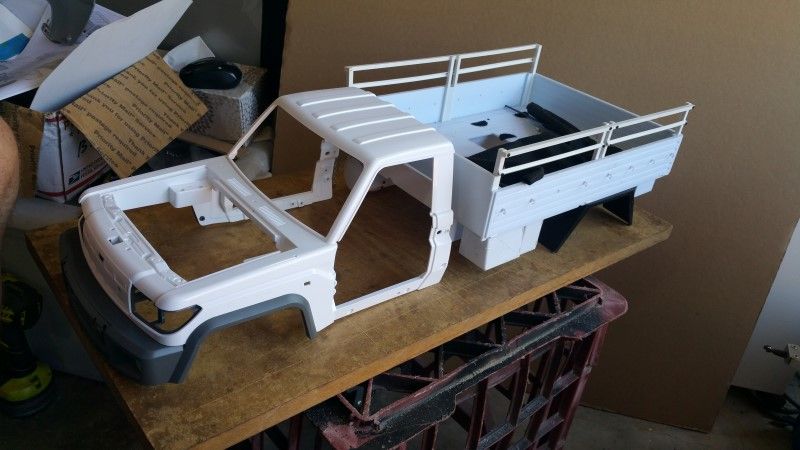 This body is narrow. It will be a challenge to achieve total tyre coverage. This is with a Yota 1 diff, 1.9 Fun Country 2 Tyres on LURC wheels. 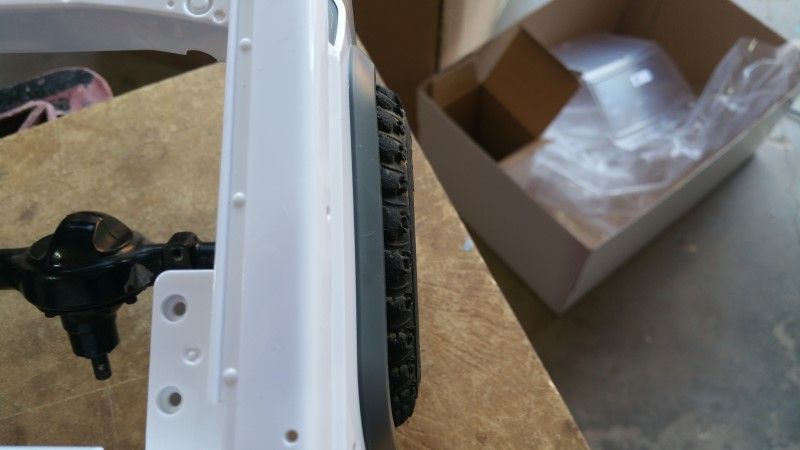 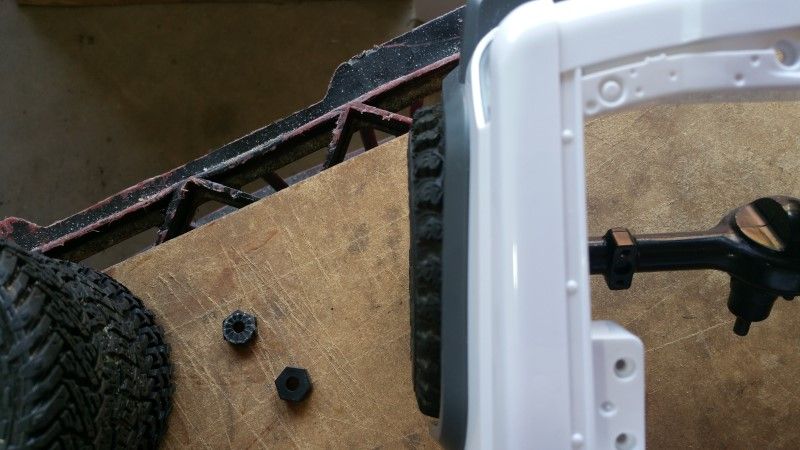 Next I will show some different tyres against the body. Cheers H2Micr0 |
| |  |
| | #3 |
| Rock Crawler Join Date: Jan 2013 Location: Australia
Posts: 541
|
Funnily enough I had quite a collection of tyres laying around. 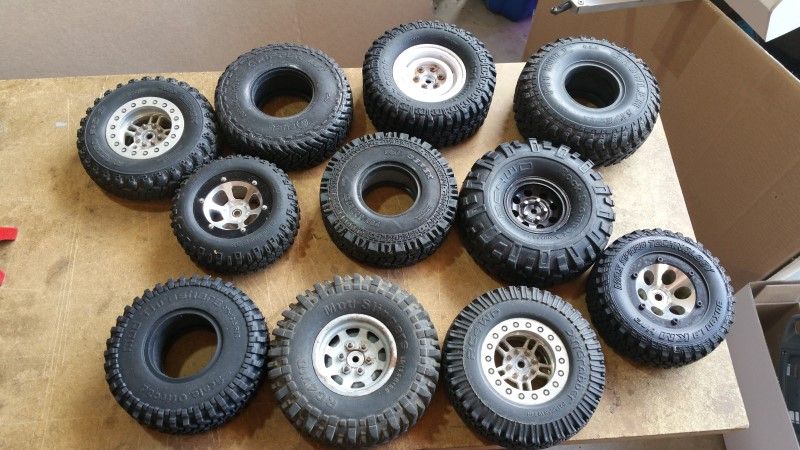 Is that strange? No I didn't think so either. Starting at the smallest here we go. 84mm 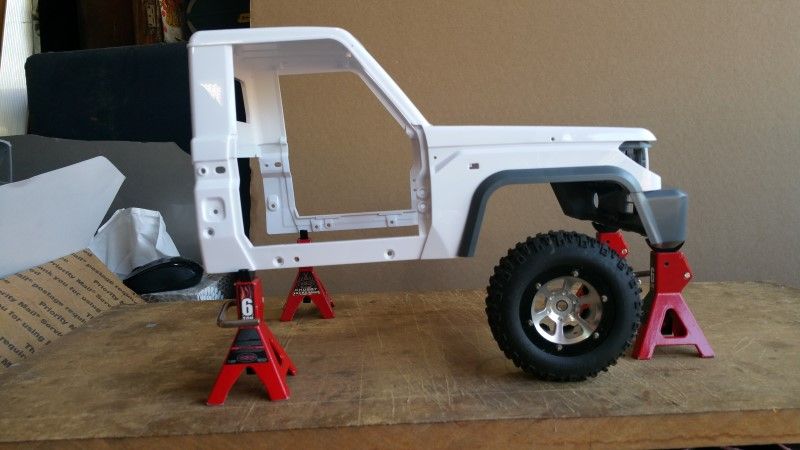 90mm 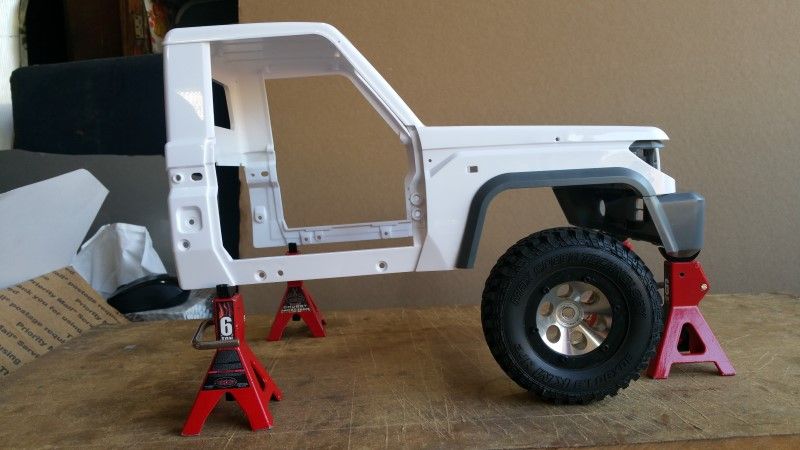 95mm 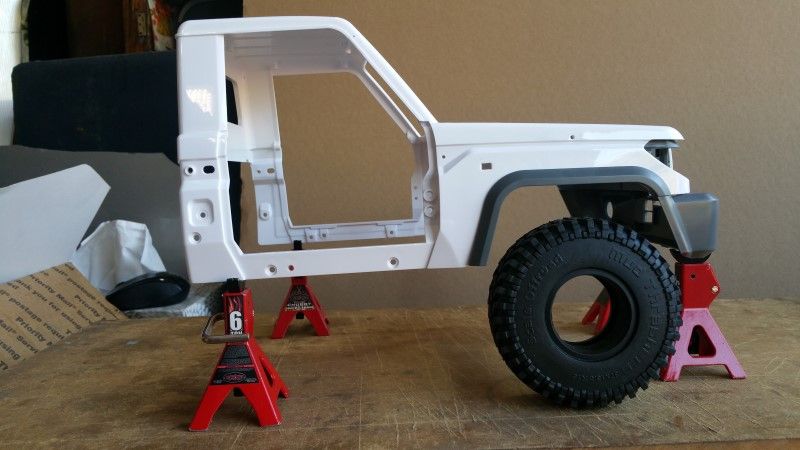 95mm with tall foams so call it 98mm 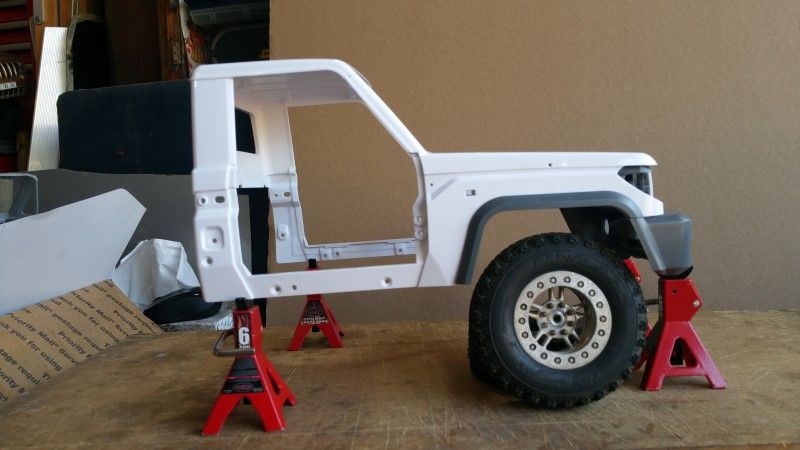 98mm 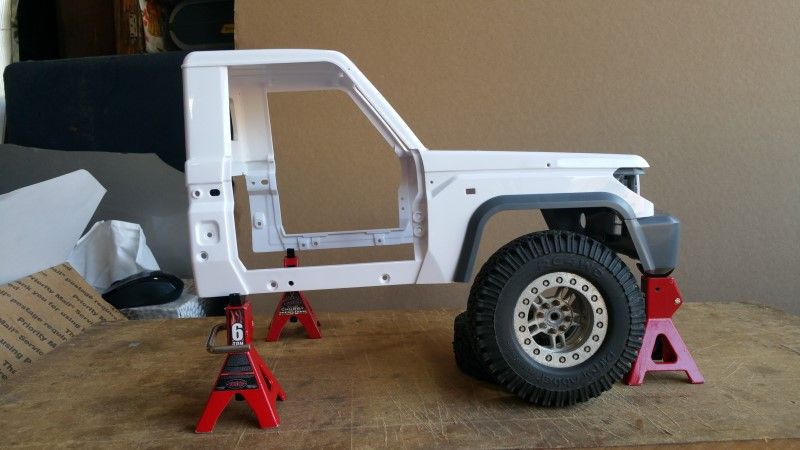 100mm 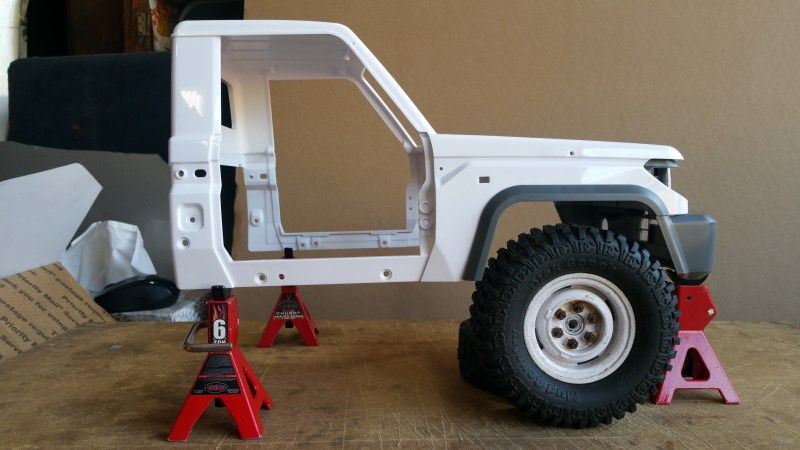 101mm 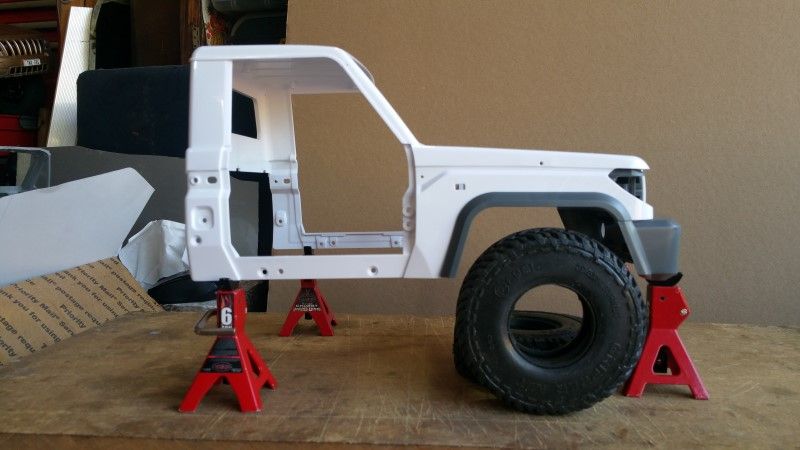 103mm 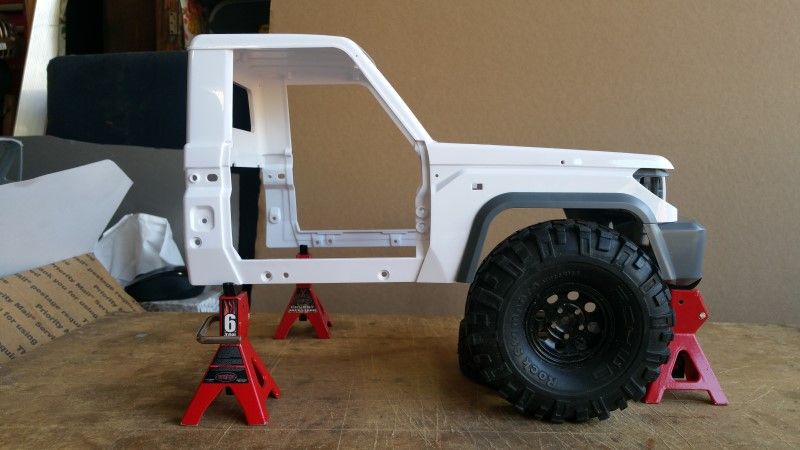 104mm 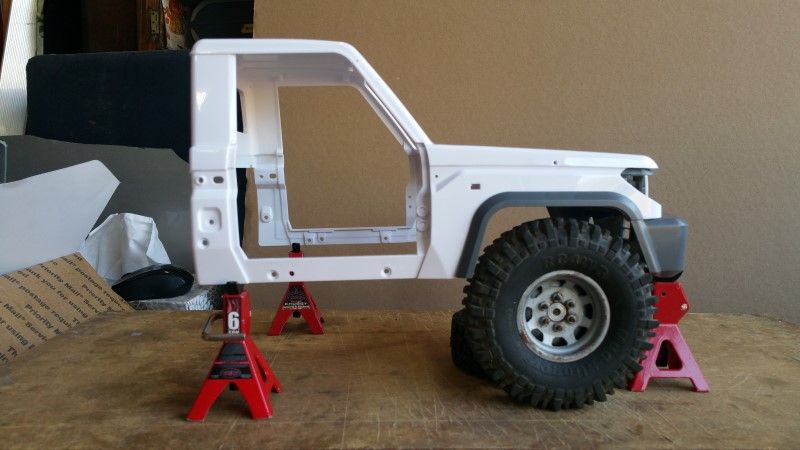 106mm 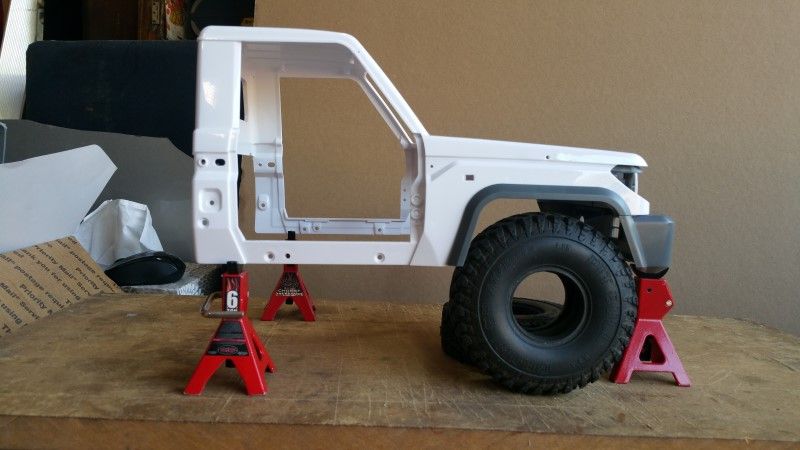 In my opinion, going larger than 106mm will just look very toy like. To get away with the 106mm growlers, you would need the right stance, attitude and theme to pull it off successfully. I hope this has been helpful. I am considering a number of options before I decide how to tackle this build. Cheers H2Micr0 |
| |  |
| | #4 |
| Rock Crawler Join Date: Jan 2013 Location: Australia
Posts: 541
|
So just what am I going to build with this awesome piece of plastic art???? That is a good question. I did have this idea for a Buggy Transporter using the 6x6 chassis under my Defender Crew cab. So I mocked that up. After stripping off the Defender body and front Bull Bar, the cab actually sits quite nicely over the Defender Chassis. 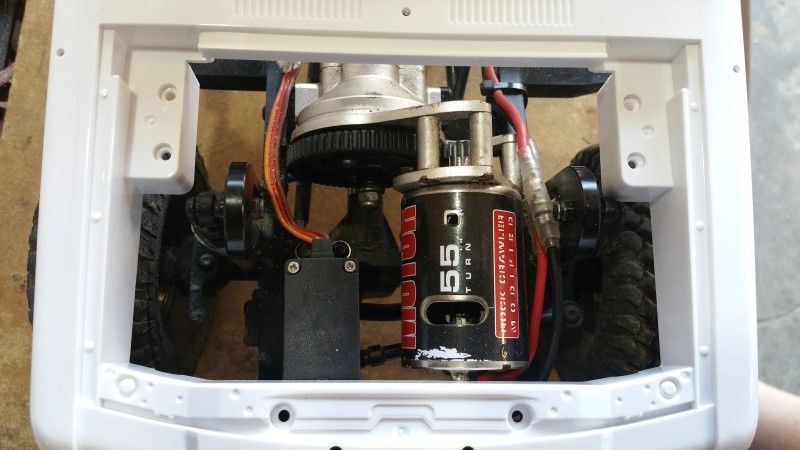 This chassis would be a good alternative to the TF2 variants. Easy enough to convert the rear to leaf spring. This is what it looked like. 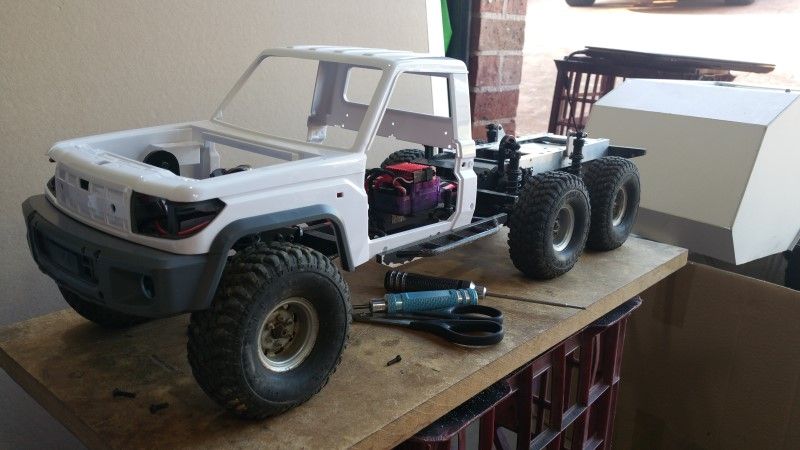 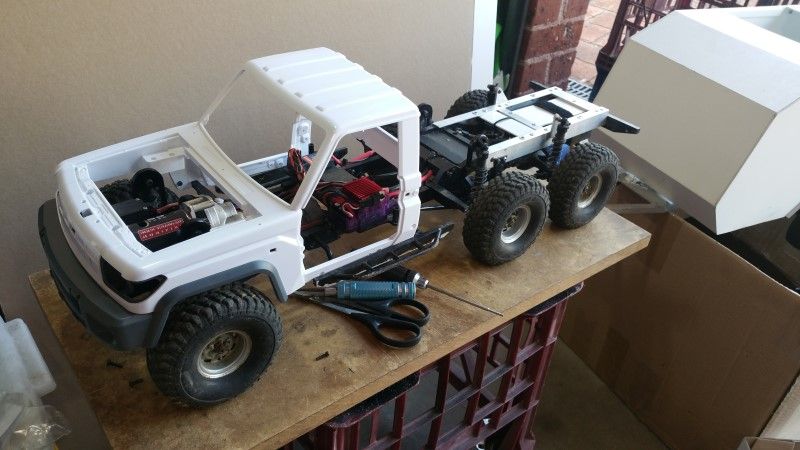 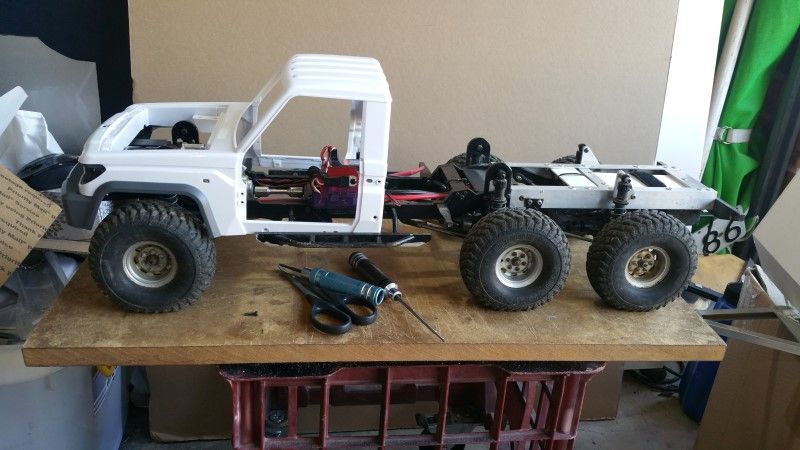 And with my FAV on the back. 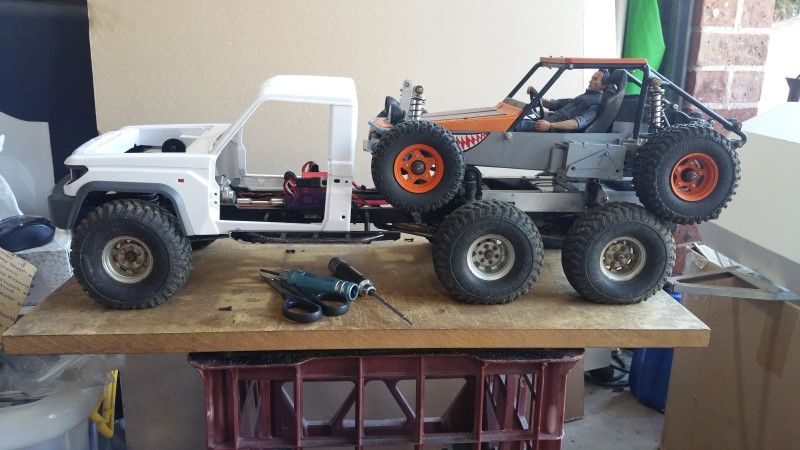 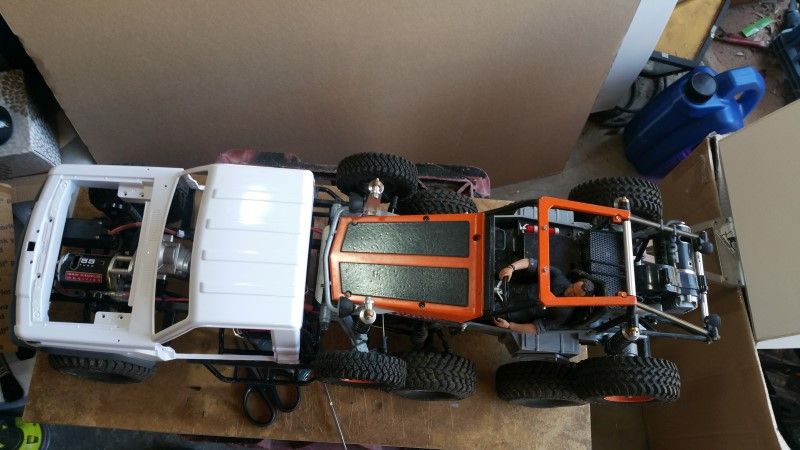 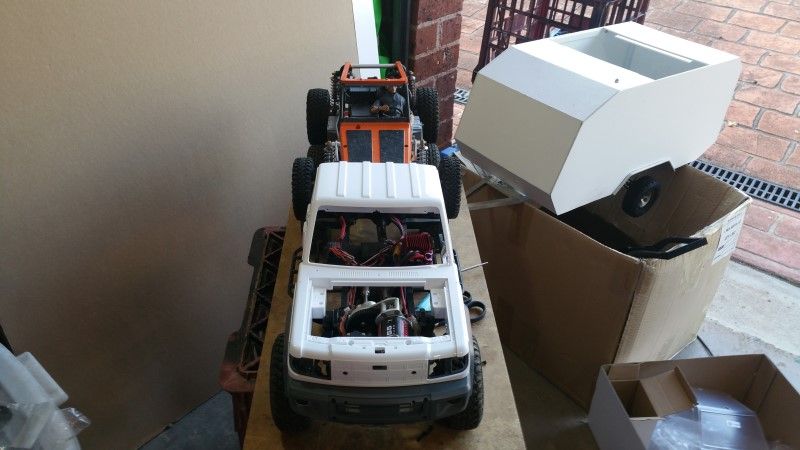 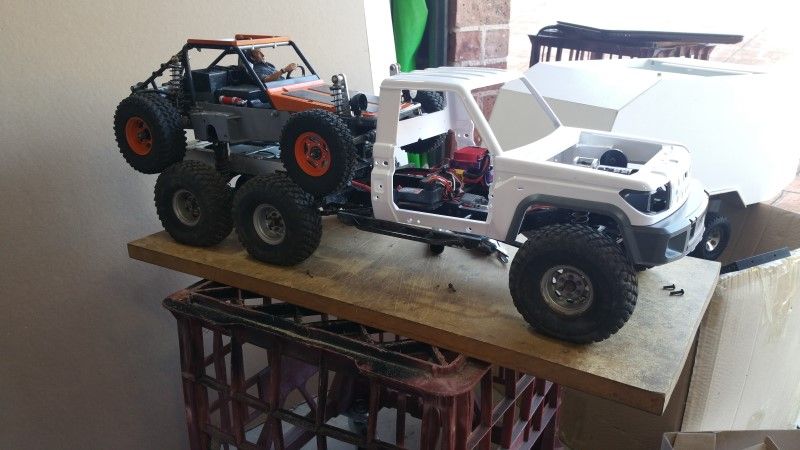 BUT, the cab really needs to be a size or two large to be able to pull this theme off convincingly. I could try smaller tyres but the gap between the two back axles would be too far apart, and the FAV would look too big. The Pitbull Growlers are also too large for a street driven daily driver, unless you lived in Iceland I guess. Also, my unfinished Defender 6x6 would never actually get finished, and I really like that rig. So that idea was scrapped. I do have a D110 chassis and it does fit very nicely under the cab and bed, so it is a viable choice for those looking for options. I do have another pair of the G5 Axles. These are a whopping 3mm narrower than a Yota 2. I used Axial 4mm hexes and 1.55 steelies with 1.55 Fun Country tyres. This wheel and tyre combo is well used, as they came off my original FJ45 Troopy build. Overall tyre height now would be around 93mm. While I don't get total tyre coverage, it does get close enough, and certainly represents common upgrades for modified rigs here in Australia. 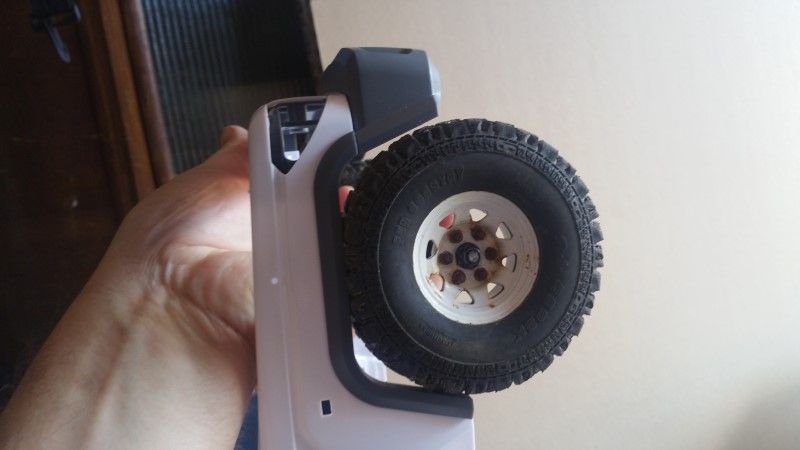 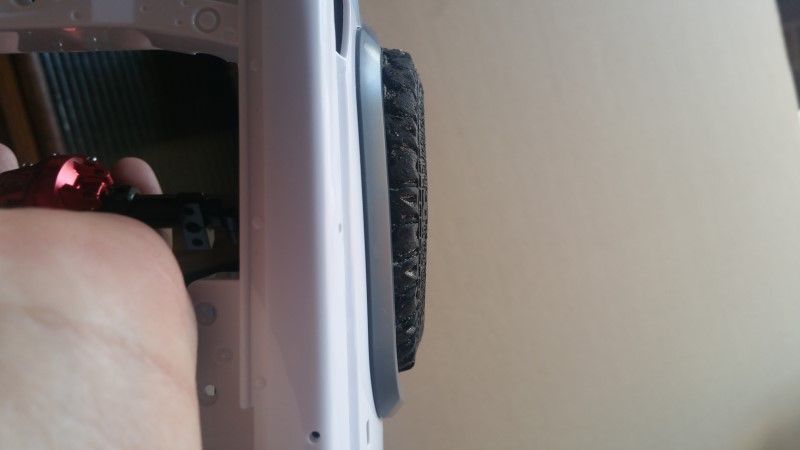 I liked where this was going, so I put in a bit more time setting up a previously loved Chassis I had laying around. 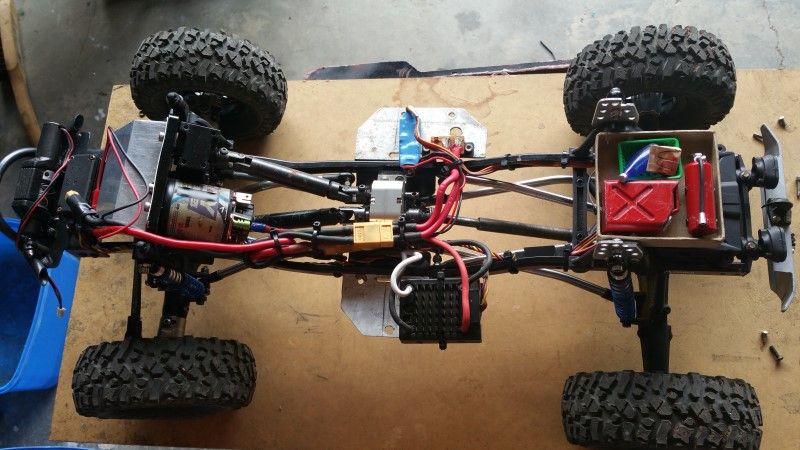 This used to be under my F100 Class 2 build, and it now has the G5 axles under it. PERFECT!!!! Has a front motor mount, transfer case and CMS. Front is a 5 link coil, and the rear is easily adaptable to leaf spring. First mock up. 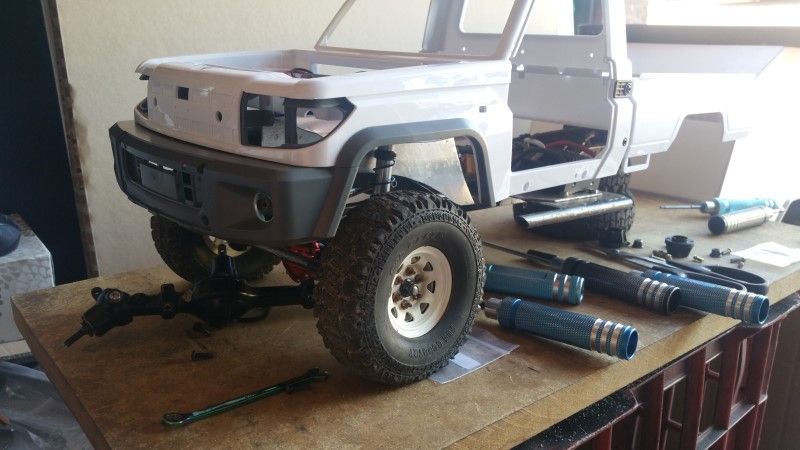 Bit too tall, but promising. 2nd attempt is better. 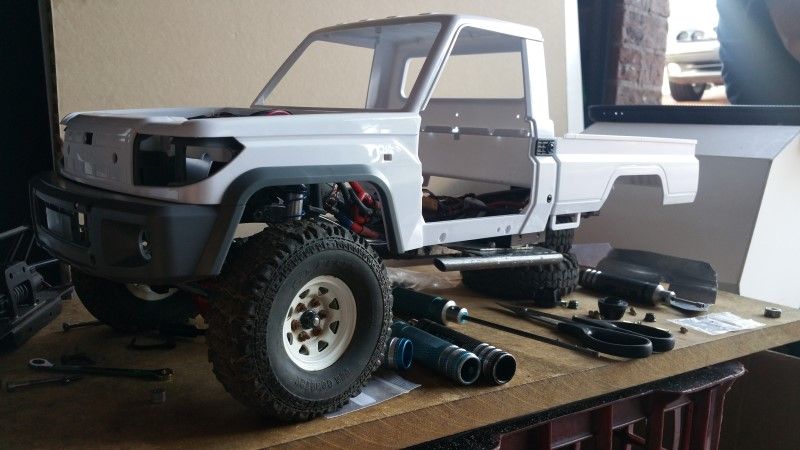 Tyre coverage is good. 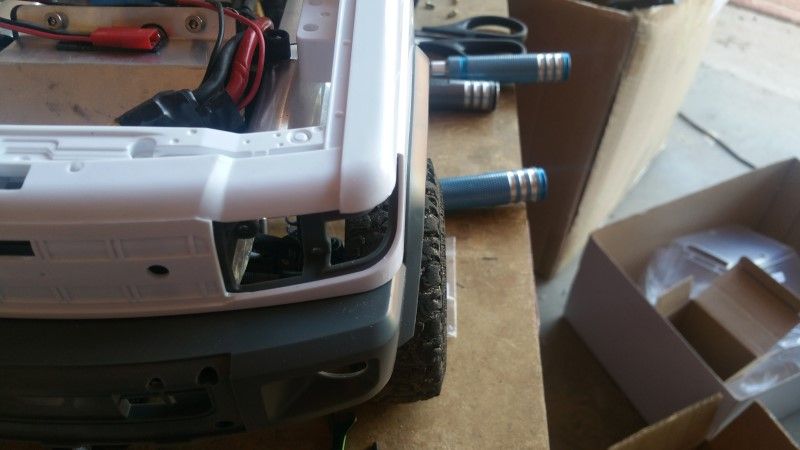 And the bits all fit in the engine bay. 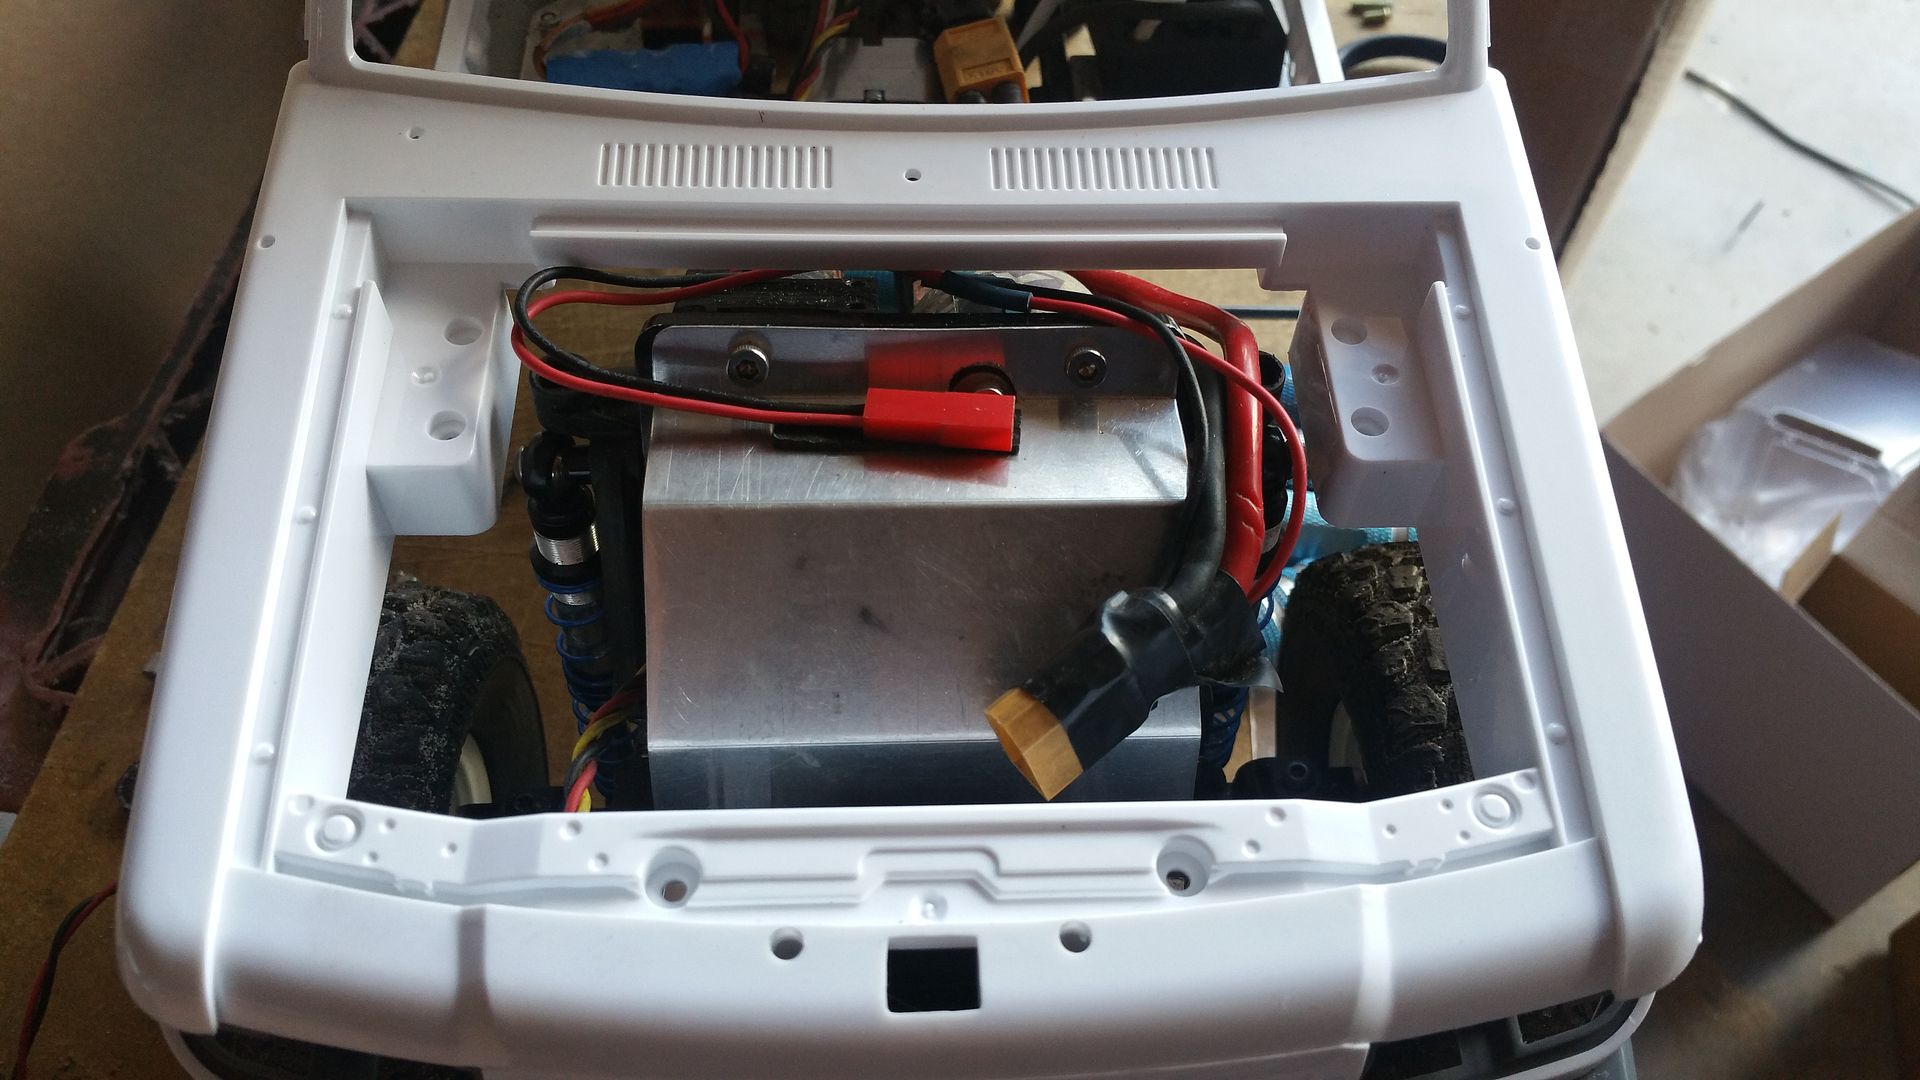 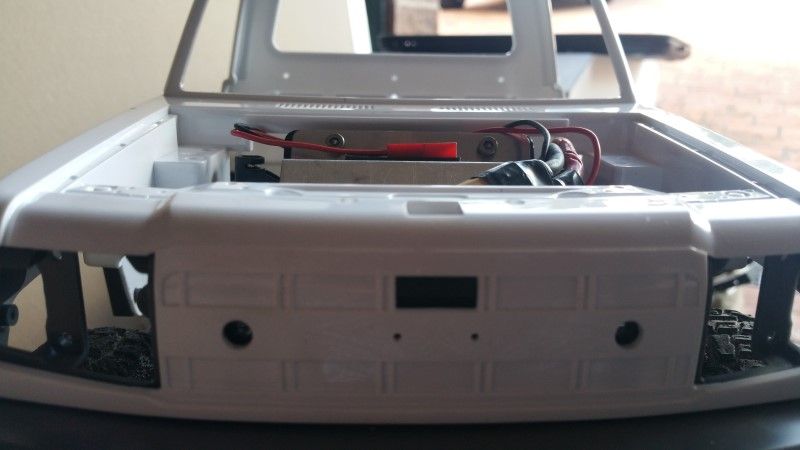 Now, I don't plan on using the Tub. I will build a custom rear of some description. What I will point out is that the rear wheel arches are 10mm narrower than the front. Which sort of makes sense given that the full size versions rear track is 100mm narrower than the front. But that will make it hard to get it to look right. Anyway, I am happy with how my build is starting to shape up. The K30 Chevy though isn't happy as he doesn't want all that dust over him again. Cheers H2Micr0 |
| |  |
| | #5 |
| Rock Crawler Join Date: Jan 2013 Location: Australia
Posts: 541
|
Being quite happy with how this is progressing I kept moving forward with the build. The initial goal is to get the chassis assembled as a roller, make the roller into a driver and mount the body. Thought it might be a good idea to see if the bonnet would fit over the front engine mount.  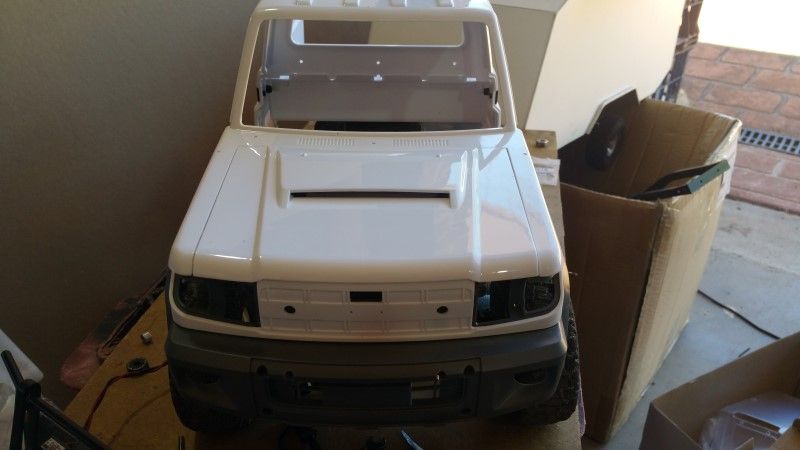 Yes!!! Not a problem! I have some relatively thin 3S batteries that I hoped would fit under the bonnet. 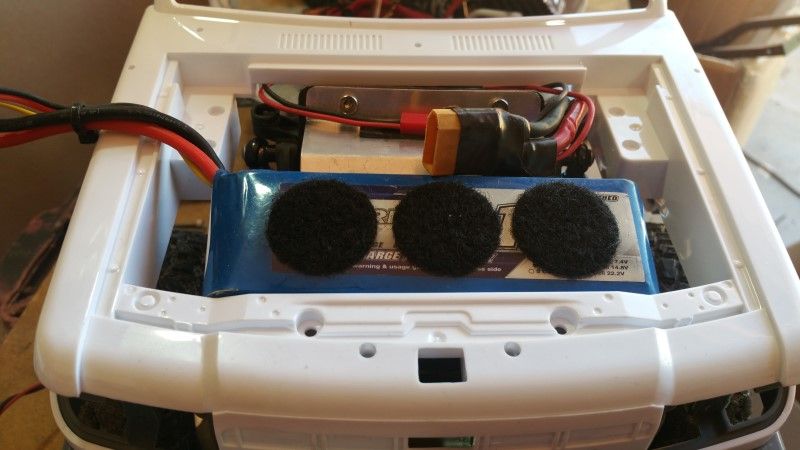 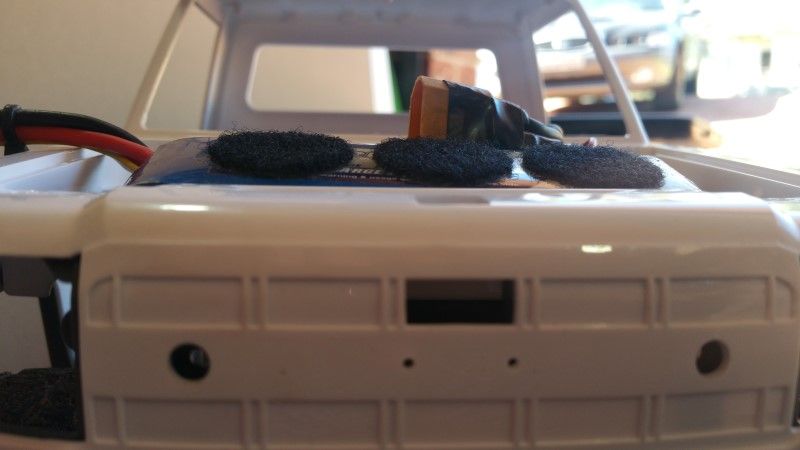 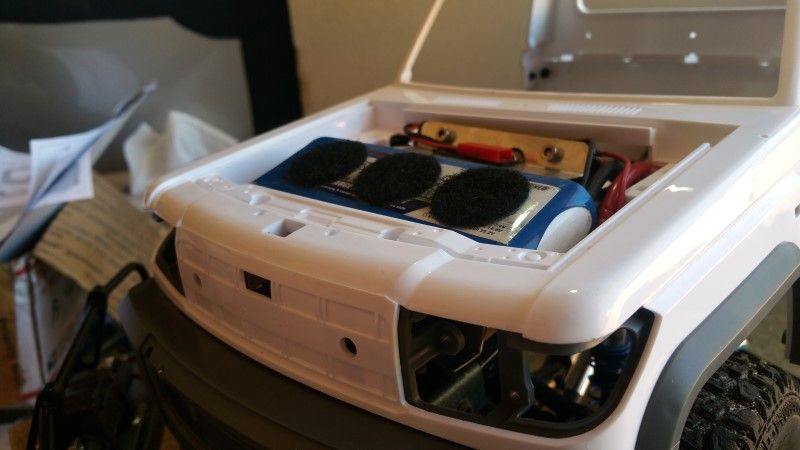 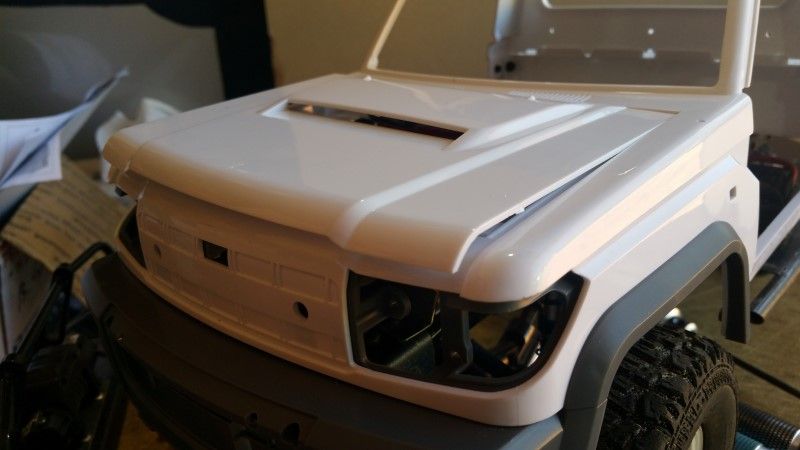 Bugger. Guess I will need to find an alternative location later on. While this chassis has the front end in place, the rear end wasn't. And it needed a leaf spring conversion. But just to make things even more interesting, I wanted to make it Leaf Under like the full size truck. When I did the leaf under conversion on the HJ47, it was pretty easy to do with the Yota 1 diffs. I could leave the diffs in their standard orientation and with some locknuts as spacers it was simply a matter of bolting the leaf under the diff. But, I am using the G5/K44 type axle. There was no way to run a bolt right through the leaf spring perch. This means I would need to flip the diff upside down so the the leaf could bolt under the diff like below. 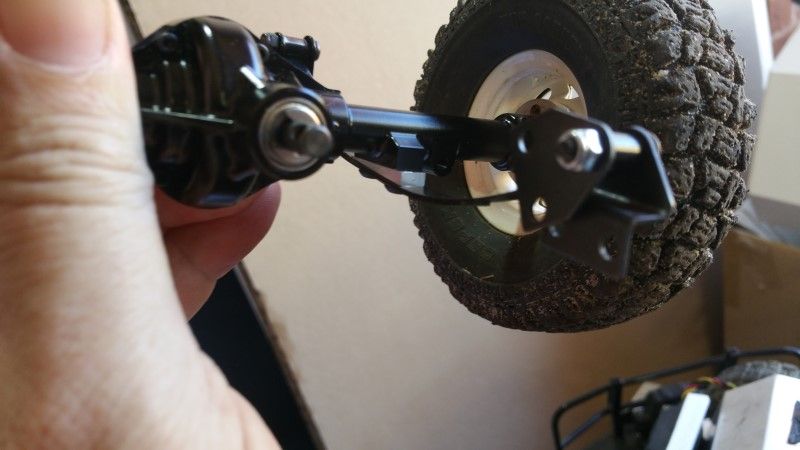 For those that don't know, when you flip the diff over the wheels now spin backwards with the same rotational input from the driveshaft. If I was using a Yota 2 diff they allow you do flip the the ring gear to the opposite side correcting this issue. Unfortunately the G5/K44 diff does not have this option. However, I have one of these in this chassis. 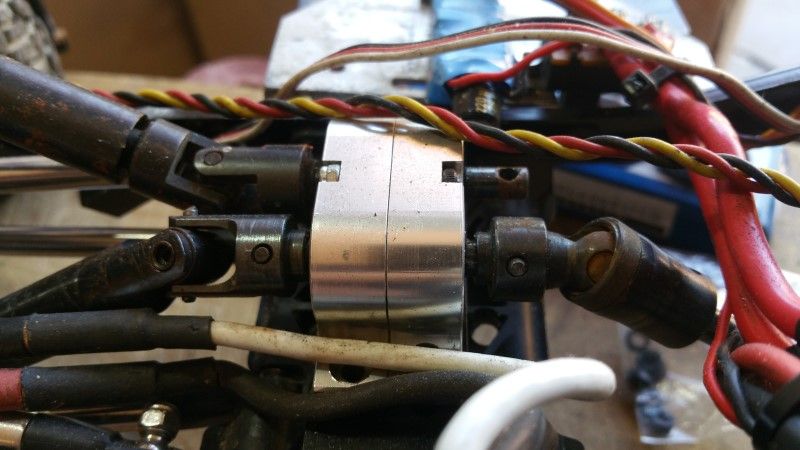 This transfer case has two inputs and two outputs. All I have to do is swap the drive shaft to the other output to get the correct rotational direction. A quick mock up with the leafs on the diff to get an idea of what sort of brackets I am going to need. 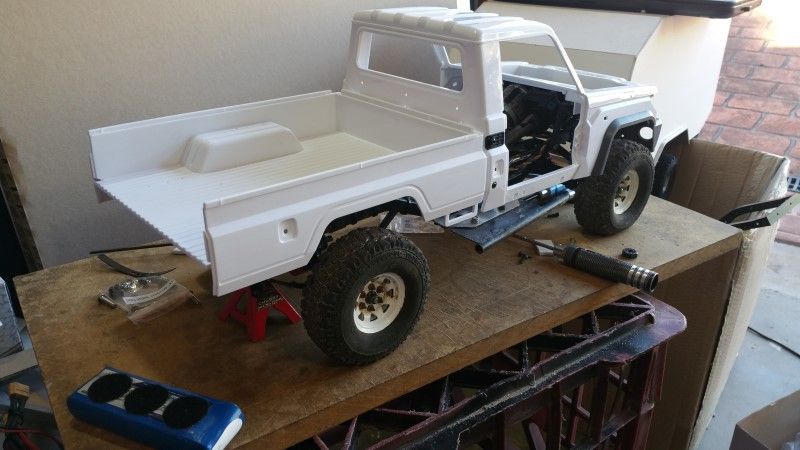 Hmmmm, tyre coverage on the rear isn't as good as I would like. It is still class 1 legal, but I would prefer more coverage. 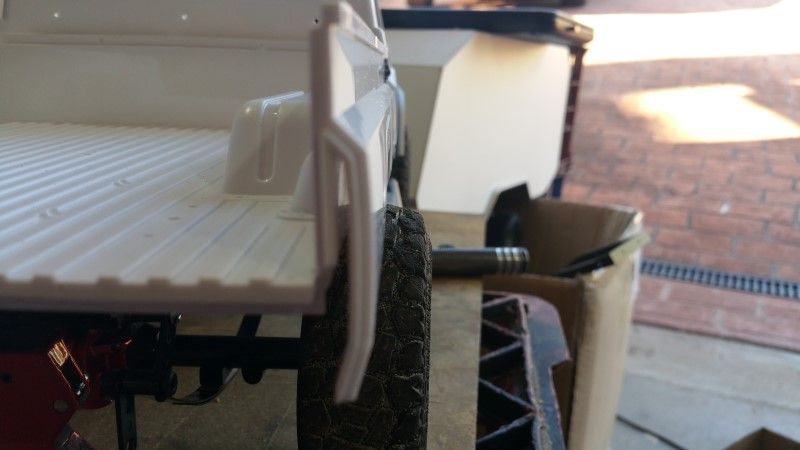 I Bolted the doors on to get a better feel for how it looks. 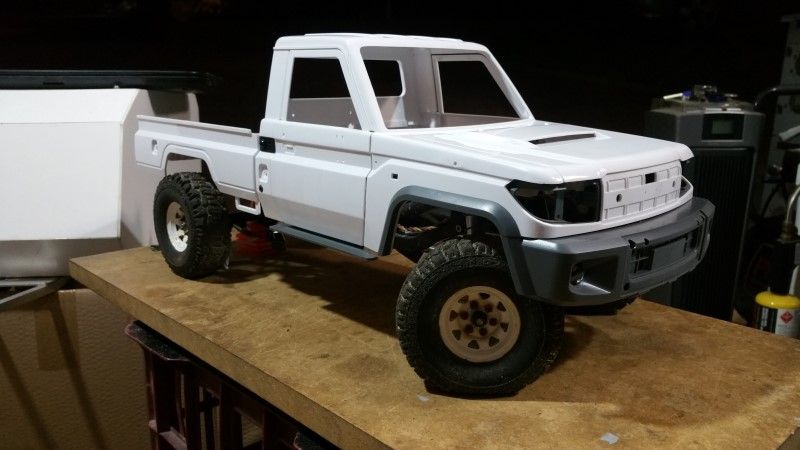 Then I spent a few hours designing the brackets to mount the leaf spring hangers and shackles on. This is critical to to get right. The position of the front hangers set the wheel base and ride height, and the rear shackles also effect the ride height and the compliance of the springs depending on the shackle angle. As I went with leaf under the mounting points will be lower down than typical. 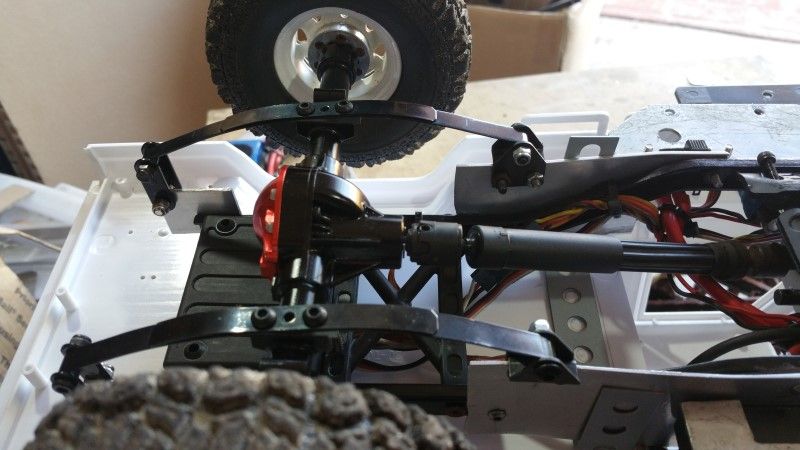 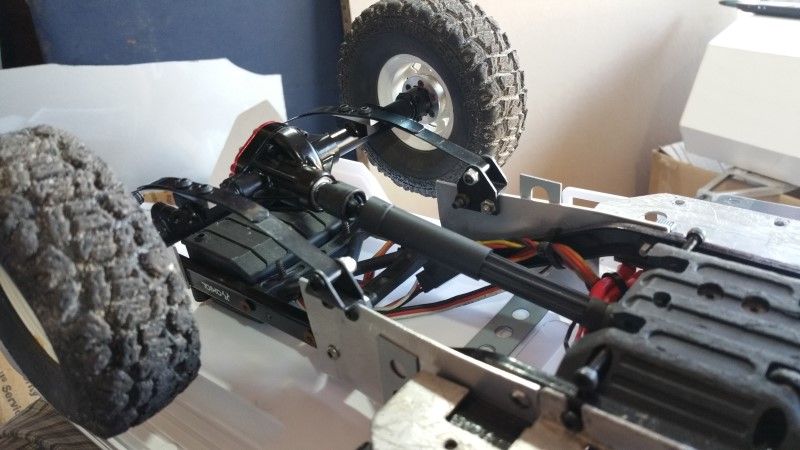 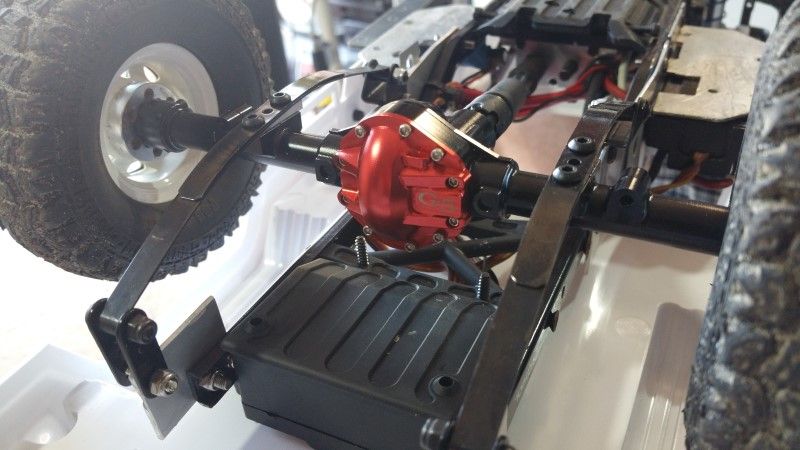 Here is the finished chassis on all four wheels. 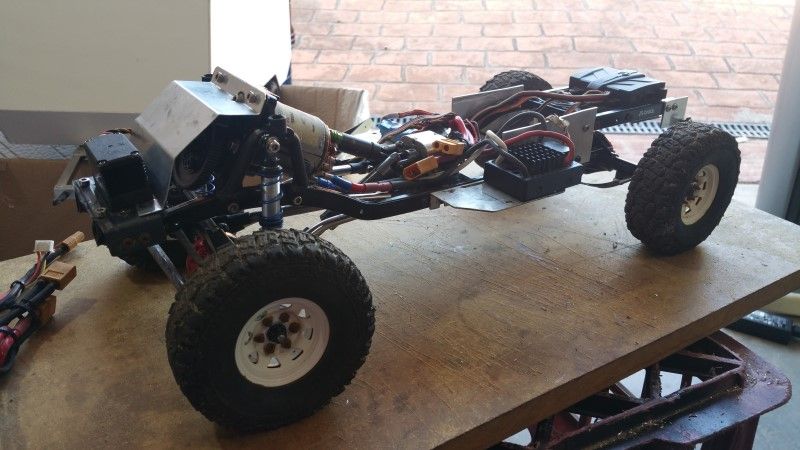 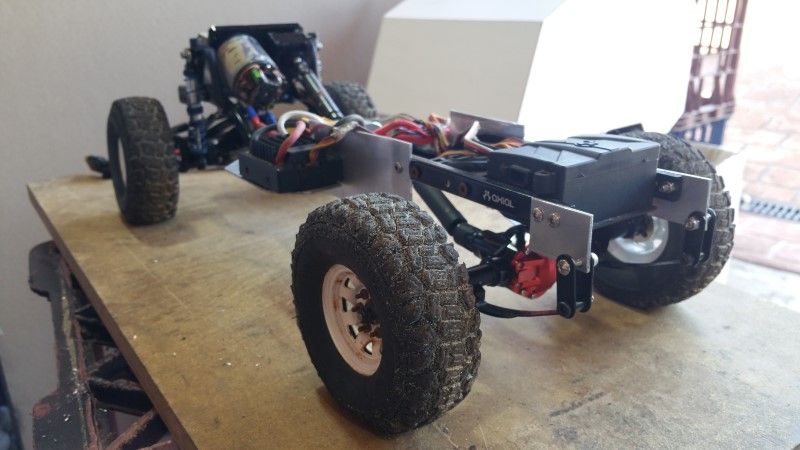 The brackets will get some more shape and paint later on. Then more time was used to contemplate a vast variety of body mounting options, but finally I came up with something I was sort of happy with. Here is the body on the chassis. 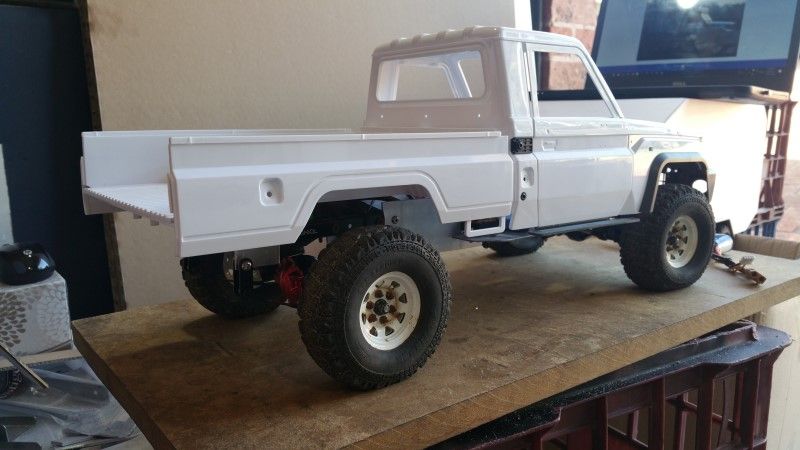 Then of course I just HAD to plug in a battery and take it for a spin. 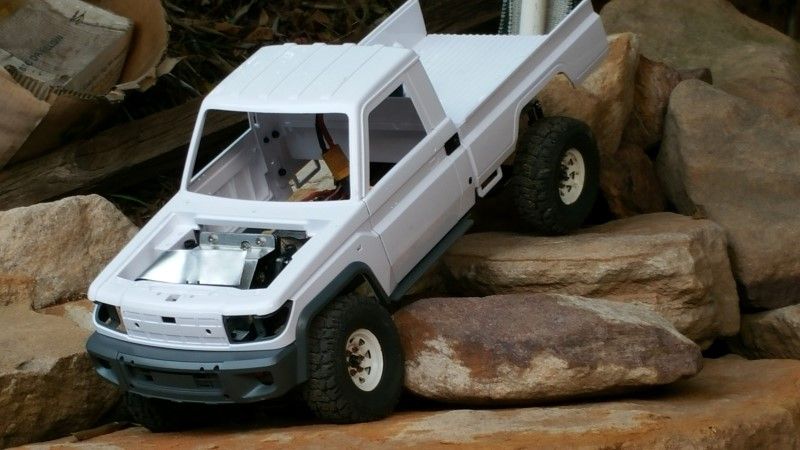 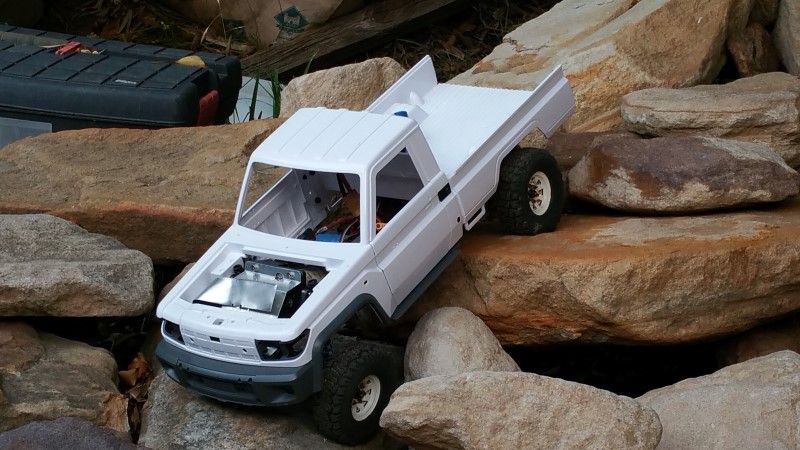 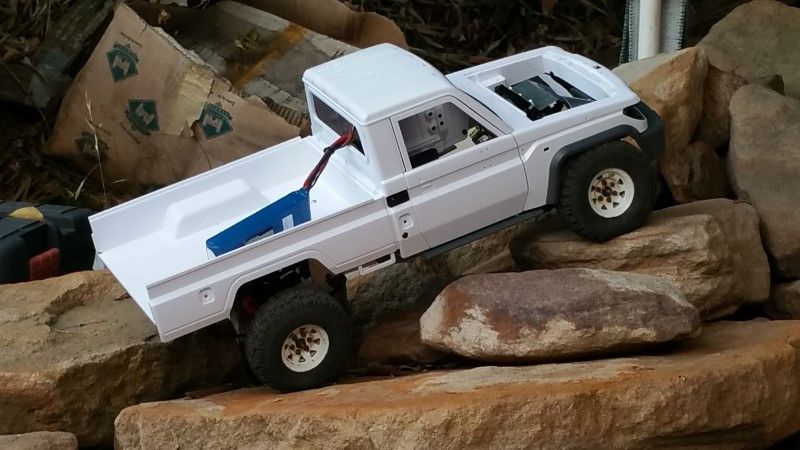 I think I have a very scale amount of flex with this rig, especially considering the dimensions, and the 95mm tyre. It actually drives pretty good. The rear is quite stiff, but that would be appropriate for an empty tray. Now I can move on to customising this build. Cheers H2Micr0 |
| |  |
| | #6 |
| Rock Crawler Join Date: Jan 2013 Location: Australia
Posts: 541
|
I knew from the outset, that I wanted to do something other than use the tub supplied with the body. Why??? Well as mentioned already, the Tub bed is a pre order option here in Australia. They don't even stock at the dealer or factory. Most new LC79s are sold as a cab chassis, or the a factory option alloy tray. So then I considered a tray. But I figured every on else that doesn't use the bed is likely to build a tray. After a bit of searching I found some inspiration. 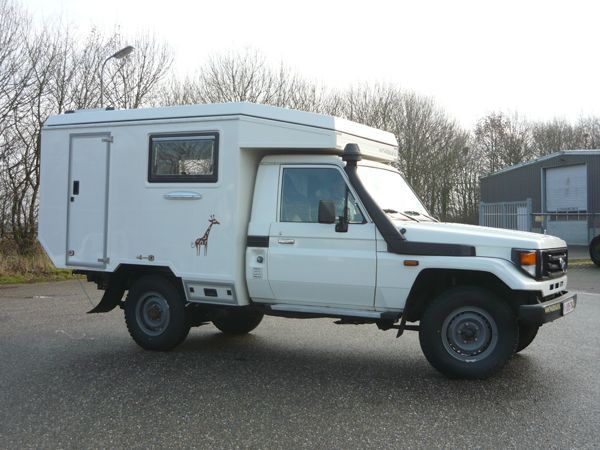 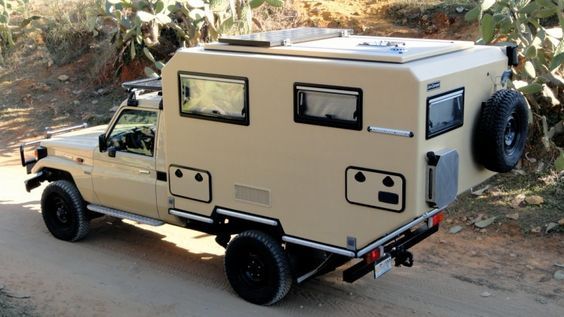 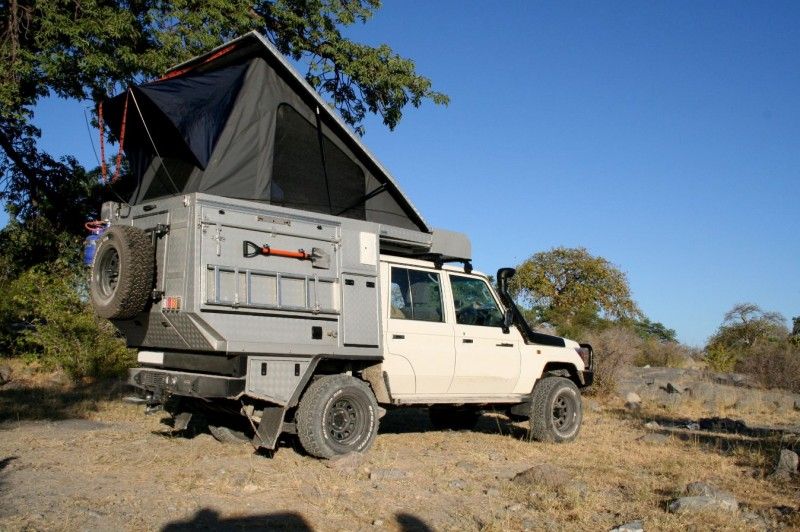 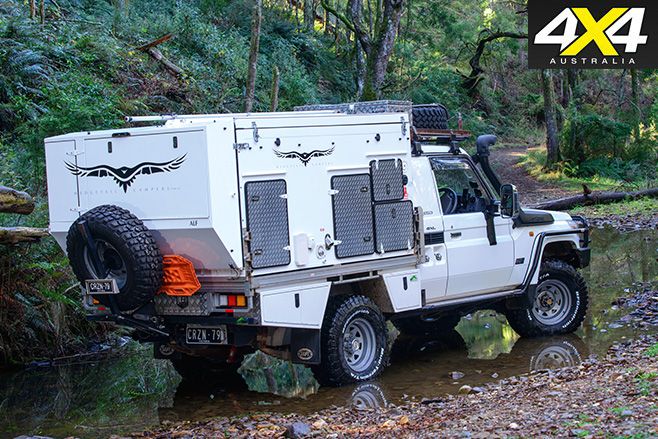 And so I sat for hours on end just looking at my LC79 and a bunch of pictures. Then the weather here in Sydney got just a little bit warm this week. 37c makes for a very uncomfortable garage. So seeing as my other half is away in Disneyland, I moved some stuff inside where the A/C is working keeping things nice and cooooool. 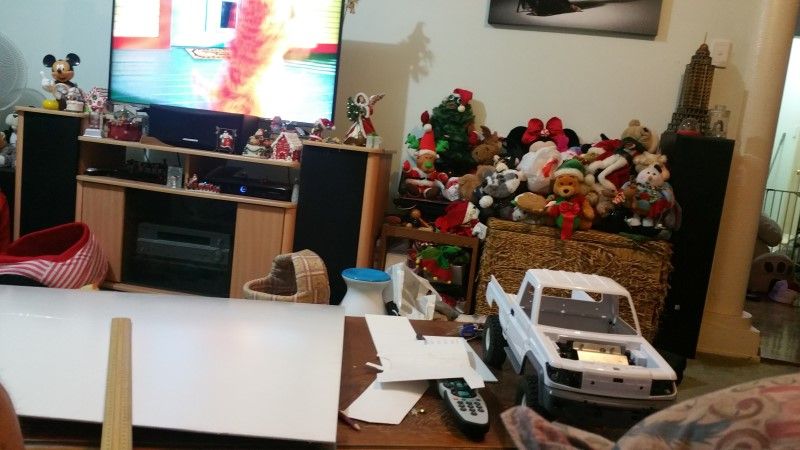 Finally I grabbed some cardboard and a ruler and go things underway. 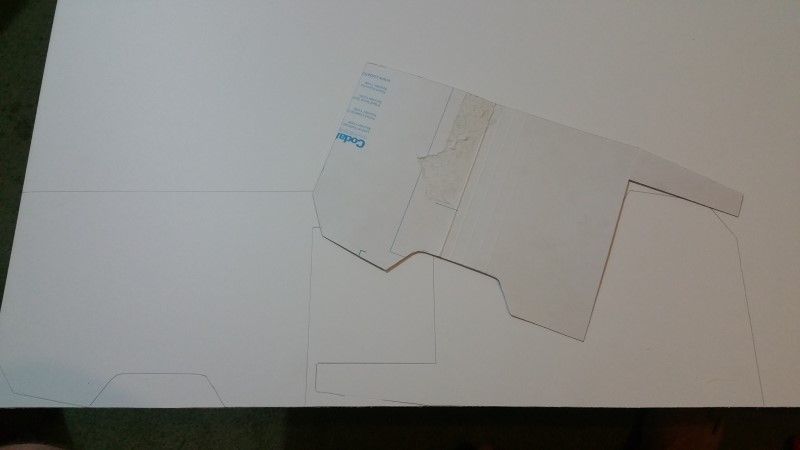 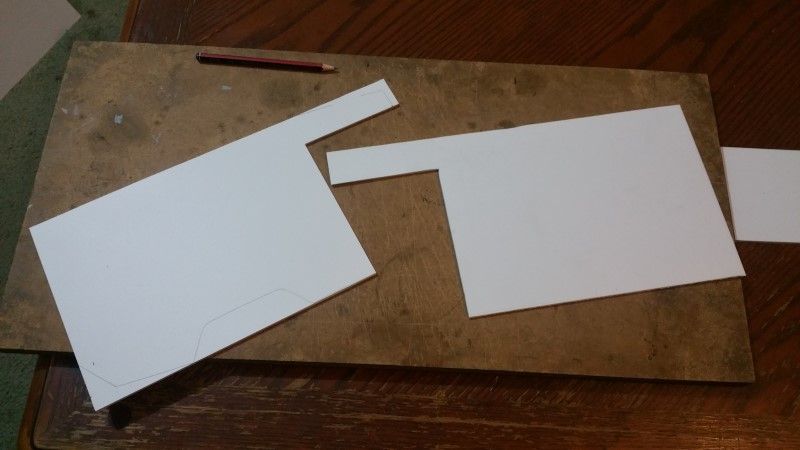 Things evolved along the way. 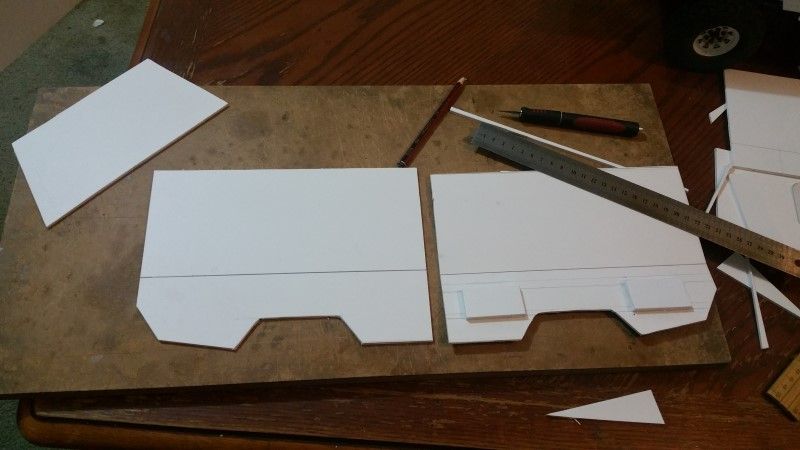 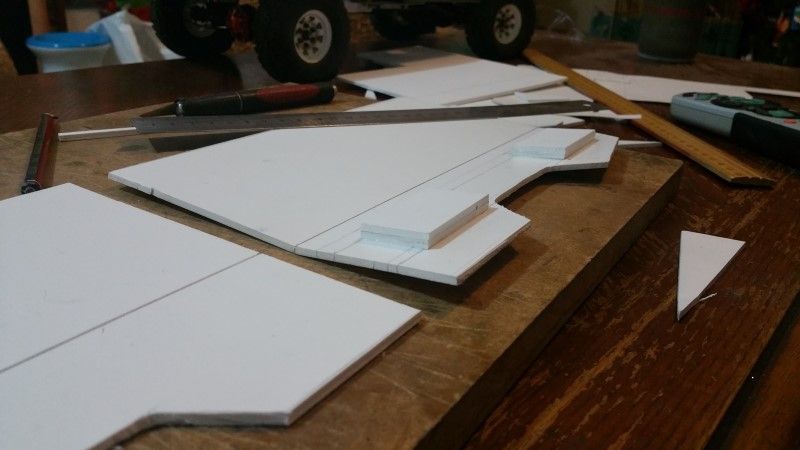 Wikkie approves. 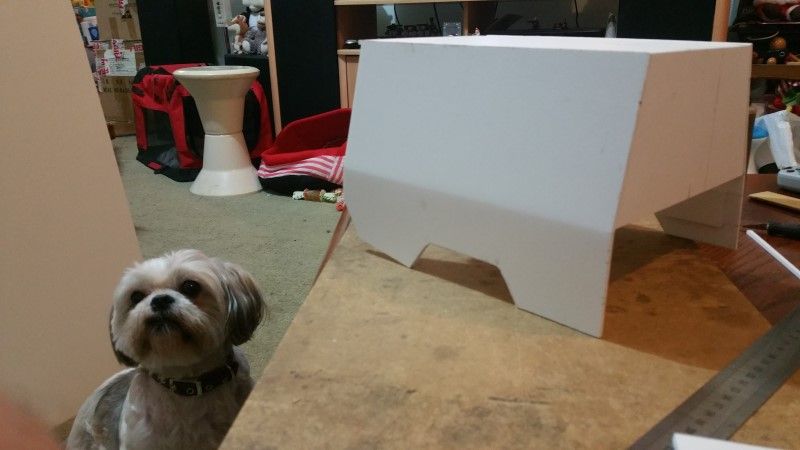 I like where this is going so far. 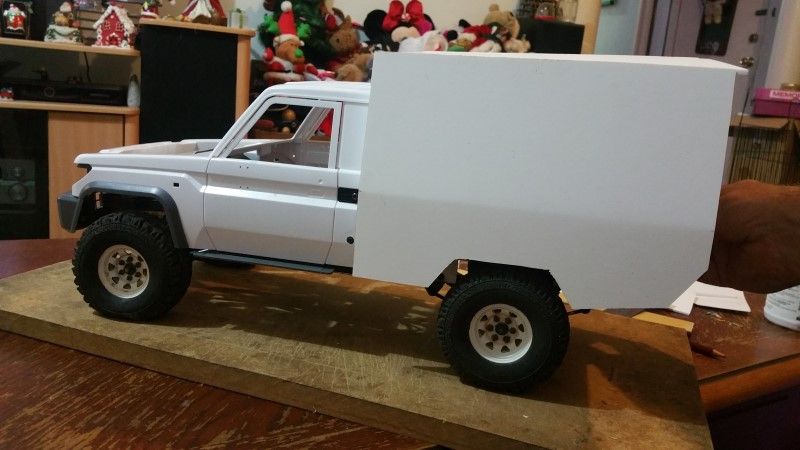 For the cab roof am thinking a flat rack for the spare tyre to go on. The tub is still under this and I am using it as the mount. Cheers H2Micr0 |
| |  |
| | #7 |
| Rock Stacker Join Date: Sep 2016 Location: NE VIC, Australia
Posts: 87
|
Good stuff, mate! Can't wait to see the finished product. This body definitely needs a camper or steel canopy hung off the back IMO, it's pretty much the only way they come around these parts  |
| |  |
| | #8 |
| I wanna be Dave Join Date: May 2008 Location: Baltimore
Posts: 4,442
|
That body set looks like a first class product !
|
| |  |
| | #9 |
| Newbie Join Date: Aug 2016 Location: Germany
Posts: 25
|
I really like this body, and I hope I'll be able to get one some day, but it sure looks a bit small compared to the others. Oh well... not gonna stop me. |
| |  |
| | #10 |
| Rock Crawler  Join Date: Dec 2012 Location: Utah
Posts: 955
|
I love where your going with this! Keep up the great work
|
| |  |
| | #11 |
| Rock Crawler Join Date: Aug 2007 Location: Philadelphia
Posts: 797
|
I saw Killerbody reposted your build on their FB page. Congrats. This build looks great. I have one of these in the box still. Not sure when I'll have time to build it but the pictures don't do the body justice. It's amazing in person.
|
| |  |
| | #12 |
| Quarry Creeper Join Date: May 2006 Location: Georgetown, Texas
Posts: 229
|
I don't even want to build mine after seeing this. Awesome work! Sent from my iPhone using Tapatalk |
| |  |
| | #13 | |||||
| Rock Crawler Join Date: Jan 2013 Location: Australia
Posts: 541
| Quote:
It is finished very nicely with high detail levels. Quote:
Quote:
Quote:
Agreed, if you build it right, it really will look quite real. Quote:
************************************************** ********** A couple more mock up pics. 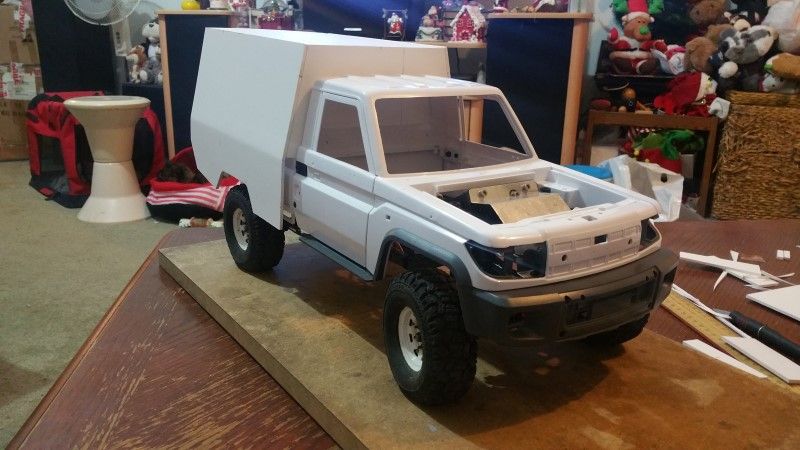 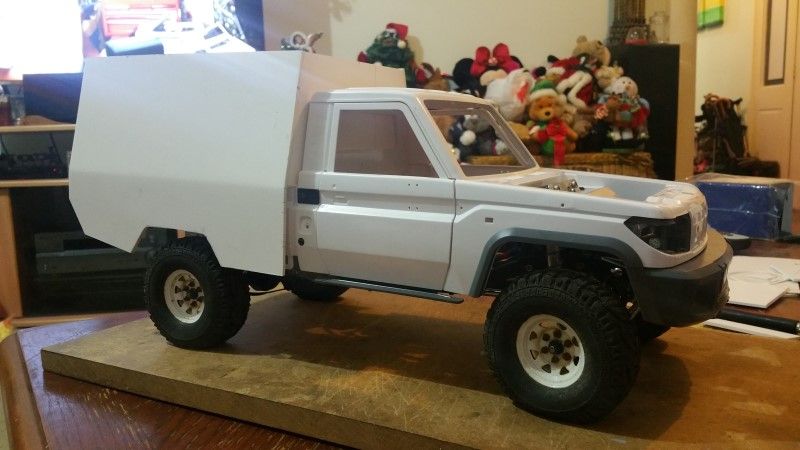 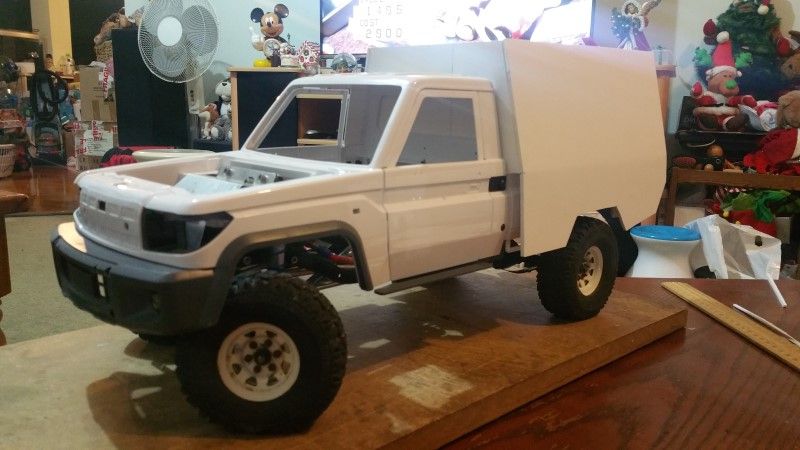 Cheers H2Micr0 | |||||
| |  |
| | #14 |
| Quarry Creeper Join Date: Nov 2015 Location: Walkerton
Posts: 445
|
All I can say it "WOW! " Thanks for sharing this awesome build with us. Peace to all |
| |  |
| | #15 | |
| Newbie Join Date: Aug 2016 Location: Germany
Posts: 25
| Quote:
But first I got to finish that Defender. | |
| |  |
| | #16 | ||
| Rock Crawler Join Date: Jan 2013 Location: Australia
Posts: 541
| Quote:
Quote:
************************************************** **** Any respectable Overlander rig needs some additional protection from the harsh outback Australian sun. 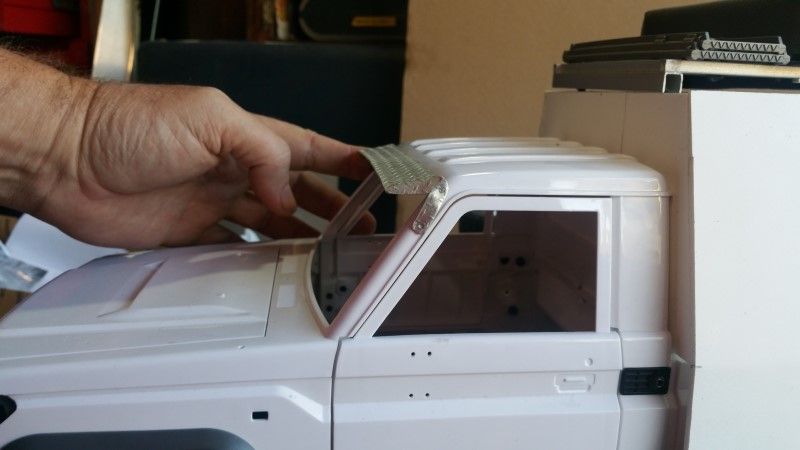 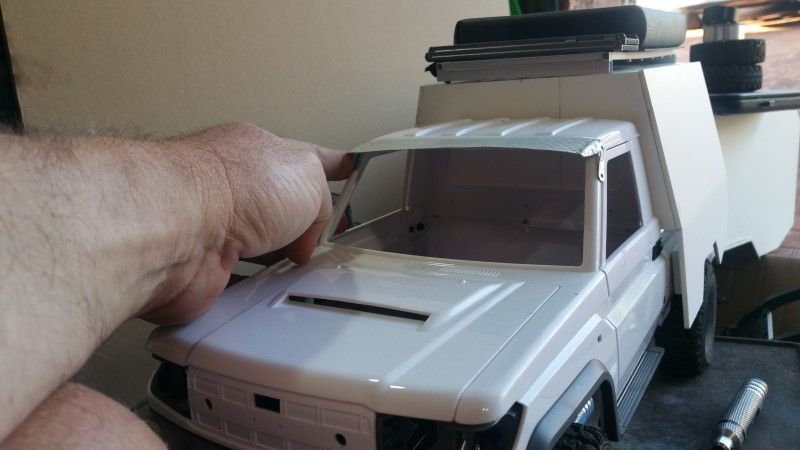 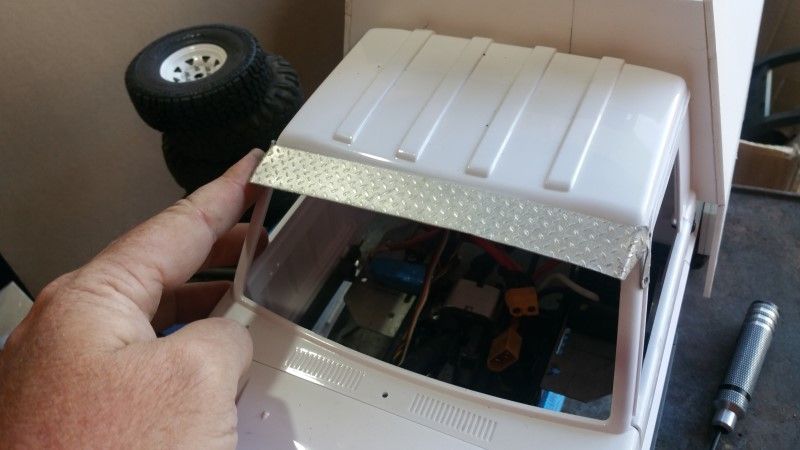 Hmmm, I think this will do the job. The old Troopy body doesn't need it any more, so it can now have a home here. I drilled a couple of small holes in the A pillars and screwed the M2 Scale bolts directly in. 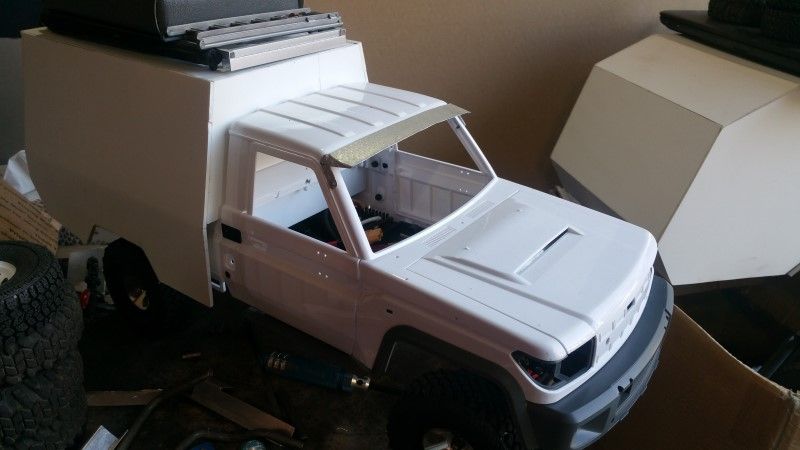 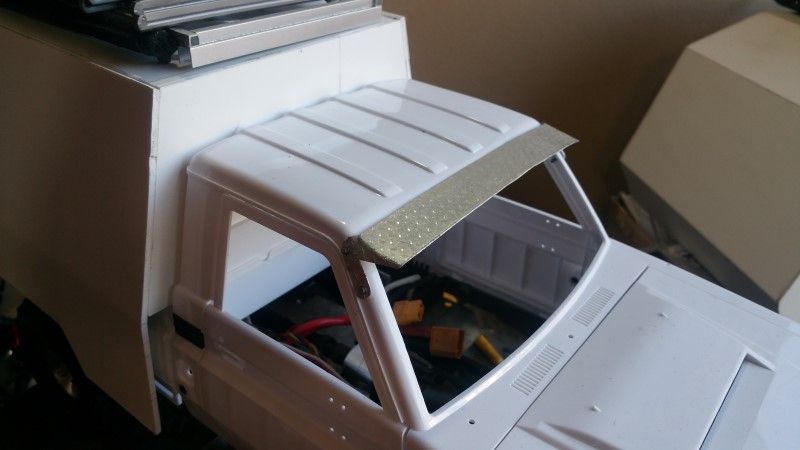 Liking it very much. Have settled now on the final look. Just need to get in and get it done. Cheers H2Micr0 | ||
| |  |
| | #17 |
| Rock Crawler Join Date: Jan 2013 Location: Australia
Posts: 541
|
With Christmas done and some free time today I was able to continue on this. Over the last week or so I have been slowly turning over options on how to mount the rear canopy/work bed/topper thingo to the body. I finally came up viable solution. I started by drilling holes through the side of this nice, but rather unloved, tub. 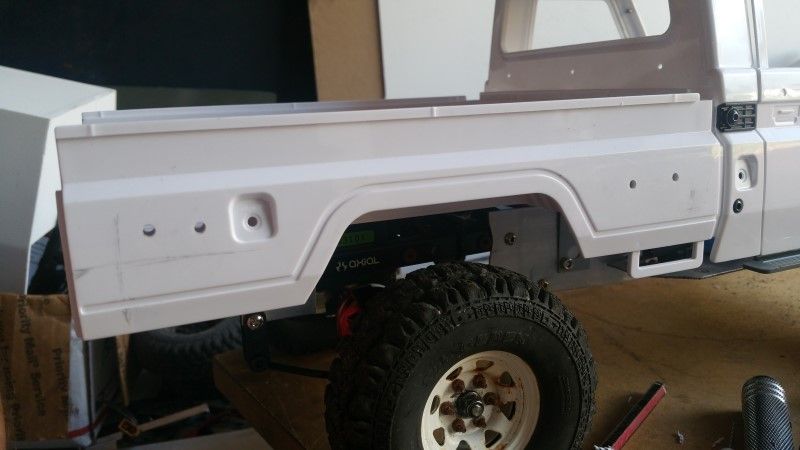 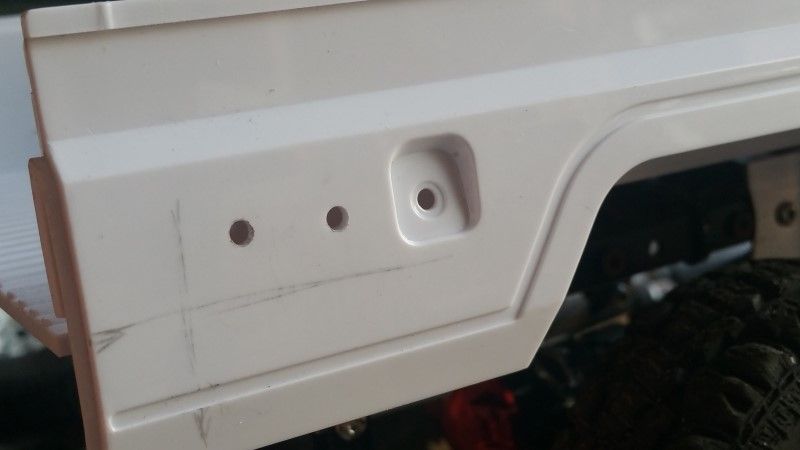 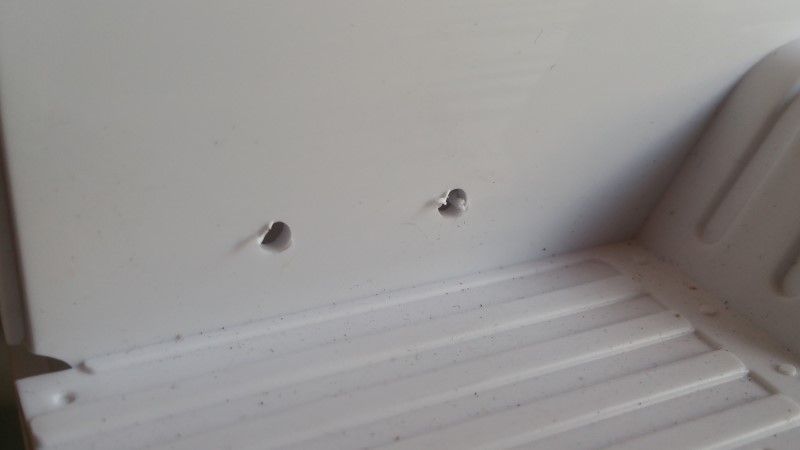 As you can see the holes go right through the bed sides as well. I then carefully marked, drilled and tapped 8 holes into the spacer blocks attached to the inside of the bed walls. Test fitting the first bolt. Should help clarify how I did this. 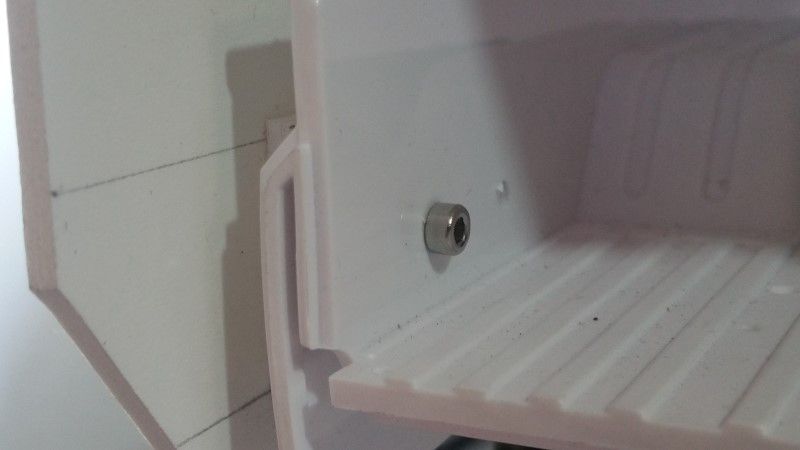 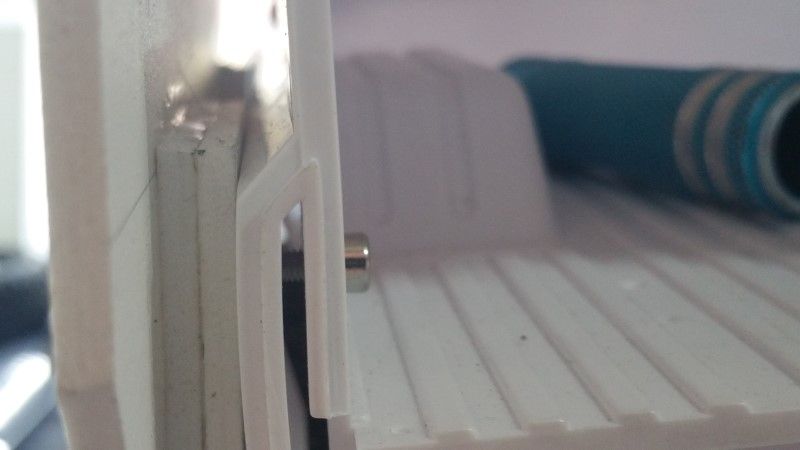 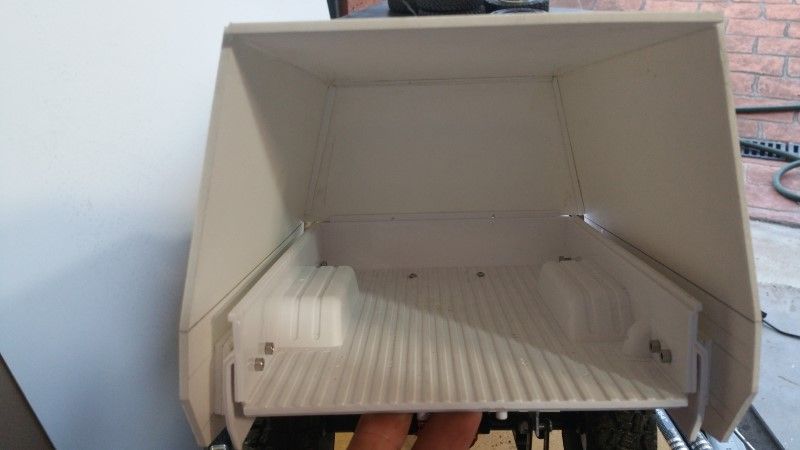 This method leaves a clean mounting method and is actually quite strong. Then of course I just HAD to take if for a test drive. 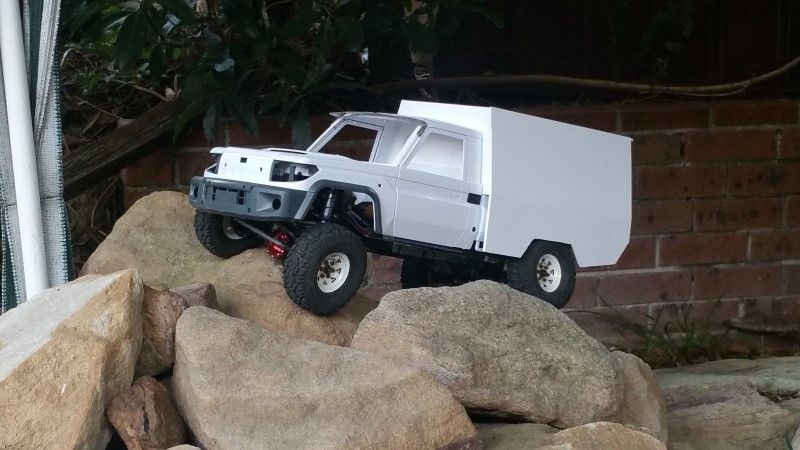 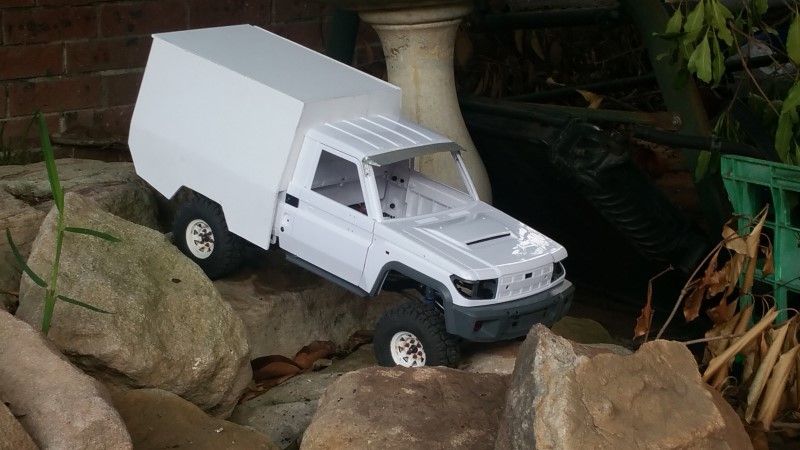 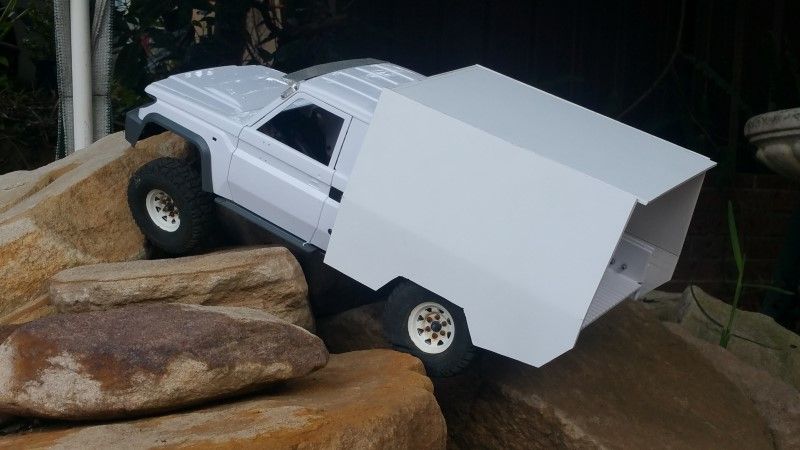 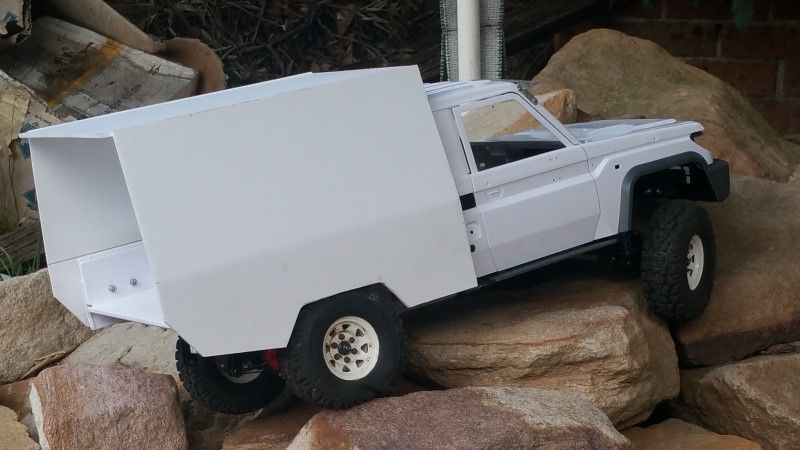 This is going to be a fun little truck to trail. Cheers H2Micr0 |
| |  |
| | #18 |
| Rock Crawler Join Date: Jan 2013 Location: Australia
Posts: 541
|
It has been a little on the warm side (38 C) here in Sydney, and the Trailworx Garage is in desperate need of Air-conditioning. But I braved the heat and humidity today and made a bit more progress. I originally planned to have the battery in the back behind the cab. This would have required an easy way to access that space and so my head was filled with ideas regarding hatches, hinges and latches. While messing around with that question I stumbled over the original kit bed side cap rails. Not needing these anymore I decided to re purpose them. I trimmed off the tie down hooks and now I have some roof rails. 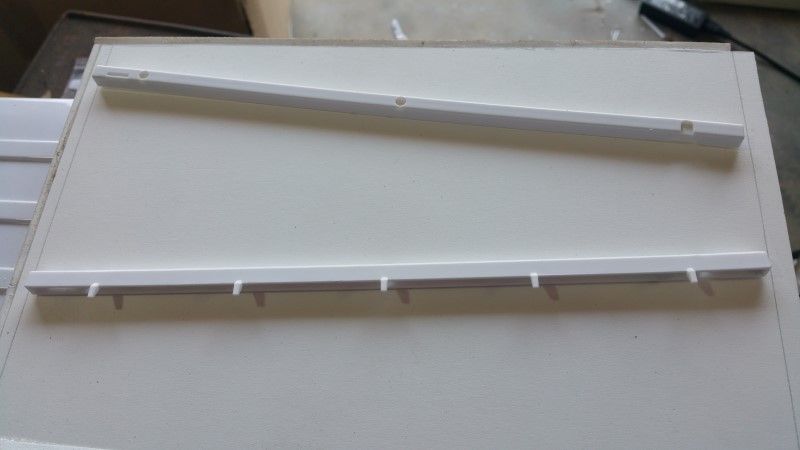 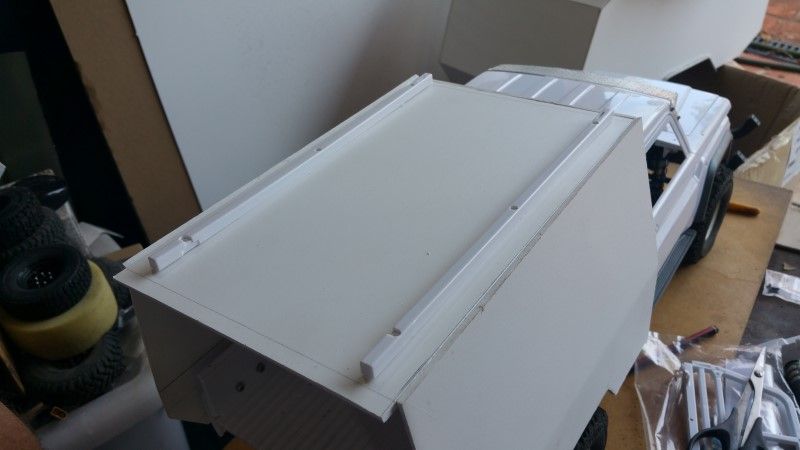 There are even small bolt hole recesses. Winning!!!! Then in a stroke of Brilliance "TADAAAAAA", I found spot under the rear of the bed for the battery. This now meant I did not need easy access to inside. I did need some access however to be able to get at the canopy mounting bolts. Now I had to fill in the gaping hole at the back. The lower angle was first. 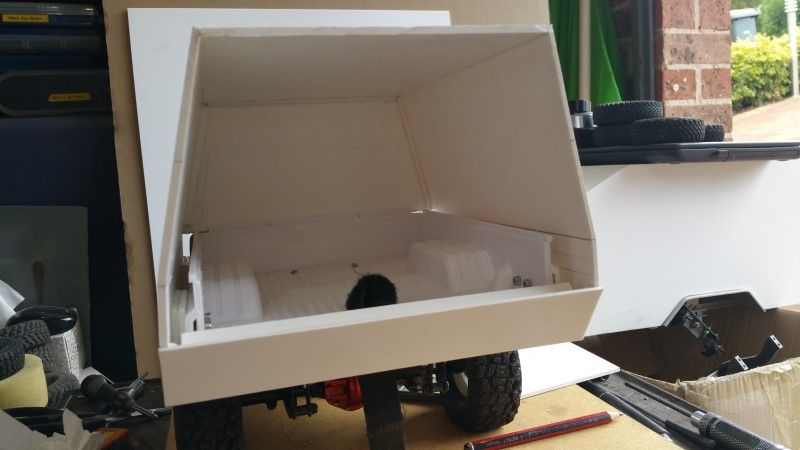 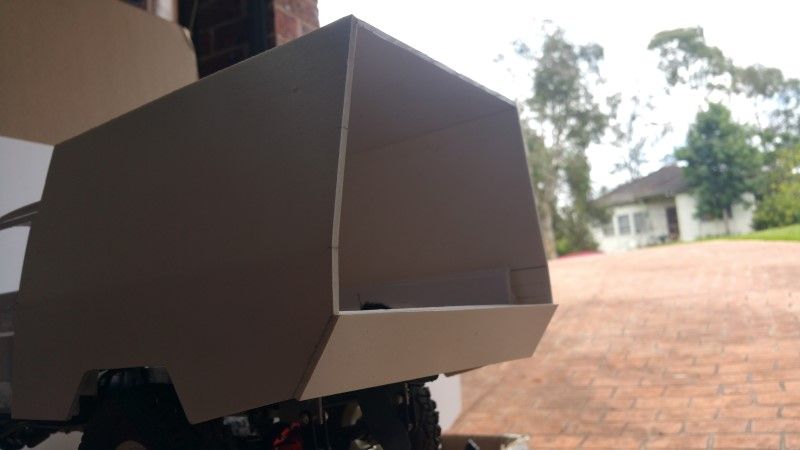 This turned out better than I hoped. To provide some rigidity I glued in a piece across the length. With that done the rest sort of just fell together. I made these. 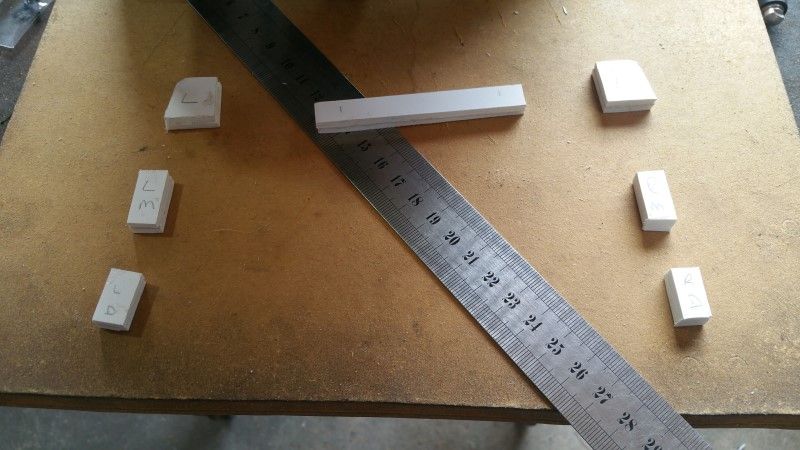 and glued them in here. 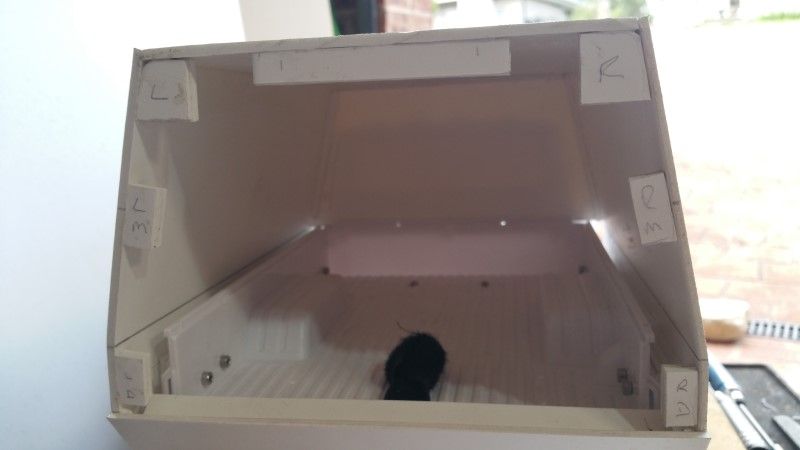 Drilled a bunch of holes so I could do this. 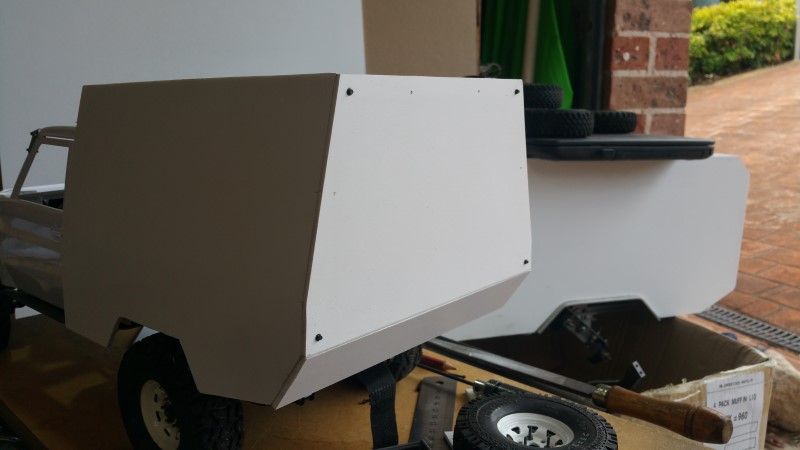 Seeing as I was on a roll this also happened. The ladder that is. 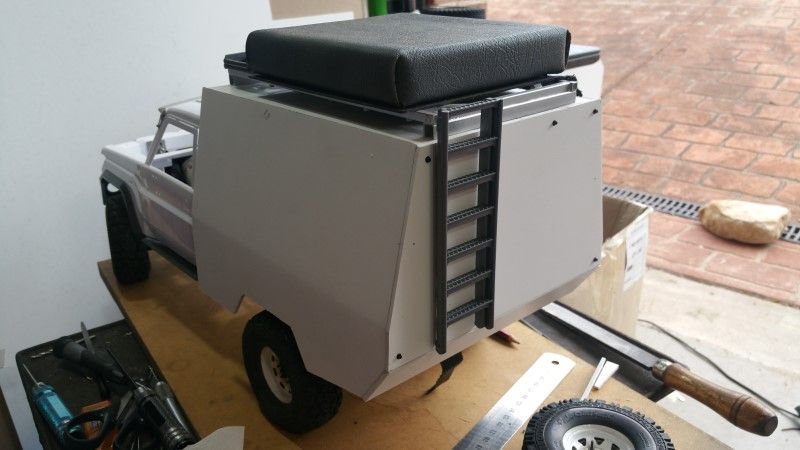 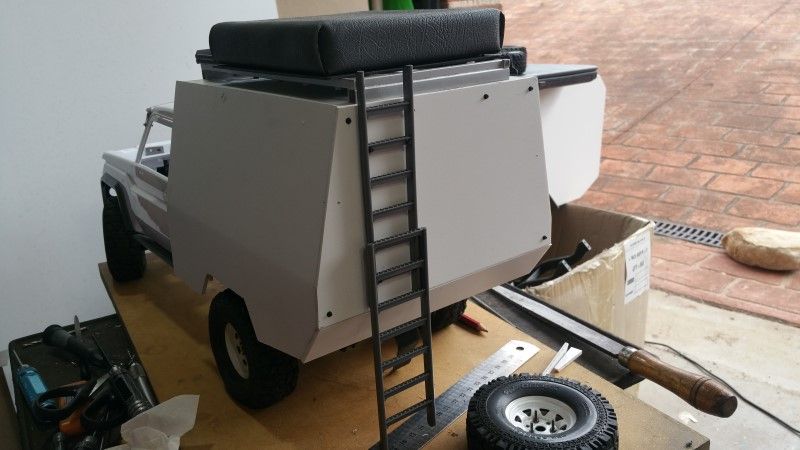 Ignore the tent from the Camper Trailer. Just using it as a stand in. Decided I should use the tail lights that came with the kit, seeing as they are already painted and all that. I used a piece of scrap material to see if I could cut the needed hole neat enough. 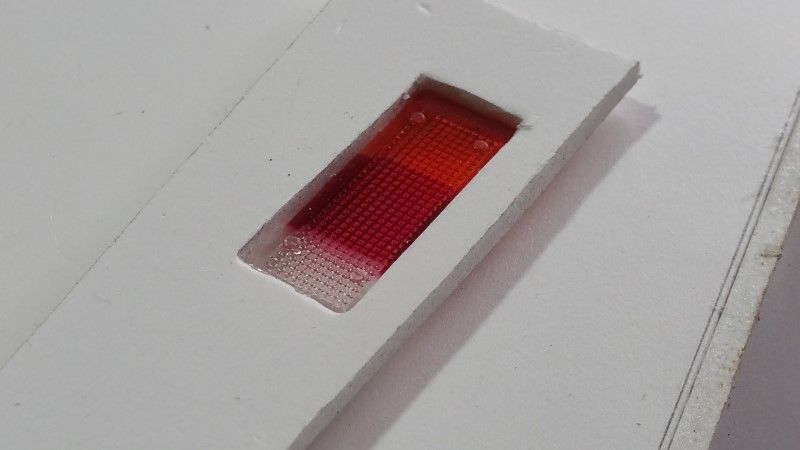 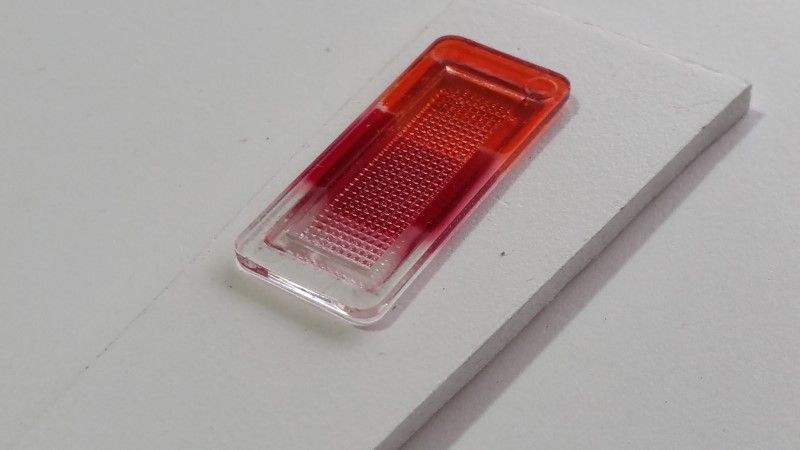 I think that will do. They will go as per the below pics. 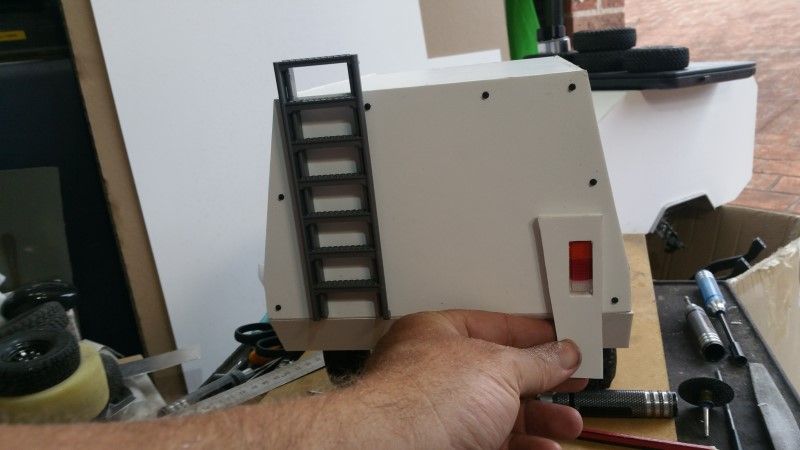 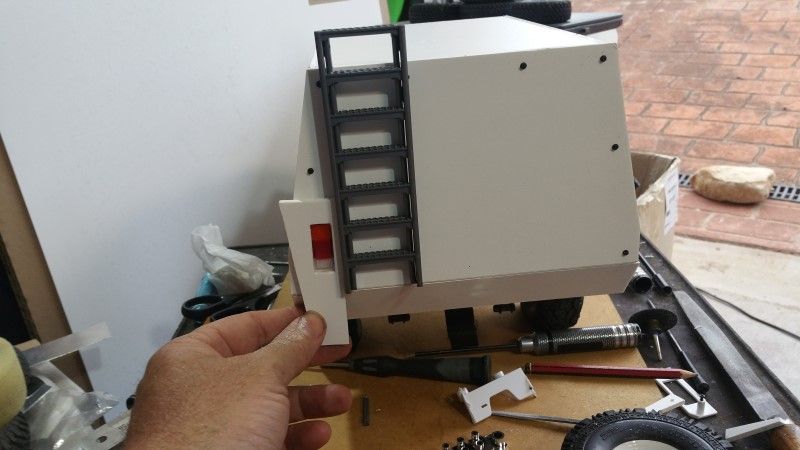 So tail lights and spare to go on the back. Cheers H2Micr0 |
| |  |
| | #19 |
| Rock Crawler Join Date: Jan 2013 Location: Australia
Posts: 541
|
It has been a little on the warm side (38 C) here in Sydney, and the Trailworx Garage is in desperate need of Air-conditioning. But I braved the heat and humidity today and made a bit more progress. I originally planned to have the battery in the back behind the cab. This would have required an easy way to access that space and so my head was filled with ideas regarding hatches, hinges and latches. While messing around with that question I stumbled over the original kit bed side cap rails. Not needing these anymore I decided to re purpose them. I trimmed off the tie down hooks and now I have some roof rails.   There are even small bolt hole recesses. Winning!!!! Then in a stroke of Brilliance "TADAAAAAA", I found spot under the rear of the bed for the battery. This now meant I did not need easy access to inside. I did need some access however to be able to get at the canopy mounting bolts. Now I had to fill in the gaping hole at the back. The lower angle was first.   This turned out better than I hoped. To provide some rigidity I glued in a piece across the length. With that done the rest sort of just fell together. I made these.  and glued them in here.  Drilled a bunch of holes so I could do this.  Seeing as I was on a roll this also happened. The ladder that is.   Ignore the tent from the Camper Trailer. Just using it as a stand in. Decided I should use the tail lights that came with the kit, seeing as they are already painted and all that. I used a piece of scrap material to see if I could cut the needed hole neat enough.   I think that will do. They will go as per the below pics.   So tail lights and spare to go on the back. Cheers H2Micr0 |
| |  |
| | #20 |
| Rock Crawler Join Date: Jan 2013 Location: Australia
Posts: 541
|
Grabbed some more Garage time today. I started by marking out where the tail lights needed to be. 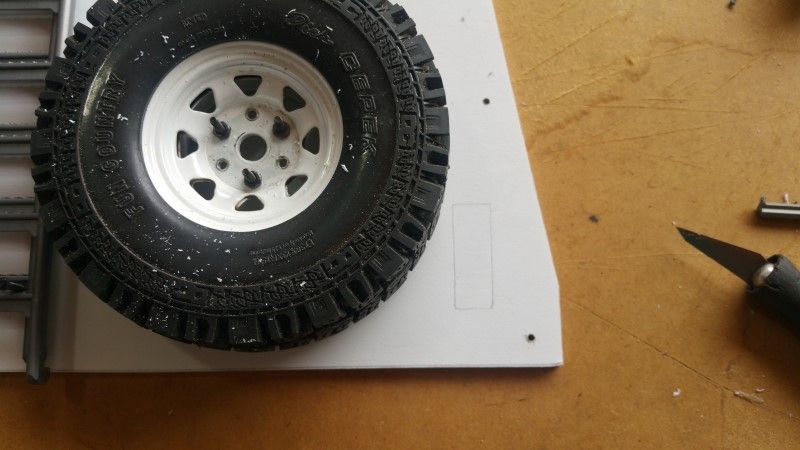 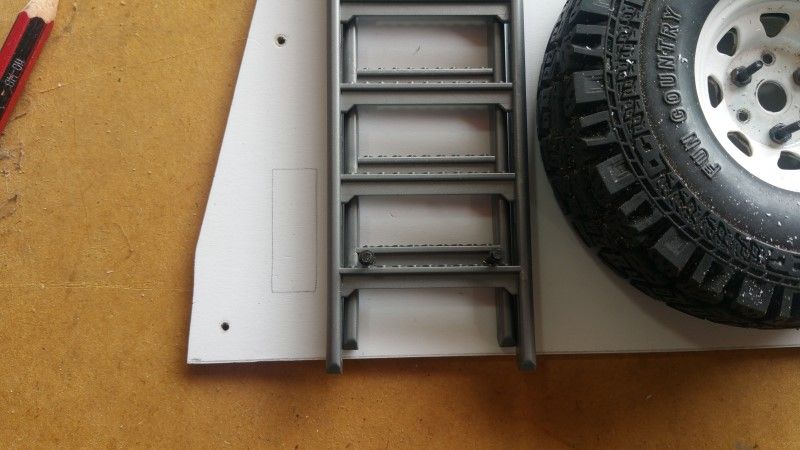 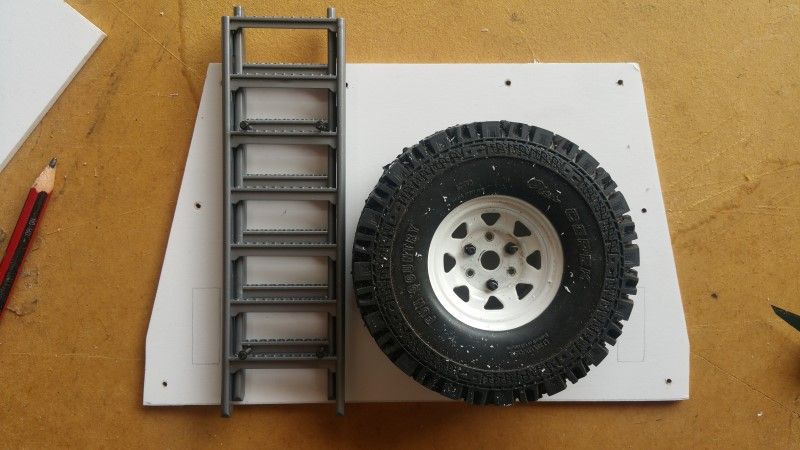 Made sure there was room for everything, and for the lens buckets on the inside. I used a ruler and a sharp knife and carefully cut out the holes. I think it worked out just fine. 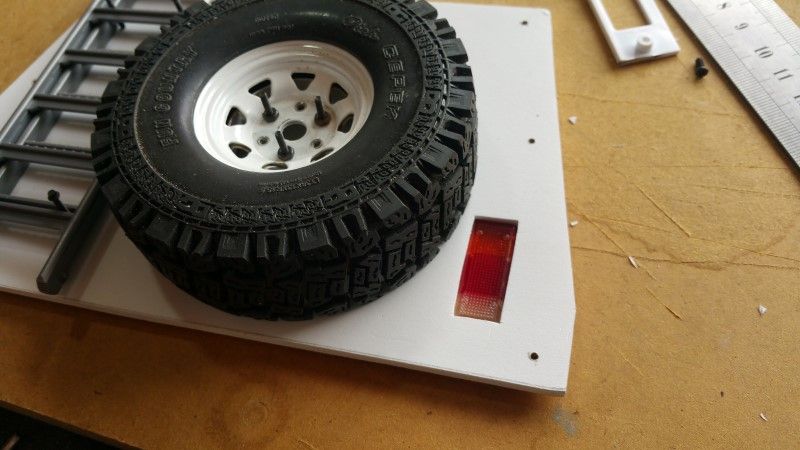 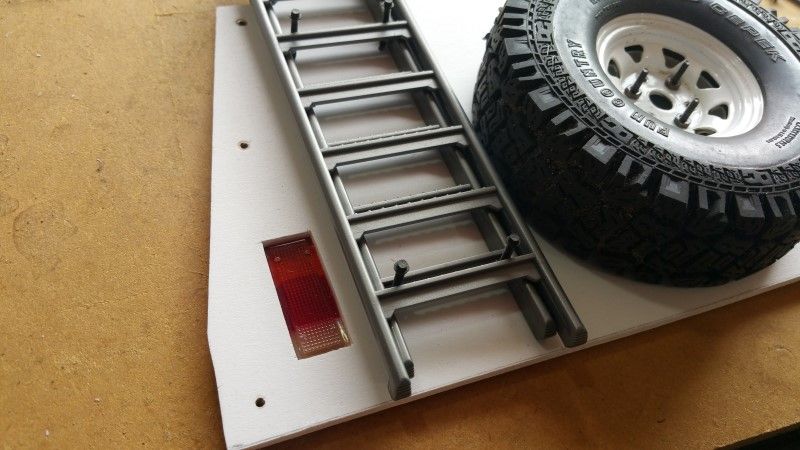 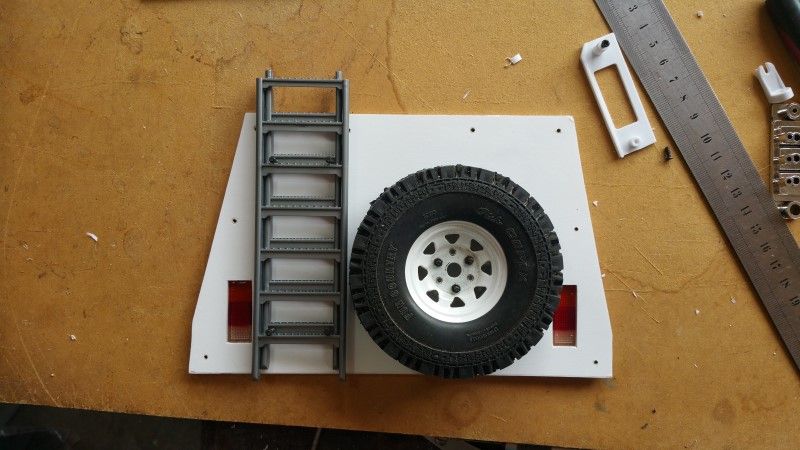 Now I needed to work out how to mount the lens buckets. 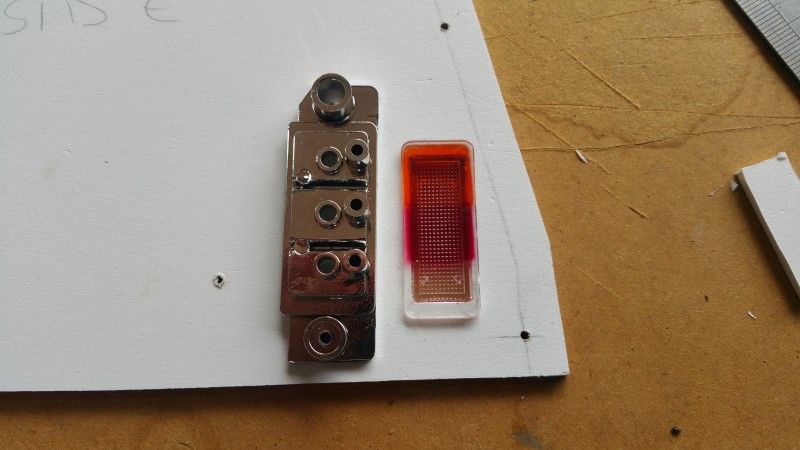 The white plastic is the original kit piece. I carefully cut out some small pieces and glued them in place before drilling holes so the screws would have enough material to bite into. 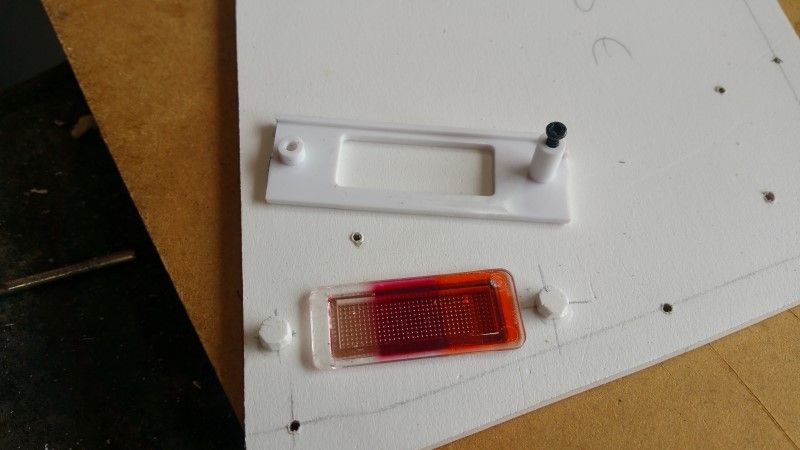 That seemed to work as intended. 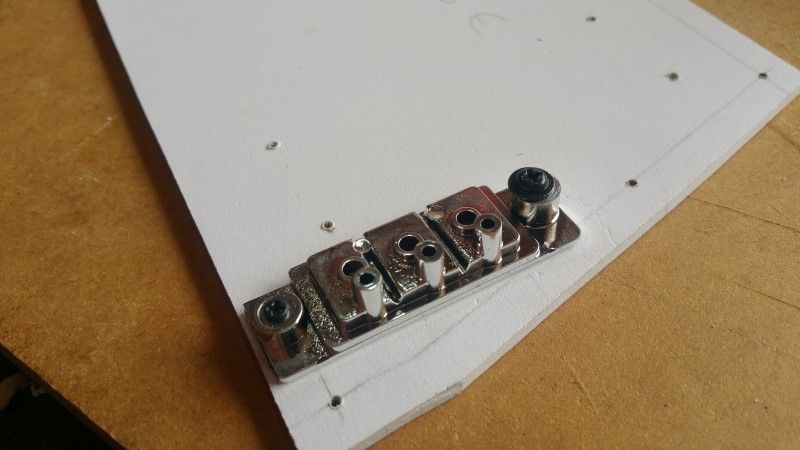 The ladder is already mounted using m2 scale bolts. But I needed a spare wheel mount. I came up with this to provide some strength and support for the rear wall. There is also a plate on the inside. 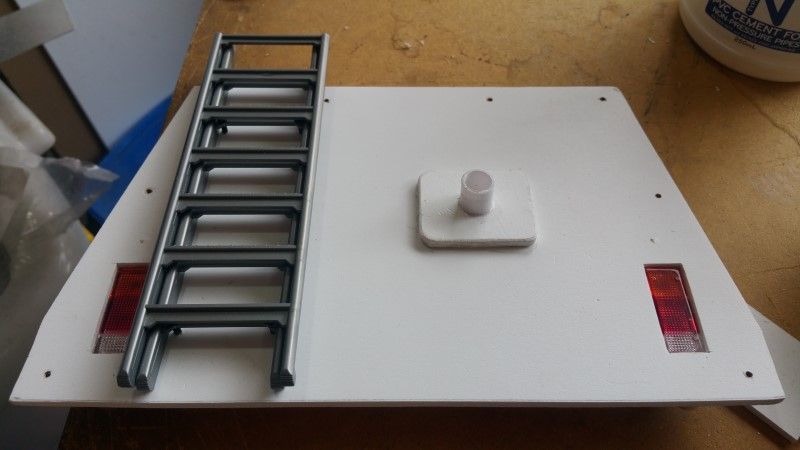 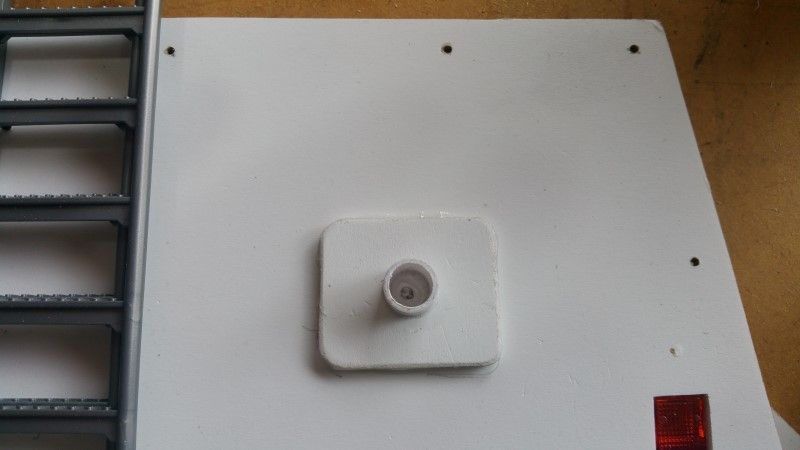 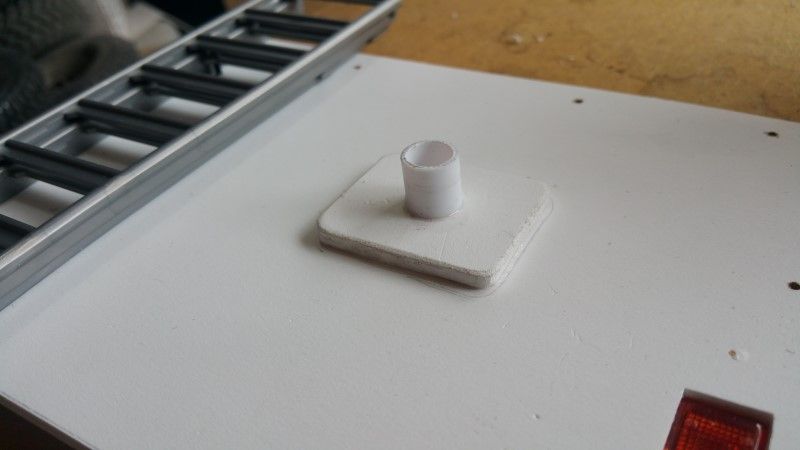 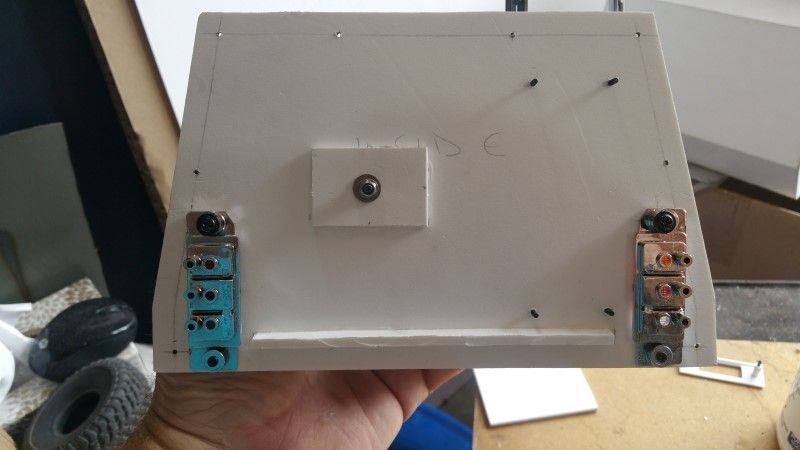 I also installed the roof rails. 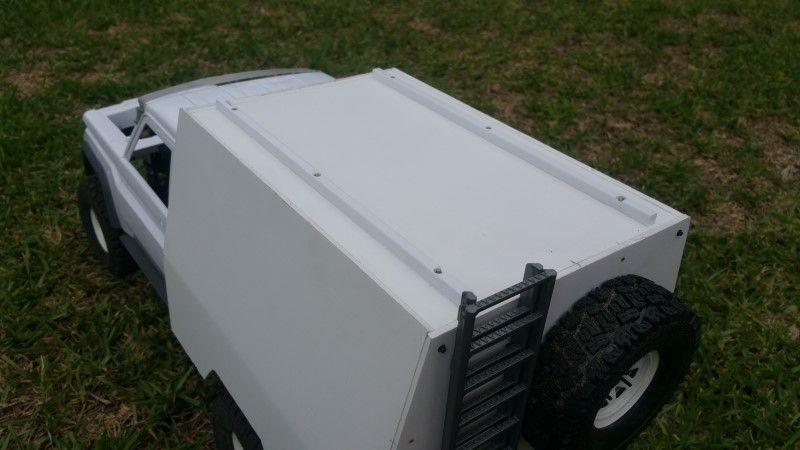 Took it for a spin around the front yad. I like how the tail lights turned out. I will add LEDs later on. 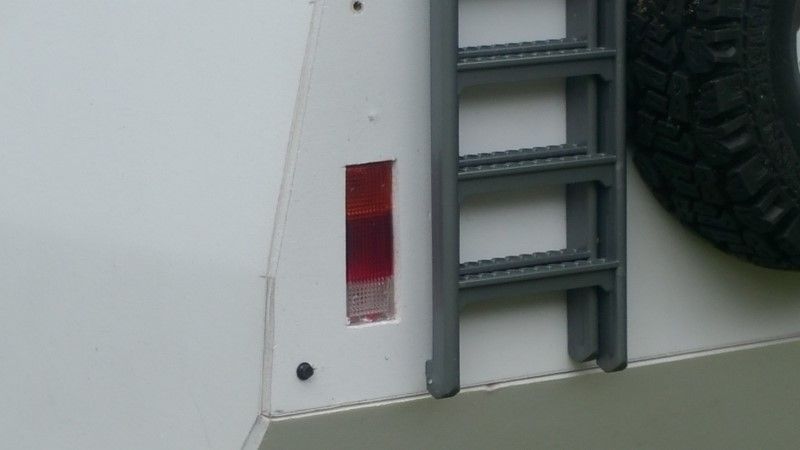 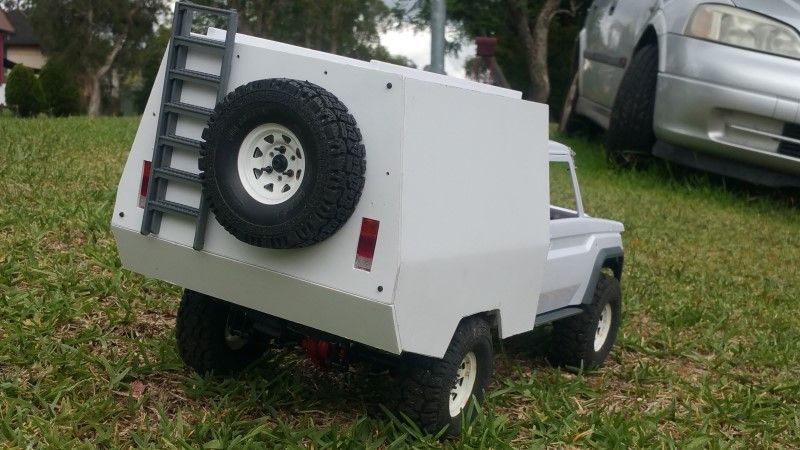 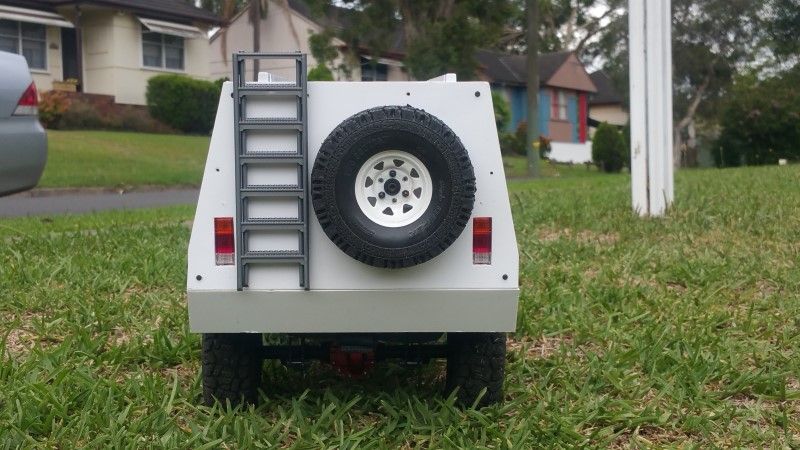 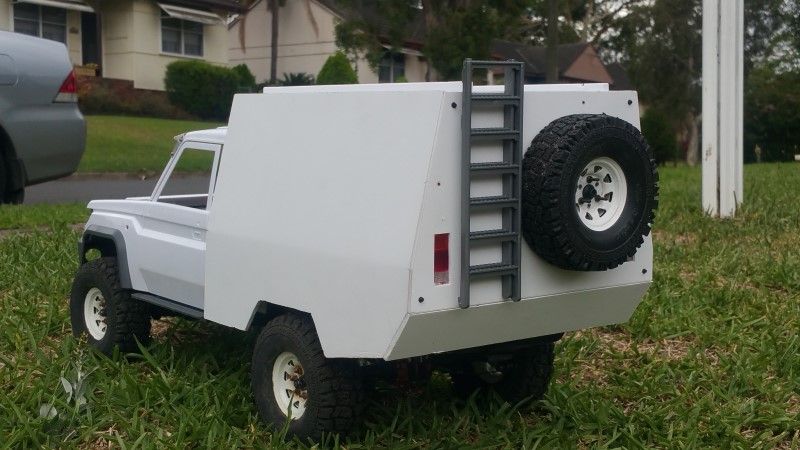 Cheers H2Micr0 |
| |  |
 |
 Land Cruiser 79 Hard Body by Trailworx Garage - Similar Threads
 | ||||
| Thread | Thread Starter | Forum | Replies | Last Post |
| new hard body? 1/9th scale LC80 Land Cruiser | STANG KILLA SS | General Scale Talk | 27 | 07-04-2017 01:07 AM |
| hard jeep/land cruiser/land rover body | IronRC | Paint and Body | 2 | 03-02-2008 10:14 PM |
| |