| |
| |||||||
 |
| | LinkBack | Thread Tools | Display Modes |
 09-08-2011, 10:45 AM
| #1 |
| Rock Crawler  Join Date: May 2009 Location: Hillsboro, OR / Kapolei, Hi
Posts: 695
|
2:30am. Couldn't sleep. Here's what passed the time. Bought this chassis here a while back and its been sitting in the garage since. The WK was my first "crawler" but I always hated its CG and ground clearance. It got stripped and shelved when I got my Axial. Insomnia lead to the merging of the two...    Test fit of the Toyota body...  True Kapakahi style....   Still needs shocks for the front. Axial trans will be used so I need to swap the WK pinion for Axial pieces. I want to Styrene the rear of the cab and possibly make a flatbed for it. Lots of work left, but at least it has shape now. Like the reduced 2.2 Rock Beasts? Hahaha. -B |

|  |
| Sponsored Links | |
| | |
|
09-08-2011, 11:03 AM
| #2 |
| RCC Addict Join Date: Jan 2008 Location: Lake Michigan
Posts: 1,898
|
holly mini monster tires! LOL. Off to a good start. Isn't the Kapakahi style to run a narrow tire on a wide rim? |
|
| |
|
09-08-2011, 11:11 AM
| #3 |
| Rock Crawler Join Date: May 2009 Location: Hillsboro, OR / Kapolei, Hi
Posts: 695
|
Nah. Kapakahi basically means messy or messed up. Closest defn is crooked or askew. The stretched tire is all out Hawaiian Style. Hahaha.
|
|
| |
|
09-08-2011, 01:07 PM
| #4 |
| Quarry Creeper Join Date: Mar 2011 Location: Kailua
Posts: 387
|
Looks good! Sucks when no can sleep, I get the same problem sometimes. Nice to have extra stuff to be able to build something different. Will be watching this one.  |
|
| |
|
09-08-2011, 01:34 PM
| #5 |
| Rock Crawler Join Date: May 2009 Location: Hillsboro, OR / Kapolei, Hi
Posts: 695
|
Mahalo my braddah. Auready have the rear of the cab Styrene'd. Kinda sloppy but some putty will fix it. Super tired now tho. Nap time.
|
|
| |
|
10-13-2011, 12:21 PM
| #6 |
| Rock Crawler Join Date: May 2009 Location: Hillsboro, OR / Kapolei, Hi
Posts: 695
|
Ok. So the ring/pinion swap with Axial pieces didn't work. Monsterous amounts of binding. If anyone has successfully done this conversion, I'd like to know what i did wrong. ANYWAY... Instead of that, I decided to splce Axial shaft with Maxx shafts. We'll see how much punishment they'll take before the splices fail. Free mod tho. Free is key. a little cutting  a little gluing  a little install.  -B |
|
| |
|
10-13-2011, 12:37 PM
| #7 |
| Rock Crawler Join Date: May 2009 Location: Hillsboro, OR / Kapolei, Hi
Posts: 695
|
More pics.... Still working on the body. Four coats of heavy paint is a pain. No idea why anyone would do this. 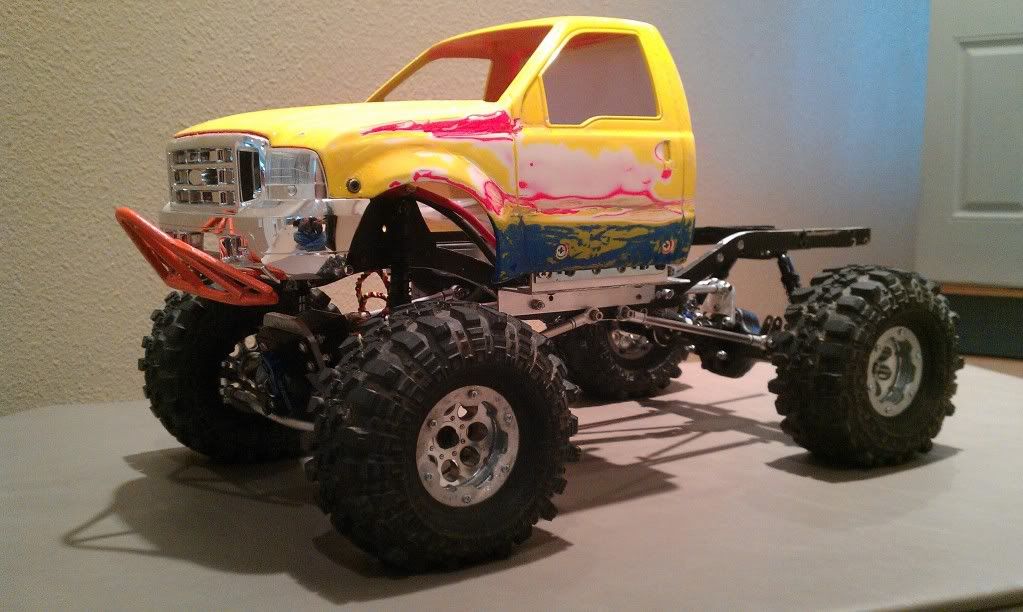 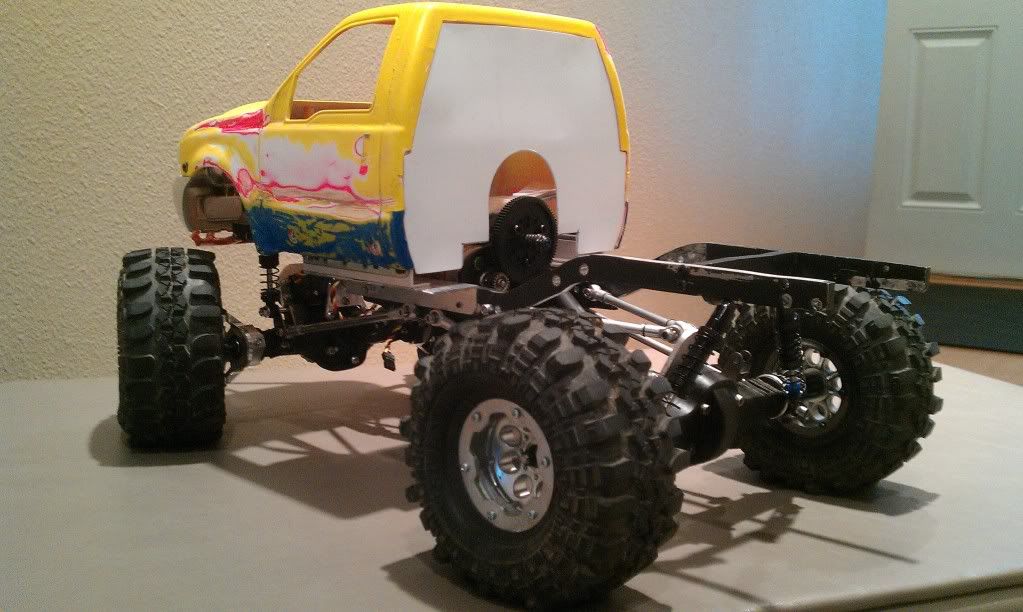 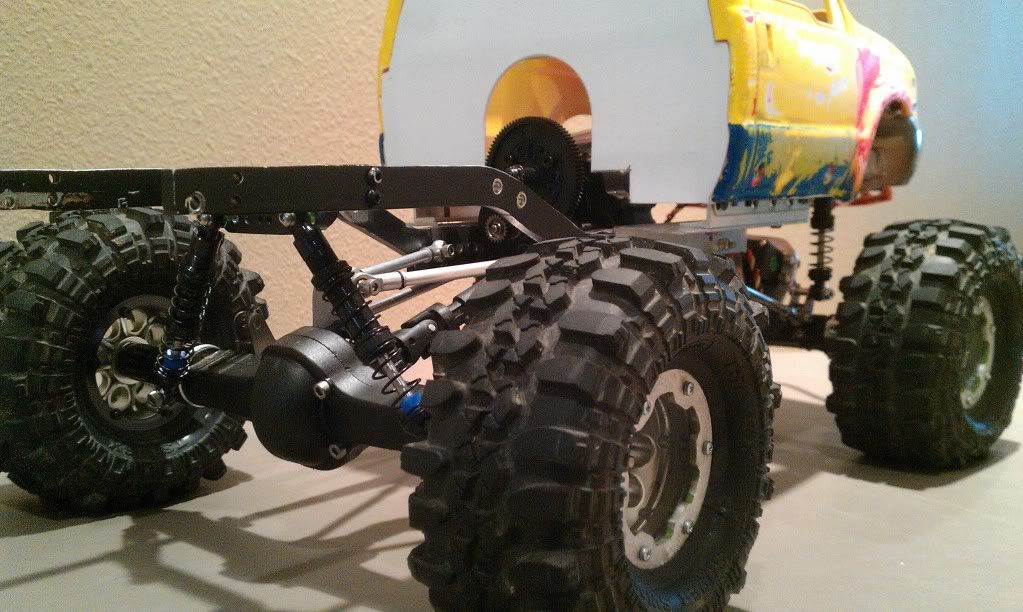 Decided to go with the reduced 2.2 TSL's on this rig. We'll see how they perform. Also modified the chassis a little. Repositioned the links and raised the trans mount. This rig has great ground clearance now. Made new front shock mounts and was able to raise the front suspension so be level with the rear. Hope it runs well. -B |
|
| |
|
10-13-2011, 10:18 PM
| #8 |
| RCC Addict Join Date: Jan 2009 Location: Crawlifornia
Posts: 1,941
|
To get the axial pinions in the WK, you have to throw in the whole axial gear set. Ring and pinion. |
|
| |
|
10-13-2011, 10:31 PM
| #9 |
| RCC Addict Join Date: Aug 2010 Location: wherever paypal sais.
Posts: 1,740
|
Brah!!! Who done wen n reduced all dem tires for you?
|
|
| |
|
10-13-2011, 11:13 PM
| #10 |
| Rock Crawler Join Date: Jul 2011 Location: Incirlik AB, Turkey
Posts: 605
|
pretty sweet project. Ya got another pic of yer rear upper shock mount? |
|
| |
|
10-14-2011, 12:19 AM
| #11 |
| Rock Crawler Join Date: May 2009 Location: Hillsboro, OR / Kapolei, Hi
Posts: 695
|
Caliking: Tried that. Mesh was too tight. Tried the Axial ring on the WK housing, bound worse. Swapped bearings back and forth. Nothing I did helped. Trav: These TSL's are the ones I copied from you. They have so much CA on the seams that the rig bounces at speed when the bead meets the road. Hahahaha. Stashing yours for when these give. I do still run the Hammers on my AX-Lux. They've become my favs. meanbgreen: I'll get some better pics tomorrow. They're nothing special. Its basically a 5mm thick cross brace thats been drilled and tapped. Works really well tho. On a side note...........I took this thing to the rock pile in the back yard today. Pretty amazing. Can't wait to get in on real rock. Last edited by 808DA6; 10-14-2011 at 12:32 AM. |
|
| |
|
10-14-2011, 11:23 PM
| #12 |
| Newbie Join Date: Jun 2011 Location: tigard
Posts: 10
|
I can't wait to see this thing in action. I got mine fixed let's do it!
|
|
| |
|
10-14-2011, 11:40 PM
| #13 |
| I wanna be Dave Join Date: Dec 2009 Location: Outside DC
Posts: 2,997
|
That's one chunky Ford you've got there! Don't get some sleep and keep working on this bad boy! |
|
| |
|
10-15-2011, 03:11 AM
| #14 | |
| Rock Crawler Join Date: May 2009 Location: Hillsboro, OR / Kapolei, Hi
Posts: 695
| Quote:
ALohas! -B | |
|
| |
|
10-15-2011, 03:17 AM
| #15 | |
| Rock Crawler Join Date: May 2009 Location: Hillsboro, OR / Kapolei, Hi
Posts: 695
| Quote:
| |
|
| |
|
10-19-2011, 04:35 PM
| #16 |
| Rock Crawler Join Date: May 2009 Location: Hillsboro, OR / Kapolei, Hi
Posts: 695
|
Rear styrene. Not perfect, but its a beater. I'm not going to put too much time into making this pretty. Will pick up some paint today.  Body mount. Flip-style. No body pins. Hinges on the rear body holes and, when flipped down, the body is secured in place by screw thats sicking out from the inside of the frame.   And the rear shock mount for meanbgreen...  The holes are crooked and the shocks aren't sitting at the same angle. I gotta remake this piece, but for now it works. -B |
|
| |
|
| |


 Linear Mode


