| |
| |||||||
 |
| | LinkBack | Thread Tools | Display Modes |
 12-05-2013, 11:01 PM
| #1 |
| Rock Stacker  Join Date: Jan 2013 Location: Bothell, WA
Posts: 66
|
So its going to be a new year and a new season so I thought I would build a new C2 rig. I'll be using most of the electronics and gear form my last C2 so its mainly body and tube work that needs to be done. - Castle Sidewinder ESC - Brood 35t Intensity - HITech 7950 servo @ 7.4v - Over/Under drive gears - VP Stage 1 Kit - RC4wd XVD Axles - GCM Transfer Case - HeyOK Servo Winch - VP 5" and 1" light bars I did a lot of searching around for just the right truck and I think I've found the base of my build. 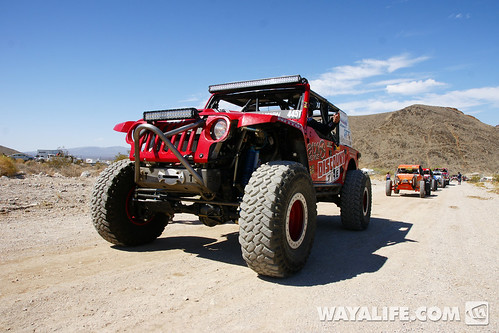 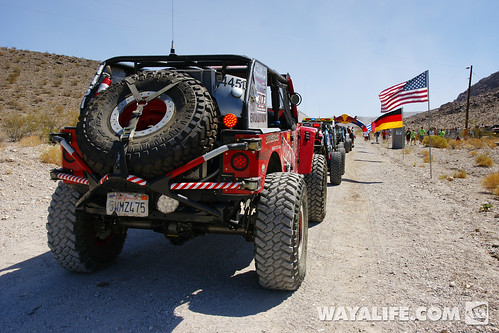 I'm not looking to do an exact replica but I like the way this truck looks and I think it's pretty unique. So I started off with the basic NB JK body (Thanks Nick!) and jumped right into some of the cage work.  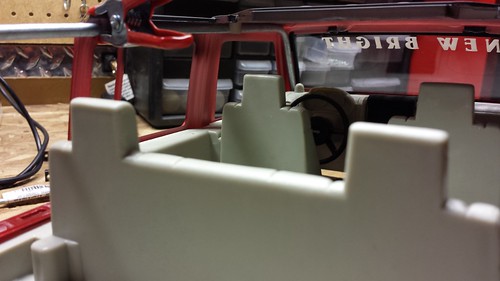 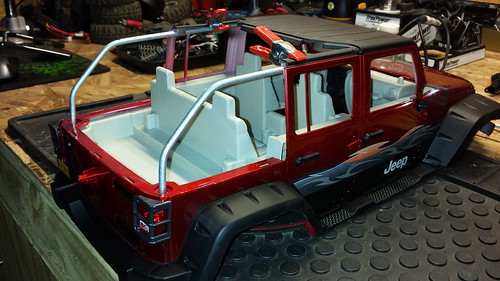 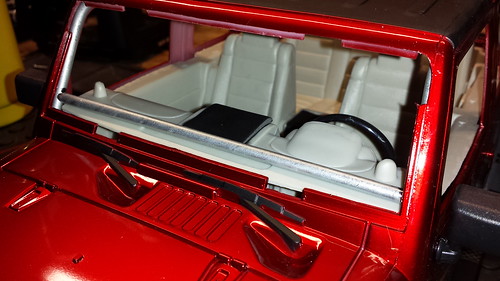 Last thing tonight was a little support in the front windshield. Still working out how I want to do the rest of the cage but its coming along I think. 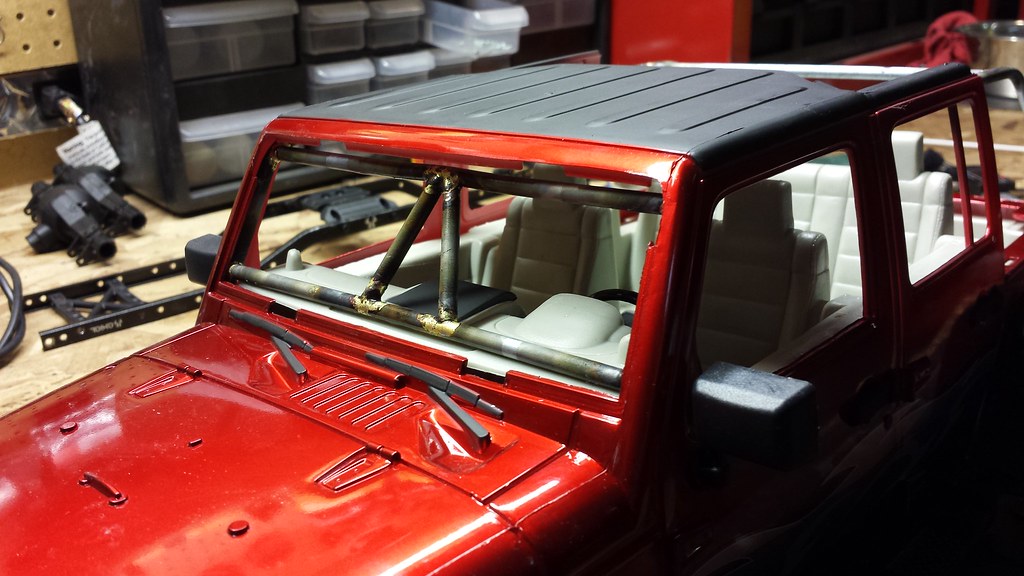 Still not sure what i want to do with the rear end. I'll either cut it open like the original base jeep or try something like the next picture. I have an extra top for a JK but I'm a little nervous to give it a shot still. We'll see. 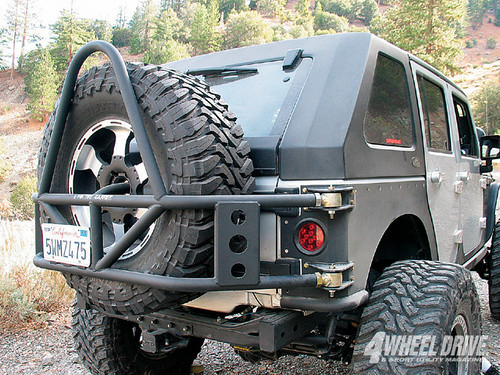 |

|  |
| Sponsored Links | |
| | |
|
12-06-2013, 08:20 AM
| #2 |
| I wanna be Dave Join Date: Jun 2008 Location: Sin City
Posts: 3,628
|
Nice looking start.... And Nice 1:1. Currie Johnny Joints for a tire carrier.... SomeOne has money! |
|
| |
|
12-06-2013, 10:08 AM
| #3 | |
| Oppan Gangnam Style   Join Date: Jun 2005 Location: Shingle Springs
Posts: 5,164
| Quote:
Good start on this build, great deals rigs to base it off of. | |
|
| |
|
12-06-2013, 08:08 PM
| #4 |
| Rock Stacker Join Date: Sep 2013 Location: cody
Posts: 70
|
Subscribed to this one can't wait to see how this one turns out! You do sweet work Robb
|
|
| |
|
12-27-2013, 01:34 PM
| #5 |
| Rock Stacker Join Date: Jan 2013 Location: Bothell, WA
Posts: 66
|
So I took a break from building anything over the holidays and decided to rebuild part of my shop. Now I have a lot more room and can work an multiple projects at once without getting them mixed up. Got rid of the rock "table" and moved it to the floor for now. Still a good place to test out our rigs. 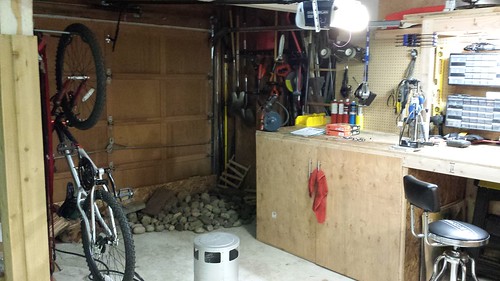  Now that I have more room, I got back to work on the JK. I tried to mimic the cage of the 1:1 as much as possible but I couldn't find many pictures of it. I copied a few things and then just started doing my own thing. I think its pretty much done though other than some 'Oh &$^' handles. I also need to clean up my joints as I suck at brazing lol. 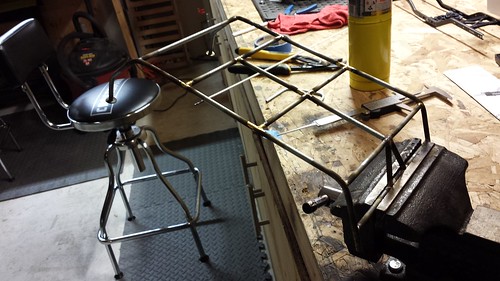 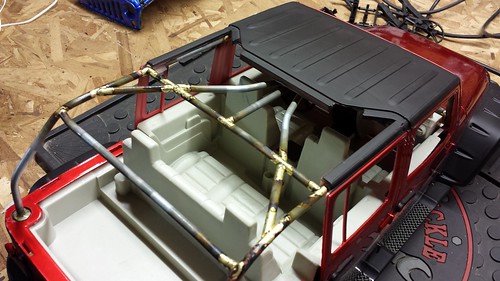 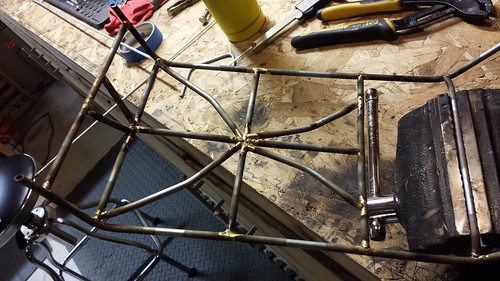 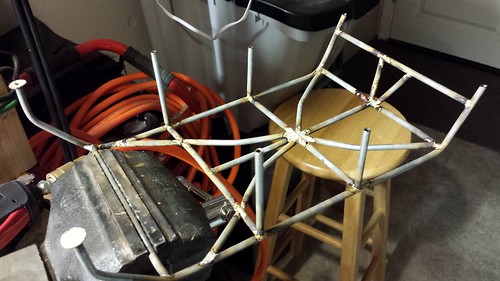 Next I started cutting on the body. This part always makes me nervous because its a commitment. Not quite sure yet if I want to completely remove the rear fenders like the 1:1 but we'll see. I cut everything off with my dremel and will use a sanding block to get down the to the shape I want. 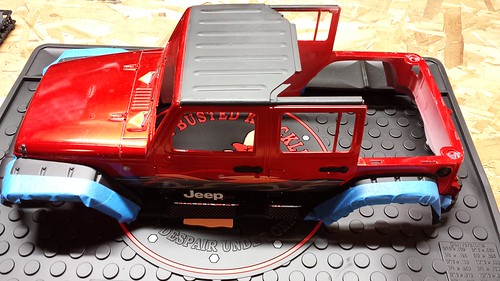 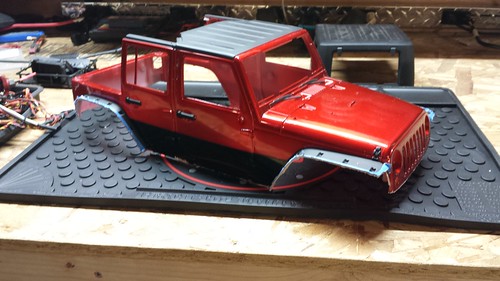 The next decision I need to make is whether or not to do the tire carrier like the 1:1. I really like it but it will prevent me from ever using the top which I really like so I am still debating on it. I will probably finish up the cage and get to work on the shock/engine/tranny mounts next. Always open to suggestions! |
|
| |
|
12-27-2013, 01:57 PM
| #6 |
| Rock Stacker Join Date: Jan 2013 Location: Bothell, WA
Posts: 66
|
Test mockup!  |
|
| |
|
12-27-2013, 04:29 PM
| #7 |
| Quarry Creeper Join Date: Nov 2012 Location: spanish fork
Posts: 435
|
Nice! Gonna watch this thing Sent from my VS980 4G using Tapatalk |
|
| |
|
12-28-2013, 06:54 PM
| #8 |
| Rock Stacker Join Date: Jan 2013 Location: Bothell, WA
Posts: 66
|
Got some work done on the chassis and made a new set of high clearance links today. Setup my axles in a jig this time because it was easier than them flopping around. I just used 2 stakes I had lying around and cut notches 13 inches apart. The links I made from drill stock, ran a 4mm die over it and used Traxxas Revo rod ends.  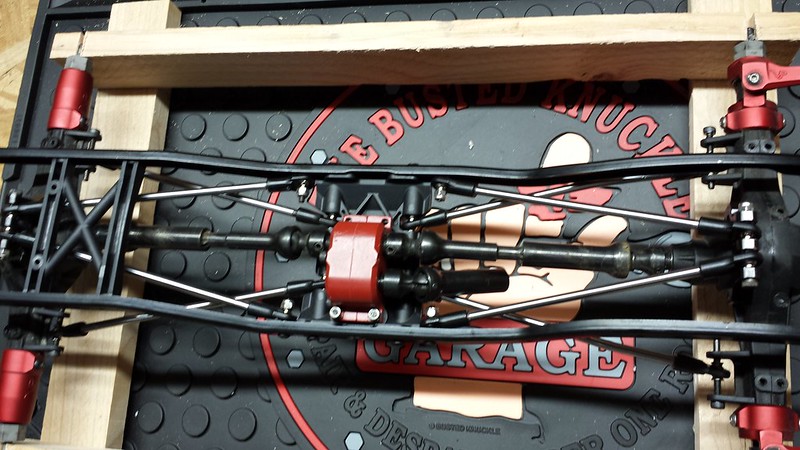 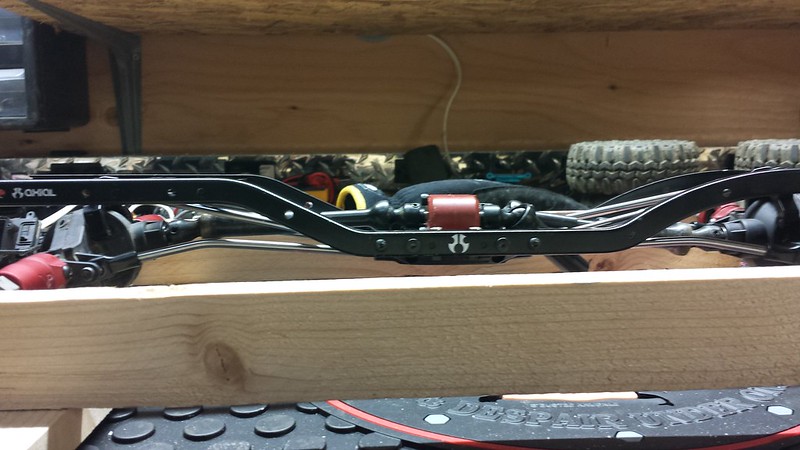 Last thing I did was decide on the ride height. I haven't made my own shock hoops yet so setting the height just right may prove to be a challenge but we'll see. I've always used the stock ones and cut the body to fit. But as most know with the NB JK's there's a little notch in the interior that a small shock hoop will fit in. That's for tomorrow. I mocked up the body for ride height and I'm not quite sure about the new TSL's under it yet. The looked and worked great on my old TJ but I'm not sure they go with this body. May end up ordering some Pitbulls. 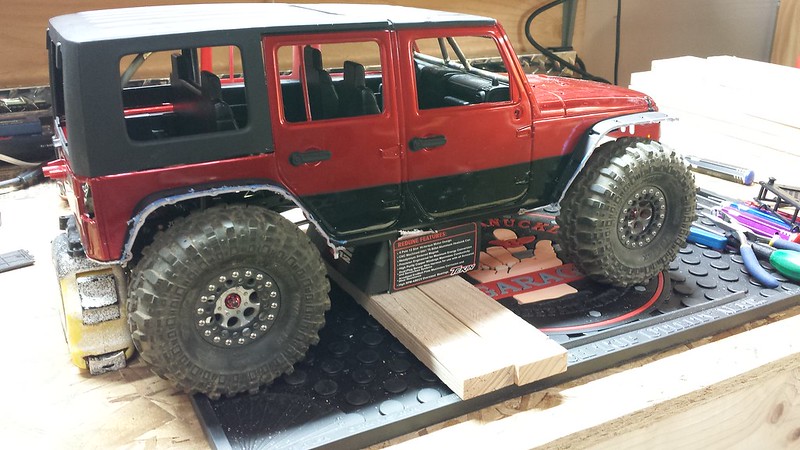 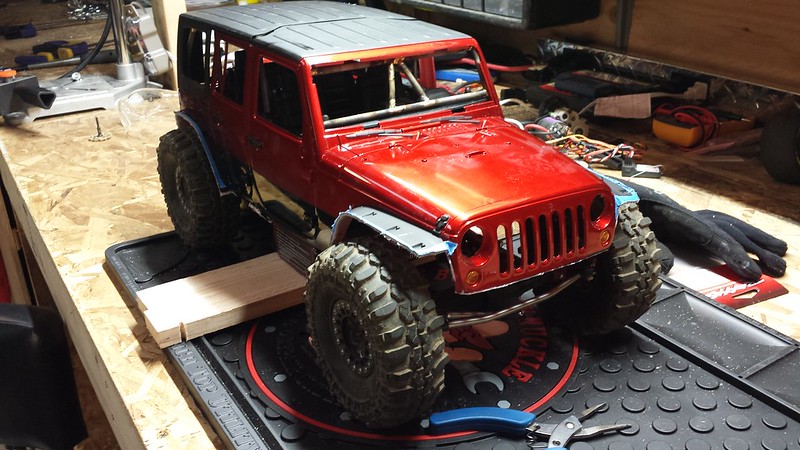 Still deciding on paint but I got the interior painted back. Going to pain in some gauges and more detail as well to it. I was thinking of making some 5 point harness's for it. |
|
| |
|
12-29-2013, 11:11 AM
| #9 |
| Quarry Creeper Join Date: Mar 2013 Location: Wisconsin
Posts: 324
|
That looks great!
|
|
| |
|
12-29-2013, 01:45 PM
| #10 |
| Quarry Creeper Join Date: Feb 2011 Location: USA
Posts: 262
|
subscribed, cant wait to see the end of this
|
|
| |
|
12-30-2013, 06:18 PM
| #11 |
| Rock Stacker Join Date: Jan 2013 Location: Bothell, WA
Posts: 66
|
Not much of an update but some new parts came in for the build today! ! - Poison Spyder stickers - RC4WD Universals - Gear Head Six shooter LED Bar  Last edited by Ssendam; 12-30-2013 at 06:29 PM. |
|
| |
|
01-14-2014, 11:36 PM
| #12 |
| Rock Stacker Join Date: Jan 2013 Location: Bothell, WA
Posts: 66
|
Finally got some time back in the shop to do some work on this thing. Had to work on my C3 to get it back up to par first. Got some new Axial bling for the shop over the holidays too! 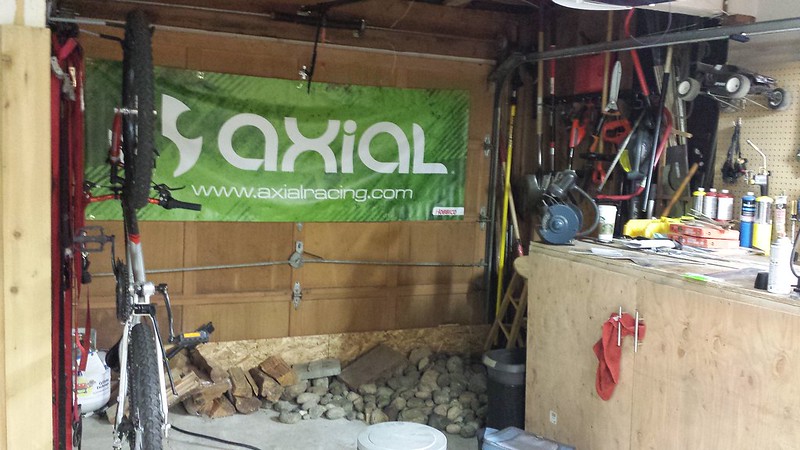 First order of business was making some rear shock hoops to tuck into the interior. If I would have used the stock ones, I would have had to cut the interior. Not what I wanted to do. So I took some ideas from some of the other NB JK build threads on here and went with the following. Still unsure if I will do the fronts as I don't need them for points but we'll see. I still need to do some shaving on them to get the shocks to mount but I test fitted the body and it's sitting right where I need it. 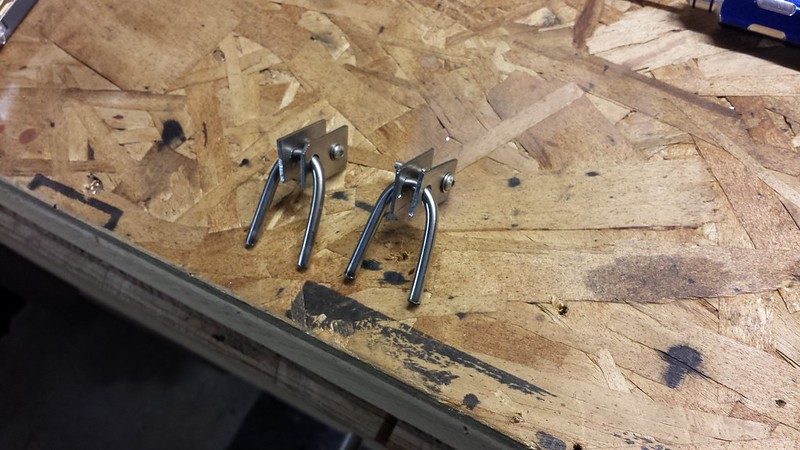 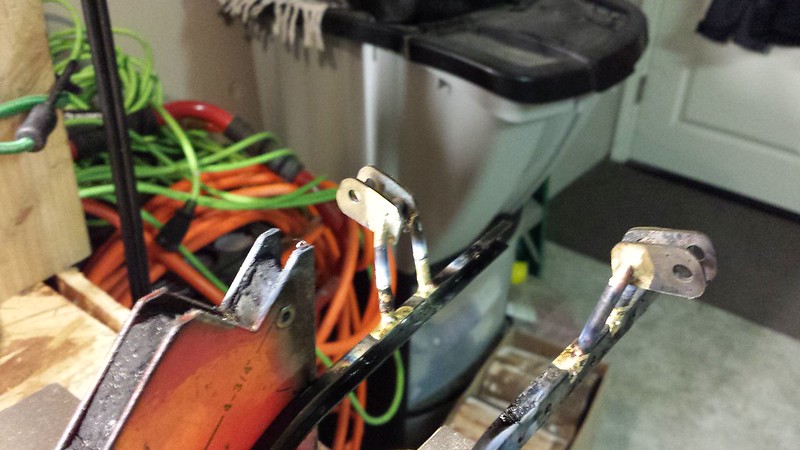 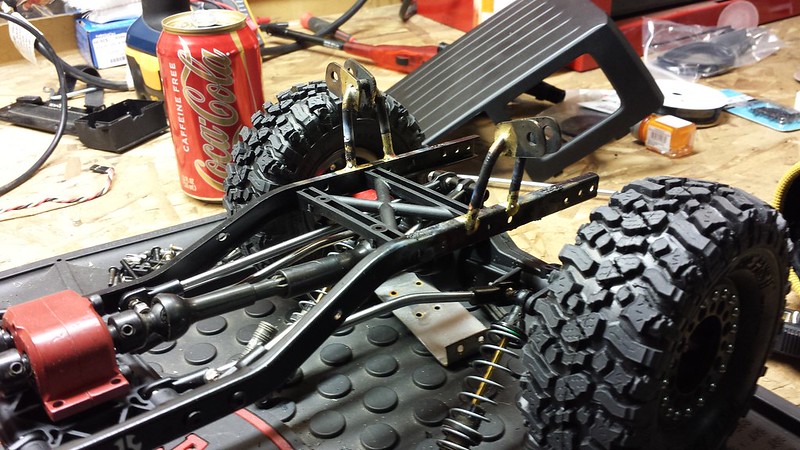 Next I started on the front servo mount. When I did this on my C3 Tundra, I measured and cut both pieces and then brazed them separate. When I did that, they ended up a little crooked but it worked. Took some advise and used one solid piece this time, measured and drilled the mounting holes then brazed it in. Once I get the bumpers done and brazed on, I'll cut the solid piece and the servo will slide right in. 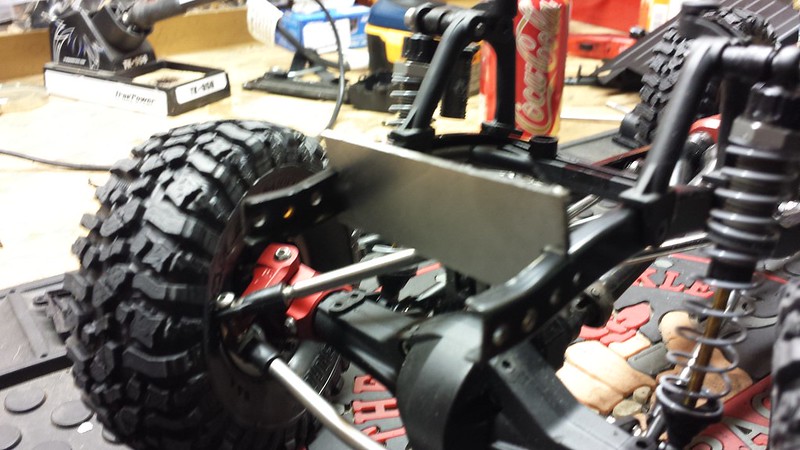 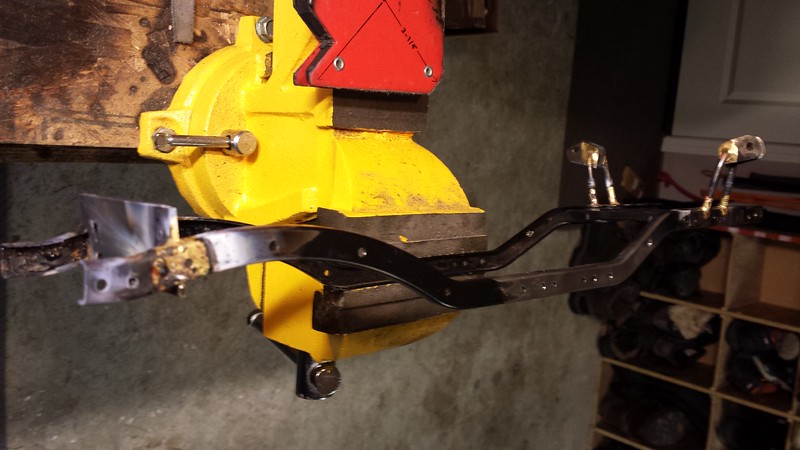 I found a nice spot under the interior to mount my servo winch with plenty of clearance. Once I start bolting this thing together, you'll see where the spot is. 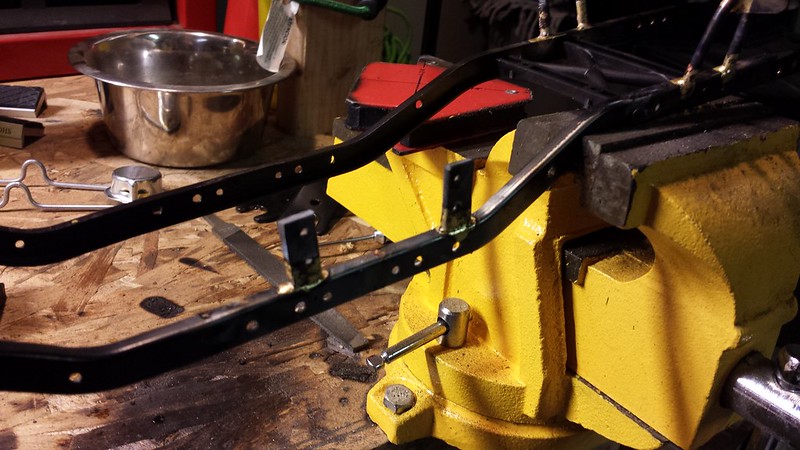 I had a little bit of time left tonight to start working on the sliders. I'll be replicating the 1:1 sliders that you see above. Here's the start. 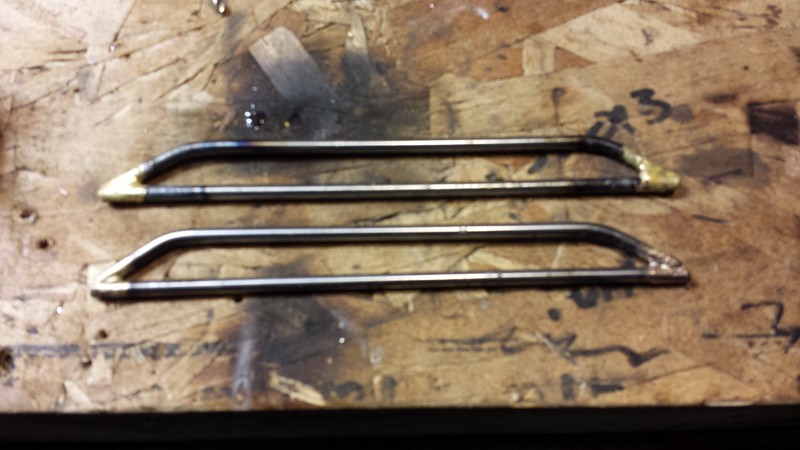 Last thing for the night. I got some new shoes in the mail! Sticking with the Axial plastic beadlocks for now though until I decide to drop the cash on some nicer wheels. They are 1.9 Pit bull Rockbeast's with Medium Comp Cut Nova foams from Crawler Innovations. When I ordered these, it took a bit longer because Eddie was under the weather with the flu. But as most know, he takes care of his customers and he sent along with the tires/foams, a nice 12" Crawler Innovations sticker. 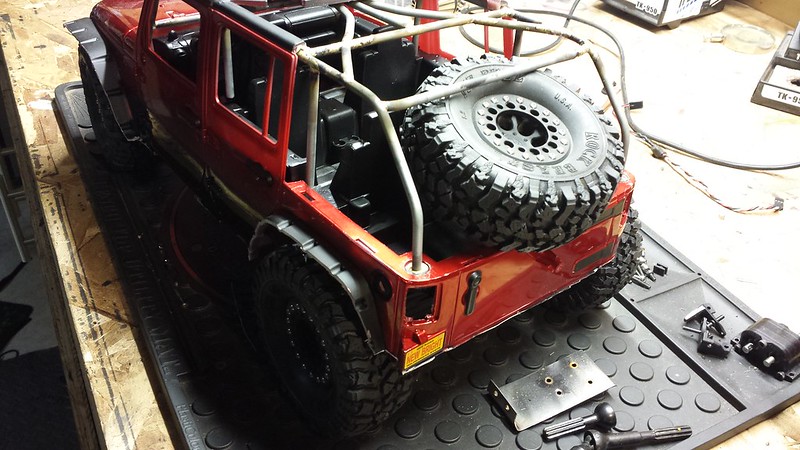 |
|
| |
|
01-15-2014, 06:54 AM
| #13 |
| Pebble Pounder Join Date: Apr 2013 Location: weatherford
Posts: 164
|
Just a suggestion and throwing this in there. The jeep your modeling after has there suspension that they call evo double throw down. Where they actually make the shocks parellel to the chassis.  For the rear and in the front they just but the bypass and coil over.  Just letting you know that's what the real one has if you wanted to make it that much more scale. But it's a great looking rig!! "Thumbs up!" |
|
| |
|
01-15-2014, 08:20 AM
| #14 | |
| Rock Stacker Join Date: Jan 2013 Location: Bothell, WA
Posts: 66
| Quote:
I almost went with the cantaliver setup from Dinky RC, would have just painted the springs blue and called it good lol. On the front though, I haven't read too many good things about the performance of the scale king shocks. Though I'd love to use them, I will be competing with this rig too so that shy's me away from them. At $45 a pair, not sure I'm willing to test them out lol. All I was planning to do is take the Axial aluminum shocks I have and painting them to look more like the 1:1. | |
|
| |
|
01-16-2014, 11:04 PM
| #15 |
| Rock Stacker Join Date: Jan 2013 Location: Bothell, WA
Posts: 66
|
So last post I had started on the sliders. I used the same drill stock as I used for the links. It looks a little rough still but i think after some more sanding and paint, it's going to look really close to the 1:1. I noticed I didn't post of any pictures of the 1:1's sliders so here you go. 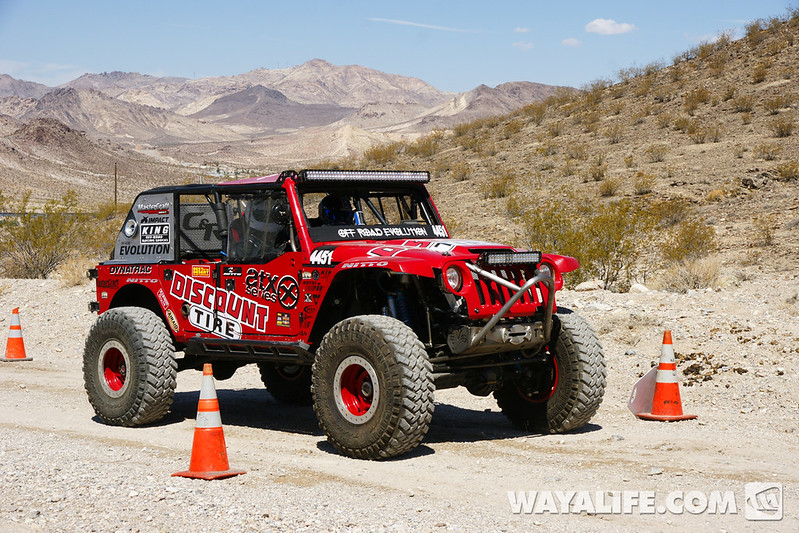 On the ends I used some thin sheet metal I had lying around, cut it to shape and brazed them in. Then used the same drill stock to braze in the center pieces. I still need to do some more grinding to get the ends more square looking but I think they turned out pretty good. 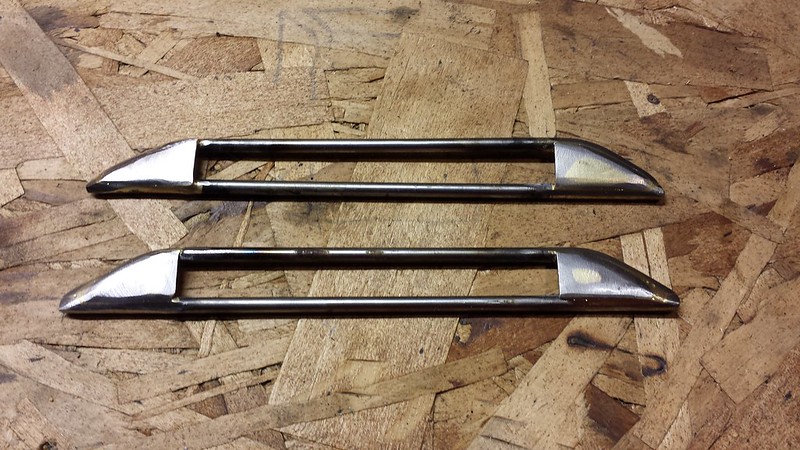 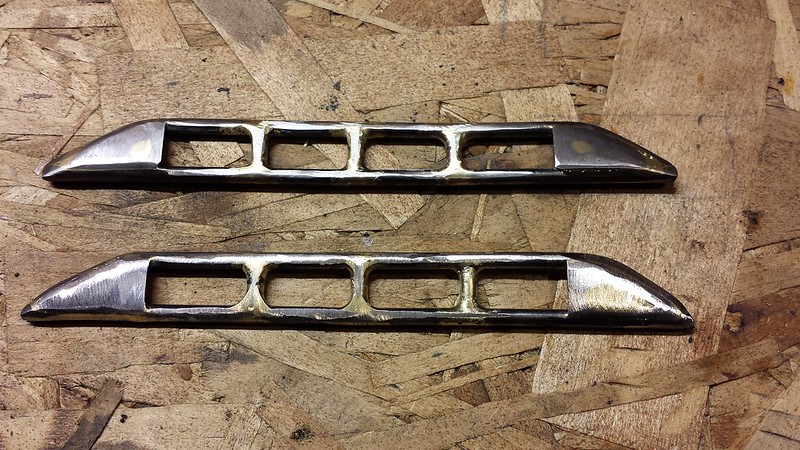 Last thing I did tonight was braze them to the frame. I used some spare 1/4 square stock to bring it out from the frame just enough so the body would tuck in nicely. 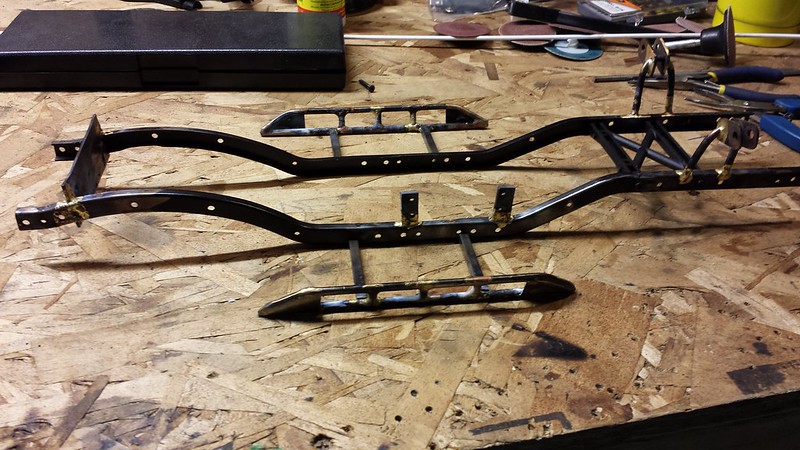 I did a test fit on the body and realized that because of where I had to attach it to the frame (so I didn't block the link and skid plate holes), the sliders are about a half inch farther forward than I wanted. So tomorrow I'll heat up the sliders and move them back a bit on the mounts so it looks better. I'll take a picture of it and post it then. I also noticed while posting this that my winch mounts are crooked lol. Glad I noticed this before I finished it, painted it and tried to install the winch. I'll fix that tomorrow too. Next items Are the front and rear bumpers. This is going to require some body trimming and test fitting. Not even sure how Im going to pull off the front without cutting the body too much. I always get intimidated during a build while I'm thinking about what needs to be done. Once I start measuring and cutting though it usually just flows thankfully. So we'll see! |
|
| |
|
01-16-2014, 11:46 PM
| #16 |
| Pebble Pounder Join Date: Mar 2013 Location: Vancouver
Posts: 171
|
fully tuned into this one |
|
| |
|
01-17-2014, 11:18 PM
| #17 |
| Rock Stacker Join Date: Jan 2013 Location: Bothell, WA
Posts: 66
|
Got the sliders moved forward tonight and did a little shopping for some more MAPP gas and square stock for the bumpers. I realized after watching some running video of the 1:1 today that I might not have to cut the tail gate at all to fit the spare. It looks as though it just leans in to the body. That will keep the body more stable too. Also while watching the video I noticed I was missing a lot of cage work so that's what I worked on tonight. Yeah I'm scared of the bumpers, so what lol. I plan to make the "Oh %÷!!" handles from the same fabric I will do the door nets with so no need to braze those in.   |
|
| |
|
01-24-2014, 11:31 AM
| #18 |
| Rock Stacker Join Date: Jan 2013 Location: Bothell, WA
Posts: 66
|
So the work on this beast has been slow going while trying manage a few other projects. I think I now have the body work 95% completed. I am going to build some rock armor on the rear panels so I can use a smaller tail light like the 1:1 and have a smooth place to tie in the tire carrier mounts. Put on the last coat of putty to fill in the front fenders where the fake mounting holes were and where the tire mount use to be. 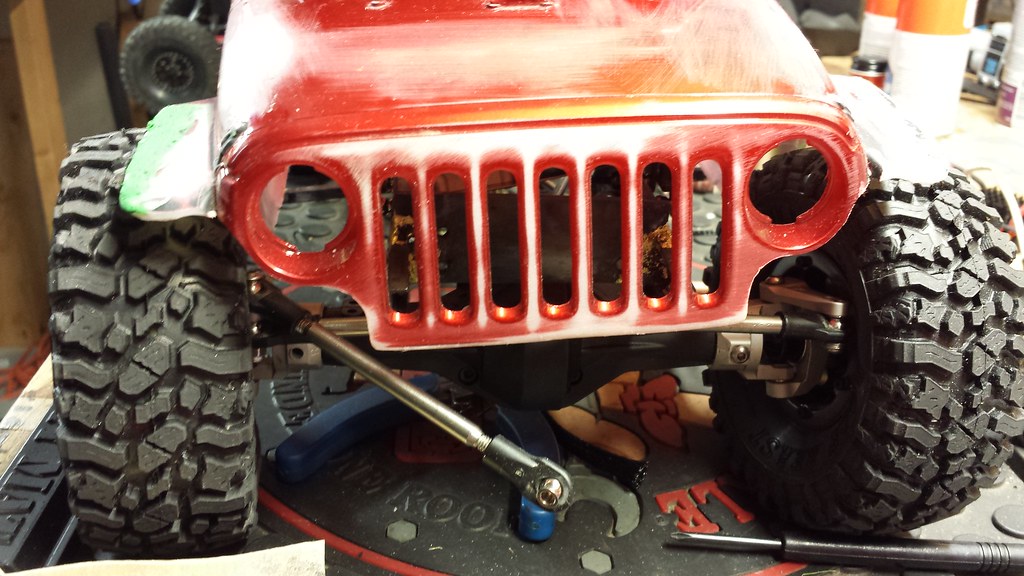 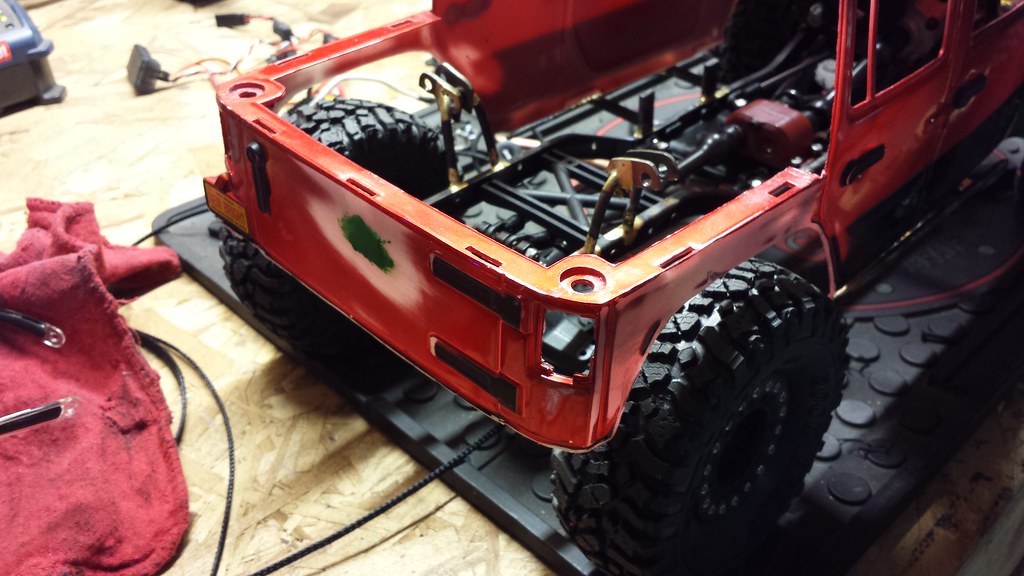 I decided against using the scale king shocks for now. I took my aluminum axial shocks I had, wire brushed them a bit and painted the springs and reservoir blue to at least make it similar to kings. I also got the last set of parts in yesterday that I needed for the build. From Locked Up I ordered some black winch line (very strong) and some scale bolts which i'll show in a sec. From RC4WD I ordered those nice straps the have so I can use them on my tire carrier to tie it down like the 1:1. I also got some aluminum rod ends that I think will mimic nicely the Johnny joints the 1:1 uses 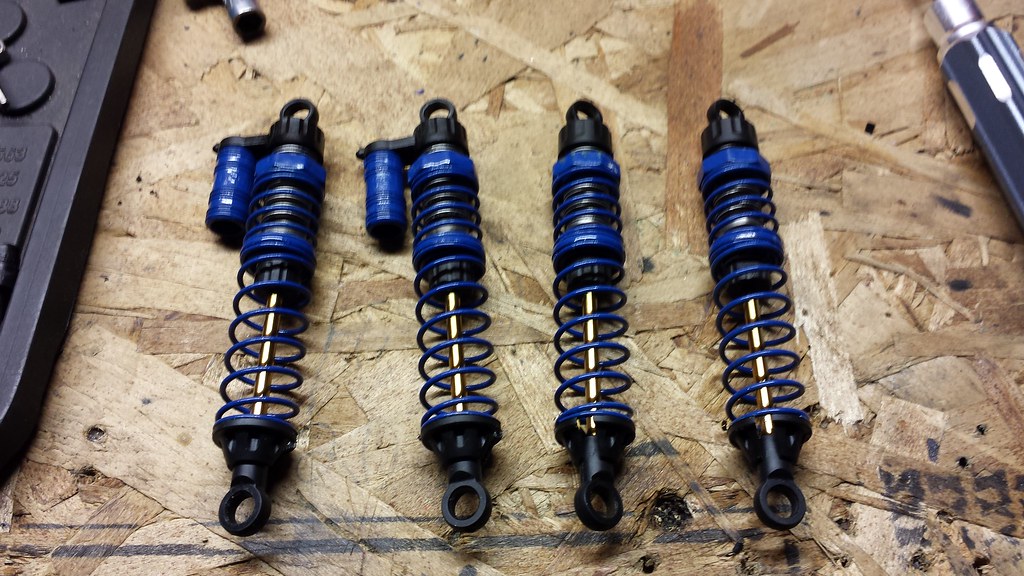 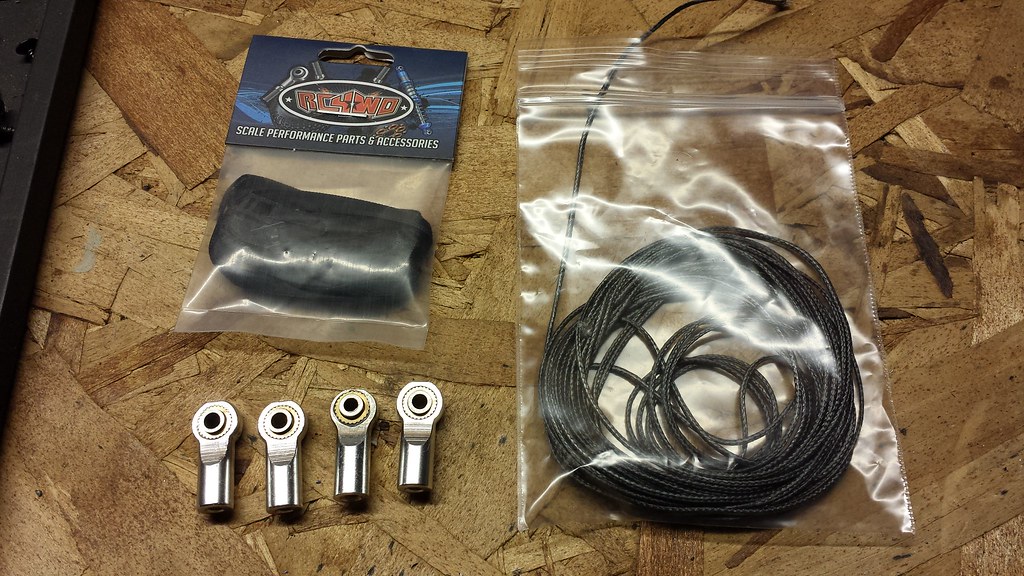 |
|
| |
|
01-24-2014, 11:31 AM
| #19 |
| Rock Stacker Join Date: Jan 2013 Location: Bothell, WA
Posts: 66
|
While I was waiting for the body work to cure, I started working on the fuel cell that I noticed the 1:1 had in a running video. I was at the electronic store last weekend picking up parts to hack my sons Flysky GT3B and noticed they had some sealed project boxes. They also have some in aluminum but I stuck with the plastic for weight purposes. 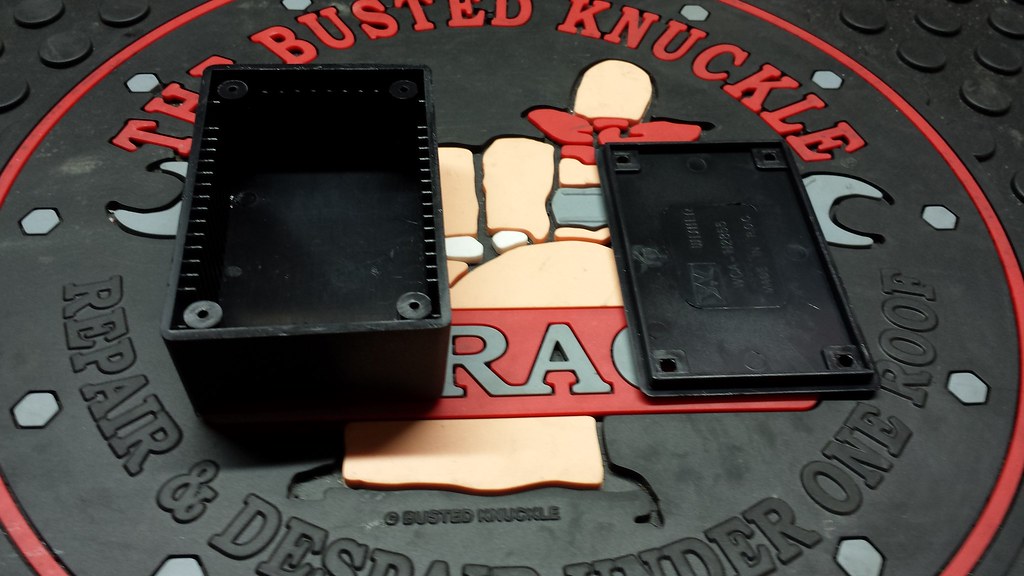 I did this pretty quick and without precision but I think it looks pretty good for the money and time I spend on it. I first cut out the oval shape for the top and then drilled the bolt holes all the way around. I used the M2 scale bolts from RC4WD and a spare shock plunger I had for a vented gas cap. 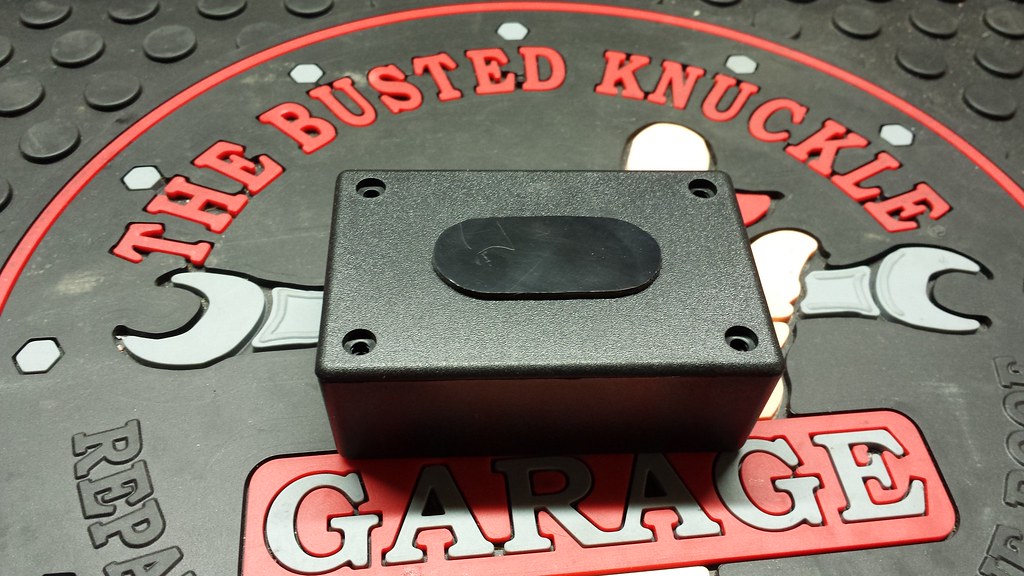 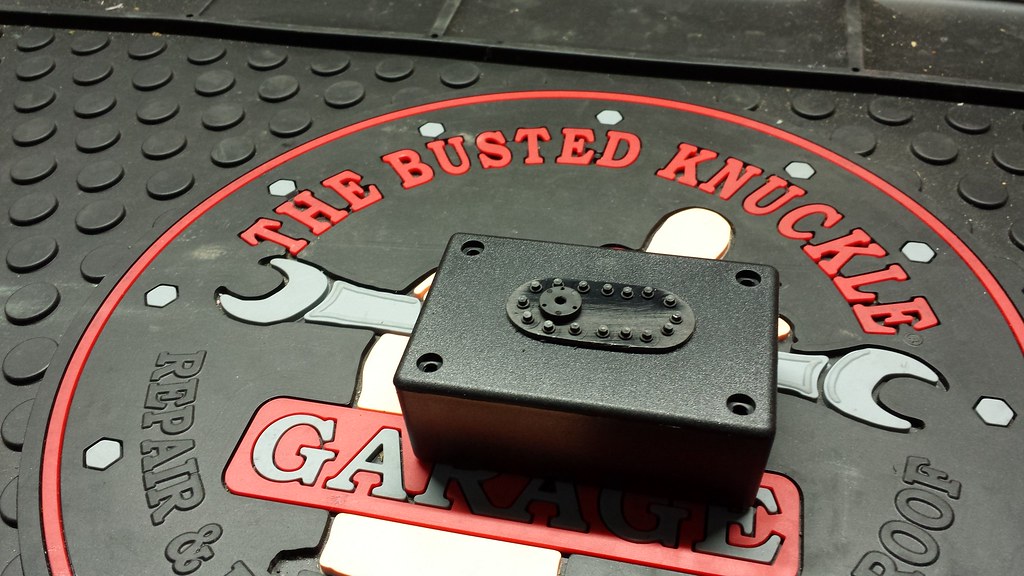 After some metallic paint for the fuel cell and some red for the cap, this is what I ended up with. The size I bought fits nicely in the back of the JK too. SO for $12 in parts and about 30 minutes of work, I have a nice fuel cell which is very light and has plenty of room for electronics if wanted. When I get ready to install it for good, ill put some wires coming from the fuel cell down to the floor to mimic the lines. 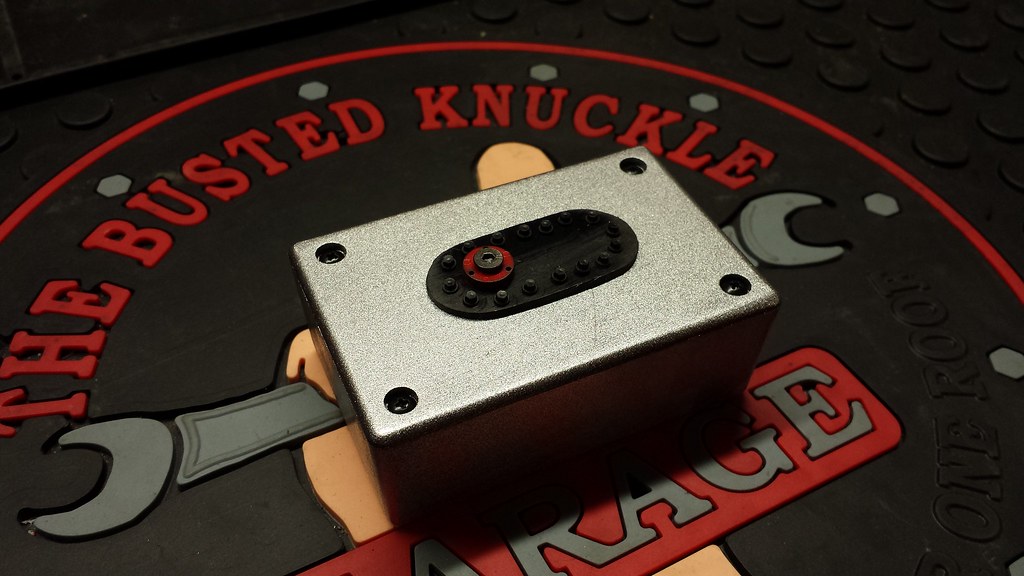 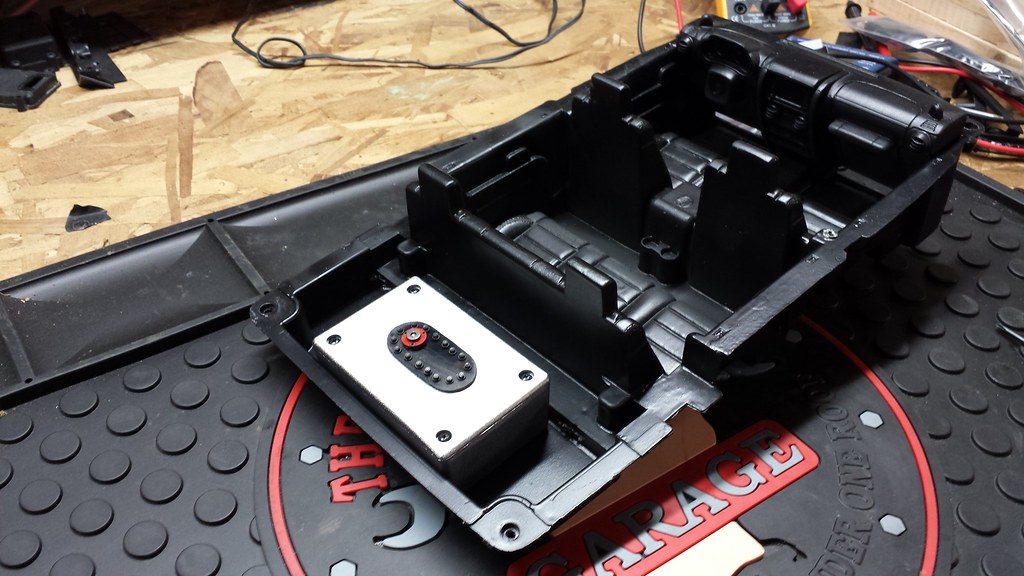 Up next are the bumpers. I got the front cut last night and am headed to Tacoma screw to pick up the drill rod for the tubing at lunch today. |
|
| |
|
01-24-2014, 11:56 AM
| #20 |
| Pebble Pounder Join Date: Nov 2010 Location: Throttleville
Posts: 195
|
Looking great so far. Really like those sliders! Keep it going!!
|
|
| |
|
 Project Offroad Evolution - Similar Threads
 | ||||
| Thread | Thread Starter | Forum | Replies | Last Post |
| zone offroad project mj | matt_22 | 1.9 Scale Rigs | 50 | 03-06-2013 08:30 AM |
| PROJECT~GREEN YOTARUPTOR~(evolution of a Yota Scaler) | BiG_DaWgZ | 1.5 Scale Rigs | 7 | 04-21-2011 11:27 PM |
| Project- Offroad Park for crawling and bashing | subyman | General Crawlers | 5 | 02-27-2010 06:39 PM |
| All Pro Offroad Yota project | Crawln Coles | 1.9 Scale Rigs | 21 | 01-03-2009 06:49 PM |
| |


 Linear Mode


