| |
 04-28-2017, 04:07 PM
| #1 |
| Quarry Creeper  Join Date: Apr 2016 Location: Canada, Ottawa/Gatineau
Posts: 290
|
Since there is no dedicated “Vaterra Slickrock” or “Mini Scale Rig” (1:18 to 1:16) sub-forum and this vehicle is a 1:18 crawler equipped with 1.9 tires, I guess that the “1.9 Scale Rigs“ sub-forum is a good a place to post my build as any other. If not, than I am sorry in advance. To the big despair on my wife… ( Here it is being welcomed by the rest of the family. 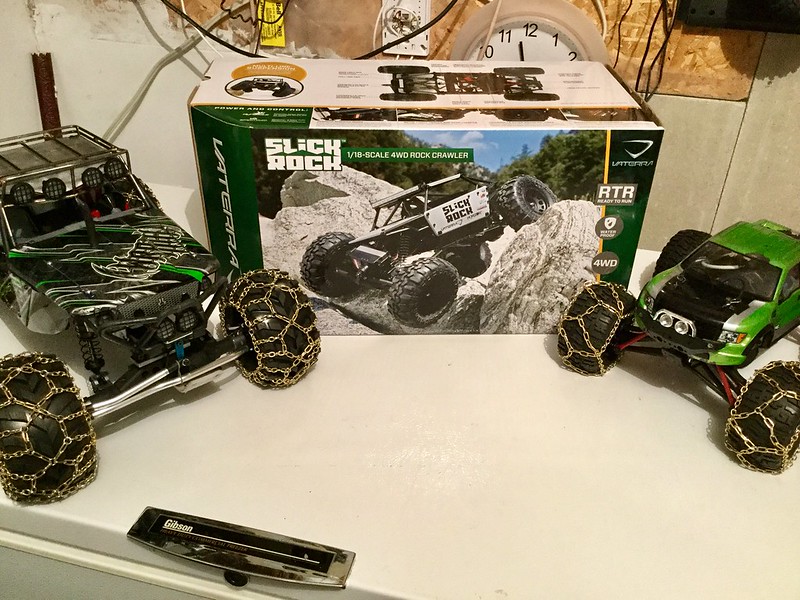 It came with an upgraded ESC since the original one died under their watch otherwise, everything else was bone stock. Upon reading a bit on my new acquisition, the first thing I did was relocate the battery and the electronics as far forward as I could inside the chassis, flip the transmission 180 degrees. Quickly realizing that the turning radius was “slightly impaired”, I managed to source all the parts from the Losi MRC Pro to go CVD in front with aluminium carrier, spindles, lower links and threaded shocks with a choice of springs. This made a big improvement on the turning abilities to the point that the tires could no rub against the lower links, giving the vehicle about 45 degrees of turning angle. 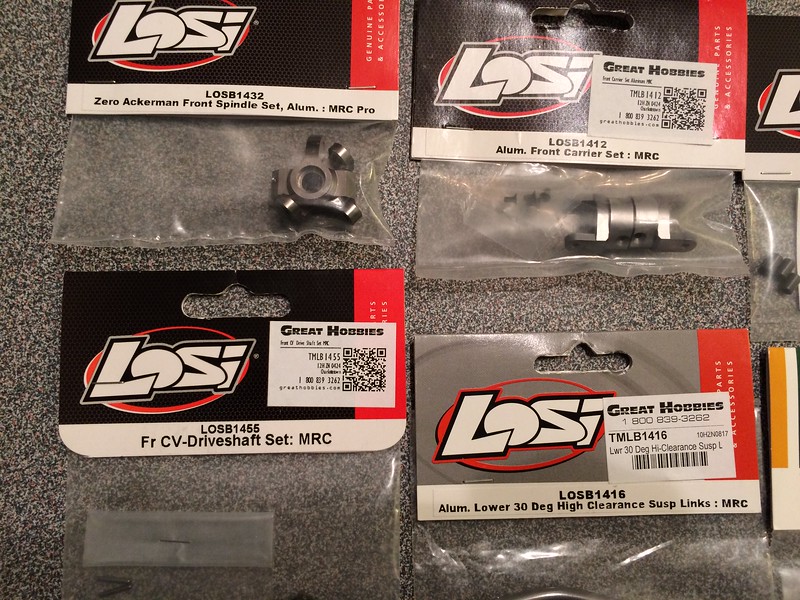 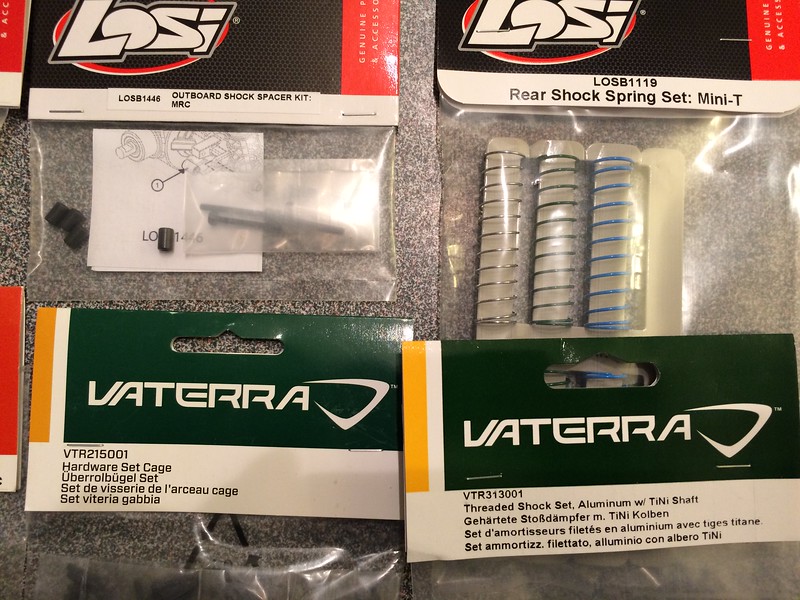 Not too long after upgrading the front steering, the stock servo started to act up 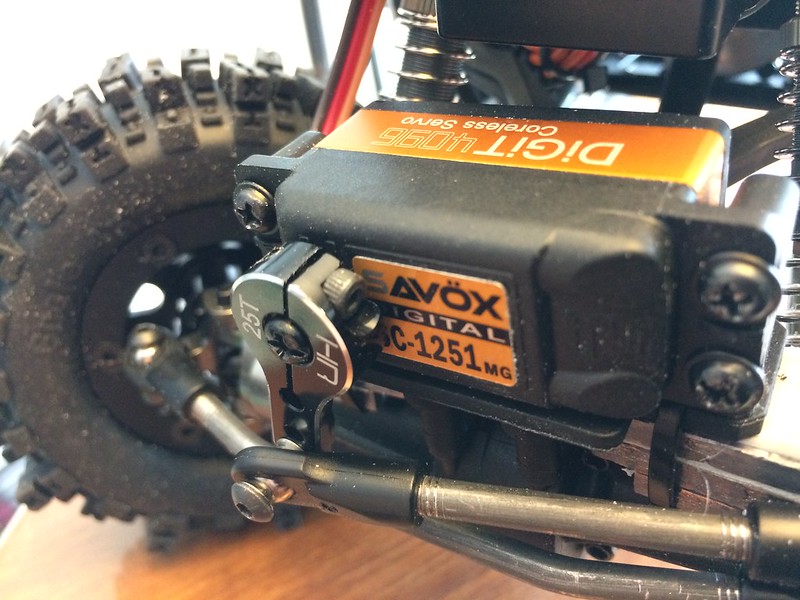 One thing that bothered me since day one with the Slickrock was the un-Godly noise the transmission made under operation. Therefore I ordered the complete transmission aluminium upgrade kit from Hot Racing; the housing and all the gears in an attempt to quiet the little guy down. 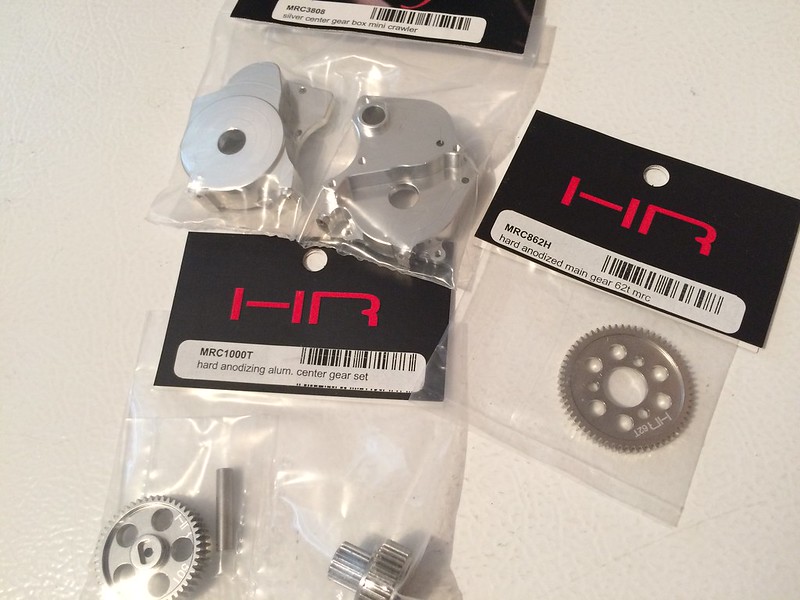 The transmission aluminium upgrade didn’t really help, therefore the issue must lie somewhere else. After taking everything apart again and reading some more, I realized that at the size the factory specified 48 pitch pinion gear needs to be, the gear profile was in fact not shaped properly to match any 48P spur gear, factory or after-market. I then ordered some 0.5Mod pinion gears to try out with the stock 48P spur and magic, 60%+ of the gear noise is gone! *** Sorry no photos of this *** One thing that the Slickrock suffers from immensely is torque twist; driving straight on level ground the whole body tilts a good 30 degrees to one side and this really annoyed me including a tendency of the front springs to bind because of their pronounce tilt angle, even with the upgraded shocks with Tin coated shafts. Therefore I decided to make a front shock mounting frame to relocate the top of the shock that they could be mounted more vertically. It’s made out of 1/4” steel and utilizing the factory shock upper mounting points and 2 of the front hood panel mounting points. 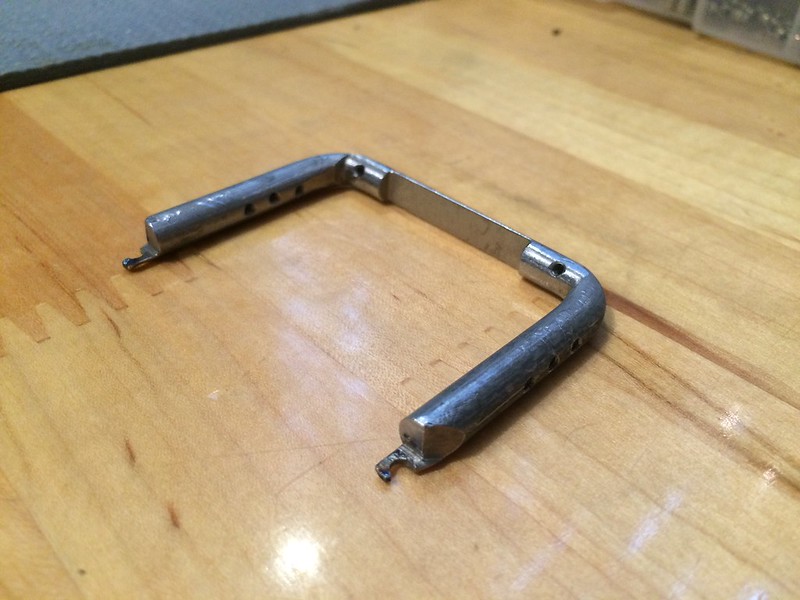 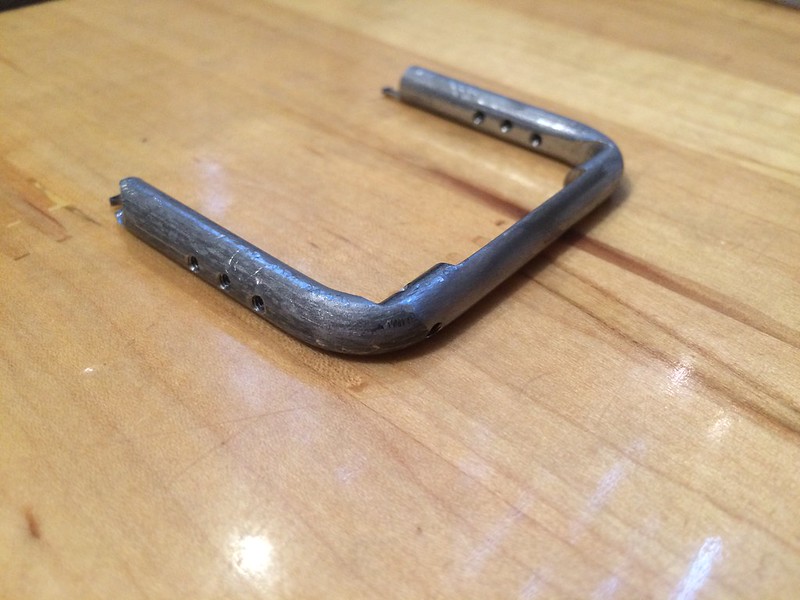 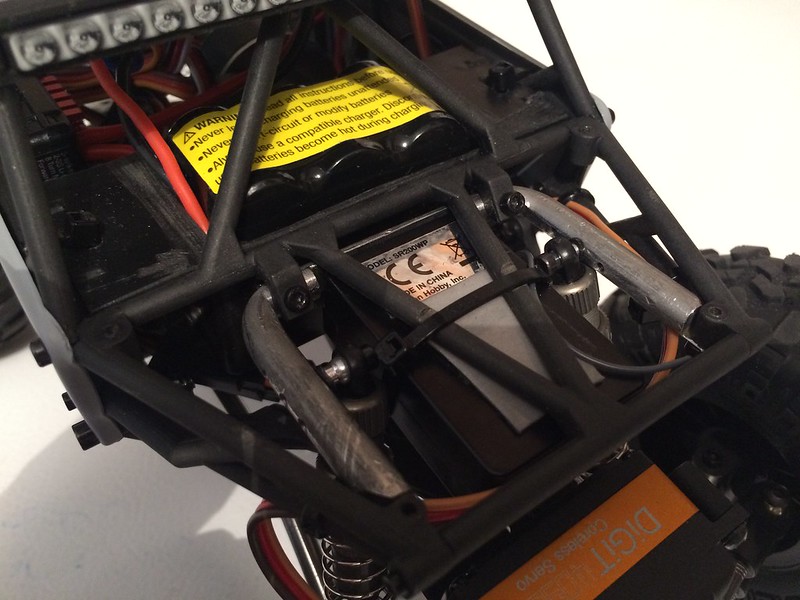 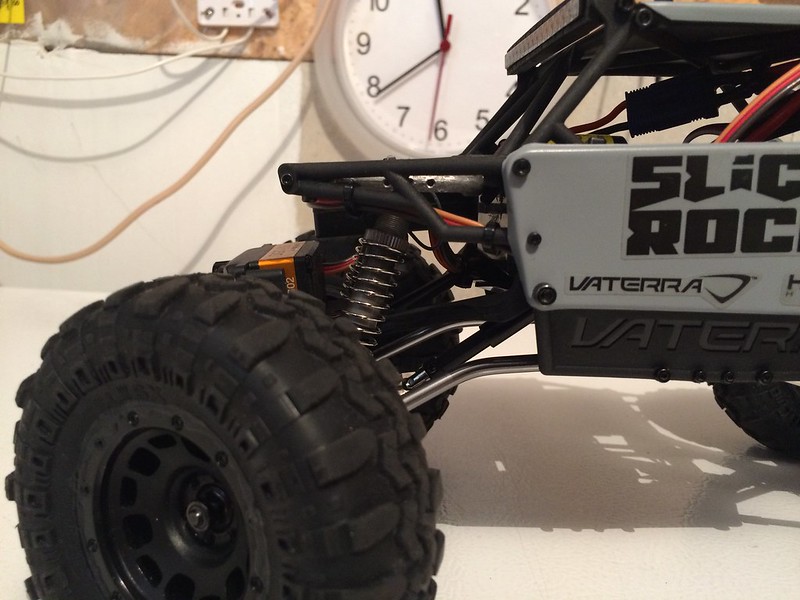 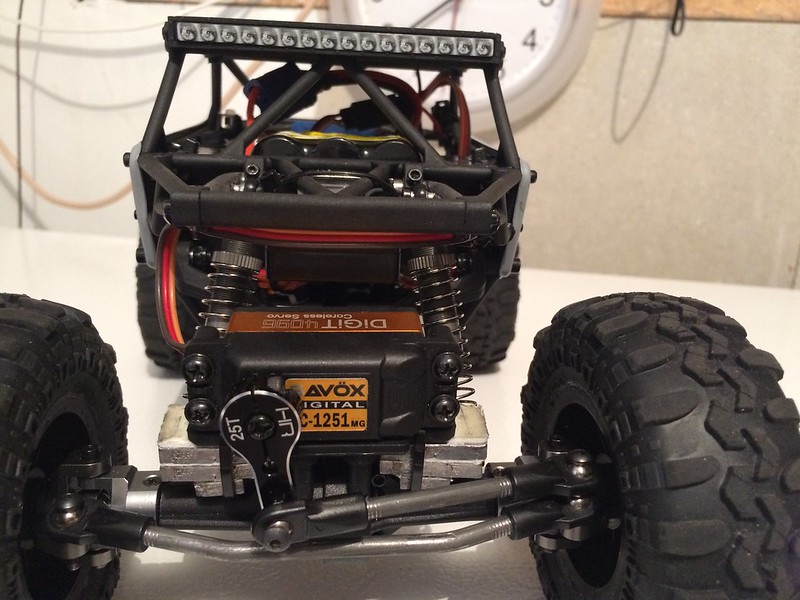 I also tested every combination of springs I had, from the supper soft to the hard, and shock oil, from 15 to 100, in an attempt to get rid of the torque twist. Where the torque twist was reduced to a point of being satisfactory, the suspension flex was being compromised because of the lack of mass of the vehicle to make it move properly. So I decided to make a rear sway bar using the Vaterra Twin Hammers rear sway bar kit as a base. 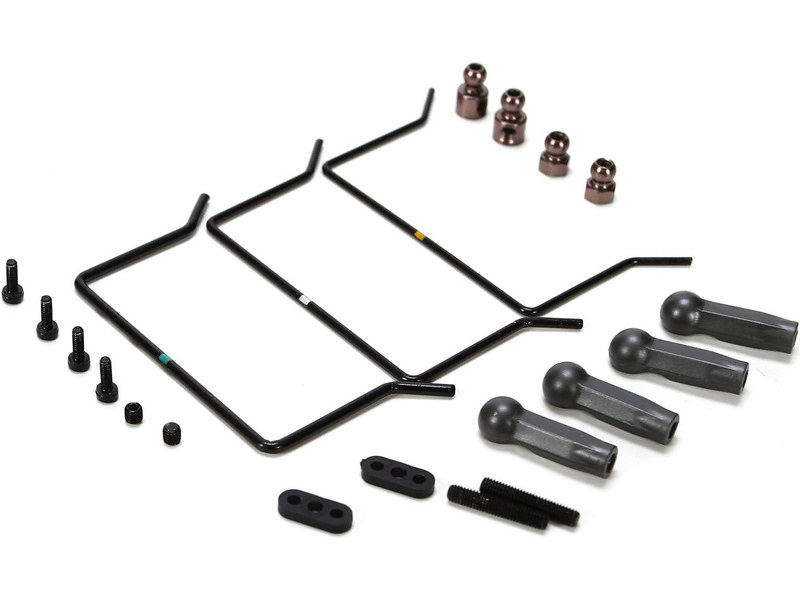 I then bought a variety of spring steel rods from my LHS and bent my own sway bars to match the space and suspension travel available on the Slickrock. The upper bar is one I made, the lower is the smallest bar from the Twin Hammers kit. 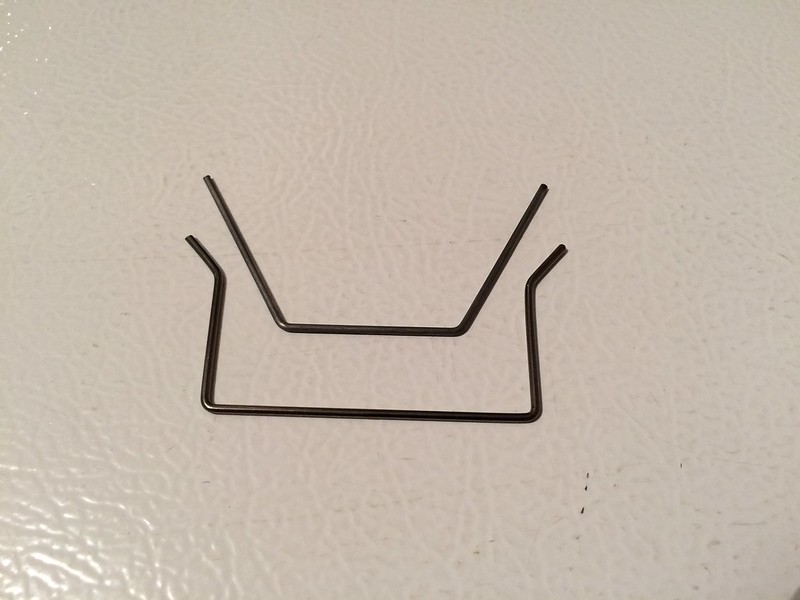 A small length of 4-40 all-thread rod, some 1/16 Traxxas shock ends, a piece of micro tubing to act as a bushing and a few zip-ties, and it performs like it was designed by Vaterra. 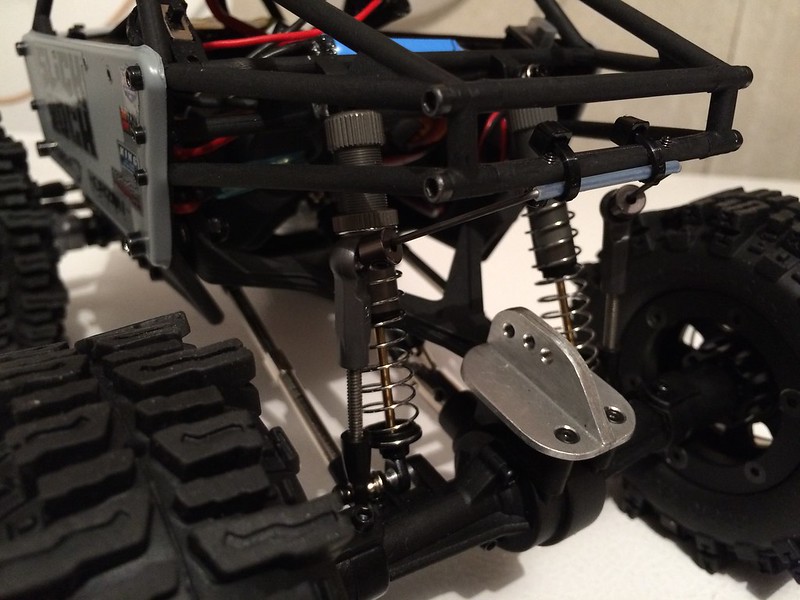 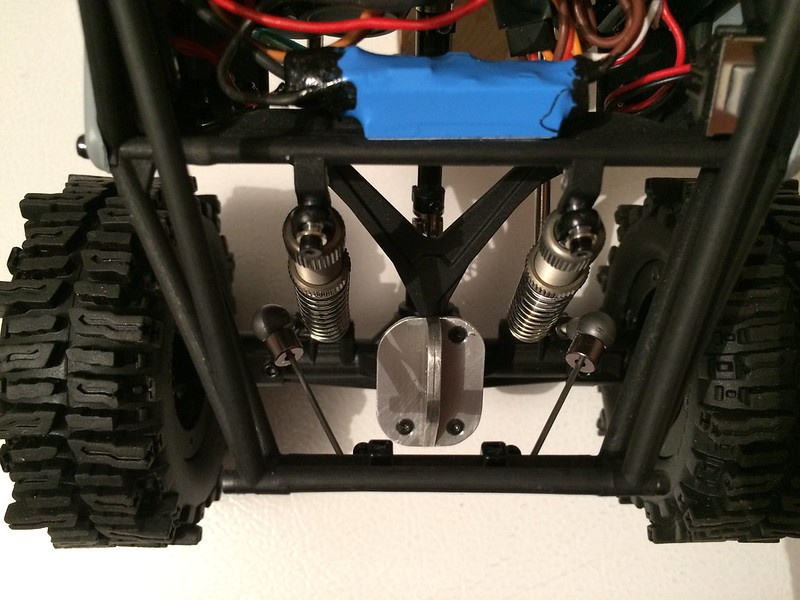 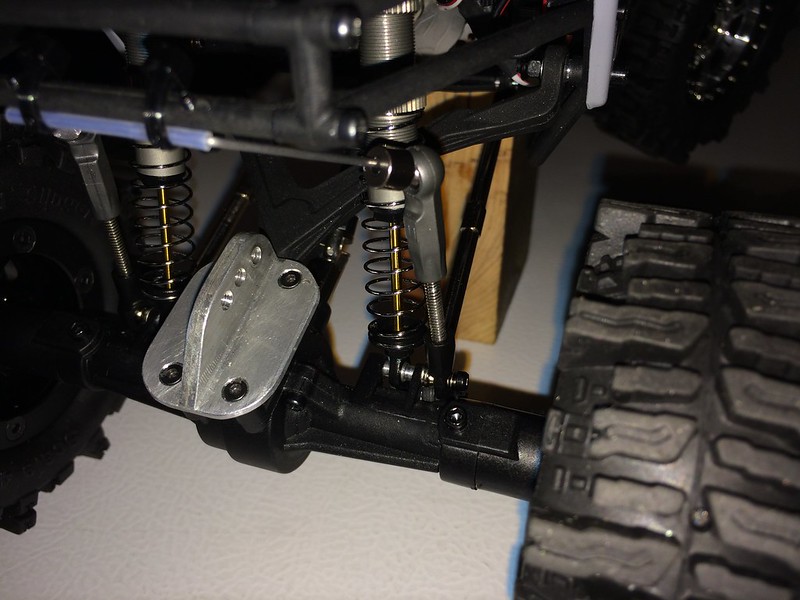 While I was working on the rear sway bar, my RC4WD order of 1.9 Raceline bead lock wheels, +6mm offset hubs and 1.9 X2SS compound Mud Slingers arrived! 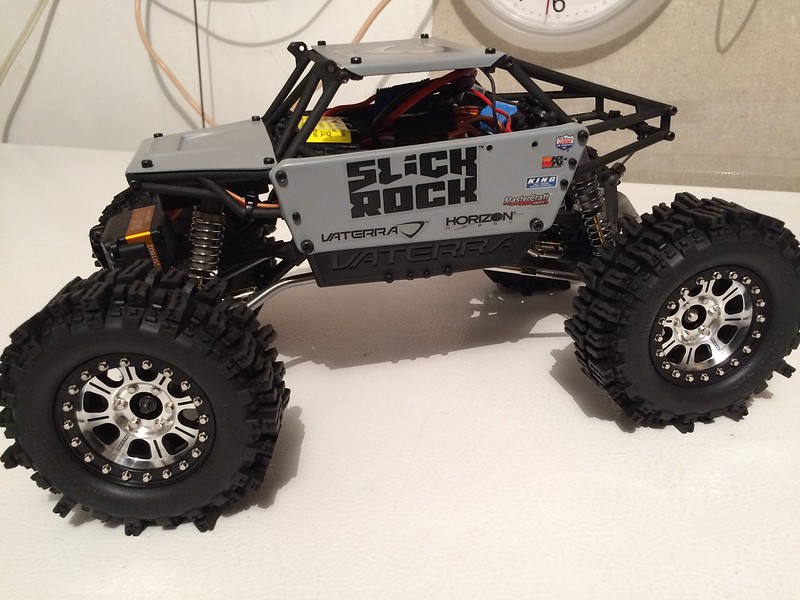 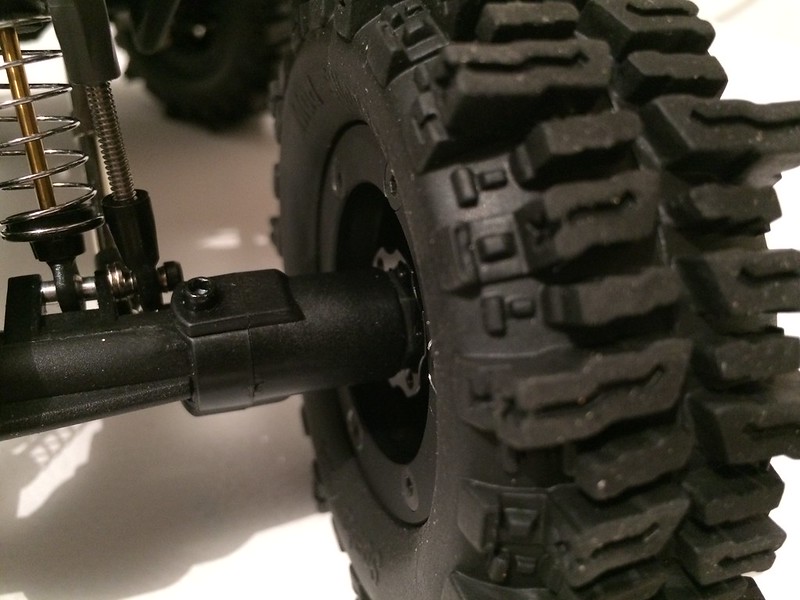 D Last edited by valheru; 04-28-2017 at 06:49 PM. |

|  |
| Sponsored Links | |
| | |
|
04-28-2017, 07:43 PM
| #2 |
| I wanna be Dave Join Date: Jul 2014 Location: Deep South
Posts: 3,444
|
I've wanted one ever since my LHS sold the two they had a year ago. Sent from my SM-T310 using Tapatalk |
|
| |
|
04-29-2017, 05:31 AM
| #3 |
| Quarry Creeper Join Date: Apr 2016 Location: Canada, Ottawa/Gatineau
Posts: 290
|
I know what you mean, I actually bought the Slickrock for my kids as an indoor crawler, but this soon change after I did the rear sway bar and had a chance to try it out outside on the rocks, it performs almost as good as my Wraith, albeit slower and you have to pick your lines better. Back in December, I was looking at what was available in the micro crawlers at my LHS, I was looking at vehicles like the ECX Tempest, but they all seems toyish and cheaply built, that when the employee (who knows me way too much, like first name and cell#) whipped out their demo Slickrock and uttered the famous deadly words: "it's our demo and the last one we'll ever have, so I'll cut you a good deal on it..." Since then I purchased a Proline 1:24 Ambush to fill the role of indoor crawler, but it's currently apart on my bench in the R&D phase of fitting an FA-130 size motor for a bit more oomph! Last edited by valheru; 04-29-2017 at 05:37 AM. |
|
| |
|
05-02-2017, 08:00 PM
| #4 |
| Quarry Creeper Join Date: Apr 2016 Location: Canada, Ottawa/Gatineau
Posts: 290
|
Well I got bored with the look of the stock Slickrock body panels and other than cutting my own out of aluminium or some other material, or to paint them some funky colors, there is not much you can do with the current design. 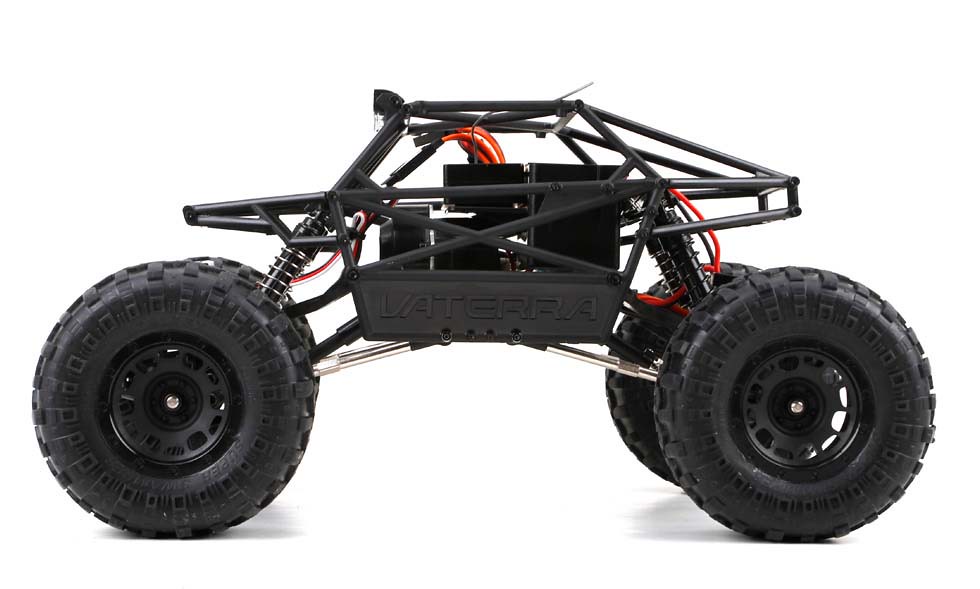 Since the Slickrock has a full "tube" chassis underneath those panels, with lots of mounting points, it got me looking at fabricating my first styrene body. What I plan for my first styrene build is to transform my Slickrock into an armoured reconnaissance vehicle similar to the recently procured Canadian Armed Forces TAPV vehicle (Tactical Armoured Patrol Vehicle). 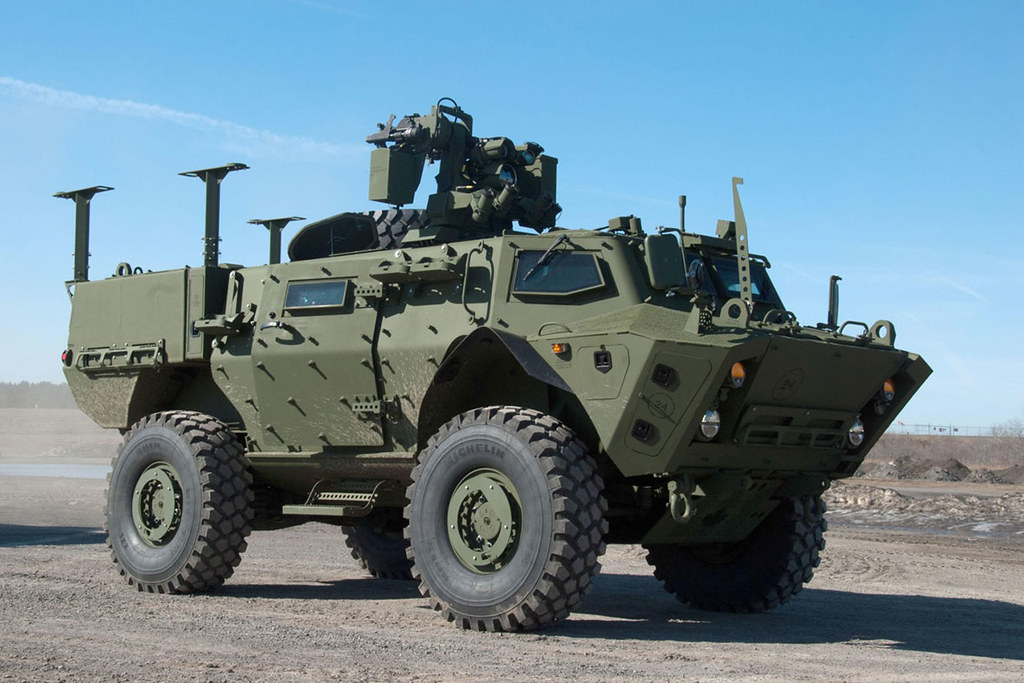 I will also pull inspiration from the Canadian Armed Forces AHSVS trucks that were procured for the mission in Afghanistan, as well as the current LAV 3.0 vehicles. 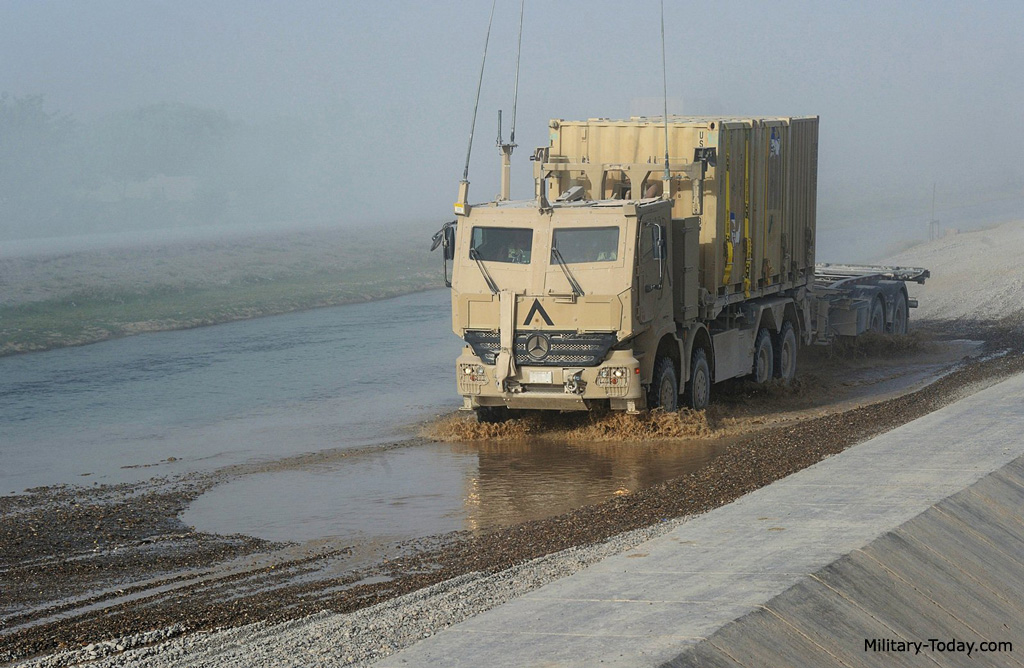 I sourced from my local industrial plastic supplier two 4x10' sheets of white styrene for this build; the first is .090" thick and the second is .040" thick, and from my local hardware store some MEK (methyl ethyl ketone). The plan is to fuse all the pieces instead of super gluing them for stronger bonds. Here are the first panels taking shape; I used the .090" sheet as the base of the overall body panels, then I laminated the .040" sheet to the .090" one to act as the to armoured panels of the finished vehicle. 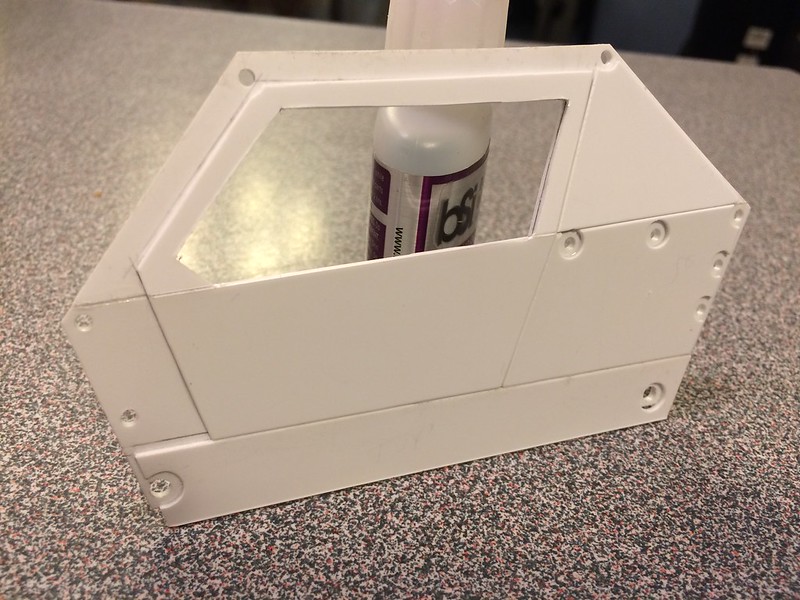 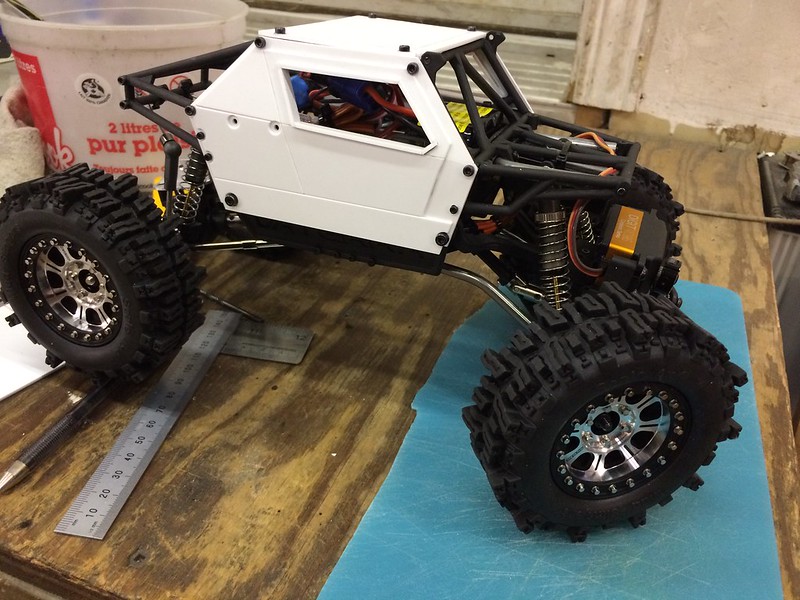 I got the hood panel in the works, the compound angle are being a PITA, so far this is the body panel that will require body filler, all the other ones were made in such a way that they didn't. 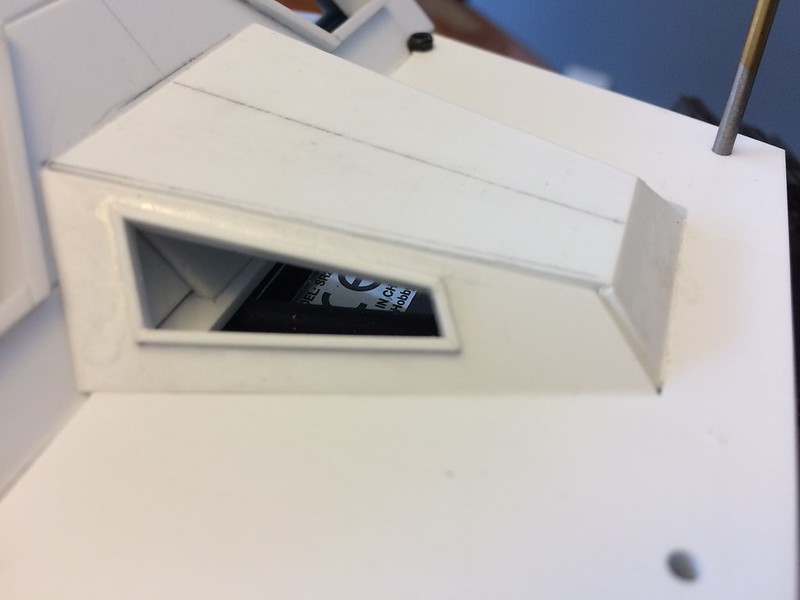 Trying to get the slats mounted into the hood vents has proven impossible to do by single pieces, therefore the following technique was the only was I found that worked: 1 - Glue oversized slats to a backing; 2 - Cut the slat assembly to slide fit into the hood cavity; 3 - Glue to the hood panel; 4 - Cut the backing that held the slats together; and 5 - Finish assembly of the hood panel. 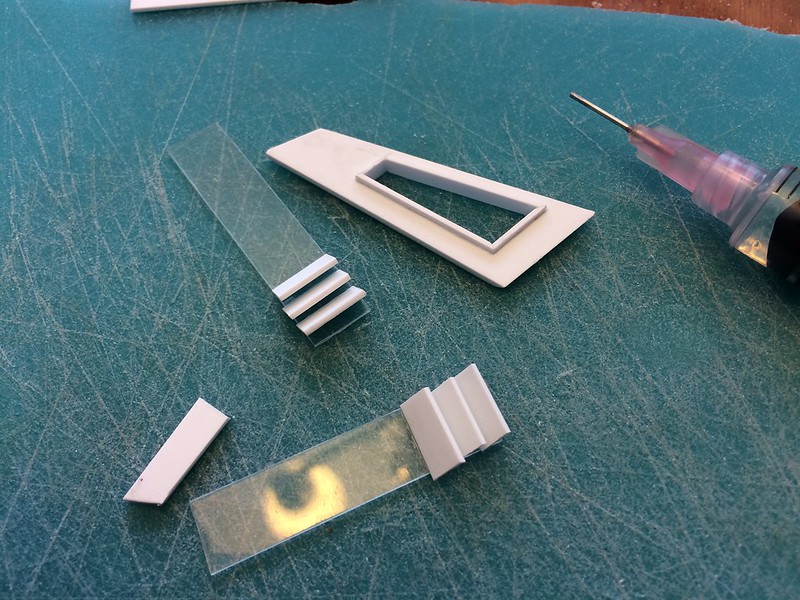 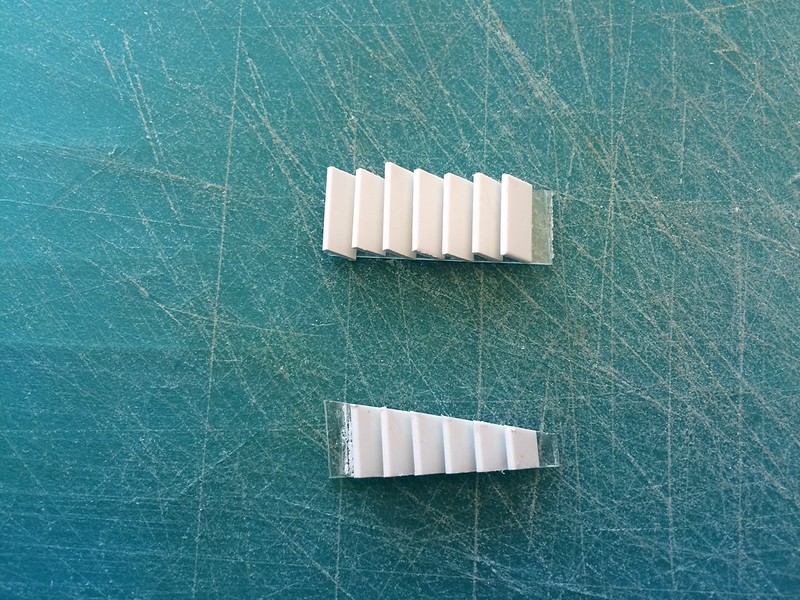 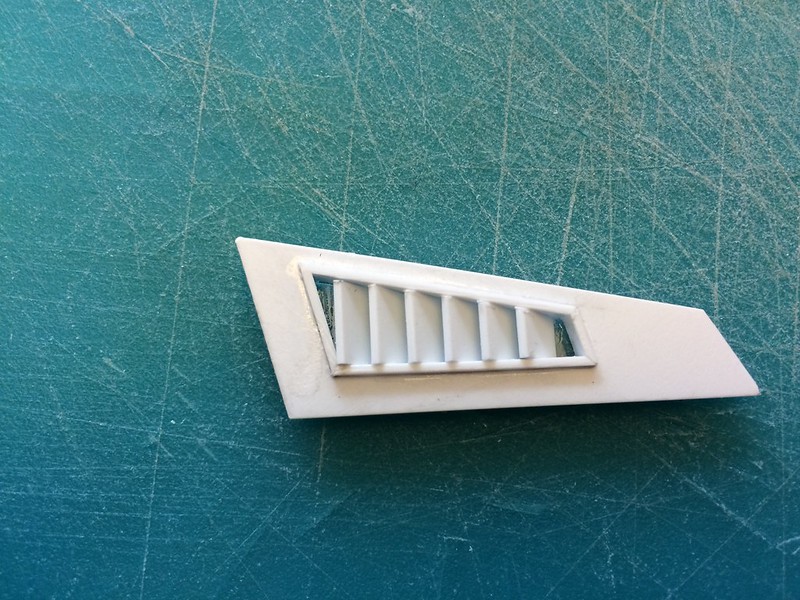 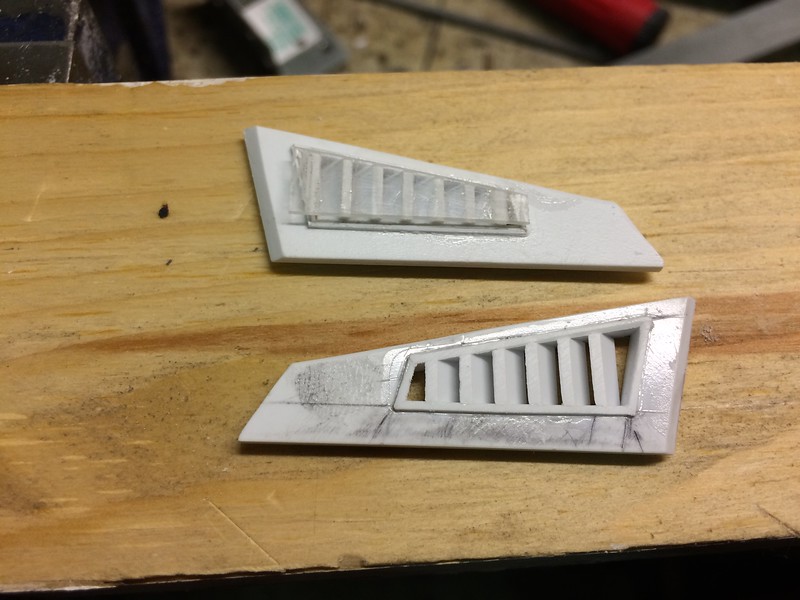 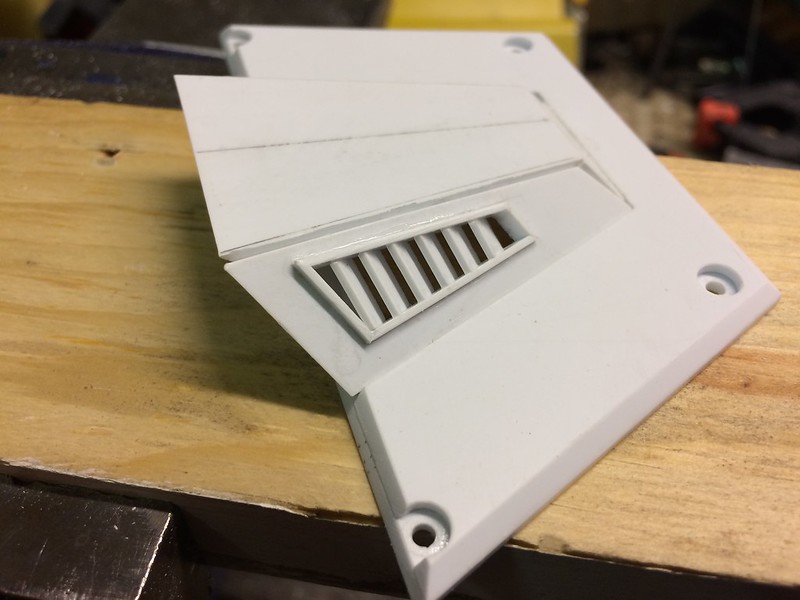 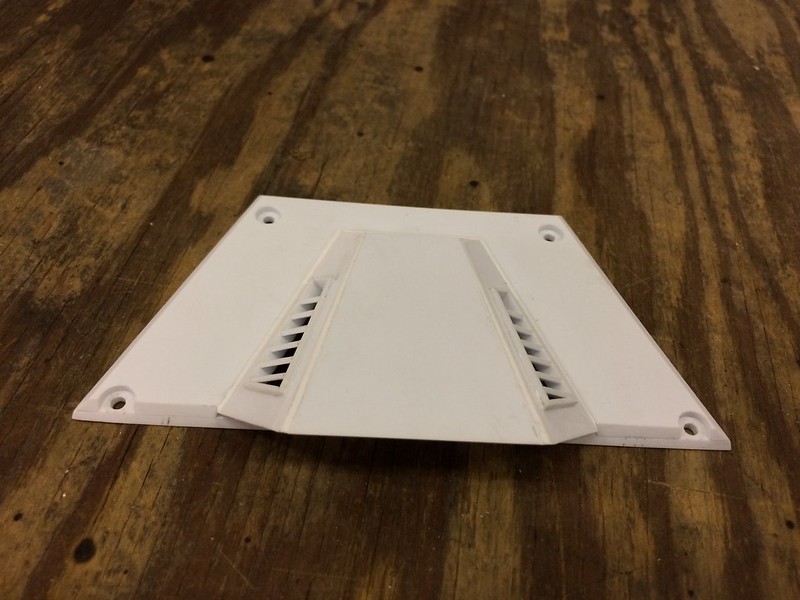 More to follow soon. D Last edited by valheru; 05-03-2017 at 08:50 PM. |
|
| |
|
05-03-2017, 09:04 PM
| #5 |
| Quarry Creeper Join Date: Apr 2016 Location: Canada, Ottawa/Gatineau
Posts: 290
|
Inside view of the hood panel. 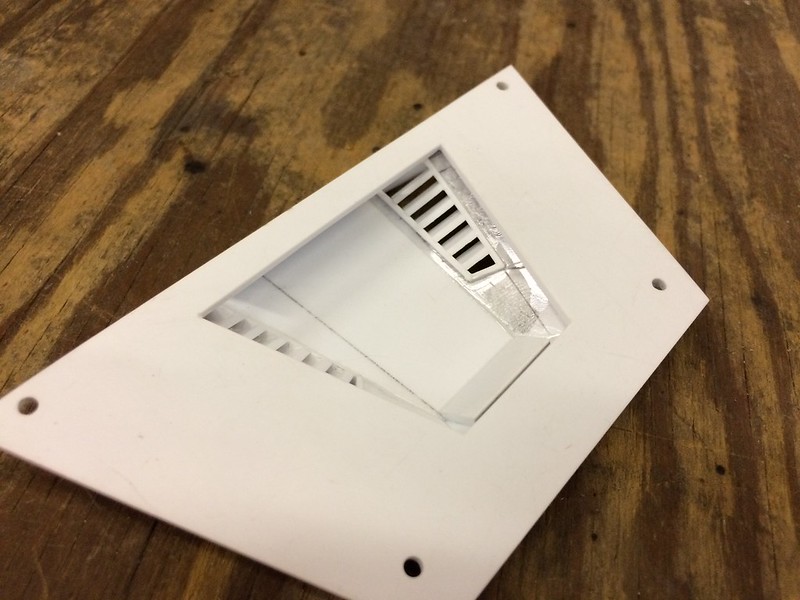  |
|
| |
|
05-05-2017, 12:10 PM
| #6 | |
| Quarry Creeper Join Date: Apr 2016 Location: Canada, Ottawa/Gatineau
Posts: 290
| Quote:
Thank you Sir The roof panel is for all intent and purposes is done, the exception being the modifications that will be required for a future roof mounted remote weapon station (RWS) that I still need to figure out. 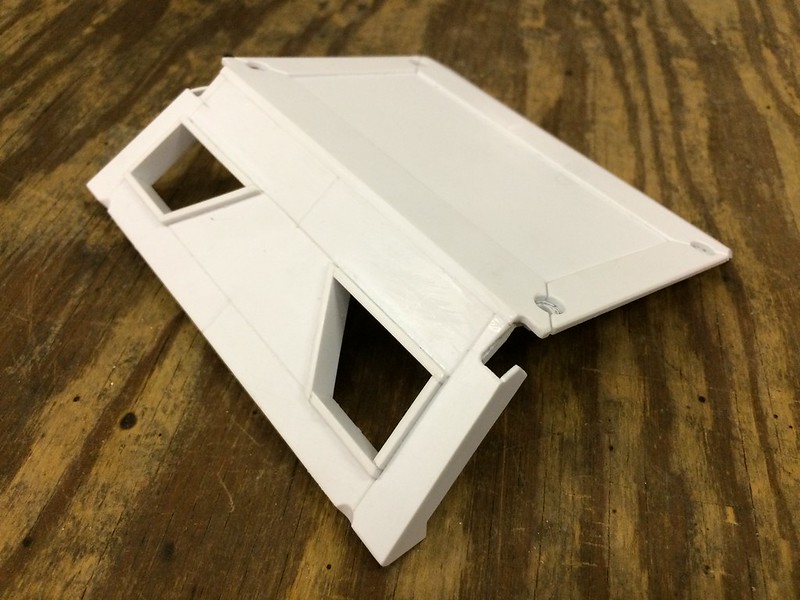 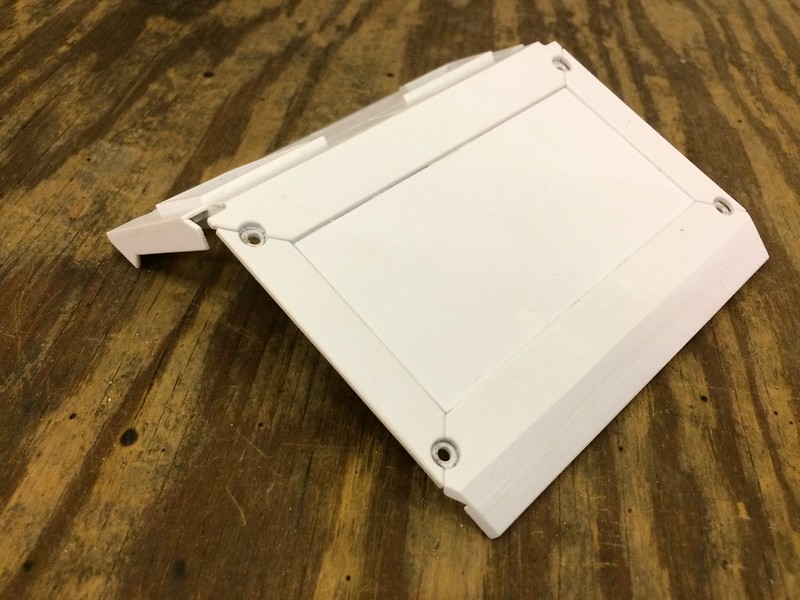 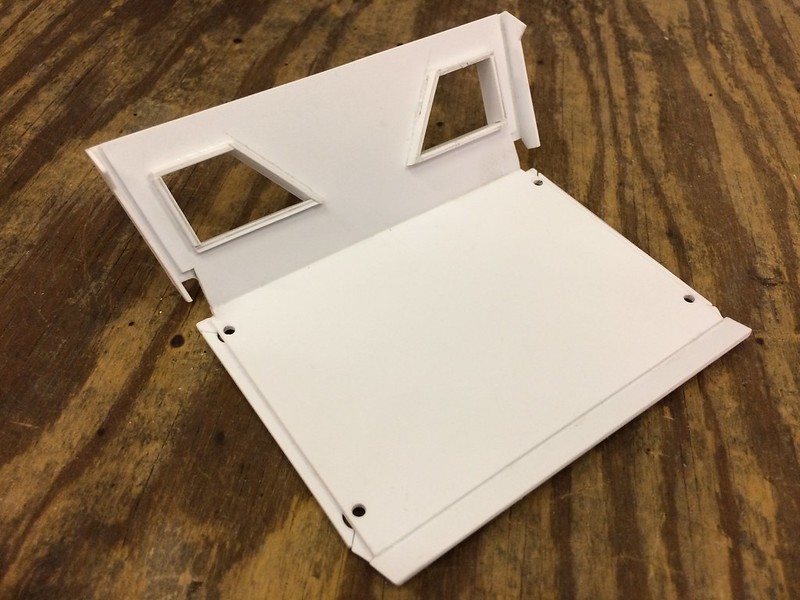 The armour panels overlap just like on an actual combat vehicle, it also keeps the side panels from snagging on obstacles. I adjusted the fit as tight as I could for a seamless look. 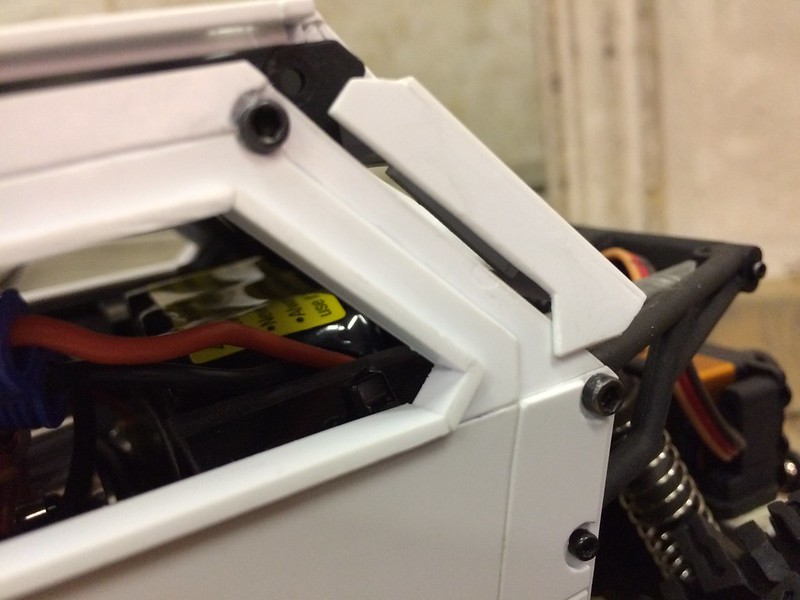 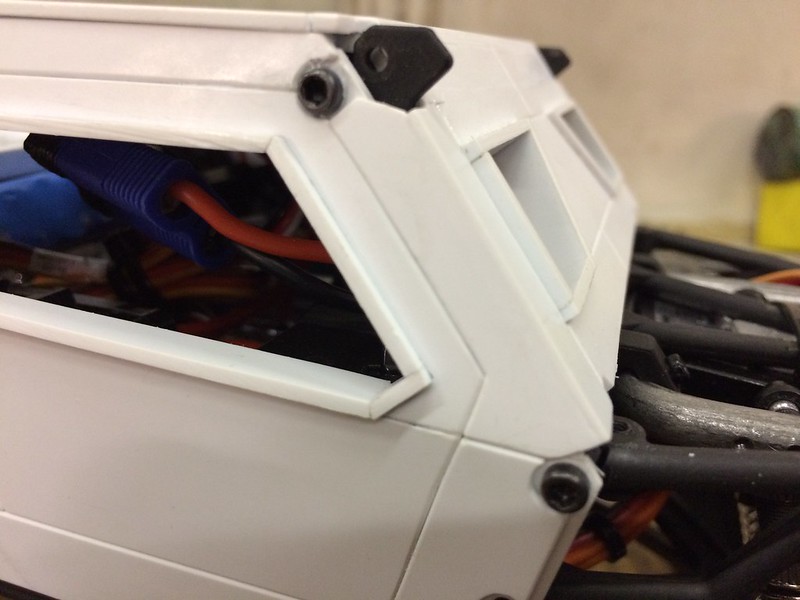 And one more that shows the fit between the roof and the hood panel: 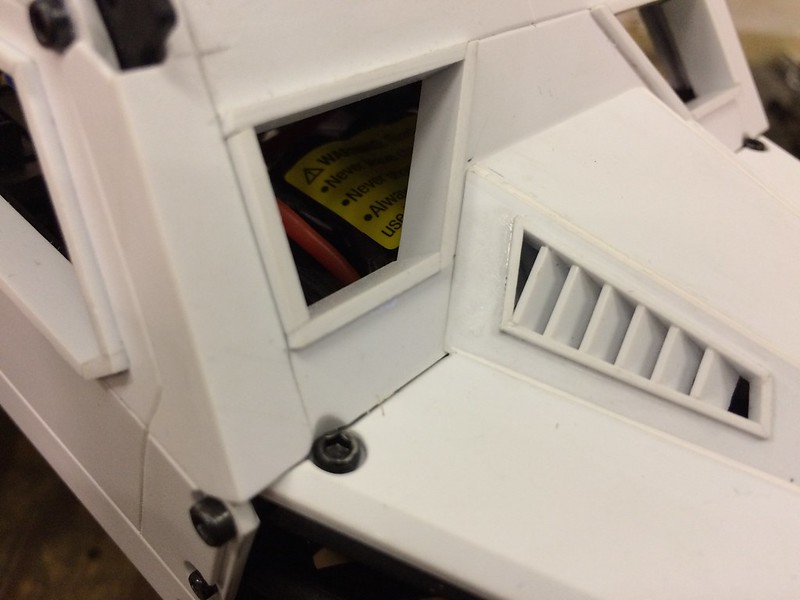 Speaking of the RWS, what I plan on fabricating will be based on the Chinese made UW4 remote controlled weapon station manufactured by Norinco. It is equipped with a 30mm canon and 76 mm grenade launchers: 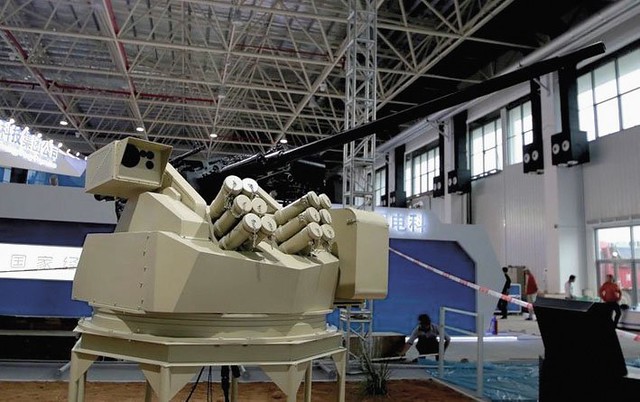 D | |
|
| |
|
05-07-2017, 09:09 PM
| #7 |
| Quarry Creeper Join Date: Apr 2016 Location: Canada, Ottawa/Gatineau
Posts: 290
|
The back deck and sliders are done. On to prep for prime, paint, weathering and scale details.  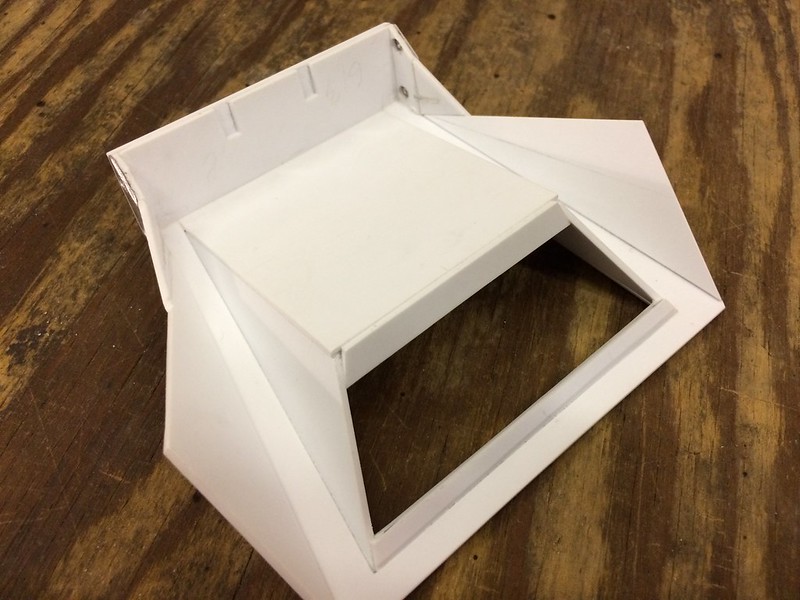 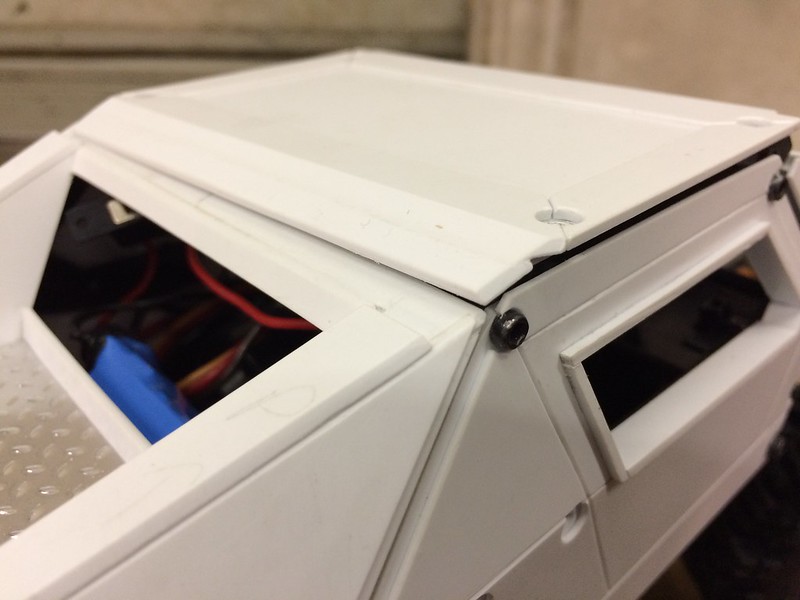   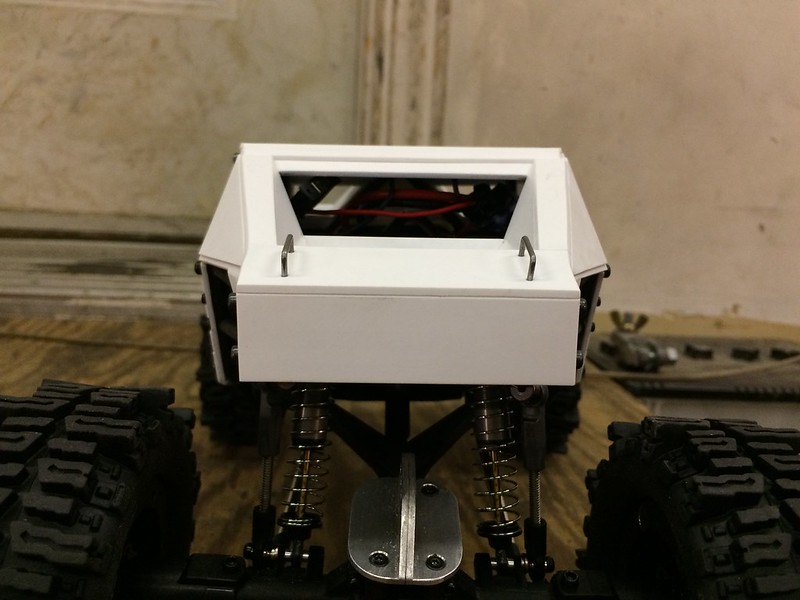 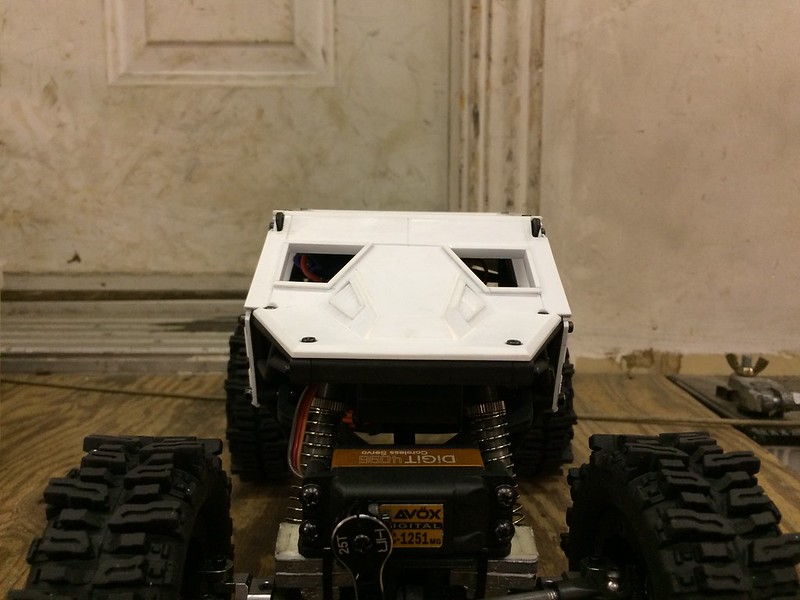 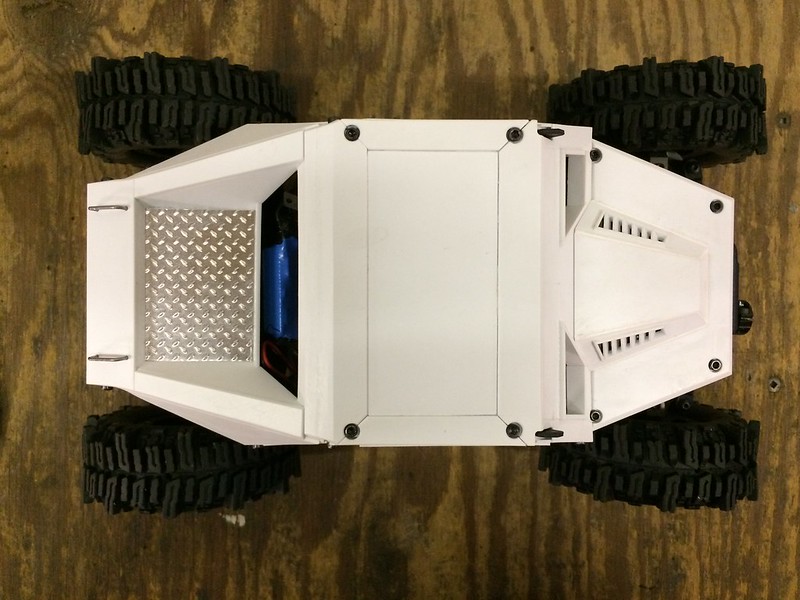 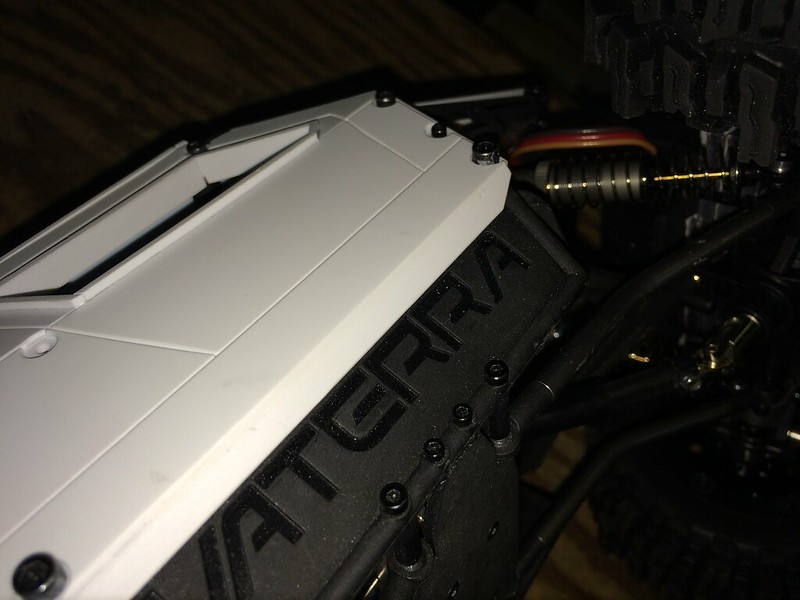 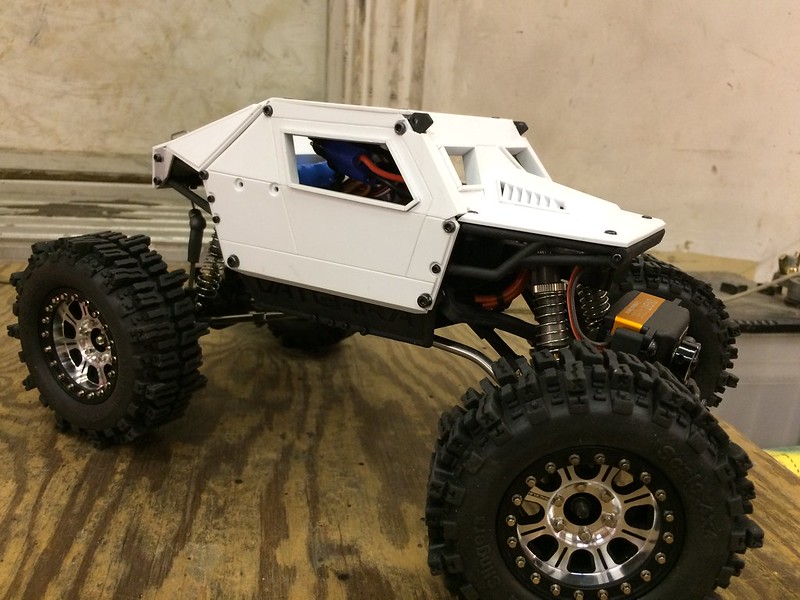 D |
|
| |
|
05-11-2017, 04:25 PM
| #8 |
| Quarry Creeper Join Date: Apr 2016 Location: Canada, Ottawa/Gatineau
Posts: 290
|
Since my last update I got the following done: - The panels are painted, weathered and have custom decals that I made to go with my Canadian Armed Forces vehicles deployed in Afghanistan theme (ISAF); - The remote weapon station is done, but I'm not quite satisfied with the barrel, so more to follow on this point; - I made a scale camo net, which ended up too big for the cargo deck; and - I re-purposed a Lego shovel as its perfect for use with the 1:18 scale of the Slickrock. Say hello to call sign 2-1-Charlie! 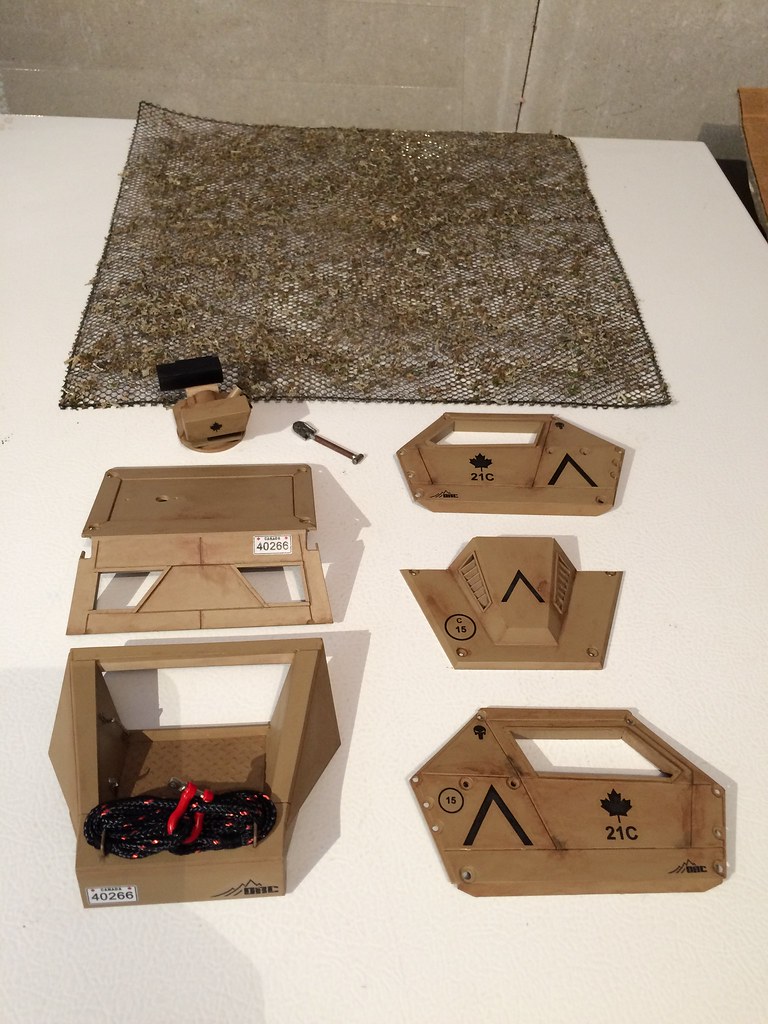 The markings are all in accordance with the Canadian Armed Forces regulations, with the usual stuff that we can get away with , as well as the ISAF marking (chevron). The only exception are the Ottawa Rock Crawlers (ORC) club labels which are of my local crawler club, I just had to put them on. When deployed, the camo net (20'x20' scale) fit on 2-1-Charlie perfectly, but once rolled-up and stowed on the cargo deck it's too big. Therefore I will make another one, slightly smaller, probably 15'x15' scale, so that it fits when stowed without taking 3/4 of the stowage space. 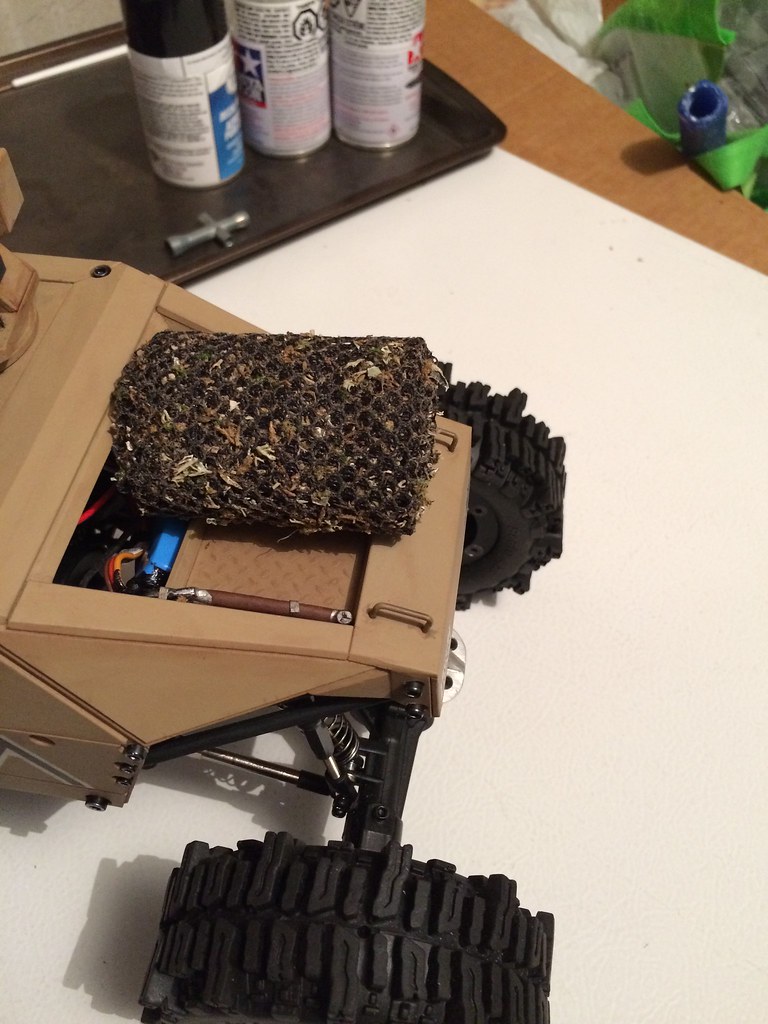 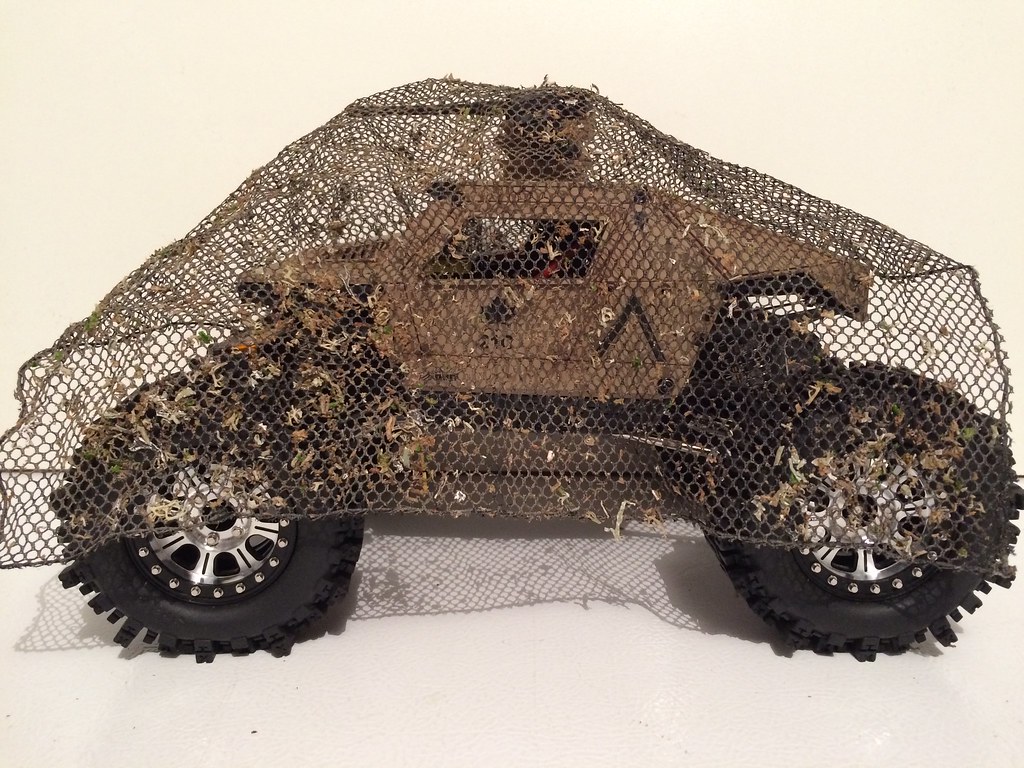 Here is a before and after of the weathering, the top panel has it and the bottom one has only the base colour, which is Tamiya AS-15 Tan (USAF). 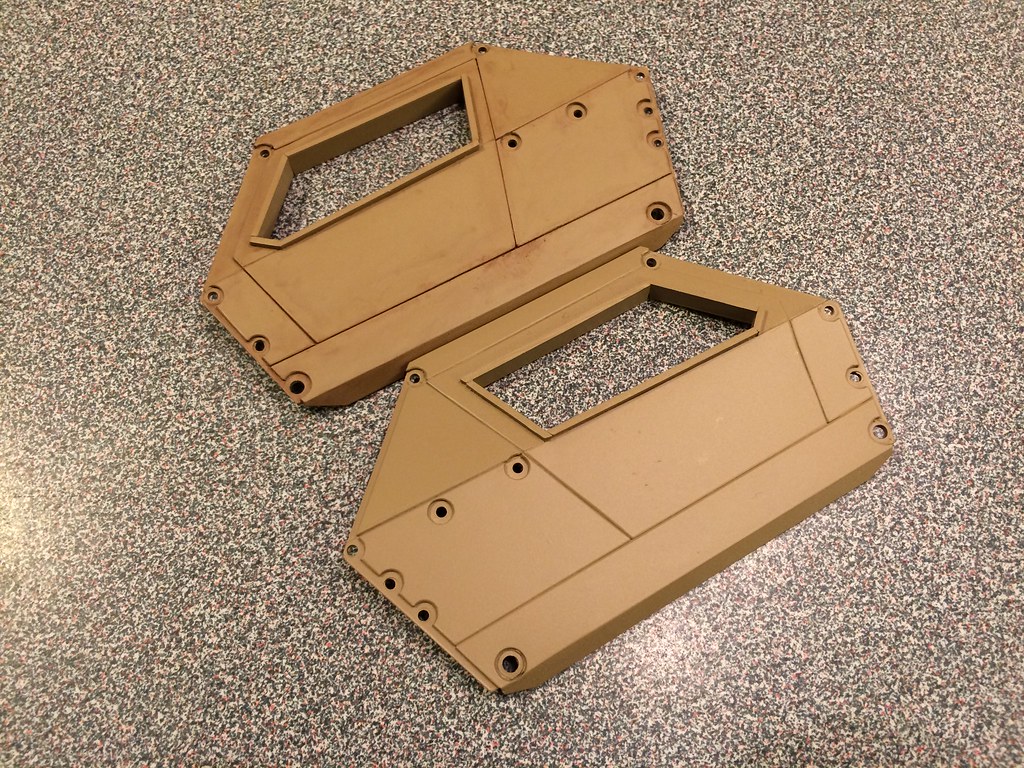 I also started work of a scale US Meal Ready-to-eat (MRE) box and labels for Naya 600ml water bottles. 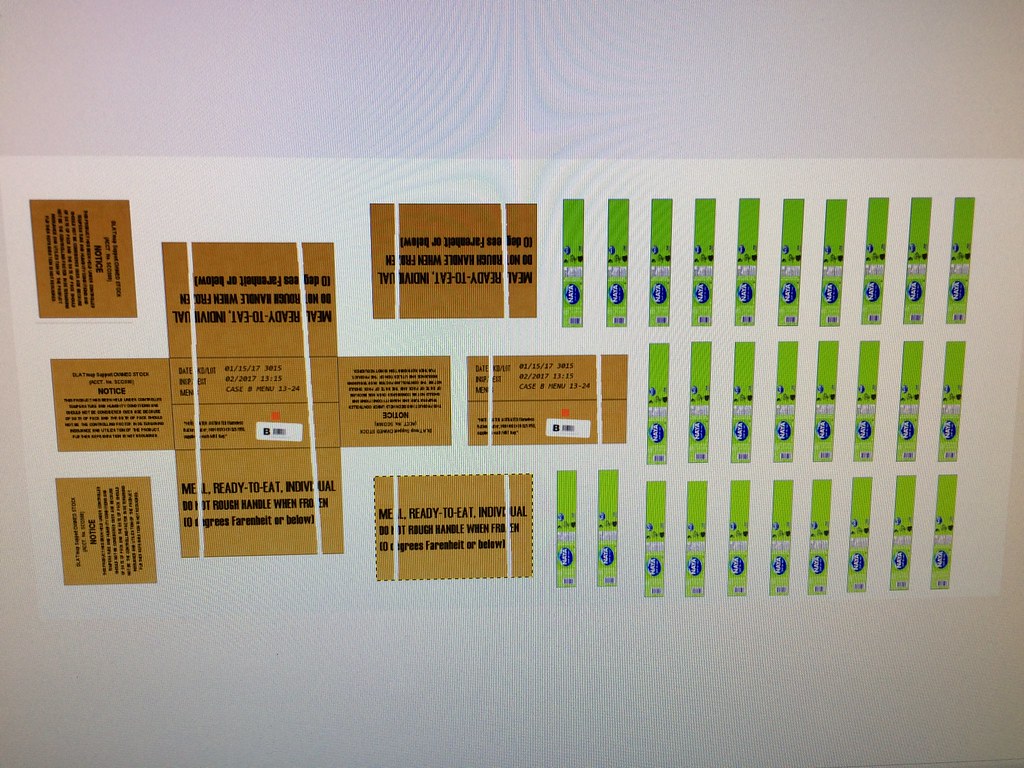 D |
|
| |
|
05-11-2017, 04:32 PM
| #9 |
| RCC Addict Join Date: Nov 2014 Location: Nowhere
Posts: 1,326
|
This is a very underappreciated build, your panels fit together excellently.
|
|
| |
|
05-11-2017, 04:38 PM
| #10 |
| Slow is the new Fast  Join Date: Nov 2013 Location: Winterpeg
Posts: 2,906
|
Looks great! Planning to Camo the wheels?
|
|
| |
|
05-11-2017, 04:58 PM
| #11 | ||
| Quarry Creeper Join Date: Apr 2016 Location: Canada, Ottawa/Gatineau
Posts: 290
| Quote:
Quote:
Thank you both for your compliments. For the wheels, I have the same ones as in the photos; the 1.9 RC4WD Raceline bead locks, but all black currently on order from my LHS, that should even out the military look. D Last edited by valheru; 05-11-2017 at 05:06 PM. | ||
|
| |
|
05-11-2017, 05:31 PM
| #12 |
| Rock Crawler Join Date: May 2013 Location: Dallas
Posts: 680
|
Superb attention to detail and fitting on those panels!
|
|
| |
|
05-13-2017, 08:05 PM
| #13 | |
| Quarry Creeper Join Date: Apr 2016 Location: Canada, Ottawa/Gatineau
Posts: 290
| Quote:
One of the main goal for this build was for zero use of body filler, unlike most, if not all styrene body builds I've looked at so far, not that its a bad thing, just not mine. In this goal I pretty much succeeded as only the hood scoop, with its compound angles, ended up with some filler. All other panels of my build are 100% free of body filler, this meant a lot of filing, sanding and test fitting prior assembling the pieces into panels. Now for some scale details; I made a .50 cal ammo box with the proper military markings and I finished the MRE (ration) box. Here is the 1:18 scale .50 cal ammo box sitting atop a 1:1 one I use to store some of my ammo at home. Sadly, the yellow markings on the label doesn't show very well. 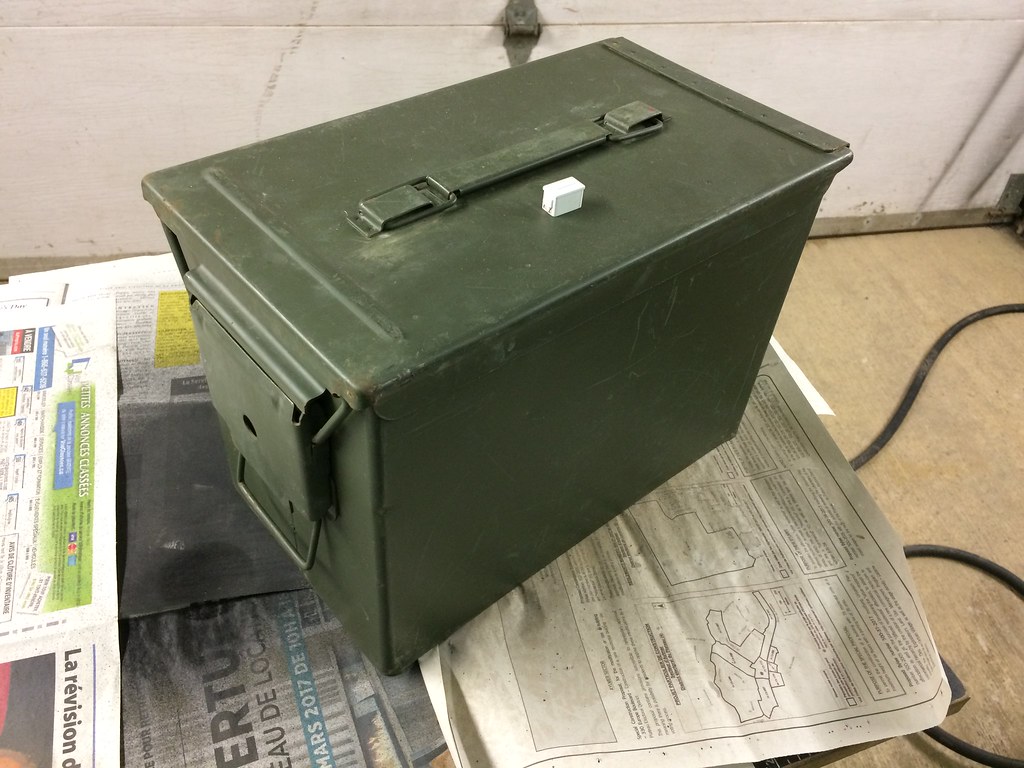 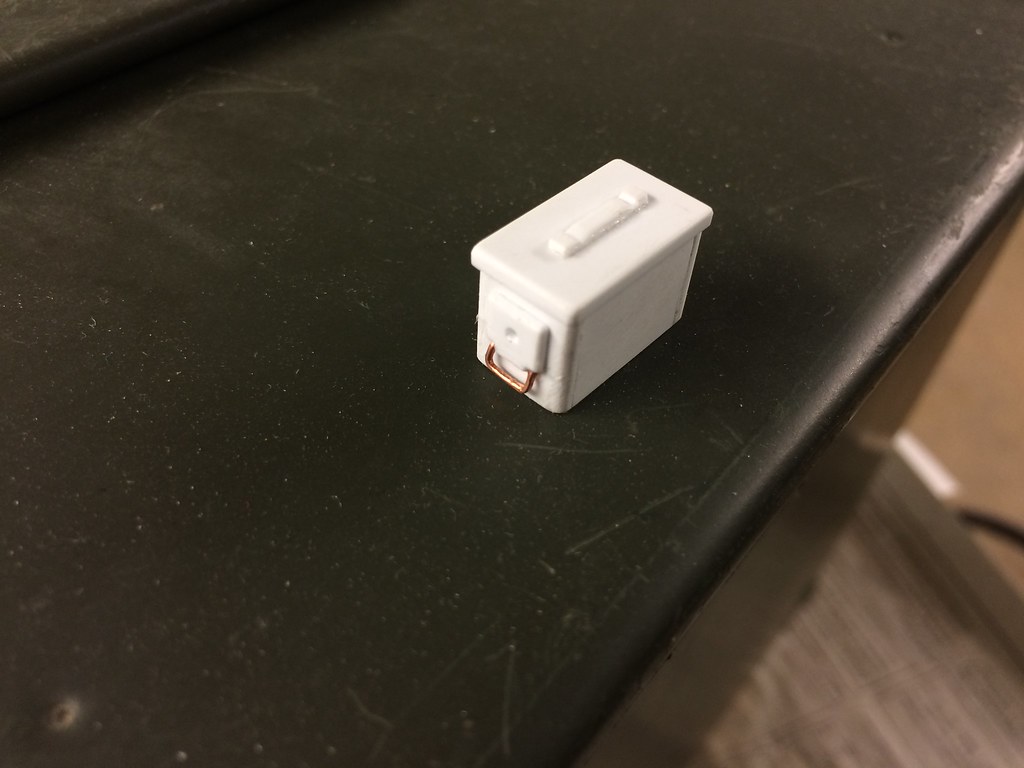 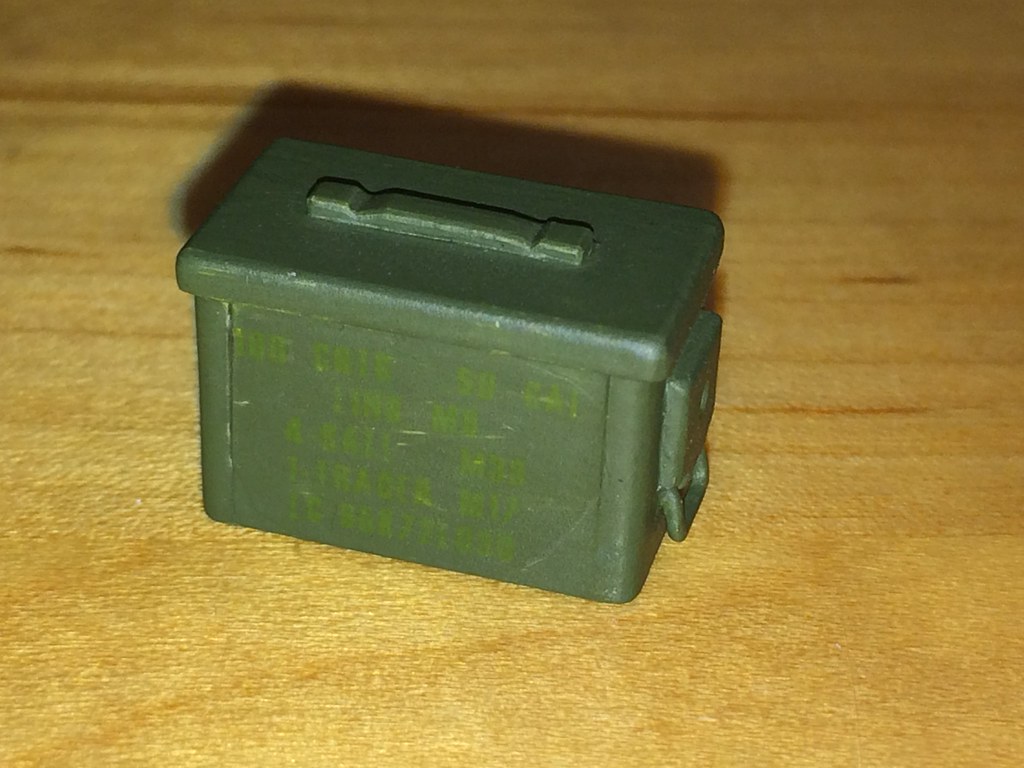 Here is the US Meal-Ready-to Eat (ration) box. 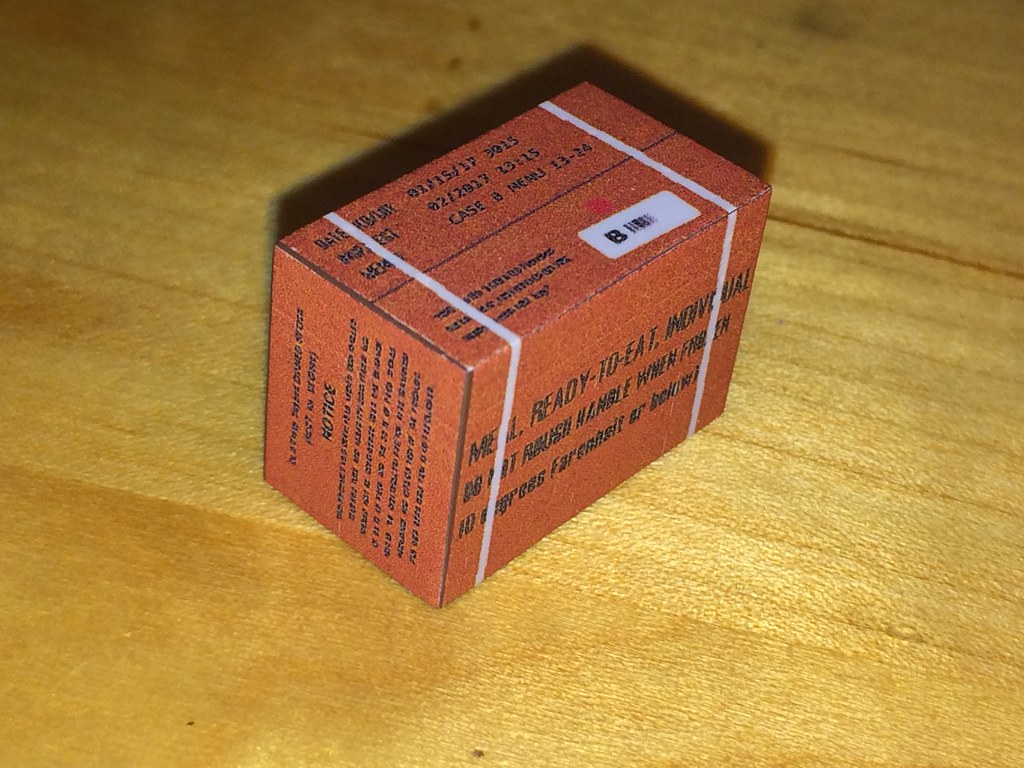 Both together and just thrown on the cargo deck of 2-1-Charlie. 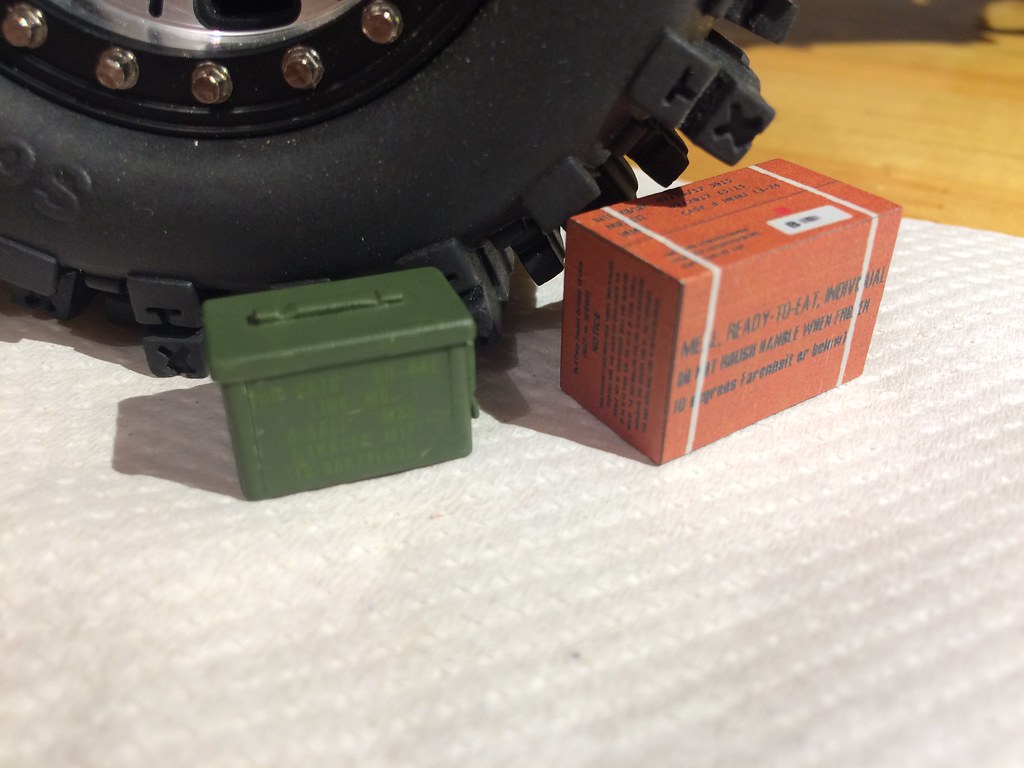 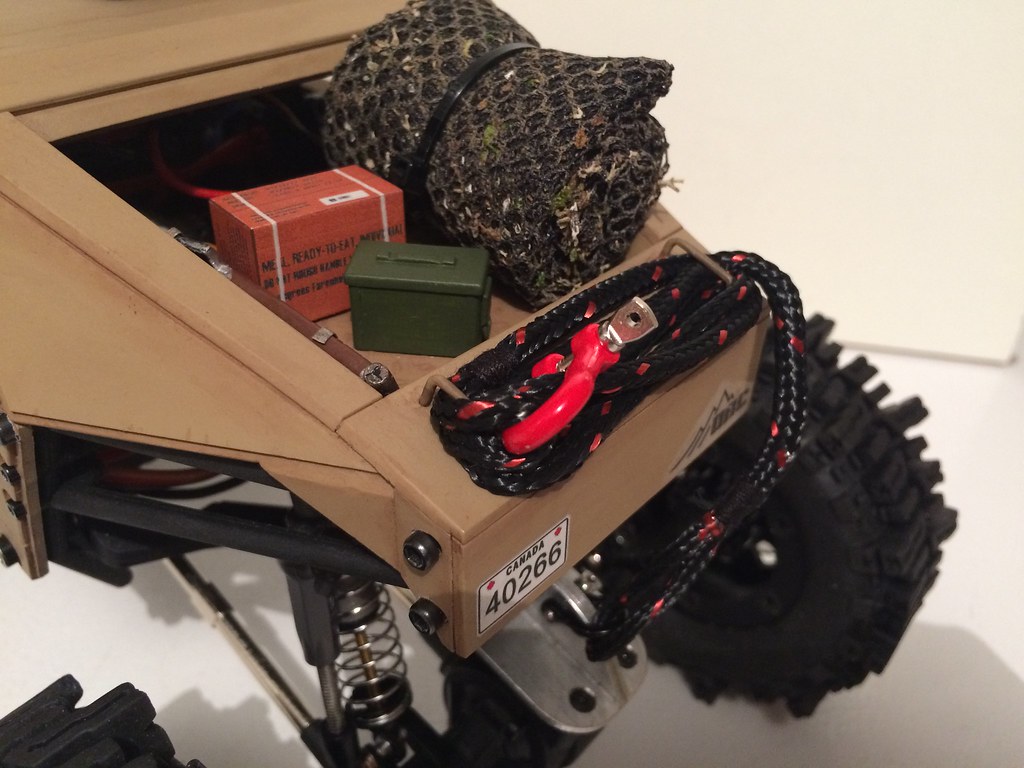 D | |
|
| |
|
05-14-2017, 01:21 PM
| #14 |
| Oppan Gangnam Style   Join Date: Jun 2005 Location: Shingle Springs
Posts: 5,164
|
Very nice styrene work, everything looks like it fits super tight. That's a hard feat to accomplish when scratch building. Great job! |
|
| |
|
05-14-2017, 03:44 PM
| #15 |
| I wanna be Dave Join Date: Aug 2006 Location: under a rock and a hard place
Posts: 5,443
|
Heck yeah, very nice build with lots of time and patience put into it.
|
|
| |
|
05-14-2017, 10:57 PM
| #16 | |
| Pebble Pounder Join Date: Mar 2008 Location: Happy Valley
Posts: 131
| Quote:
I couldn't agree more. Very nice work, I will certainly be following. Sent from my iPhone using Tapatalk | |
|
| |
|
04-06-2018, 04:00 PM
| #17 |
| Quarry Creeper Join Date: Apr 2016 Location: Canada, Ottawa/Gatineau
Posts: 290
|
A lot has happened in my personal life since my last update on project 2-1-Charlie, my mom got diagnosed with cancer of the esophagus, nearly died from her first treatments, took a while for the doctors to figure out their stuff, finally had progress with her treatments, than major surgery this winter to remove a big chunk of her esophagus and stomach, but it's getting better everyday! Anyway, back to a more enjoyable subject. Project 2-1-Charlie was completed late last spring and I will try and summarized all the steps of this build in the following. The wheels were weighted to the tune of 3.4oz each using duck hunting decoys lead strips as it is the right width, height and malleable to form easily to the center ring: 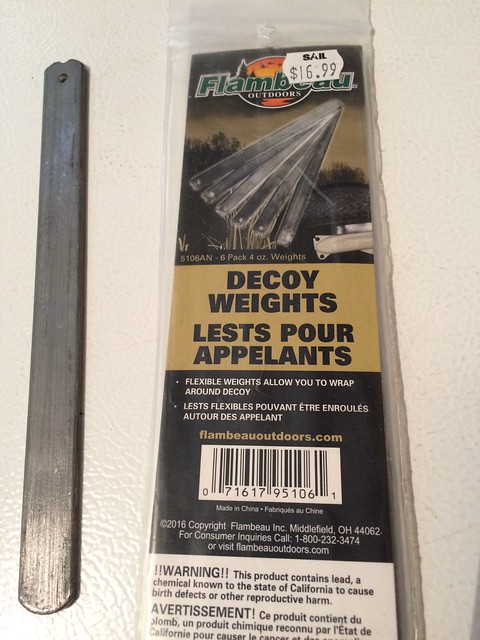 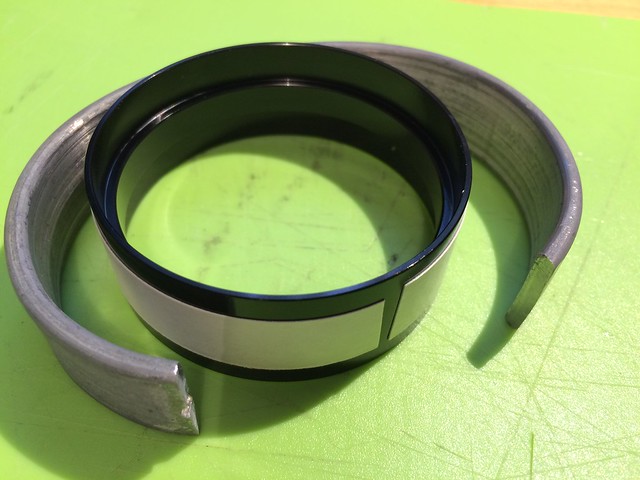 I ordered some very high quality 1:18 scale items and a driver from a online store: 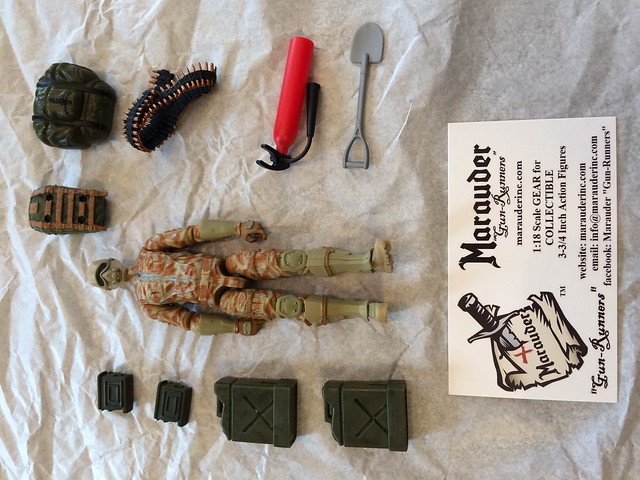 I fabricated on my press-drill a 1:18 scale positive blank to then make a negative silicone mold to reproduce water bottles as I was enable to find any descent ones in that scale: 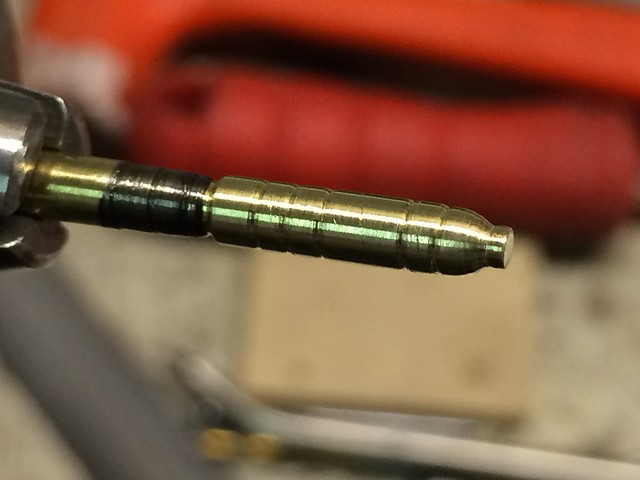 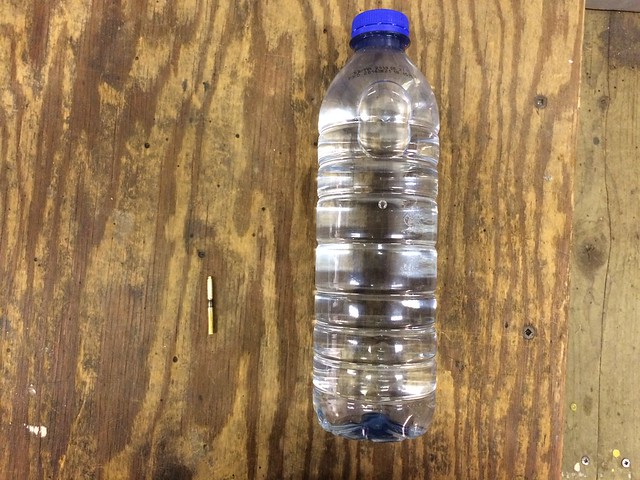 I made a drivers seat out of aluminum sheet and padding with adhesive backed foam, then I mounted it to the vehicle, but I had to remove the legs of Cpl Bloggins as the transmission was in the way. 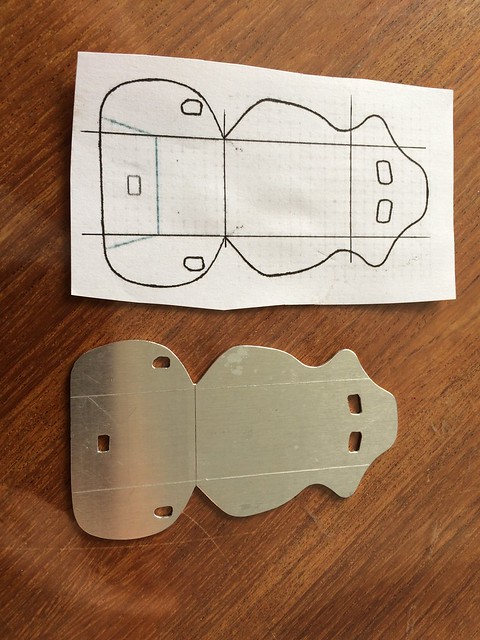 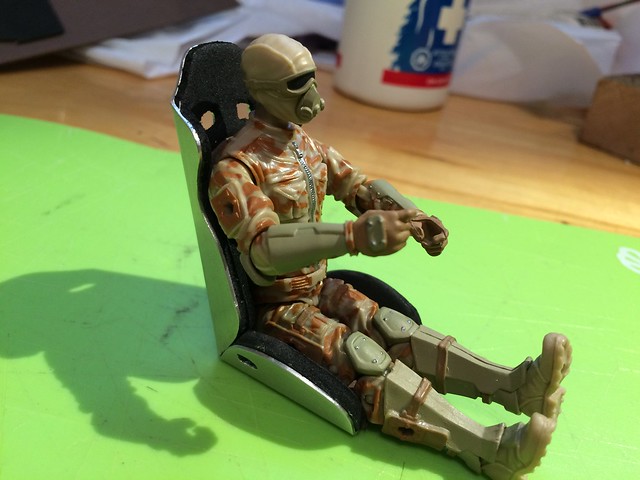 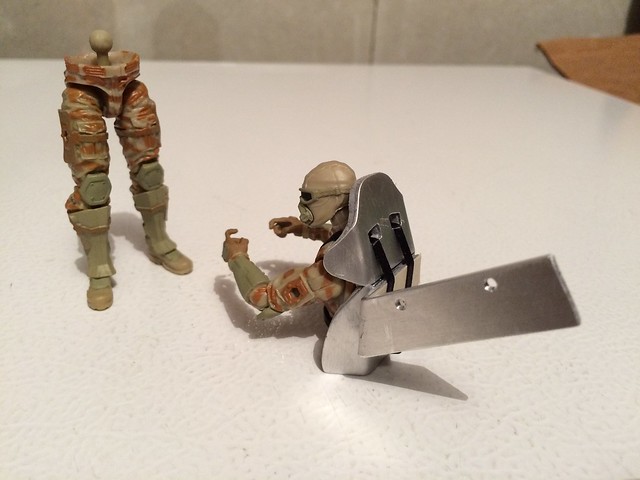 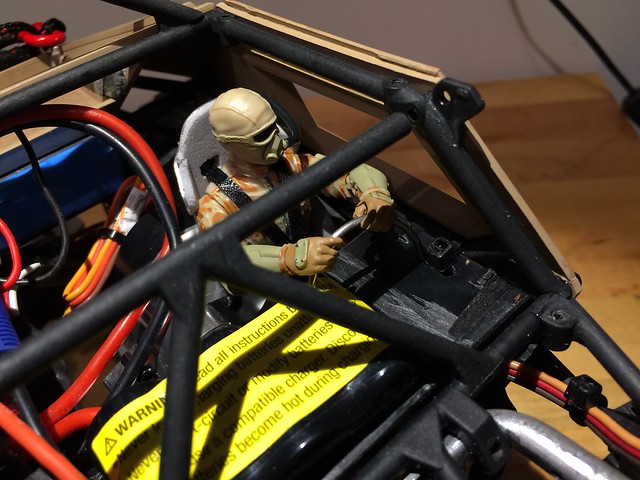 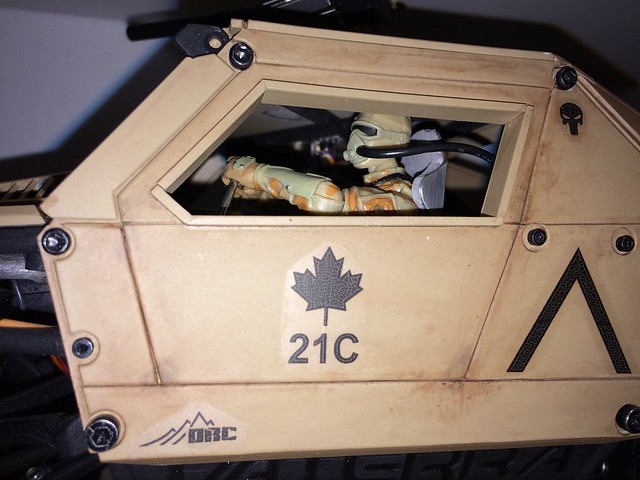 What is a reconnaissance vehicle with a communication suite, so I made and antenna array mount: 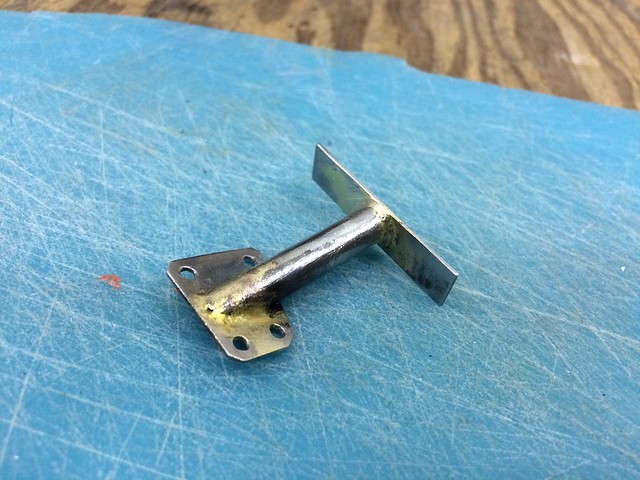 I casted my water bottle and printed some labels. 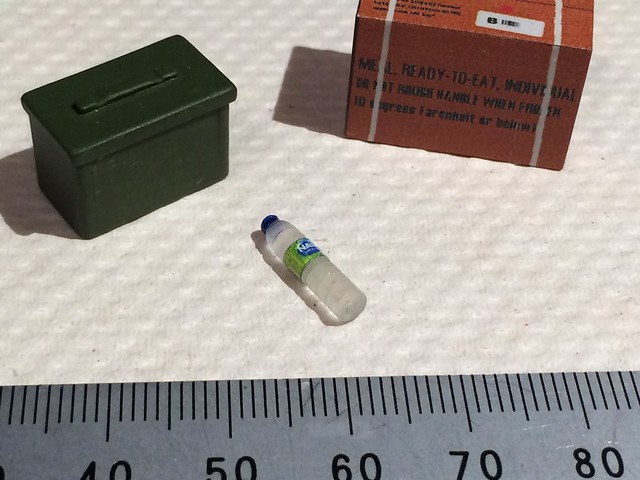 Made a safety pin for the fire extinguisher: 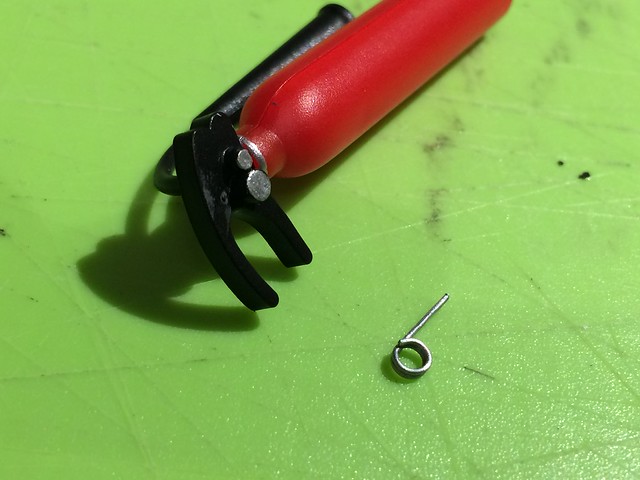 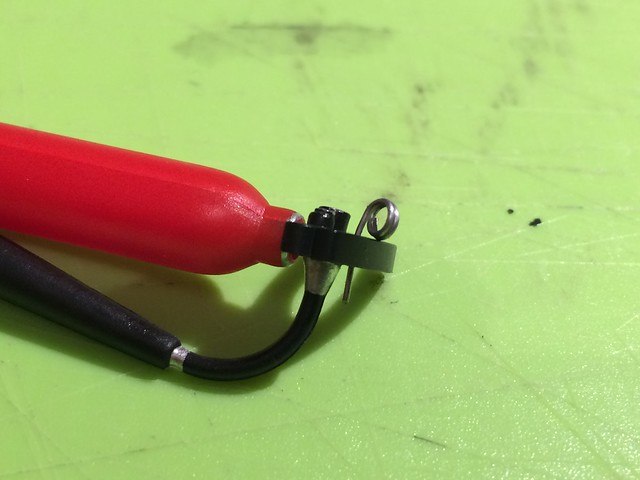 Removed the molded mounting bracket from one of the jerrycans and weathered it: 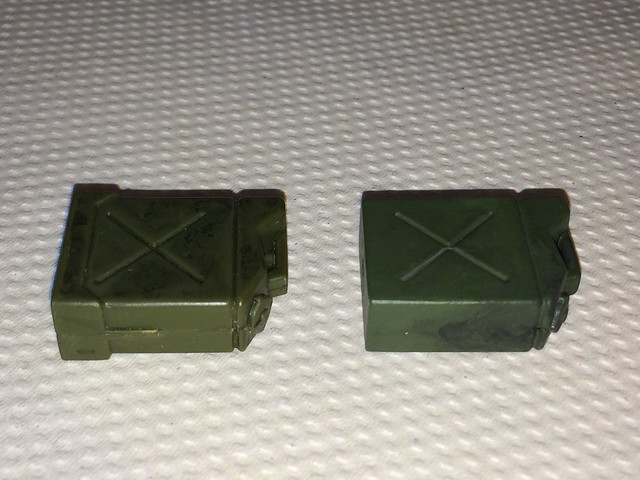 Installed all the scale kit in the rear box, made antennas and strapped the water bottle to it like we do in blacked out night operations to identify vehicles with glow sticks, and this build is done!  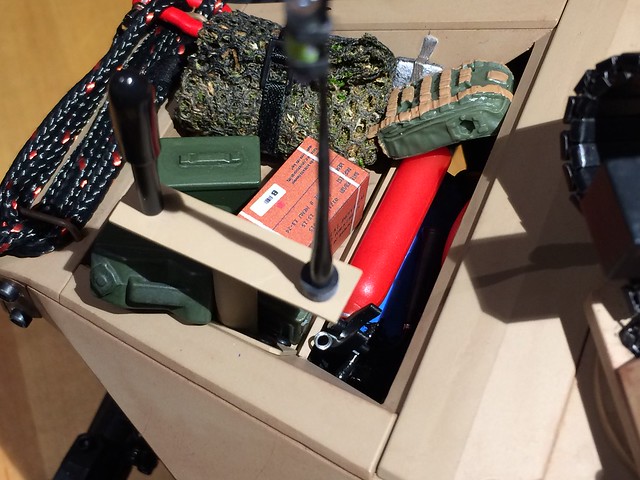 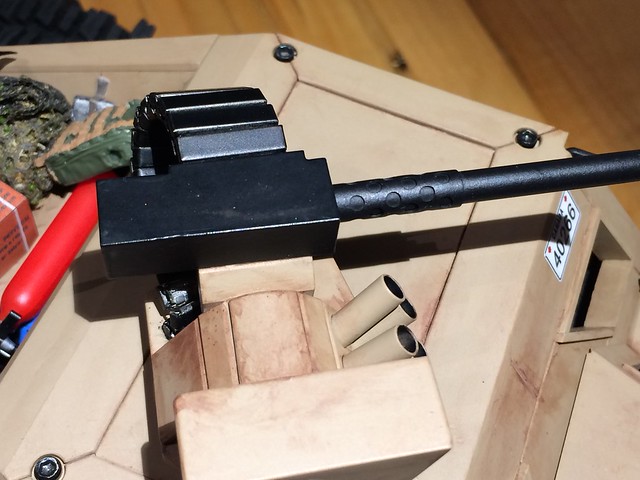 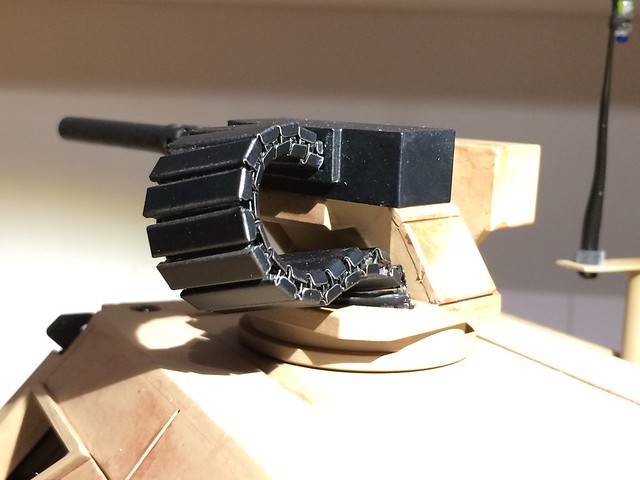 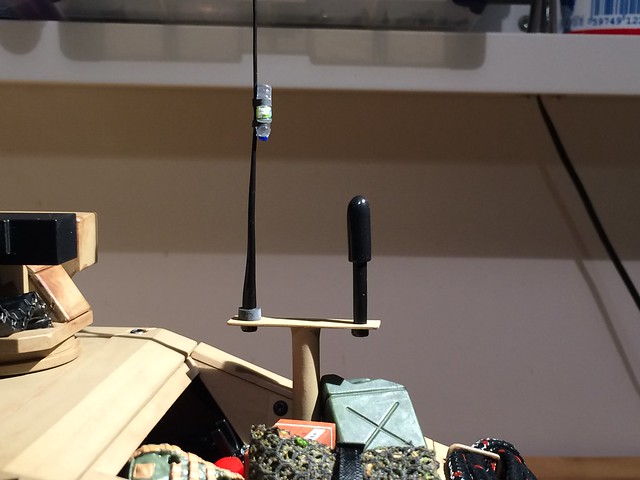 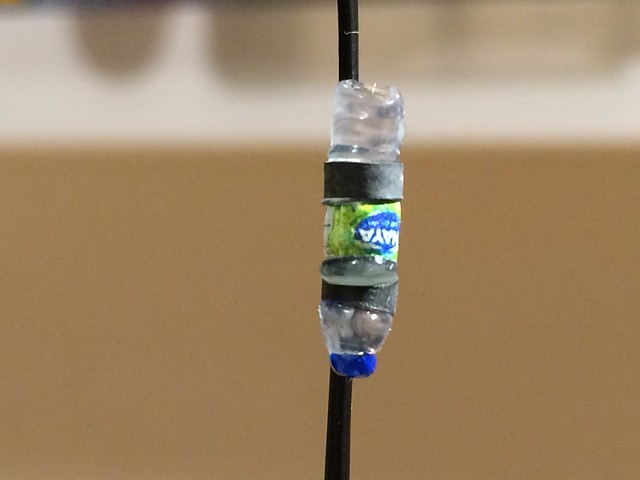  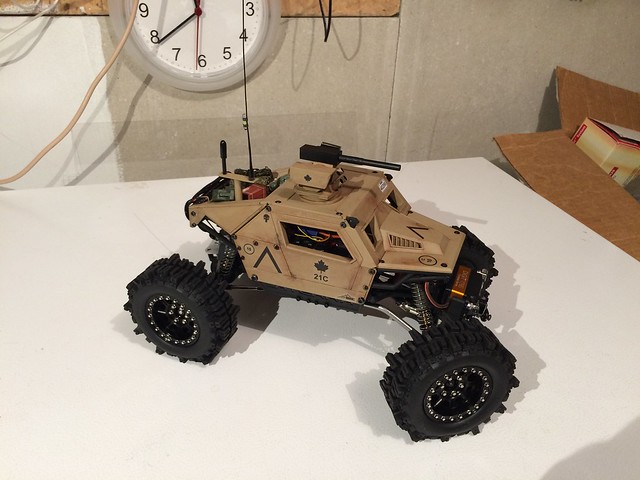 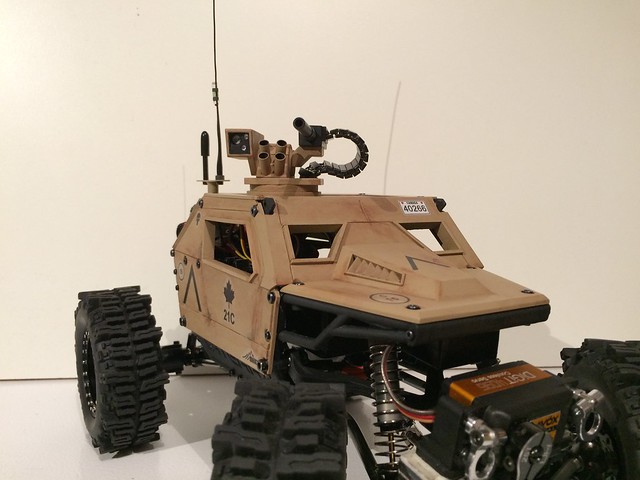 And here are a few shots of this beast in its natural environment: 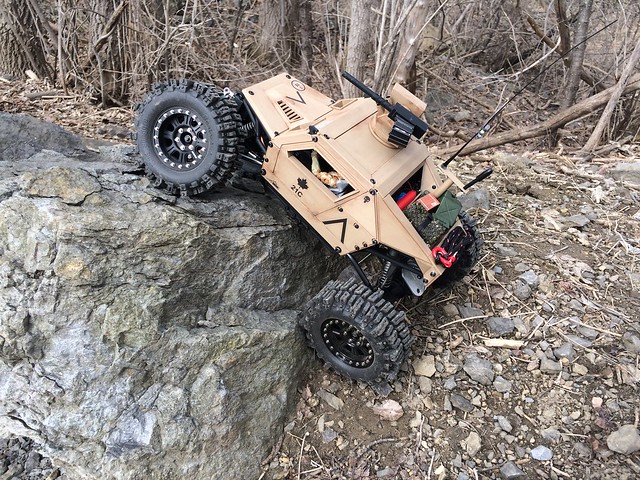  Can you see me? 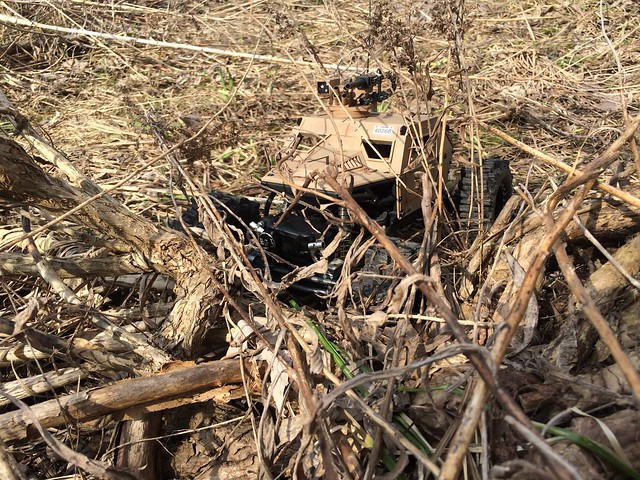 This was a fun first scratch build, I will and have definitively worked on more scale stuff in the future. Cheers, Denis |
|
| |
|
04-06-2018, 04:30 PM
| #18 |
| I wanna be Dave Join Date: Jul 2014 Location: Deep South
Posts: 3,444
|
Looking good. Those tires look big on it when its not out in some rough.
|
|
| |
|
04-06-2018, 09:38 PM
| #19 |
| Rock Crawler  Join Date: Dec 2012 Location: Utah
Posts: 955
|
Sweet body work must have taken a looooong time for this precision! ! |
|
| |
|
04-07-2018, 08:55 AM
| #20 |
| Rock Crawler Join Date: Oct 2009 Location: Danish badlands
Posts: 761
|
"armoured reconnaissance vehicle" Thats something to that order i would buy for a EDD if i hit it big in the lotto, sure as hell not going for some stupid sports car of something like that. |
|
| |
 |
 Slickrock 2-1-Charlie - Similar Threads
 | ||||
| Thread | Thread Starter | Forum | Replies | Last Post |
| Slickrock | pauly383 | Losi Mini-Rock Crawler | 18 | 10-10-2017 02:54 AM |
| Vaterra Slickrock | AZDIGGER | Newbie General | 2 | 08-04-2016 07:31 PM |
| my slickrock | doudou | Losi Mini-Rock Crawler | 5 | 06-07-2015 02:52 PM |
| slickrock mods? | motoman96 | General Crawlers | 2 | 05-04-2014 09:50 PM |
| |


 Linear Mode


