| |
| |||||||
 |
| | LinkBack | Thread Tools | Display Modes |
 04-24-2010, 11:58 AM
| #1 |
| Rock Crawler Join Date: Oct 2009 Location: SO CAL
Posts: 598
|
So after surfing through all these AMAZING builds on here I decided it was time I tried one out! Once I saw the New Bright JK body I couldn't resist finding one and doing a build! Gathering inspiration from War Pig's EB, Tommy R's TJ, G-crawler's JK and many others I have decided to do a bulletproof JK, full cage, 4 linked front/back, tube fenders, the whole works.... so far the plan is: SCX10 rails Axial axles with alum C's, lockouts, I have a set of UD gears too Axial trans 2.2 Flat Irons, I don't really care for them that much but they are the only 2.2 that I feel like fits the size of the JK without looking like a monster truck Mayhem 7's with the star BL rings RC4WD winch no plan for electronics yet First thing I did when I got the body was start hacking: (first side I did entirely with an x-acto knife, then decided that took way too long and did the other side with the dremel. should have stuck with the x-acto ! haha) 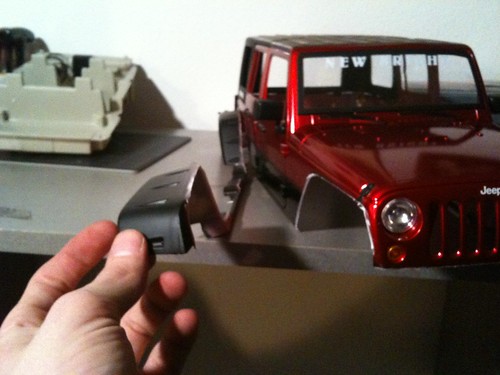 Checked it with some 2.2 claws. This is about the look I was hoping for size-wise. Hoping the flat-irons will be a bit smaller when I get emz  tube fenders to come. 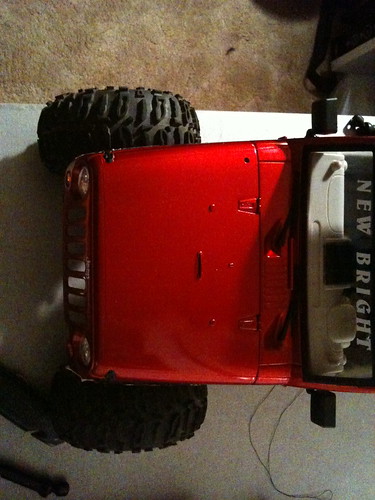 starts of the bumper: 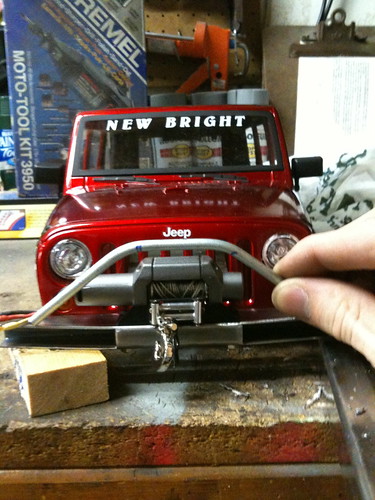 Cut down to width and TIG-welded front pieces on:  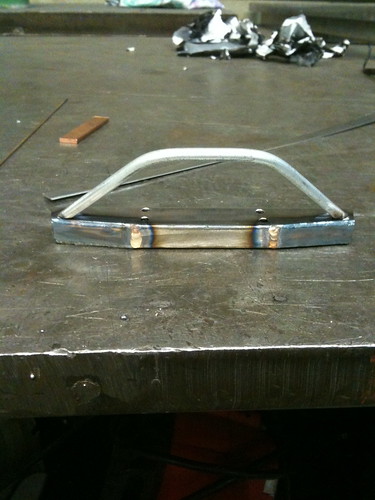 Detailed, I do have plans to put another piece of tube under the winch on the face of the bumper to protect the cable guide. 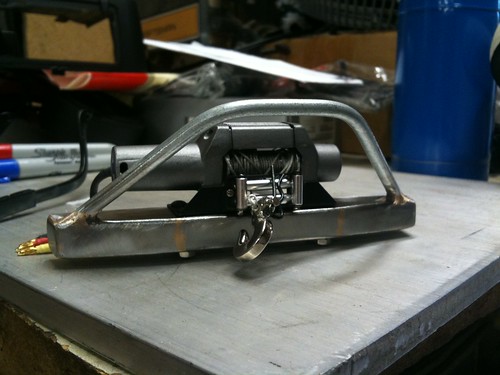 Shot from underneath to show shape:  Starting to map out the cage: 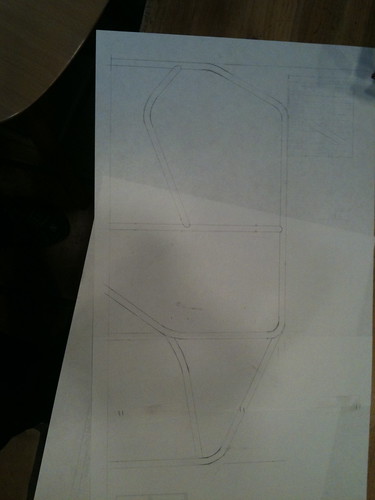 My ghetto screen door roller bender can be seen in this one, it works alright for now, but fastball is making me one of his this weekend, that should cut the time in half on the bendings! Bent up the main side hoops to fit pretty tight to the sides of the NB body: 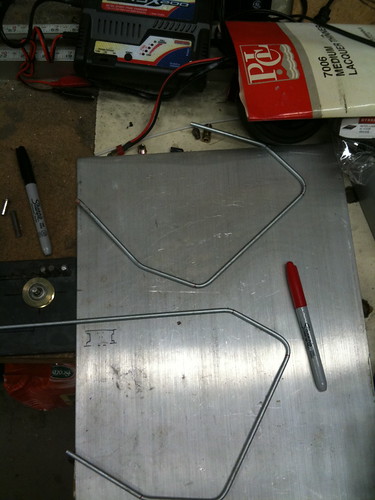 Bent up a front bracing that has some slight bends in it to follow the barely curved windshield line: 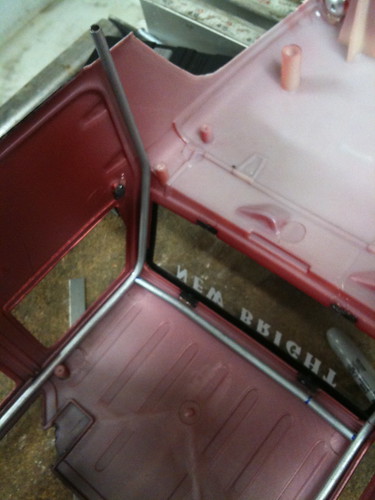 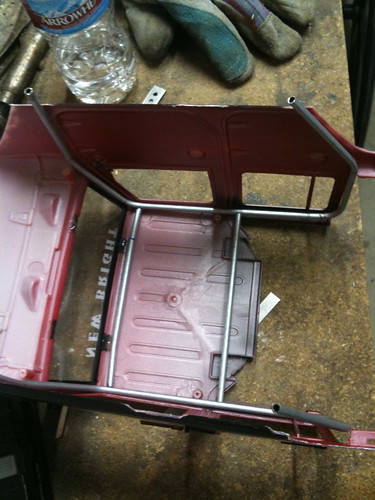 In trying to get this perfect from the start (which wont happen) I have mitered all the tube with the dremel and its all press fit for now. I have high hopes! Now for some opinion... After staring at it in this state for some time I can't decide how to do the back end. The more and more I thought about it and taking into consideration the build and what I'm going for I kind of want to dovetail the back end but am a little scared of the body work that will go into it... but here is my idears... As it stands: 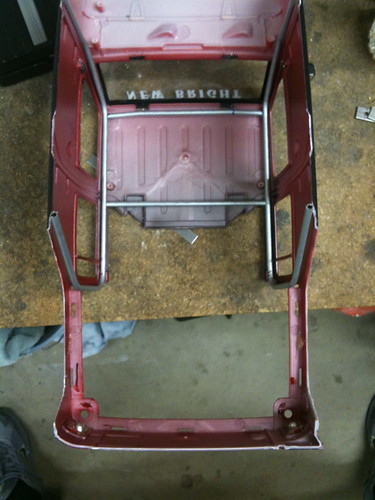 And with the dovetail which could be a little more extreme, but it gives an idea: 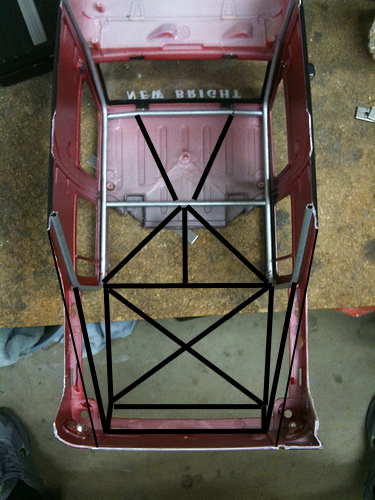 Thats all I have for now, more shots of the chassis to come soon. It's almost a roller now, just have to figure out front susp. Let me know what you guys think! |

|  |
| Sponsored Links | |
| | |
|
04-24-2010, 04:43 PM
| #2 |
| RCC Addict Join Date: Dec 2007 Location: Calgary
Posts: 1,575
|
Wow, great work so far, this is going to be a sweet build I can tell already. Nice work on bumper and bending the tube work. Keep up the great work, you have my attention.  |
|
| |
|
04-24-2010, 11:17 PM
| #3 |
| RCC Addict Join Date: Nov 2008 Location: Santa Fe, NM
Posts: 1,265
|
Cool roll cage man nice work!
|
|
| |
|
04-25-2010, 02:23 AM
| #4 |
| Quarry Creeper Join Date: Jul 2006 Location: Look outside your window 0.0
Posts: 399
|
This is going to be one interesting build, I am going to keep my eyes on this one |

| |
|
04-25-2010, 03:30 PM
| #5 |
| Rock Stacker Join Date: Feb 2006 Location: Williamstown
Posts: 98
|
This looks like its going to be a great build, and the cage looks awesome. may give me some inspiration to modify my 2.2JK one day.
|
|
| |
|
04-27-2010, 12:17 AM
| #6 |
| Rock Crawler Join Date: Oct 2009 Location: SO CAL
Posts: 598
|
I began brazing the cage tonight! This is my first time brazing ever, I've been MIG/TIG welding for 5 years at work, so I figured I could handle it... It went well overall, I think I am getting too much heat on the joints and it's burning away the flux before the rod can be added? If anyone has some pointers on this and why it might be happening that would be sweet! I've also decided to go with the dovetail and just see what happens with the bodywork... If it looks stupid I'll just have no body on the back and it will be a truggy of sorts, we'll see. Start of the cage: 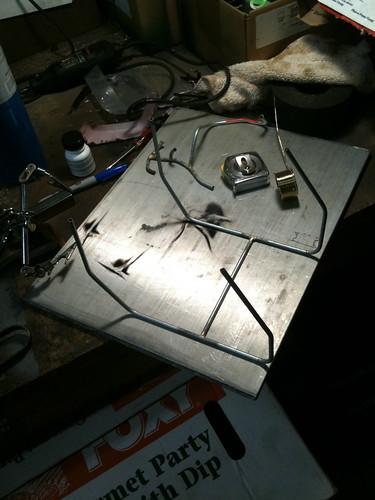 Dove-cage:  How it fits from the inside:  And from the outside, I decided to extend the length of it past the body so I could jam the 2.2 tire in there like so: 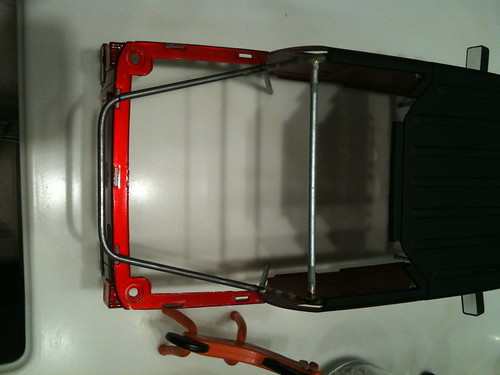 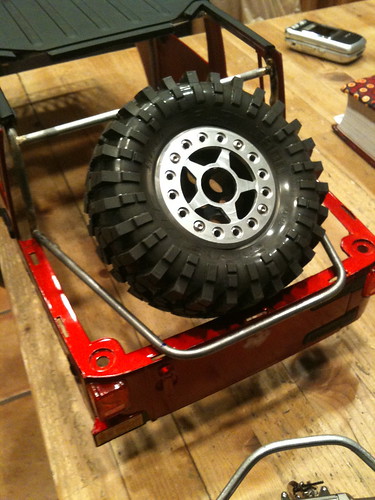 Some dremel rash from cutting out the flares. Inside fit of the cage is SWEEEET! 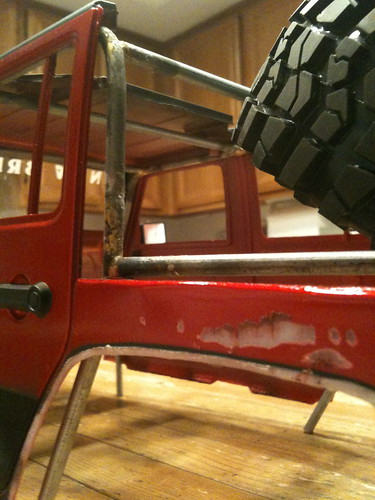 Tomorrow will come more cage bracing and such, along with perhaps the bottom half of the cage and a back bumper setup of some kind, which will include chopping the back half of the body off! wooo! I'm stoked on this! Thanks for the interest that the few have shown! the compliments mean a lot to me! |
|
| |
|
04-27-2010, 12:25 AM
| #7 |
| RCC Addict Join Date: Jan 2009 Location: Crawlifornia
Posts: 1,941
|
JK looks sick man. Nice work. LOVE the winch!! |
|
| |
|
04-27-2010, 12:41 AM
| #8 |
| Rock Crawler Join Date: Oct 2009 Location: SO CAL
Posts: 598
|
haha yeyahhh the winch is dope! got a build thread for the SSS or what?
|
|
| |
|
04-27-2010, 01:08 AM
| #9 |
| Quarry Creeper Join Date: Jul 2006 Location: Look outside your window 0.0
Posts: 399
|
I think dovetailing it is going to be a nice touch...that is what I plan to do with mine...when I get around to building it...lol. As for the brazing part, yeah it could be too much heat. Just make sure you grind or sand the galvanizing off |
|
| |
|
04-27-2010, 06:15 AM
| #10 |
| Rock Stacker Join Date: Mar 2010 Location: Mississauga, Canada
Posts: 93
|
sweet rig! maybe its cuz im attracted to jeep jks. does it have anything to with the fact my teacher has a black and white one?
|
|
| |
|
04-27-2010, 08:25 AM
| #11 |
| I wanna be Dave Join Date: Sep 2005 Location: Dirty South
Posts: 4,064
|
Nice looking build ,keep up the good work . |
|
| |
|
04-27-2010, 07:15 PM
| #12 |
| Pebble Pounder Join Date: Apr 2010 Location: Peoria,AZ
Posts: 166
|
looking forward to this build, great work so far
|
|
| |
|
04-27-2010, 07:32 PM
| #13 |
| Rock Stacker Join Date: Sep 2009 Location: griffith nwi
Posts: 69
|
dove tail isnt that hard just do one side at a time so then that way you dont lose your center thats all the advice i got and measure everything twice i got a build on here i sectioned the front of an f350 and i think it came out nice it was my first time doing anything of the sort
|
|
| |
|
04-28-2010, 09:40 AM
| #14 |
| Rock Crawler Join Date: Oct 2009 Location: SO CAL
Posts: 598
|
got some cage work done yesterday, it's coming out really nice for my first go at this. it's within 1/16 square which i was realllly surprised about! so on with the photozz decided to bend this back piece forward and extend it 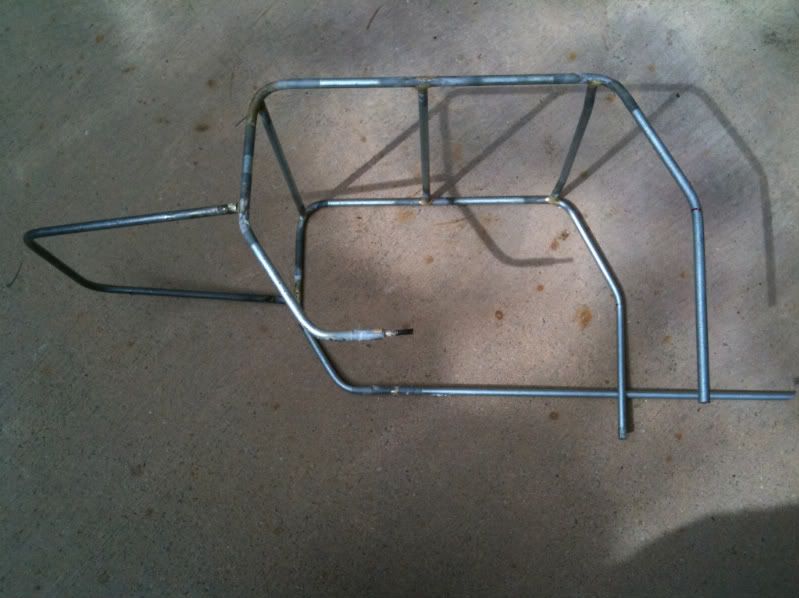  cut down the pieces going forward and brazed them to the front down tubes: 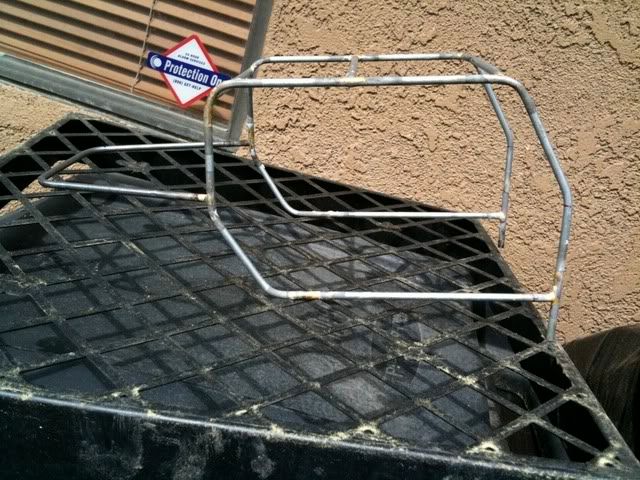 braze shot: 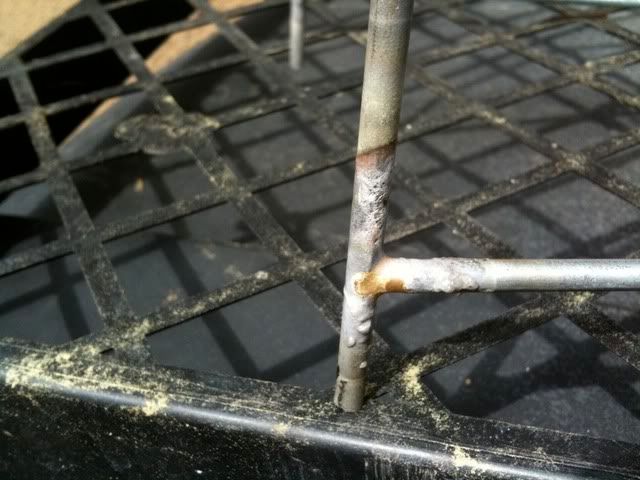 my clamping methods: 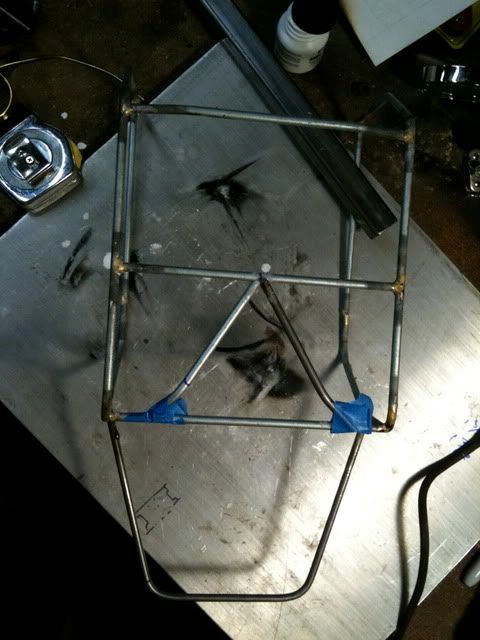 had to put some shape on those supports to follow the bends on the main hoops, 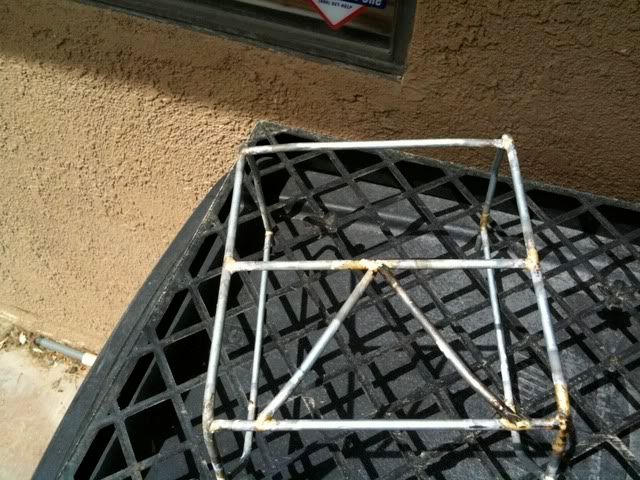 front bracing: 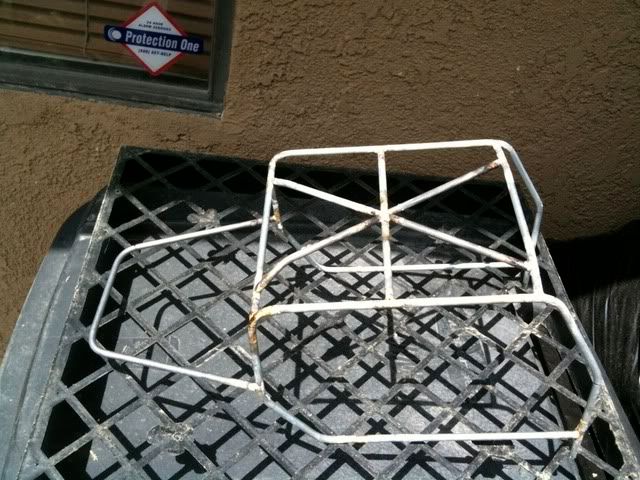 profile shot: 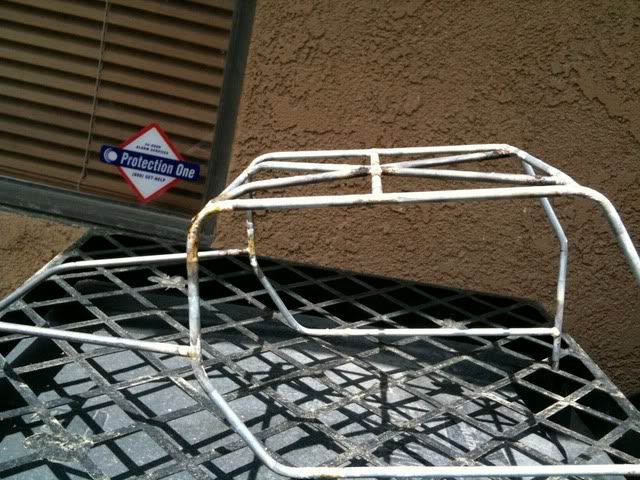 how its coming together and will sit inside the body: 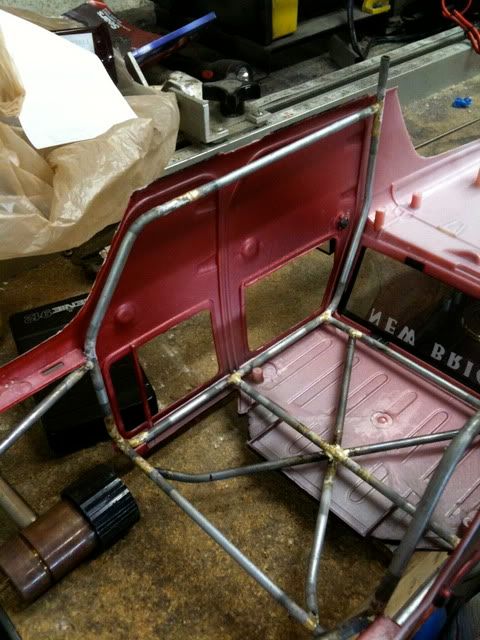 added the B-pillars to the cage: 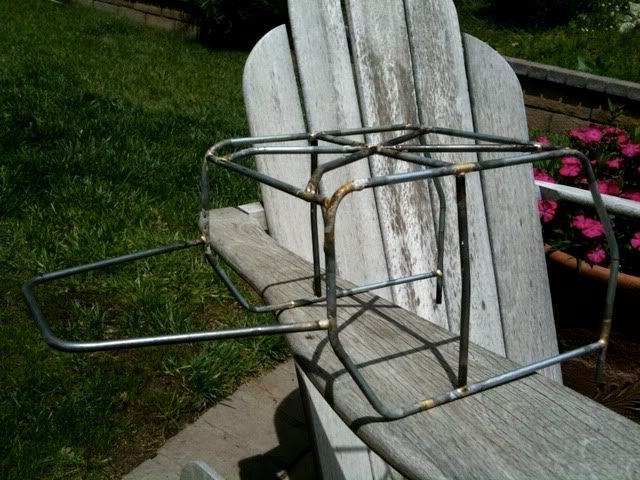 this picture sucks, but next to go in was the windshield bracing and dash tube: 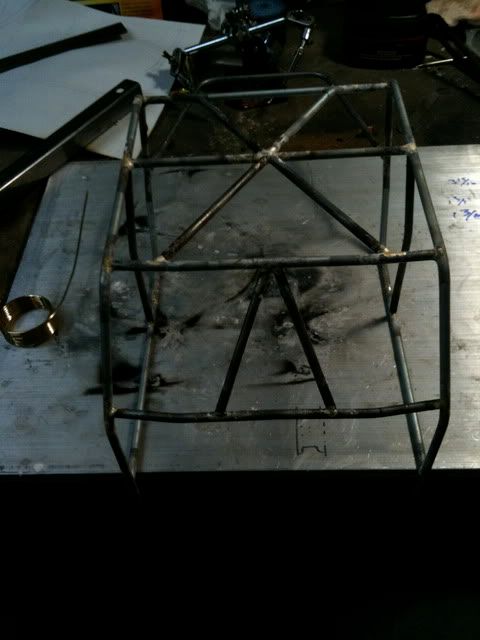 yet again the inside fit: 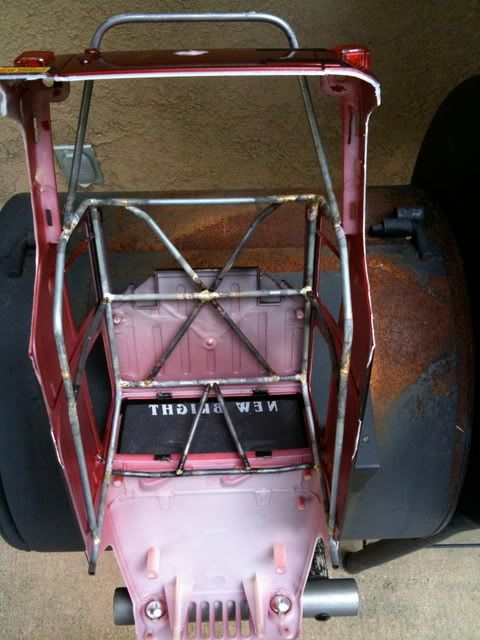 OH NO WHATT HAPPPENEEDDDD!? 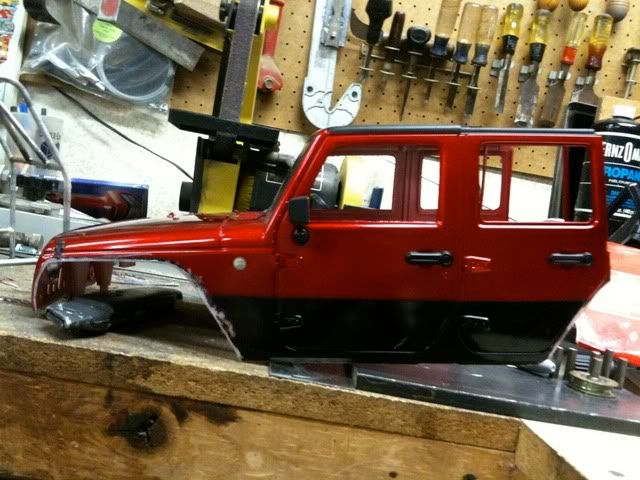 decided to just chop the back end off completely... i have no clue what is going to happen now, but i will go forward with the cage and try to build a body around it later. low profile upper 4-link mount: 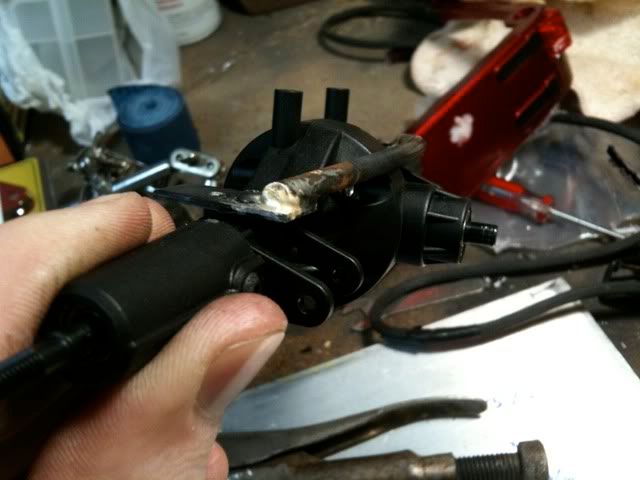 one of these days i'll put up some shots of the chassis as far as i have it, which isnt very far hence me putting up no pictures of it yet next will be more rear cage stuff, trying to decide to run a spare tire or not... and attempting to get the cage tied into the frame rails. and sliders!! and as always thanks for the compliments! Last edited by yjdavid; 04-28-2010 at 09:41 AM. Reason: wrong photo! |
|
| |
|
04-28-2010, 02:20 PM
| #15 |
| Quarry Creeper Join Date: Jul 2006 Location: Look outside your window 0.0
Posts: 399
|
Nice tubework bro, looks like you got a handle on brazing. That cage fits in there like a glove.....can't wait to see more |
|
| |
|
05-03-2010, 05:15 AM
| #16 | |
| Rock Crawler Join Date: Oct 2009 Location: SO CAL
Posts: 598
| Quote:
onto some updates. nothing too exciting, hopefully more to come later today. got 2 tubes brazed up on the back end, gave it some more shape. and, got two of the mounting points to the frame rails done too. in doing that i have definitely decided i need to widen the axles somehow, perhaps with VP hubs. 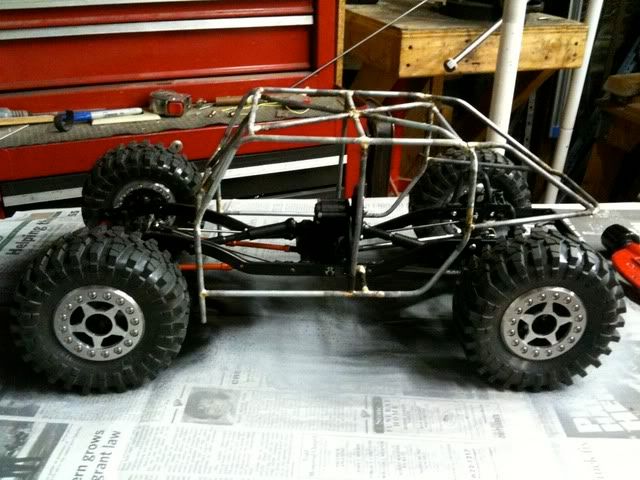 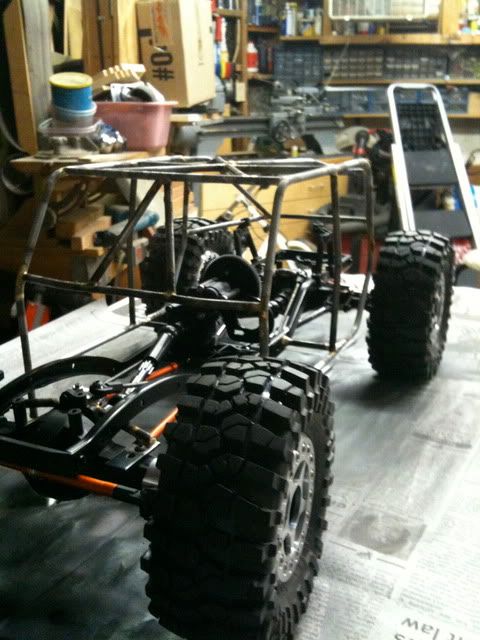 it actually uses the link hole as the mounting point. 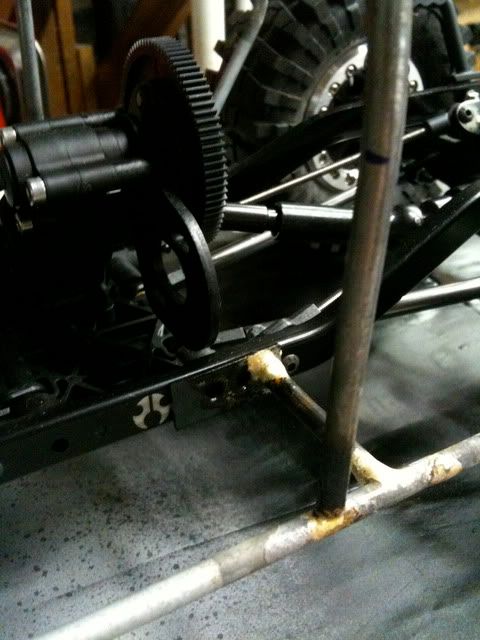 (crooked) front link truss 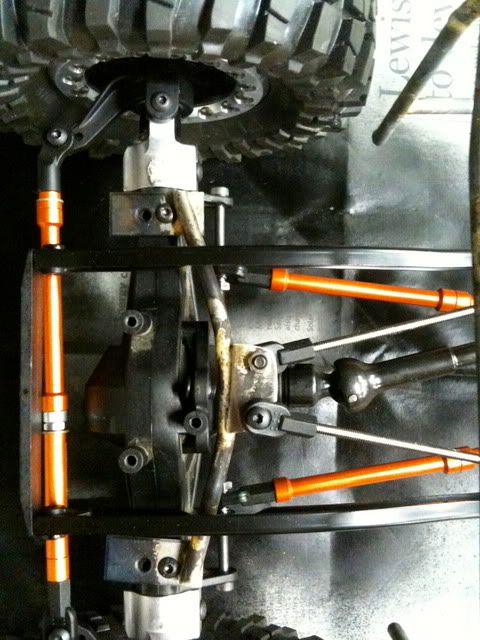 (less crooked) rear link truss 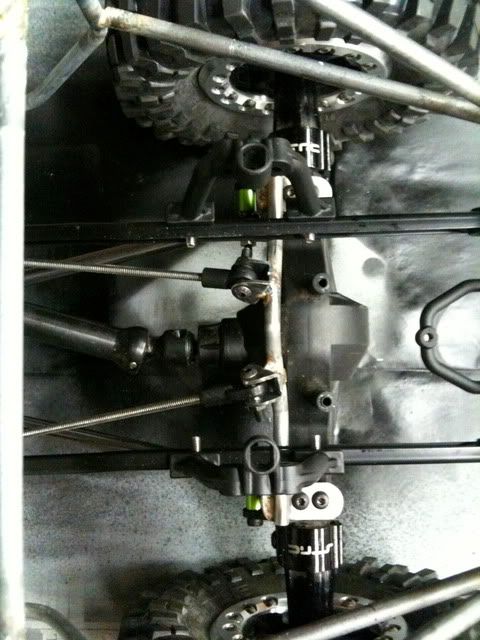 ridic bottomed out stance: 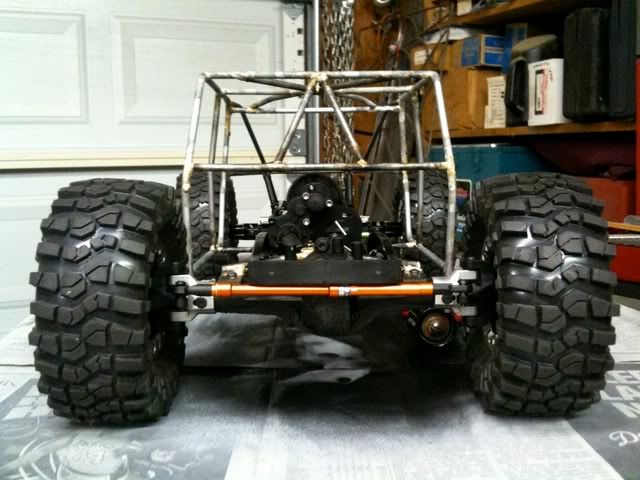 closer to ride height: 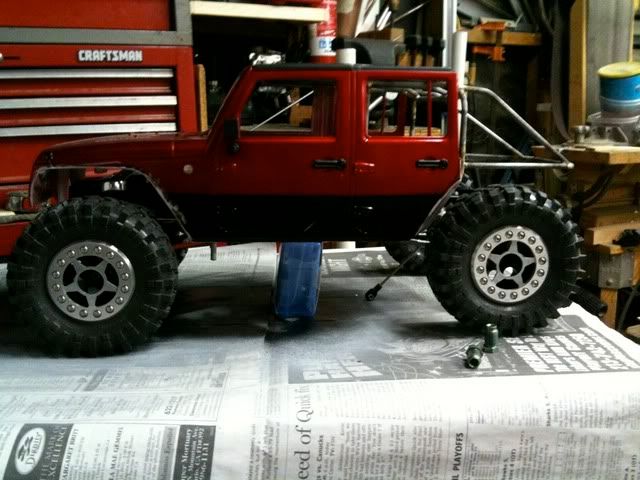 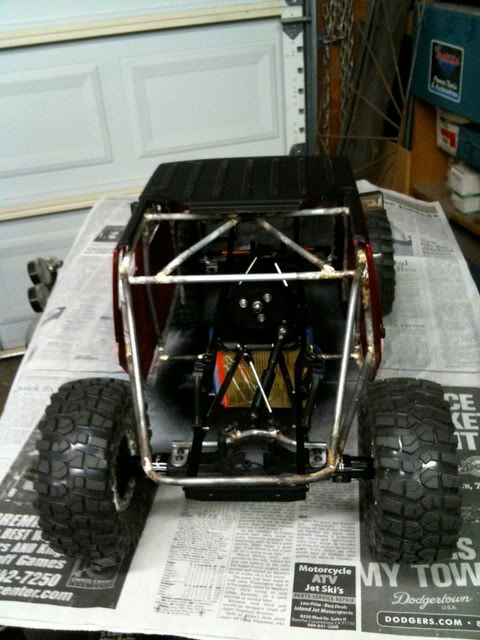 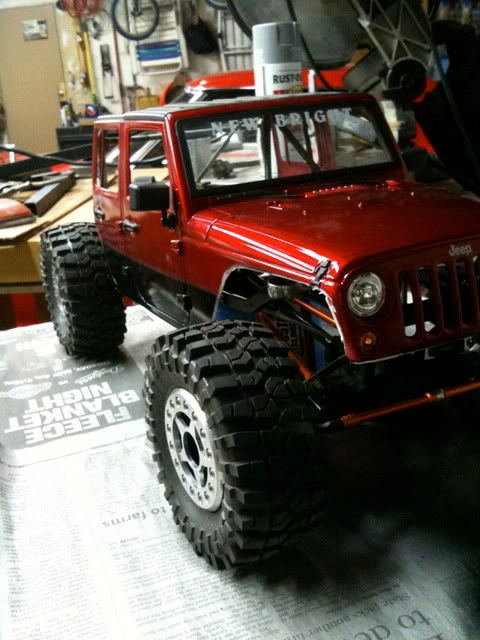 | |
|
| |
|
05-12-2010, 12:17 AM
| #17 |
| Rock Crawler Join Date: Oct 2009 Location: SO CAL
Posts: 598
|
Got some stuff done... It's almost standing on its own now, servo coming soon so I can work out the steering, and I got some VP hubs to widen the stance, I need to drill some holes in the 7's to get them some holes for lug screws. I wasn't feeling the flat-irons so I found some tires that might work for this guy:  shock mounts in the front done, but tying the cage to the frame is yet to be figured out. Probably wont be until I get the wheels solid-ly mounted 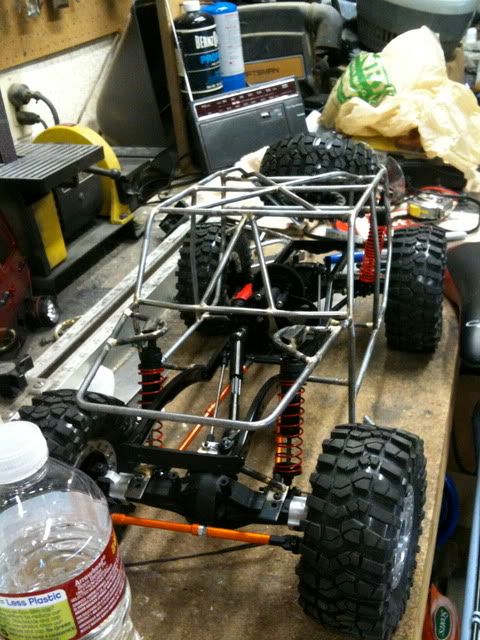 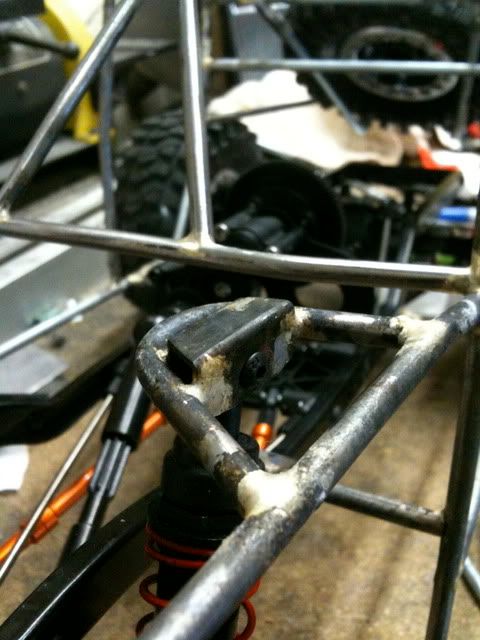 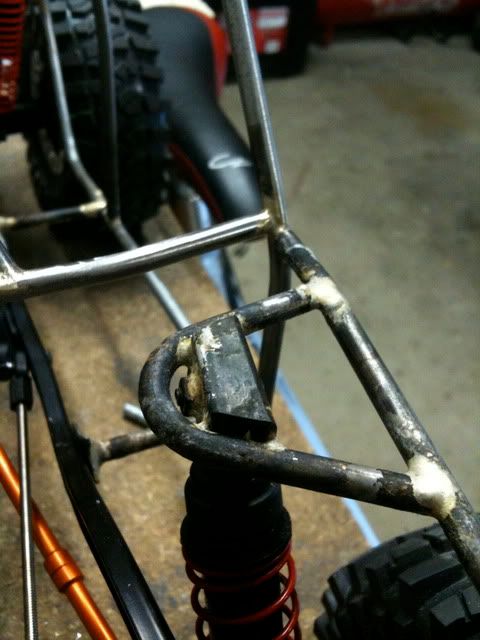 I also cap-modded some big bore shocks. Thats a greattt idea whoever came up with it. rigged up these tubes in the back to hold a spare tire, and the tube behind at the back of the cab will serve as part of the rear shock mounts as well. 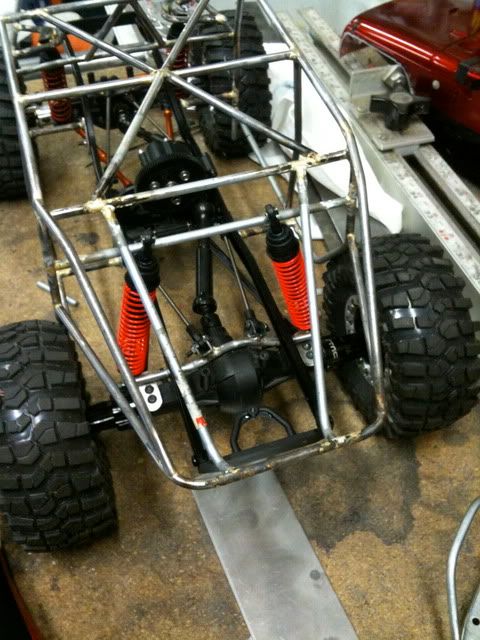 with tire: 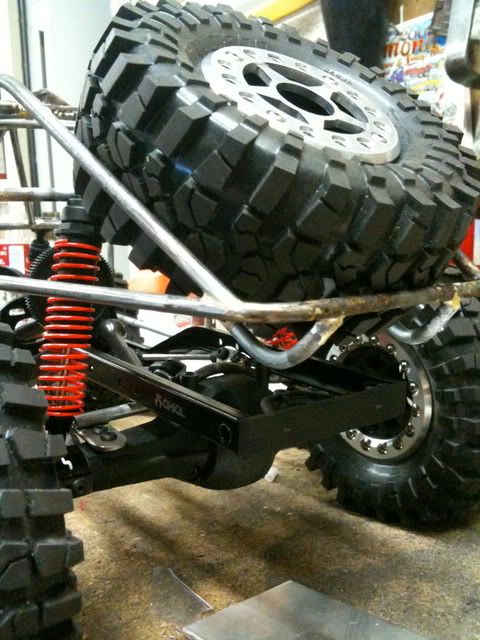 ride height without rear shocks done 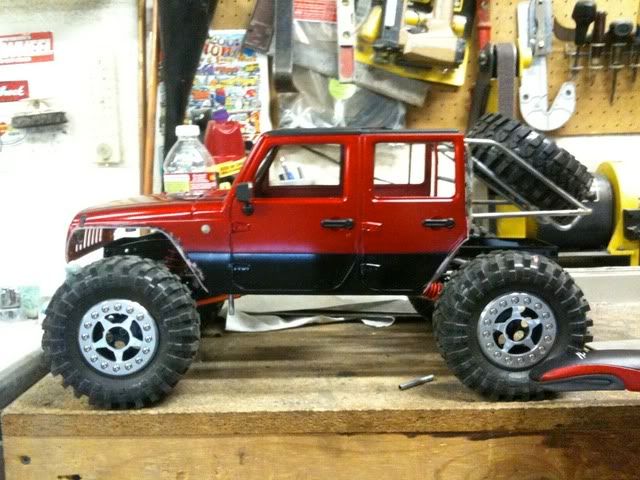 let me know what you think! thanks for looking! |
|
| |
|
05-13-2010, 11:13 AM
| #18 |
| Quarry Creeper  Join Date: Aug 2008 Location: Grand Jct.
Posts: 445
|
nice build those jk are cool. heres mine   |
|
| |
|
03-01-2011, 12:43 AM
| #19 |
| Quarry Creeper Join Date: Mar 2007 Location: Sneads Ferry
Posts: 430
|
From the dead, but any progress? I was pretty much in love with the back half cut off, wondering how it was finished.
|
|
| |
|
09-23-2011, 05:56 PM
| #20 |
| Rock Crawler Join Date: Feb 2006 Location: jacksonville beach
Posts: 848
|
sweet new motivation! ill be watching!!! |
|
| |
|
| |


 Linear Mode


