| |
| |||||||
 |
| | LinkBack | Thread Tools | Display Modes |
 06-07-2009, 02:21 PM
| #1 |
| Rock Crawler  Join Date: Nov 2008 Location: Sunny Southwest Florida
Posts: 743
|
Hey Guys; Well I was in the right place at the right time.At least I think so.I got this from a kid at the LHS for $150. I have since added so many parts I build a second truck from it.I will start with this and add from here.l8r,w. 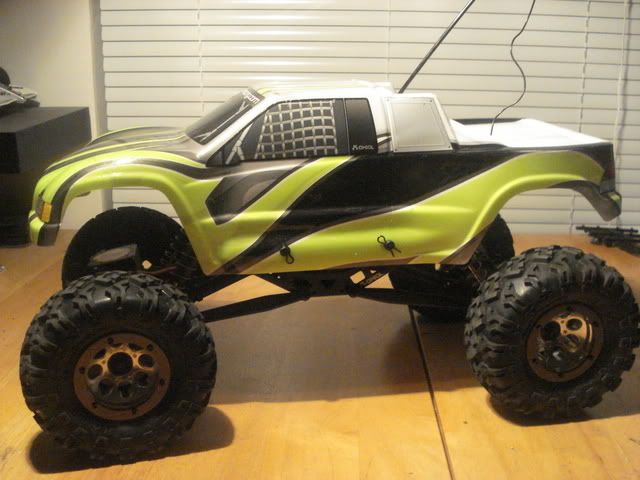 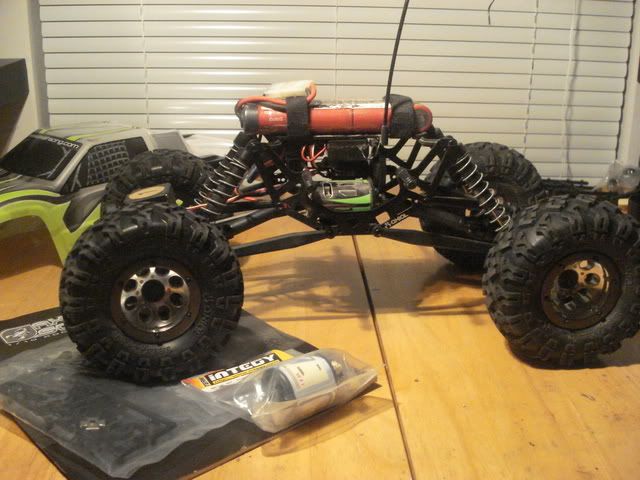 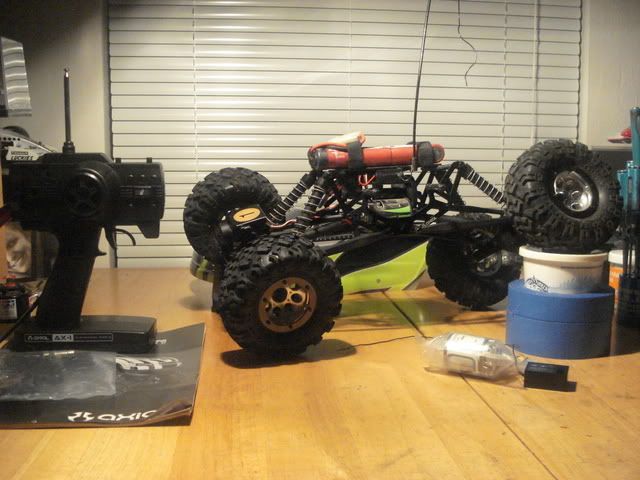 So far all I have done was to lock the front diff. Out with the stock 27t motor.Off with the 20t gear and on with the 14t gear. In with a Integy 55t motor. What were they thinking puting that 27t in there. Oh well it gets it out the door,right.I am runnnig a Tekin FXR ESC.An airtronics macdaddy servo.And a ton of hopups I will list out later on.Enjoy. 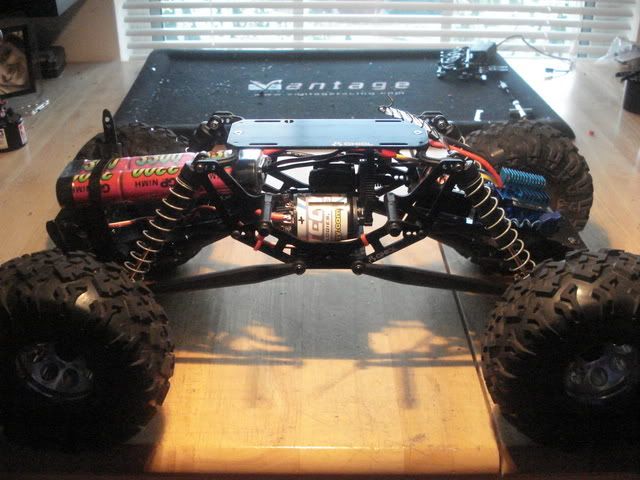 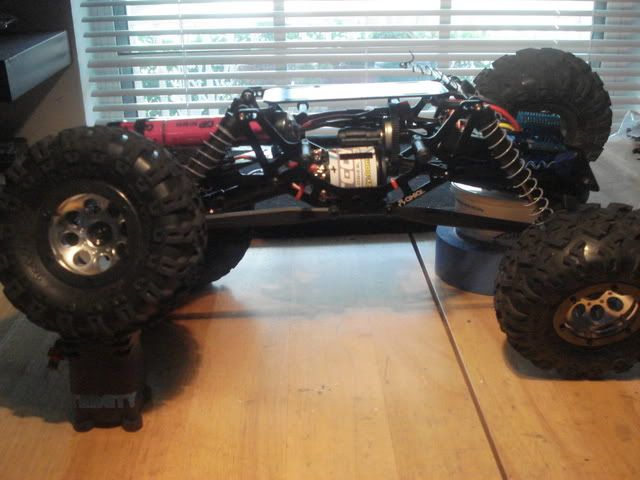 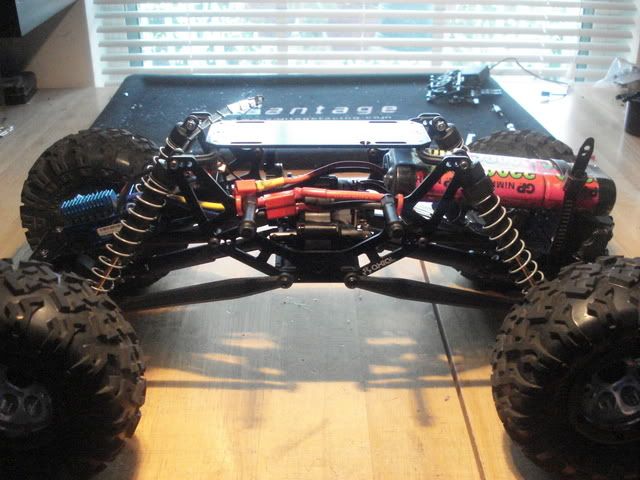 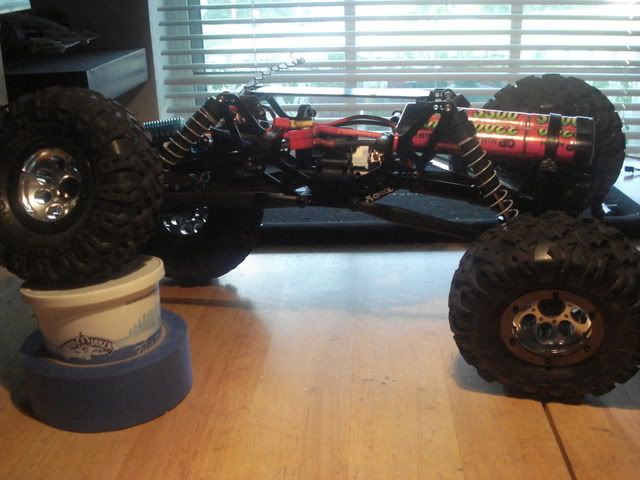 Hey All; well got a few mins. at work during lunch to post up some goodie shots. I have added a few hop-ups to my rig. I did the tire mods as as posted as a how to I will post in this section. Also I got some Alloy goodies from STRC in silver as scratched coloerd Alloy looks ugly to me all scratched up. So if silver gets scratched up it is still silver. I got the front knuckles and hubs. Also silver battery plate mounts and a C/F battery plate. I also got some Red springs and some 70wt shock oil. I added 1/8 inch of fuel tubing under the pistons to lower the CG and ride hieght.  goodies,who doesn't like hop-ups. Need more goodies.NOW. Why I autta give you a knuckle sandwich.LOL Here are the hubs and knuckles compaired to stockers.  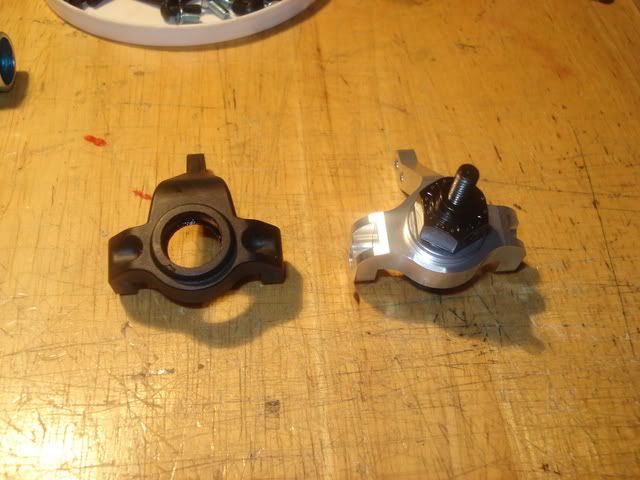 And here are the goodies fully installed and ready to be a climbing fools.I am getting into the whole crawler thing. 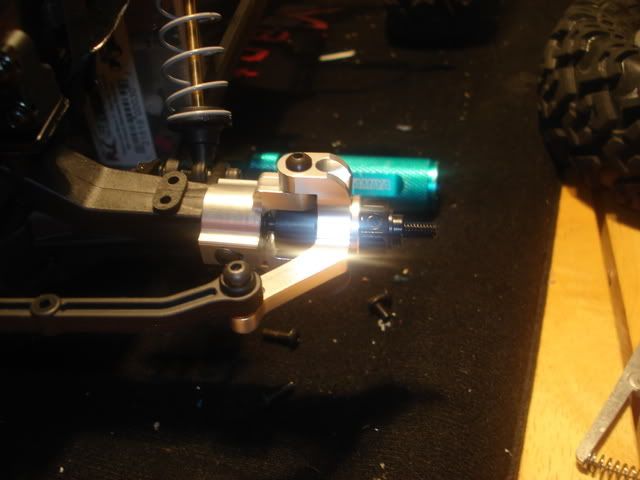 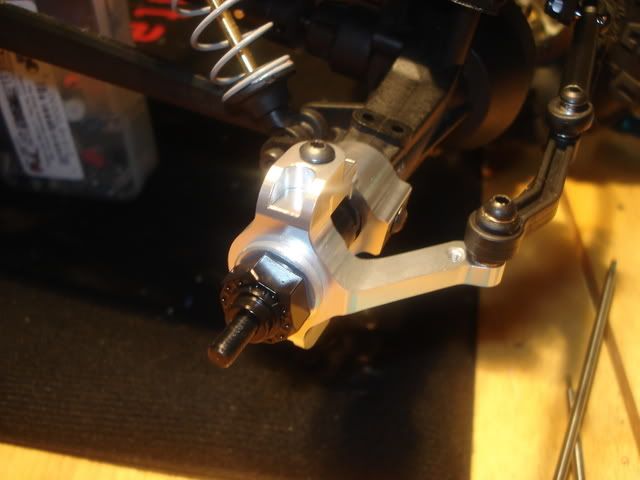 So here is the finished product. All ready to be a crawling and I like it. what you all think?? 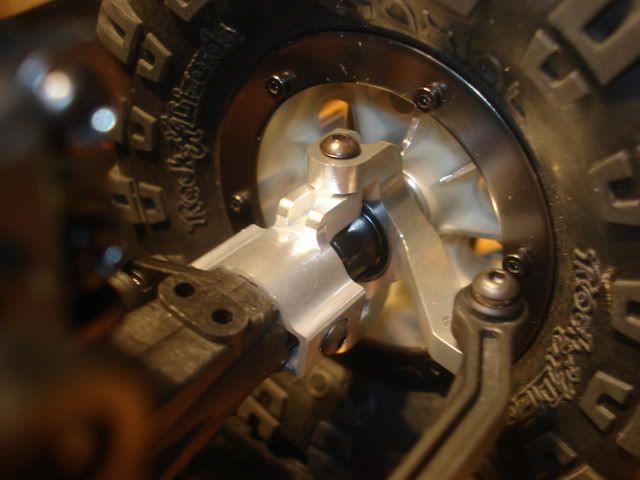 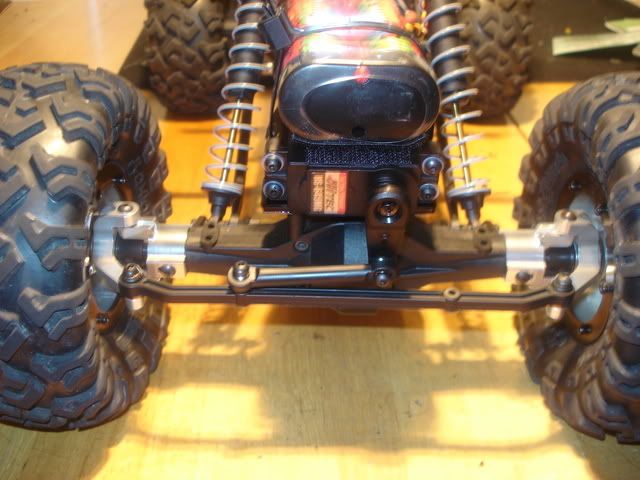 and here are the other goodies I got for it.I got rid of the servo saver and added a solid horn. 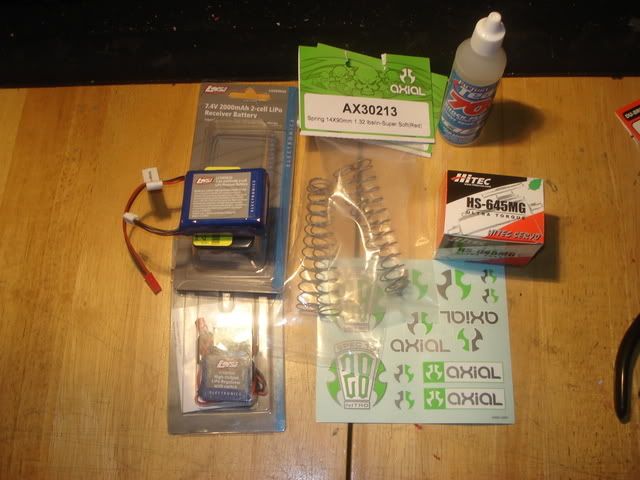 What up?? So here we are again with some more goodies to go on project "Sting". So I was looking around for a chassis but didn't want to go tuber yet and or scaler chassis either so I went CARON FIBER. SSG C/F, one step even further since I am going with a Silver theme.I got the new Extreme Racing chassis for less than $30 shipped. Gotta loce C/F. Here is a pic of both the stocker and the new Hop-Up. notice all the extra mounting points the new chassis comes with. I Like It. 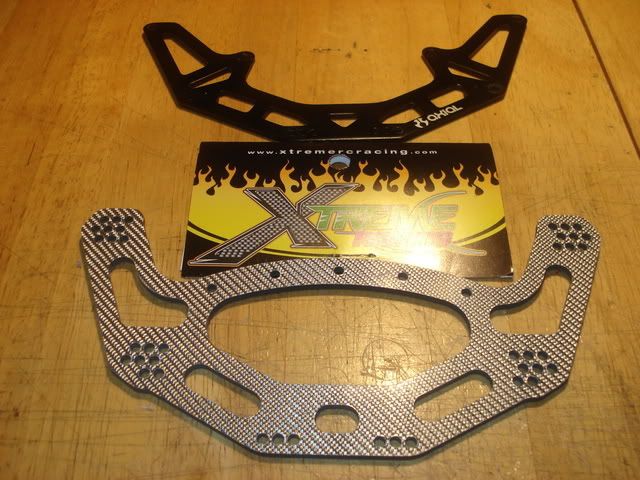 Here I am removing the stocker without even taking the whole truck apart. Sweet isn't it? 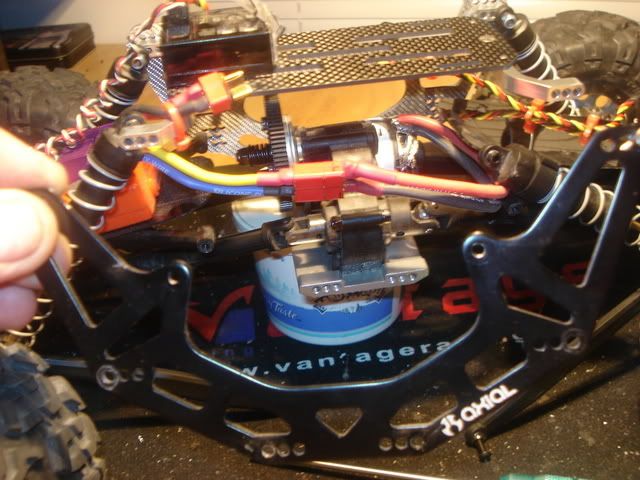 Here is the NEW Carbon Fiber chassis plate all pretty and adjustable. 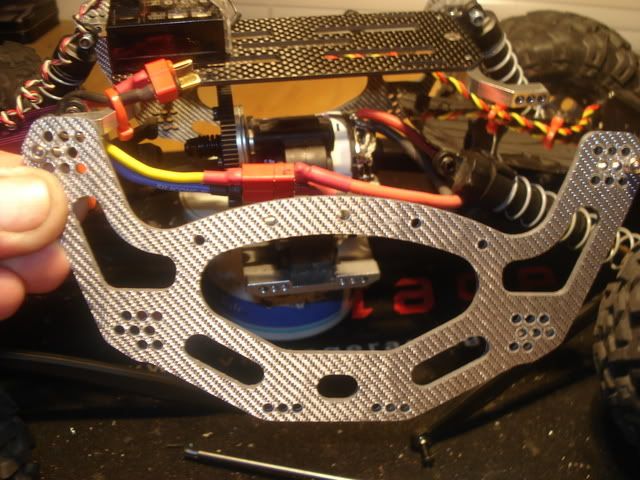 See how plain the black stocker is. And not to adjustable to boot. Well out with the old and in with the new. Gotta love this hobby,don't cha?? 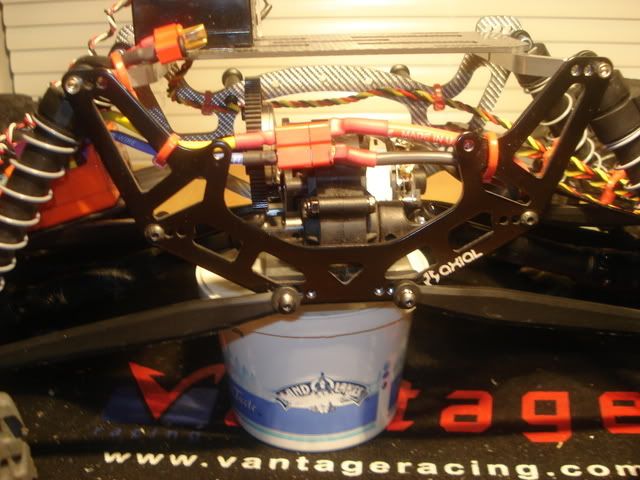 And now the C/F all sittin pretty on it's new home. Nothing beats a good Hop-Up that is for sure. 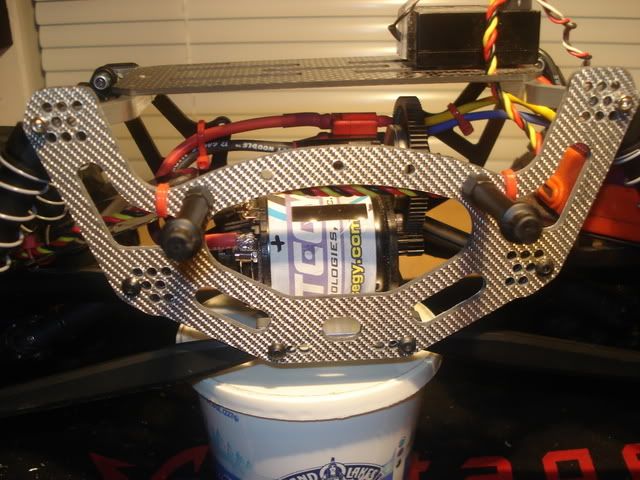 I have been having a blast doing up my crawler. So here is a pic of some goodies I added and will be doing alot of add ons to this thread. Project "Sting" is in full swing. 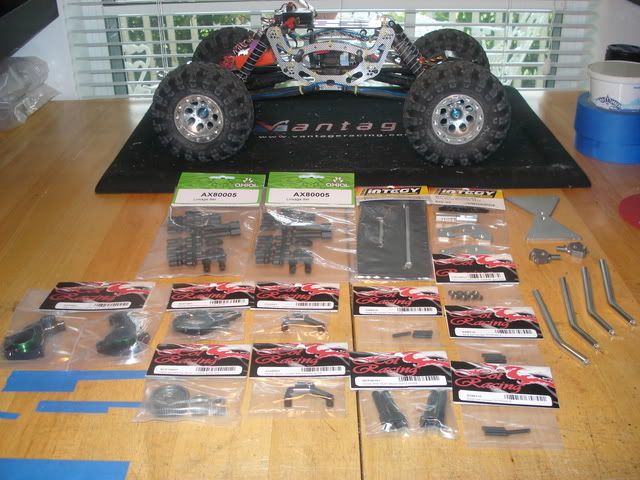 Hey All;So I wanted to share these Pro-Line tires I installed as well as the alloy goodies. I opted for the new Pro-Line 2.2 Hammer's in the M3 compound complete with memory foams. I was looking at 4 different tires but these were only $2 more a set than the Losi Rock Claws and I wanted something different from what everyone else is using here. So I slung some hoops and installed last week. Man that is alot of friggin' screws. AGAIN...They are a little smaller in OD but it lowered my CG and made it a bit more stable. This was a RTR and has big top heavy phobia issues to overcome. But I wanted a challange of making it my own as well as work well here in flat A** Florida. Next on my list is a set of alloy 2.2 rims but so far the $$$$ is holding me back. I want $135 rims so I must wait it out. It will flip itself on its roof up against the wall in a split second ther is so much bite compaired to the Lizards. Forwards or backwads. I like the sidebite alot as well. I try and crab crawl sidways along the side of my house. The old tires would not let me do that at all.The only thing I had to do was stiffen the rear shocks to get the front from lifting so easily.Well here are a few pics from the tire swap. Fresh Bologna skinz. 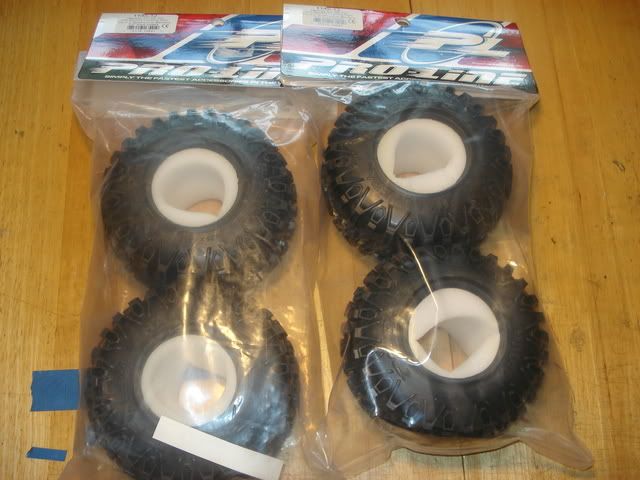 Here is the outside diameter of the 2 tires all mounted and weighted. 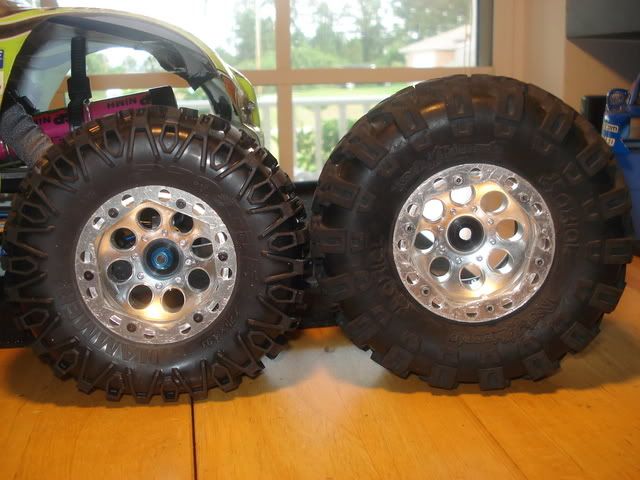 Here we are Out with the old OEM rubbers and on with the new ones.Swchweeeeet!!!!!!!!!!!! 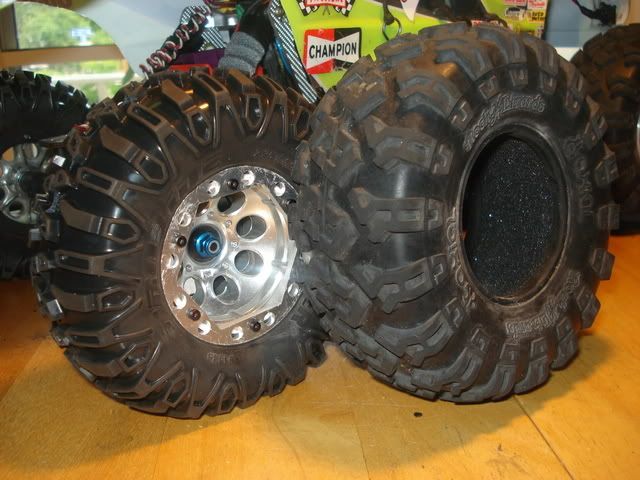 Here we can compaire the old tread pattern to the new Pro-Line tread pattern. 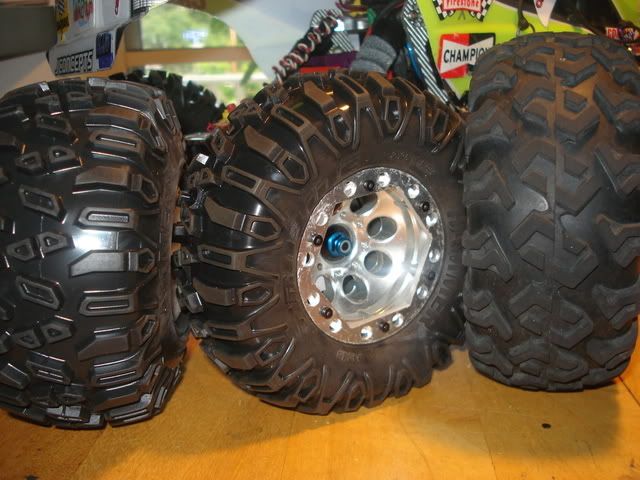 Here they are all mounted and ready to conquer the Florida Flat Spot. No, we do have a few rocks here and there. 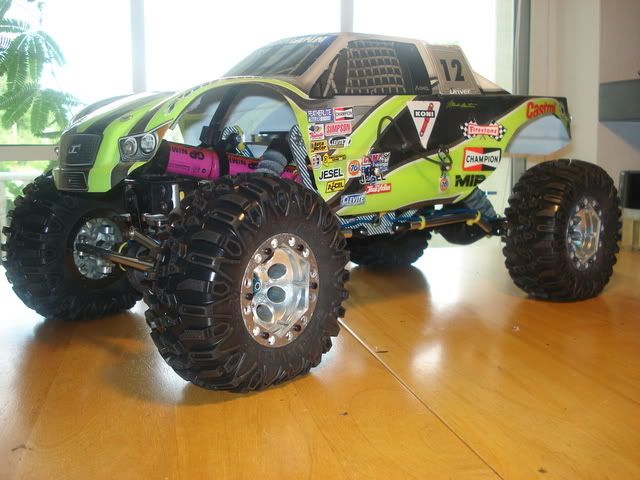 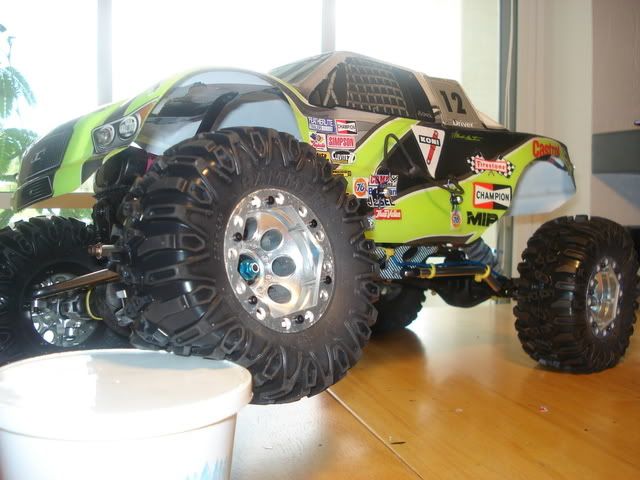 Since these things are gunna tumble and get tossed about silver was the way to go for me. I am not a fan of green to begin with and since any color will scratch off over time I went silver. I opted for the Integy front steering rack as well as there servo mounts,and so far so good. I know how people feel about em and only used em cause I got a good deal on em. So all other stuff was from HR and some people feel the same way about them. I opted for the alloy trans gears and alloy trans case. I also got the alloy upper 3way link brace. Body post set. and some ball link connector bolts/hardware. I also found some 30* lower links and upper 3link mounts and rods as well as some real nice plate to mount electonics to and support my battery.So I ordered some OEM Axial ballcups and installed all without a hitch. No grinding or cutting and no 4 letter words. So here we have the front end now completed with the alloy steering duties. NO MORE FLEX.. The alloy servo plates are a nice touch I think. The new Hitec HS645MG servo and the Alloy airplane servo horn.The whole truck now sits more lower and longer to the ground. And yet I have more ground clearence. 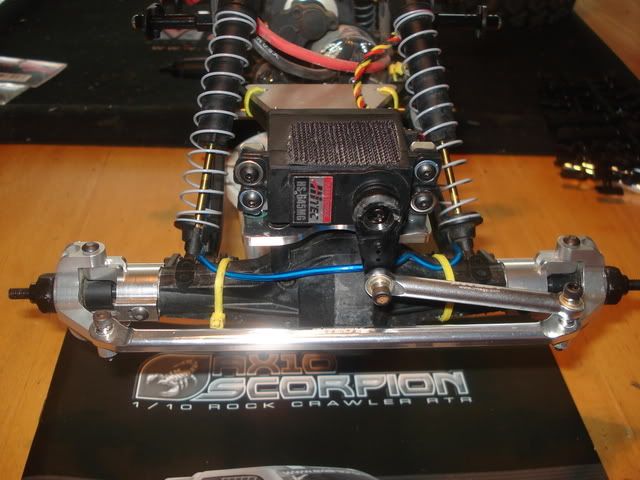 Here is the back end ready for my ESC to be mounted up. I liked the way it all fit together.  And here is the alloy 3link brace. Looks all stealthy sittin' in there. 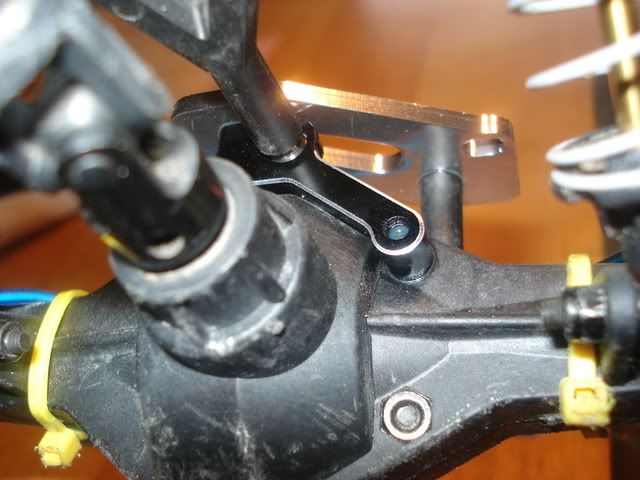 Here are the upper and lower links as well as the mount plates and more weight to hold this sucker to the rocks. 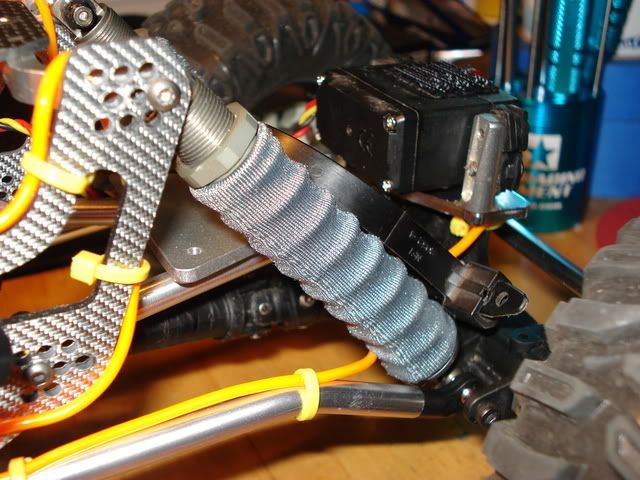 Here you can see the alloy body mounts with the polished tips. Nice touch. 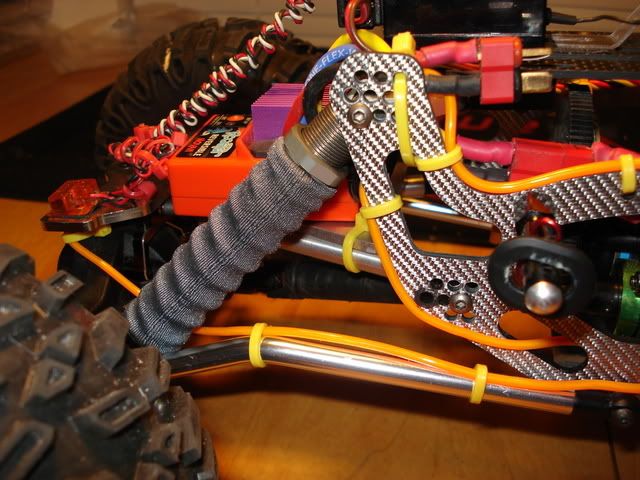 Here are the new 3 link mounts and upper rods as well the stocker to compare. On the left Wimpy,Wimpy and on the right,Beefy,Beefy,F'in Beefy.  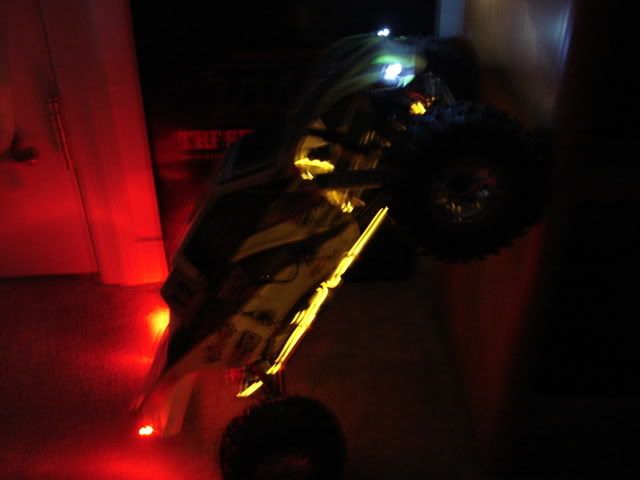 OK class now let's all pick our heads off the desk and get back to work. Recess is over for now and class is back in session. SO where were we. Oh yeh we were talking crawlers and my Axial project "Sting" is rolling right along. So this big bag of goodies was chock full a' holesome Alloy goodness. Since these things are gunna tumble and get tossed about silver was the way to go for me. I am not a fan of green to begin with and since any color will scratch off over time I went silver. I opted for the Integy front steering rack as well as there servo mounts,and so far so good. I know how people feel about em and only use em cause I get a good deal on em. So all other stuff was from HR and some people feel the same way about them. I opted for the alloy trans gears and alloy trans case. I also got the alloy upper 3way link brace. Body post set. and some ball link connector bolts/hardware. I also found some 30* lower links and upper 3link mounts and rods as well as some real nice plate to mount electonics to and support my battery.So I ordered some OEM Axial ballcups and installed all without a hitch. No grinding or cutting and no 4 letter words.So here is are some pics for your viewing pleasure. L8R,Wrench. |

|  |
| Sponsored Links | |
| | |
|
06-07-2009, 02:26 PM
| #2 |
| Rock Crawler Join Date: Nov 2008 Location: Sunny Southwest Florida
Posts: 743
|
Page 2 of my build journey Enjoy So here we have the front end now completed with the alloy steering duties. NO MORE FLEX.. The alloy servo plates are a nice touch I think. The new Hitec HS645MG servo and the Alloy airplane servo horn.The whole truck now sits more lower and longer to the ground. And yet I have more ground clearence. Here is the back end ready for my ESC to be mounted up. I will be adding rear wheel steering someday just to have it all in one truck.I liked the way it all fit together but I am looking at a tuber chassis if a really killer good friend comes through for me like I did for him. ;) I did get some Losi 4" crawler shocks for the rig as well and will do another thread on that all together. And here is the alloy 3link brace. Looks all stealthy sittin' in there. I added the MIP C-Sline center shafts to my crawler for 2 reasons. Beefy is always better. But not to the point of no return. Meaning I like to at least leave something plastic and or cheep to snap and or break. That way the repair cost is lower than expected if need be. Well these were a snap to put together and was done in about an hour.The main reson for this purchase and upgrade was because the previous owner broke off the front center shaft and replaced it with what he had on hand as opposed to buying the correct replacement part from the manufaturer. He thought bigger was better and added a T-Maxx shaft set from the diff to the axel longer one. He modified it to fit and away he went.He failed to tell me this and I was to excited to notice it when I bought it. But a few climbes into the ownership of the truck it would kick out the grub scews and I would have 2wd rear drive only. So I tryed a few tricks and put a new hole in the sleeve and added a second grub screw ontop of the first and glued them in place. But after getting better with the crawler and getting better option parts for the project it could now do more.So then I had the problem of it contiuing to do it on an almost everytime I would use it bases. So out with the old and in with the new. So here we go on adding a set of CVD type axels and or drive shafts to you build job. Thanks for looking. So here are the new additions to the build and the patient ready for the transplant operation. MIP makes great stuff and has easy to follow instructions too. 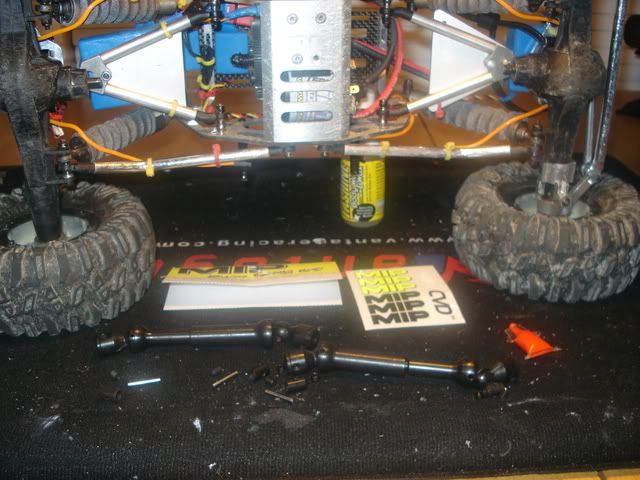 Here are the parts that make up one end of the kit. You have to make four of these one for each end to be attached to the diffs and to the tranns. 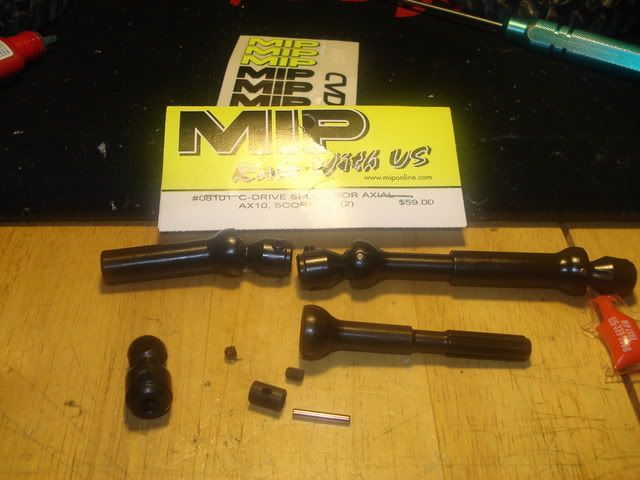 Here is the whole shabang laid out end to end and all the corosponding patrs that bless go with. 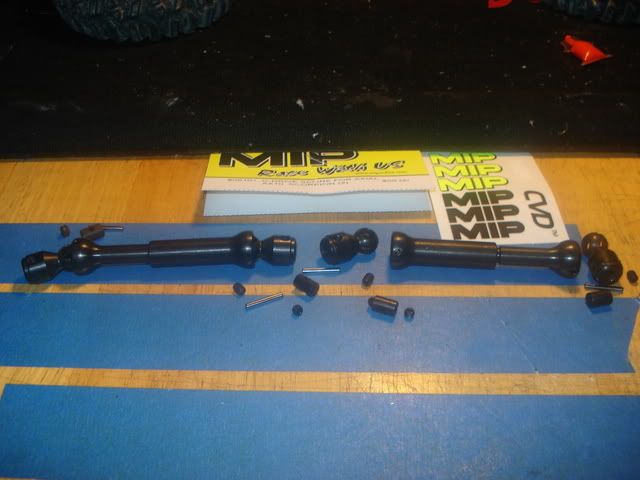 Now comes assembly of the parts. Here it can get a little tricky since they are so small. But with a well lit work ares and towel and or pit mat to catch any dropped parts just take your time and do right once. So here I am adding the supplied grease to the center stud that is the backbone of these CVD shafts. I try and not use to much since it will attract dirt and add to wear and will break down on you. Only upside is you can get parts to rebuild the shafts from MIP. 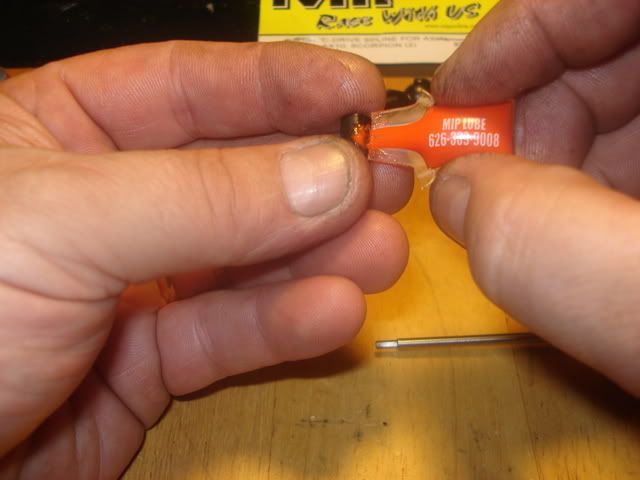 Now I add a drop of BLUE removable thread lock to a brub screw and instal it into the center stud. This will be used to secure the pin that holds the whole thing together. 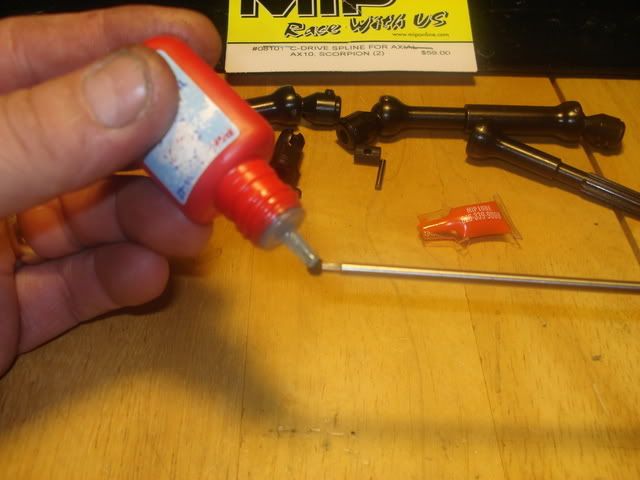 Now insert the grub screw and stud assmbly into the center of the bone swivell. 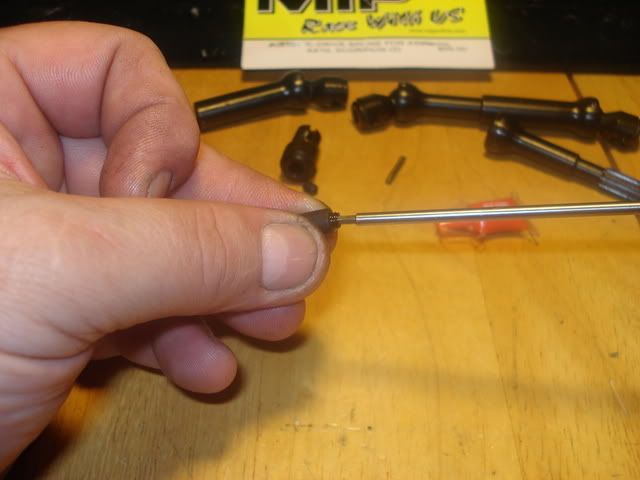 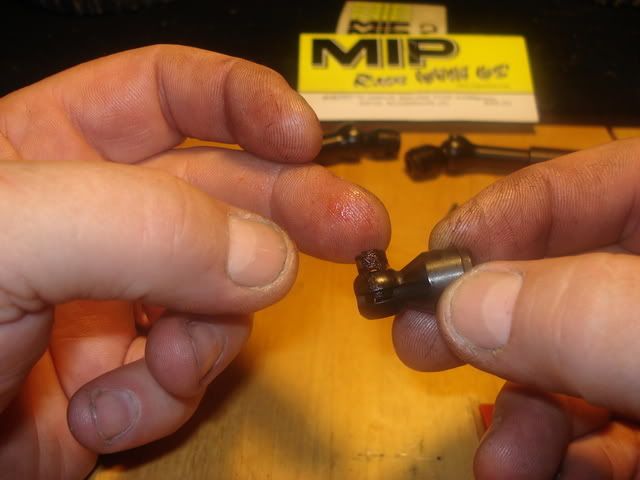 Next insert the pin the holds it all together and secure with the grub screw. 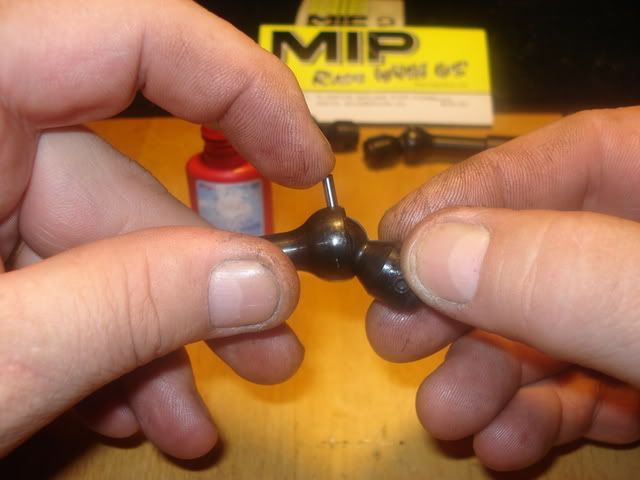 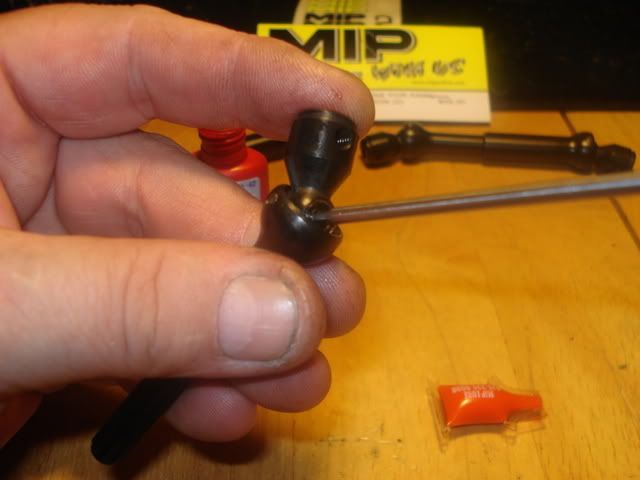 I prefer to add a second grub screw to the oppostite side of the bone to have a second line of defense. Since most of will not have spare grub screw on us while we are out enjoying our rides and you ever try and look for one of those microscopic suckers. No Way!!.So here I have a spare and it is silver insted of black but who cares. 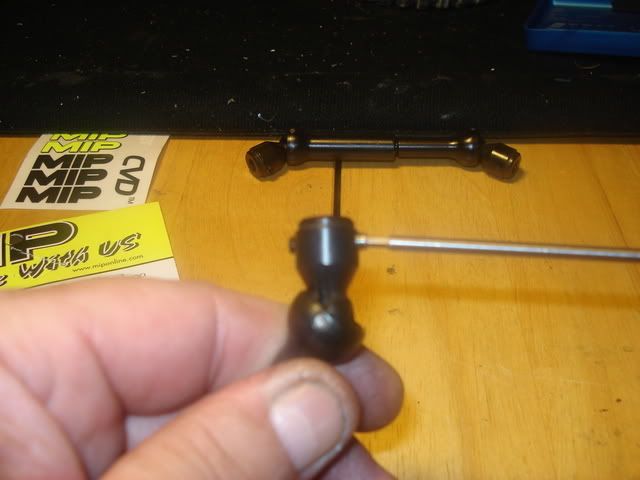 Now here are the finally assemebly all ready to be added to my crawler and boy do they look good. 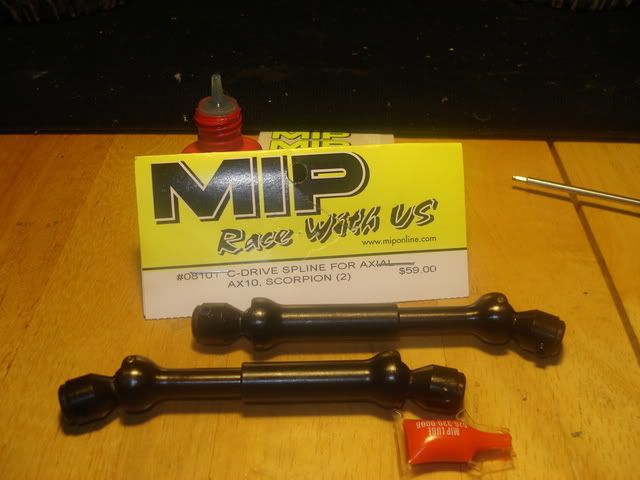 Now comes the installation job and this is pretty sraight forward. Unscrew and remove the old ones and secure the new ones in place.Don't forget to use your thread locker. Just a friendly reminder to take it slow and do the job right once. Unlike me I forgot on one side and had to remove the grubs to add thread locker. So just bolt em on and you will be good to crawl. Here is the attachment point at the axel. 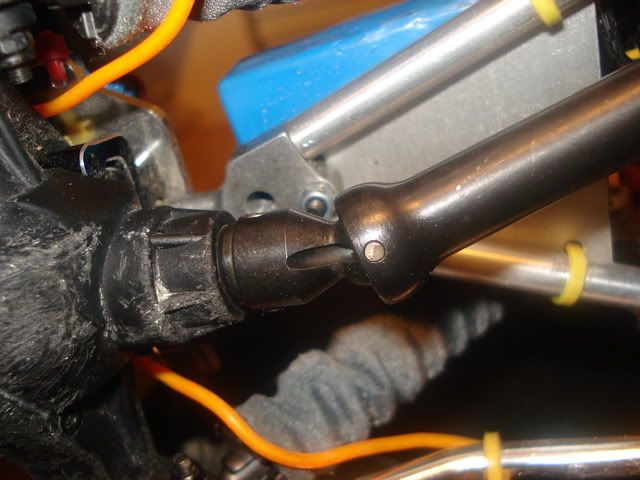 Here is the attachment point at the transmission. 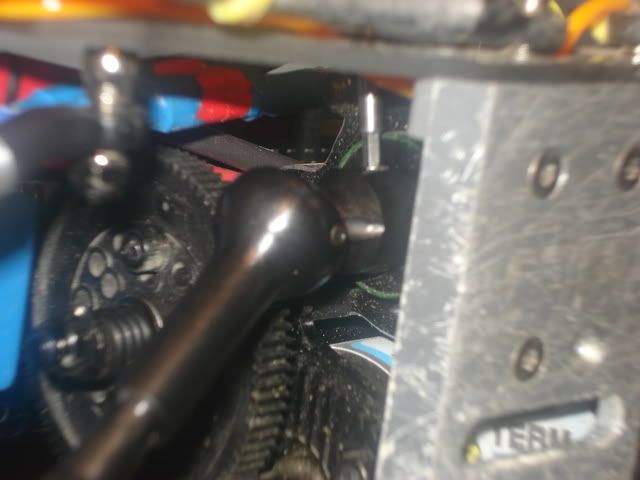 And here is the finished and fully installed set of MIP AX-10 C-Spline center CVD drive shaft assemblies.Bring on the mountains and goodbye mole hills.  And here she is out on her maiden voyage in the rock garden at Oh about 1am in the morning,I like nightcrawling.LOL 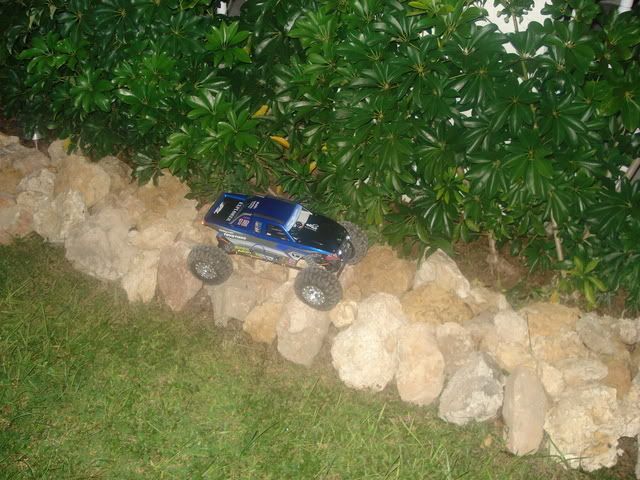 I found some kool Carbon Fiber 2.2 Rock Rings for my rig. I have the Alluminum ones on the outside of the rim and have been thinking of getting another set for the insides of the wheels.I wanted to get rid of the stockers as I think they're a little boring. So I was out on-line shopping the other night and found a guy making Carbon Fiber ones and had to have em'. They don't get as scratched up on the insides and wanted something different. Here are the rings all NIP and not a scratch on em'. 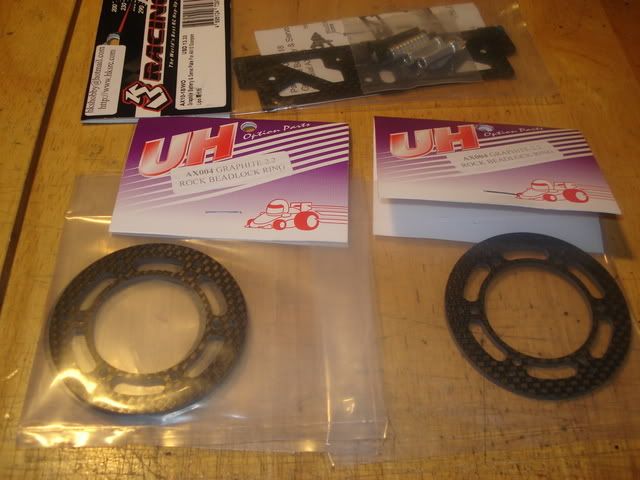 Here is a compairison of the stockers and the replacements. Oh how I love Carbon Fiber,Let me count the ways..... 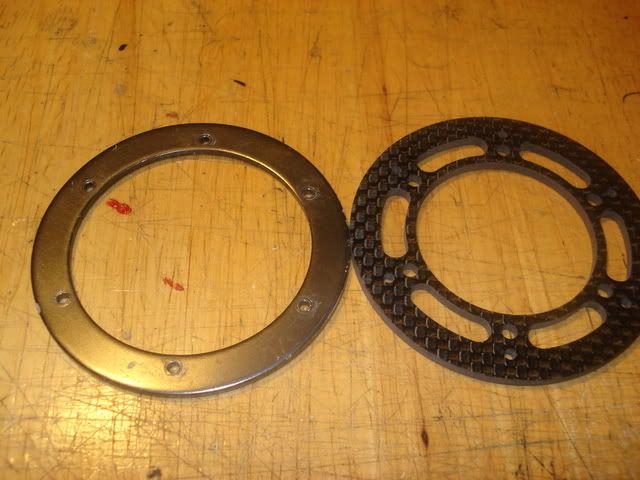 Had to toss in a close up of these puppies. Ruff Ruff. 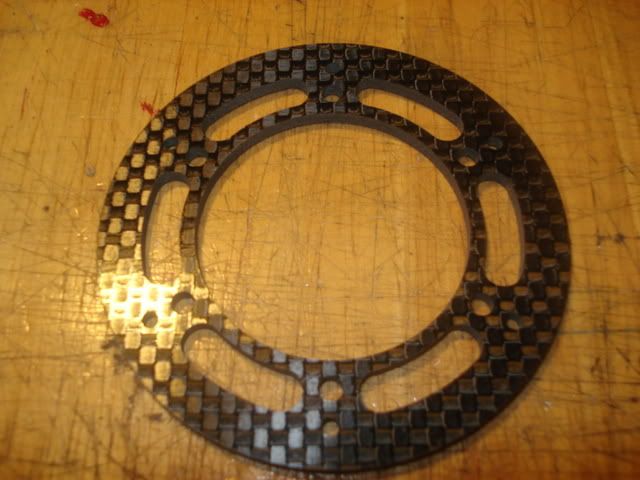 Simple sawp out of removing a few to many screws.LOL and just replace said to many screws. Sore wrist after all 4. Pain never looked so good to me. 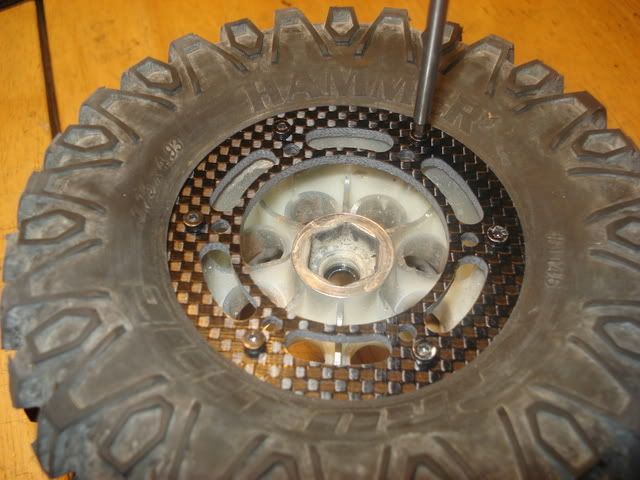 And the finished product of the installed rock rings and I am lovin' every minute of it.... 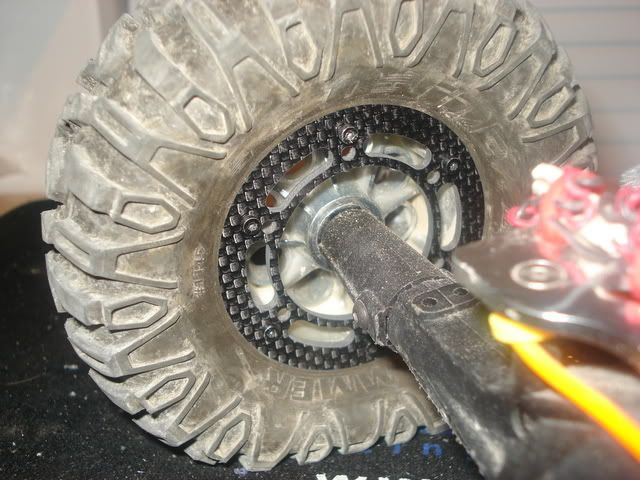 I am adding the 3Racing Carbon Fiber front servo relocator and battery area. It was an EEZZ fit and looks steller to me on the rig. All I had to do was flip the servo over the other direction and it fits like a glove. Here is the kit all ready to be installed. Man I am diggin the new low profile look.  Here are few pics of the old setup. I have been running this alloy setup but now that is about to change. 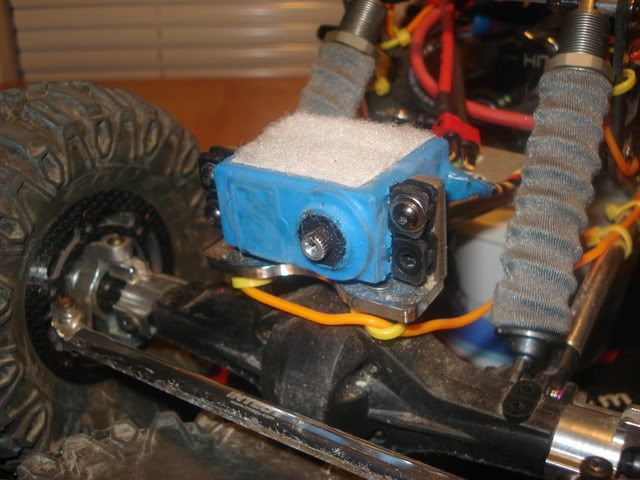 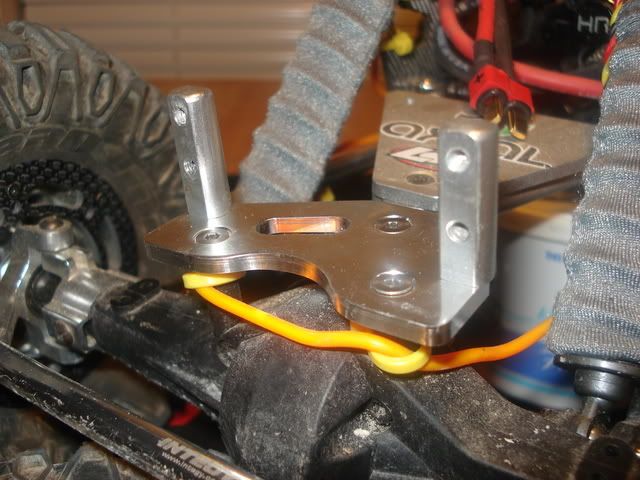 Pretty straight forward fittment. Here are a few pics of the new set up,Enjoy. 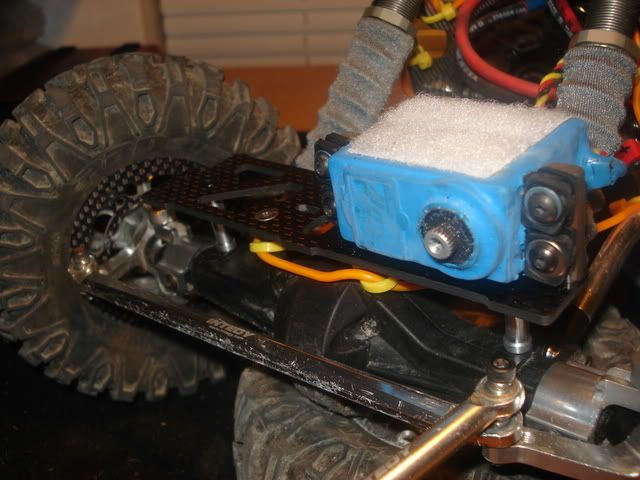 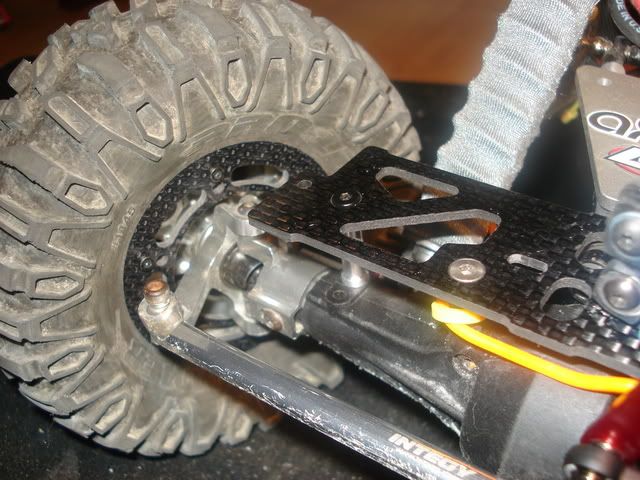 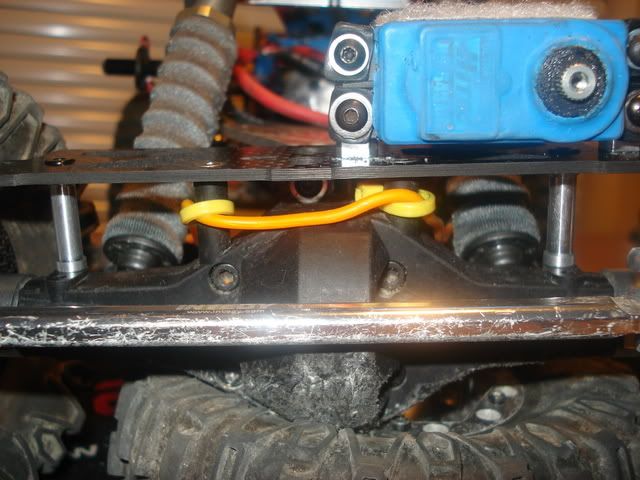 Here is the finished product. 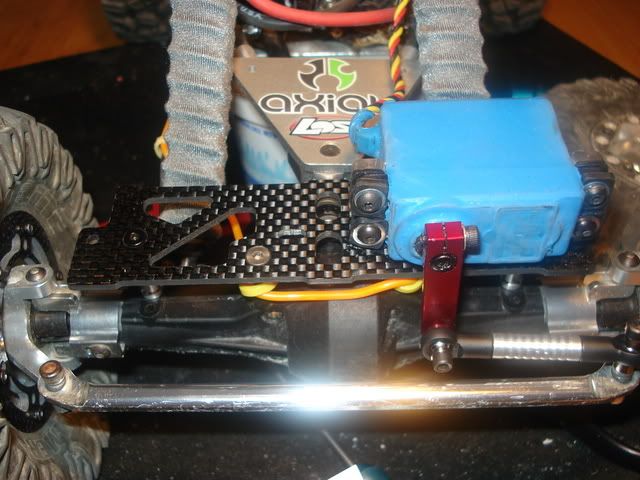 And here is the Losi Grappler body I topped it off with. 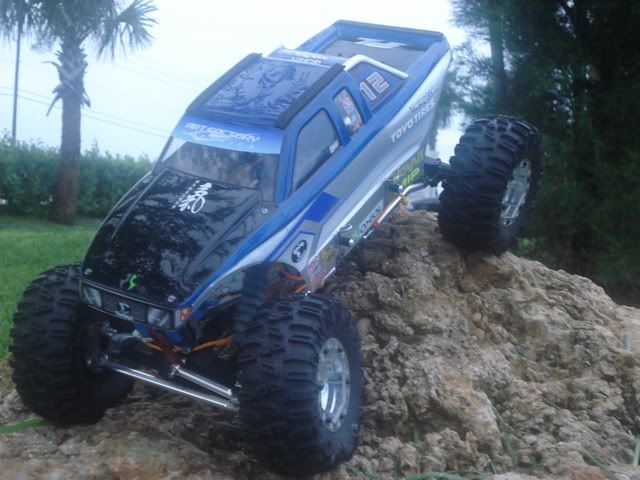  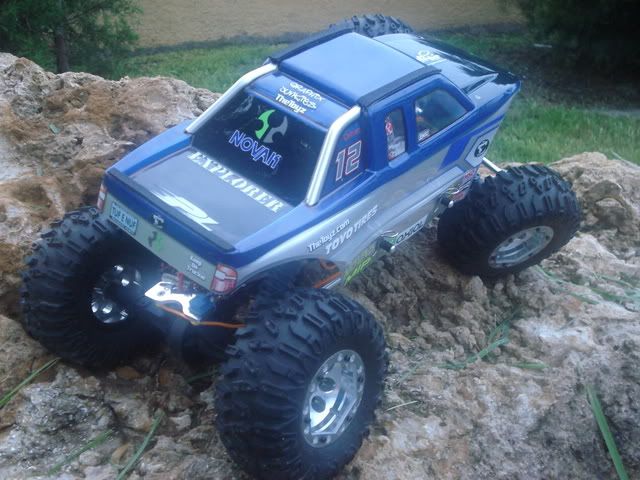 |
|
| |
|
| |


 Linear Mode


