| |
| |||||||
 |
| | LinkBack | Thread Tools | Display Modes |
 02-12-2011, 05:41 PM
| #1 |
| RCC Addict Join Date: Sep 2006 Location: Depew
Posts: 1,551
|
First let me congratulate you on purchasing your Underground Crawlers Viper chassis. This thread is for tips and tricks on the assembly of your new chassis, tuning tips, and modification tricks. Lets take a look at what should be included: 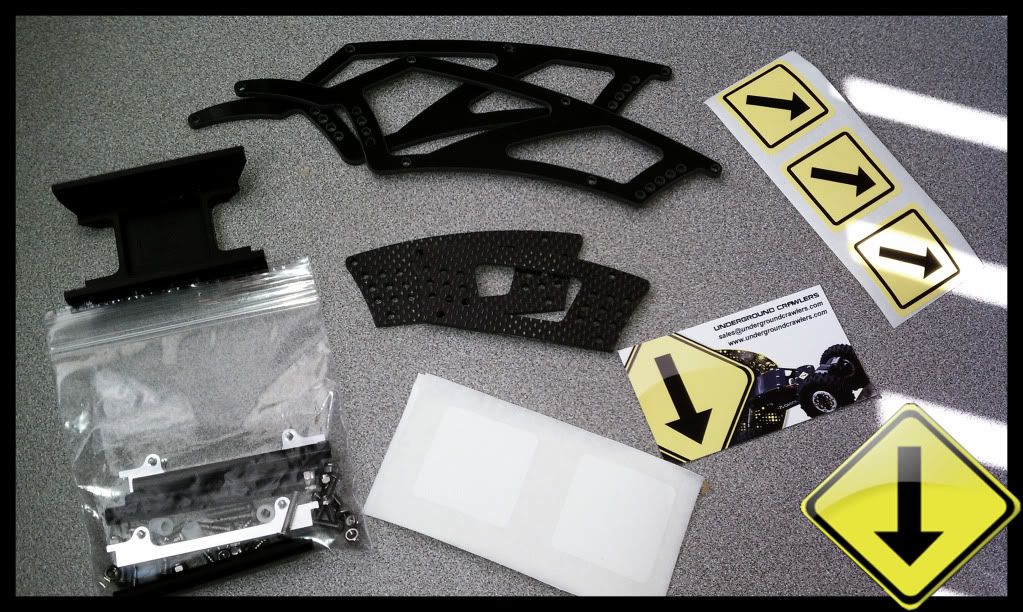 -2 Upper cab panels -2 Lower chassis panels -2 Shock supports -1 Skid -1 Electronics tray -4 White short delrin spacers -4 Black long delrin spacers -8 Long fine thread screws -8 Short fine thread screws -8 Short coarse thread self tapping screws -12 Nuts --------------------------------------------- Step 1) Start by sanding the lower carbon fiber chassis plate edges with 400 grit sand paper and lay down a bead of CA glue. This is done to prevent the carbon fiber from seperating due to normal bashing and moisture in the air. Be careful along the bottom that sits on the skid, because the tolerances are already tight down there. Picture to come at a later date --------------------------------------------- Step 2) Begin by attaching lower side panels to the skid by using the 4 short fine thread screws. The skid is threaded to accept the screws but 4 nuts are provided to secure the pieces in place. Thread the screw all the way in, then thread on the nuts and tighten. Please note the orientation of the upper holes where the cab attaches, so that these are facing the same direction. 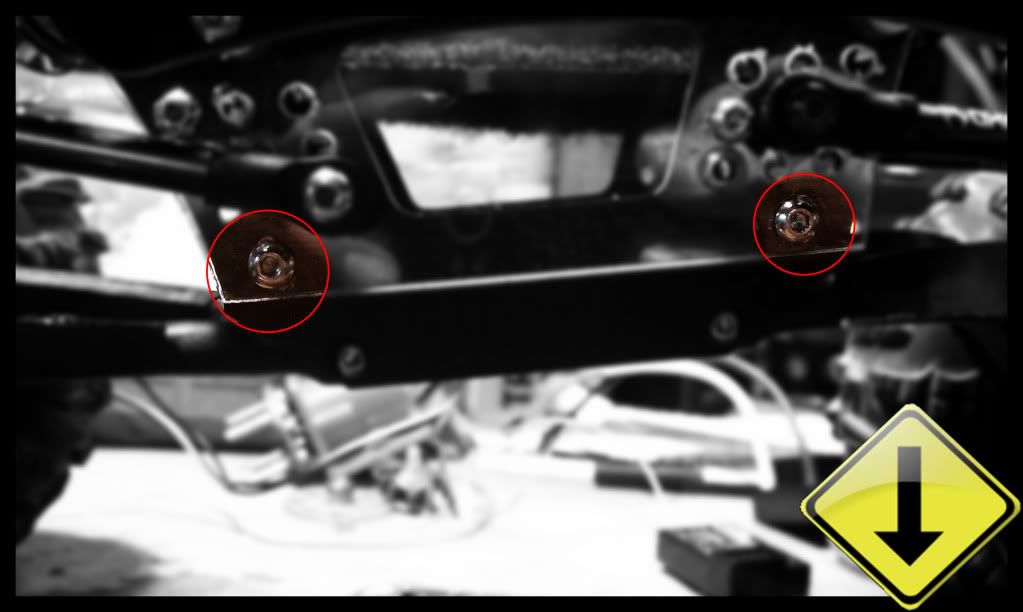  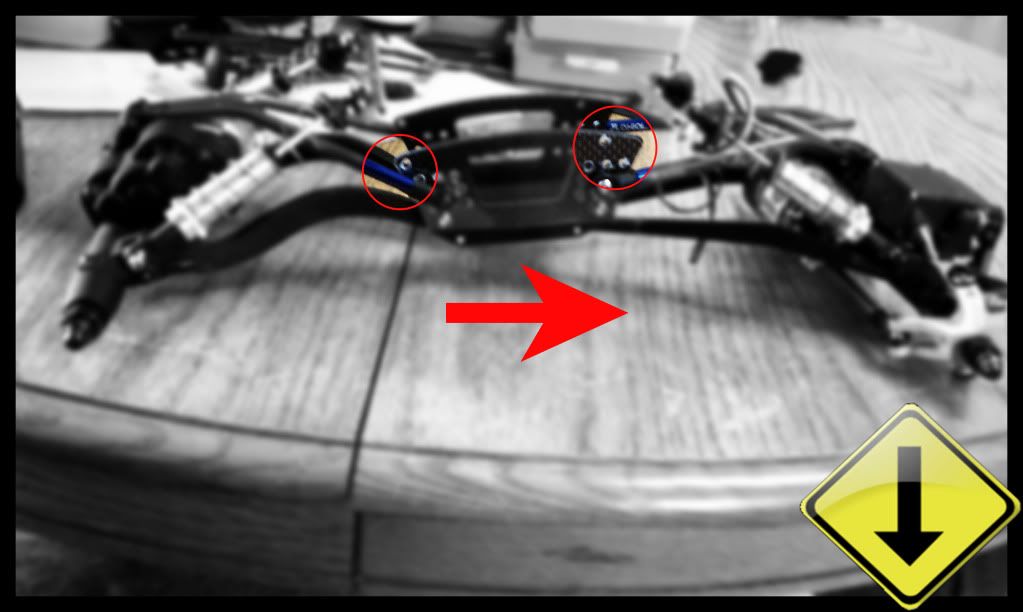 --------------------------------------------- Step 3) Attach the cab side panels to the lower chassis side panels. Use 4 of the long fine thread screws, the 4 short white delrin spacers, and 4 nuts. Slide the screw through the cab panel. Then slide the white delrin spacer over the screw. Proceed to slide assembly through the lower chassis side panels and secure using the nuts. Please note the orientation of the cab on the lower side panels. The hole spaced further back on top of the lower side panel is for the front of the cab. 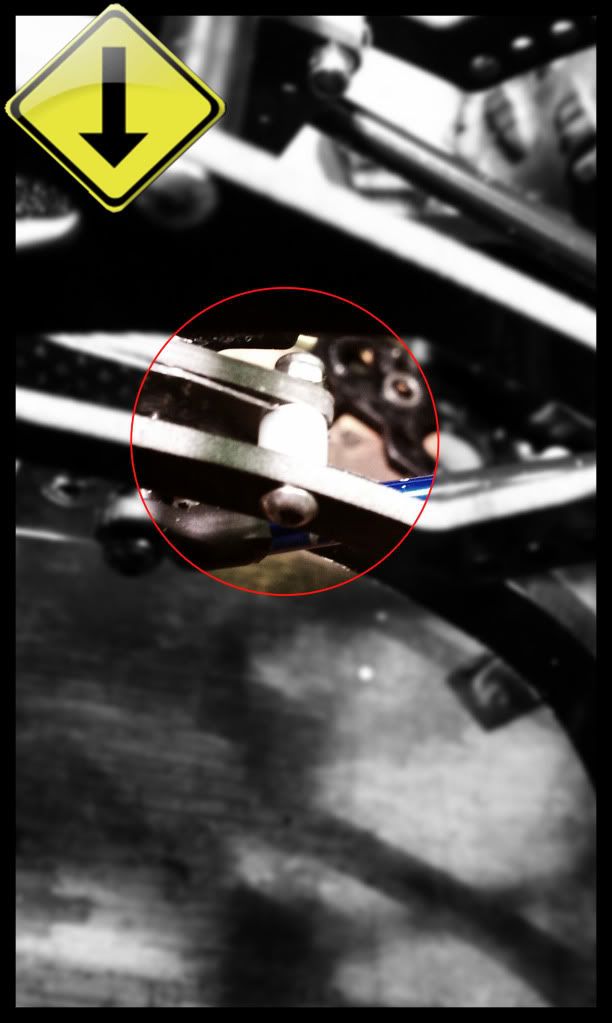 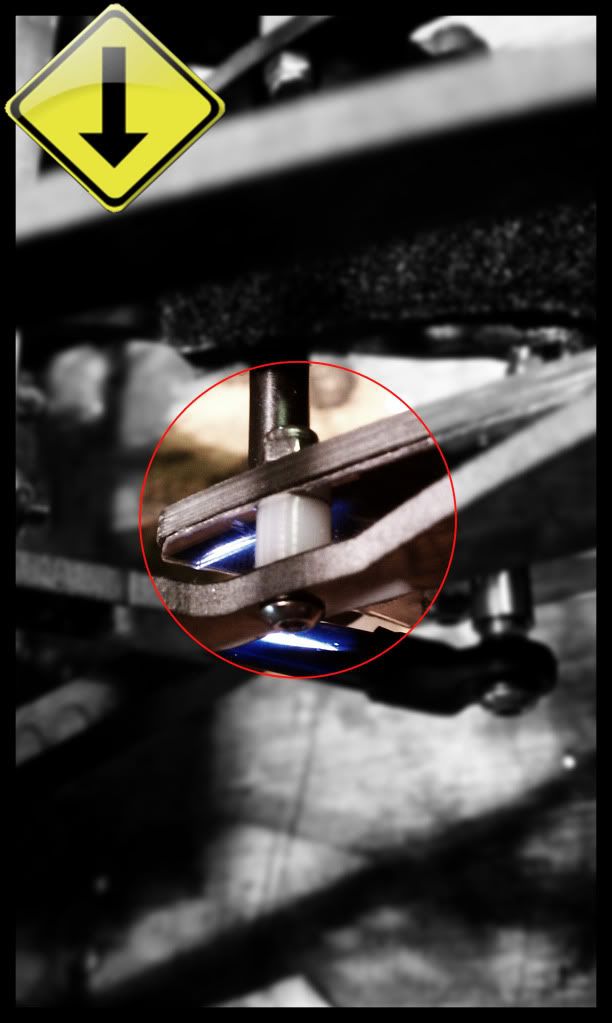 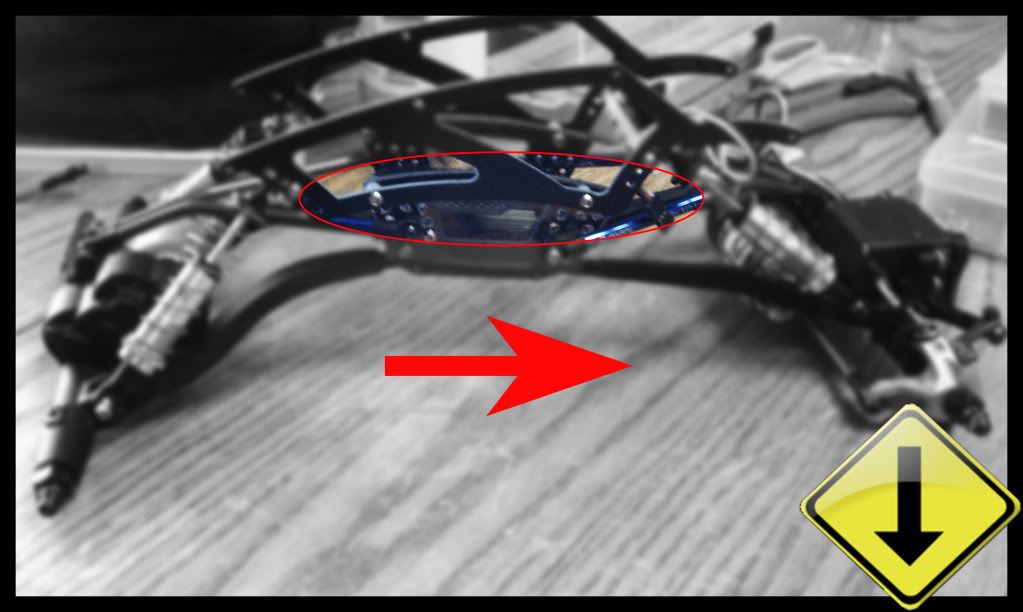 --------------------------------------------- Step 4) Attach the shock braces to the cab using the 4 remaining short fine thread screws. 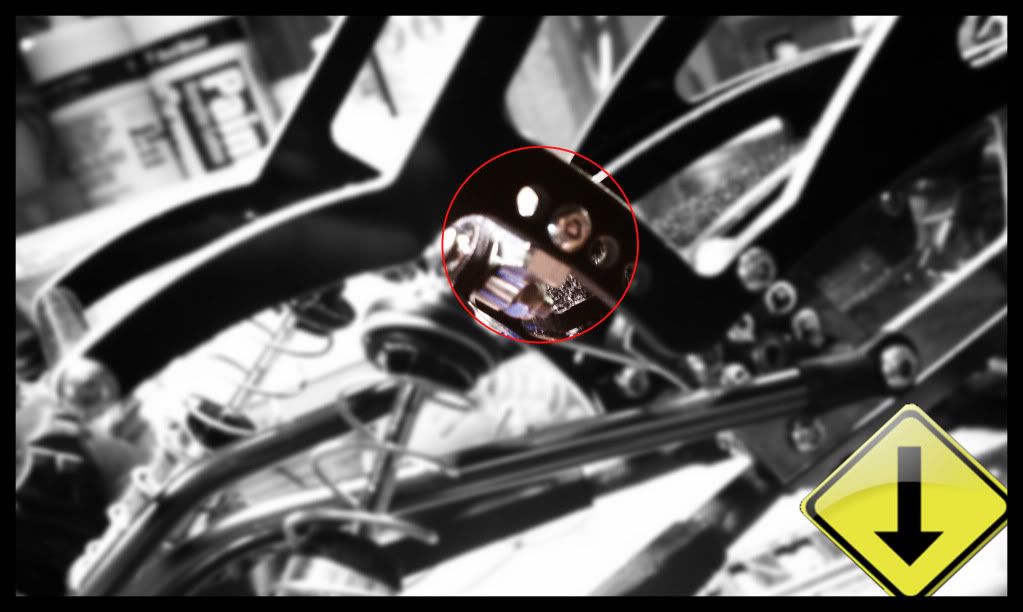 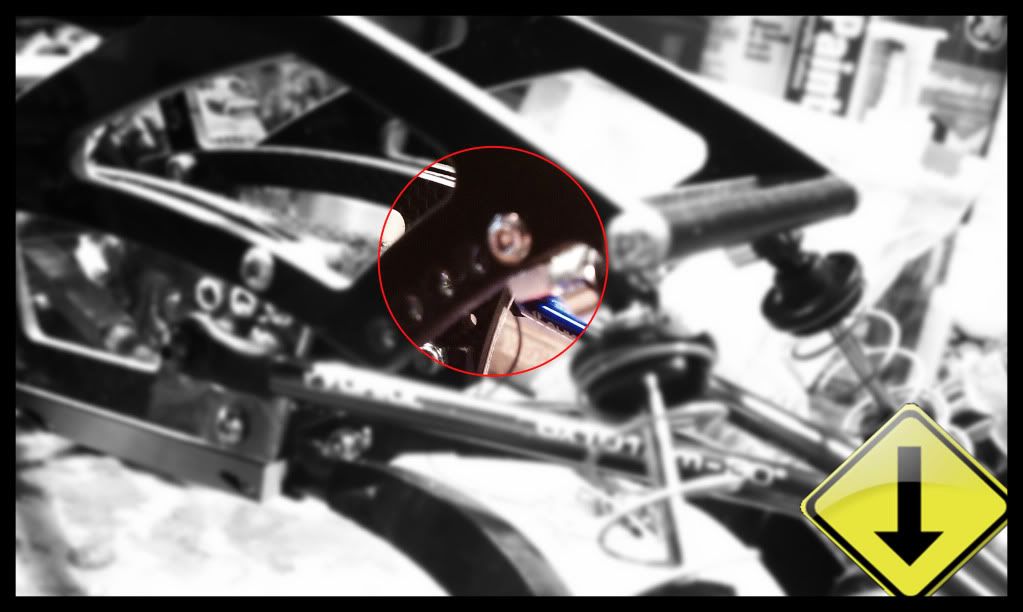 --------------------------------------------- Step 5) Attach the 4 long delrin cab supports to the cab using the 8 coarse thread self tapping screws. *This picture shows the button head screw mod and does not picture the hood support*  --------------------------------------------- Step 6) Attach the lower links and electronics tray using the remaining 4 long fine thread screws and 2 nuts. The electronics tray goes between the front two links and the screws thread into the electronics tray, no need for nuts. In the back, use the 2 nuts. *Electronics tray not shown here* 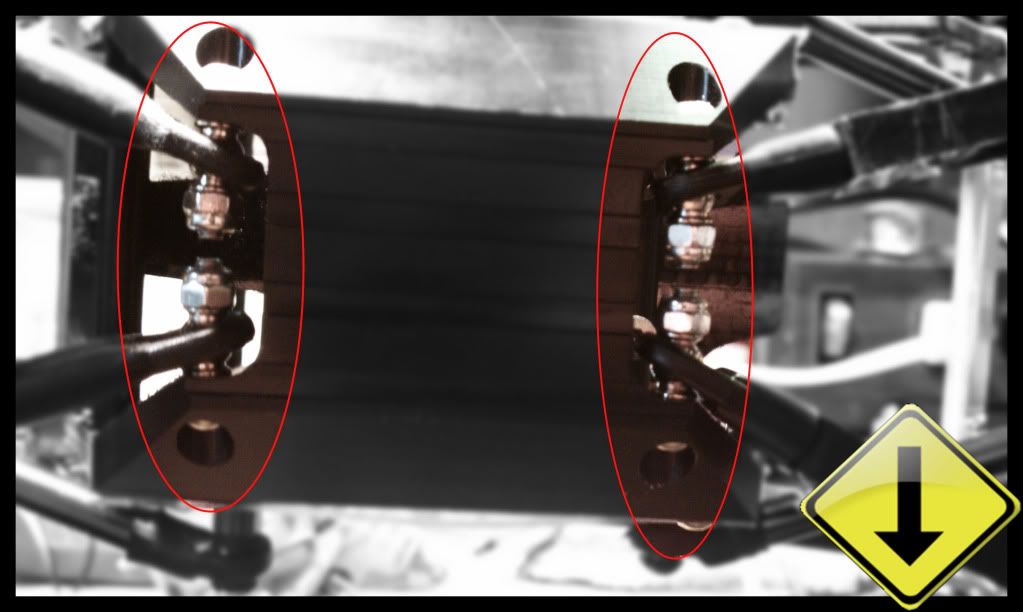 Your chassis is now assembled and ready to crawl! Last edited by articzap; 02-13-2011 at 08:31 PM. |

|  |
| Sponsored Links | |
| | |
|
02-12-2011, 05:42 PM
| #2 |
| RCC Addict Join Date: Sep 2006 Location: Depew
Posts: 1,551
| Tips and tricks: Before building your truck, you should check to see if your lower links will hit on the skid. The skid is cut in a U shape where the links mount. Certain link setups may contact the skid. I had to cut a 45 degree angle on the skid towards the end to allow the links to clear. 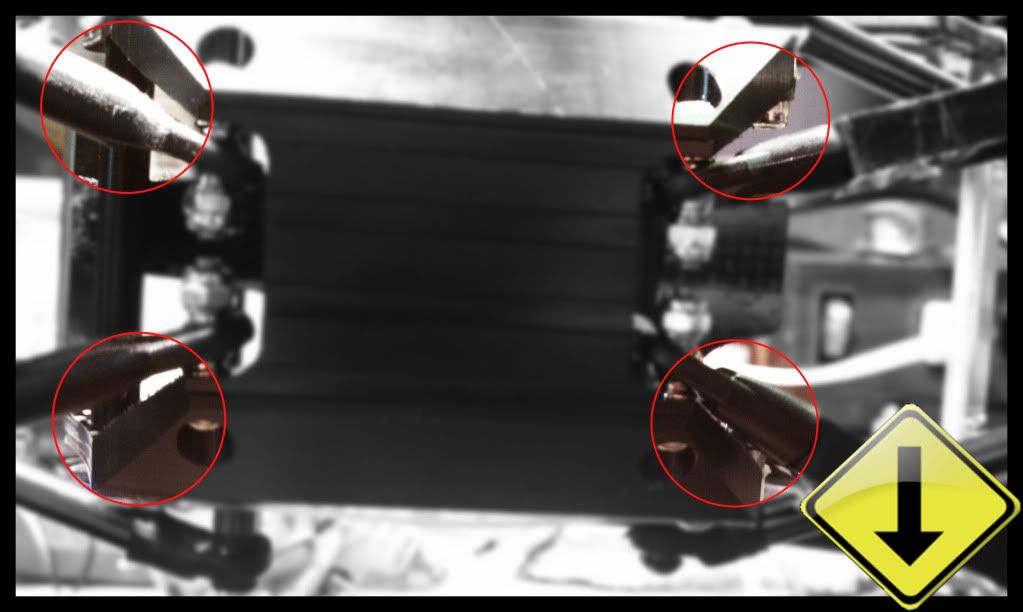 ------------------------------------------ When attaching the upper links, spacers may be needed to prevent the links from hitting the chassis. The size of the spacer will depend on the how far back a mounting hole you choose to use. ------------------------------------------ Although the cab fits the lower chassis in both directions, it will only work in one direction. Please make sure to face the cab in the right direction as described above to prevent headaches. ------------------------------------------ Take the upper long black delrin rods and tap them for 3mm screws. Then use 3mm fine thread button head screws. Hex head screws are much easier to work with then a philps and are less prone to stripping. ------------------------------------------ The way the shocks are mounted, they seem to be slightly more inboard then the stock chassis. When you flex the suspension, there is a chance the motor can make contact with the shock/spring. This could be very dangerous. As you can see I had to space the rear shocks out on the axle to prevent them from getting into the motor. This may very pending the length of your motor. 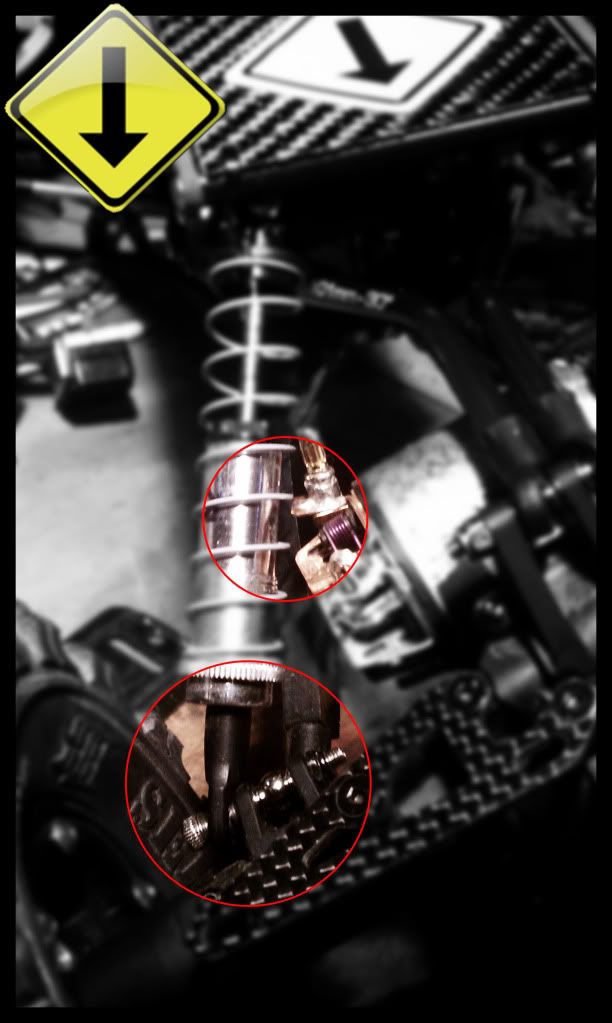 Last edited by articzap; 02-13-2011 at 08:29 PM. |
|
| |
|
02-13-2011, 01:37 AM
| #3 |
| Rock Crawler Join Date: Jan 2009 Location: crawlorado
Posts: 555
|
nice write up  Im sure it will help a bunch of the guys build up their trucks Im sure it will help a bunch of the guys build up their trucks
|
|
| |
|
02-13-2011, 04:37 AM
| #4 |
| Pebble Pounder Join Date: Nov 2007 Location: Alice Springs/Australia
Posts: 131
|
Great write up when can we buy them!!!!!!!!!!!!!!
|
|
| |
|
02-13-2011, 09:01 AM
| #5 |
| Rock Crawler Join Date: Jan 2009 Location: crawlorado
Posts: 555
|
look in the giveaway thread.......we are taking orders |
|
| |
|
02-13-2011, 09:29 AM
| #6 |
| Quarry Creeper  Join Date: Dec 2010 Location: Princeton Mass
Posts: 272
|
What upper and lower links are you using for this set up.
|
|
| |
|
02-13-2011, 09:36 AM
| #7 | |
| RCC Addict Join Date: Sep 2006 Location: Depew
Posts: 1,551
| Quote:
Crawler innovations low clearance front links T1e high clearance rear links Axial 6x101mm 30* bent uppers | |
|
| |
|
02-13-2011, 01:33 PM
| #8 |
| RCC Addict Join Date: Sep 2006 Location: Depew
Posts: 1,551
|
Added another helpful tip with rear shock possibly contacting the motor on serve flex.
|
|
| |
|
02-13-2011, 01:38 PM
| #9 |
| I wanna be Dave Join Date: Dec 2009 Location: Lady Lake, Fl
Posts: 2,128
|
Nice write up. |
|
| |
|
02-13-2011, 04:28 PM
| #10 |
| RCC Addict Join Date: Nov 2008 Location: I don't think theres rocks in Florida
Posts: 1,228
|
Clear and conscise directions, I followed them and had no problems. The pictures were very helpful too. I took advantage of the tips and tricks; you were very thorough.  |
|
| |
|
02-13-2011, 04:32 PM
| #11 |
| RCC Addict Join Date: Sep 2006 Location: Depew
Posts: 1,551
|
Thanks! Glad your build went smoothly. Those pictures of the skid really help to show where you cut. Thanks!!!
|
|
| |
|
02-13-2011, 06:28 PM
| #12 |
| I wanna be Dave Join Date: Oct 2007 Location: Scumrise, Flooriduh
Posts: 5,181
|
Awesome writeup articzap! Thanks for doing that. One thing I may have missed but did not see mentioned it to prep the edges on the carbon fiber lowers. You should sand the sharp and leading edges a bit with 400 grit, then run a CA bead around all sanded surfaces to seal it. This will help prevent any peeling from rock rash or moisture from working it's way in through the raw edges. |
|
| |
|
02-13-2011, 07:20 PM
| #13 |
| RCC Addict Join Date: Sep 2006 Location: Depew
Posts: 1,551
|
Crap! Good call. Should I add that to main instructions or tips and tricks? I'd assume tips and tricks. I'll tear mine down after Motorama and do that.
|
|
| |
|
02-13-2011, 08:27 PM
| #14 | |
| I wanna be Dave Join Date: Oct 2007 Location: Scumrise, Flooriduh
Posts: 5,181
| Quote:
Add it to the build portion as step 1 please | |
|
| |
|
02-13-2011, 08:29 PM
| #15 | |
| RCC Addict Join Date: Sep 2006 Location: Depew
Posts: 1,551
| Quote:
| |
|
| |
|
02-24-2011, 01:26 PM
| #16 |
| RCC Addict Join Date: Sep 2006 Location: Depew
Posts: 1,551
|
Bump for people starting to receive these!!
|
|
| |
|
02-24-2011, 03:20 PM
| #17 | |
| Quarry Creeper Join Date: Aug 2008 Location: meriden
Posts: 341
| Quote:
| |
|
| |
|
02-24-2011, 03:40 PM
| #18 |
| RCC Addict Join Date: Sep 2006 Location: Depew
Posts: 1,551
|
I need to change it around. Right now, Losi angled rod end in front to axle with jato in for chassis side. The rear is both revo. I'm going to switch chassis side around so it Losi, revo, jato, revo. Hope that makes sense.
|
|
| |
|
02-24-2011, 06:04 PM
| #19 | |
| RCC Addict Join Date: Jul 2009 Location: Shreveport, LA
Posts: 1,005
| Quote:
| |
|
| |
|
02-24-2011, 06:08 PM
| #20 | |
| I wanna be Dave Join Date: Dec 2009 Location: .
Posts: 7,967
| Quote:
| |
|
| |
|
| |


 Linear Mode


