| |
 01-30-2007, 07:38 PM
| #1 |
| Pebble Pounder Join Date: Apr 2006 Location: grand rapids
Posts: 122
|
Here is a cheap, easy to build, and effective chassis for your radio shack truck. The pictures arn't great, but I think you will get the idea. I have only driven it for about 3 minutes in the basement, but it seems to work great. The electronics are only temporarily mounted for testing, I need to make some body posts, and I need to finish the body modifications. The pics where it is balanced on the side are with the battery installed. Parts required: Suspension lockouts, 5/32 rod, 5/32 lock collars, washers, longer driveshaft. 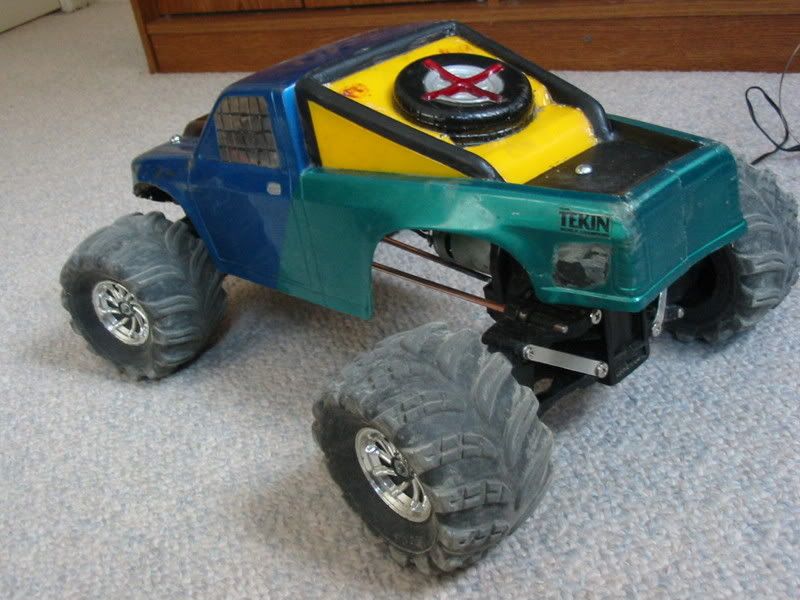 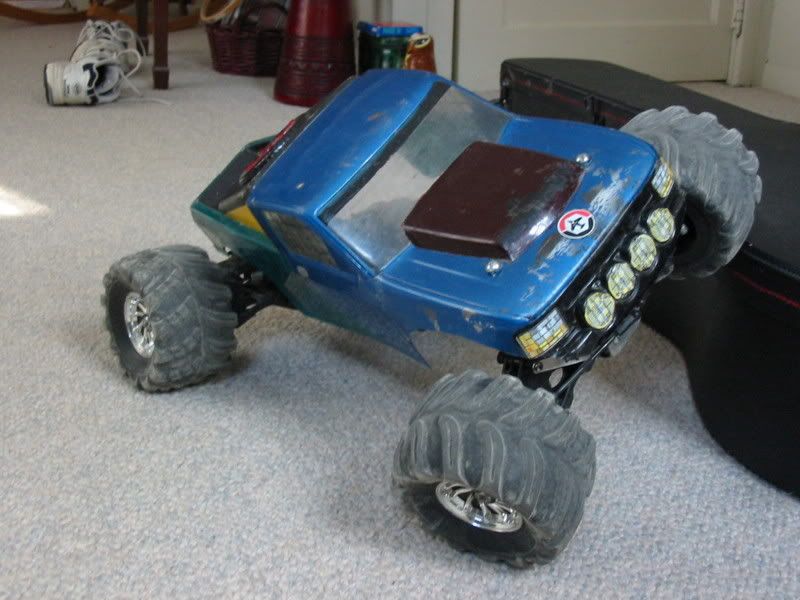 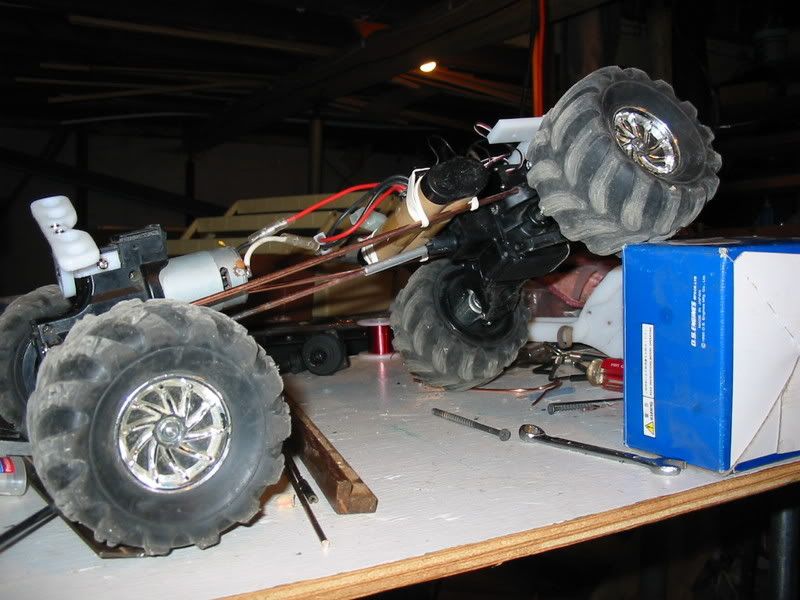  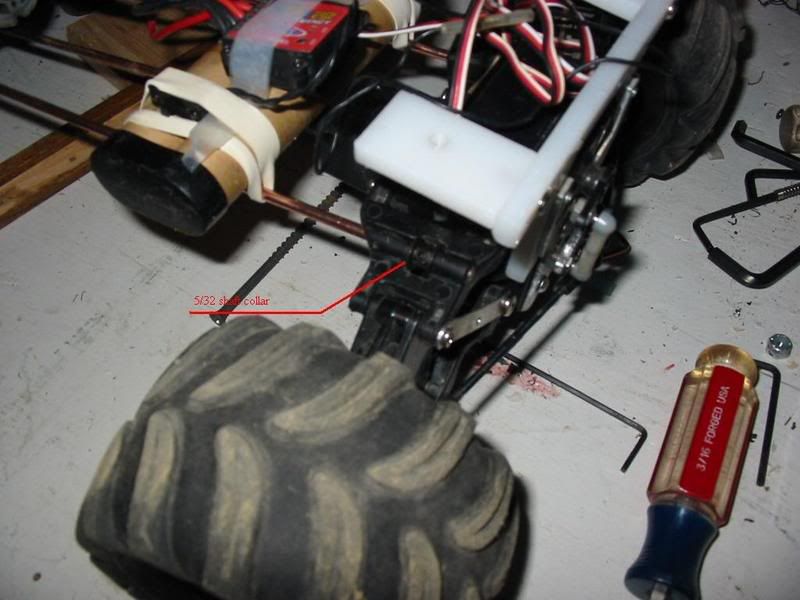 Here is a lower A-arm mod I did to increase ground clearance. This is a picture of the back with one side done. I gained 3/8" clearance at the arrows. I did the same in the front. It will now clear a 2x6 lengthwise, just barely. 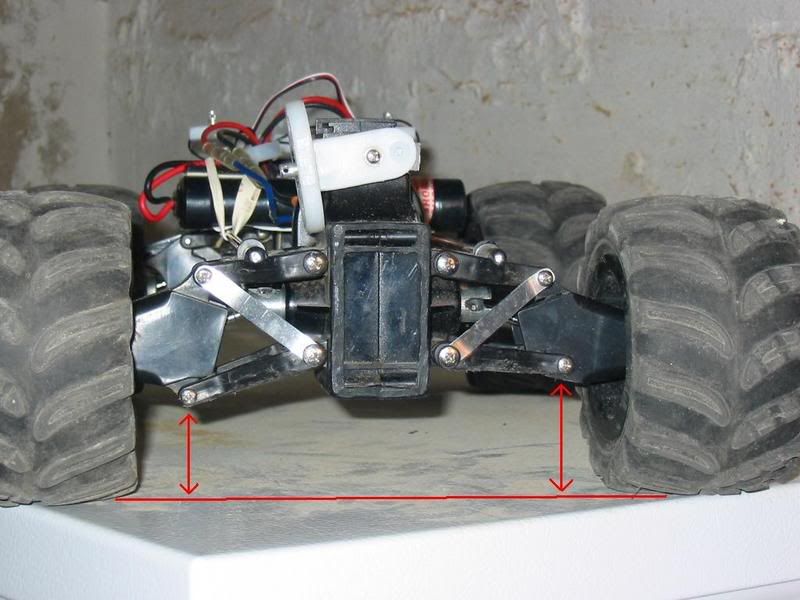 I also made a third bar to help control rear wheel hop. It works great, but I need to replace it with something not so crude. It is the threaded rod that goes from just above the motor, to the front body mount. I may try to triangulate it a little more too. 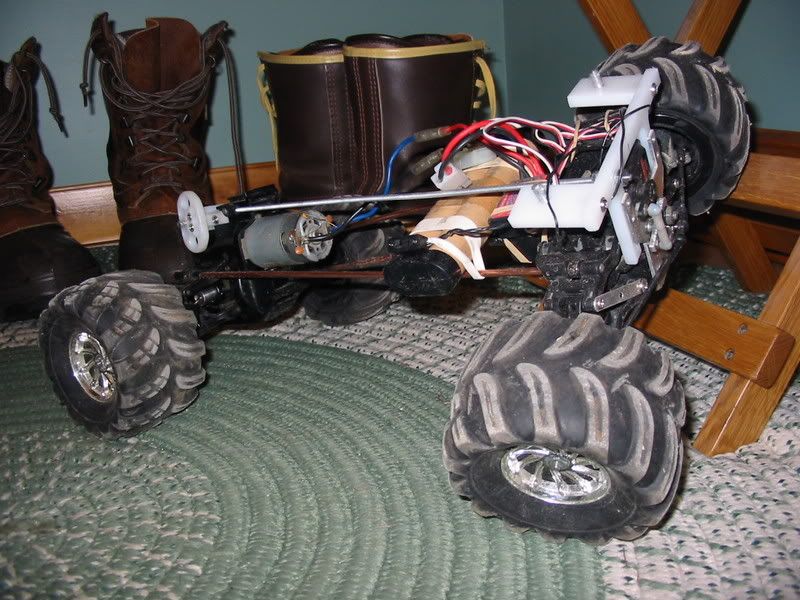 Last edited by DumpsterRC; 02-27-2007 at 11:08 AM. |

|  |
| Sponsored Links | |
| | |
|
01-31-2007, 06:41 PM
| #2 |
| Newbie Join Date: Nov 2006 Location: Central Ontario
Posts: 8
|
wow man that is amazing i have that same truck and want to do something to it do u have like a step by step guide er something? to do that, it is cool!  |
|
| |
|
01-31-2007, 07:21 PM
| #3 |
| Quarry Creeper  Join Date: Jan 2007 Location: wilkes-barre
Posts: 313
|
yeah thanks man.. I have the f350 ratshacker... I put it aside for abit when I started on a micro crawler.. now I have a tuber project.. but I see these pics and think I will finish the 350 quick first.. nice work |
|
| |
|
01-31-2007, 07:31 PM
| #4 |
| Newbie Join Date: Nov 2006 Location: Central Ontario
Posts: 8
|
Pics would be cool but dont rush stuff! |
|
| |
|
01-31-2007, 08:04 PM
| #5 |
| Pebble Pounder Join Date: Apr 2006 Location: grand rapids
Posts: 122
|
I don't know about a step by step guide. This probably will only work if you have hobby grade electronics. That is the most difficult part of this conversion. If you can figure that out the rest is easy. The chassis is this. Lock out the independent suspension. If you need better pictures of what I have for lock outs just ask. Remove the shocks/shock mounts. The bottom shock mounts should be held in place with pins that will need to be driven out of the A-arms with a hammer and punch. Don't break the A-arms. I found that 5/32 rod was the perfect diameter to fit in the holes that the pins were driven out of. I was going to use piano wire, but the store in town that carries it was out of stock and not planning on restocking soon. I am just using 5/32" oxy/acetlyne welding rod. I just have steel, ss would probably be better. I bought four 5/32" lock collars from Tower Hobbies. Push the rod through the holes in the A-arms. While pushing the rod throuth the A-arms, line up the lock collars where the bottom shock mount was. I shimmed each lock collar with two #10 flat washers. You will probably want to stretch the wheel base so you will need to lengthen the driveshaft. My wheelbase now is about 12 1/8". You may also have a problem with the stock driveshaft binding. This is because the chassis mod clocks the front axle, and changes the pinion angle. I silver soldered an HPI MT2 tranny drive cup onto my front pinion, and made a new driveshaft. The back end of the driveshaft is just flatened rod like the original. The front of the driveshaft is half of a MT2 dogbone. They are spliced with a roll pin. I haven't really given it a good beating yet, so I am unsure of how the driveshaft will hold up. I have the front body mount solid, and made a pivoting mount for the rear. I dove tailed the body for better tire clearance in the rear without jacking the body up or deleting too much of it. As with most crawlers. It will probably look different in another month anyway. Of course this was inspired by the BMVII TLT chassis. I hope Toyofast\ RCRockGear isn't offended that his/their idea was used on a crappy radio shack. |
|
| |
|
02-10-2007, 10:47 AM
| #6 |
| Pebble Pounder Join Date: Apr 2006 Location: grand rapids
Posts: 122
|
I just updated the pictures at the top. Still a little fuzzy, but the lighting is better.
|
|
| |
|
02-12-2007, 09:18 AM
| #7 |
| Pebble Pounder Join Date: Jan 2007 Location: Washougal
Posts: 112
|
Nice work!
|
|
| |
|
02-27-2007, 11:11 AM
| #8 |
| Pebble Pounder Join Date: Apr 2006 Location: grand rapids
Posts: 122
|
I made some spools/outdrives. I kept having problems stripping out the cheesy three-piece stock outdrives. I also replaced the plastic bushings with bronze. There isn't room for bearings and the spools. 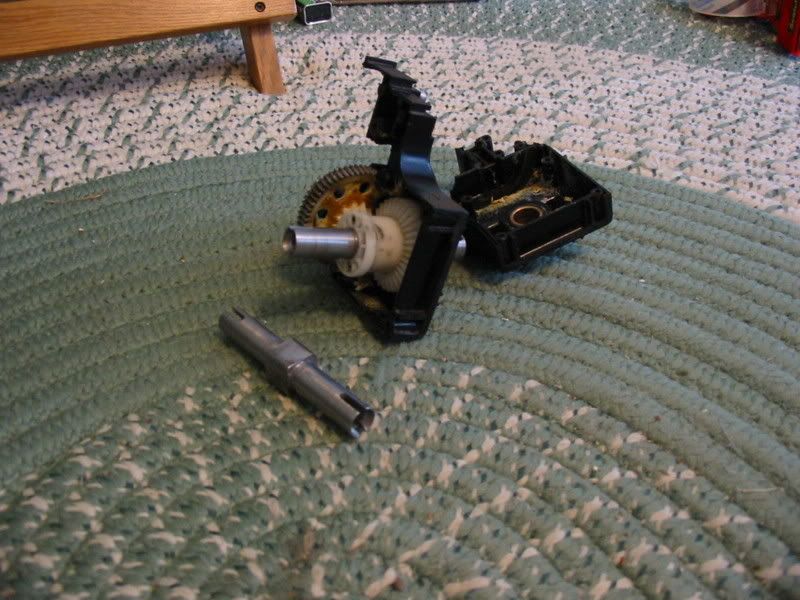 |
|
| |
|
02-27-2007, 06:58 PM
| #9 |
| Newbie Join Date: Nov 2006 Location: Central Ontario
Posts: 8
|
how did u make those spools?
|
|
| |
|
02-27-2007, 07:27 PM
| #10 |
| Pebble Pounder Join Date: Apr 2006 Location: grand rapids
Posts: 122
|
It is a piece of 5/8" square stock. I turned it down to 1/2" , and bored it out on the lathe. Slotted the outdrives on the mill. They probably could be made with just a piece of 1/2" shaft. Use some roll pins through the shaft to engage the diff housing instead of the square. If you are determined and good with hand tools, it could probably be done other ways. |
|
| |
|
03-03-2007, 08:31 PM
| #11 |
| Pebble Pounder Join Date: Dec 2006 Location: wood lands of no were to important
Posts: 120
|
i biult this outta the same axles. 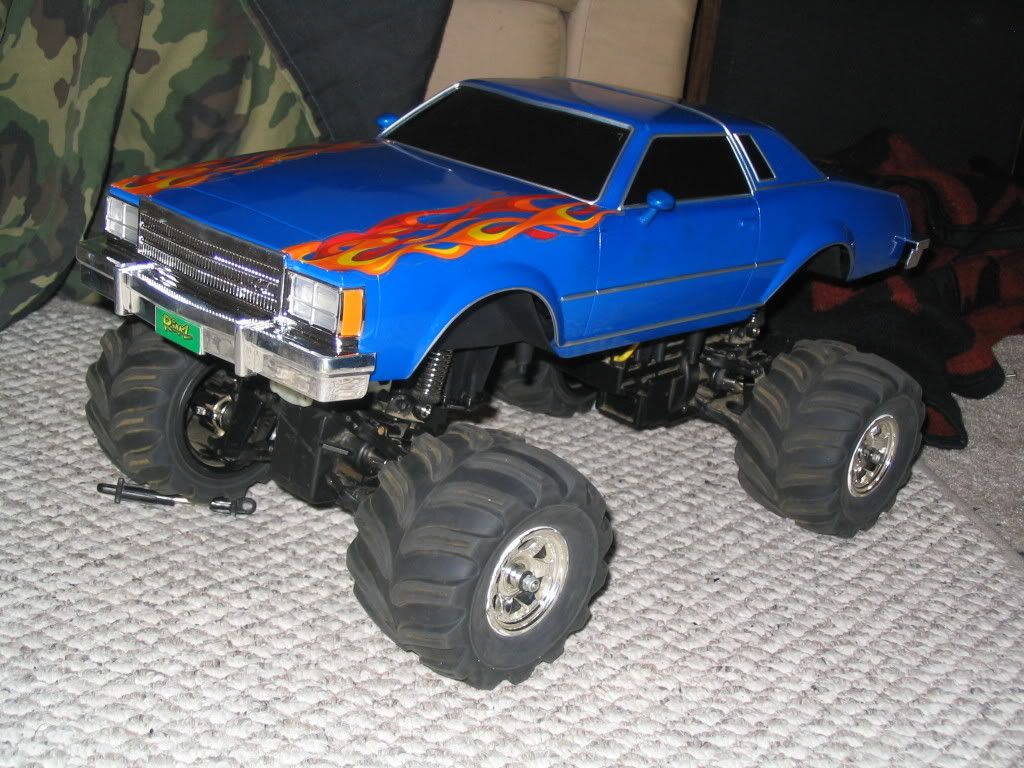 |
|
| |
|
05-26-2007, 10:49 AM
| #12 |
| Pebble Pounder Join Date: Apr 2006 Location: grand rapids
Posts: 122
|
Here are the latest mods. Masher 2000s, new body mounts, more body trimming, 55t lathe, new servo mount/electronics mount, redid the funky steering, TowerPro servo, dropped from a 9 to 7 tooth pinion. 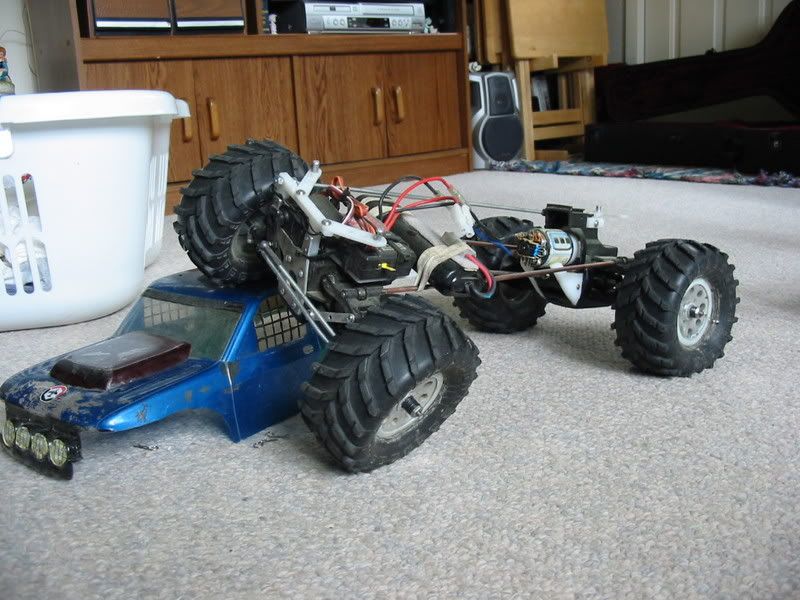  The tire change was a huge improvement. More clearance, better traction, better approach/depart angles, narrowed the track width from 12" to 10.5" front 10.75" rear. Last edited by DumpsterRC; 05-26-2007 at 10:56 AM. |
|
| |
|
05-27-2007, 06:22 PM
| #13 |
| Pebble Pounder Join Date: Nov 2006 Location: Rye Brook, NY
Posts: 176
|
so how does it preform?
|
|
| |
|
05-27-2007, 07:16 PM
| #14 |
| Pebble Pounder Join Date: Apr 2006 Location: grand rapids
Posts: 122
|
It does ok I suppose. It's kind of hard to judge when I haven't ran it with any real crawlers. If you have experience with the Radio Shack trucks, you know they are pretty lame stock. This is infinently better than stock. From things I have read, and pictures/videos I have seen on this forum, it probably crawls as good as a basic TLT with similar Tire/motor combo (probably not much competition for a well built comp. 2.2). The problem is; if you break it, you make it. Stock parts are pretty weak, and it really doesn't make sense to try to replace them. 1.If you can get parts they typically come as an assembly. 2. When you get them, they are still stock parts.
|
|
| |
|
03-03-2009, 10:40 PM
| #15 |
| Newbie Join Date: Mar 2009 Location: SLC
Posts: 1
|
DumpsterRC, how tough was it to change the pinion gear on the stock motor? (Both swapping the gear, and meshing the new gear to the existing spur.) I'd like to use the stock electronics and motor on my truck, but seriously need to lower the gear ratio. This truck is quite fast on smooth surfaces, but really drags on grass and dirt. I want this thing to drive like a TRUCK!
|
|
| |
 |
| |


 Linear Mode


