| |
| |||||||
 |
| | LinkBack | Thread Tools | Display Modes |
 02-07-2012, 10:58 PM
| #1 |
| Pebble Pounder Join Date: Jan 2012 Location: middle earth
Posts: 116
|
After doing tons of research and being inspired by houps R1 build I got the ball rollin and ordered the redcat rs10xt with plans of doing a R1 conversion. I got the redcat in a few days ago and ran about 4 packs through it waiting on parts. The thing crawls crazy good but I had other thoughts on my mind as far as what I was going to upgrade. I saw houps build and knew that was the direction I wanted to go but I also wanted to make it as lcg as possible so I ordered the chassis sides and hardware from rcrun.com which is crazy fast with their shipping and I highly reccomend them being a US dealer. I also knew that I wanted a skid and hopefully a full skid at that...so I started with a piece of stainless steel from a leftover piece from a f150 stainless kit...its the stainless rocker panels that stick on the bottom rockers. After many hours of work I was able to get what I was aiming for.  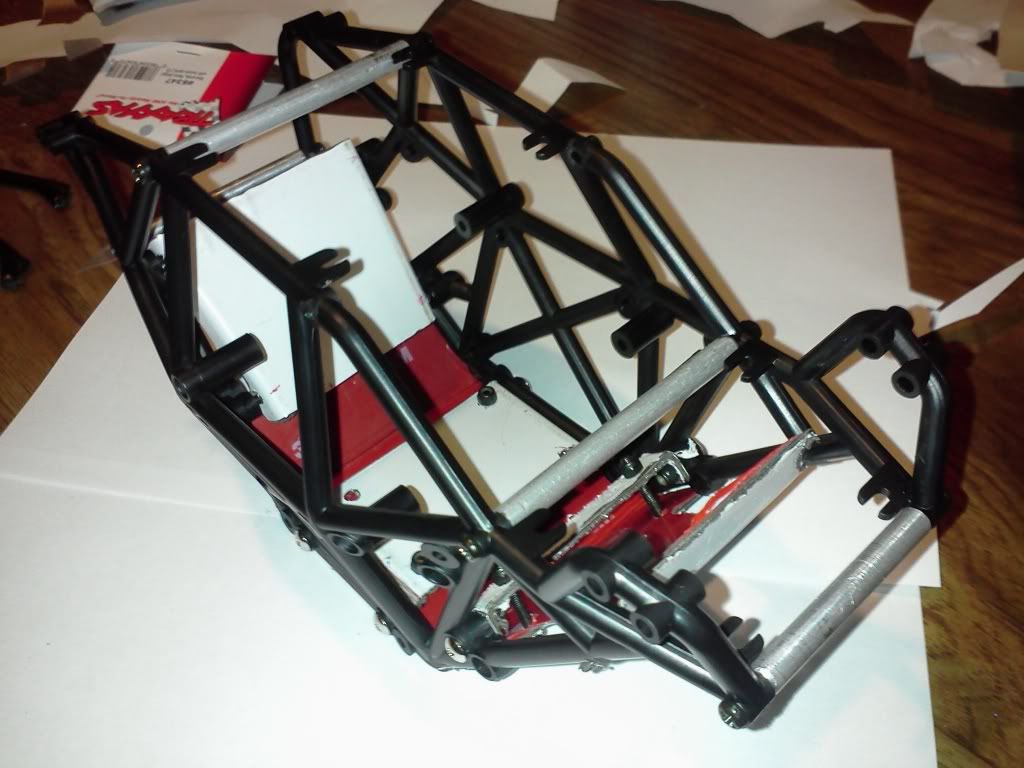 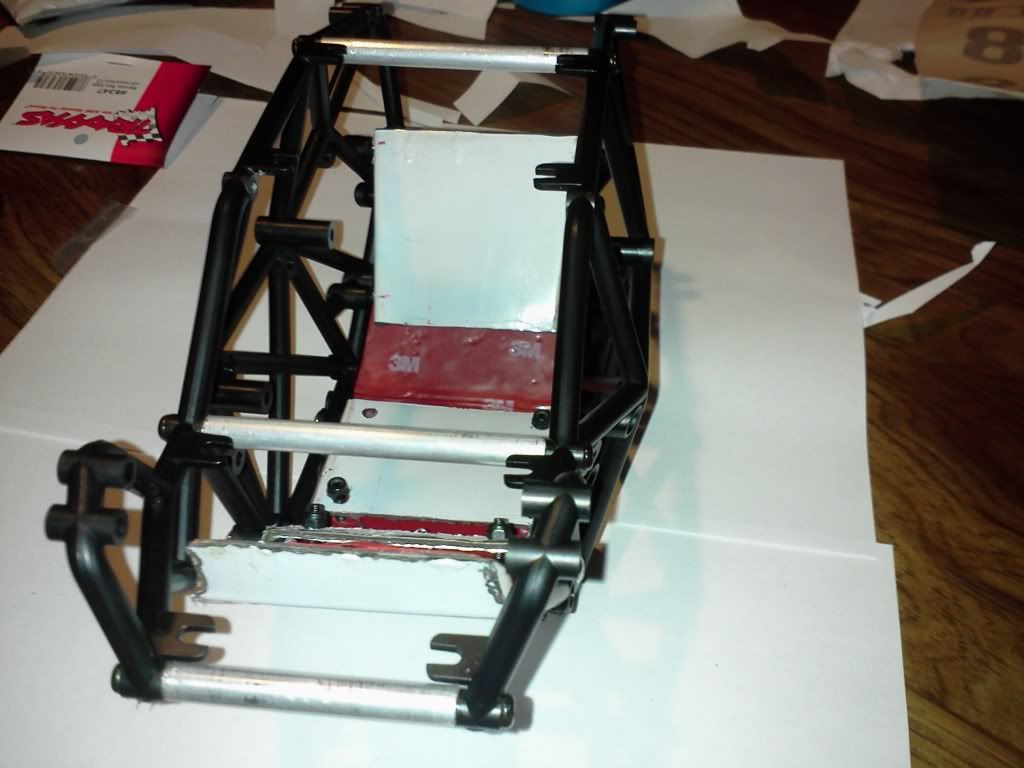 The skid is countersunk for flush mount screws and the buttonheads will be replaced once they come in 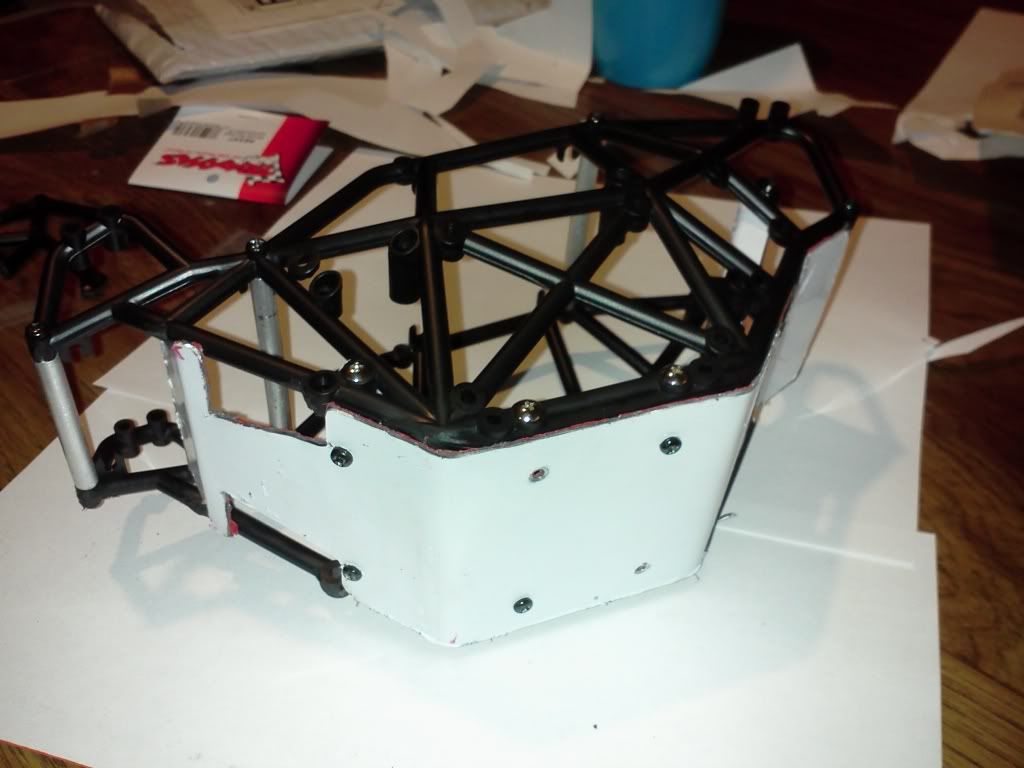 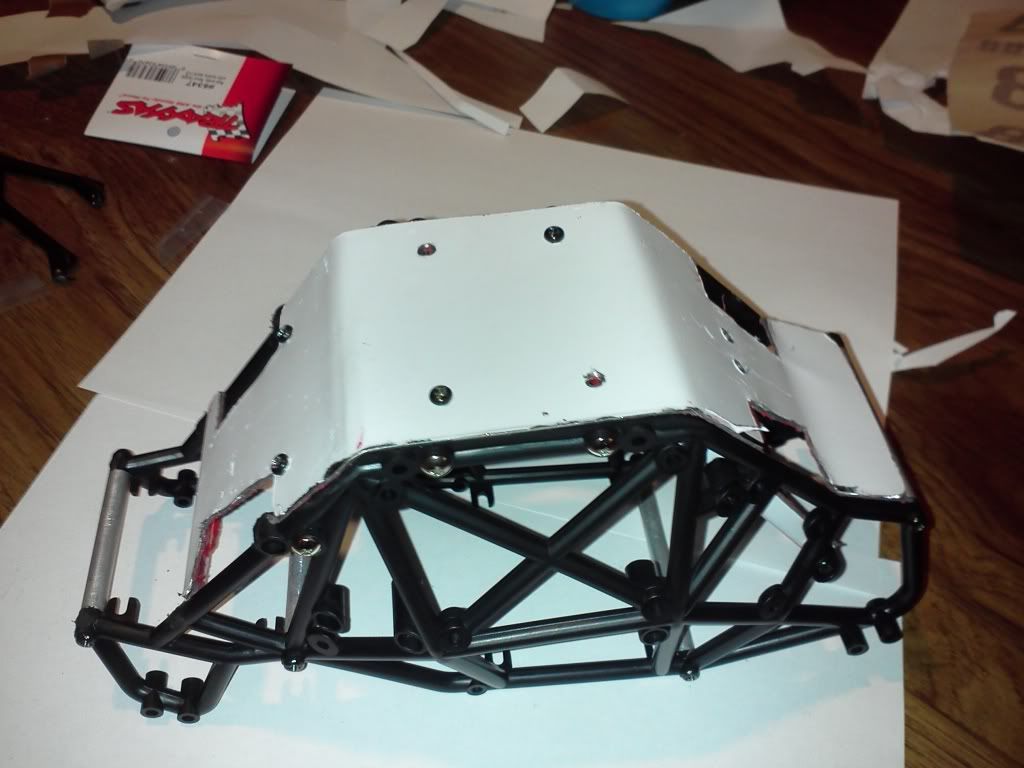 I got the print for the chassis for the body panels from serge's build on the Gmade forum...printed them out and they were a perfect fit...thx serge 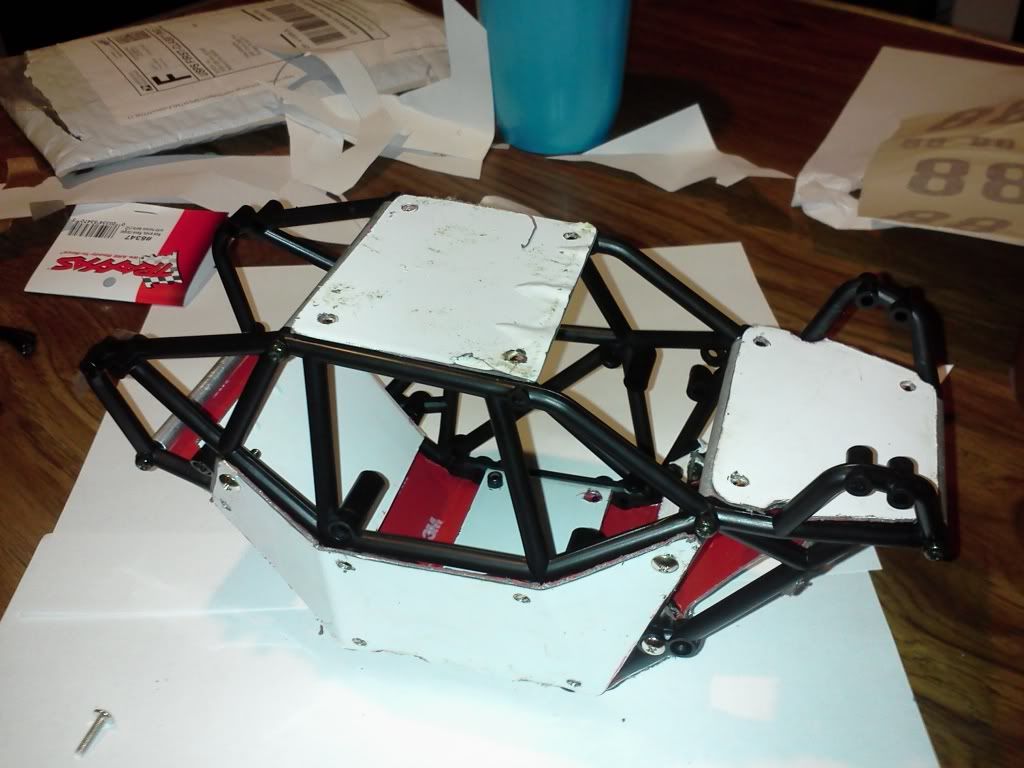 heres the rs10xt 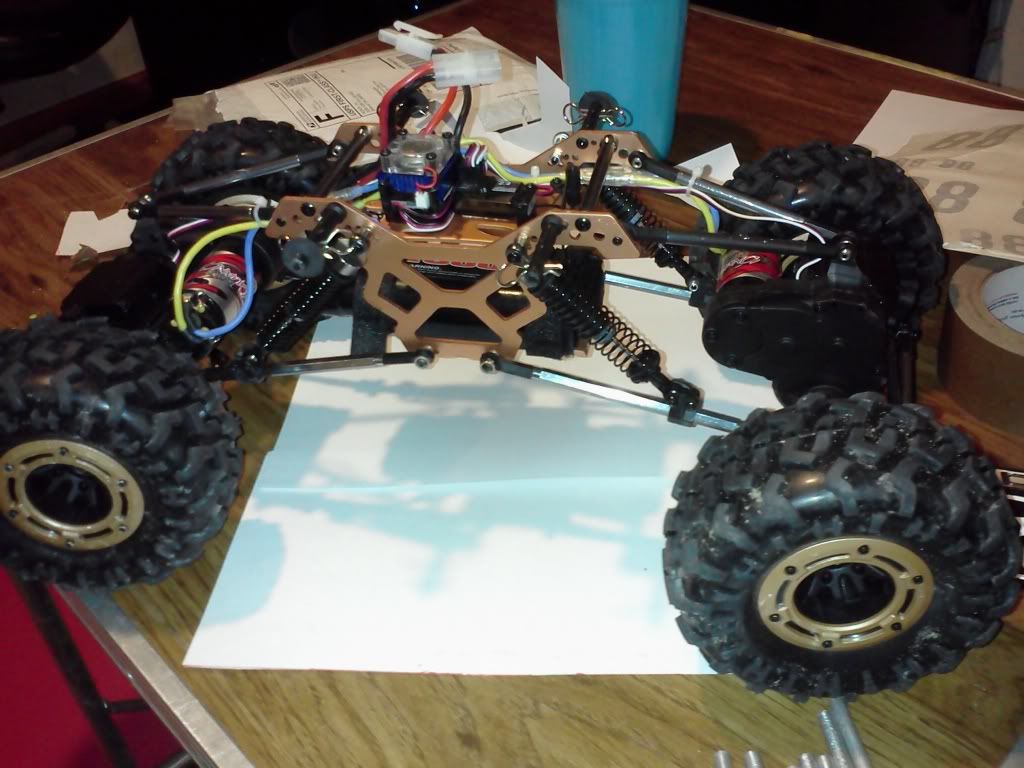 rovers waiting to go on 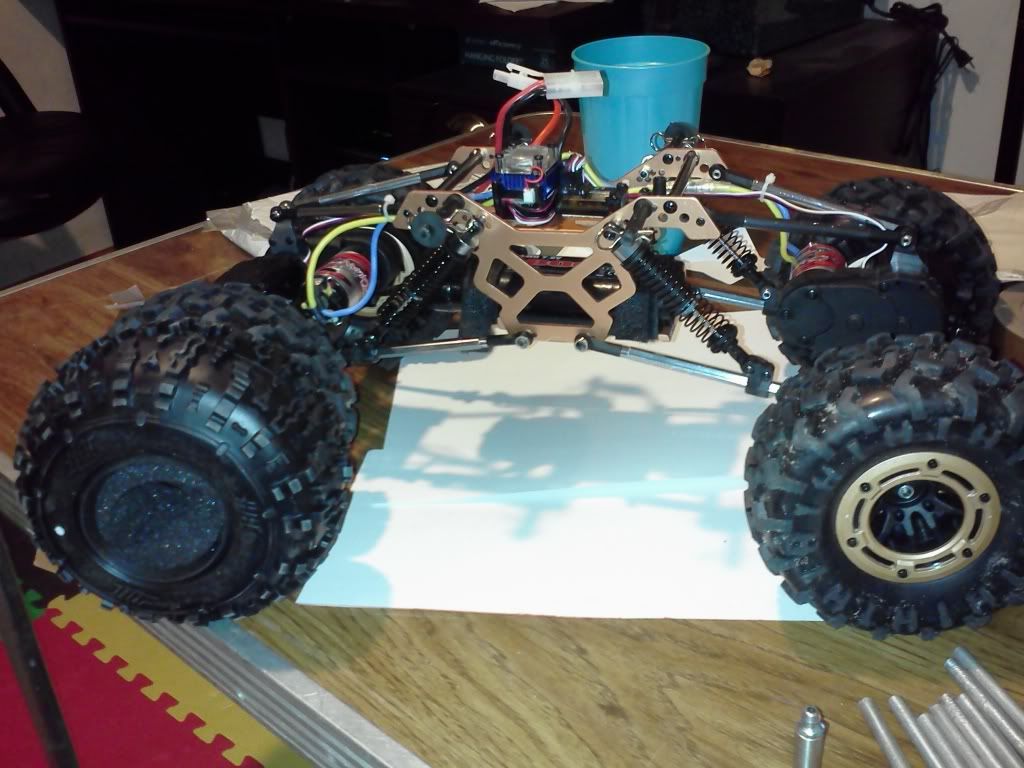 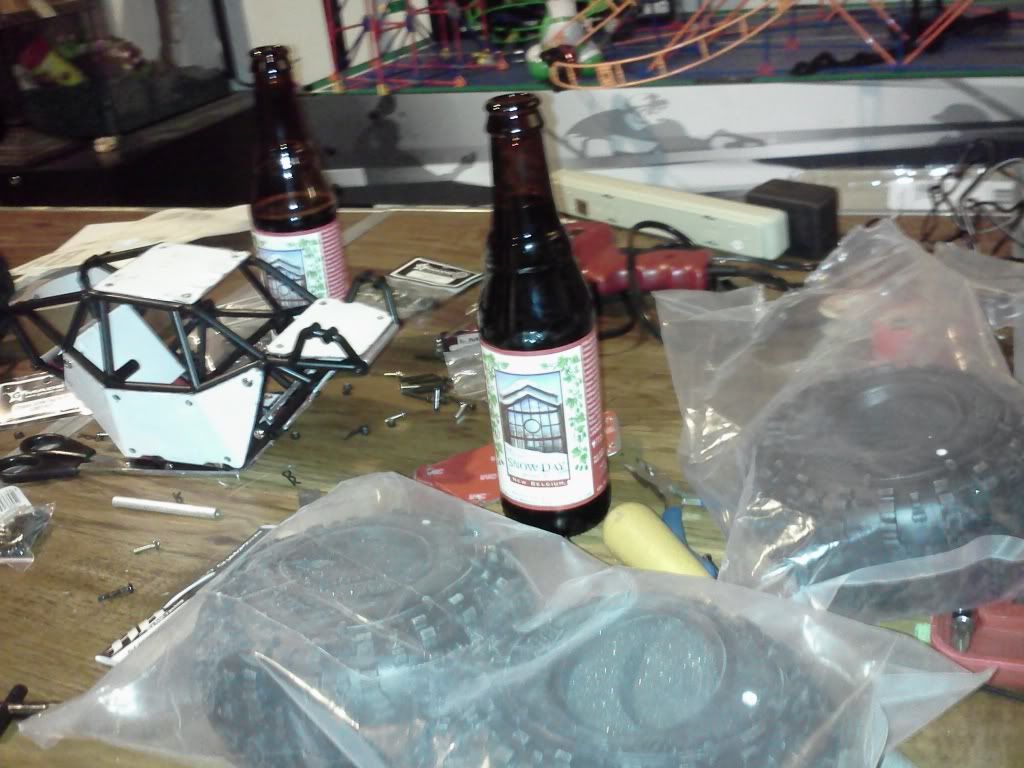 I needed to make some supports to screw the skid to 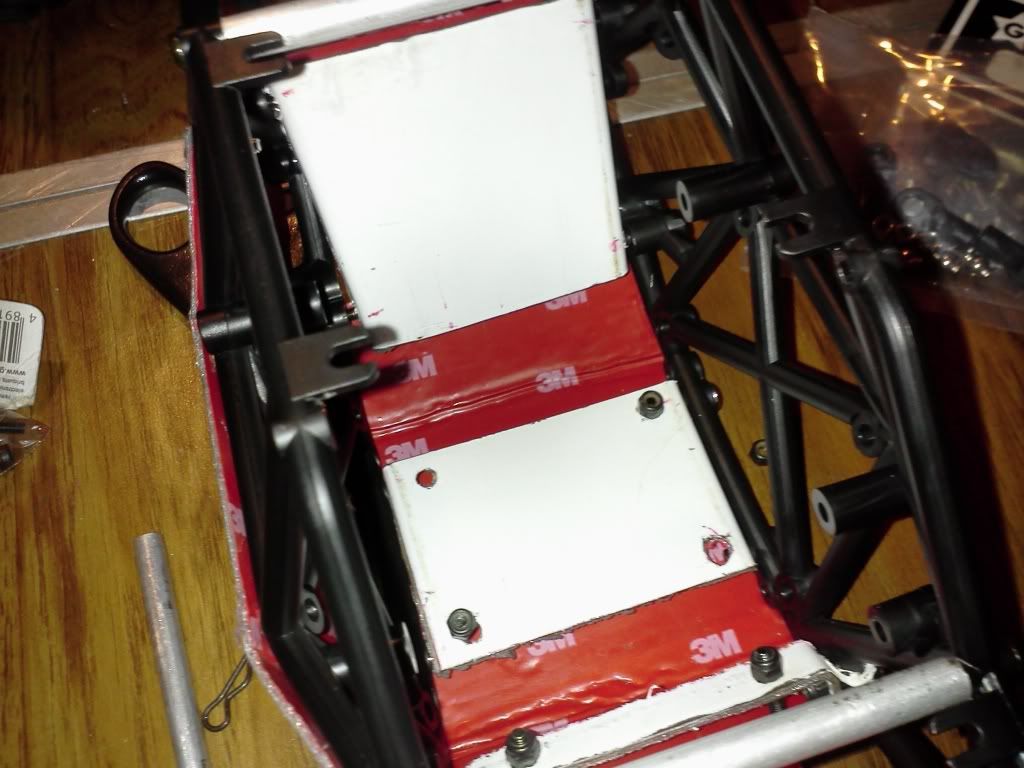 two cree led lights will go into the front for some serious light 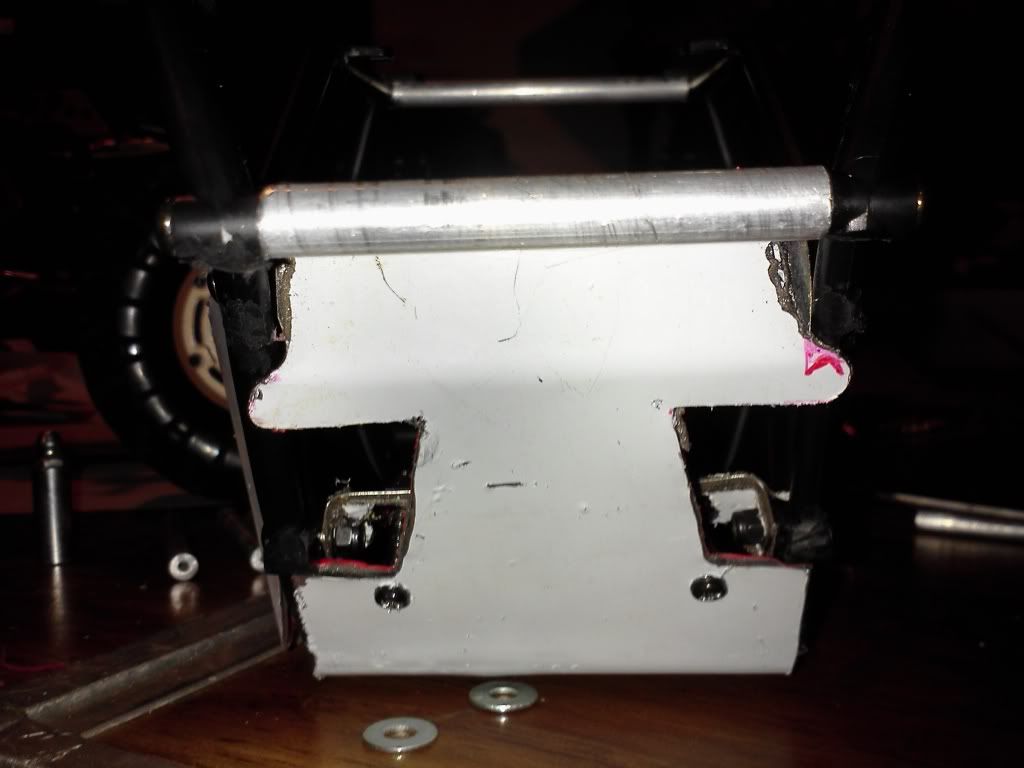 I also came up with this to make the links and chassis supports...it spun in the bearing at first so i tack welded it to keep it from spinning 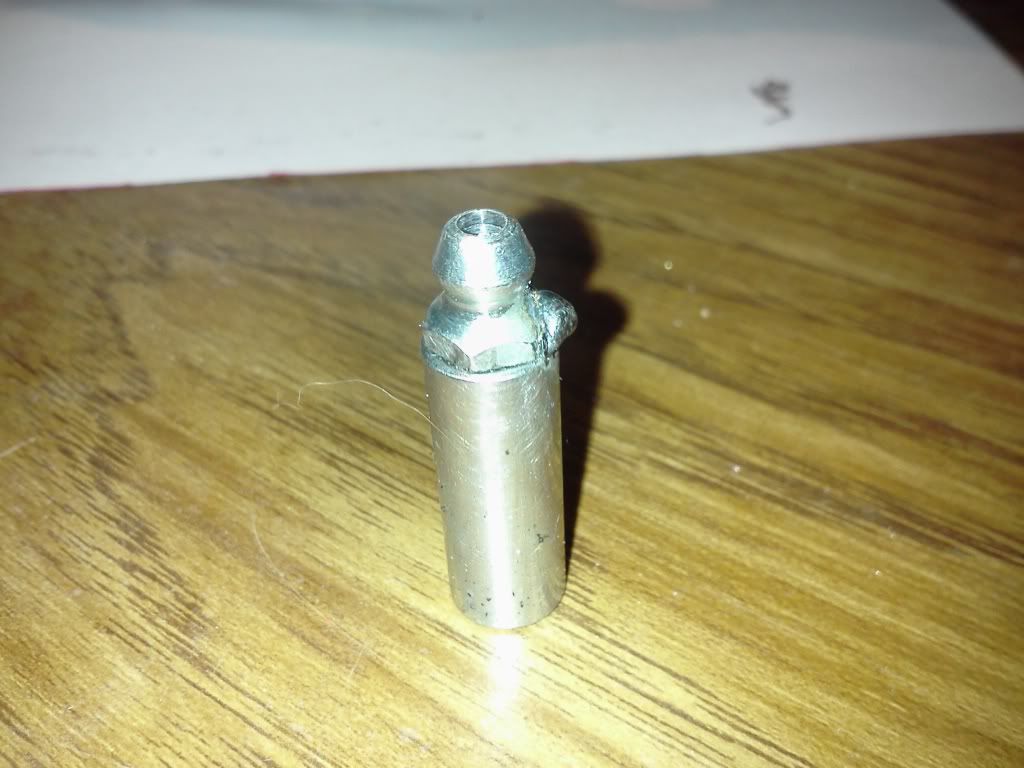 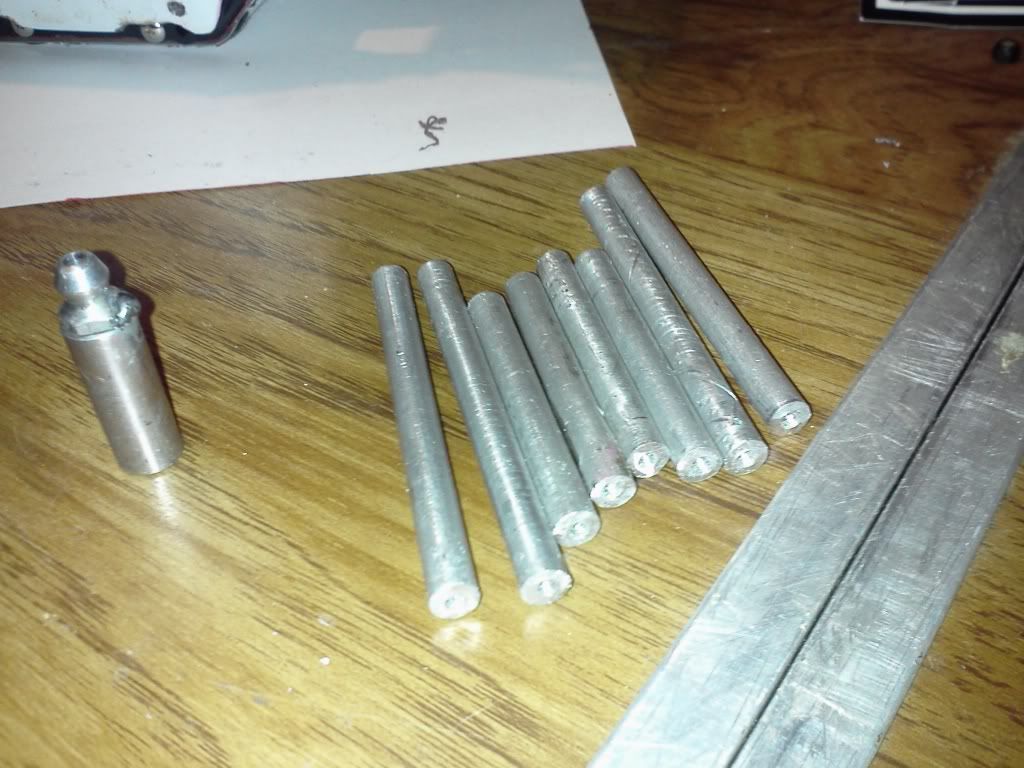 after a few snow days and not wanting to mess up what I have going so far gonna take it easy for the night...will start on getting the rx and esc mounted to the angled mount inside the chassis and work on making a battery tray for the front at an anglebut that should be cake. Then onto making sure my clearances for links and shocks are ok. Last edited by shaggy2112; 02-07-2012 at 11:22 PM. |

|  |
| Sponsored Links | |
| | |
|
02-07-2012, 11:16 PM
| #2 |
| Pebble Pounder Join Date: Jan 2012 Location: middle earth
Posts: 116
|
I gotta put a shout out to jsowens hoosierdaddy serge romad and houps amongst others for the help with this build...thanks for all the help guys!
Last edited by shaggy2112; 02-07-2012 at 11:23 PM. |
|
| |
|
02-08-2012, 08:08 AM
| #3 |
| Pebble Pounder  Join Date: Dec 2011 Location: Texas
Posts: 112
|
Looks good so far. Your probably going to get yours done before i get mine done haha. Keep up the good work Sent from my SCH-I500 using Tapatalk |
|
| |
|
02-08-2012, 08:16 AM
| #4 |
| Pebble Pounder Join Date: Oct 2011 Location: Meridian
Posts: 140
|
Looking real good man  BTW It's good to see someone with fine taste in beer! Snowday is an excellent choice for working on the crawler on a winter evening! Also totally diggin the bushing for your links! I will copy that idea for future endeavors. That was one of my biggest battles when I bent my links, getting the hole centered. Kudos keep the updates coming! BTW It's good to see someone with fine taste in beer! Snowday is an excellent choice for working on the crawler on a winter evening! Also totally diggin the bushing for your links! I will copy that idea for future endeavors. That was one of my biggest battles when I bent my links, getting the hole centered. Kudos keep the updates coming!
Last edited by Romad; 02-08-2012 at 08:23 AM. |
|
| |
|
02-08-2012, 05:12 PM
| #5 |
| Pebble Pounder Join Date: Nov 2011 Location: Maricopa
Posts: 178
|
Yeah man!!! I'm diggin the build!! Thanks for the kudos man, if you have any other questions, just let me know. That skid plate is killer, I had one CA glued on... Oh, another tip... install the internals (esc, on/off switch, lower and upper links and one side of all the trays) with one side off (driver or passenger). It gives you so much more room and makes life a little easier Looks good dude!!! |
|
| |
|
02-14-2012, 09:35 PM
| #6 |
| Pebble Pounder Join Date: Jan 2012 Location: middle earth
Posts: 116
|
Well I got a lil more done...still waiting for the lipos to come in to make the battery tray but couldnt wait anymore so threw it together with the stock pack which just barely fits. I was going to go bta but before I realized where I needed to redrill the holes I cut the servo mounts to clear the stock shocks...cutting away the area needed to go bta. So I just flipped the servo arm and built high clearance steering links. Originally the plan was to go axle mounted shocks using the link mount location but ended up using the stainless to build some top of the axle shock mounts...they may look flimsy but they are way stronger then they look...I may rework them in the future. The springs are mini t springs which wear a front and rear set and were wayyy to stiff. I stretched the front springs to match the rears length and then annealed them all to soften them up...so far so good...but they will need some tuning to get right. The front has full articulation thx to the bent uppers and redrilling the mounting hole but the rear hits the bottom of the Gmade chassis...I thought about cutting it to get full movement but decided to keep it in tack for now...itll be removed later. All electrontics were waterproofed using liquid tape per squirellrods direction on youtube. Decided to redo the sides to cover the the entire side of the chassis. The rear piece was stuck on using the 3m tape thats on the back of all the stainless but wouldnt stay...so ill end up ziptying it. Overall Im extremely happy with it so far and the full stainless skid allows it to slide across everything with ease.       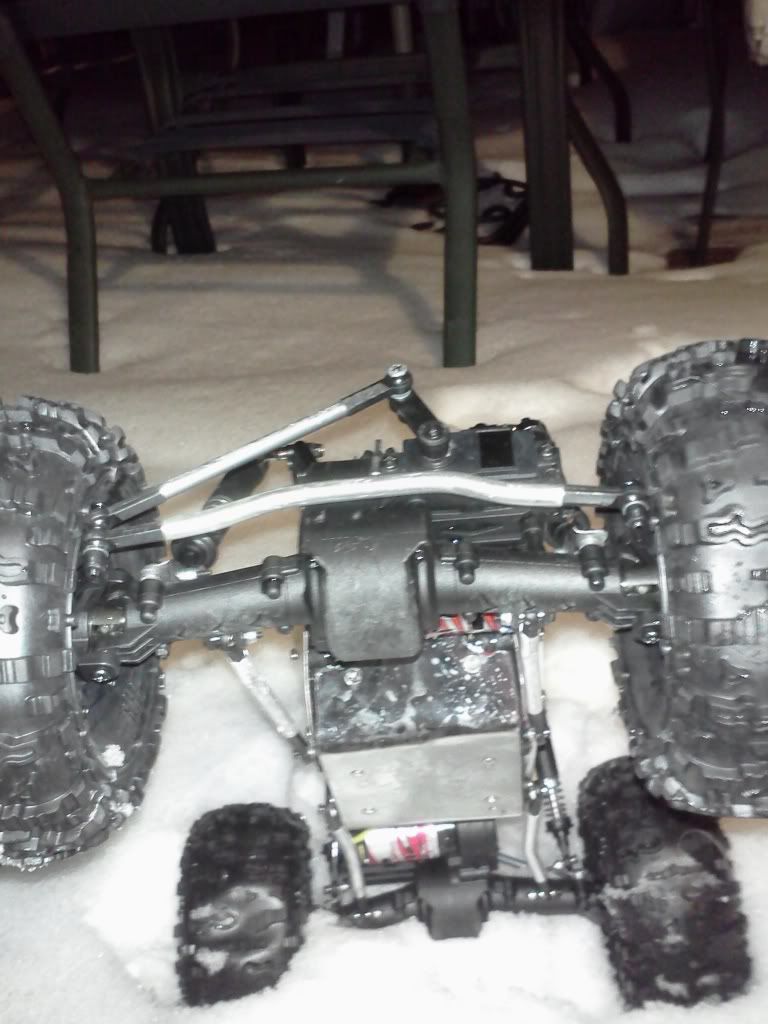 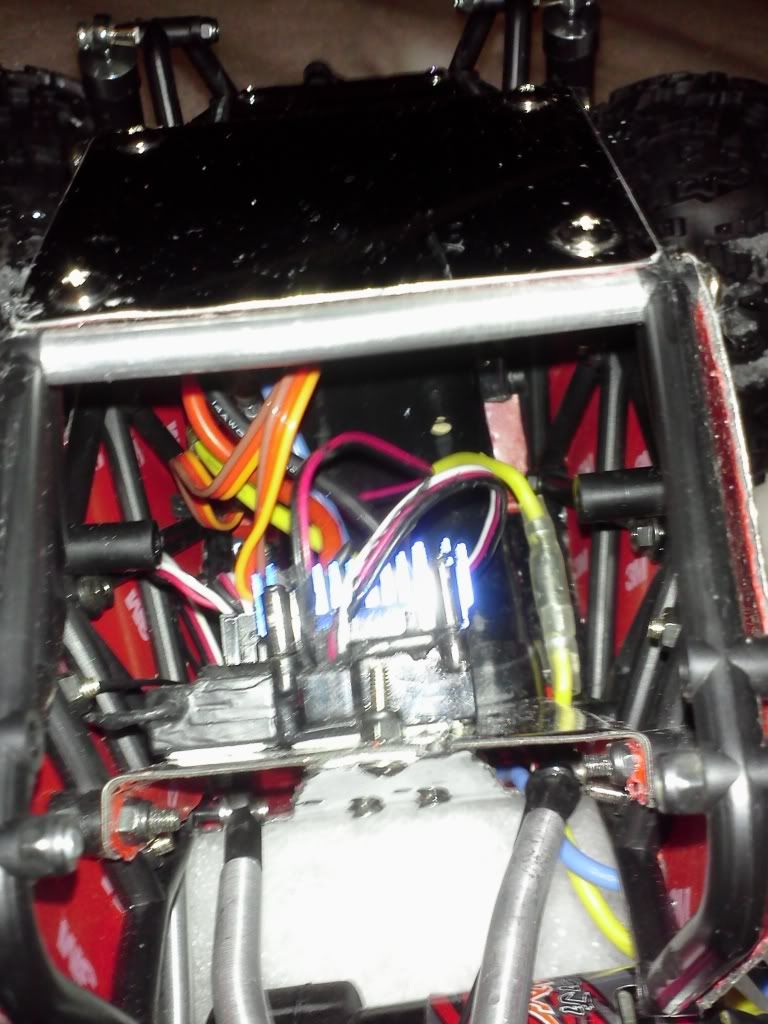 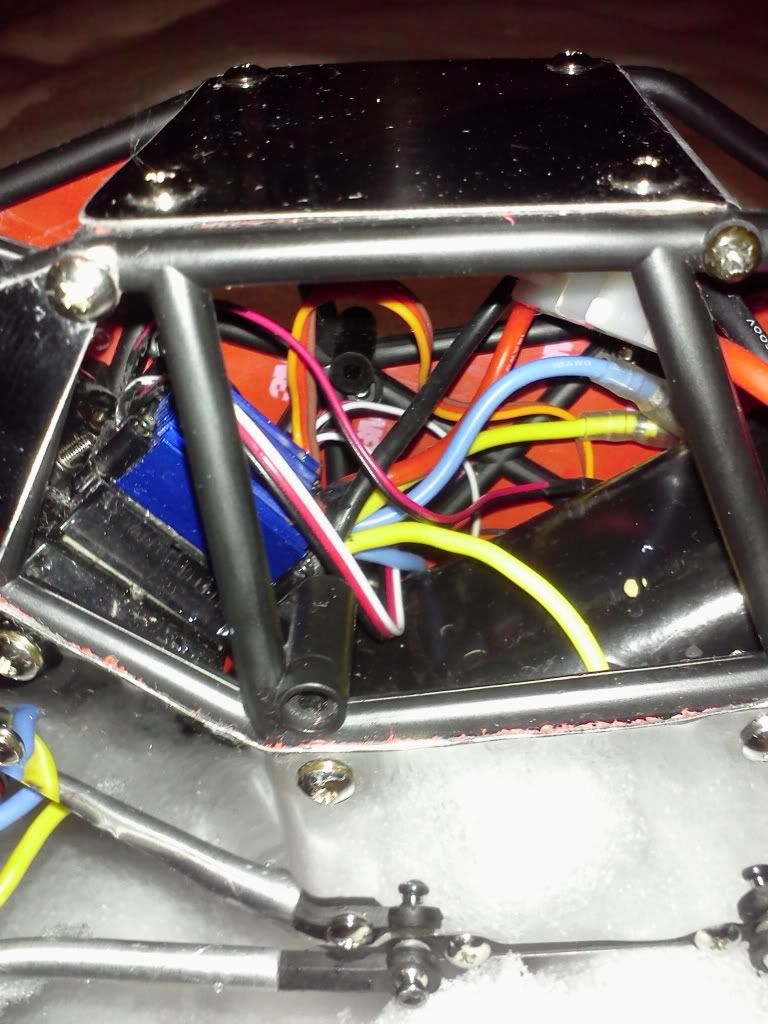 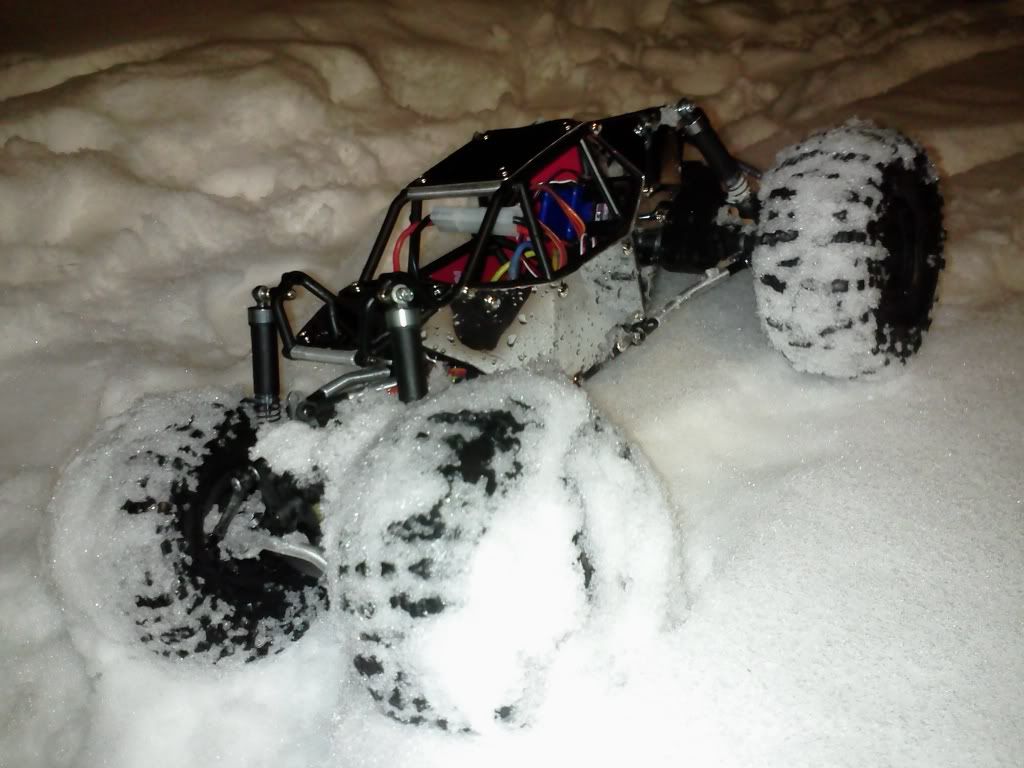  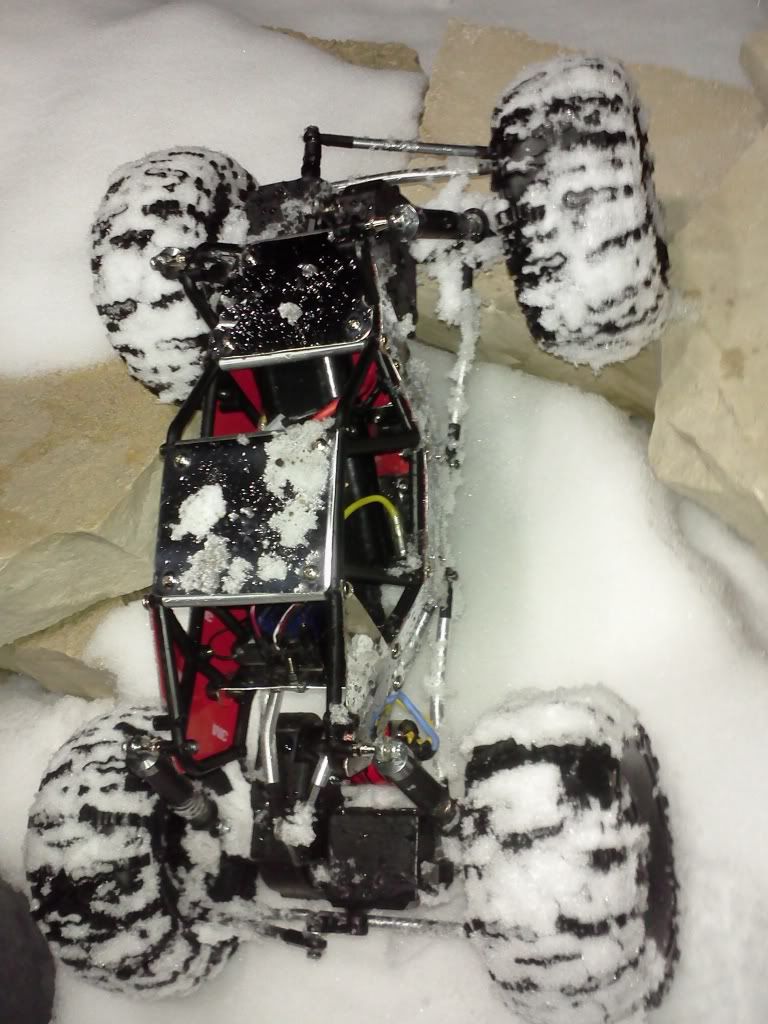 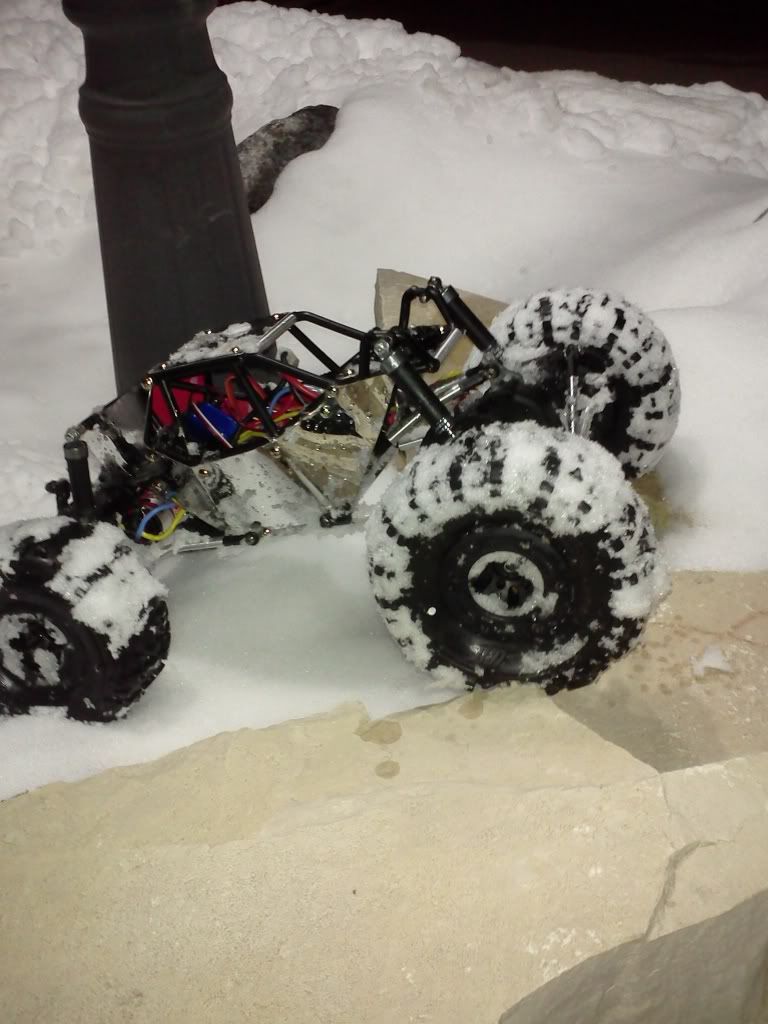 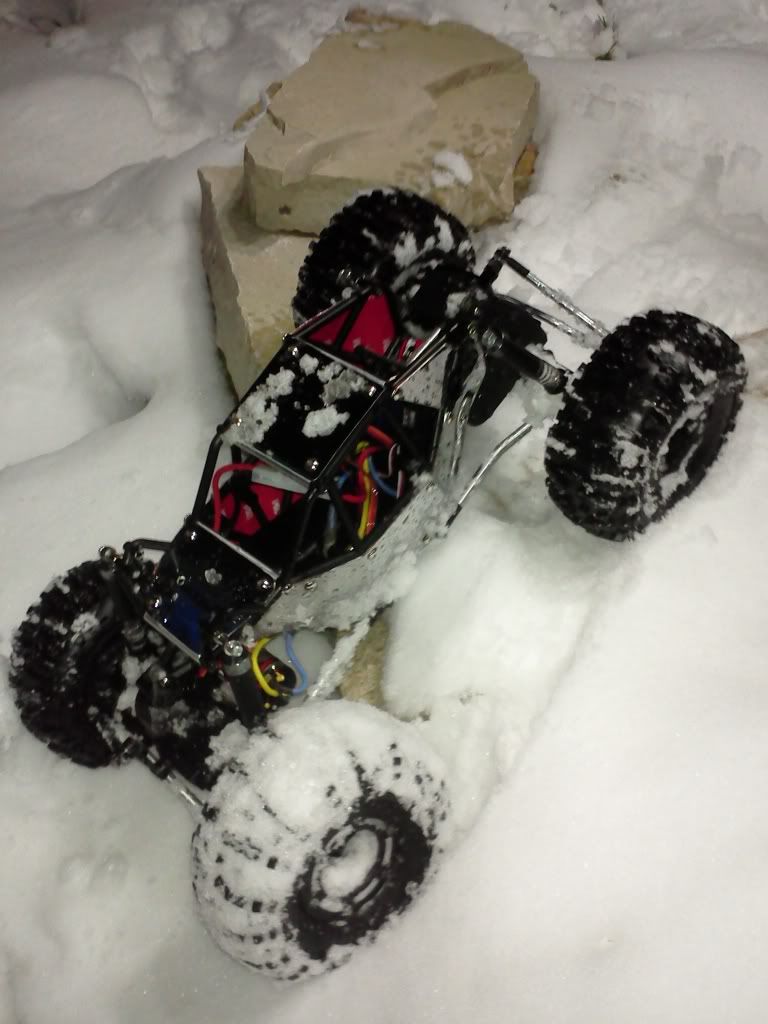 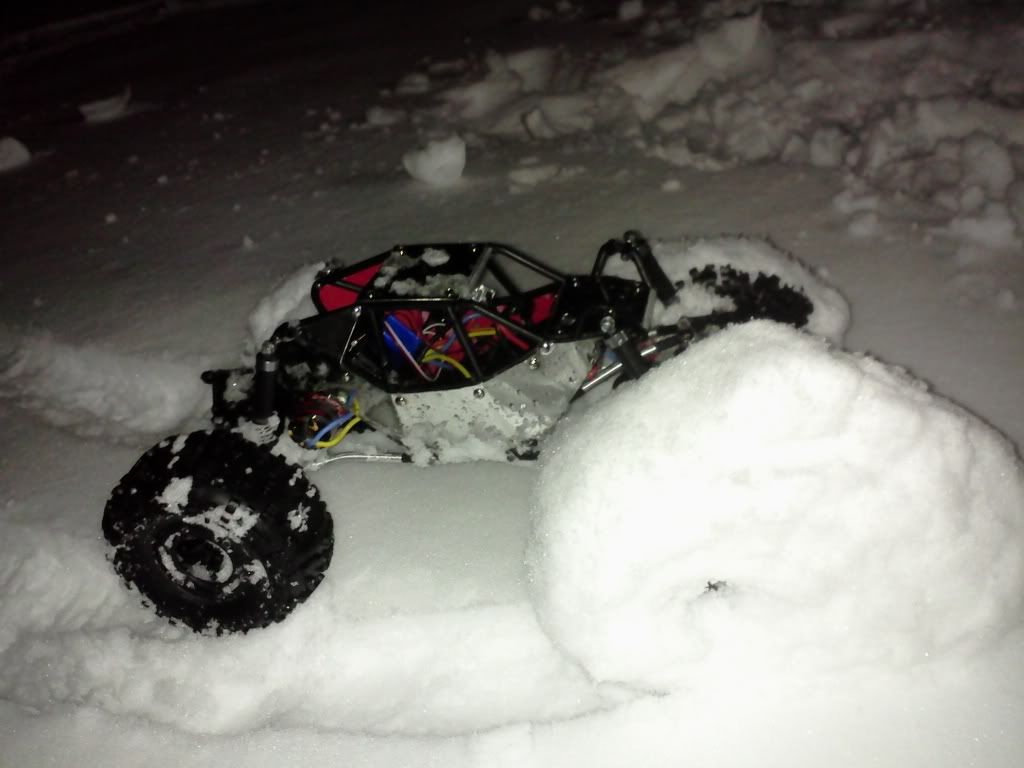  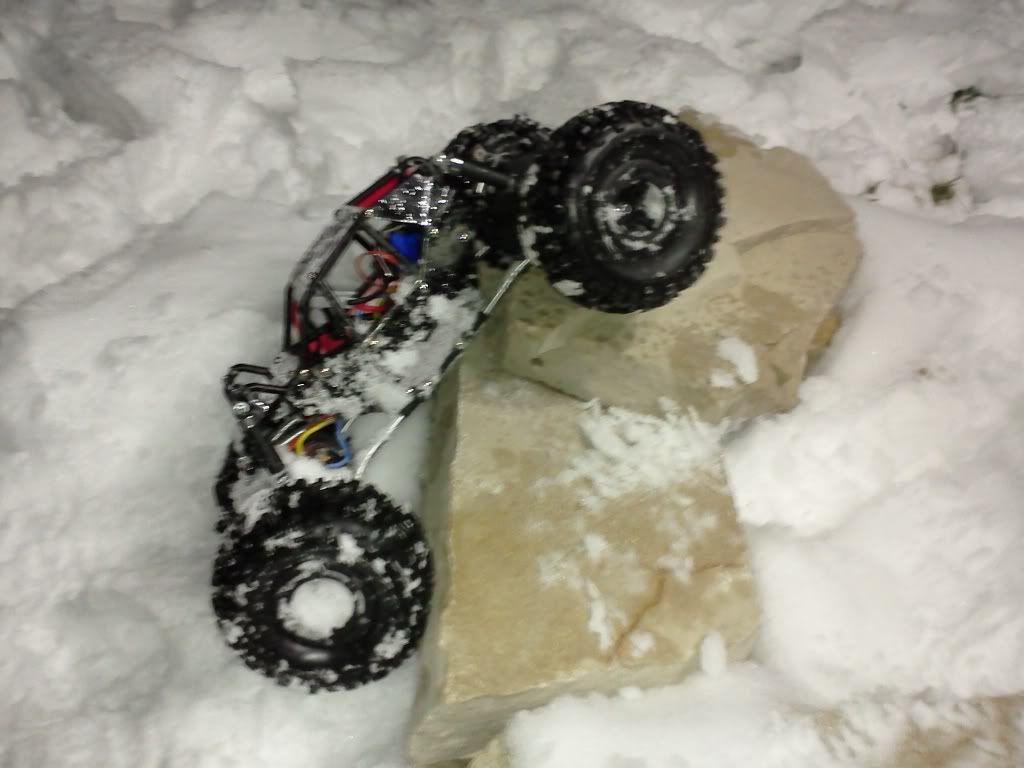 Last edited by shaggy2112; 02-14-2012 at 09:38 PM. |
|
| |
|
02-15-2012, 05:22 PM
| #7 |
| Pebble Pounder Join Date: Nov 2011 Location: Maricopa
Posts: 178
|
It's good to see you got it movin', a big PITA but it's worth it. Looks good man!! |
|
| |
|
02-16-2012, 11:17 PM
| #8 |
| Pebble Pounder Join Date: Jan 2012 Location: middle earth
Posts: 116
|
Alright...im not getting the articulation I wanted outta the suspension...when I compress the suspension it loses at least 5mm travel and doesnt wanna extend the full length. If I go with the stock springs they rub on the wheels. Question is how do I get the full compression without losing articulation due to compression and the max amount of extension withoutout losing full extension due to spring length?
|
|
| |
|
02-17-2012, 07:45 AM
| #9 |
| RCC Addict Join Date: Jul 2009 Location: Blacksburg, VA
Posts: 1,882
|
The shocks being vertical like they are will make it so you won't have the articulation you had in stock form. How much articulation are you looking to have? Anything more than a soda can worth isn't really a good thing. To hopefully answer your question about compression...I would say your shock springs are probably too soft or not long enough if they're not allowing your shocks to fully extend back.
|
|
| |
|
02-17-2012, 08:05 AM
| #10 |
| Pebble Pounder Join Date: Jan 2012 Location: middle earth
Posts: 116
|
Ok lemme elaborate a bit since I noticed I really didnt explain well what I have going on. When compressed the springs compressed size does not allow for the shock to fully compress...and when extended the spring does not fully exrend long enough to push the shock out to its full length. using pen springs will not work for the same reason...compressed they wont allow full collapse of the shock. The stock springs work somewhat ok but are too big and contact the tires....I suppose I could try to get more clearance there.The articulation is there without the springs on but not having them on causes the shocks to collapse due to the weight of the crawler obviously. Other then trying 10 different springs or buying $50+ shocks...I need another idea.
|
|
| |
|
02-17-2012, 10:47 AM
| #11 |
| RCC Addict Join Date: Jun 2011 Location: Lindsborg
Posts: 1,708
|
those are your ideas, i mean really there is no way around it, trial and error and probably not find a solution, or new shocks. i have been watching ebay, the g-transistions go for about 40 bucks a full set, i have seen some cheaper ones. i think your going to need a fully internal sprung shock to get your clearance and travel. you could cut down and stretch a pen spring, but it will increase the rate and still not work well. coil bind is a killer.
|
|
| |
|
02-17-2012, 11:31 AM
| #12 |
| Rock Crawler Join Date: Feb 2011 Location: Courtenay
Posts: 716
|
If you get a slightly heavier spring, or stretch the ones you have a bit, you should be able to get them to sit fully extended. Check auto supply places too. Then, if you put the spring internally in the shock, There should be a bit of space between the plunger and the top cap. You should get CLOSER to full compression then spring on the shaft. Just undo the top cap and drop it in. Done! I run both a stiff internal spring AND a pen spring on the shaft. But My shocks sit at a 45* and get MORE than enough flex. |
|
| |
|
02-17-2012, 12:36 PM
| #13 |
| Pebble Pounder Join Date: Jan 2012 Location: middle earth
Posts: 116
|
Ok...thats a good idea...Ill hafta give that a try. thx jackalope
|
|
| |
|
02-17-2012, 02:35 PM
| #14 |
| RCC Addict Join Date: Jul 2009 Location: Blacksburg, VA
Posts: 1,882
|
You're using a small spring that is basically installed on the shock shaft itself. When that spring compresses fully, it can't compress any further, and that makes your shock not able to fully compress. The spring basically acts like you have an external limiter on the shock. If you use a pen spring installed on the shock shaft, the same thing happens. The only way to really counteract the compression problem is to use a full length external spring much like the stock setup. As for the extension problem, you could try to extend the spring some, but again the spring looks pressed onto the bottom of the shock body and is likely pressed into the spring cup as well. It can only extend so far as a result of this. Post up a picture of your rig fully articulated with your current springs on. If you buy a new set of shocks and do the exact same thing with the springs, unless those shocks are longer, you're going to be in the same boat you're in right now. |
|
| |
|
02-18-2012, 12:40 PM
| #15 |
| Pebble Pounder Join Date: Jan 2012 Location: middle earth
Posts: 116
|
Ill getcha a pic as soon as i can js...with and without front springs. I got the 11.1v 1300mah lipo in the other day. Took the fan off wired up a couple deans made up the battery tray and threw it in. The esc is handling it just fine even being waterproofed with liquid tape....and it is a huge difference more power and run time and also speed but not as much as I was wanting. Looking into motors now and have been considering the banebots 395 but not sure how the speed will be compared to stock...or thinking of just doing the 540 conversion for the options. |
|
| |
|
02-22-2012, 11:45 PM
| #16 |
| Pebble Pounder Join Date: Jan 2012 Location: middle earth
Posts: 116
|
Finally got some action shots at the beach on the breakwall 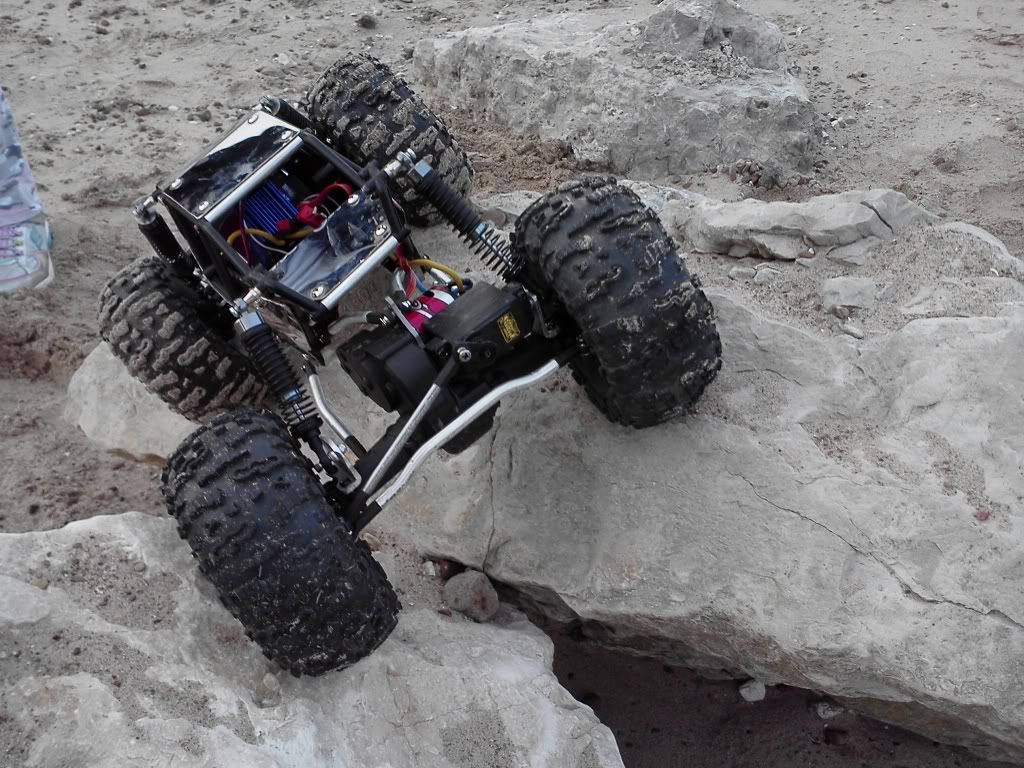 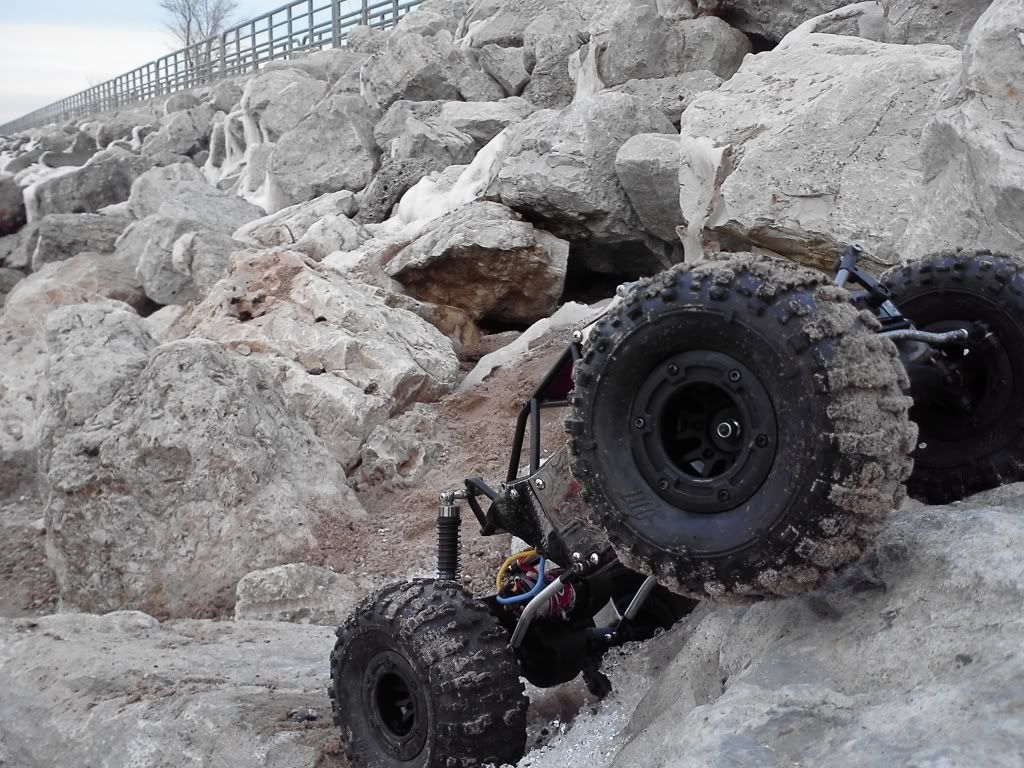 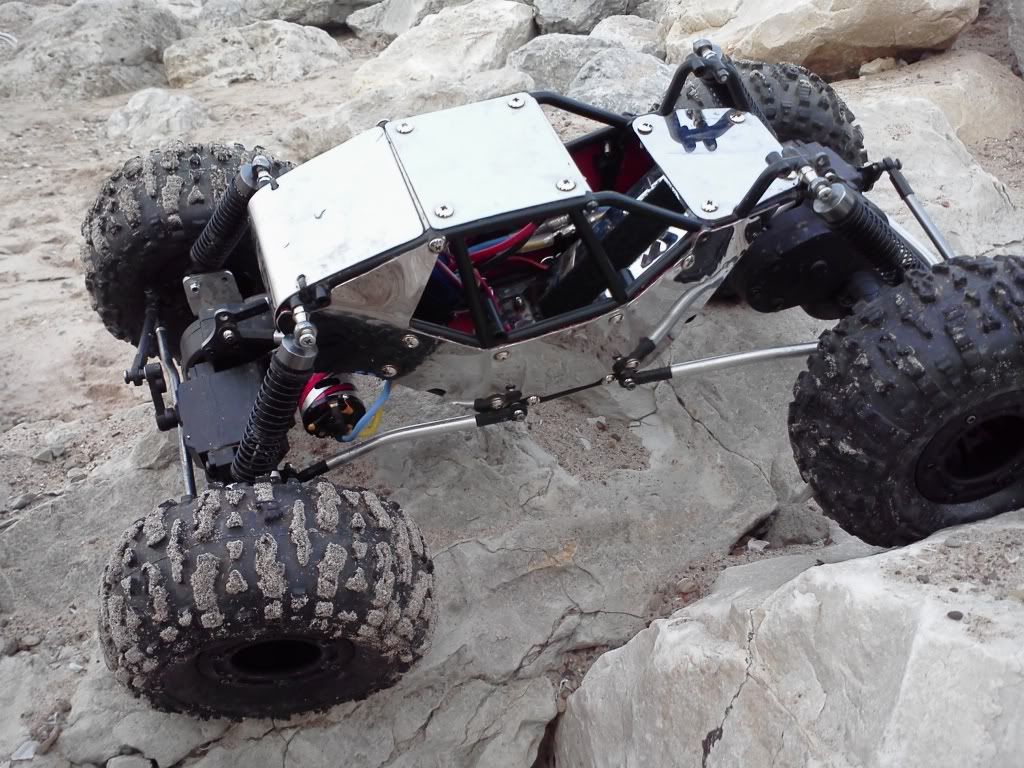 I also changed the shock mounts to aluminum angle and made them alot taller so I could go back to the stock springs which made a huge difference for my articulation...just a touch of rubbing 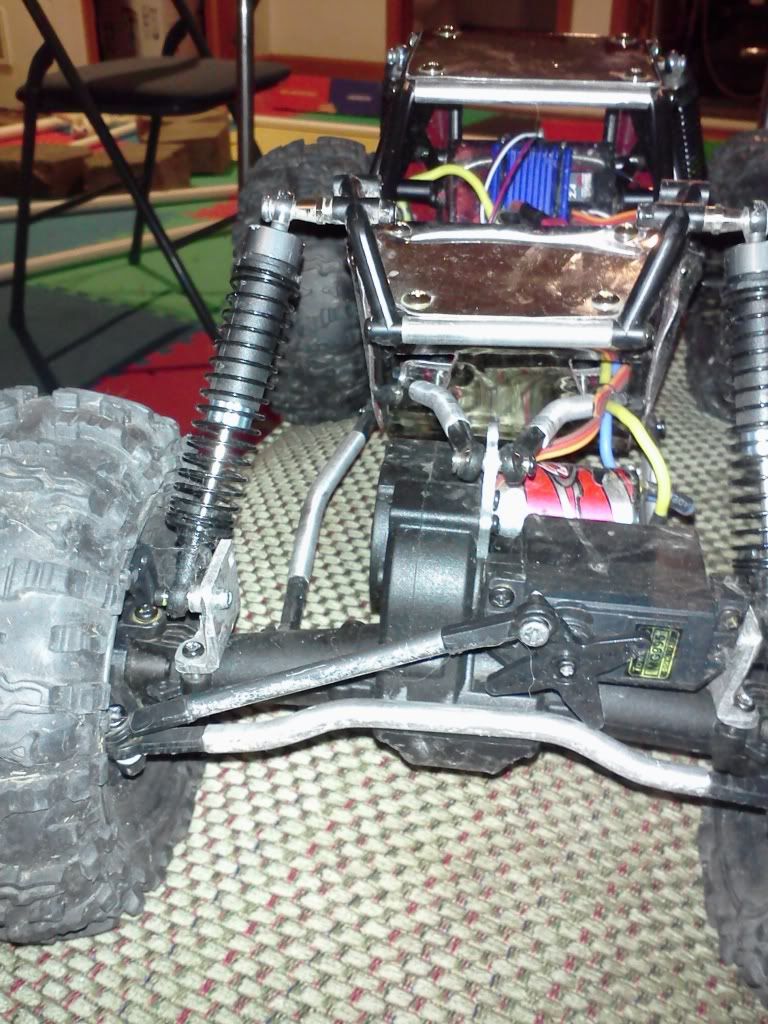 Last edited by shaggy2112; 02-22-2012 at 11:50 PM. |
|
| |
|
02-23-2012, 12:32 AM
| #17 |
| Rock Stacker Join Date: Nov 2011 Location: Spokane
Posts: 69
|
I like your setup. I gave up on mine, I just couldn't get it tuned to my liking. I might have to try again after seeing your setup.
|
|
| |
|
02-27-2012, 11:26 PM
| #18 |
| Pebble Pounder Join Date: Jan 2012 Location: middle earth
Posts: 116
|
new decals: 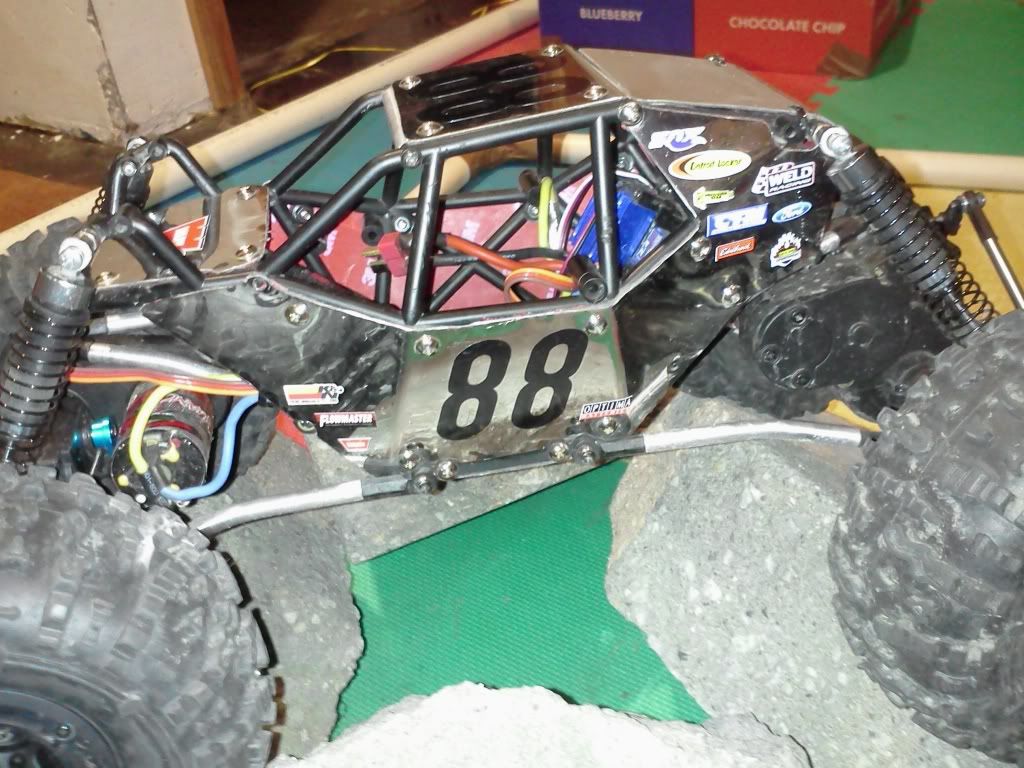 The high clearance steering link setup was great except for one major flaw. Every time Id flip it on its top the servo horn would hit breaking it every time since it points straight up. It was fully exposed the way I had it and it needed to be changed. Plus I read the thread in the general crawlers section about steering setup and found out the draglink needs to be parralell to the tie rod for maximum efficiency. So, I decided to go bta and set out to make it work. Since I had cut the servo plate where the new holes for the servo pillars needed to go I made another top for it out of some left over stainless. And four hours later I finally got it done lol my 4 hour bta mod: 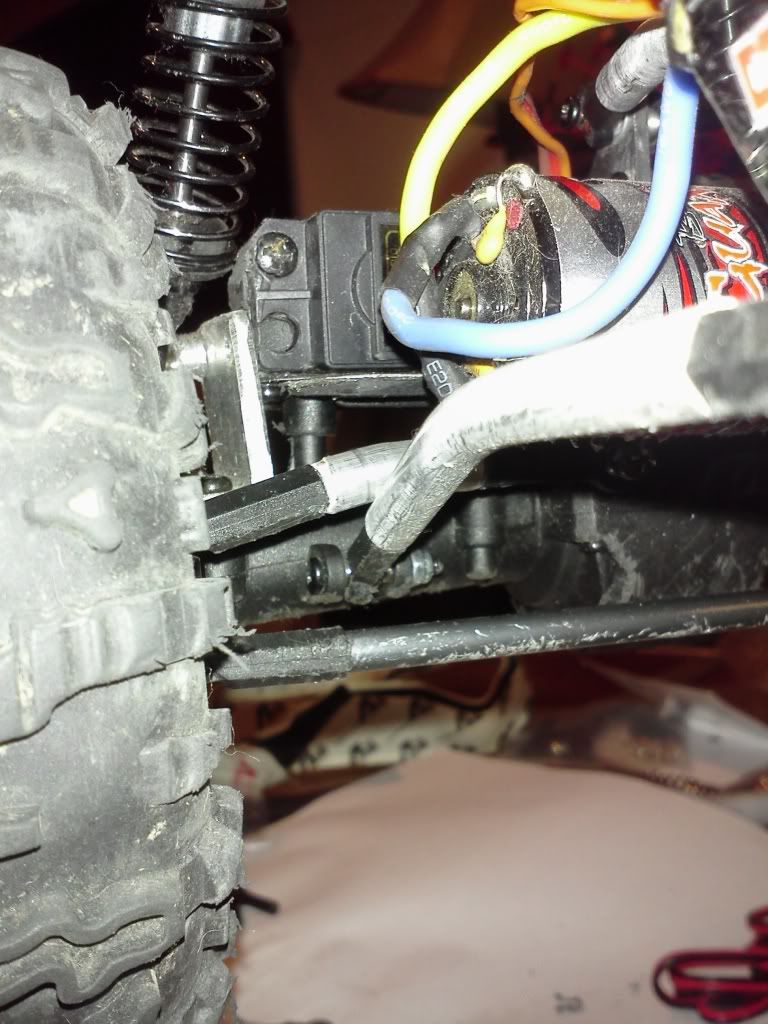 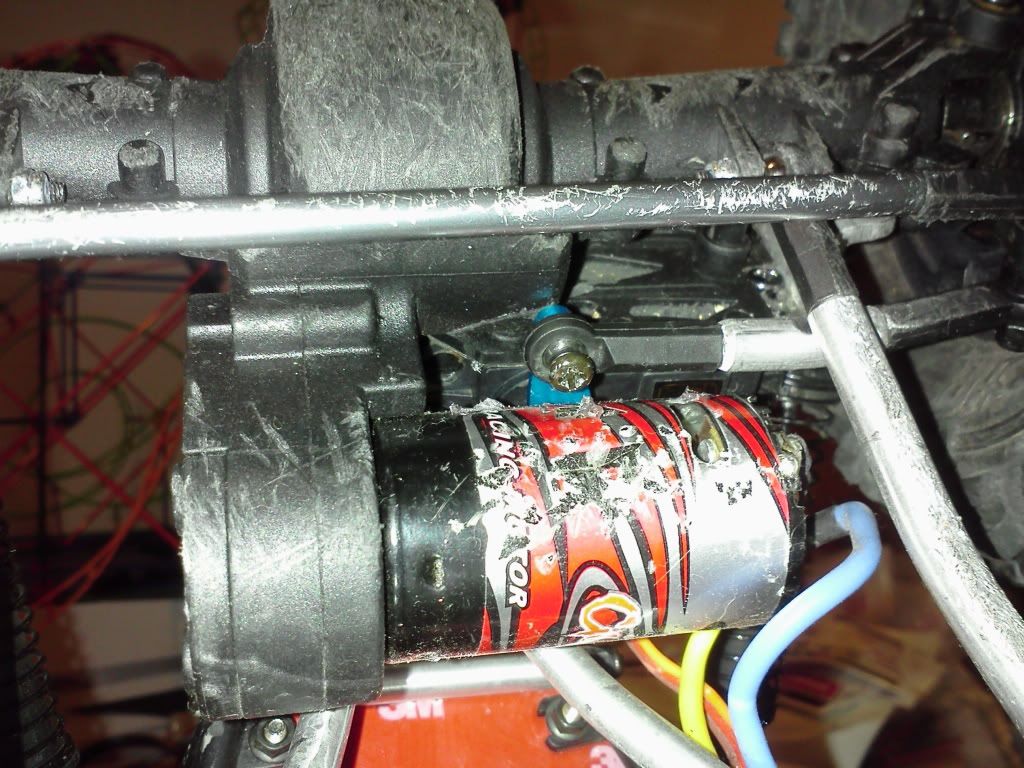 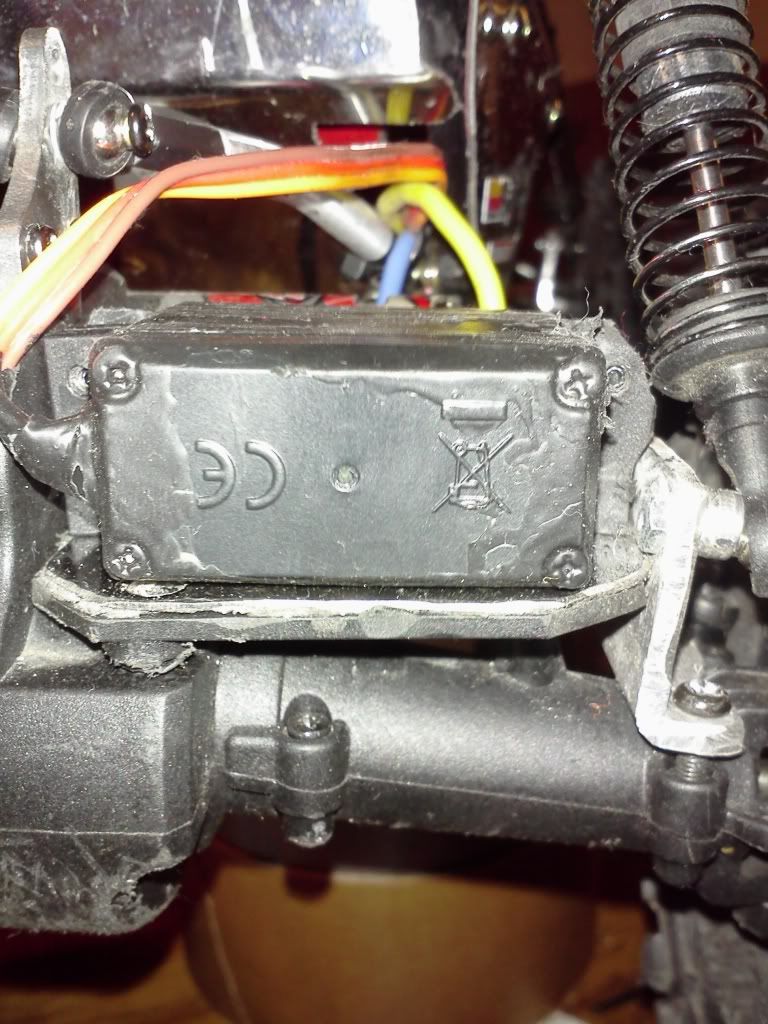 the bta with the bent links on the r1 chassis was difficult to say the least to get it to clear. I needed to lower the servo plate, shave the servo mount pillar, bend draglink, redrill and move back servo pillar mounts, space servo to draglink for clearance...the entire mod was a pita. Im glad its finally done. The screw head that hold the draglink on the servo horn does just barely hit the motor and even causes the motor to move slightly at full throw...but I plan on changing it out to a flathead or ill grind a bit off the head of the screw. I gotta tell ya this mod is very tight on the r1 chassis anyways with bent links...but I needed to change my setup around so im happy with the way it came out...hopefully I never have to remove it cause its another huge pita. Last edited by shaggy2112; 02-28-2012 at 01:02 AM. |
|
| |
|
02-27-2012, 11:59 PM
| #19 | |
| Rock Crawler Join Date: Feb 2011 Location: Courtenay
Posts: 716
| Quote:
I read that a while ago. couldn't remember where I found it. VERY helpful. Could you please send me the link? | |
|
| |
|
02-28-2012, 12:55 AM
| #20 |
| Pebble Pounder Join Date: Jan 2012 Location: middle earth
Posts: 116
|
Update: I shaved the both sides of the ball on the servo side of the draglink to gain the extra clearance I needed... giving me the extra mm i needed to clear. Now it barely touches the motor at 85% throw...im good with that.
Last edited by shaggy2112; 02-28-2012 at 01:38 AM. |
|
| |
|
 shaggy's custom G-made R1 - Similar Threads
 | ||||
| Thread | Thread Starter | Forum | Replies | Last Post |
| Custom made parts? | Slowsteve | Axial Wraith | 27 | 08-25-2011 07:07 PM |
| Shaggy's Beetlejuice V3 | Shaggy5050 | RC4WD Bully | 6 | 08-08-2010 01:38 PM |
| Shaggy's New Wheels | floydkahue | Axial AX-10 Scorpion | 6 | 11-10-2009 01:51 PM |
| custom made parts | merlcrawl | Axial AX-10 Scorpion | 7 | 11-08-2009 02:10 AM |
| |


 Linear Mode


