| |
| |||||||
 |
| | LinkBack | Thread Tools | Display Modes |
 07-10-2011, 01:16 PM
| #1 |
| Newbie Join Date: Dec 2010 Location: france
Posts: 38
|
Being a huge fan of the old toyota Fjs and my last Rc experience dating back to my youth, I bought a used Cr01 rtr with a land cruiser body on an impulse. Pretty satisfied with the general look of the car despite the awful paintjob from the former owner, I started bashing it around and really enjoyed driving this little truck on my favourites mtb trails. Curious as to what others Cr01 owners had done with their rigs, I did some research on the web and discovered the whole Rockcrawling thing. That was 8 month ago, since then I tried several different setup, looking for enhanced rockcrawling performances over scale look, despite keeping the land cruiser body. As a result the last setup I made 2 months ago using the stock chassis was looking like this : 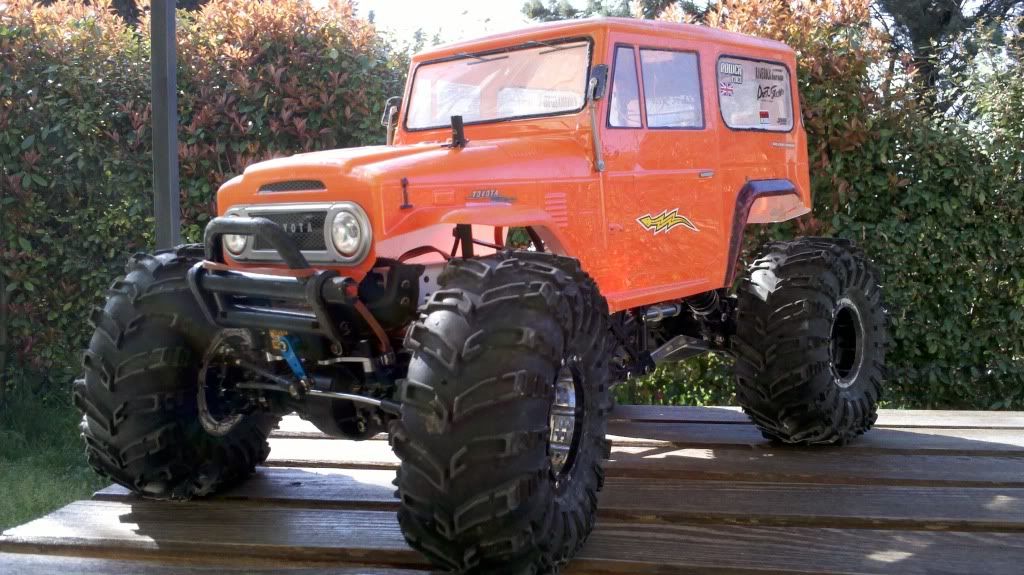 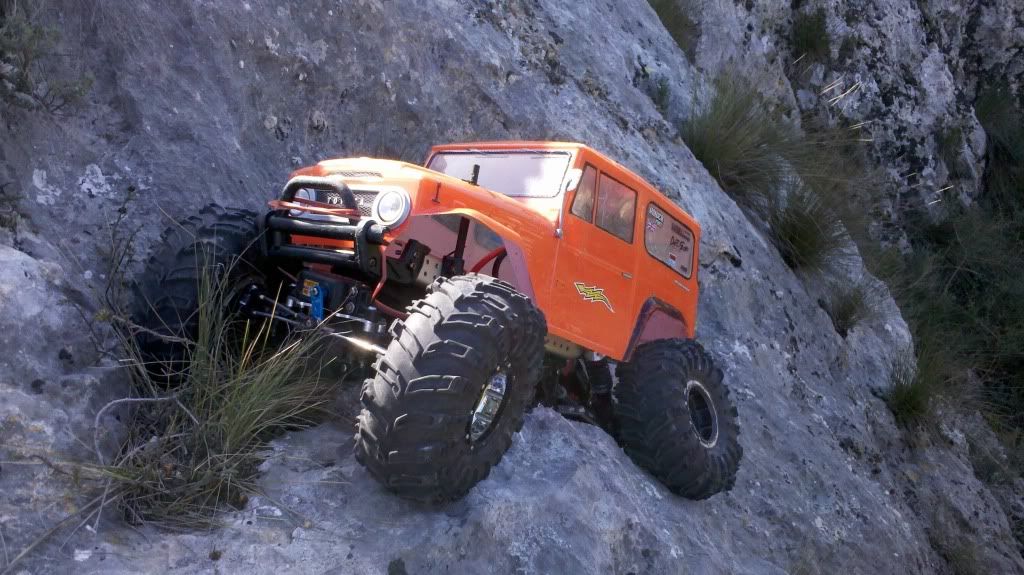 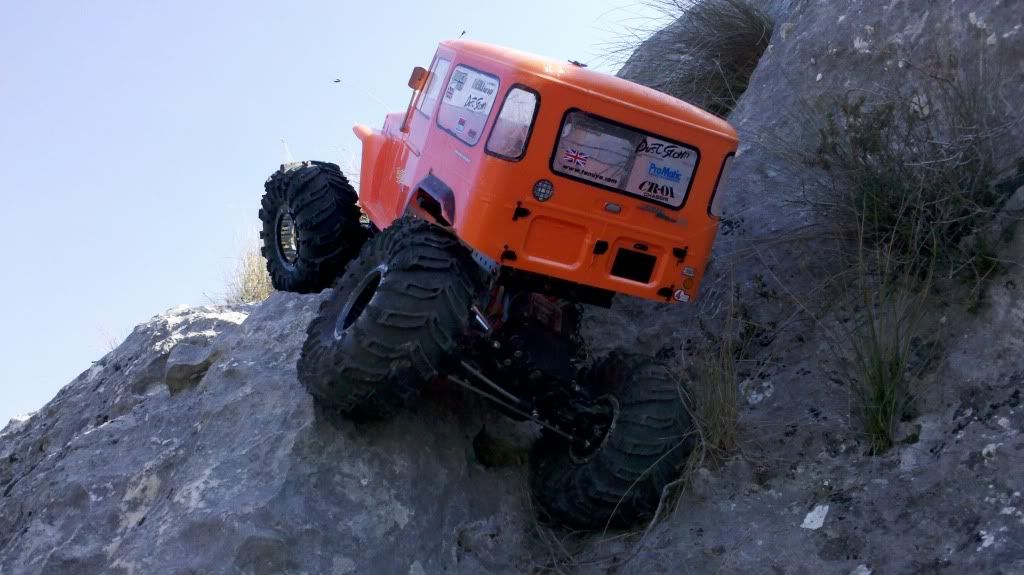 performed like this : (sorry for the crappy phone video) And was specced like that : - tamiya reinforced drive shafts and diff lock. - wide hex and long axle shaft in the front. - junfac universal shafts. - tamiya Cr tuned 35t with stock pinion. - tamiya high clearance links. - tamiya aluminium skid plate. - tamyia reinforced kingpins - hr aluminium steering knuckles. - Drooped suspension with gmade zero shocks modified with inner springs. - I turned around the transmission case to allow for a 5000 mah 2s to fit behind the front servo without rubbing against the case. - Hpi rockgrabber with custom cut foams on stock tamiya wheels with 160 gr weight for each front wheel and 60 gr for each rear one. - I lowered the chassis rails on the chassis plates to keep the cog as low as possible. - both esc (CC sidewinder Sct) and Futaba rx attached between rear upper links. - front junfac servo plate with savöx 1268mg, rear stock servo plate with towerpro mg 995. - Futaba 4exfm. - weighing at 2980 Gr with 2s 5000 mah lipo. 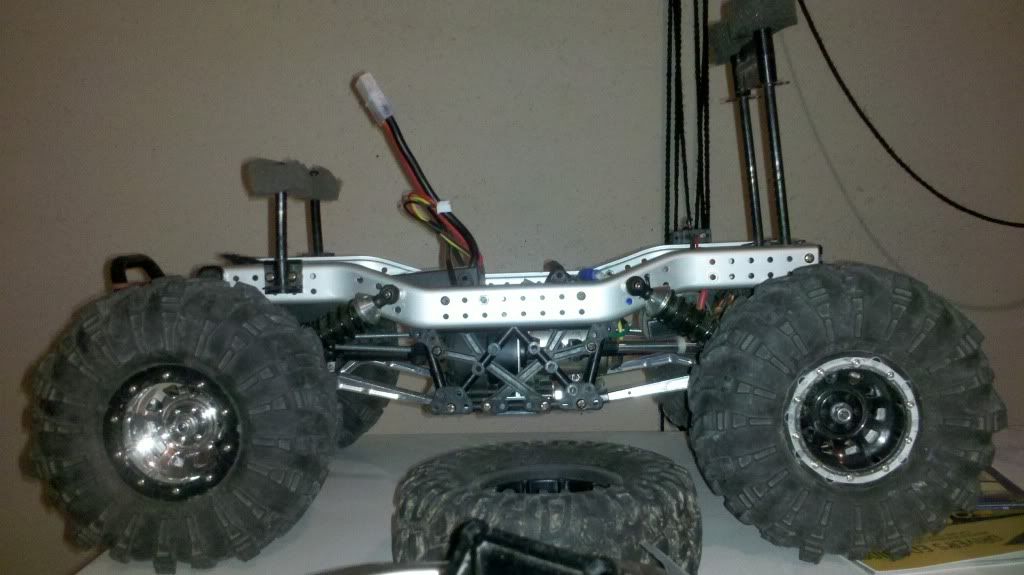 I was quite pleased with the way it crawled, allowing me to follow my friends ax-10 (Gc3a,Od/Ud,Sedonas, hh45t, 3s 1300 mah) without too much troubles (that is, when he wasnt waiting for some replacement parts for the ones he had broken, and it happened a lot ...) But then I bought some cheap used acetal sheets on an impulse a month ago and went on a cutting, filing, drilling craze that resulted in this : 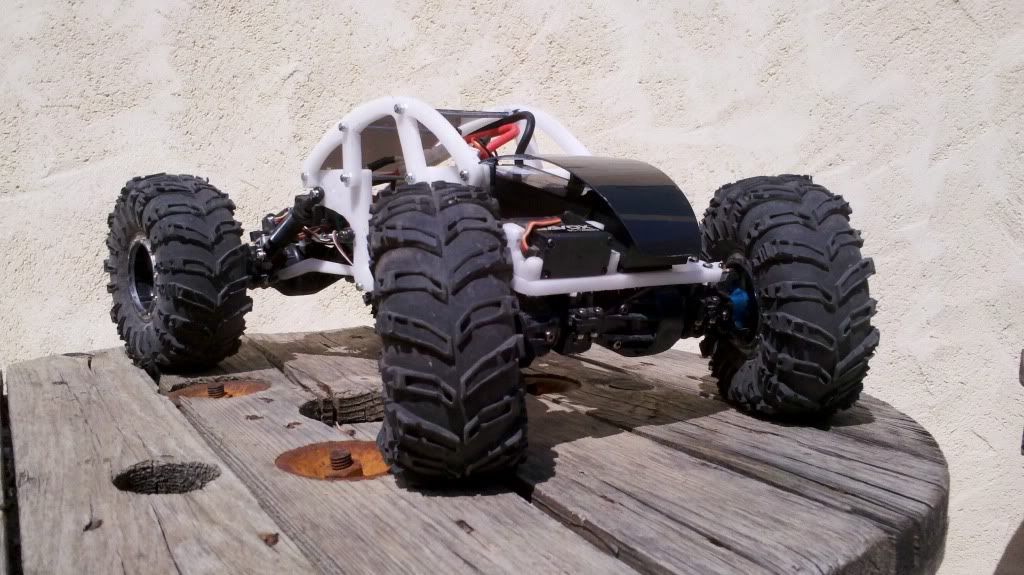 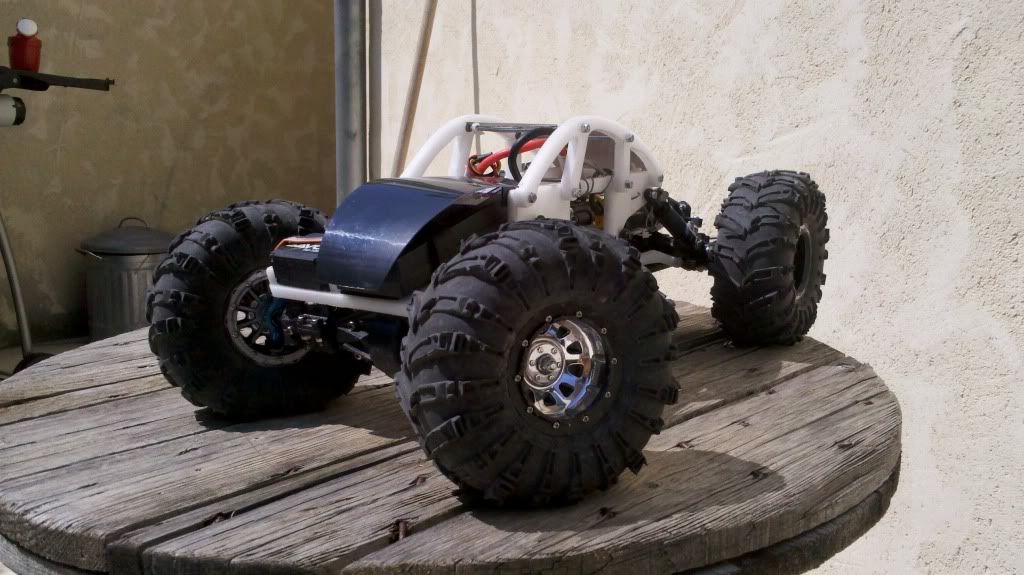  Which is actually performing like that : Btw I know that it doesnt look like a landcruiser anymore (which was the only reason I first bought this model) and no, if I wanted to build a bodyless rig I wouldnt have done it with an Ax10 I certainly wouldnt have expected for it to behave this good on the rocks out of the box, and im looking forward to refine this raw base. I started this project without a precise idea of its outcome, the chassis plates were intended to be used with a lexan body at first, but then, having much acetal left, I mostly made whatever part I needed to suit my needs. front axle plate, lower links, skid plate, rollcage, bta steering link and front servo mounts came out of my hands after many more hours of acetal madness.(incidentally, mostly night hours, which might be a clue to the weird look of the whole thing) Rtr it now weighs in at 2760 gr with the same lipo as the former setup and Im waiting for some 1300 mah lipos I ordered, to begin messing up with weight distribution again. Also looking for some lexan sheets to do some body panels, and to replace the fugly front body thing hastily made from a dvd cake box. Finally I decided to start a thread as I realized I had never seen a bodyless rig made with cr01 axles, and a true bta set up. So I thought I would share my work (not sure anybody will be interested in it though)as I benefited from the work of countless others who make rockcrawling such a great hobby. So please be kind for me being a noob, for my English which I havent practised in a while, for my debuts in video editing and for the chimera this rig has become. Thanks from france for this awesome forum! Last edited by farfab; 09-14-2011 at 03:49 PM. Reason: Syntax |

|  |
| Sponsored Links | |
| | |
|
07-10-2011, 07:22 PM
| #2 |
| RCC Addict Join Date: Feb 2008 Location: tauranga north island new zealand
Posts: 1,786
|
I like the new chassis alot,and it crawls well too. Im doing a tube chassis CR01 , with rear steer( which you need),so thanks for the insperation. |
|
| |
|
07-11-2011, 06:16 AM
| #3 |
| Newbie Join Date: Dec 2010 Location: france
Posts: 38
|
i'm glad you like it ! here's the link to a french rcc forum in which i created a more detailed thread of this build : http://www.rccrawler-france.com/foru...hp?f=52&t=7084 Hope it can help you ... |
|
| |
|
07-12-2011, 03:57 PM
| #4 |
| Newbie Join Date: Apr 2011 Location: France
Posts: 16
|
Actually there is a 4WS, and this .... thing is owning my GC3A ax10... |
|
| |
|
07-14-2011, 01:04 PM
| #5 |
| Rock Crawler Join Date: Mar 2010 Location: NRV
Posts: 958
|
Pretty cool. That is quite an evolution from where you started. You wouldn't even know it started as a CR01.
|
|
| |
|
07-16-2011, 07:03 PM
| #6 |
| Newbie Join Date: Dec 2010 Location: france
Posts: 38
|
Thank you ! As i see it now, a stock CR01 is 60% scale / 40% crawler, coming from tamiya the scale aspect is to be expected, and honestly i only bought this model because of the old toyota fj body. I've really enjoyed bashing it around in stock configuration, it behaved like a refined toy, and i admit that the first hopup parts i bought for it were some metal plated tamiya wheels and grille. But then driving it on meaner and meaner obstacles became an addiction and thus, most of the modifications i made from then on were focused on crawling abilities. As i said, the stock chassis with wheel weights, droop setup, lowered chassis rails, flipped transmission case and lipo attached to the front axle behind the steering servo proved surprisingly efficient (and it clearly gave this rig a more scale look, the body seated lower, the droop setup negated partially the effects of torque twist and the lowered chassis rails hid pretty well the lipo battery). That's why i just couldn't stop and decided to make a chassis of my own to have more build options regarding suspension travel, cog and clearance. In the process, i also decided to adress the problem of the steering angle which is pretty bad in stock configuration. I came up with this Bta setup : 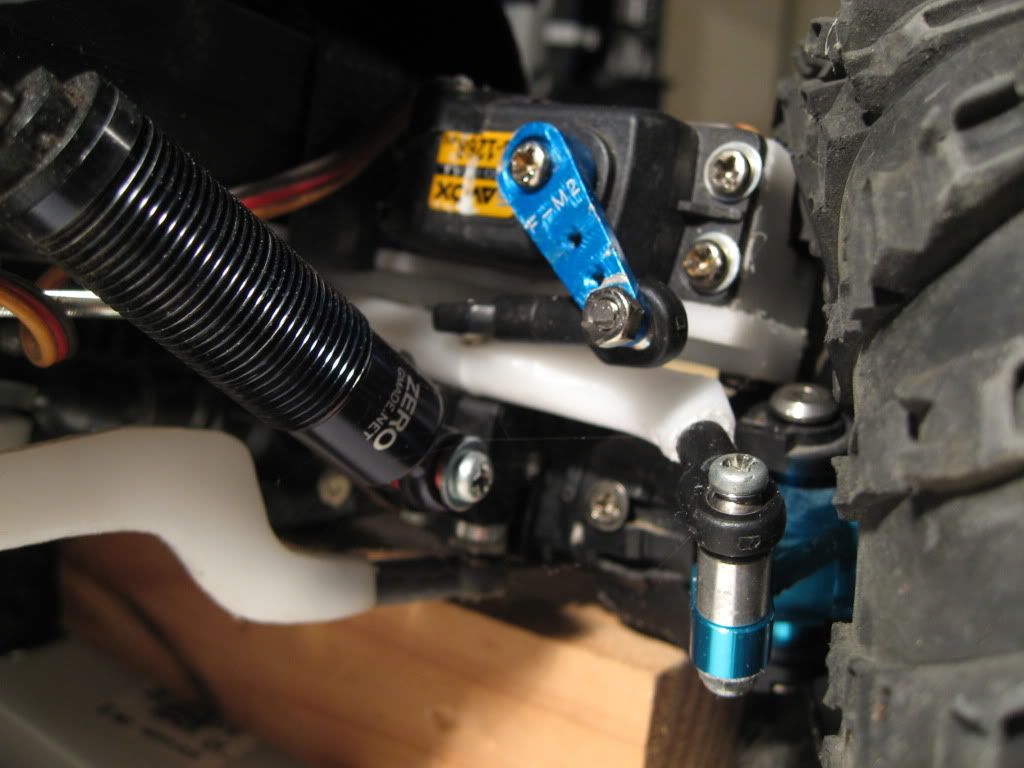 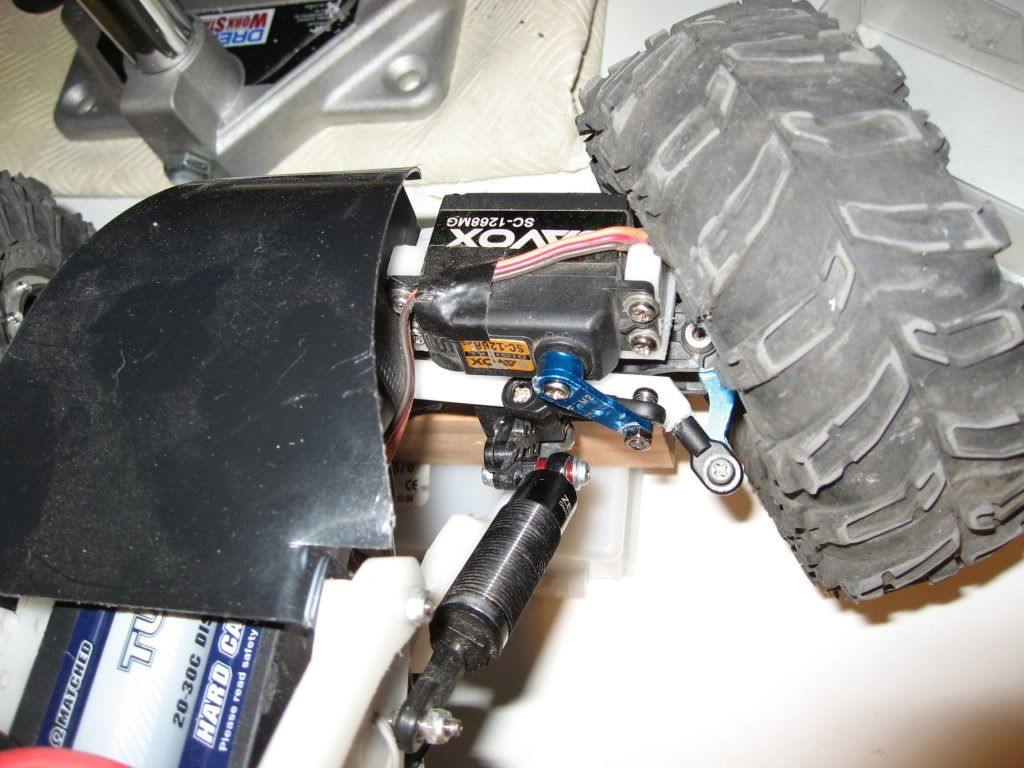 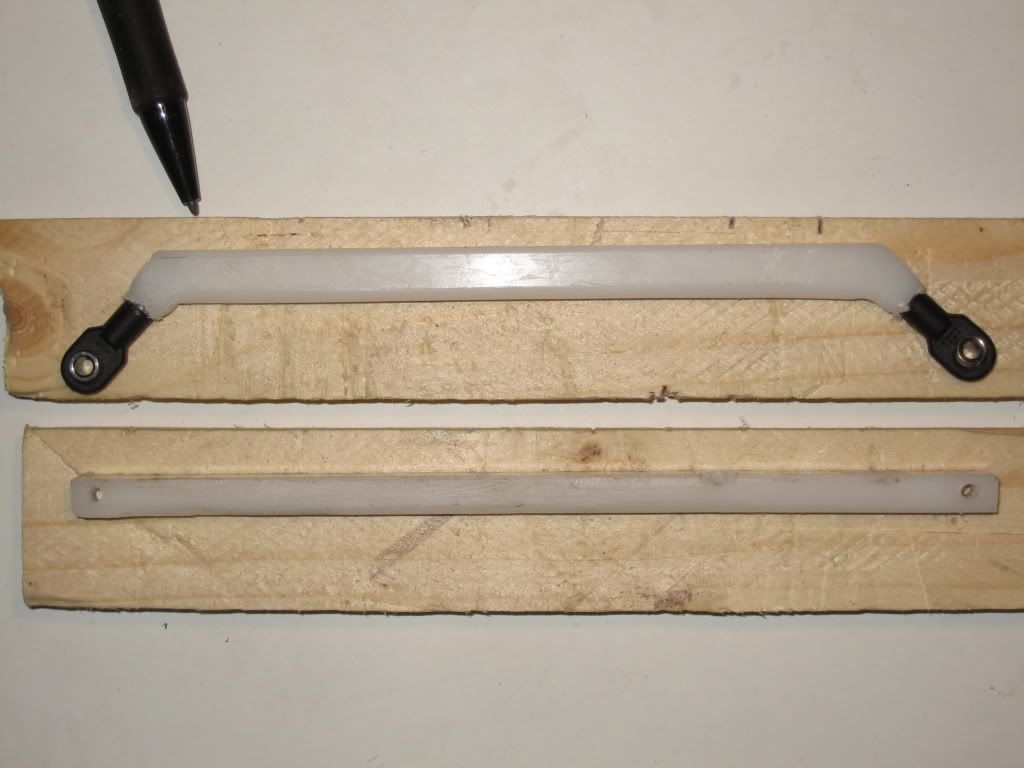 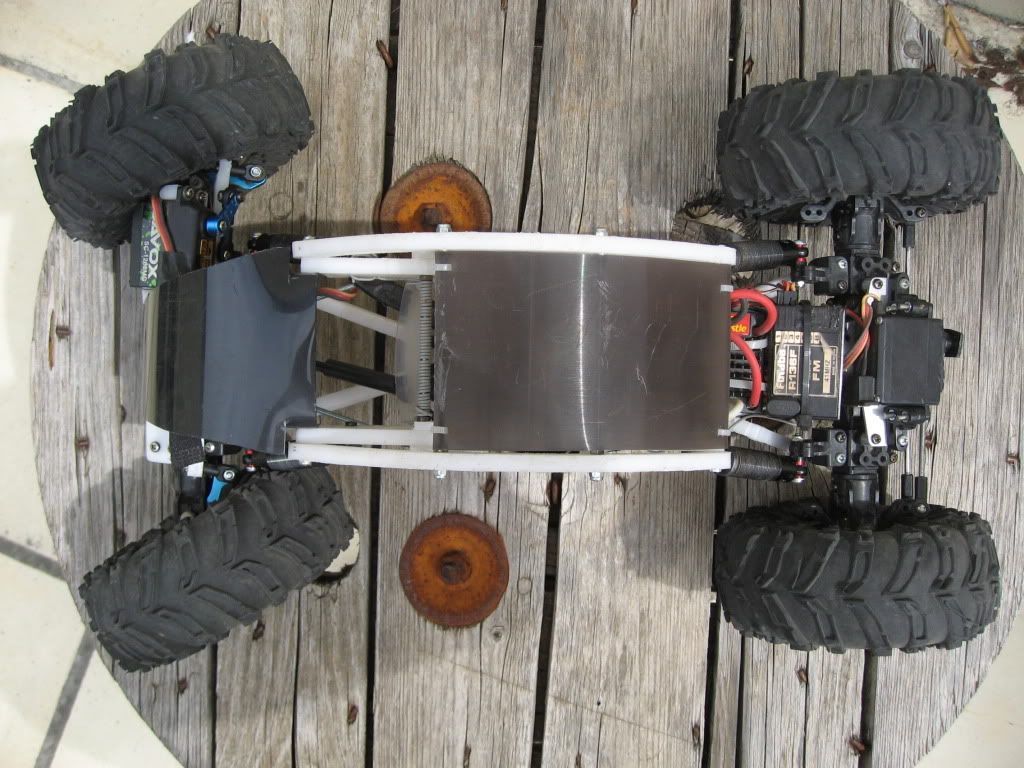 the steering angle is the same as with the thinner rod but the beefier one doesn't bend at all under effort. As a conclusion, i'm pretty happy with my original choice for the Cr01, it has proven to be reliable even after rough treatment and it performed far beyond my expectations (with some room left for more improvments All in all, the Cr01 is not far from being the perfect rig to begin rockcrawling ... 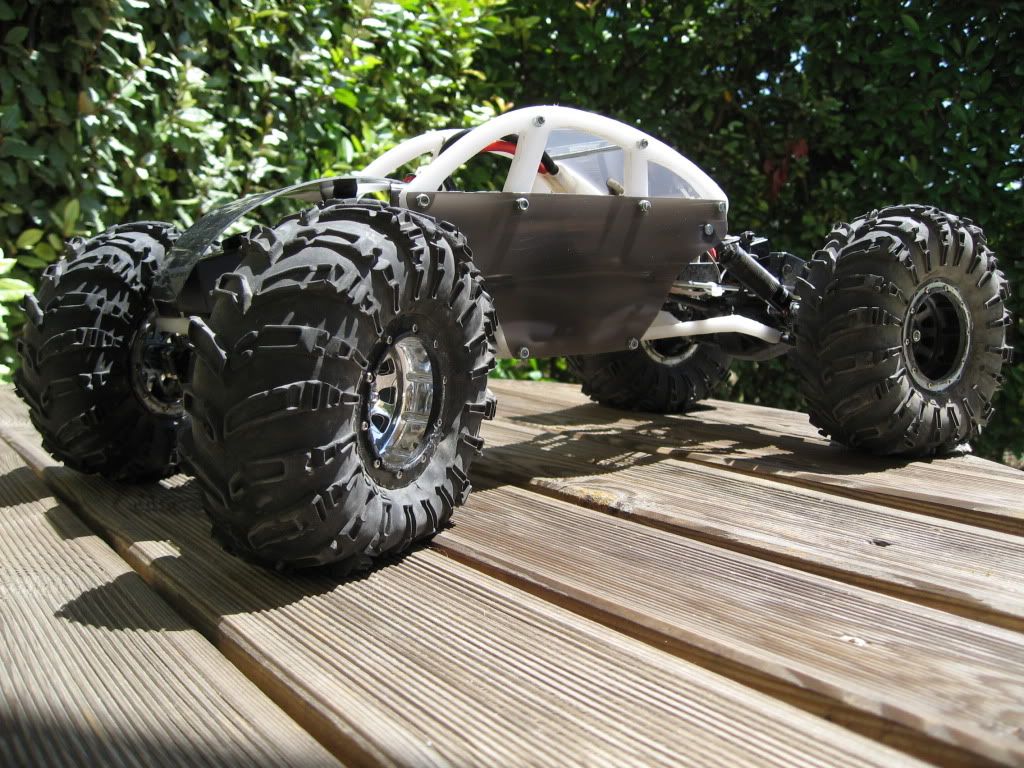 |
|
| |
|
07-17-2011, 04:15 AM
| #7 |
| Newbie Join Date: Apr 2011 Location: France
Posts: 16
|
planning to go bta on the rear stear as well ?
|
|
| |
|
07-17-2011, 01:22 PM
| #8 |
| RCC Addict Join Date: Feb 2008 Location: tauranga north island new zealand
Posts: 1,786
|
So with the new steering setup,did you get more steering throw? Ive had problems trying to gain more steering, in the dogbones poping out of the stub axle cups ,and ripping the "C"s off the axles!. |
|
| |
|
07-21-2011, 04:27 PM
| #9 |
| Newbie Join Date: Dec 2010 Location: france
Posts: 38
|
At the moment, this setup doesn't have any problem with the dogbones, at full turn they sit like this : 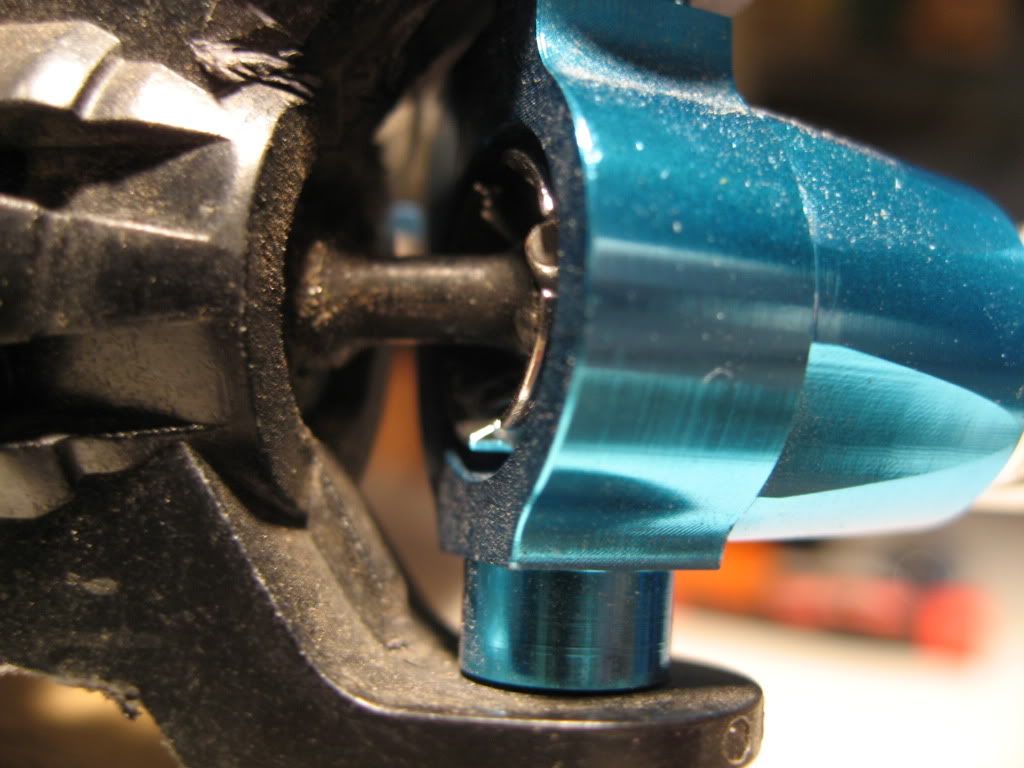 Btw i'm not using the stock axle driveshafts, instead i use those long ones :  They allow me to accomodate nicely the wider track front (inducing far less rubbing from the tyres on the shocks) I found out that they were steeper than the stock ones, and i still have to test the limits of those parts, but i'm currently waiting on some aluminium C's i ordered as i didn't want to "shave" more of the stock plastic C's : 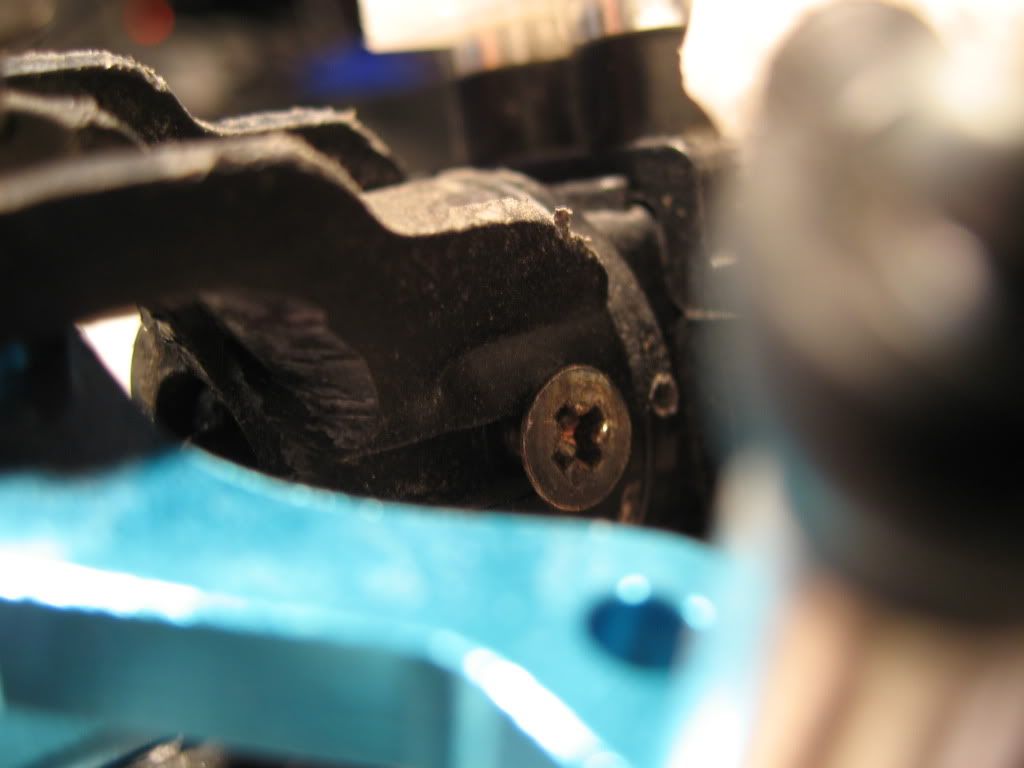 I also had to remove some material from the steering knuckles so that they now touch the back of the C's at full lock : 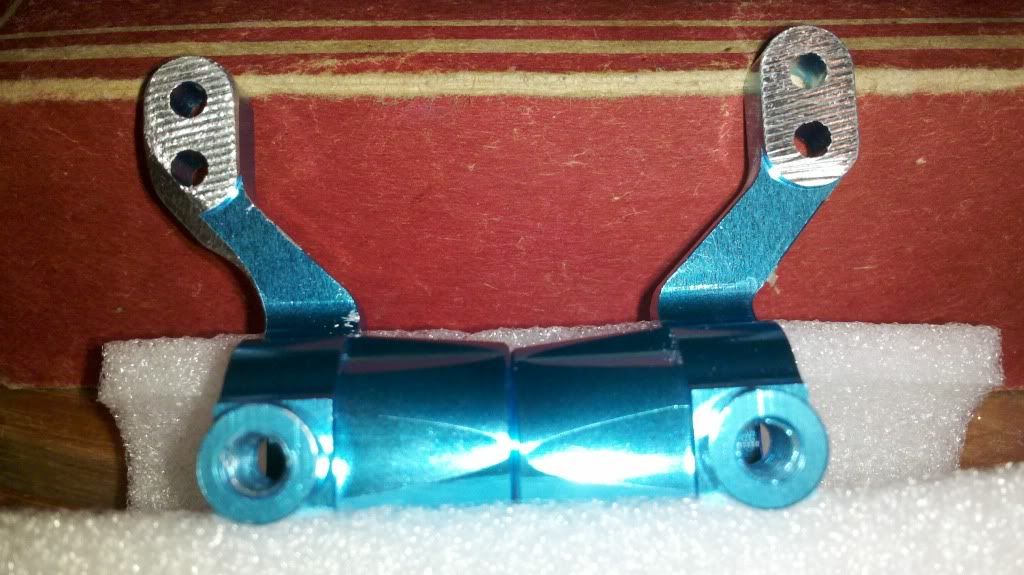 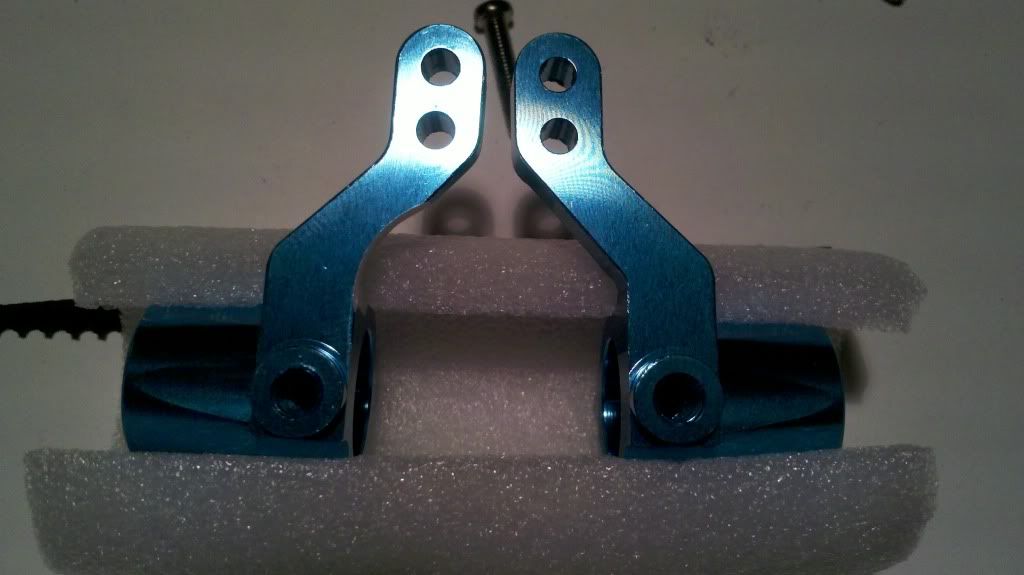 (sorry for the crappy phone pictures, i'll do better ones when i'll mount the new C's) The right one is stock on both pictures. There is still room for some more improvements, i'll keep you posted ! Last edited by farfab; 07-22-2011 at 05:31 AM. Reason: typo |
|
| |
|
07-22-2011, 12:39 AM
| #10 |
| Pebble Pounder Join Date: Oct 2008 Location: Prague, Czech Republic
Posts: 118
|
Hi, I really like your project. We watch him here long. I wanted to do something like that, but I did not want to cut metal, so it was not too difficult. Can I ask what the material that you have to cut and what thickness? Thank you very much. Karel - Prague |
|
| |
|
07-22-2011, 07:01 AM
| #11 |
| Newbie Join Date: Dec 2010 Location: france
Posts: 38
|
Thanks for the comment ! i've followed the evolution of your HDJ80 with great interest, your rig looks awesome  Being a huge fan of toyota offroad vehicles, it makes me wonder if there will ever be a 1/10 body of a KZJ70/KZJ73 (i think it would look killer), i saw a nissan patrol Gr 1/10 body not so long ago, so i just keep hoping. Concerning the material i used, it's Delrin 1/4 thick sheets (6.5mm). Now that this setup is approved, i'm currently waiting for some 3mm sheets. It will allow me to redo some parts to shave some weight in strategic places, and to test if 3mm thick delrin can cope with the sharp rocks i play on. I found interesting deals on these two ebay shops depending on their stock/arrivals : 1 2 You just have to look for delrin or acetal sheets, and to convert from inches to Cm you just have to do inches x 2.54. Thanks for your interest in this build, looking forward to see what you come up with using acetal/delrin ! To the moderators, i hope it's Ok to post links that way ? |
|
| |
|
07-23-2011, 08:47 AM
| #12 |
| Pebble Pounder Join Date: Oct 2008 Location: Prague, Czech Republic
Posts: 118
|
Do you think I could ask you about some approximate dimensions? So if you do not mind that I would like to inspire you to build your own. Feel free to private message. thanks |
|
| |
|
07-23-2011, 05:09 PM
| #13 |
| Newbie Join Date: Dec 2010 Location: france
Posts: 38
|
Pm sent.
|
|
| |
|
07-30-2011, 12:51 PM
| #14 |
| Newbie Join Date: Dec 2010 Location: france
Posts: 38
|
I found a new playground just 15 mn from home : 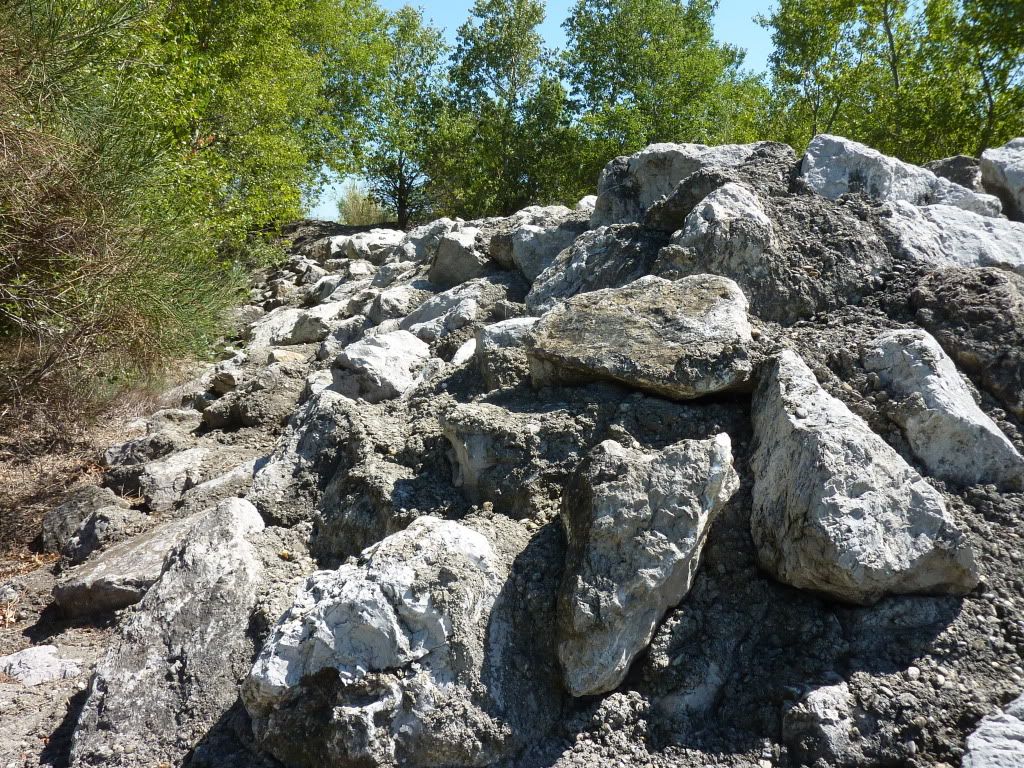 and broke my rear servo while crawling on it : 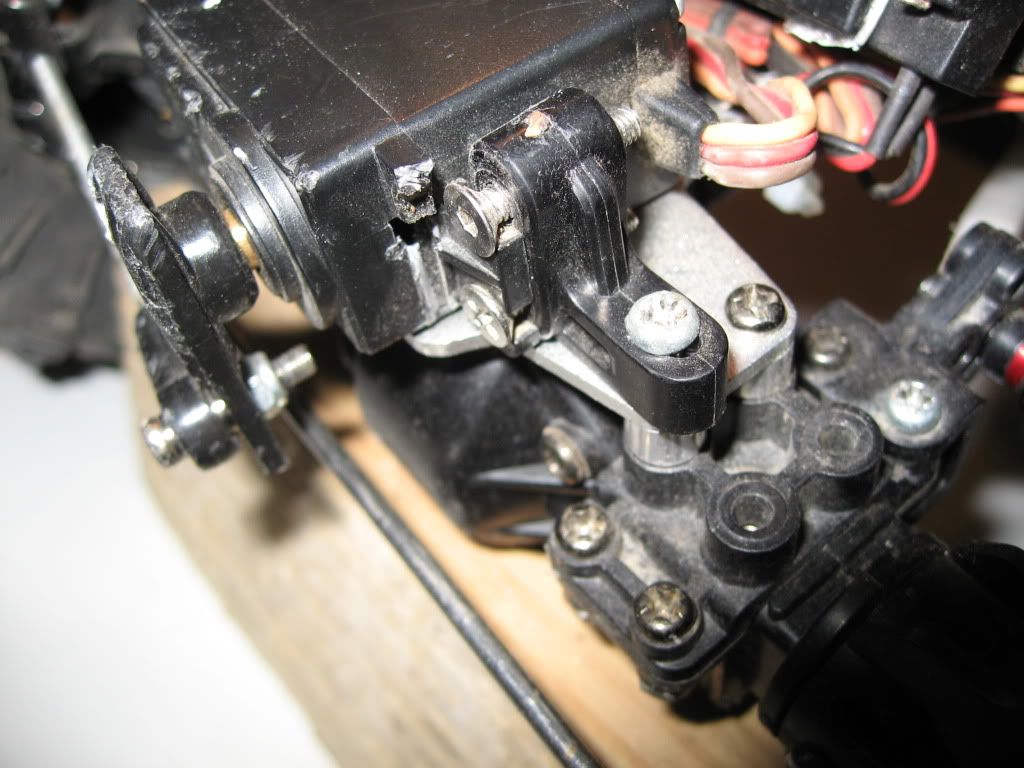 So back to 2ws and still waiting for my small lipos 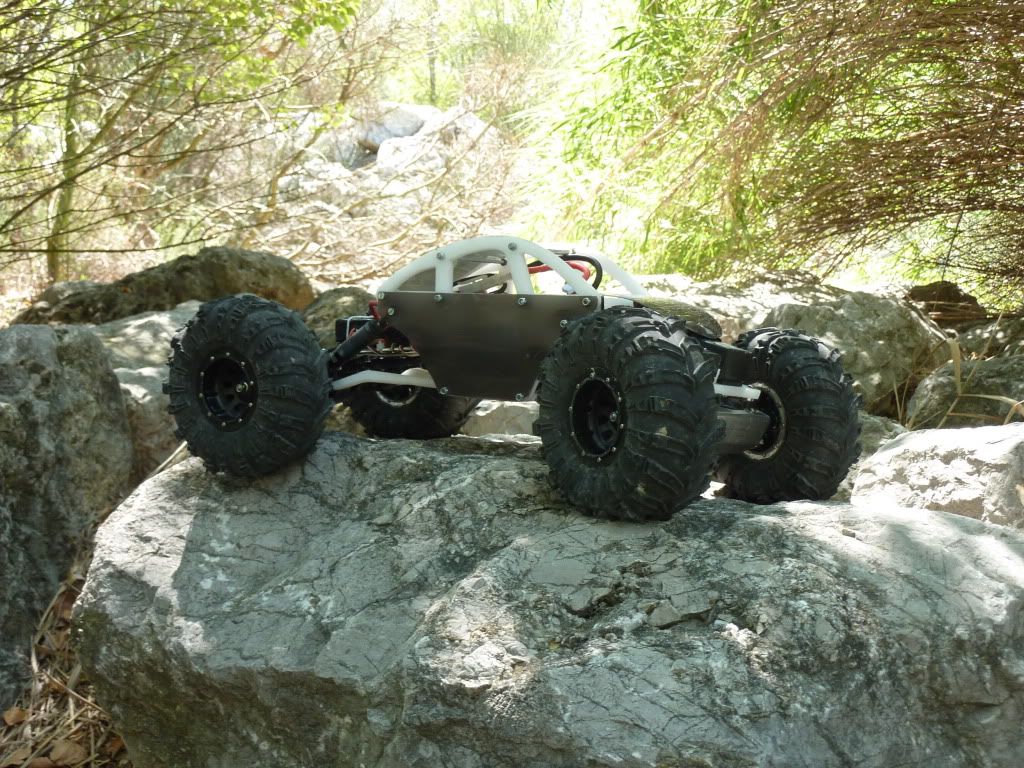 As a result it is much more nimble and playfull, even if the rear suspension is too hard for this weight. I'll come up with a better setup when i get the new lipos as they will cut down some more weight... I made a front skid plate out of stainless steel to try to protect the axle as best as i could from the agressive rocks i encountered in this new place : 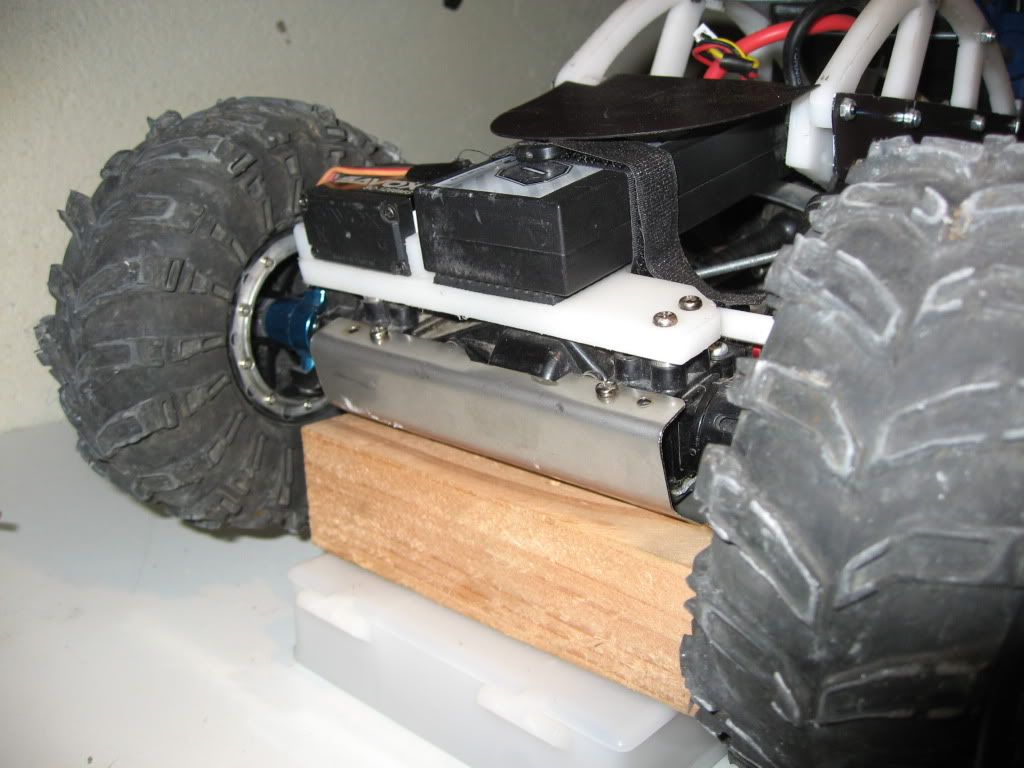 It's pretty raw at the moment and i'll refine it after some more testing. Here's a vidéo available in Hd i made on this new terrain : |
|
| |
|
07-31-2011, 02:53 AM
| #15 |
| Pebble Pounder Join Date: Oct 2008 Location: Prague, Czech Republic
Posts: 118
|
Great, Sometimes I feel it a little harder to cross. Am I right? |
|
| |
|
07-31-2011, 09:52 AM
| #16 |
| Newbie Join Date: Dec 2010 Location: france
Posts: 38
|
Yep, you're right and it is pretty obvious from the video. it's the result of the 180 gr i shaved from the rear axle, i'll test softer shock oil when i get the 1300mah lipos. Btw i received the aluminium hub carriers i've been waiting for, so i'll probably post some pictures of the new setup tonight or tomorrow. |
|
| |
|
07-31-2011, 05:42 PM
| #17 |
| Newbie Join Date: Dec 2010 Location: france
Posts: 38
|
As i mentionned, i received some STRC aluminium blue hub carriers yesterday. I got them for 8$ on ebay and after 5 mn of chemical experimentation they came out like this :  and once installed 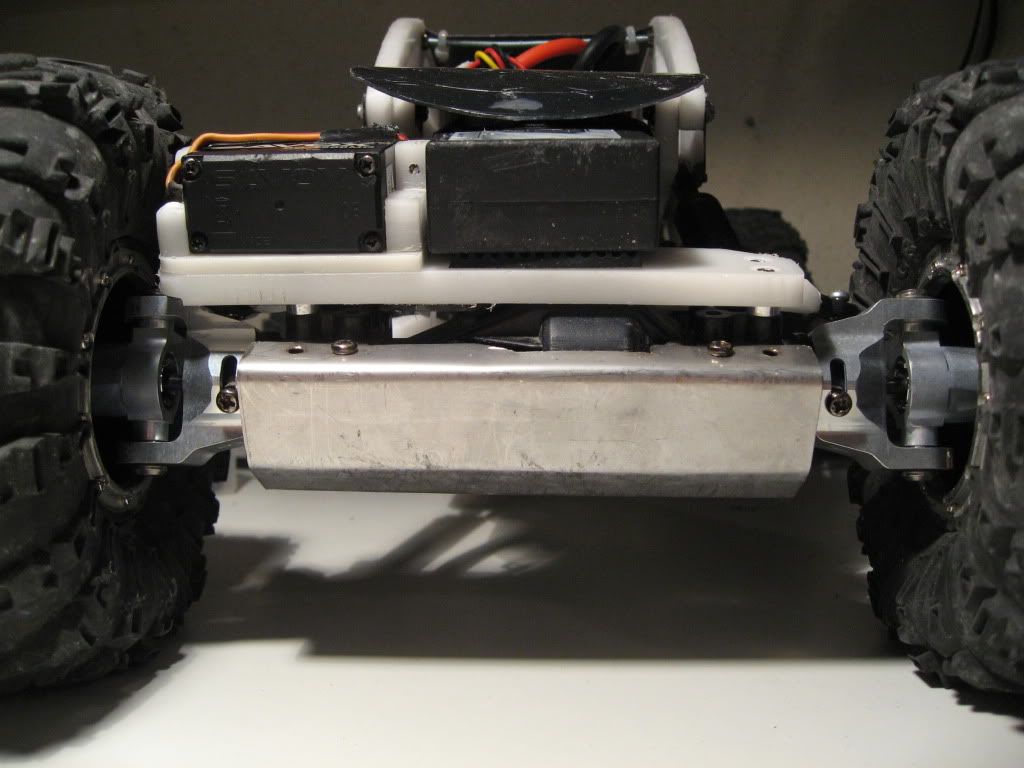 I also bought a longer and beefier servo horn to replace the previous one. As a result i had to make a 3mm delrin plate to ensure that despite the longer servo horn, the shock doesn't get in the way. 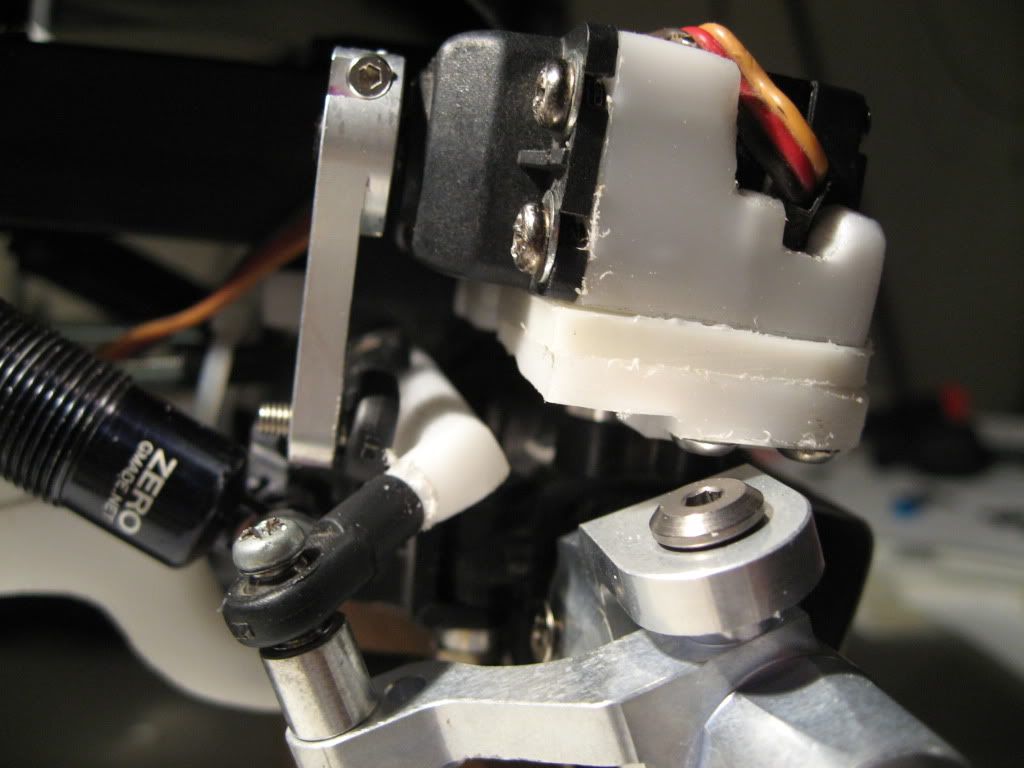 I still have to cut the traxxas ball end screw i used to atach the servo horn to the steering rod, but i want to make sure this setup can deal with the front servo running on 7v first. 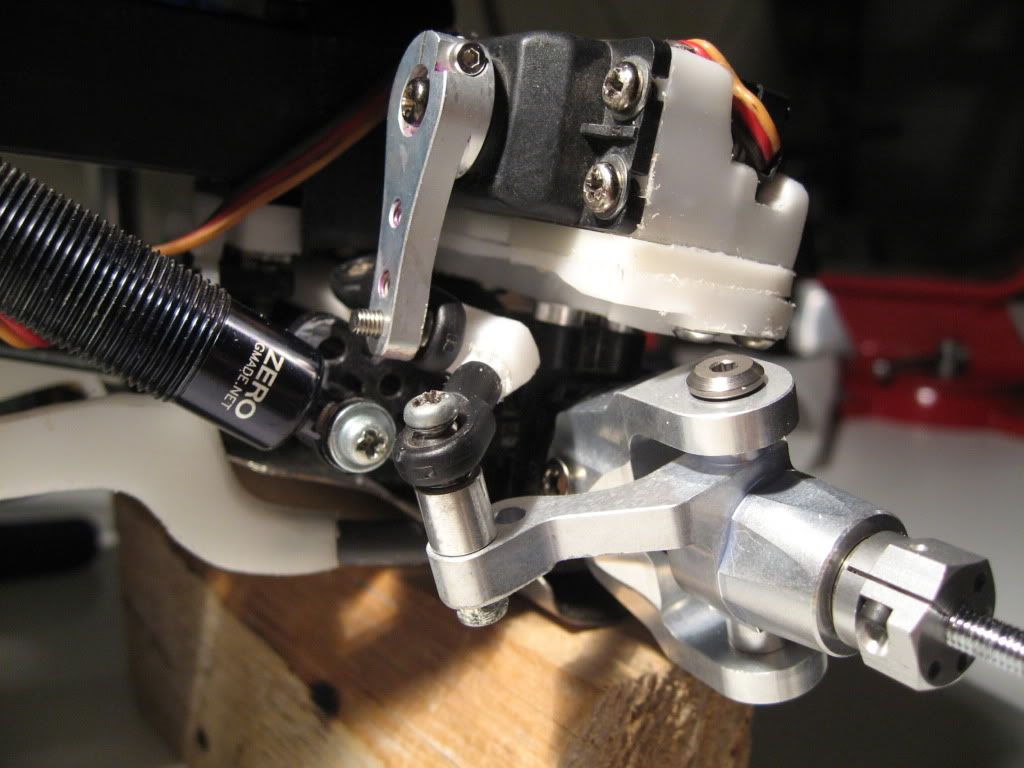 The longer servo horn and new hub carriers allowed me to gain more steering angle, now the tyres are rubbing heavily on the shocks at full throw. 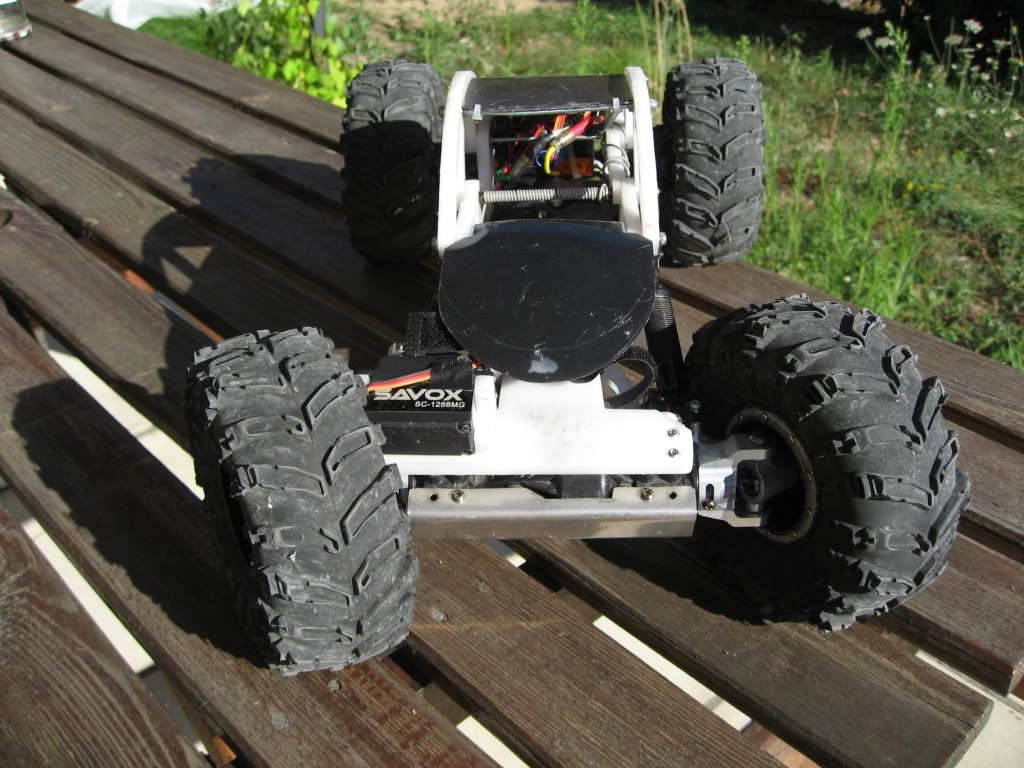 Despite that better steering angle, the dogbones sit deeper in the driveshafts, so i suspect the new hub carriers make the steering knuckles sit nearer to the axle than the stock ones. 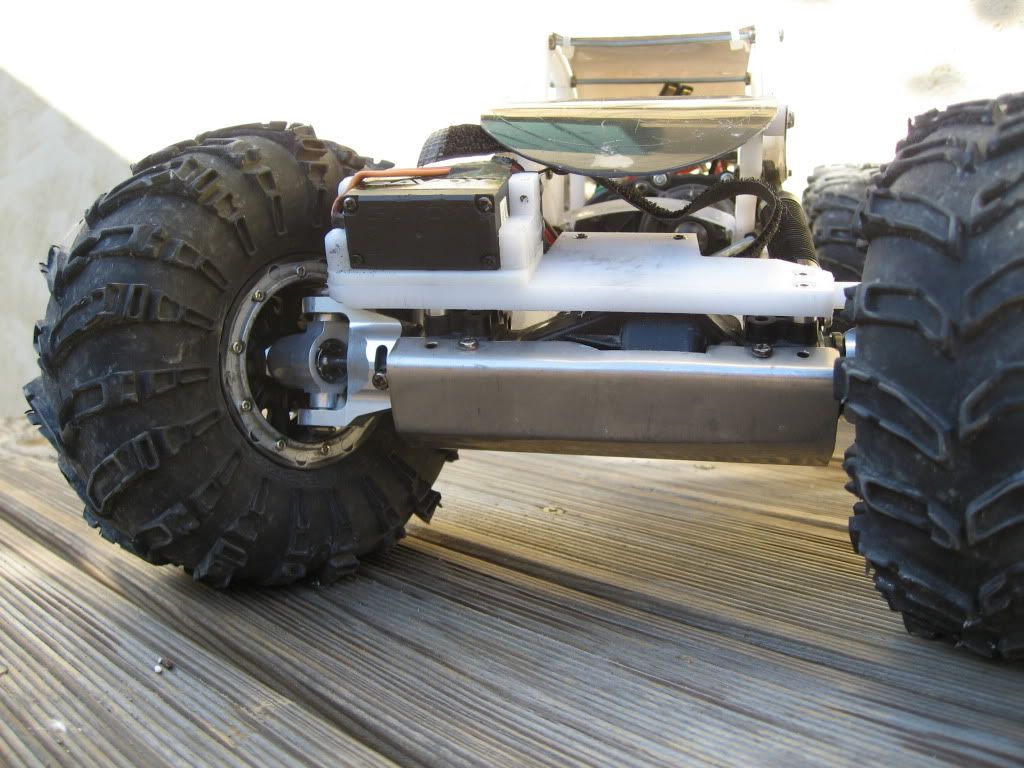 To be continued ... |
|
| |
|
08-01-2011, 12:48 PM
| #18 |
| RCC Addict Join Date: Feb 2008 Location: tauranga north island new zealand
Posts: 1,786
|
Nice upgrades, this is going to bee one tough CR01,the video looks good too.
|
|
| |
|
08-01-2011, 01:08 PM
| #19 |
| Rock Crawler Join Date: Mar 2010 Location: NRV
Posts: 958
|
What a cool project. It's amazing when you look at the first picture in this thread. It doesn't even look like the same truck.
|
|
| |
|
08-02-2011, 03:58 PM
| #20 |
| Newbie Join Date: Dec 2010 Location: france
Posts: 38
|
Thanks for the comments ! At the moment it is back on the "operating table" : 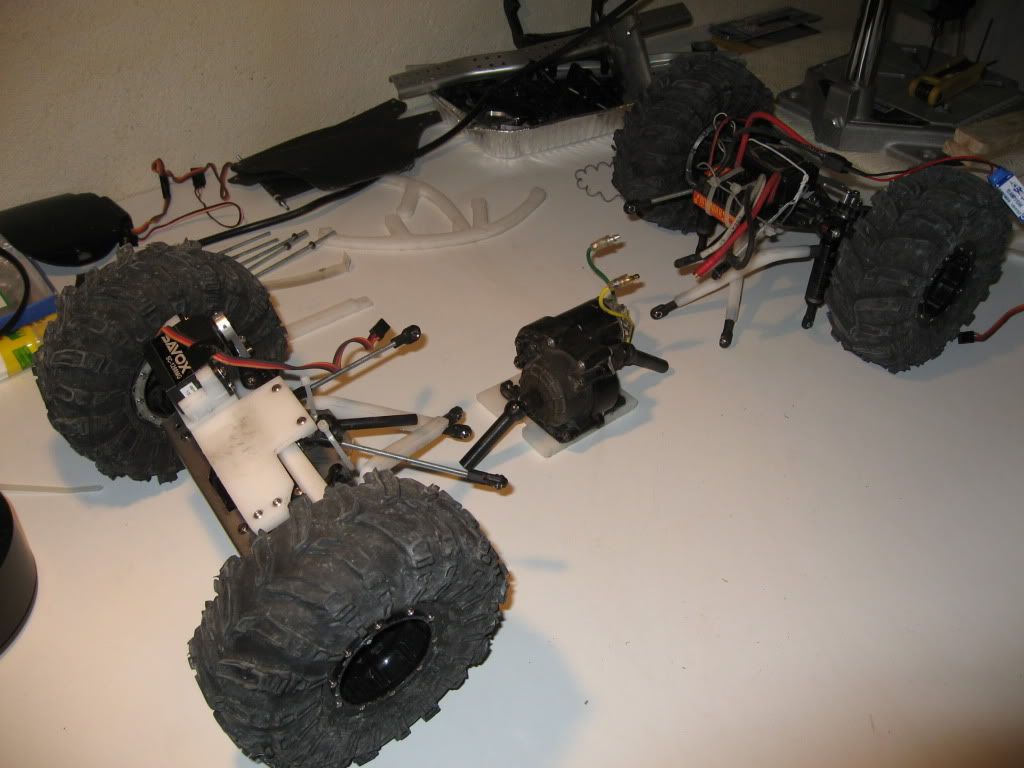 I made another skid plate to be able to use 30 mm roundhead screws to attach the chassis plates and the lower links, they shouldn't hang on the rocks like the previous locknuts i used : 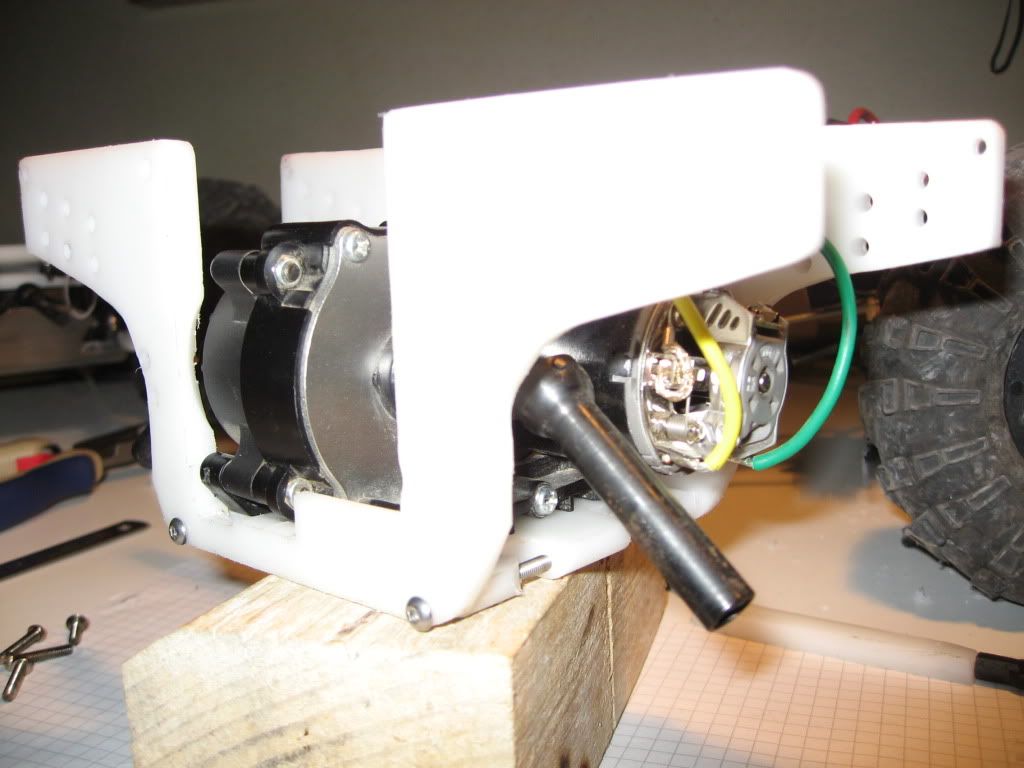 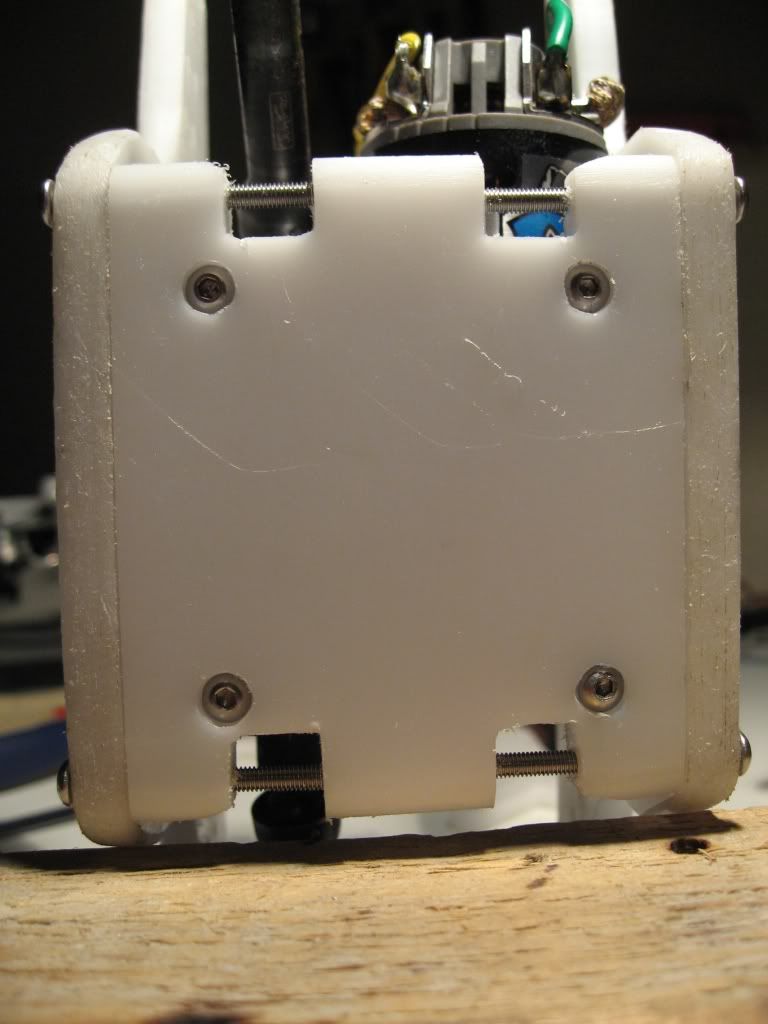 next big step : 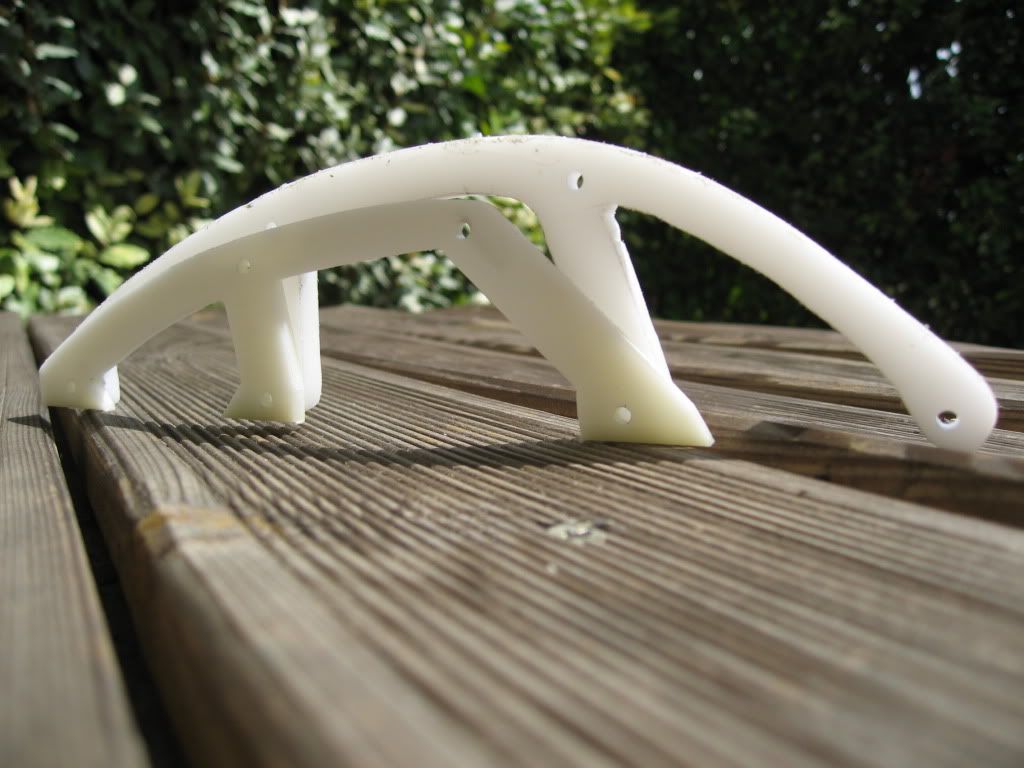 To be continued ... |
|
| |
|
| Tags |
| cr-01, cr01 |
| |


 Linear Mode


