| |
| |||||||
 |
| | LinkBack | Thread Tools | Display Modes |
 04-28-2006, 10:02 PM
| #1 |
| Quarry Creeper Join Date: Aug 2005 Location: Jefferson City
Posts: 345
|
Tyler was kind enough to allow me to test his remarkable chassis. The chassis came packaged very well and I was immediately impressed with the quality of the machined pieces. I could also tell that this chassis was well thought out. I guess before I get too far, here are the specs of the truck.
 After getting parts to make my new links, I proceded with the build. I chose to use 1/4" Delrin rod as my link shafts (thanks again, Tyler) as opposed to using 6-32 all-thread and sleeving it with 3/16" brake line. The Delrin is a lot easier to work with and is extremely slick. I had a hard time holding onto the sections with a pair of pliers. 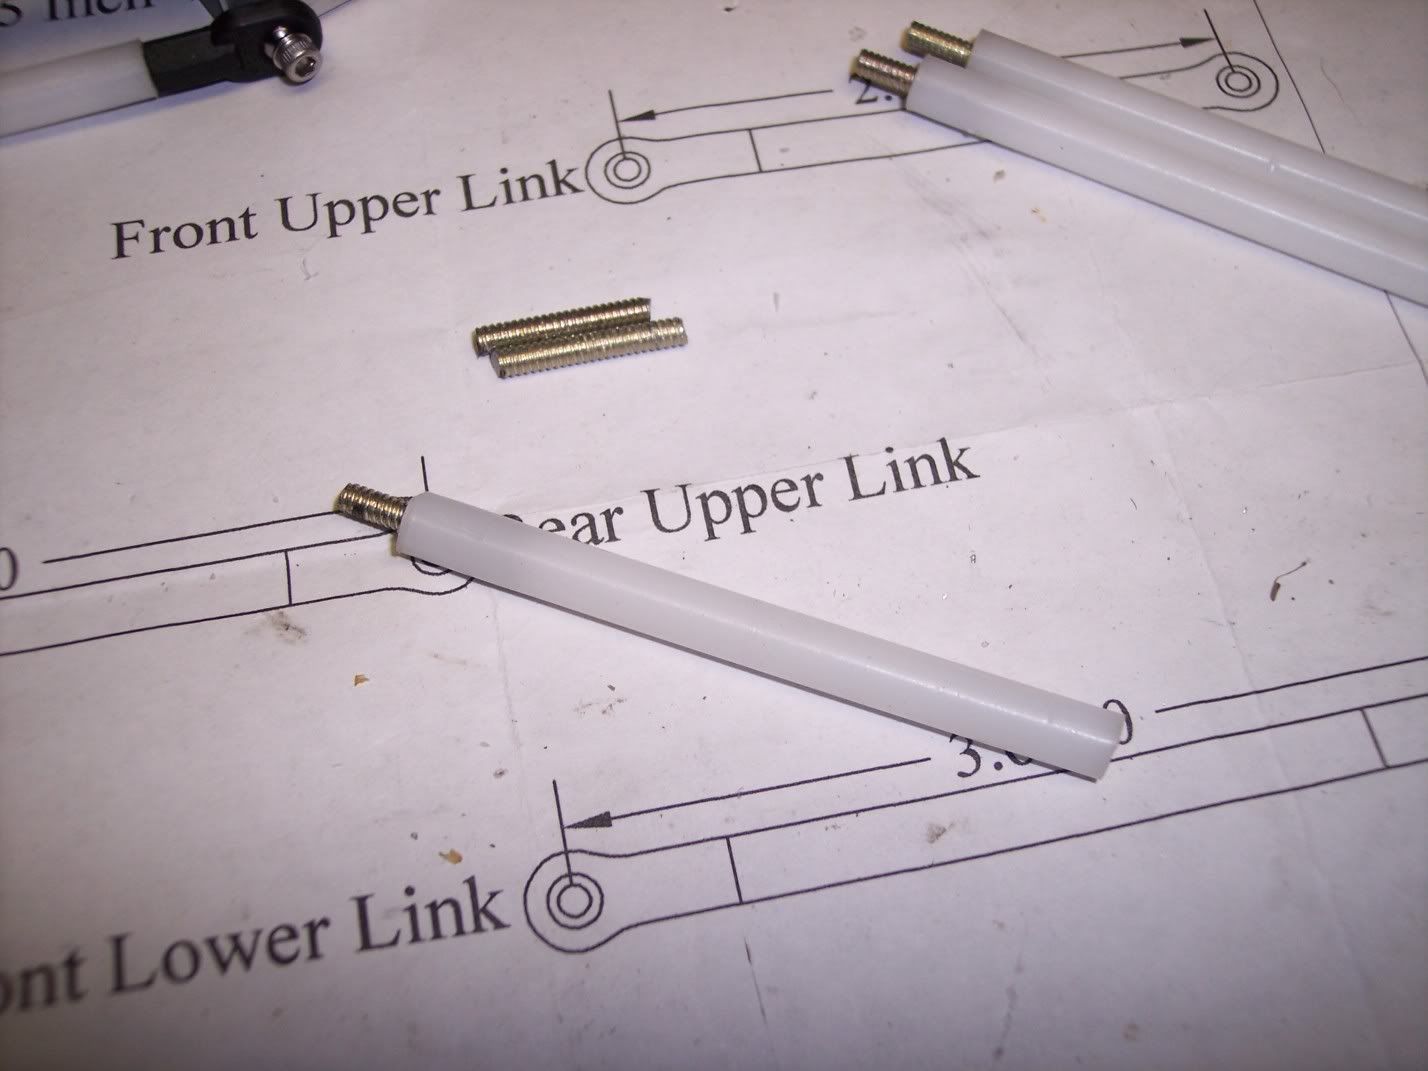 I proceded to drill holes in the ends of each section of Delrin as per the link length chart that Tyler included with the chassis. His link lengths yeild a 12.5" wb. After drilling the holes, I chucked up pieces of 6-32 all-thread in my cordless drill and used it to drive the all-thread into the ends. 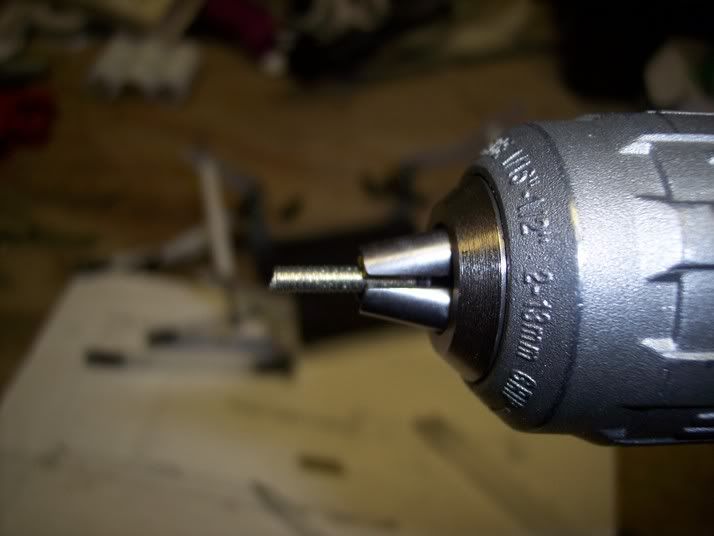 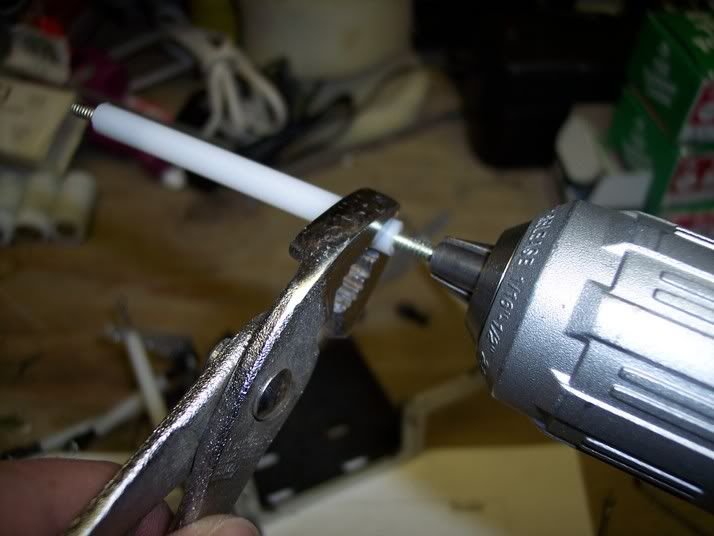 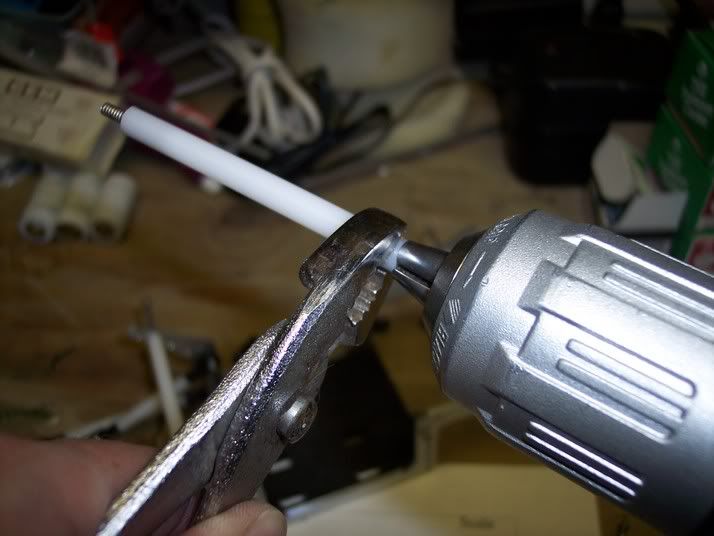 I then used Traxxas #2732 rod ends as my link ends.  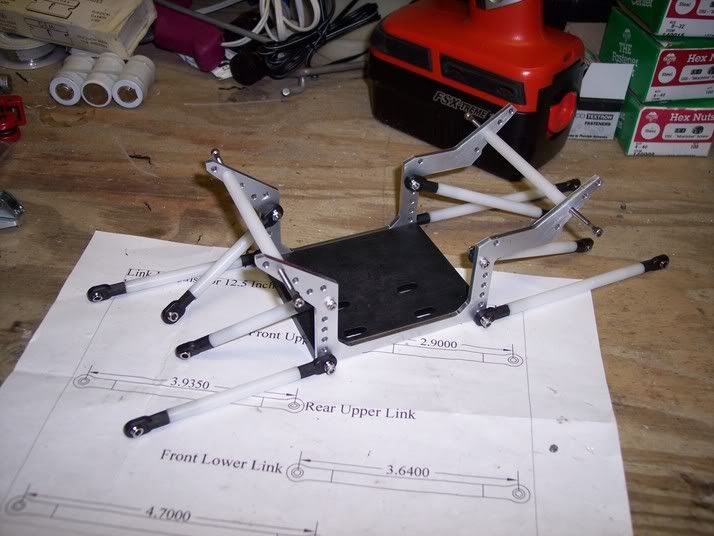 The easy part was now finished. I mounted the axle plates as well as my Emaxx shocks. Now I had to figure out where and how to mount all of my electronics.   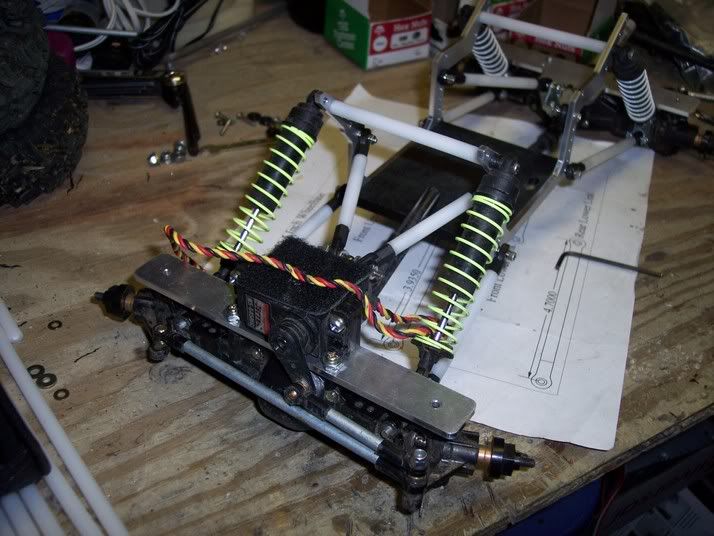 The Stampede transmission went in without a hitch. Tyler had enough forethought on the design of the Delrin base plate to allow the tranny/motor to be mounted in two ways. You can either have the motor facing the front (as most seem to do, including myself) or you can mount it with the motor facing the rear, which reportedly helps to counteract torque twist. I mounted mine the way I was used to it, but may very well change it after a bit to see if there really is a difference. I decided to mount the ESC (Tekin Rebel II) on the rear axle plate and the batteries on the front axle. The pictures show my 1200mah 2/3A pack on the front axle on either side of the servo. I use this setup for messing around, but still utilize my sub-C 3300mah pack mounted on top of the servo parallel to the front axle. I will eventually create a pack similar to the 2/3A configuration to keep the CG down low. The receiver was mounted on the side of one of the side plates (Hitec Shredder...ultra small!!) I created a pigtail to connect the ESC to the batteries with 12GA Dean's "spaghetti wire" and Dean's ultra plugs (not pictured). The system will also allow me to mount the battery over the rear axle on downhill comps. 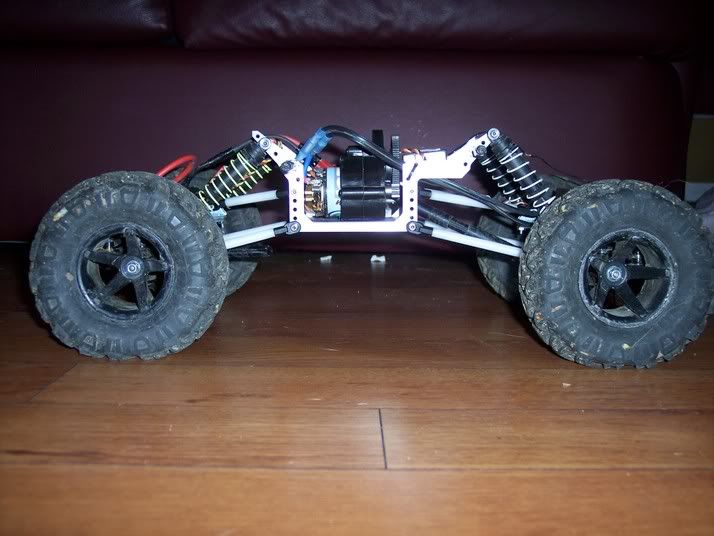 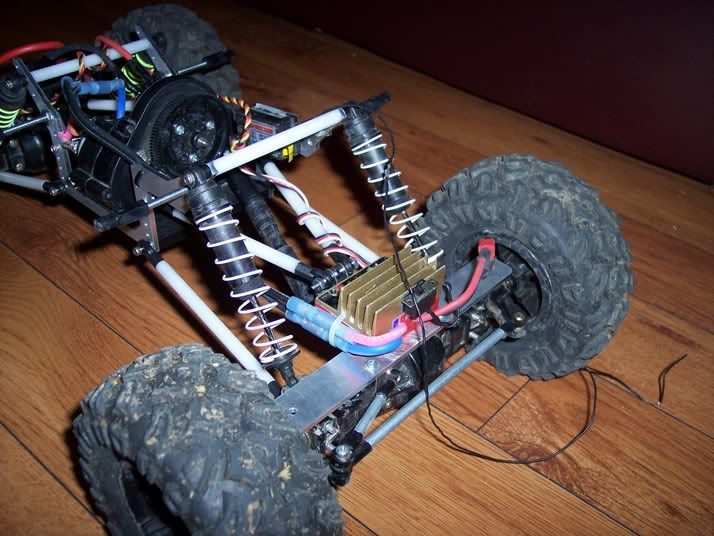 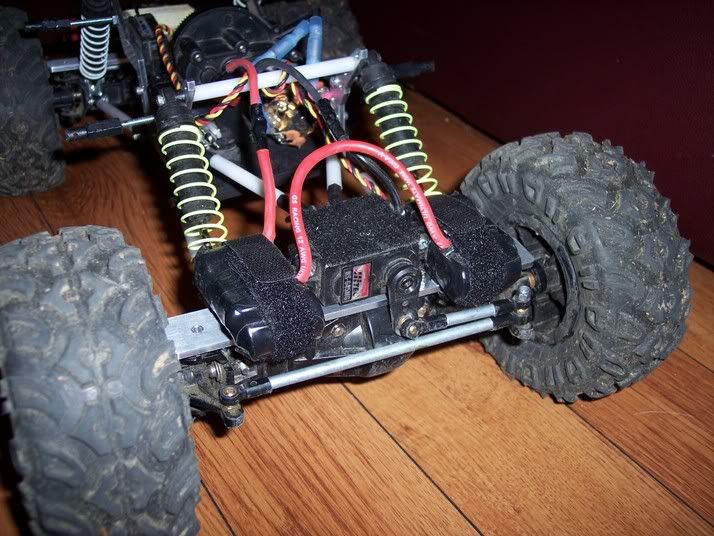 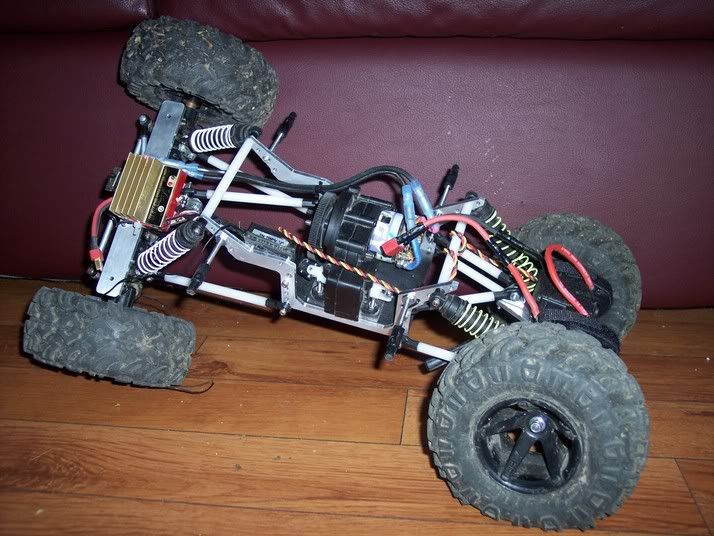  Now, the big question...how does it crawl? Well, I've only had a couple of chances to try it out since the build. I did have some issues with the build that I believe seriously dampened the performance, which was totally my fault for not noticing it when I built it. For some reason, when using the Traxxas ends that I used, I had to add spacers between the chassis and the ball end in order to not bind up the upper links (the flex pics above are BEFORE the fix, so you can see how much artic it has even when you screw up building it But, even with that problem, the chassis performed amazing! I had a couple of guys (Dezfan especially!) wanting one. I had someone say that it seemed like I was going to be the one to beat at the next comp. Wait until they see how truly capable the chassis is now. We're supposed to have another practice session tomorrow (Saturday), but it's supposed to rain ALL day, so I doubt it will happen. I'm anxious to see what it does now that I've corrected the problem. In a nutshell, once Tyler starts selling these, I would highly recommend getting one. The axle plates themselves are worth the price of the chassis. Oh, and I would HIGHLY recommend using Delrin as links! That stuff is COOL!!! Tyler is a great guy and it's obvious that he's got a good chassis on his hands. This is one instance where "less is more"! Last edited by bugman72; 04-28-2006 at 10:05 PM. |

|  |
| Sponsored Links | |
| | |
|
04-29-2006, 07:23 AM
| #2 |
| Pebble Pounder Join Date: Mar 2006 Location: Rockland ME
Posts: 108
|
Any action pics? What body are you going to run? Looks great by the way. |
|
| |
|
04-29-2006, 08:11 AM
| #3 |
| Quarry Creeper Join Date: Aug 2005 Location: Jefferson City
Posts: 345
|
No action pics yet. Our get together for today has been postponed until tomorrow, but I seriously doubt we'll be doing any crawling tomorrow. I'm using my old body, which is an HPI MX-1 body that has been seriously hacked up and beat to crap! Here's a pic of the truck with my old RBX chassis.  |
|
| |
|
04-29-2006, 08:17 AM
| #4 |
| Pebble Pounder Join Date: Mar 2006 Location: Rockland ME
Posts: 108
| |
|
| |
|
04-29-2006, 08:53 AM
| #5 |
| owner, Holmes Hobbies LLC   Join Date: Nov 2004 Location: Volt up! Gear down!
Posts: 20,290
|
I really like that chassis! I saw it in person last weekend and it is quite purty, and looks stout too. What is soooo secret about your foam, huh? I bet you are using minimally expanding foam!! |
|
| |
|
04-29-2006, 11:42 AM
| #6 |
| Rock Crawler Join Date: Nov 2004 Location: Roseville
Posts: 560
|
Lookin good there bugman! I especially like the fact that you did a little write-up on the links and everything. C'mon! What's so special about your foam?!?! |
|
| |
|
04-29-2006, 01:03 PM
| #7 |
| RCC Addict Join Date: Apr 2006 Location: On Da' Shelf
Posts: 1,253
|
Yah man nice article on the P4! The more I see this chassis the more I like it! It is at the top of the list for me! Now how much closer are we to being able to buy it? |
|
| |
|
04-29-2006, 01:09 PM
| #8 |
| Rock Crawler Join Date: Nov 2004 Location: Roseville
Posts: 560
|
It should be available later this week! If not, most definately next week.
|
|
| |
|
04-29-2006, 03:00 PM
| #9 |
| Quarry Creeper Join Date: Aug 2005 Location: Jefferson City
Posts: 345
|
Alright, alright, there isn't anything TOO top secret about my foams. Here's what I did. Go to Walmart and get some of that 2" thick seat cushion foam back in fabrics. It comes in an 18" square piece for less than 2 bones. Take your stock Moab foams and cut them in half. Take your purchased foam square and cut out an exact copy of your Moab foam. Cut this 2" thick piece into two 1" thick pieces. Shove your cut Moab foam in and place it inside the tire on what will be the outside sidewall of the tire (away from truck). Place the Walmart foam on the inside sidewall area and you're done. The Walmart foam is softer, which helps give you some bite. The Moab foam helps to retain some sidewall support, yet still will collapse enough to help with grip. OK, now the secret's out Back to the P4...the CG is excellent. With allowing all of the electronics and batteries to be mounted on the axles, all of the main "bulk" of the chassis is either in the center (tranny/motor) or over the axles. You will more than likely have to add weight to the tires, though. The chassis is so light that you'll need to add weight. I added 3.5oz to each front tire and left the rears alone. I haven't wheeled it much since fixing the link problem and adding the weight (I didn't have any at the practice session last Saturday), but I'm positive that it's going to be one heckuva crawler. |
|
| |
|
04-29-2006, 05:23 PM
| #10 |
| Debunking old stereotypes  Join Date: Feb 2006 Location: 1st and Amistad
Posts: 2,260
|
Nice write up and build up Bugman72!! I too agree that it's going to be one heck of a capable crawler. Our MN GTG ended up being at Apple bee's today because of rain, we had a good meeting. I brought the P4 and everyone was impressed with the looks and most were following the build up threads and excited to see it in action. As soon as this rain quits I hope to get out on the rocks. I would think that Tyler is going to do well with this chassis design, and I look forward to working with him on his other designs. Thank you Tyler!! And Best of luck with the launch of the P4 comp chassis!!! |
|
| |
|
04-29-2006, 05:34 PM
| #11 |
| Rock Crawler Join Date: Nov 2004 Location: Roseville
Posts: 560
|
Thanks for all the kind words guys! I really hope this chassis does well on the market. I know mine does wonders on the rocks. Hey bugman, what did your wheelbase end up being? It looks a little short but that could just be the picture. |
|
| |
|
04-30-2006, 07:10 AM
| #12 |
| Quarry Creeper Join Date: Aug 2005 Location: Jefferson City
Posts: 345
|
The Walmart foam is considerably softer than the Moab foam. That's the advantage of doing it. You have the best of both worlds without having to figure out how to hack up your Moab foams to get the desired results. I haven't put it on the scale yet. I'll make sure to do that tomorrow and let you guys know. I can tell you that the chassis plates and Delrin skid only weigh 4.0oz. My wheelbase is right at 12.5". A lot of the guys that saw it last Saturday thought it was longer due to how low the truck looks. |
|
| |
|
04-30-2006, 12:51 PM
| #13 |
| I wanna be Dave Join Date: Jun 2005 Location: KENNEWICK, WA
Posts: 2,513
|
Looks good, now get out there and test it out! |
|
| |
|
05-01-2006, 10:54 AM
| #14 |
| Quarry Creeper Join Date: Aug 2005 Location: Jefferson City
Posts: 345
|
Ok, had a chance to weigh the truck and here's the verdict. Total weight, including 3.5oz in each front wheel and 6-cell sub-C pack is 5lbs 8.5oz. Not the absolute lightest, but if you take the 7oz of weight in the front wheels and about 6oz of weight from the battery, we're talking right around 4.5 lbs. I'm hoping to be able to do a bit of crawling this evening. I can't guarantee it, since we're getting ready to sell our house and we need to do a bit of cleaning :( before the agent comes over. If I do go crawling, I'll take some action shots. |
|
| |
|
05-01-2006, 11:04 AM
| #15 |
| Rock Crawler Join Date: Sep 2005 Location: wyckoff, NJ
Posts: 639
|
thats nice! I may have to get me one of them chassis's
|
|
| |
|
05-02-2006, 08:54 PM
| #16 |
| Quarry Creeper Join Date: Aug 2005 Location: Jefferson City
Posts: 345
|
Alrighty, I was finally able to get out and do a bit of testing after fixing the link binding issue. Man, it's an entirely different truck. Here are a few pics and a very sh*tty video that I took. I didn't realize that my Razr was set to the lowest quality video, so this is the best I have for right now. I will have to say, though, that this new phone of mine takes some pretty decent pics. You can see in the last two pictures what I'm climbing up in the video...very steep almost 10" high ledge. You just can't really see it in the video. Anyway, enough yappin! Here's the pics and the crappy video. 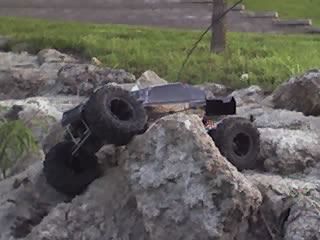   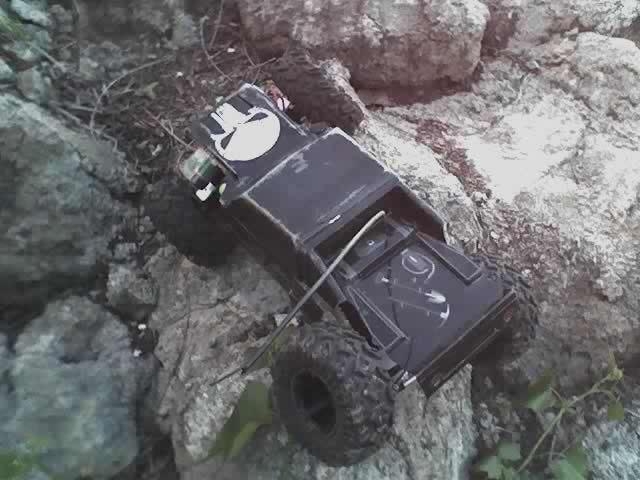  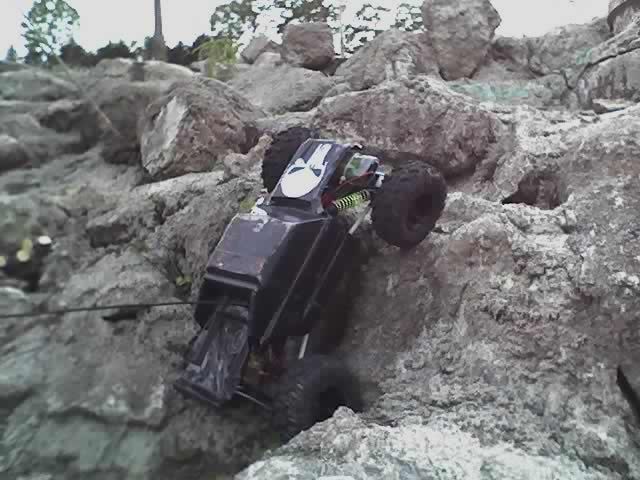 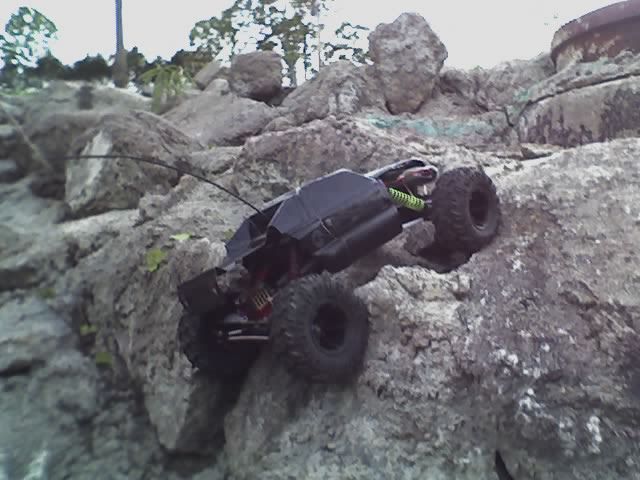  |
|
| |
|
05-02-2006, 10:10 PM
| #17 |
| Quarry Creeper Join Date: Jan 2006 Location: bay area
Posts: 444
|
How does the P4 compare to your old RBX chassis on its first run? What did u do to solve the binding issue. photo's look great! |
|
| |
|
05-02-2006, 11:25 PM
| #18 |
| Rock Crawler Join Date: Nov 2004 Location: Roseville
Posts: 560
|
Looks good bugman!! I think that I finally figured out why you were having binding issues with the links. The newest version of link mount plates, which were sent to you and freetime, have the holes set back a 1/4 inch farther towards the chassis than the plates that I'm using. Since I already have all the plates and everything made up, I'm going to include longer screws for the links and I'm going to try and find some 1/4 inch spacers. This will fix the link binding issue. Thanks again for helping me with all your input. It's greatly apprieciated. Tyler |
|
| |
|
05-03-2006, 06:05 AM
| #19 |
| Quarry Creeper Join Date: Aug 2005 Location: Jefferson City
Posts: 345
|
From what I can tell so far, the P4 is VERY comparable to the RBX and the more I run it, the more I think it outshines the RBX. The two biggest advantages that I see with the P4 is overall weight savings (minimalist chassis) and the axle plates. Granted, the axle plates don't DIRECTLY correlate to the chassis's performance itself, but being able to mount as many things as possible on the axles is a big advantage in weight transfer and obtaining a low COG. I think you're right about the cause of the binding issue, Tyler. Adding the 1/4" spacers should take care of the problem. We'll see how the P4 holds up to my driving on Saturday. I was hoping to get up to Cosmo before then to see if I needed to change my spring setup for that style of crawling. From last night's run, I think I'm going to be pretty good, but Cosmo can be VERY unforgiving. |
|
| |
|
05-03-2006, 09:20 AM
| #20 | |
| Rock Stacker Join Date: Jan 2005 Location: Columbia
Posts: 62
| Quote:
Kelly | |
|
| |
|
| |


 Linear Mode


