| |
| |||||||
 |
| | LinkBack | Thread Tools | Display Modes |
 10-30-2023, 03:11 PM
| #1 |
| RCC Addict Join Date: Nov 2017 Location: Austin Texas
Posts: 1,615
|
If you could take a few seconds and comment, it would be greatly appreciated. Forum is so dead lately and it's a shame that so many threads/ posts just get ignored. Definitely makes people less enthusiastic to post. Not that this project was anything exciting but still... always nice to at least know that someone takes a look. And apologies.. didn't realize how bad the pics were till I uploaded to my pc. I'll start with the rig... Defender model ( parts upgraded or added) : > Swapped out the HH 21t TM Sport for a HH 27t TM Sport Motor. Hoping that for pulling around approx 7lbs this will provide a little more umph. Also went with ProTek 4mm gold bullets to make changing motors quicker and easier when/ if necessary. > Finally swapped out the oem XL5 for a HW1080. Honestly the XL5 never gave me a lick of trouble and it's been thru a lot of hot nasty and stressful conditions... never glitched or threw smoke even on the hottest Texas summer days. Just wanted to up the game with some more programming options and reliability. Running it to the rx with a Gear Head 3" extension. > Installed a fan over the new motor as well. Plugs into a JST connector direct from battery using a homemade dual JST battery connector. I've had the fan a while. Picked it up on Amazon few years back for my Slash but going to use it on this tow rig for now. 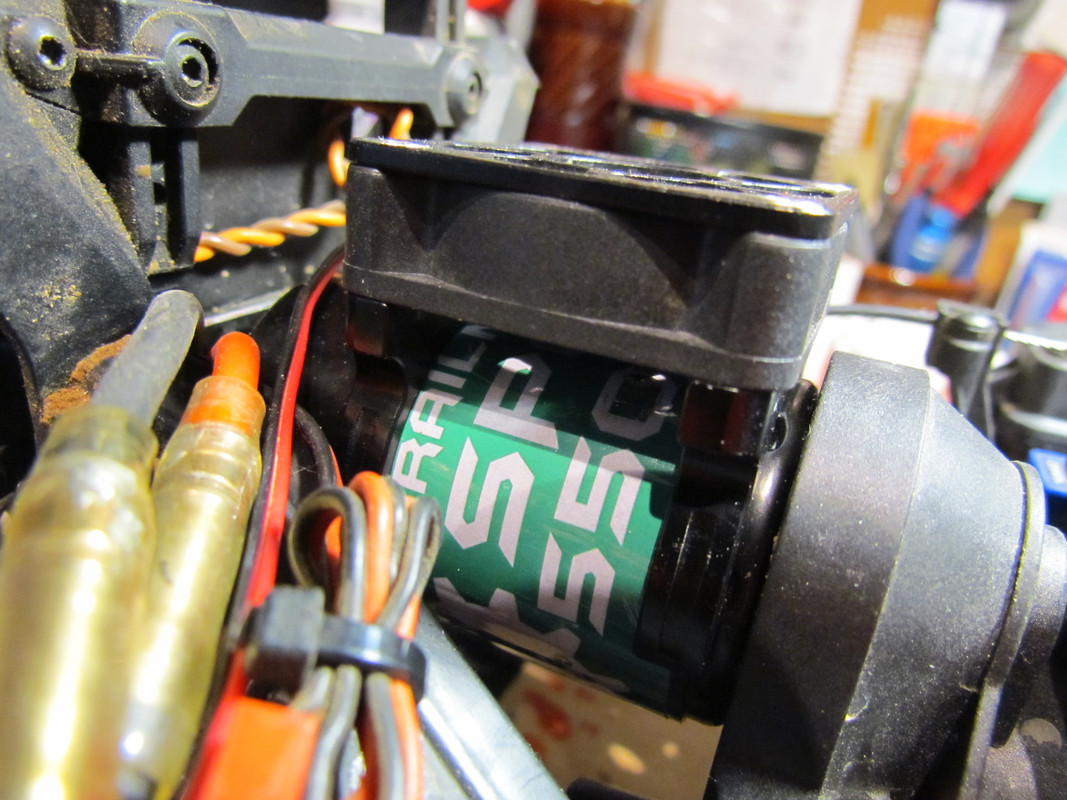 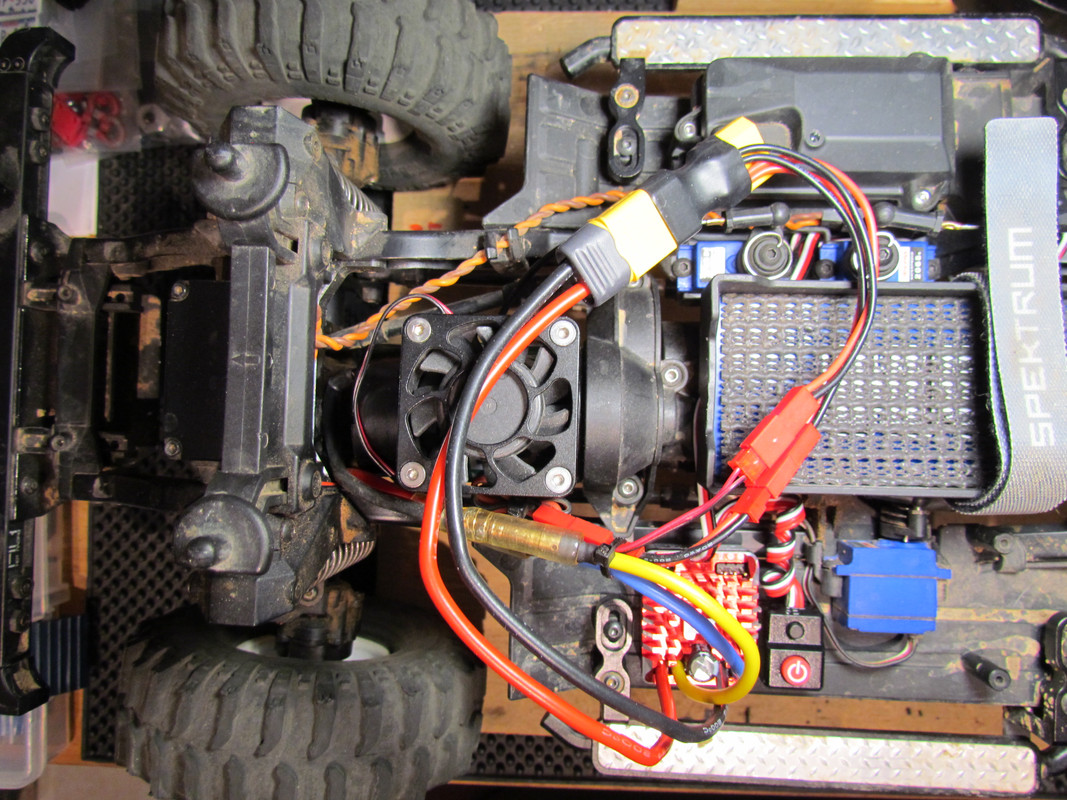 > Rear springs- I swapped out the original firm green springs on the GTS shocks to extra firm blue #8045 springs. Also replaced the 30wt oil with an Associated 70wt to keep on the objective of stiffening the rear end. Very firm feel back there now and I think it's where it needs to be. We'll see. 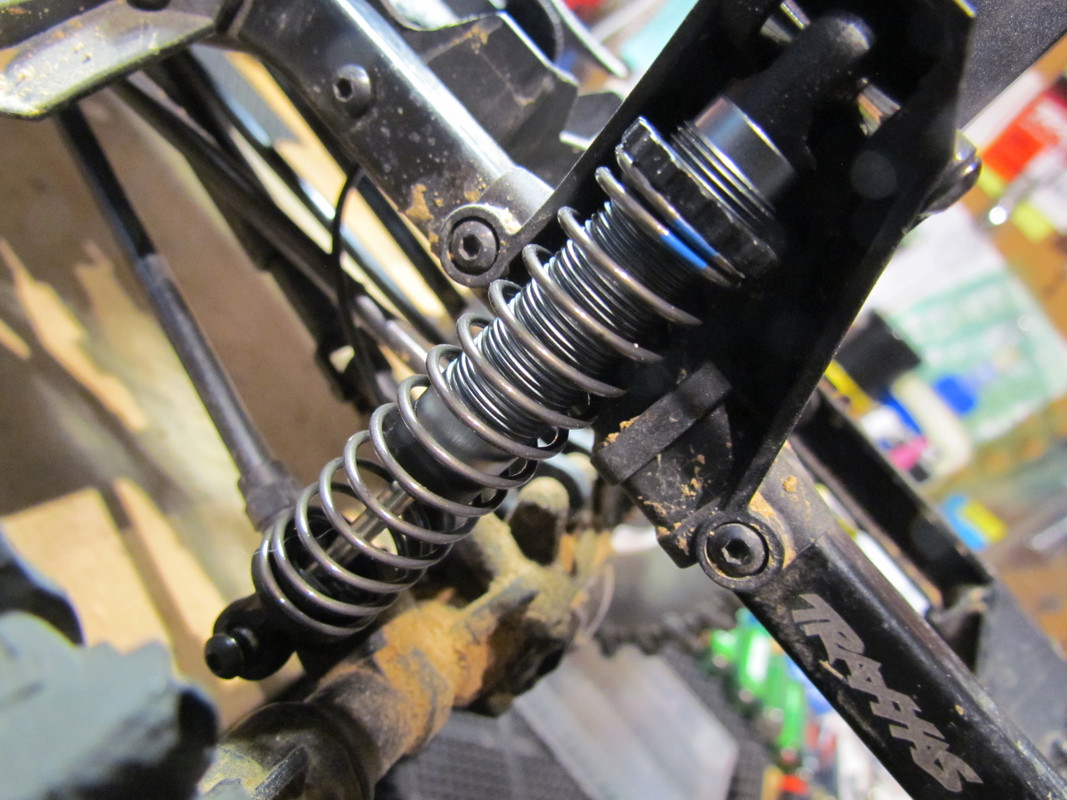 I also pulled apart the diffs to inspect and add some heavy duty grease. Gears looked good and running smooth and bearings felt nice so this was a quick job... no need to tear down. 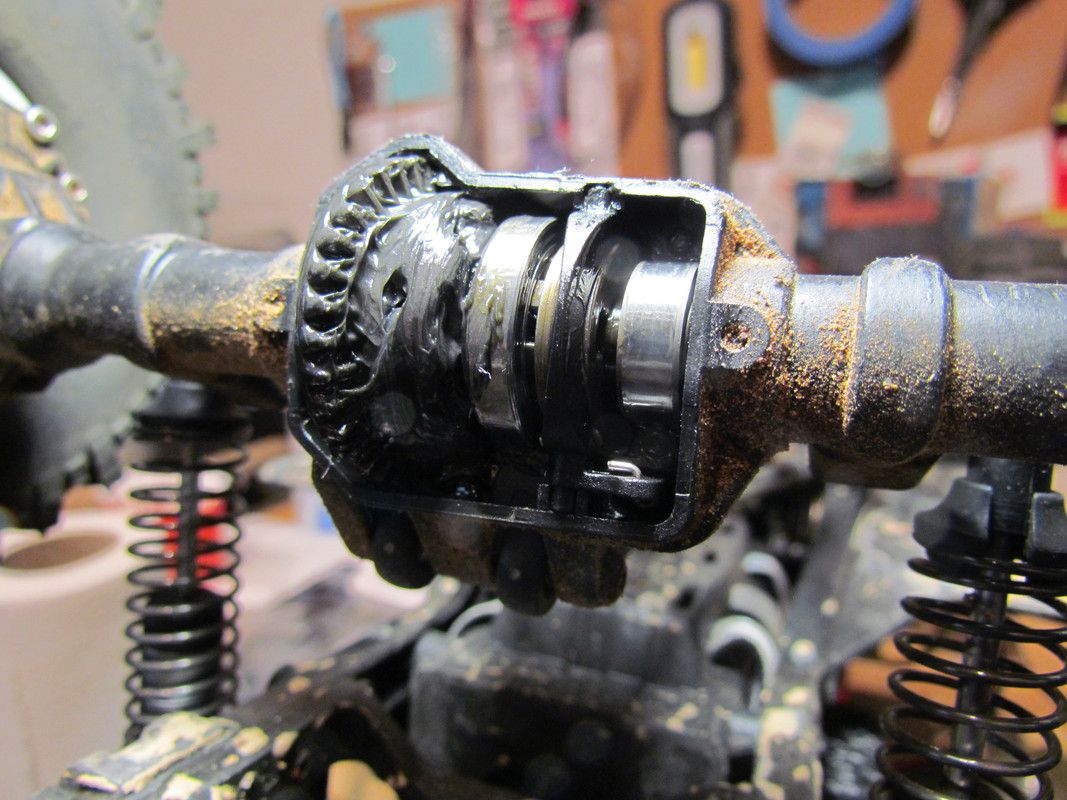 > Got a sort of freebie too I guess. Had an aluminum HR rear frame mount on hand for years that I never used but gonna use it now to assure that the rails maintain minimum tweak. Stock plastic braces were fine but again... already had the HR brace so might as well use it. > The rear bumper ( KYX or some cheap aluminum Amazon offering) that I installed on the D110 long time ago ( lightweight, good fit and finish, impressive departure angle, and body protection) has a receiver hitch and was originally accommodating a D-ring shackle that I've since removed and instead installed an aluminum drop trailer hitch ( ball head/ hitch cup style although if this fails I may look at another option... pintle maybe? ). There's some small parts with this ball style and possibly some potential weak spots so we'll see. Looks pretty legit though.. scale appearance for the most part.  Aesthetics: > I've added a lot of accessories to this Defender body over the years but figured I'd add a few more things to further personalize it. > Headlights- Finally got around to removing the stock decals in favor of actual LEDs and simulated/ faux marker lights. Not much to account for here but all lights are still non-functioning... just that they look more scale and lifelike now. I also used chrome tape to simulate buckets around the LED headlights. 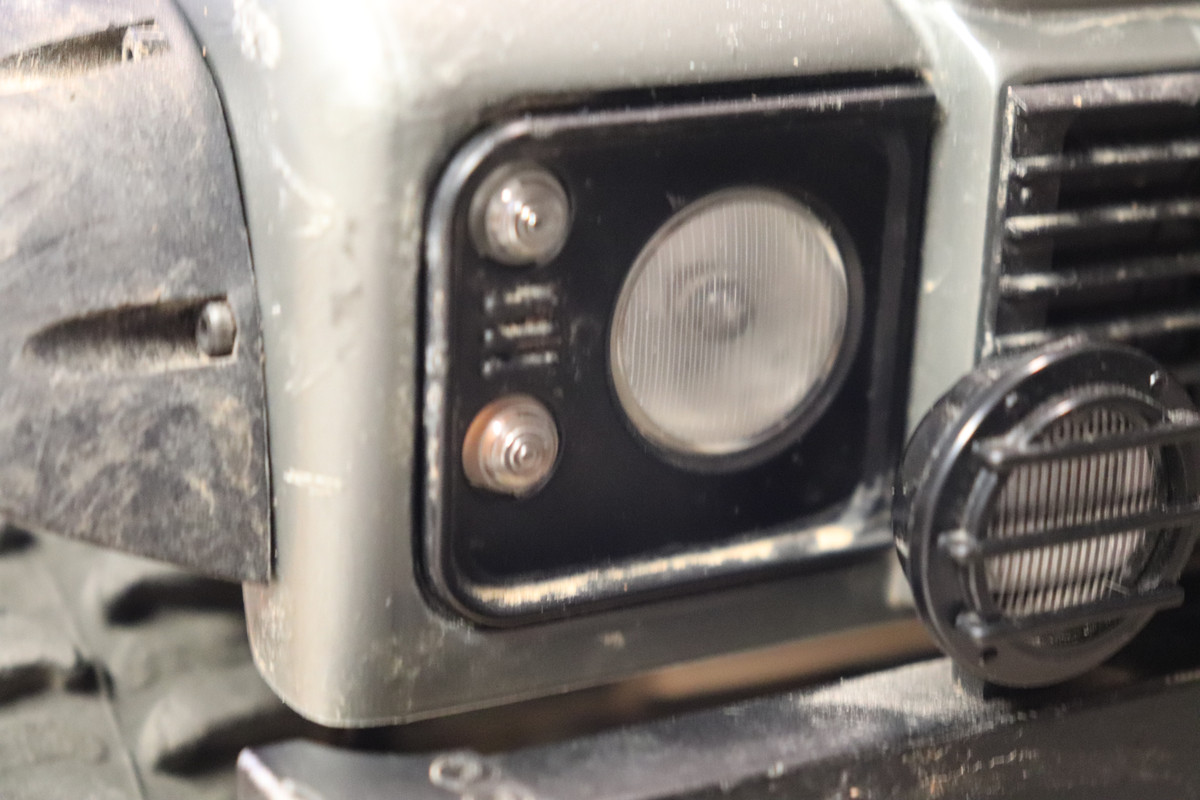 > Door hinges- I've had these forever, never installed. But I never had all the tiny screws needed to install. So I instead used some double-sided tape and to simulate the bolts that would mount the hinges in real life, I stole some button-head sewing pins from my wife. Painted them black and after the hinges were mounted, used a tiny drill bit to drill out the body behind the holes in the hinges. Then it was a matter of inserting the "bolts" and securing them from the inside. To do that I cut-out little foam blocks and used some E6000. Worked like a charm and the hinges as well as the faux-bolts are very secure and look legit. 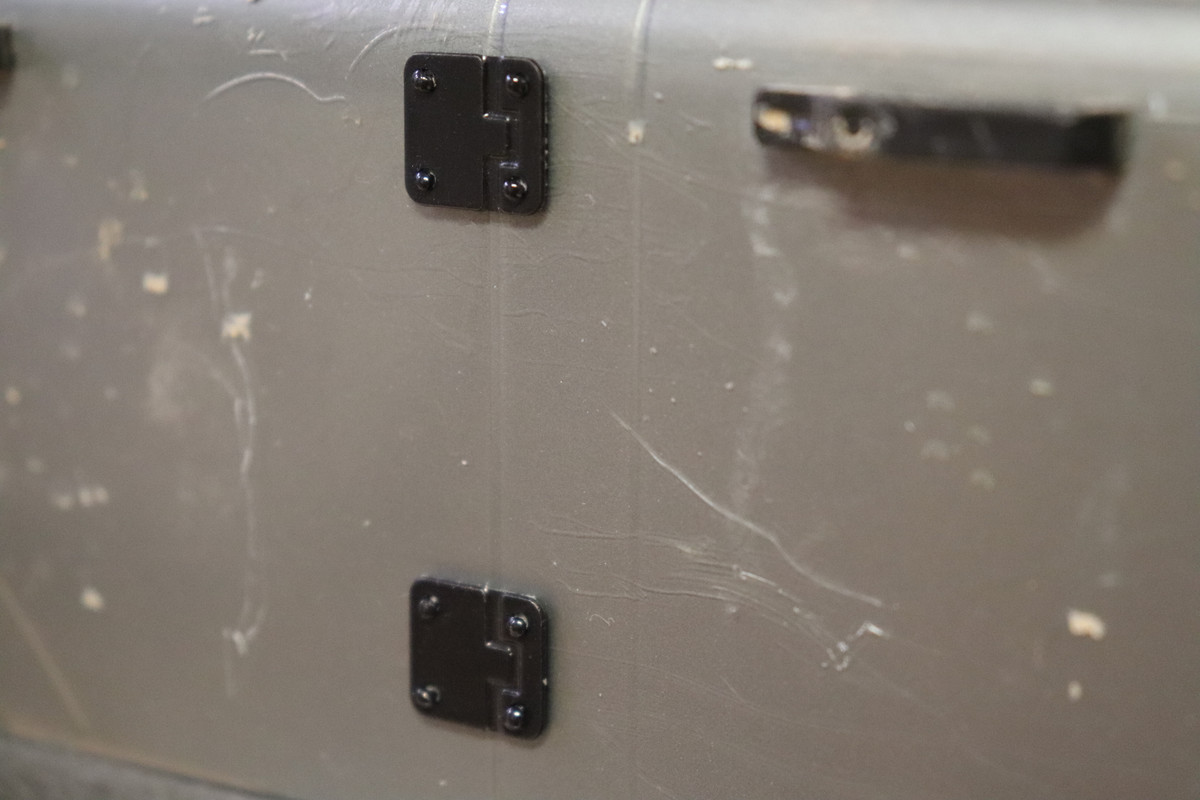 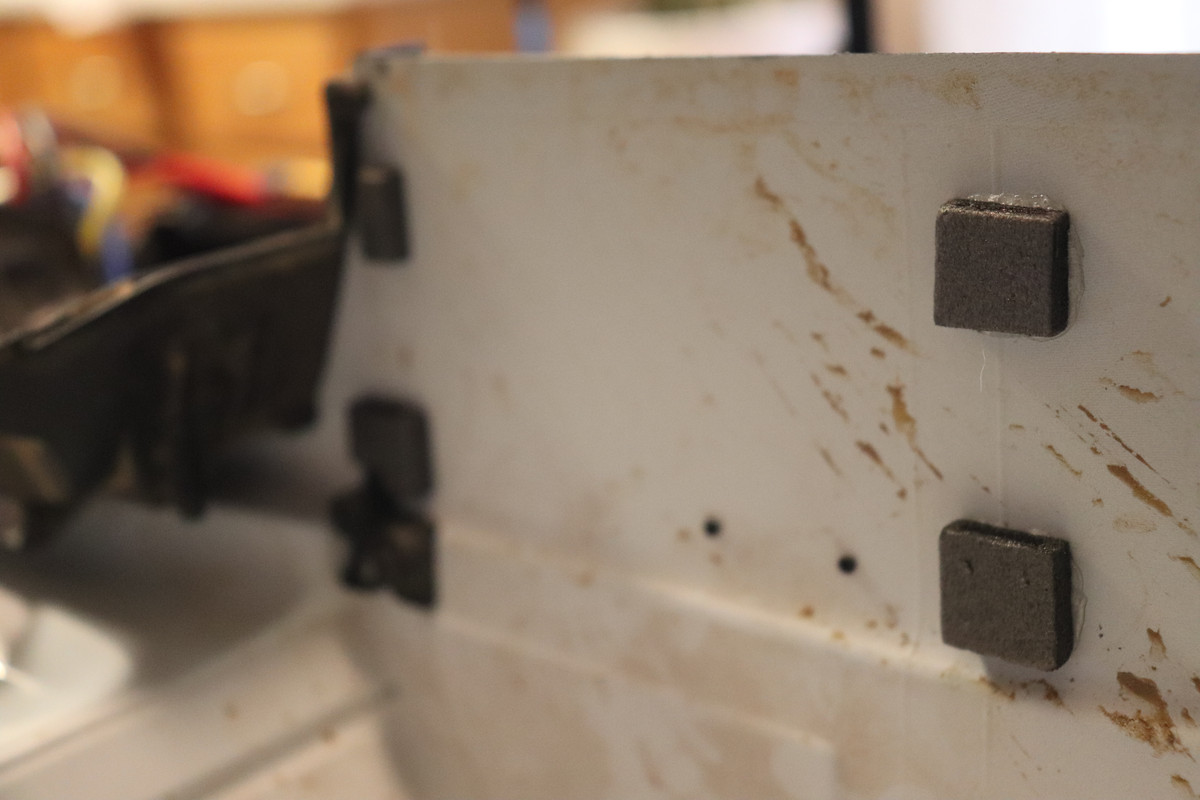 > After installing the hinges, I decided to add a strip of 3M Safety Step material to mimic rocker protection along the sides of the rig under the door sills. Only thing that I did to the adhesive backed tape material was to sand it down a bit for a more rhino-lined/ line-x appearance. I did this on my SCX24 and it came out good so figured I'd do it here as well. Only thing I don't care for is how quickly you can dull a carpet blade on this stuff but no matter. Came out well and adds some more texture and three dimensional aesthetic fwiw. 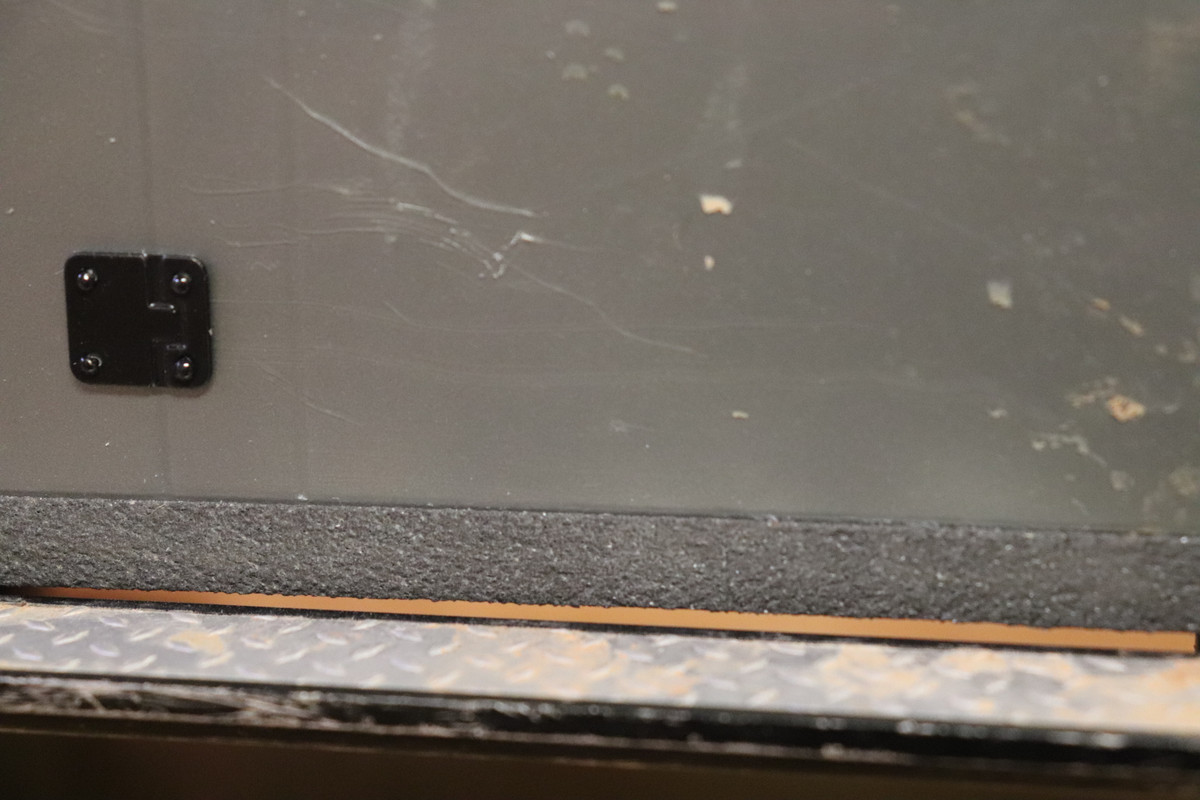 > The rear of the rig was a wreck after I had tried installing a ladder a few years ago that wound up splitting the rear pass side straight up. So I had some thin scale-size diamond plate and decided to make two reinforcing mounting plates/ panels to mount the ladder to. Used small scale screws and dbl-sided tape to attach those with nuts on the inside... tiny nuts/ much tedious lol. The two largest screws that attach the ladder are secured with [lock]nuts through a strip of styrene backed with E6000. The whole thing is now solid as can be although during the process of installing the diamond plate and securing with nuts on the inside, I unfortunately tightened a little too much and caused some additional spider cracks. Not really an issue as that entire drive-side rear is now stiff as all get out but sucks nonetheless. Fortunately the hairline spider cracks aren't too visible and hopefully there won't be any additional cracking from here on out. *** I'll note here that the reason for the ladder was to try to fill out the rear of the vehicle because it just always looked so bare with lack of accessories. I also like adding things to accentuate the whole 3D appearance of the rig and exterior aesthetic features. And the other reason for the ladder was because of the cargo rack. I always thought it looked dumb to have a cargo rack with no way to access it lol.  > Also on the rear, I decided to install a flood/ area light on the pass-side. This RC4WD part seems a bit fragile and utilizes insanely tiny screws/ nuts but it feels secure. I also "padded" the bracket a bit with a couple squares of dbl-sided tape. Looks good enough. 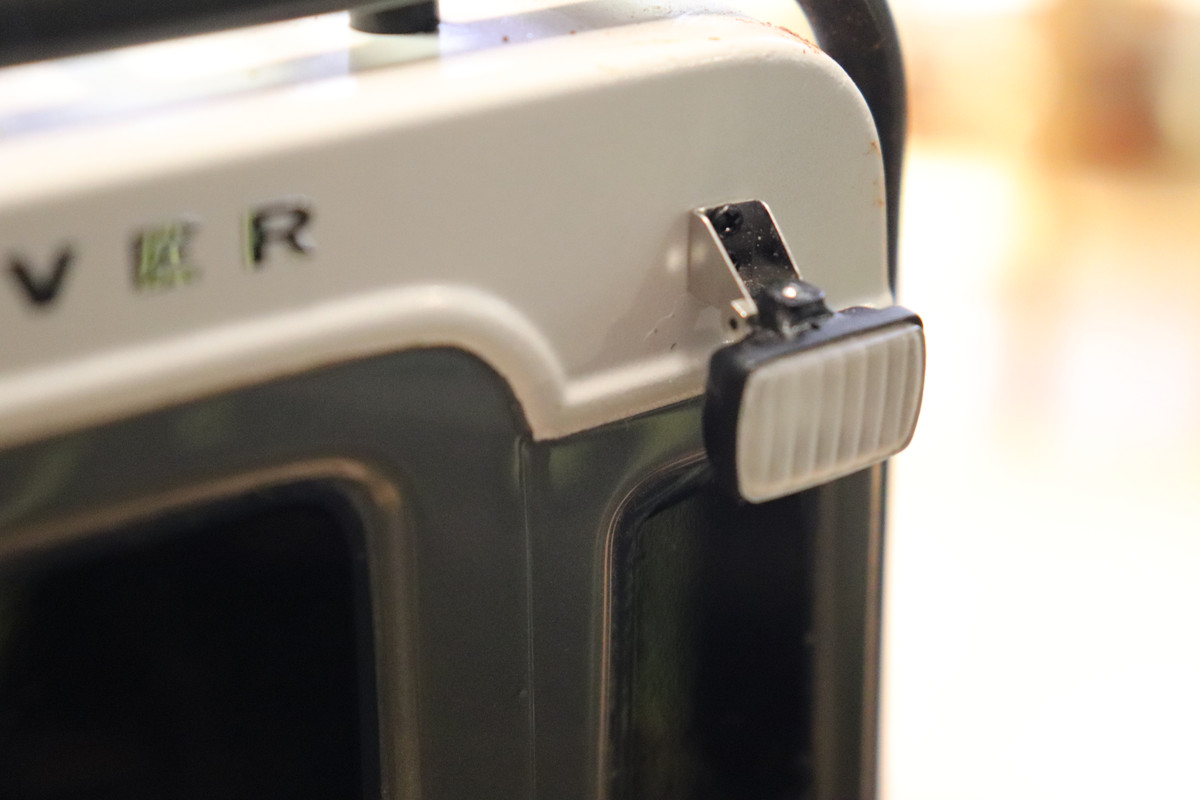 > Finally was to fabricate a more realistic 3rd brake light than the factory decal/ sticker. I used a Lego piece to do this and cut-to-fit a piece of reflective tape for the lens.. stacked upon a few other pieces of tape to raise it up inside the Lego piece to be more visible. Little dollop of E6000 and centered into place and this mod was done. Looks good/ legit imo. 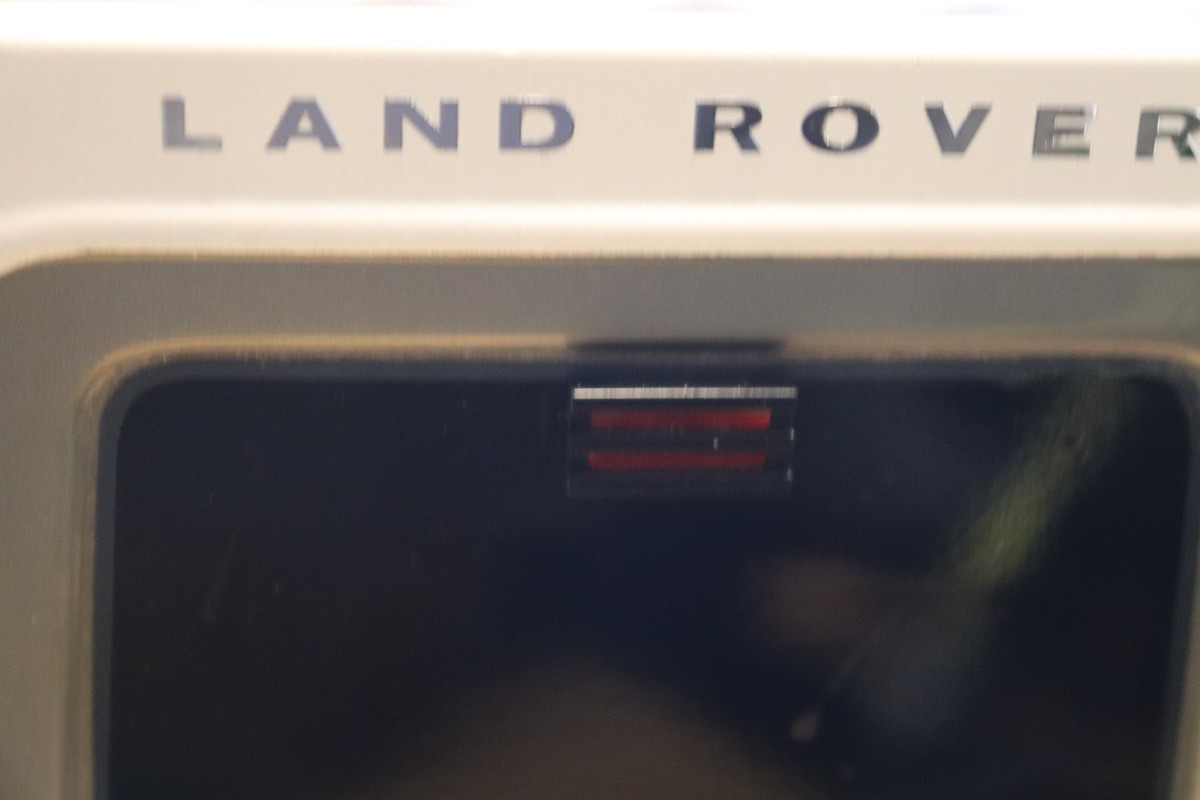  *** I already have SSD steel driveshafts installed on this rig along with LURC c-hubs and other aluminum, brass, or steel parts throughout so although this is a fairly heavy rig, it should do well as a tow-rig. Fwiw running a HH shv500 V2 direct for steering duties. *** Next up is the trailer. |

|  |
| Sponsored Links | |
| | |
|
10-30-2023, 05:45 PM
| #2 |
| Go Buckeyes!   Join Date: Jun 2017 Location: Mid-Ohio
Posts: 4,135
|
It is sad to see how slow the traffic is around here lately! Maybe, just maybe with the winter months coming soon, the traffic will get a little heavier. I hear what you are saying about posting and wondering if it goes unnoticed. Looking forward to seeing what you have planned here. The Land Rover body is one that I do not have in my fleet, but has always been a body that I have liked. This should make for a nice tow rig. Nice idea for the hinges! At first look I thought they looked great. I couldn't even tell those were pin heads. Looks pretty real to me! And the use of a LEGO piece. Genius! That little piece fits the look perfectly! It makes me wonder why I never thought about using LEGO pieces for scale items! Almost forgot to mention the rear ladder. Nice and I like the use of the scale diamond plate. It ties it all together nicely! |
|
| |
|
10-30-2023, 06:06 PM
| #3 |
| Rock Crawler Join Date: May 2021 Location: NorCal
Posts: 806
|
Love all the little details you've done. And that ladder wrecking your lexan a bit, then using the scale diamond plate, that's a nice touch and reinforces it kinda. And I'm slowly working on my own builds, but just need enough content to share. I'm gonna try to update threads in more bulky form. Just too much going on and wish I can take a whole month off!  |
|
| |
|
10-30-2023, 09:58 PM
| #4 | ||
| RCC Addict Join Date: Nov 2017 Location: Austin Texas
Posts: 1,615
| Quote:
Anyway- I've got a Carisma '76 Ford body for this thing that will replace the D110 at some point. It's seen better days and has a hefty weight... much of it up too high. Still handles very well but that Ford body will shave a good deal of weight from the top down. I'm happy with how it looks now.. but I'm about ready to give it a '70's American farm theme. My biggest concern with the hinges was how well the pins would stay in place but I drilled the pilot holes into the lexan small enough for a snug fit. The pins inserted into the hard foam blocks on the inside with the e6000 makes it all very solid. Thanks! I used Legos originally on my scx24 for tail lights/ brake lights/ front marker lights and more. And I've actually got another couple Lego pieces on my trailer that I'm going to post in this thread. Lightweight, , perfectly squared, easy to trim if necessary... Sometimes they can come in handy for aesthetic and mechanical fabrication pieces. I appreciate you taking the time to peek in here, Brian. Thanks! Quote:
BTW- You were the one iirc that suggested to me to use 4mm plugs instead of 3mm. Glad I did. These are the perfect size. I also installed these connectors onto my Carpa. Here's what it looks like now behind the scenes on that rear drive corner. Styrene, nuts/ bolts, and e6000 all sandwiched together. Not pretty but it feels solid as anything. Rest of the body should actually break around and away from this area now lol. 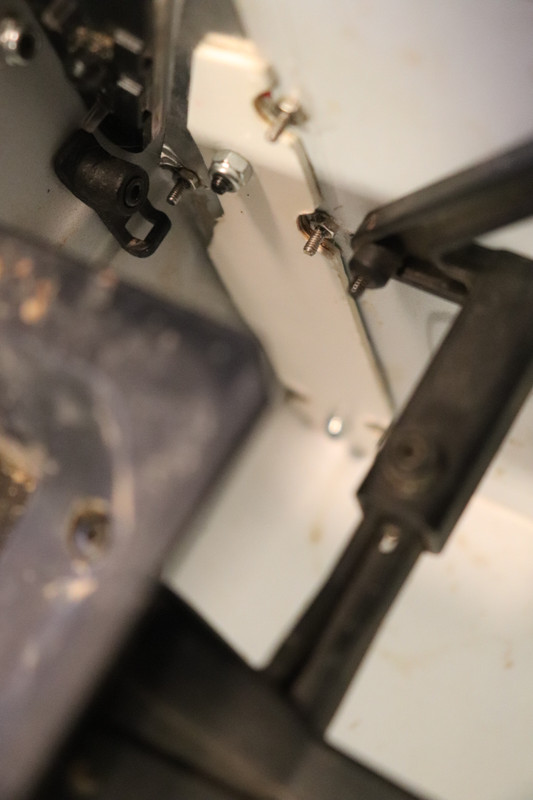 You and Brian's posts, mods, builds, etc are often inspiring and always enjoyable to follow. Thanks for taking the time to take a look. | ||
|
| |
|
10-30-2023, 10:23 PM
| #5 |
| Rock Crawler Join Date: May 2021 Location: NorCal
Posts: 806
|
Hey glad I can be an inspiration! This is my first home in the RC crawler community and as long as it's still up and running I will continue to post and update threads. There's a lot of updating to do for sure. Anyway, looking forward to your progression. |
|
| |
|
10-31-2023, 07:19 AM
| #6 |
| I wanna be Dave Join Date: Sep 2011 Location: Douglassville, PA
Posts: 4,225
|
Very nice! Always love a tow rig! I read every post, and am here 2-3 times a day, such as it is. I kinda wish the like button was back, it let you know that people were at least checking it out and you weren't just talking to yourself! |
|
| |
|
10-31-2023, 09:39 AM
| #7 | |
| Go Buckeyes! Join Date: Jun 2017 Location: Mid-Ohio
Posts: 4,135
| Quote:
I've been a member of SBG for a few years, but I don't post anything there because I feel like the builders there are on a whole different level than me. I just like reading and seeing all of the extraordinary builds that are over there. Anyways, thanks for the kind words and thanks for checking out my ramblings in my build threads.  I'm normally on here (RCC) everyday at least twice per day and try to get caught up on new posts that I have missed and sometimes add my two or three cents! | |
|
| |
|
10-31-2023, 12:42 PM
| #8 | |||
| RCC Addict Join Date: Nov 2017 Location: Austin Texas
Posts: 1,615
| Quote:
Quote:
Quote:
Yeah... SBG is such an amazing forum but I hope that I'm never forced to have only that place to go to. I'm guessing that they'd chew me in short order and then probably relegate me to the kiddie pool... nose-plugs, water-wings, and all! | |||
|
| |
|
10-31-2023, 02:11 PM
| #9 |
| I wanna be Dave Join Date: Jan 2016 Location: california under the rock im crawling on
Posts: 4,288
|
wheres the trailer lol " liked commented and subscribed"lol |

| |
|
10-31-2023, 02:15 PM
| #10 | |
| Go Buckeyes! Join Date: Jun 2017 Location: Mid-Ohio
Posts: 4,135
| Quote:
 Yeah, me too! I'd be in that same kiddie pool! Yeah, me too! I'd be in that same kiddie pool! | |
|
| |
|
11-01-2023, 03:26 PM
| #11 | ||
| RCC Addict Join Date: Nov 2017 Location: Austin Texas
Posts: 1,615
| Quote:
Quote:
| ||
|
| |
|
11-01-2023, 04:45 PM
| #12 |
| RCC Addict Join Date: Nov 2017 Location: Austin Texas
Posts: 1,615
|
Okay.. onto the trailer... and this is a LONG read ( two parts). First up is mechanics/ functionality: I ordered this thing off of Amazon, listed as "RC Trailer, 1:10 scale Dual Axle Flatbed Trailer Kit RC Trailer Accessory with Four Tires" lol ( Seller - Tbest) for $130. I knew going into this that there would be some issues as all of these trailers on Amazon seem to have their share of negative comments. But I wasn't too concerned, knowing that I could modify, reinforce, etc where necessary. Main reason for going with this one was the width. Since the Capra has a fairly wide stance with aftermarket tires/ wheels, it sits at about 10 5/8" across. The width between the rails on the trailer is 11 1/8". So just about a perfect fit. Upon receiving and inspecting everything I wasn't overly impressed although no apparent major issues either, so I was ready to make it my own. 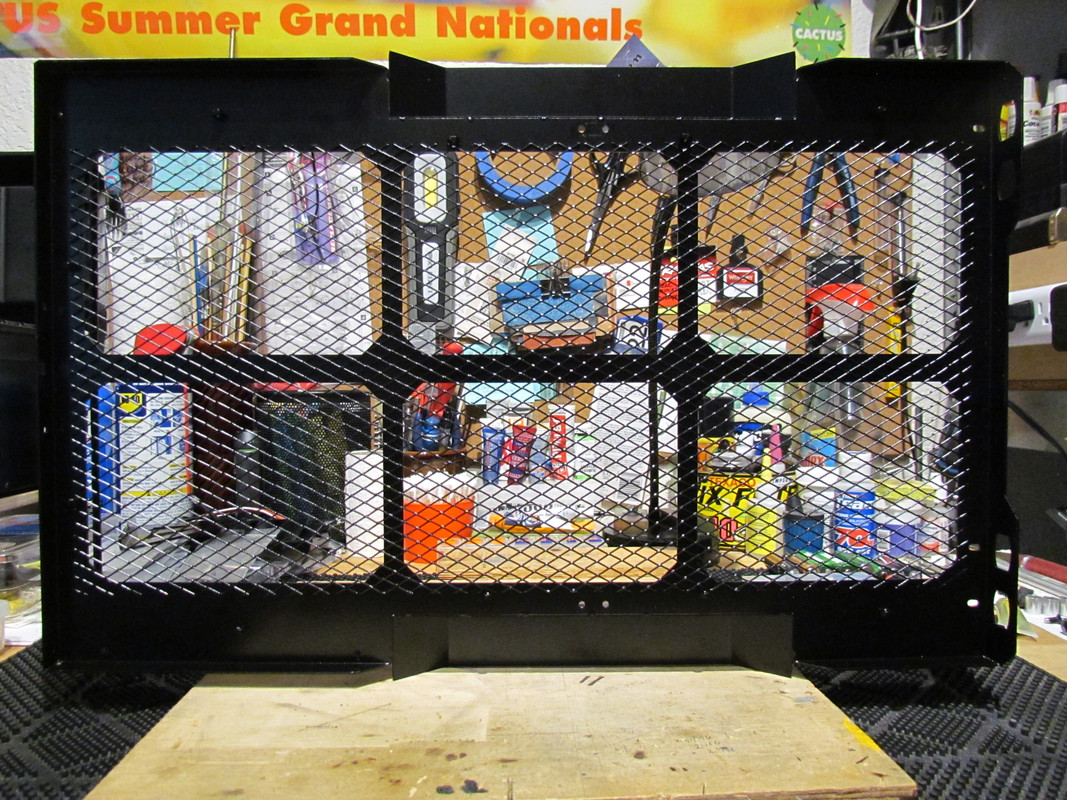 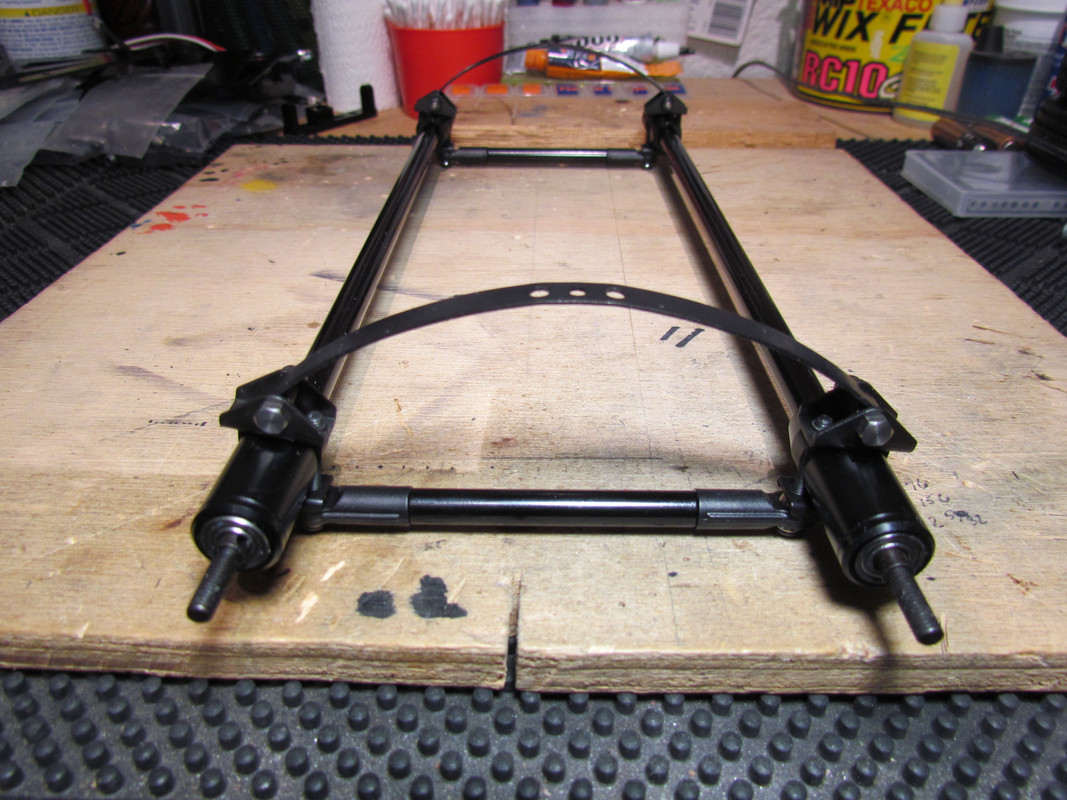 One of the first things that you notice are the tires. Holy crap they're stiff! The rubber compound and the foam inserts are both absolutely horrible in that regard. And although the aluminum wheels looked nice enough, I was unable to use them because they are such an "off" size... both in width as well as OD. So as much as I tried to find other tires to go with the wheels, I ultimately had to scrap the idea of using them and instead bought another set ( also from Amazon). They were $45 under the 'WONFAST' "brand" lol ( 1.55" /90mm). These were pretty much a perfect fit with the inside diameter of the wheels fitting perfectly onto the axle shafts. Tires and wheels are both wider than the supplied wheel set but that's good as they're more stable and also clear everything just fine- side to side as well as clearing the trailer fenders with the leaf-springs compressed. Foams could be a little stiffer so I may decide to swap them out for CI standard/ firm 2 or 3 stage in the future but these should be fine for now. Original wheel/ tire on right/ Aftermarket wheel/ tire on left: 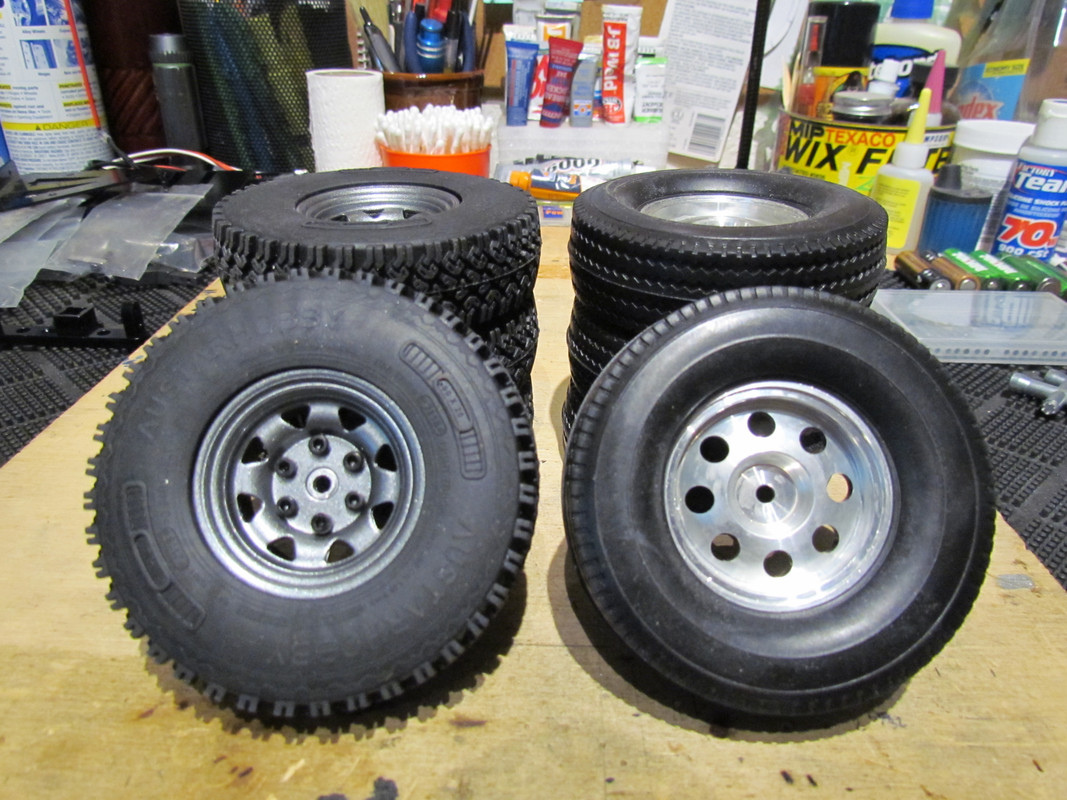 I did decide to tear everything apart to inspect bearings, stub shafts, etc.. and although I added some graphite to the shafts, that was all that was needed. Tolerances are very nice, bearings spin smoothly, and with everything bolted in place there is no binding, contact issues, etc. 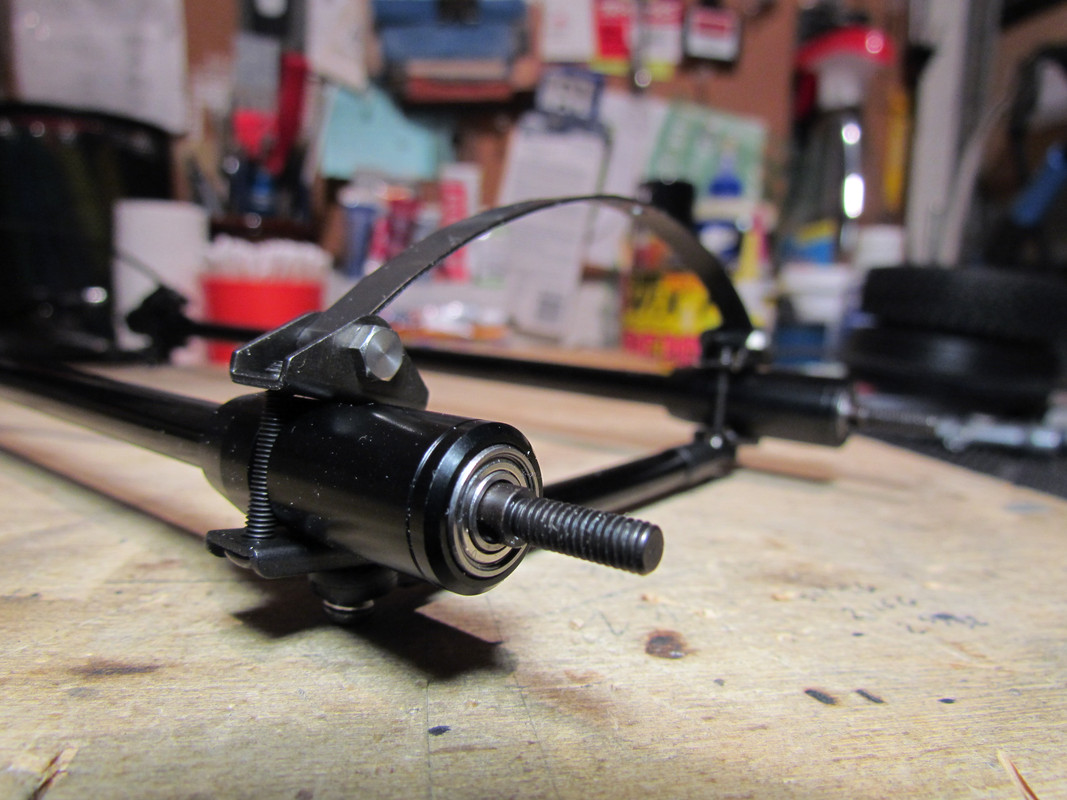 One of the main issues that I knew I'd have to address from the get-go, was the mesh floor. It's brazed onto the frame from underneath and felt very much like it wouldn't be up to the task of having a Capra bouncing around on the top of it without causing damage... either warping the mesh or outright causing it to detach from the frame altogether. My solution was to use a couple pieces of aluminum plate that would span the mesh side to side and bolt onto the trailer frame. This would be for the wheels of the transported vehicle to sit upon... distributing the load and lessening or almost eliminating the weight upon the mesh. In pics you can see better than I can explain but fwiw this aluminum plate used to be a curtain rod header that we had removed when we replaced all the curtains/ rods in our home a few years ago. My wife thought it was dumb to save these things but I just knew that I'd eventually find a use for it! Only complication here was that this trailer is going to be used to carry two different vehicles with two different wheelbases.. A TF2 and a Capra. You can see in the pics that this aluminum plate is curved up along the sides which is a good thing as I realized that it would "cradle" the wheels a bit to limit fwd and back movement while in transport ( kind of like putting wheel-chocks in front of and behind each wheel. But due to the different wheelbases, I had to cut out part of the curvature on one of the plates ( the rear one) to allow the shorter wheelbase TF2 to not be sitting up on the edge. So that's why you see the one that is cut-out. A big plus with these plates is that since they're curved along the sides, they are structurally more rigid than if they were simply flat. This also translates to having a more rigid trailer with these installed.. win win win. So after taking some measurements and firing up the Dremel, the drill-press, and finishing them off with some gloss black... they were ready to be installed. They work very well for their intended multi-purpose. 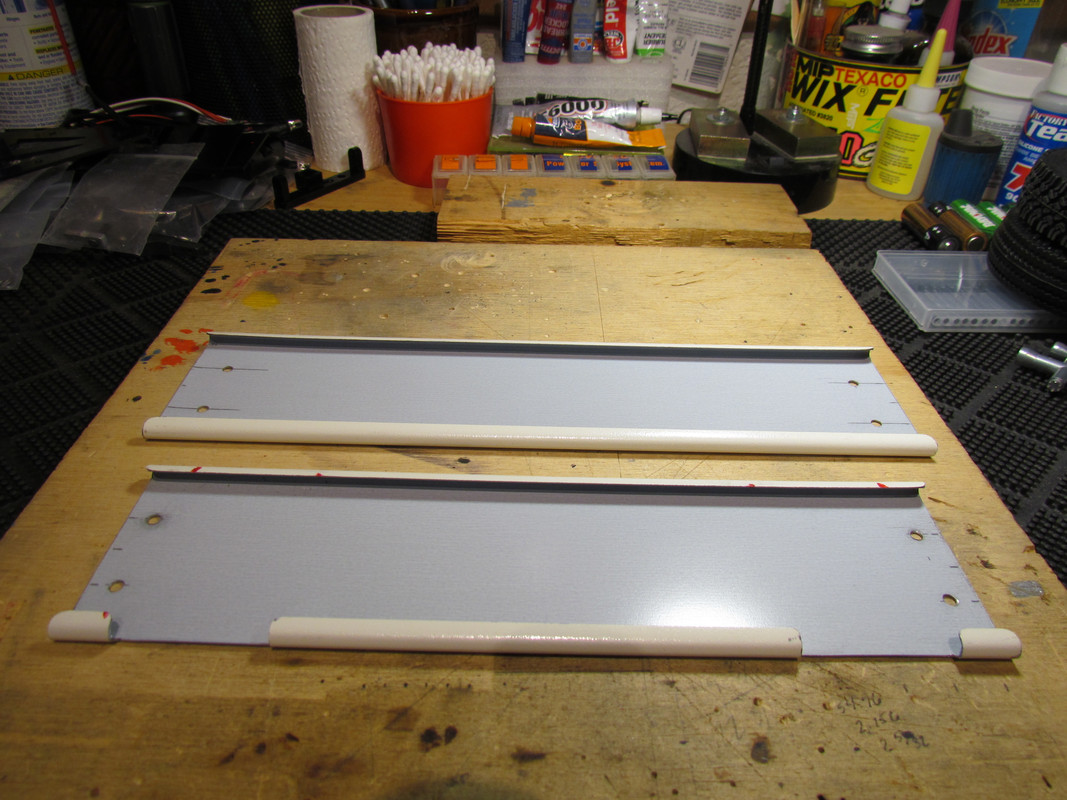 Also fwiw I replaced most of the included hardware with stainless painted black... using LURC and KNK hardware for the load-bearing stress areas. Figured that was a worthwhile upgrade since I have no idea the quality of the included fasteners and I already had the better hardware on hand. After all of this was done, I was ready to move onto other changes/ fixes. One of which were the fender corners.. sharp as all get out and ready to snag/ bend upon trail obstacles as well as myself lol. So I got after the task of rounding all four corners with my Dremel equipped with a sanding drum and some black gloss touch-up paint... done & done. Another concern for the durability of this trailer was the tongue where it attaches to the bed. It utilized only two screws and as flimsy and thin as this metal frame material is ( approx 1.4 mm) there needed to be some reinforcement. The tongue itself is not of much concern ( approx 2.15 mm) but when bolted to the trailer frame, it would flex just a little more than I felt comfortable with. The solution here was to add a thick piece of aluminum 'L' angle plate and use four additional bolts.. so six bolts in total... all secured with lock-nuts. Hopefully this can be explained more succinctly in the pic below. Anyway... very solid now and I have no concerns of the frame getting bent out of shape where it attaches to the tongue. And fwiw, the reinforcing 'L' bracket is approx 3.6 mm thick! BTW there is a spacer in there because as you can see the tongue and bed are at different heights... sigh. ( * Accidentally revealing part of the aesthetic tow-hook/ safety chain carrier intended for Part 2 of this trailer build but whatever.. only pics that I have of the 'L' bracket that ties the bed and tongue together )  Last part of the functionality portion was probably the most crucial... 'holding the transported vehicles in place'. Talk about a lot of head-scratching lol. What I needed was function over aesthetics here yet I didn't want to completely ignore appearance. So this is what I came up with. I started with installing D-ring/ shackle mounts on the trailer frame... two in front and two in the rear. I believe these are Hot Racing iirc. Anyway... I marked and drilled out where the d-ring mounts would go and got them installed. Then I moved on to the best solution I could come up with using straps with the d-rings... all while maintaining as much scale appearance as possible. I had no idea where to acquire straps but then one day while I was in Academy, I saw these bright yellow polypropylene shoe-laces and that was when it all started to "click" and come together. These were strong as could be, could be cut to any length, ends could be heated up/ melted to create an unraveling end, they were just about the right width, and had that safety strap/ tow strap appearance with the color. SOLD! So I took measurements front and back with both rigs that would be transported and came up with the lengths that I would need ( plus a few inches extra in case I measured something wrong lol). The Capra sits higher than the Marlin and both vehicles needed less length for the front tie-downs than their rears. So I would need essentially two different length sets of four... eight total. Then this is where I employed my wife to help out. After deciding how much tag-end would be sufficient for both sets, I had her sew the other ends creating an 'eye' to snugly wrap around each d-ring. She did an absolutely stellar job... even using yellow thread for the stitching. And voila! They were done!.. kinda. I still had to cut the overall length of each strap... long enough to be able to grab and pull with my fingers but short enough that they didn't look absurd... excessive length dangling off the trailer. But that was easy... just measure, mark, cut, then heat each end with a lighter and smash it down flat to seal the ends. I also ran the lighter along each one to catch any little frays. Then out to the garage where I applied dirt, grease, etc to give them a weathered appearance. Finally it was time to secure them. And this is where the real-life aesthetic takes a nosedive but I really had no choice. I knew that I wouldn't be able to keep everything 100% scale or real-life in appearance and I'm totally good with that because these just work SO well. In order to keep the rigs seated with no movement as this trailer bounces down the trail, I ran the straps and cinched them up with cord-locks.. those things used to cinch-up shoelaces, draw-strings, etc. Fortunately they're black so that helps to hide them somewhat and they're sort of tucked up to or under the vehicles and not glaringly visible so they don't look tooo bad. And I went through several different cord-locks to find the best option... small but still usable to cinch/ release quickly and utilizing a strong spring. Some were too weak, too small, too large, etc. But with these particular cord-locks and straps I can pick up both the Capra and the TF2 like palming a basketball and shake vigorously while they stay securely planted to the floor of the trailer. They simply don't move or loosen at all. I also like that these straps have the perfect amount of elasticity to aid in getting them cinched up. I ultimately switched to a different set of D-rings that all match and utilize the same hex-head size. Originally I was using four different shackles with two different sized hex-heads. Now they're all the same and utilize the same hardware although the only time that I'll need to even remove the D-rings is to switch out straps. The TF2 uses the shorter straps/ Capra uses the longer set. And technically I can just use the Capra straps for both rigs.. just that they're a little longer so there will be a little more strap 'flapping around in the breeze' if using them on the TF2. ( You can see in the first pic what they looked like new in pkg and what they look like now after weathering.) 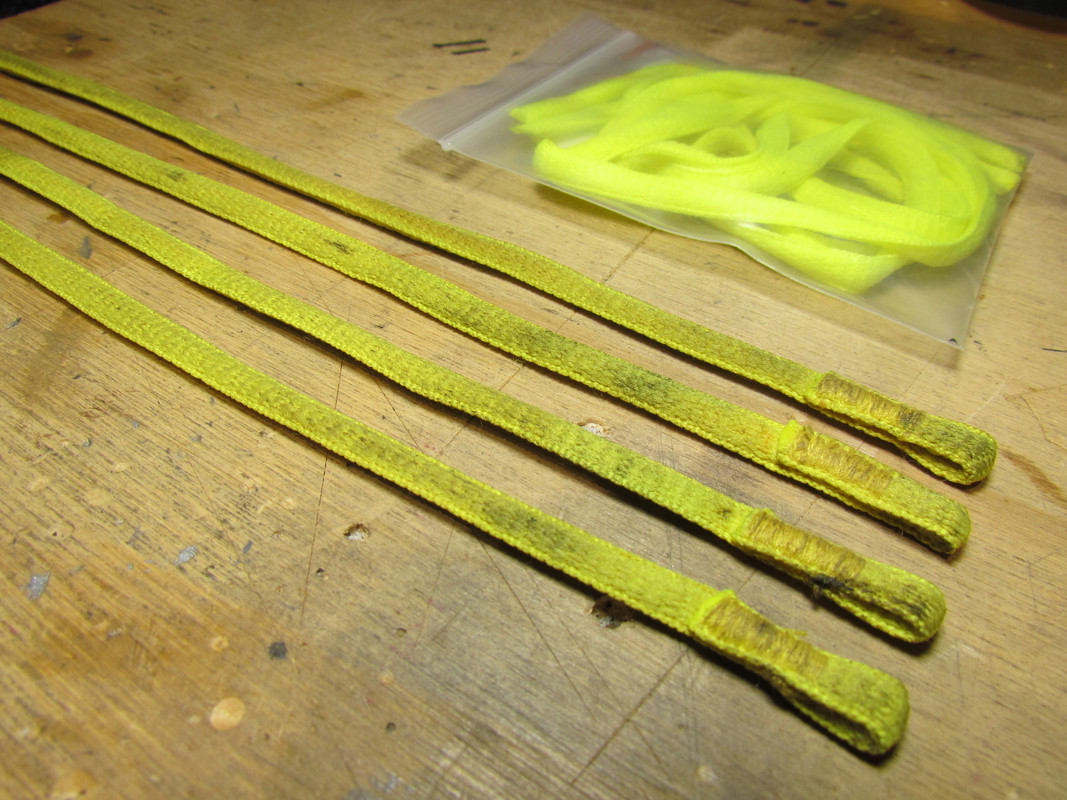 Here they are cut to length... four sets: Capra rear/ Capra front/ Marlin rear/ Marlin front. Also shown: new D-rings and cord-locks. 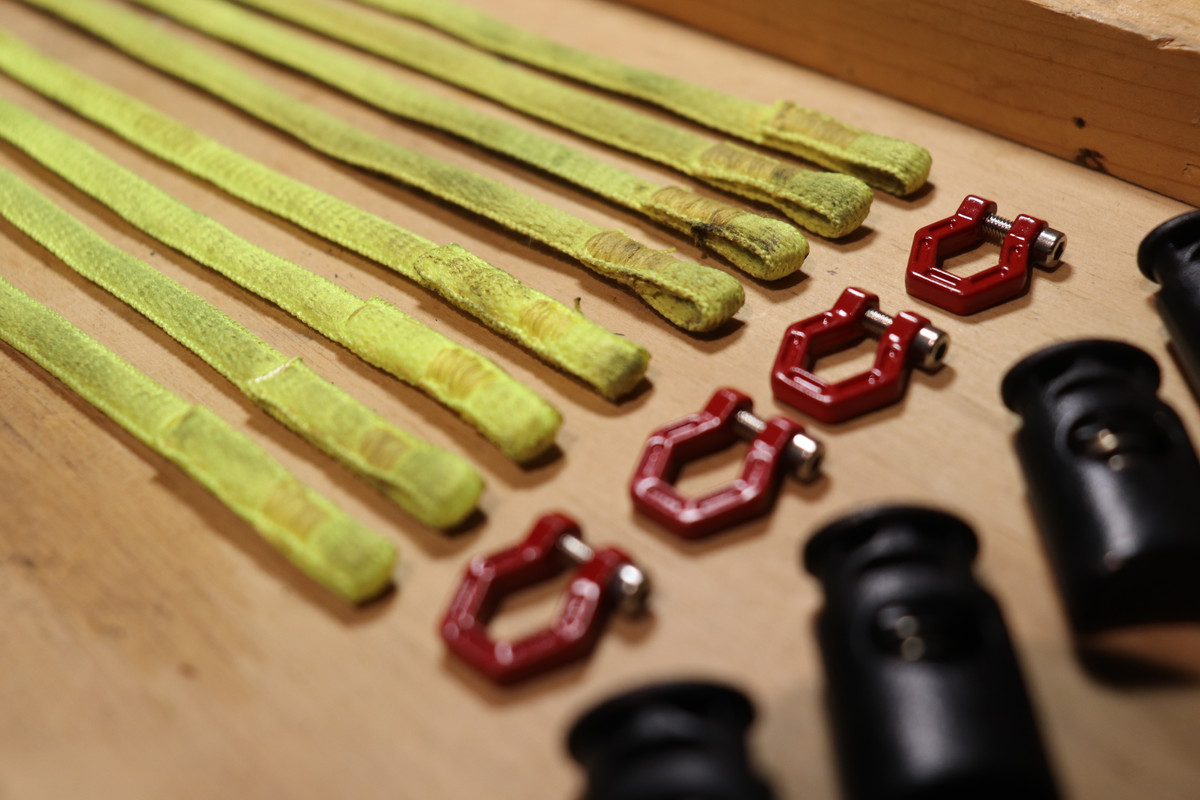 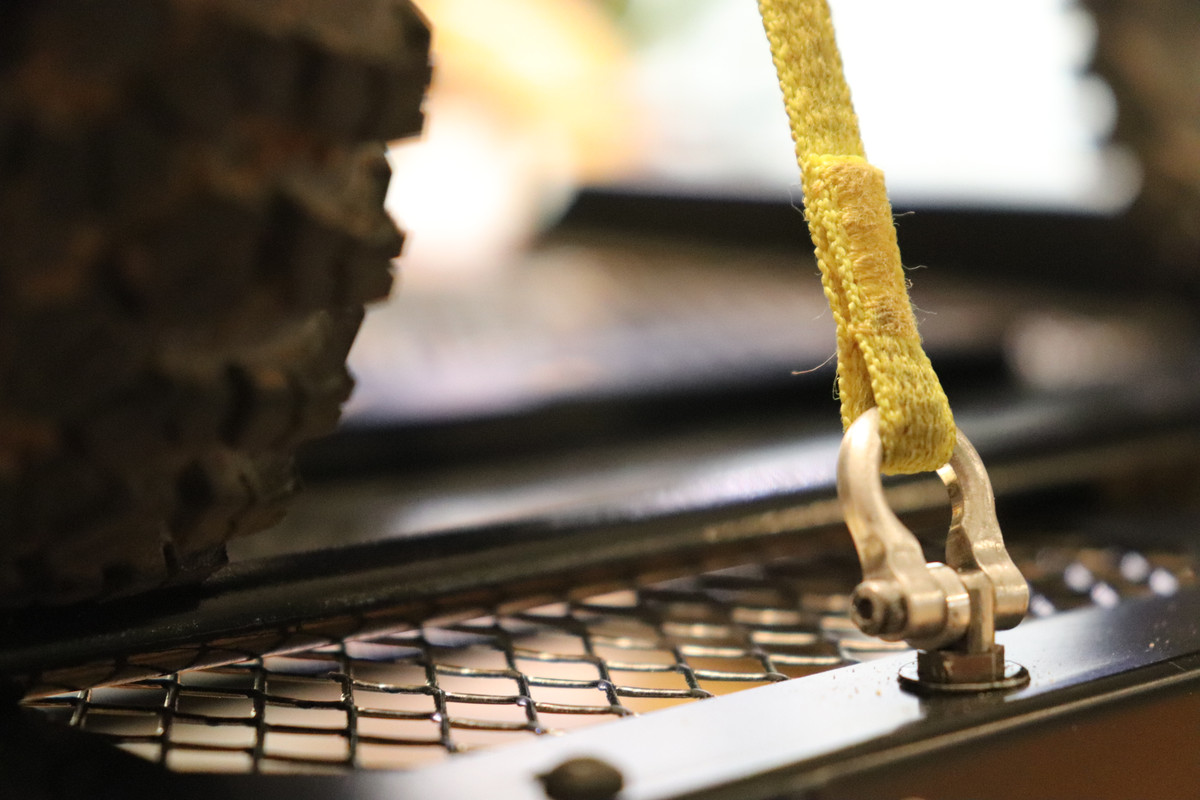 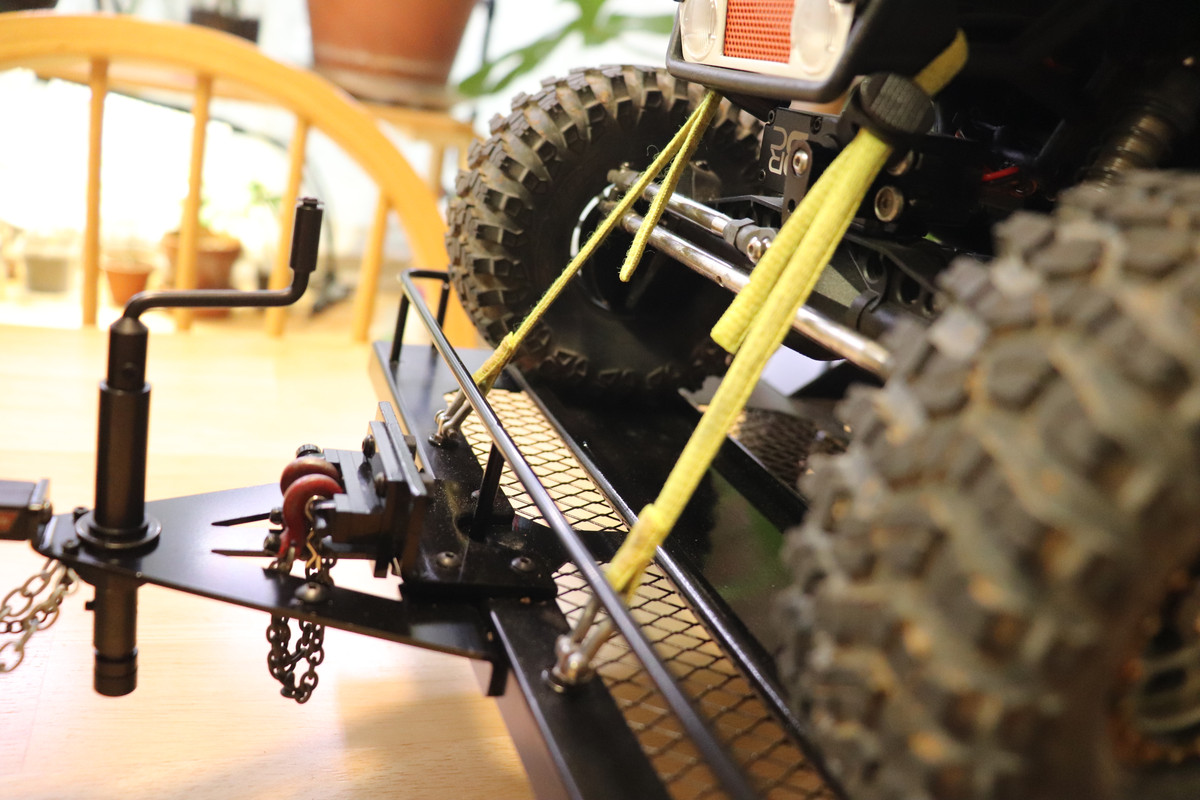 Not sure it's worth noting here after so much text lol but I've now discovered that I do NOT care for the more realistic-looking d-ring pins that you have to turn by hand. My fat sausage fingers just can't handle that task. I'd much rather use the less realistic-looking hex-head pins and spin a hex-driver to insert/ remove pins. Plus I feel like the hex-head pins can be tightened more securely. I think that about covers the functionality part of this trailer. Now onto Part 2 that covers the rest of the aesthetics. |
|
| |
|
11-03-2023, 11:11 AM
| #13 |
| RCC Addict Join Date: Nov 2017 Location: Austin Texas
Posts: 1,615
|
Trailer Part 2: So here is the finished product. It's come a long way! This first pic should've actually gone in the "Part 1 Functionality" portion of this thread but I didn't have any good images at the time. Anyway, this is the underside where the tongue attaches to the trailer bed. You can see the two black button-head bolts that were all that was included in the kit... not sufficient at all. So now it is attached with six bolts utilizing the thick aluminum 'L' brace on the top-side ( also you can see the two bolts furthest out, that are the front D-ring mounts: 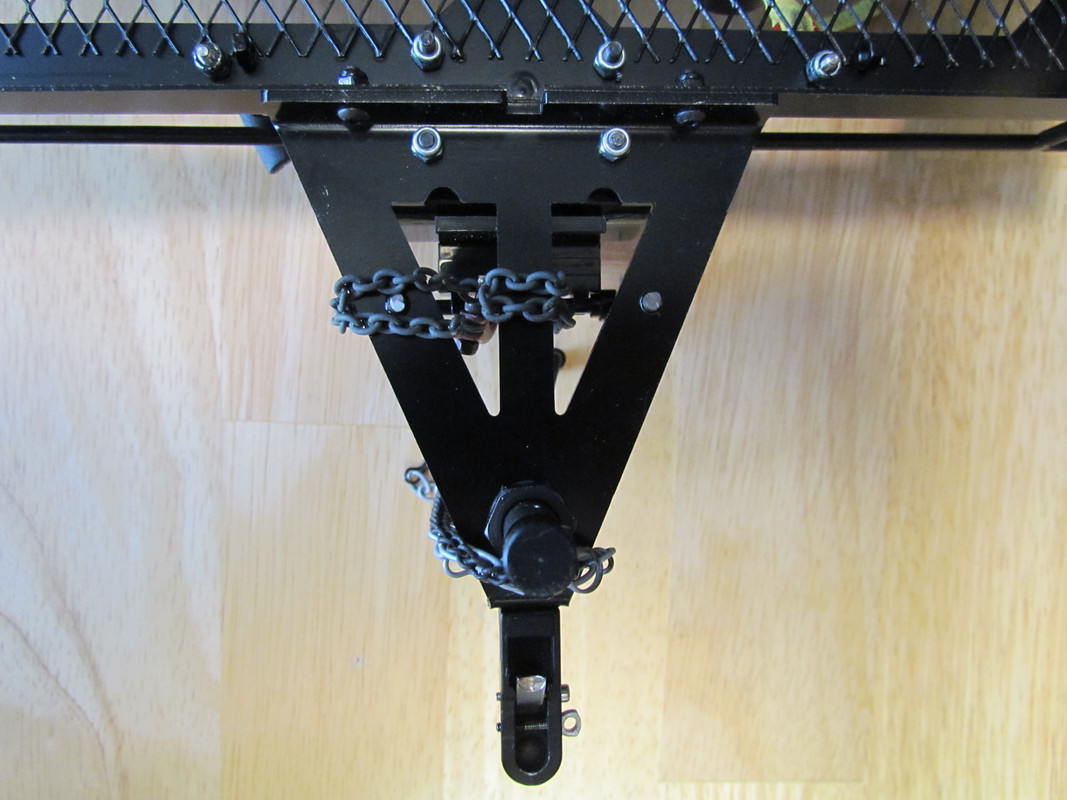 Here you can see the two safety chains ( painted/ weathered) with their respective clips that attach to the underside of the tow-rig's bumper. The darker chain to the left goes to the keeper-pin that secures the ball hitch in place: 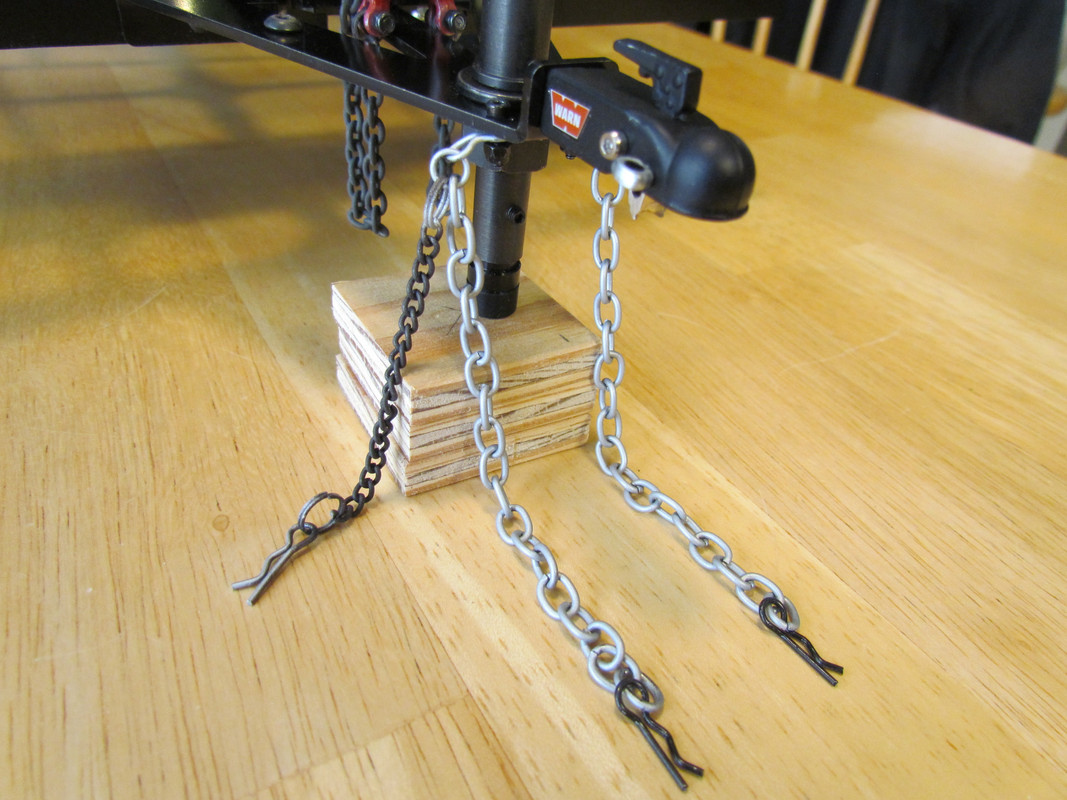 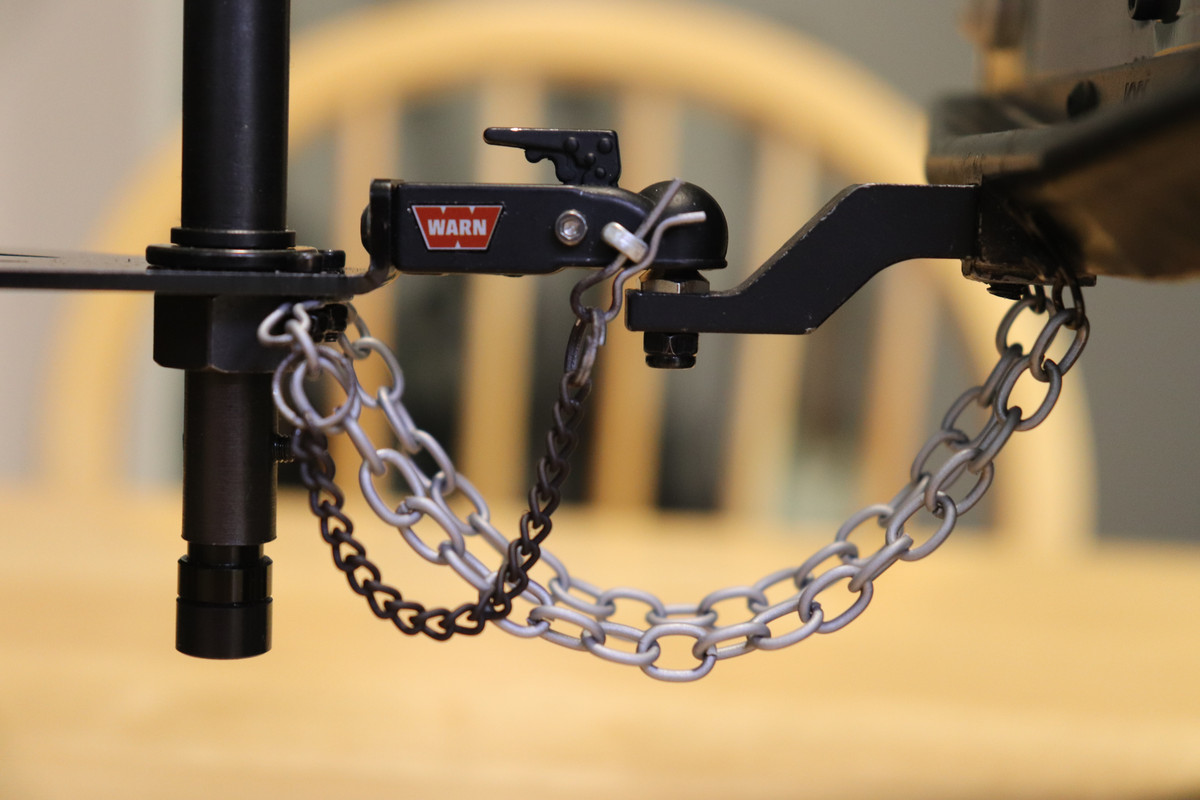 This next part I added solely for looks and to add a 'little something' to an otherwise pretty boring trailer. They are Lego blocks attached to the aluminum brace piece with e6000. This is like a storage rack for extra tow-chains/ hooks. These aren't actually going to be used for anything but I liked the look of extra chains/ hooks on-board... purely aesthetic. The hooks are hung upon another piece that is actually a Lego antenna mounted sideways and clipped into two other Lego pieces lol: 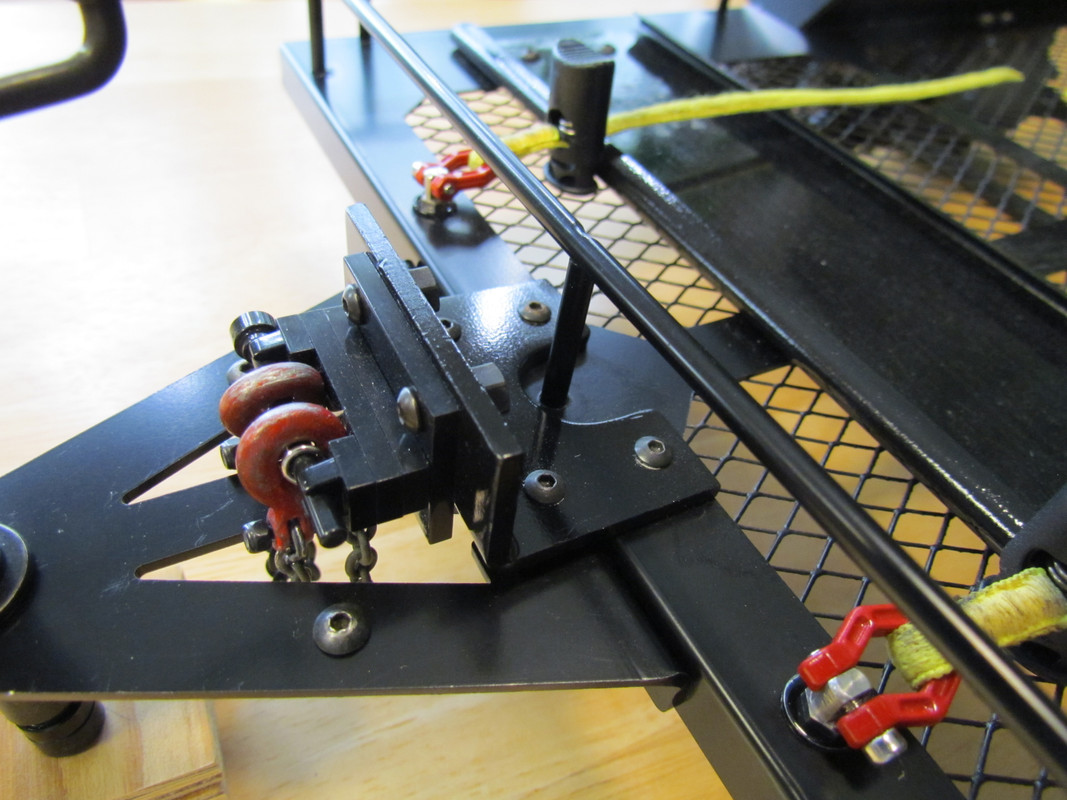 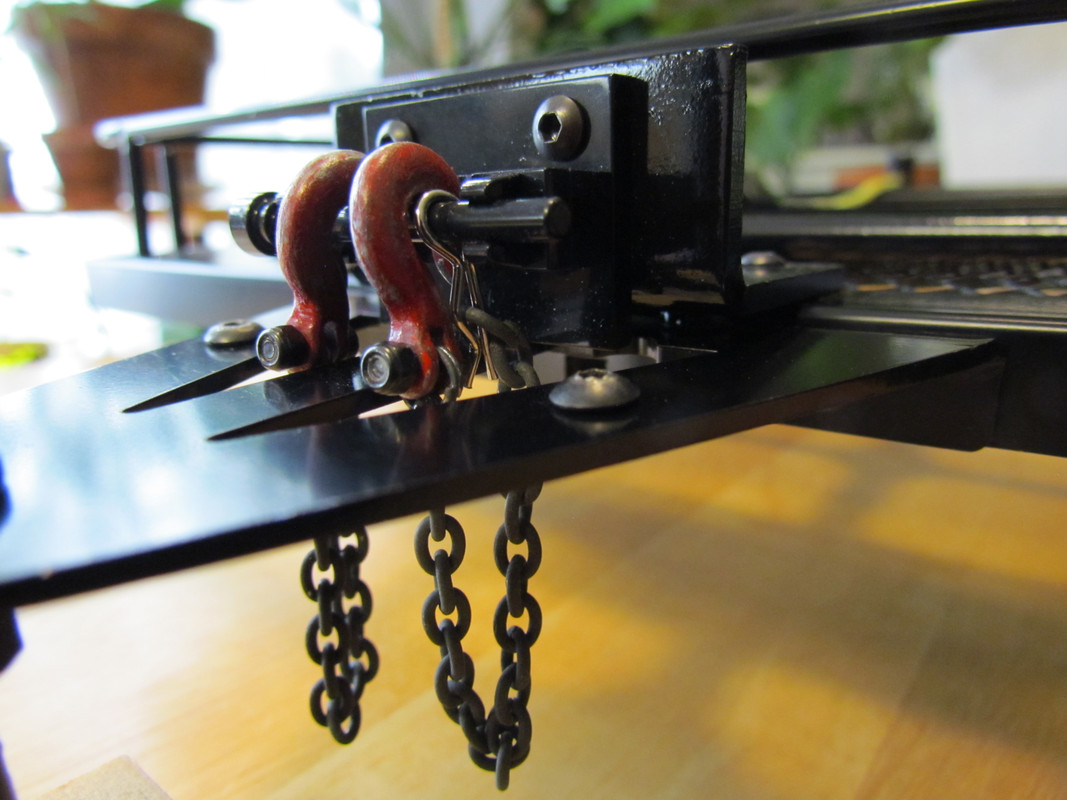 Pretty self-explanatory here... license plate with frame and bolts. Mounted on fender although I think it's illegal to mount plates this way lol, it needed to be out of the way and the only other place that I could've mounted it was on the rear of the trailer frame where it would've been more easily damaged. I'm happy with the Fender location:  Just a random pic of the rear corner. You can see here in the background, one of the rounded fender corners that were once sharp and hazardous:  This is a pic of the underside showing how the safety chains attach. They're attached to the trailer and to the tow-rig in the same way... using extra small body clips engaging onto bolts using lock-nuts. The lock nuts are only threaded onto the bolts enough to be secure yet leaving enough of a gap for them to be able to be clipped onto the bolts ( if that makes sense lol): 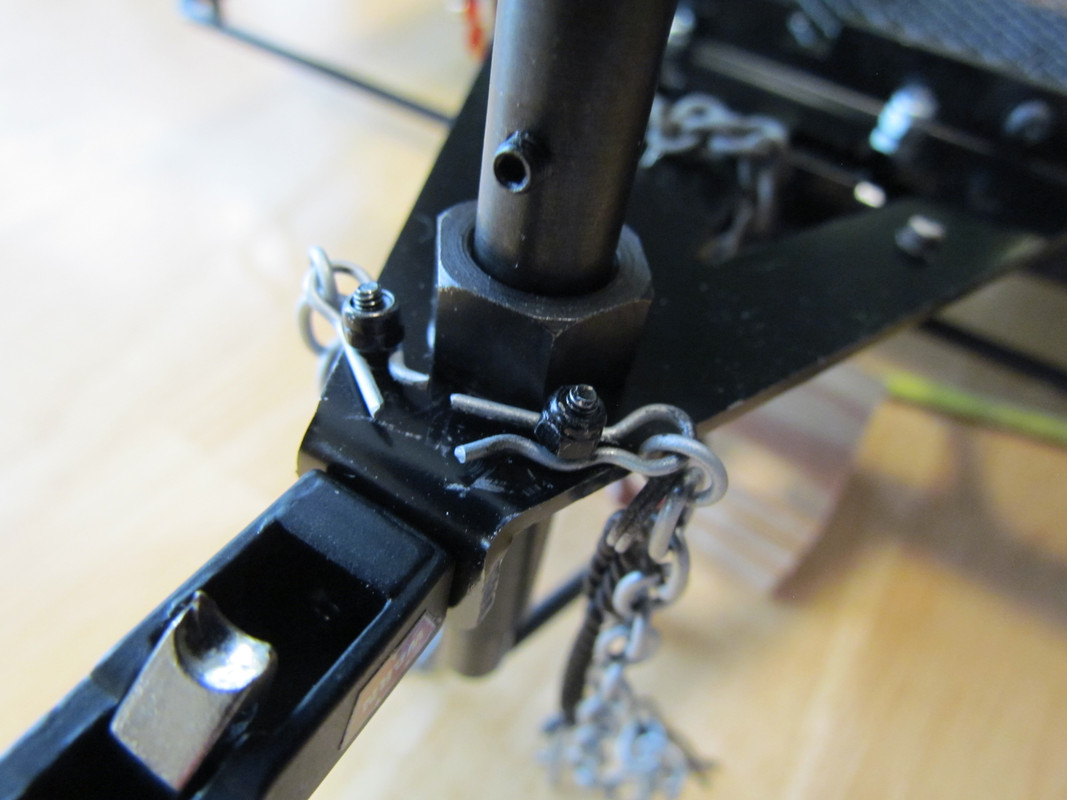 Showing the rear taillight buckets and terminated wiring. These were a pain because they actually needed an extra spacer that wasn't included in the kit) to get them to mount level into the cut-outs in the trailer frame. But they're secure and look pretty good imo: 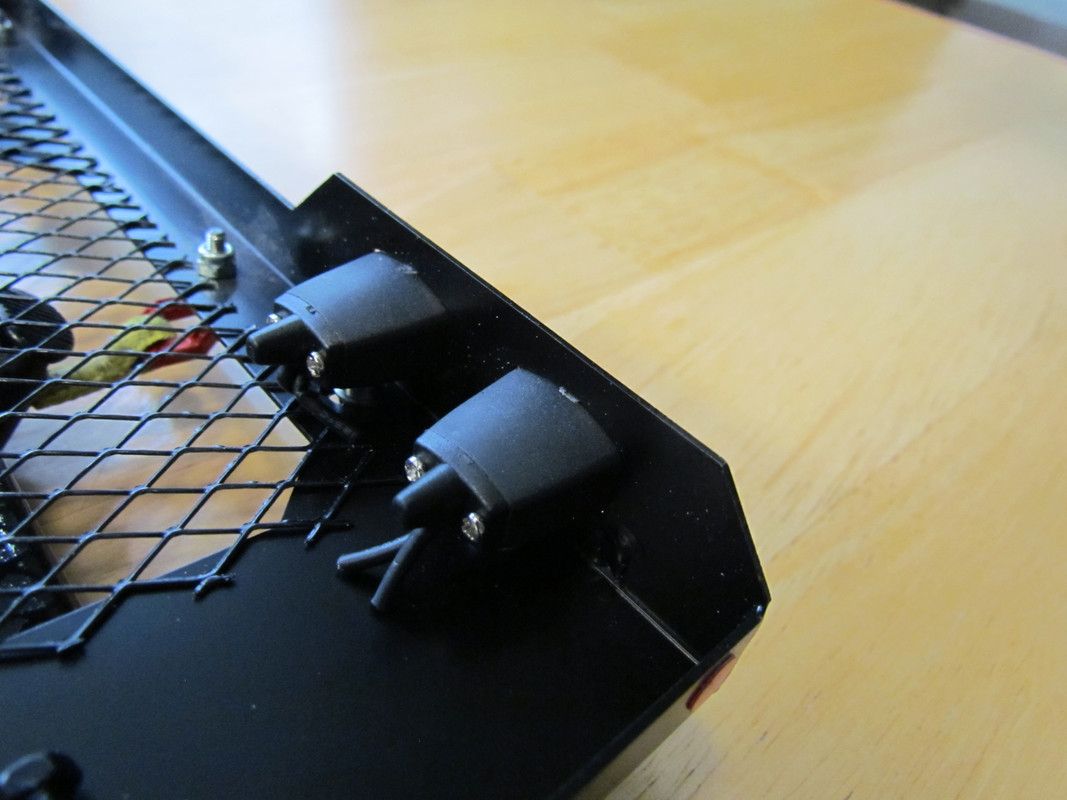 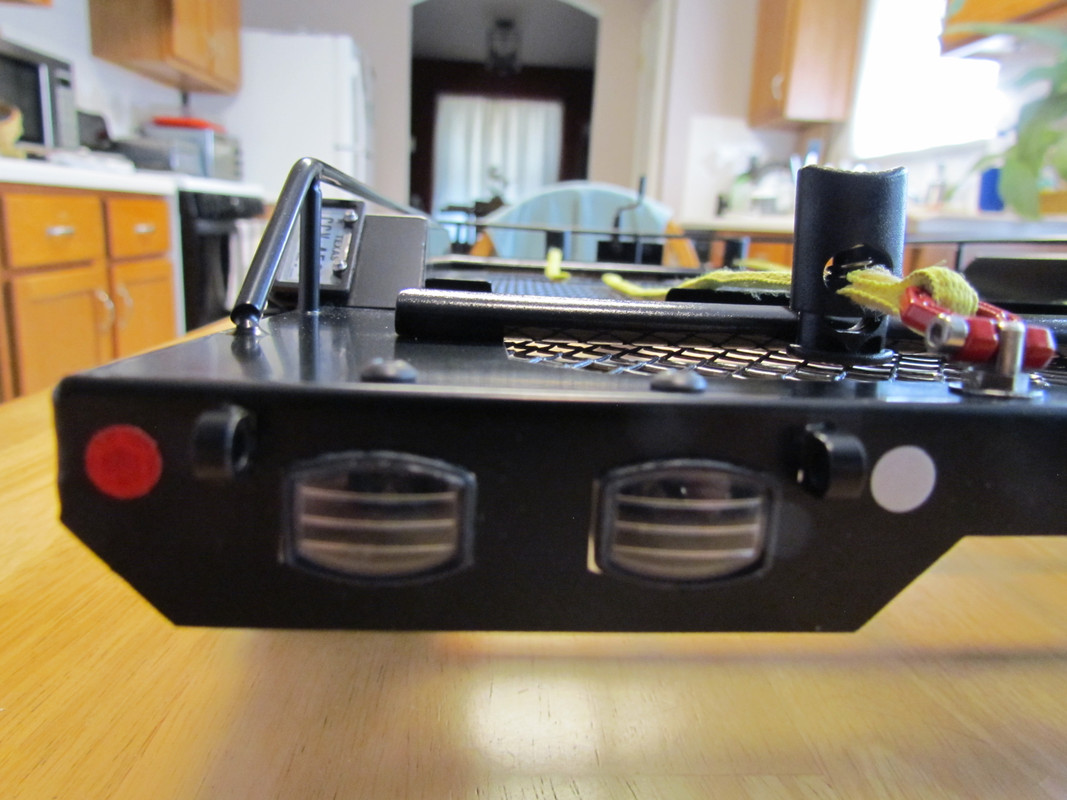 In this pic of the TF2's rear tire, you can see why I had to cut out the aluminum plate that I spoke of earlier. This is the rear plate ( front tires on both the TF2 and the Capra sit at the same spot on the trailer/ front aluminum plate so only the rear plate needed to be cut out). And as I mentioned before, I needed to cut out enough from the rear plates curvature for the TF2 to be able to be mounted flat. So the rear plate doesn't actually cradle the rear tires on the TF2: 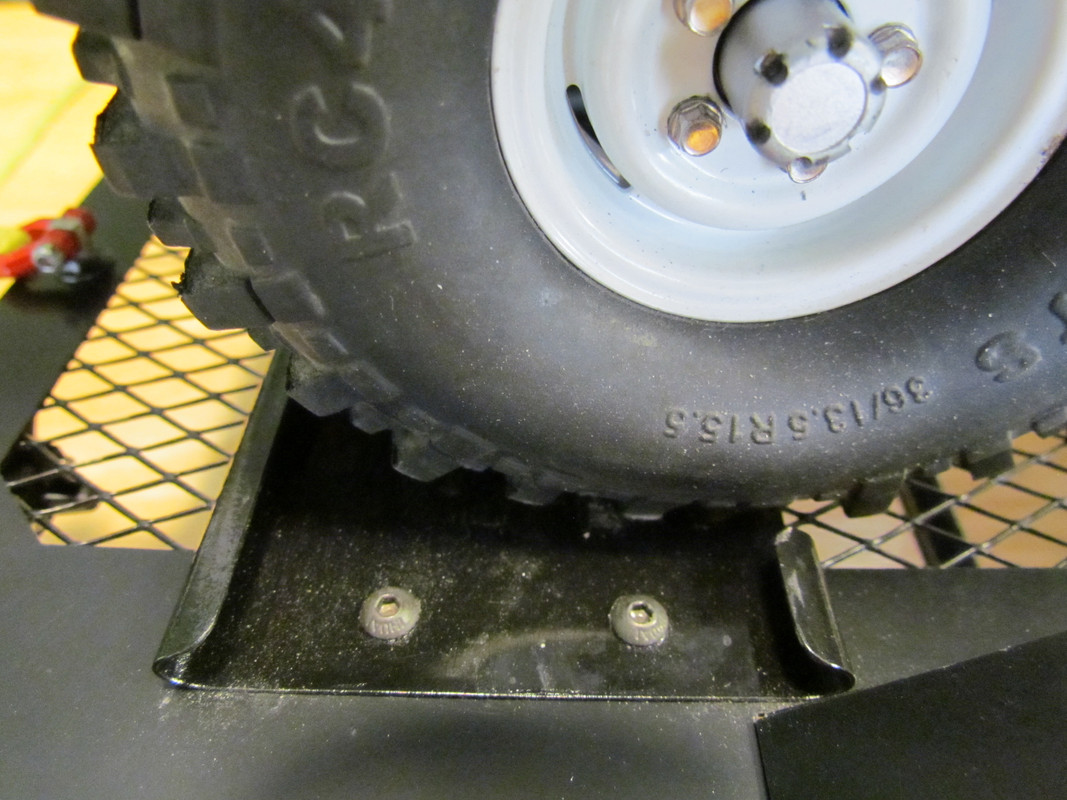 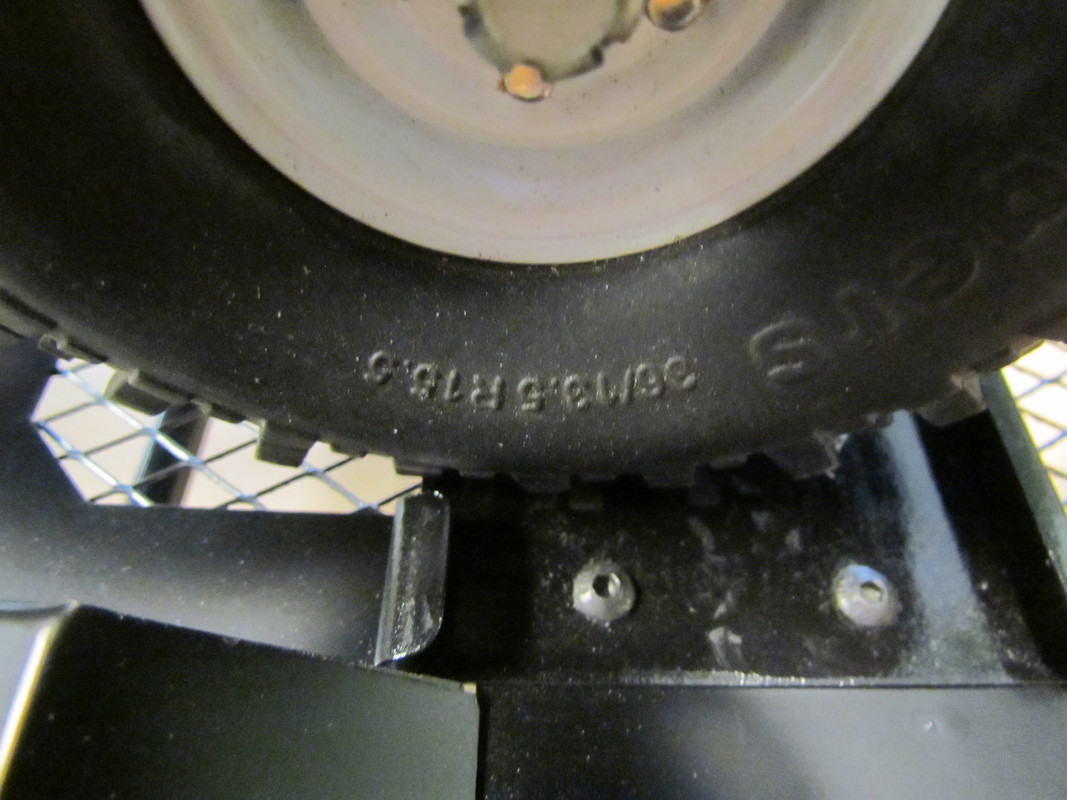 Front plate with no cut-outs necessary: 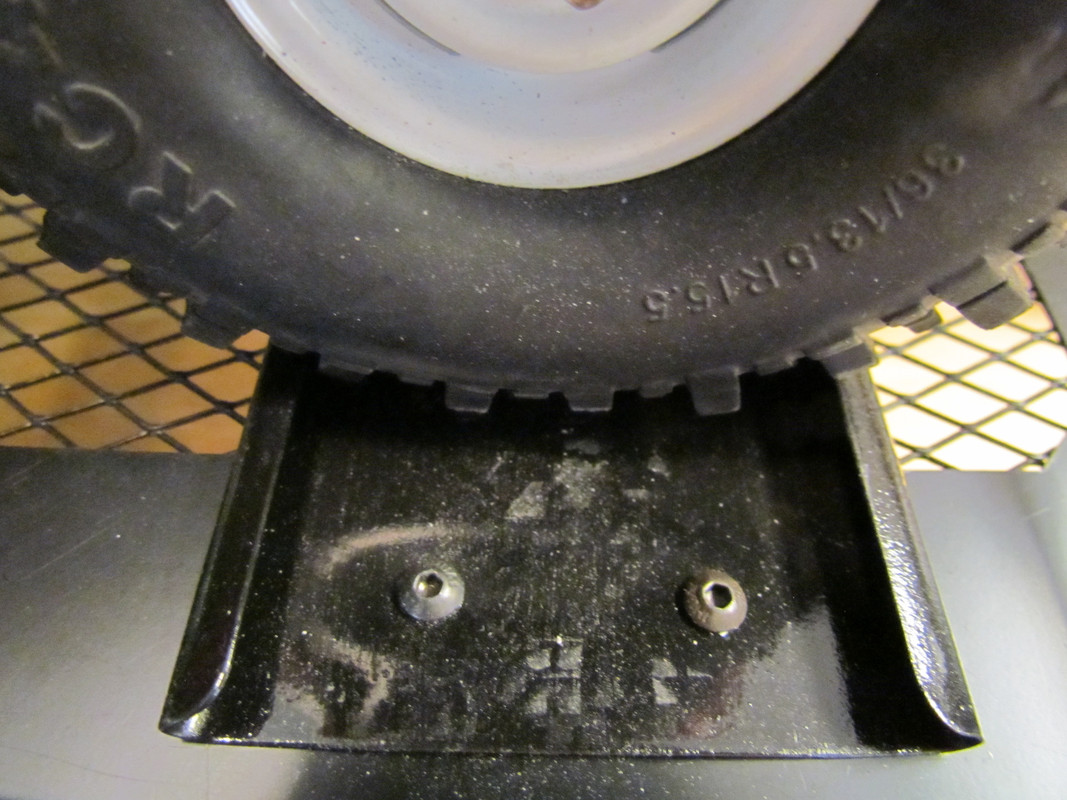 This is a pic of the rear Capra tire... able to utilize the full cradling effect of the upturned edges of the aluminum plate on the back-side of the rear tire and partially on the front-side of the rear tire. Hard to explain and not very clear in pics but maybe someone will understand all of this I dunno lol. 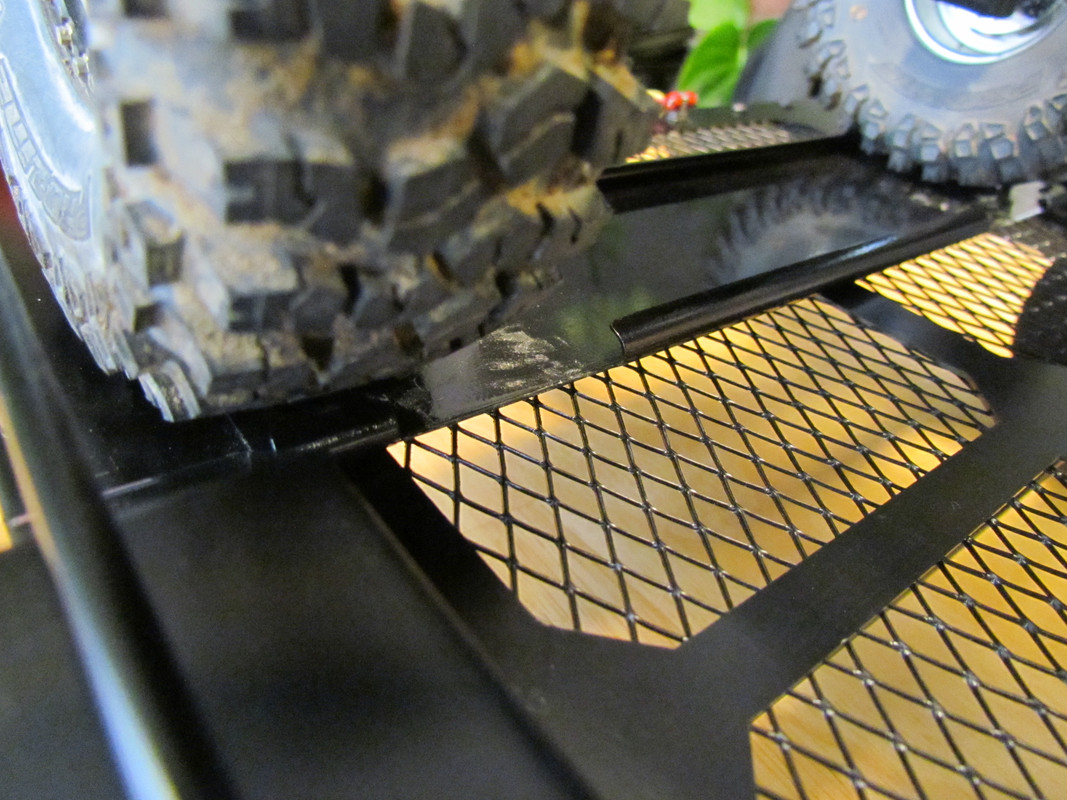 And this is what both rigs look like sitting on the trailer, ready to be strapped down. 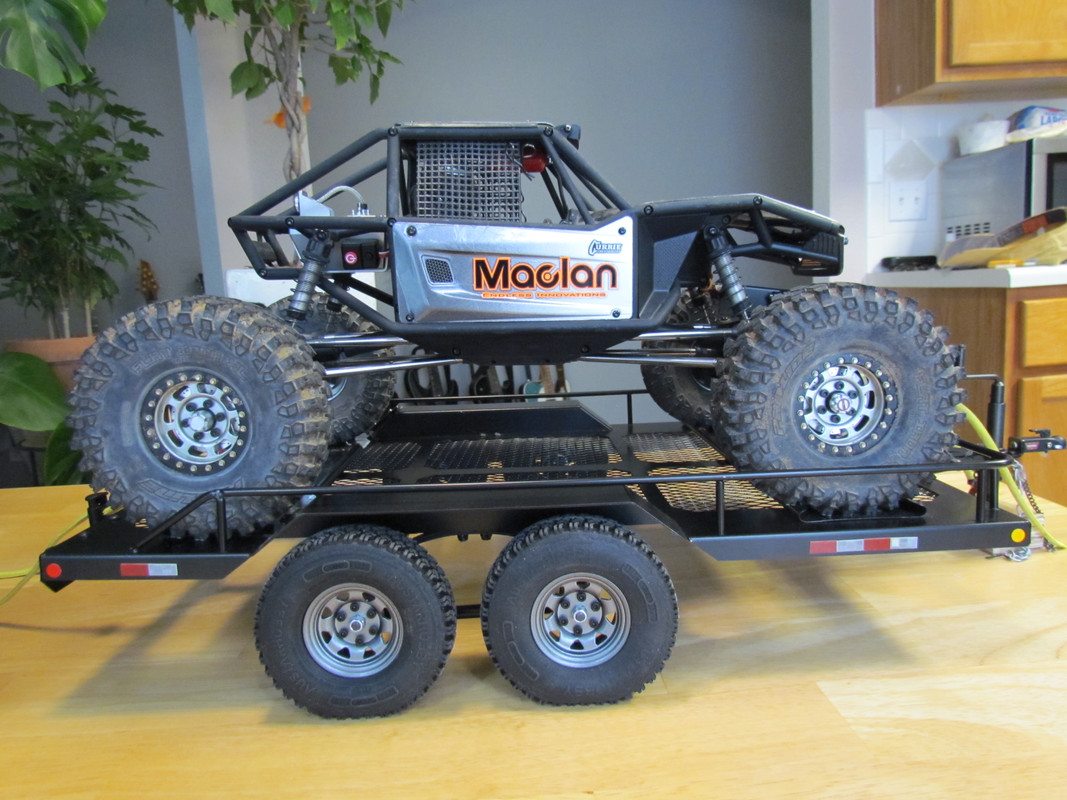 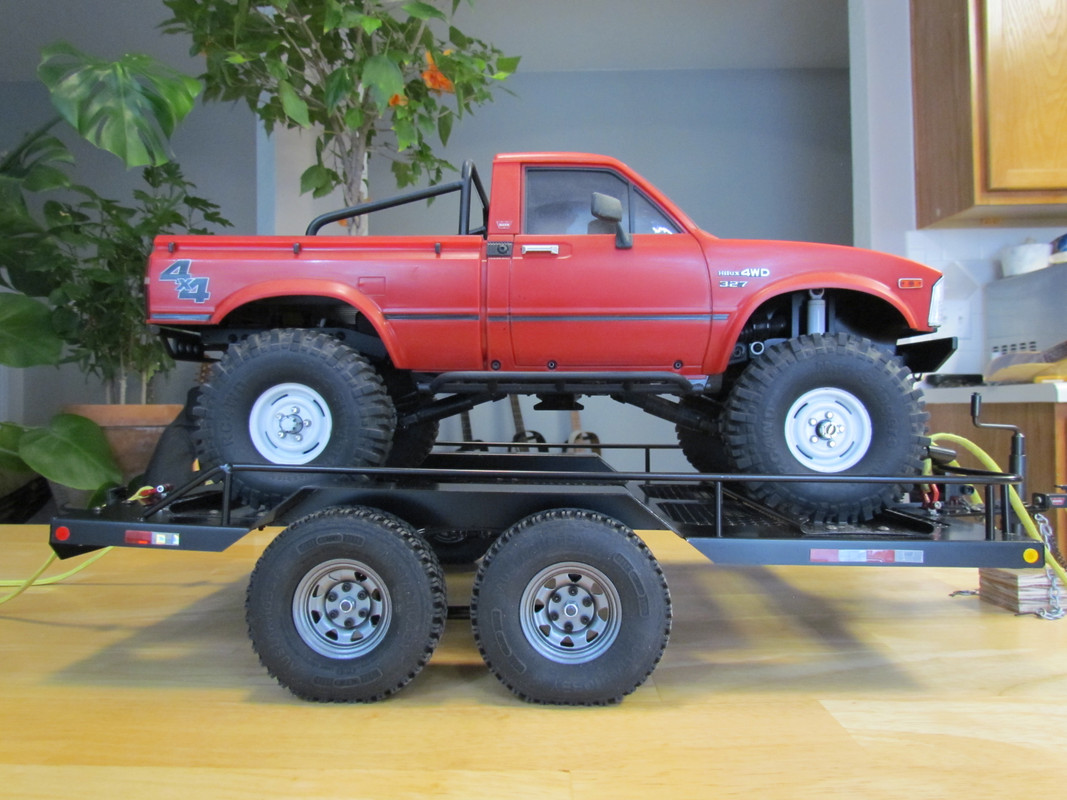 Done! 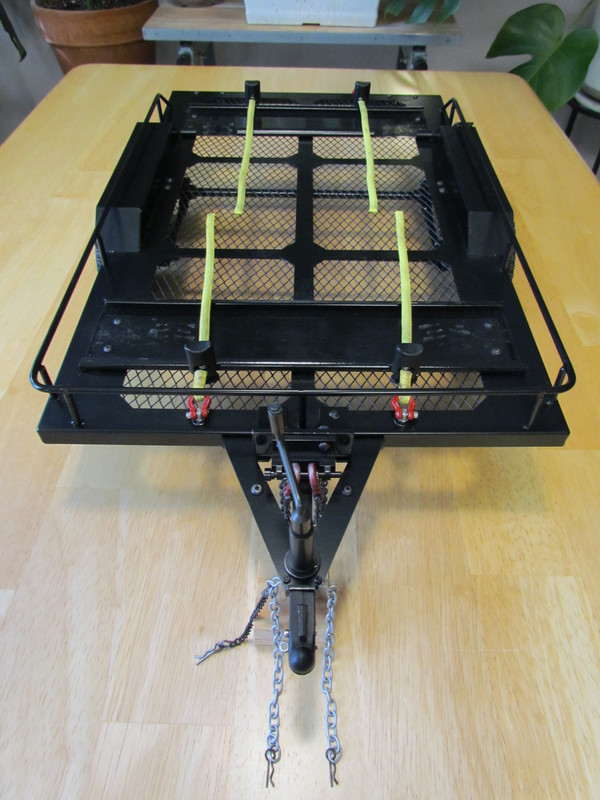 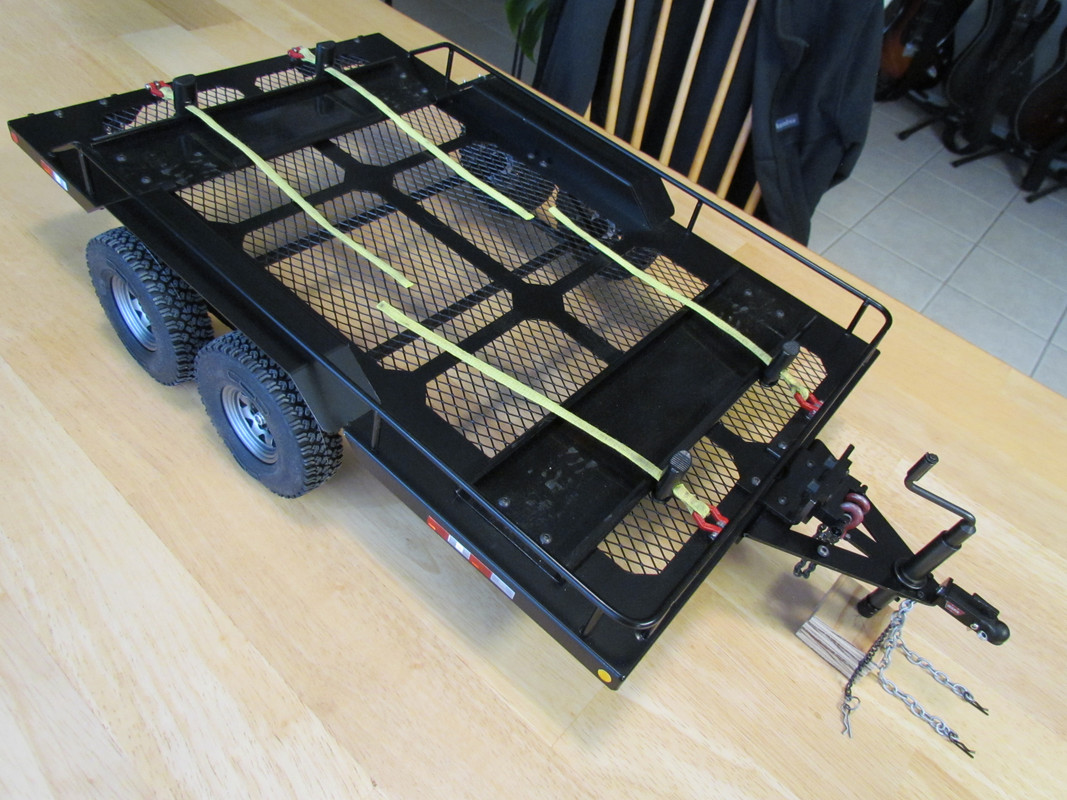 Capra strapped down:  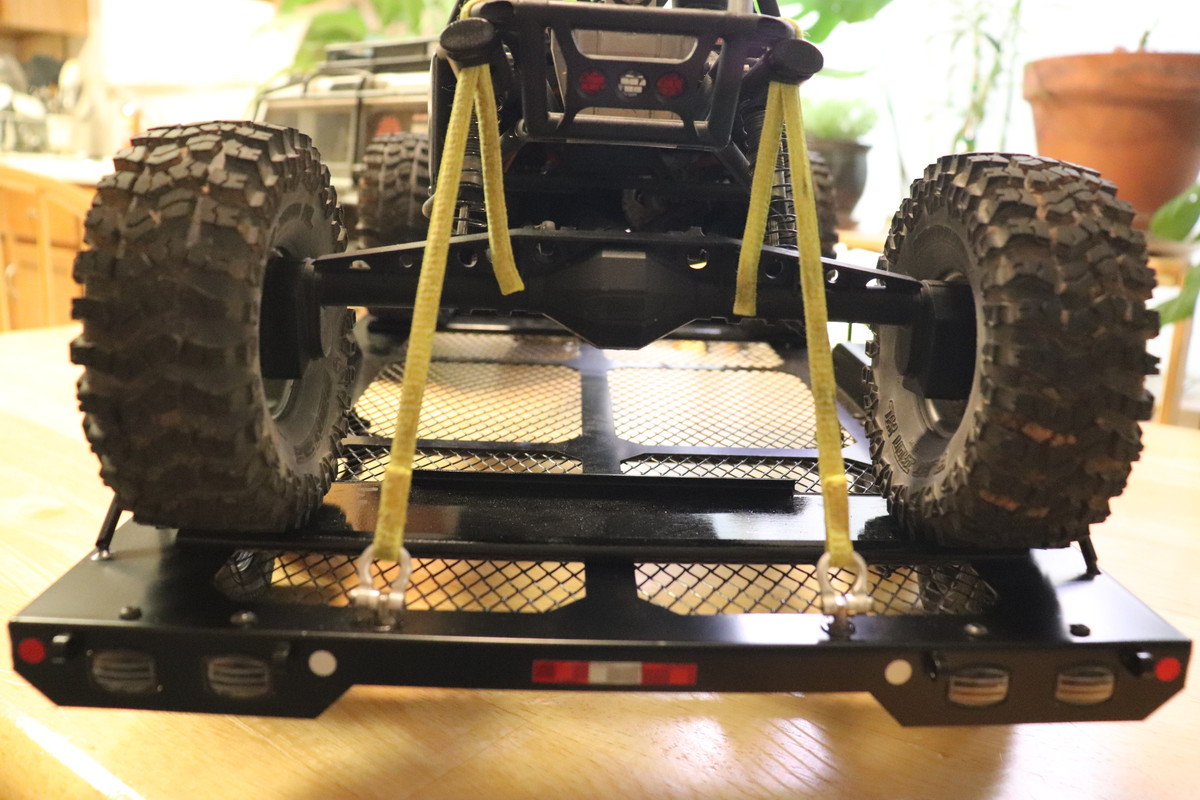 TF2 strapped down: 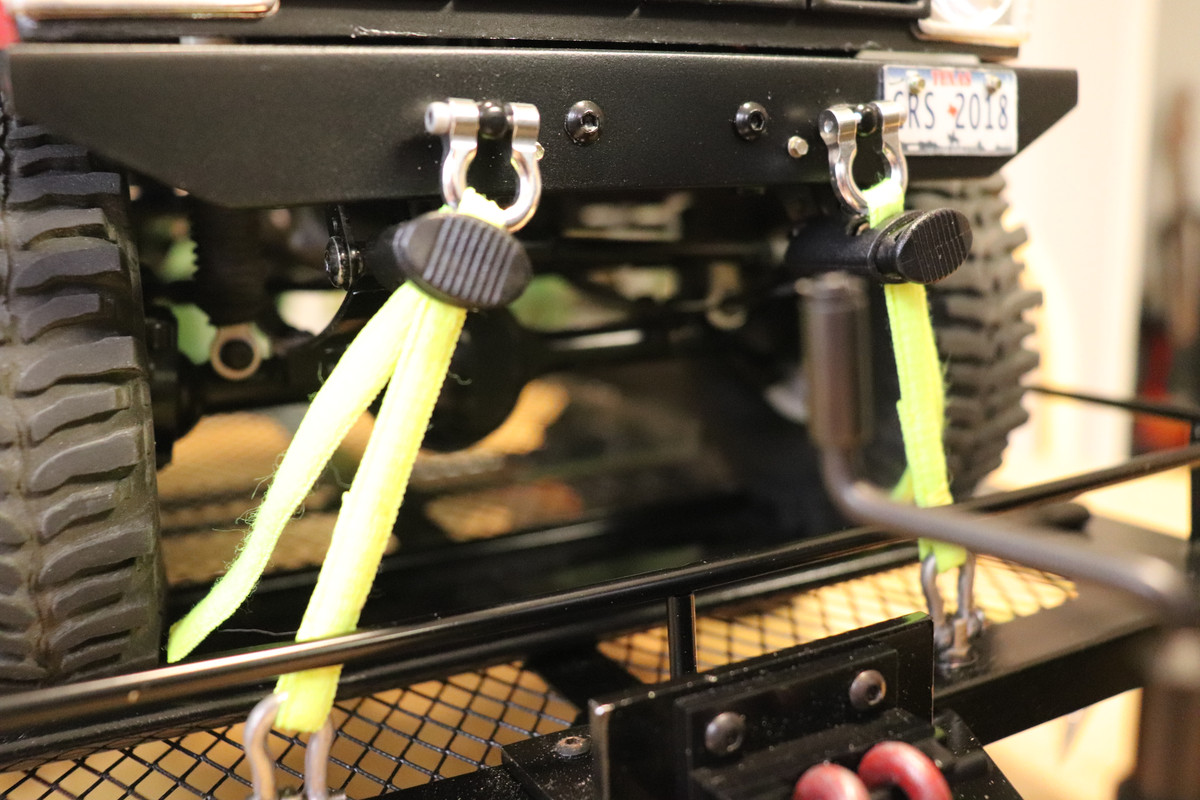 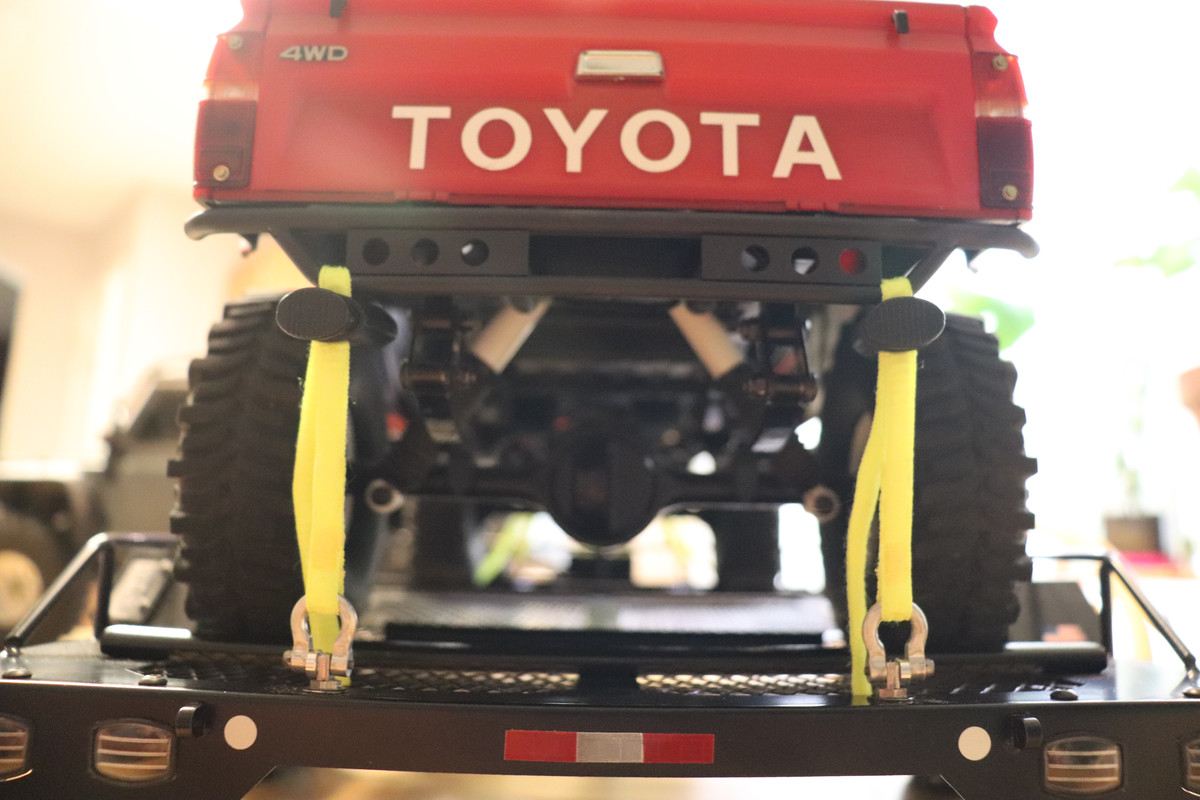 Ready to get outside and hit the trails now that cooler temperatures are here! Just need to set up and program the new ESC's in the D110 and the Capra. New motors in the D110 and TF2 as well. 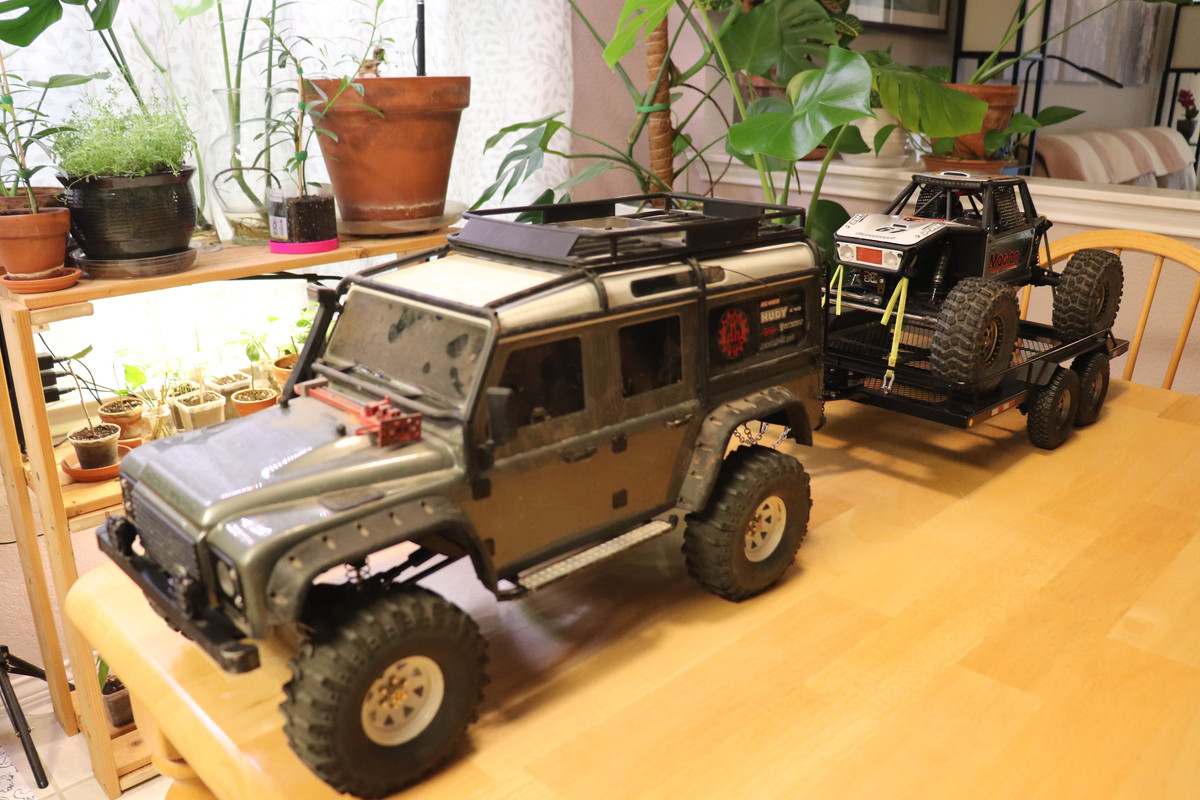 Well that was a TON of text so anyone that stuck with it... I owe you one. Thanks for taking a look! |
|
| |
|
11-04-2023, 03:55 PM
| #14 |
| I wanna be Dave Join Date: Jan 2016 Location: california under the rock im crawling on
Posts: 4,288
|
dang that's nice trailer lol
|
|
| |
|
11-05-2023, 06:46 AM
| #15 |
| I wanna be Dave Join Date: Sep 2011 Location: Douglassville, PA
Posts: 4,225
|
Awesome work on the tie downs and chains. Looks fantastic! Anytime you can work legos into a build, it's a good day. Tow Defenders are the best...  |
|
| |
|
11-13-2023, 09:30 AM
| #16 |
| RCC Addict Join Date: Nov 2017 Location: Austin Texas
Posts: 1,615
|
Thanks for checking it out, OSRC. IIRC When I was inquiring about doing a trail-rig and trailer a while back, you had posted a couple videos so that I'd know what to expect. Shame that almost no one supports stuff like this anymore on here.. although in their defense, this was definitely not a very exciting deal lol. |
|
| |
|
11-17-2023, 12:01 PM
| #17 |
| Pebble Pounder Join Date: Jan 2022 Location: Longmont
Posts: 199
|
Absolutely killer job! I have been wanting to do a tow rig and trailer but never quite did it. Maybe I will just have do after seeing yours! |
|
| |
|
11-25-2023, 11:07 AM
| #18 | |
| RCC Addict Join Date: Nov 2017 Location: Austin Texas
Posts: 1,615
| Quote:
Thanks man. I really appreciate you taking a look. | |
|
| |
|
12-08-2023, 11:45 AM
| #19 |
| I wanna be Dave  Join Date: May 2006 Location: HONDURAS...ROCK HEAVEN
Posts: 5,076
|
very nice trailer man! looks really nice. ** Nice write up on the build also. Last edited by cartronicshn; 12-08-2023 at 12:17 PM. |
|
| |
|
12-09-2023, 08:25 AM
| #20 |
| Go Buckeyes! Join Date: Jun 2017 Location: Mid-Ohio
Posts: 4,135
|
Very nice details. I especially like the tie-downs. Excellent job on the trailer project! |
|
| |
|
 Tow rig conversion and trailer build - Similar Threads
 | ||||
| Thread | Thread Starter | Forum | Replies | Last Post |
| Tonka tow rig 4wd conversion recovery rig and trailer | NissanNut | 2.2 Scale Rigs | 4 | 02-13-2015 02:36 PM |
| tow rig and trailer | buggy | General Scale Talk | 6 | 07-02-2010 07:47 AM |
| New F-650 5th wheel tow rig w/ trailer | freetimecrawler | 1.9 Scale Rigs | 12 | 05-02-2010 08:11 PM |
| |


 Linear Mode


