• Welcome to RCCrawler Forums.

    It looks like you're enjoying RCCrawler's Forums but haven't created an account yet. Why not take a minute to register for your own free account now? As a member you get free access to all of our forums and posts plus the ability to post your own messages, communicate directly with other members, and much more. Register now!

    Already a member? Login at the top of this page to stop seeing this message.

SCX10 II by newIIrocks

These seem pretty redundant actually. There is many cross braces from the old scx that seems to do the same job. The cross brace that the servo always used to bump into for example. I'm sure lots of people got them laying around, since most took it right off anyway. And the old cross brace that was in between the shocktowers also looks like it will fit. The top holes also match up with the transmission.

I have only eyeballed the braces, but it looks pretty dam close. I have not any intention on doing the flip on my scx2, since I gonna swap to the OG transmission with Hurtz dig. But I gonna try it on a old scx that will get the new transmission.

those braces dont take the drive shaft into account, looks like to me they would not work like the new cross brace they made...
 
30sec with a dremel fix that

you can dremel out material, but you will weaken the entire brace when you do. the amount of material needed to be removed from what I see, would make it way to weak too work.. I will be able to compare it better once I have my mount and rig..
 
Last edited:
Well I have the rig and I have eyeballed it from under the rig, and it looks pretty close, especially the shocktower brace. I'll swap skids in the weekend, and know more then.
 
I'm not saying that it will or won't fit, but the holes are spot on.

You'll also need either the stock servo mount or the servo/winch plate we are also releasing.

f16368c8073f168387383e1a6697f4e4.jpg


Sent from my iPhone using Tapatalk
 
New battery tray/servo mount headed to the printer once this coffee kicks in ;)


Sent from my iPhone using Tapatalk
 
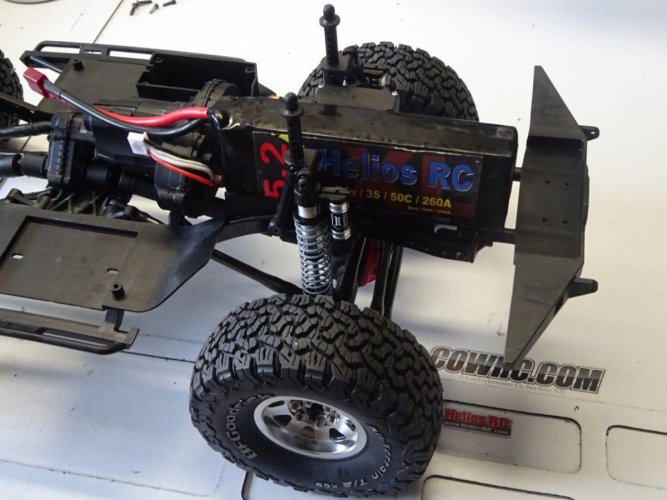
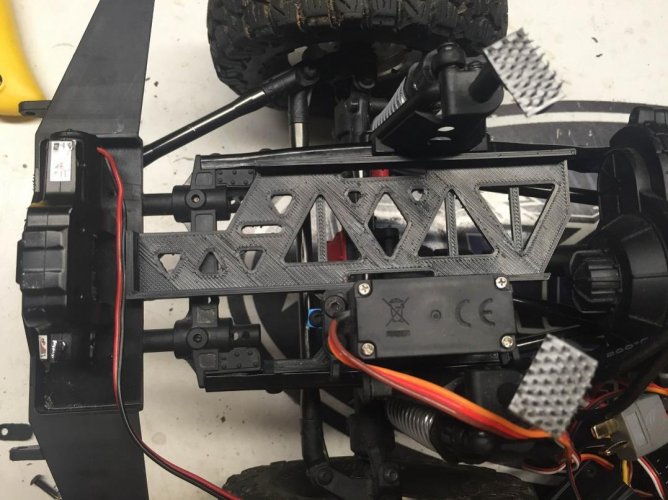
The coffee is working. The BowHouse engineering team has created two versions of the new battery tray. One mounts up to the stock steering servo mount like the stock battery tray, and the other replaces the stock steering servo mount with an integrated mount. Here are pix of the prototypes, printed in draft form (forgive the rough edges):

DSC00769.jpg

The tray fits the 5200 mAh 3S Helios RC pack, as well as the 5000 mAh 3S Onyx and Venom soft packs commonly sold in LHS's (Helios pack shown):

DSC00765.jpg

DSC00768.jpg

We'll be putting these up on our Shapeways store, where they'll be printed with SLS nylon (much smoother and stronger than the prototypes) once we add a few more details (including channels to accept the stock battery tray tabs and velcro straps). And then we'll turn to the servo winch mount... "thumbsup"
 
note to self.. buy new battery tray for old scx chassis. oooohhhhh yeah.

Now there's an idea. ;-) It should end up being a direct bolt-on since the II uses the same chassis rail hole locations as the OG. We'll definitely have to give that a test...

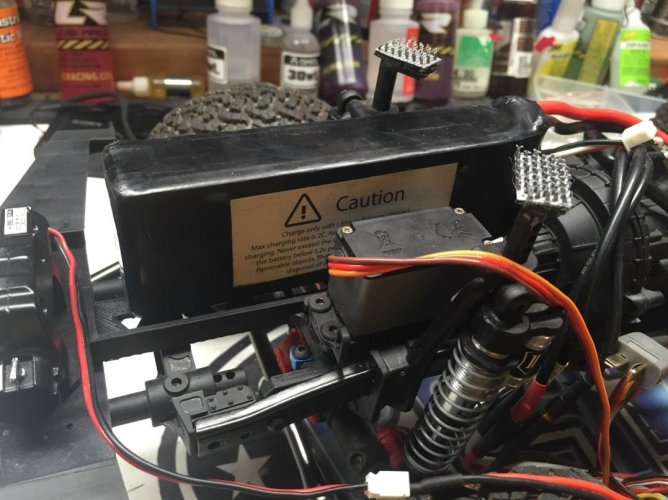
A few quick updates. Nick and I are still making a few small tweaks to the battery tray design. Here's the current iteration with the integrated servo mount:
DSC00773 (cropped).jpg

IMG_6655.jpg

IMG_6656.jpg

As you can see, plenty of room for a large stick pack (pic shows the same 5200 mAh 3S pack you've been seeing). Once we finalize the design, I'll be mounting this up for good.

And as a follow up to the earlier discussion of different 3D print technologies, here's a side-by-side comparing the cradle prototype printed in high res using FDM/FFF to the production version printed using SLS:

DSC00787.jpg

I edited the lighting to make the surface texture differences easier to see (both parts look smoother in normal light to the naked eye). Between the smoother surface texture and added strength of SLS, it's easy to see why we use that for our production parts. "thumbsup"
 
Stuff looks great! I like the batt tray with the servo mount. Be good for us peeps trying to update the older rigs! Nice Job "thumbsup"
 
Back
Top