• Welcome to RCCrawler Forums.

    It looks like you're enjoying RCCrawler's Forums but haven't created an account yet. Why not take a minute to register for your own free account now? As a member you get free access to all of our forums and posts plus the ability to post your own messages, communicate directly with other members, and much more. Register now!

    Already a member? Login at the top of this page to stop seeing this message.

Because I’m jealous of my wife’s rig, scale truck build

opening doors are a bit crap. my 70 came with them. Had to use gentle persuasion to make them flush with the body. Also filed the edge where are the hinges to not rub. The functional windows are a gamble because they are glued shut after assembly. My kid forced one down and now it it permanent.
 
opening doors are a bit crap. my 70 came with them. Had to use gentle persuasion to make them flush with the body. Also filed the edge where are the hinges to not rub. The functional windows are a gamble because they are glued shut after assembly. My kid forced one down and now it it permanent.

Yeah it’s a really cool concept but the functionality isn’t there. My wife’s tf2 body with doors functions just fine with no issues. Of course it has no door cards and the windows are glue in, but still. I’d like them to work but the amount of times I’ll actually open them is very little lol
 
What u doin with the old/pervious bed.......? Sorry to hear about your door/window woes.....I hope mine will go smooth like waxed butter....
 
What u doin with the old/pervious bed.......? Sorry to hear about your door/window woes.....I hope mine will go smooth like waxed butter....

The one that comes with the body? I’ve given one to my son to build with the other cab I have. I returned the Rc4wd one for this one. It’s almost identical, besides a few different holes already in the bed.
 
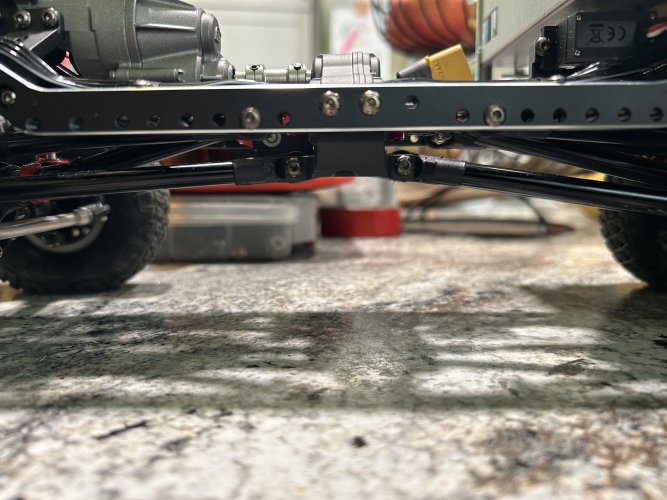
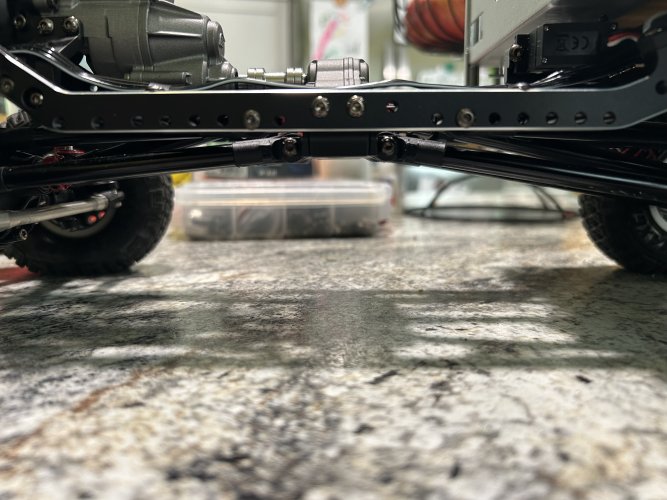
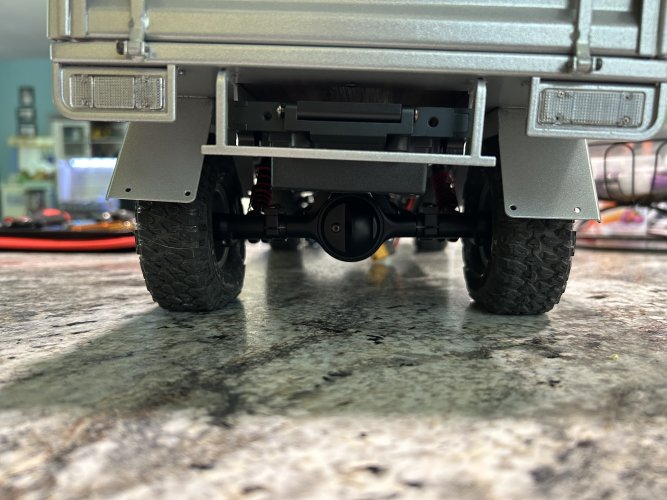
Doing some rear shock tuning/ adjustments.

As you can see, the bed makes the rear just sit all the way down on the tire. Placement of shocks per build manual. Which would be fine if the bed wasn’t so heavy lol

IMG_2716.jpeg

IMG_2717.jpeg

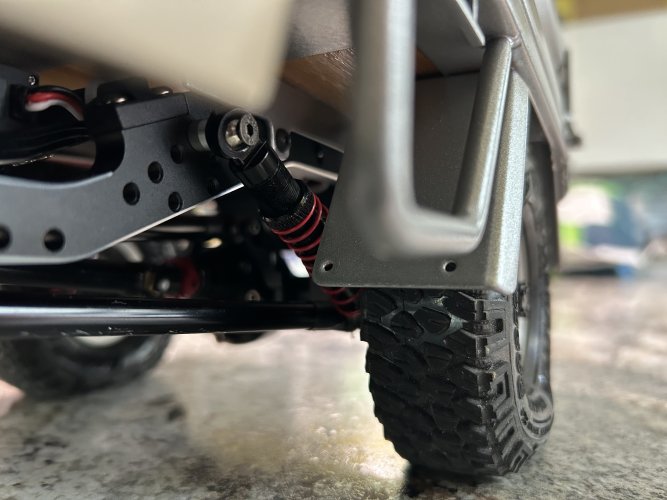
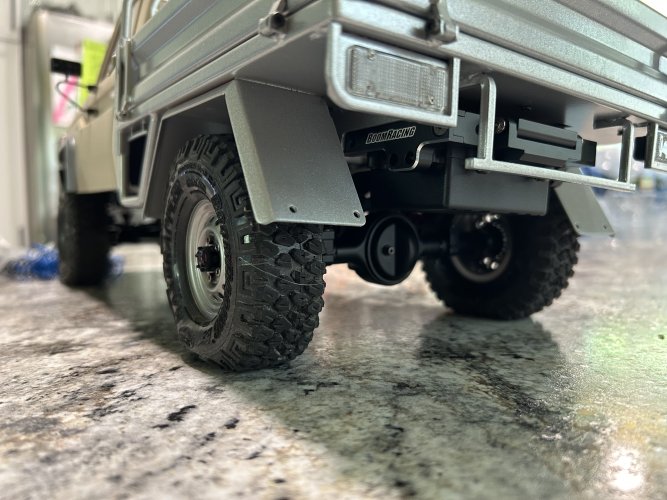
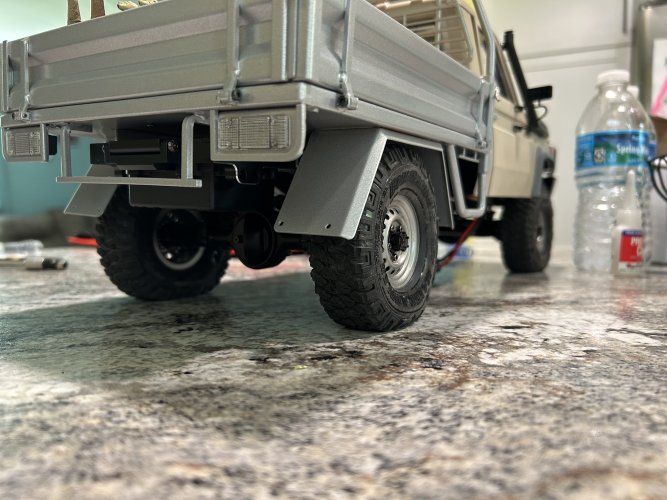
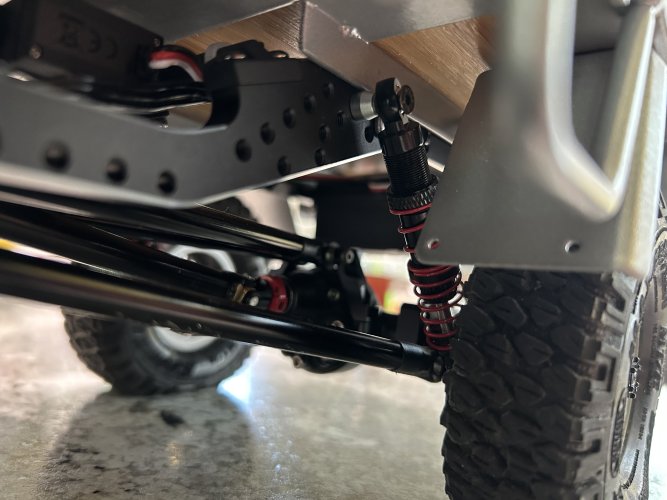
Since I don’t have any springs that fit these shocks and the extras that come with it are softer than these red ones, I’ve moved the springs around. I put the short spring on the top and the longer on bottom. If I crank down the adjusting nut, it seems to give it a stiffer feel. I’d assume because the short spring is almost compressed. Made a bit of a difference but I also moved the shock location to the rear and up slightly.

You can see the passenger (rh driver) is now sitting off the tire while the driver is still sitting on the tire, or close to it.

IMG_2720.jpeg

IMG_2721.jpeg

IMG_2722.jpeg

Now to fix the drivers side and I think it’ll be good for now. With the weight of the bed there is already tire rubs on the frame of the bed since it just sits right there when driving it lol
 
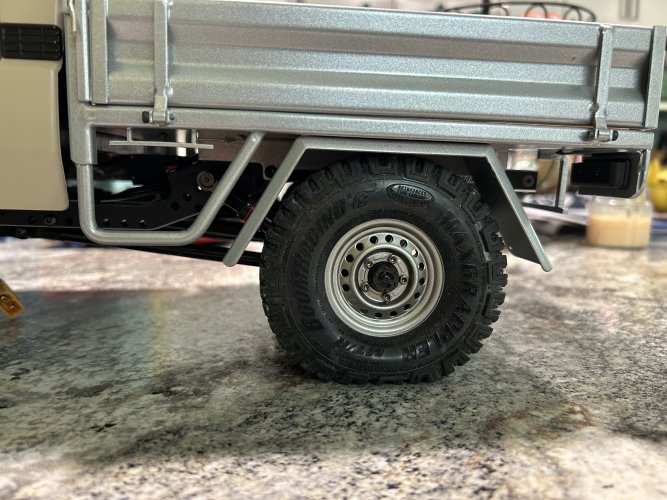
Just moving the placement of the shock on the frame made a huge difference. Before: shocks are fully compressed with the adjustment nut all the way down. Now: adjustment nut is 3-4 turns from the top and the rear has about 3/8” gap between tire and wheel well, which is what I wanted.

IMG_2719.jpeg

This was before I raised the adjustment nut, because like this on both sides it was sitting way up! Still love the fact that boom racing chassis have pre threaded holes in the frame for adjustments like this. Makes it so much easier than either drilling a new hole or adding a nut to the inside.
 
Back
Top