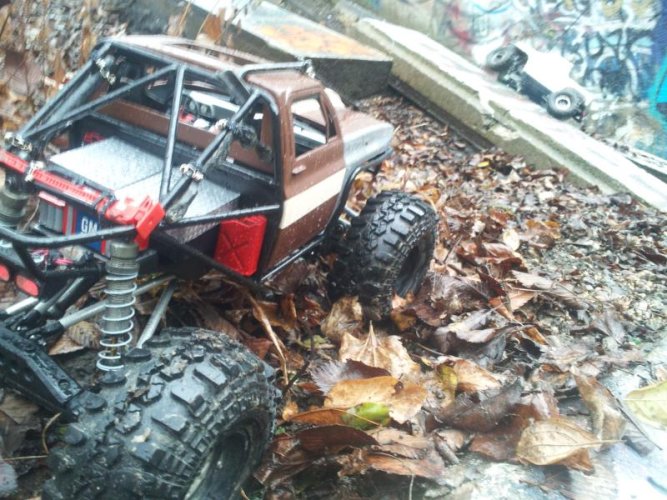
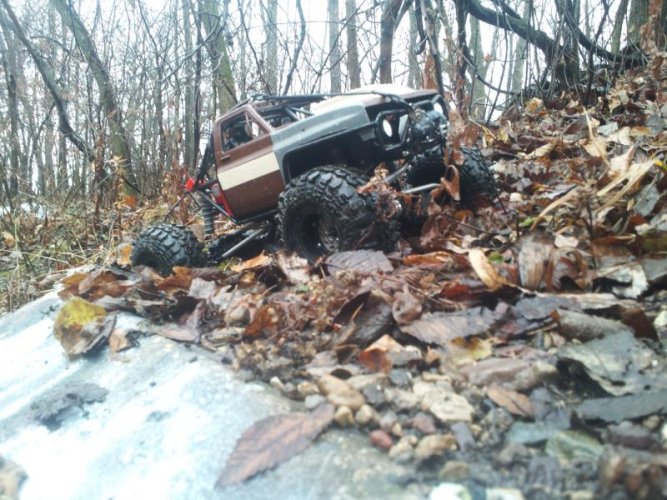
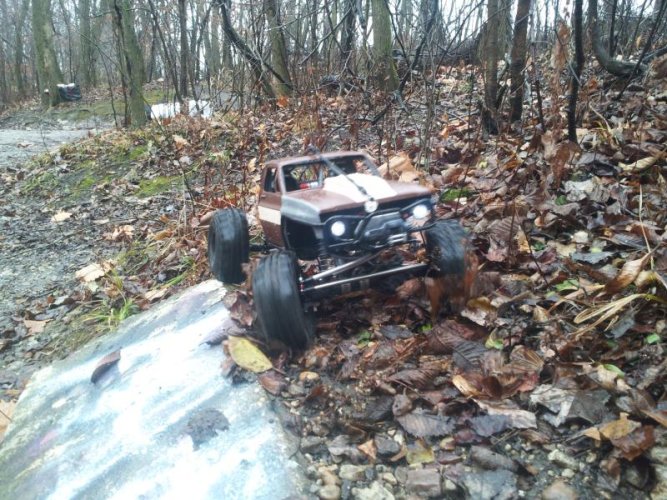
• Welcome to RCCrawler Forums.

    It looks like you're enjoying RCCrawler's Forums but haven't created an account yet. Why not take a minute to register for your own free account now? As a member you get free access to all of our forums and posts plus the ability to post your own messages, communicate directly with other members, and much more. Register now!

    Already a member? Login at the top of this page to stop seeing this message.

Clod Truggy time!

man this is a VERY well thought out, detailed, well explained build thread with a top notch rig being built"thumbsup"

I only wish i had the patience to do a build thread like yours.. very very well done my friend"thumbsup""thumbsup""thumbsup"

been wanting to try a chev/clod truggy so this will be great to watch, thanks
 
Added some neodymium magnets (happened to pick up a bunch pretty darn cheap from K&J Magnetics - Strong Neodymium Magnets, Rare Earth Magnets) to the project box lid and the underneath of the toolbox lid. This way the toolbox lid just "snaps" onto the project box with hopefully no fuss!

IMAG0304.jpg


IMAG0305.jpg
 
man this is a VERY well thought out, detailed, well explained build thread with a top notch rig being built"thumbsup"

I only wish i had the patience to do a build thread like yours.. very very well done my friend"thumbsup""thumbsup""thumbsup"

been wanting to try a chev/clod truggy so this will be great to watch, thanks

Thanks for the comments!
 
IMAG0493.jpg


IMAG0492.jpg


Well, due to breaking my Class 3 Bronco, I've re-purposed the Clod and turned it into a Class 3 with the running gear from the Bronco! At least until I get the Bronco's frame rebuilt and/or I get ahold of some of those new mix-n-match VP axles.

But I wasn't sure how it'd look sitting on Wraith axles with 2.2s, if it looked too out of scale. But in some image looking of 1:1 class 3/unlimited rigs, doesn't seem to be too out of whack. For class 2, yeah, but not class 3.

Probably want to go with some longer links in the rear, which would give it a slightly longer wheelbase than the bronco. Doesn't seem to be any clearance issues with the 2.2 wheels and the tube fenders or the body. Just needs to sit a bit lower.

Also because of the transfer case and the GripFab tranny/motor mount I don't think I'll have the issues I had with the Bronco as far as the links and all go with the offset pumpkin/driveshafts.

Just need to fab up a light bar for it, help protect the body too when rolling over since that would be like the first thing to get hit. Probably for now just cut off the light bar from the Bronco and graft it to the inner cage I built.

Anyways, I was trying to give it a 70s vibe with the paint scheme.
 
Well got the CMS mounted, the transfer case and figured out the lengths for the rear links not only for a bit longer wheelbase but to get rid of some of the angle in the driveline. Also mounted the motor/trans so now just gotta hook the trans to the transfer case and slap in some electronics and see how it runs....

Ended up having to flip the tranny around from the way I initially had it; good thing that Rick's mount allows me to do that without issue. Otherwise, I was getting my driveline crossed and it was rubbing.

But hey it's running. :)

<iframe width="640" height="360" src="http://www.youtube.com/embed/K_eWQvbQDpE?feature=player_detailpage" frameborder="0" allowfullscreen></iframe>
 
Painted the inner fender wells...

IMAG0498.jpg


And got them mounted up...

IMAG0499.jpg


IMAG0500.jpg


And now it runs! Although had to switch out the spur as I stripped the previous one due to bad mesh; the trans mount is hard to tell if it has proper mesh as you can't see it, so used the paper method and that seemed to work well.

IMAG0502.jpg
 
Well, got most of the interior done. Couldn't quite manage to do a full interior unfortunately, so was stuck with a 'torso up' type of interior. Bit disappointing, but just didn't have enough room with everything inside of it.

Here's a shot of it from the outside. Will post some more interior shots.

IMAG0505.jpg


Cut up the center console and dash from a Wraith, then just mounted it on a piece of plastic as a tray that was spray painted with the truck bed liner spray. The center console is just velcro'd to the plastic tray. The seat is a cut up Wraith seat that is bolted to a small plastic tray and then velcro'd to the main tray.

I used some body posts to mount the plastic tray with so that it can be pretty easy to remove when needing to switch out batteries, etc.

Still need to find a driver figure to use. The ones I have are either to small or too big!
 
a few shots from today. Looking good Zero!
 

Attachments

  • 2012-12-09 11.50.21.jpg
    2012-12-09 11.50.21.jpg
    105.7 KB · Views: 1,129
  • 2012-12-09 11.49.59.jpg
    2012-12-09 11.49.59.jpg
    106.8 KB · Views: 1,019
  • 2012-12-09 11.49.03.jpg
    2012-12-09 11.49.03.jpg
    130.9 KB · Views: 1,047
During the first real test of the truck out in one of our comp spots, in preparation, for an upcoming comp I had the Wraith driveshaft that I had cut down for the shaft between gearbox and transfer case break. It wasn't the shaft, but rather one of the ears on the u-joint.

Anyways, badhoopty had an old RC4WD Punisher shaft that he had cut down for his Timmy rig and wasn't using anymore which he gave to me. Had to create a new transfer case mount as the cut-down was slightly shorter than what I was using before, but otherwise fit perfectly. Much beefier, hope to have no issues with it.

IMAG0530.jpg
 
The Chevy is 12" wheelbase... Chassis is only 15" so wb has to be 3" less or more for class 2...
 
The Chevy is 12" wheelbase... Chassis is only 15" so wb has to be 3" less or more for class 2...

Also the front wheels are centered so there isn't any rubbing not to mention full compression with the panhard, etc.
 
Well clod is getting a Tekin RS with a Pro4 3300 on 3S, plus with the smaller packaging of the Tekin RS I'll be putting in a servo winch.
 
Decided I needed to protect my winch from getting torn to shreds even if it is just a prop, sorta an expensive, since I'm now going with a servo winch. Now the winch will sit inside its own cage.

IMAG0643.jpg


Also with having a servo winch I added in a winch-line guide so it doesn't get tangled, etc.

IMAG0651.jpg
 
Been awhile since I updated this thread, but I've rebuilt the entire truck.

Put together a new skid plate to give some more ground clearance while still trying to keep the truck lower. Will have to put some pictures of it up, but basically I created a small skid plate out of metal that then I mounted a paired down SCX10 skid plate inside it to attach the links to, and to use as the base to attach the transfer case too. Had to get some 3x40mm cap head screws to mount the thing. But it seems to work well.

Also swapped from 2.2 TSLs that were cut-n-shut to 1.9 IROKS; still slightly bigger than I wanted, but not as a small as the PitBulls. Only issue was to get these centered in the front wheel wells I had to re-do the front links and that, with the change in position of the transfer case, meant the standard AX10 MIP driveline was too LONG. I found a shorter one online (i'll have to dig up the location) and ordered a pair, and that fixed the issue.

Also switched from a HH BRXL running a 25t HH TorqueMaster to an Tekin RS on a Tekin Pro4 3300kv. Used many layers of conformal coating to waterproof the RS and the sensor board in the Pro4. At the NWITTC comp I had it plowing through the water without any issues.

Had it at one of the NWITTC competition, would have done ok except I was having a lot of problems with weight distribution which lead to me endoing a lot while going down the many steep inclines they had. Ended up adding some more weight to both the front and back wheels, and under my rear electronics plate I added a couple of ounces of weight which seemed to help with better weight distribution. I also decreased the drag brake to 40% from the 95% I had it; I may lose a bit of 'stop on hill' power, but at least when I come off the throttle while coasting I'm not causing as much force transfer to the front.
 
Which plastic? If its not plastic parts that came with the Axial kits, or like the project box from Radio Shack, then its probably just styrene.
 
This is the new skid plate. I cut up the SCX10 skid plate and mounted it upside down on top of a metal skid plate I fabricated (see below). Basically the same mounting holes in the frame rails I am able to run a set of 3x40mm cap head bolts through to mount the skid plate and attach the links. Worked out pretty good.

IMAG0665.jpg


IMAG0666.jpg
 
Back
Top