• Welcome to RCCrawler Forums.

    It looks like you're enjoying RCCrawler's Forums but haven't created an account yet. Why not take a minute to register for your own free account now? As a member you get free access to all of our forums and posts plus the ability to post your own messages, communicate directly with other members, and much more. Register now!

    Already a member? Login at the top of this page to stop seeing this message.

Home Made 2.2 Beadlock Rings

avanord

Rock Crawler
Joined
Oct 19, 2011
Messages
722
Location
Warren
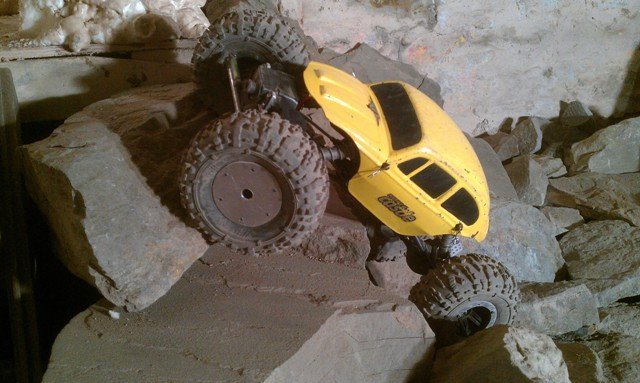
Let me start this thread by saying that I understand that companies already make beadlock rings and that they are not that expensive. I also know that people already make beadlock rings similar to these, however I like making my own stuff and am hoping that this post will inspire some creativity from others. The reason that I decided to make these was because my wheels kept hanging up on sharp rocks. The materials for this build cost me $10 and I could make about 20 more for this price.

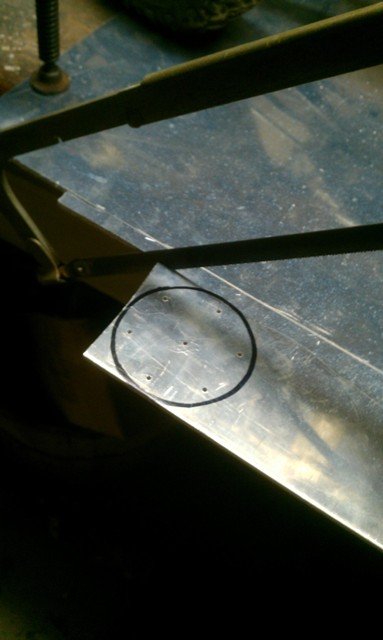
My rings were made from 1/8th flat aluminum.

Tools include:

Hacksaw
Drill
5/64, 9/64, and 3/8 size drill bits
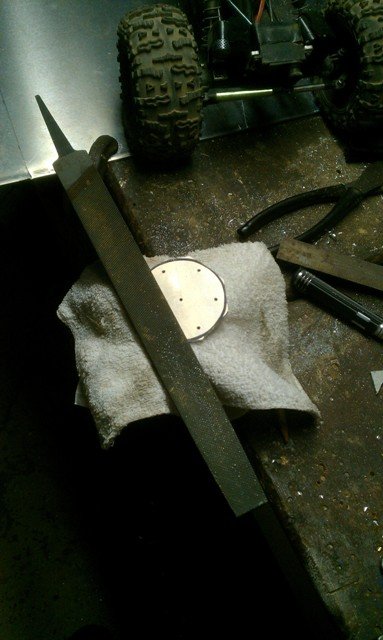
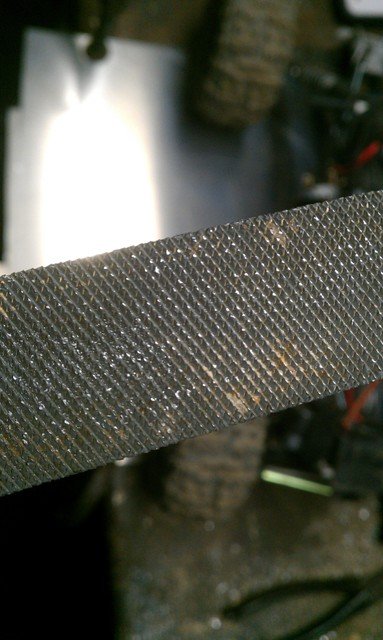
Metal File
Vice
Marker/Pencil

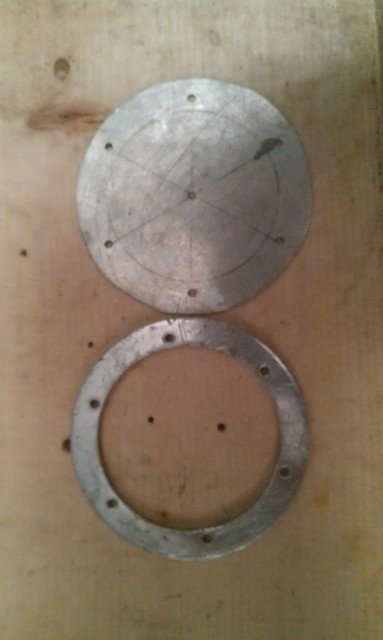
You will also need some material to make a pattern. I used an old pie pan that was sitting around.

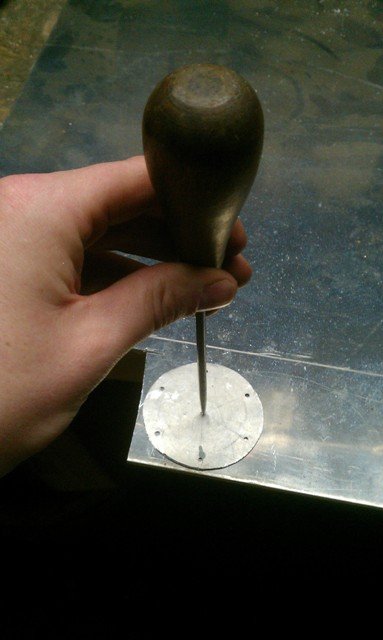
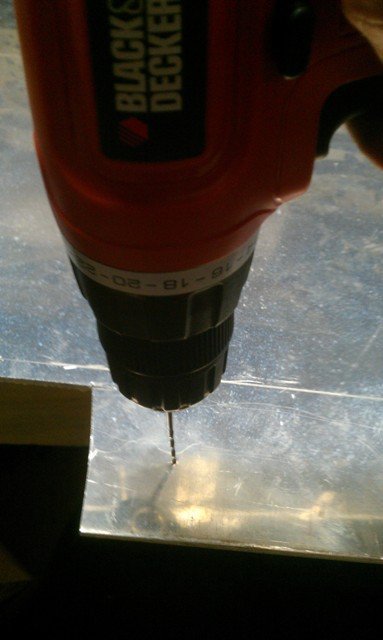
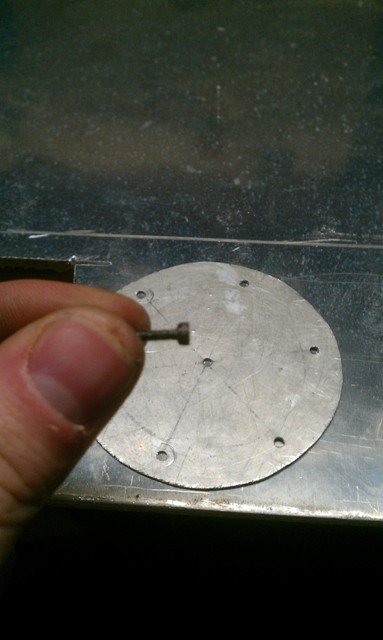
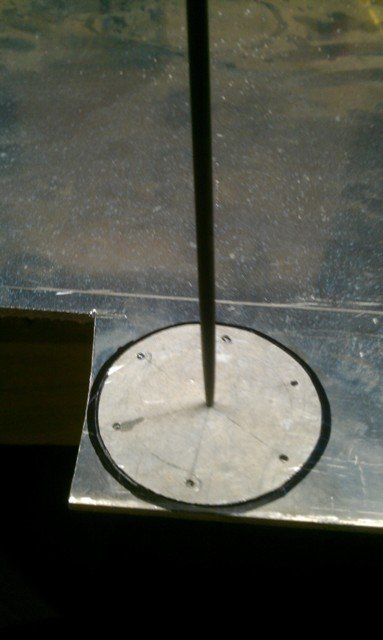
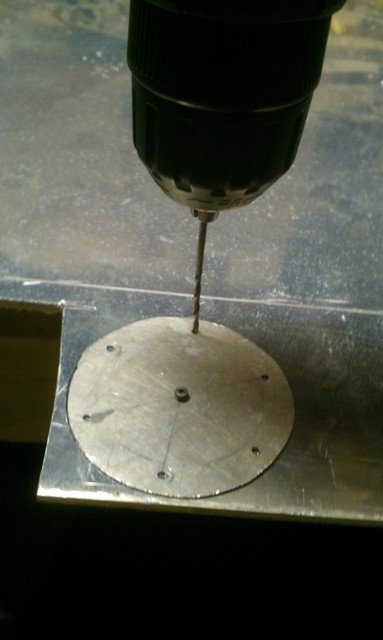
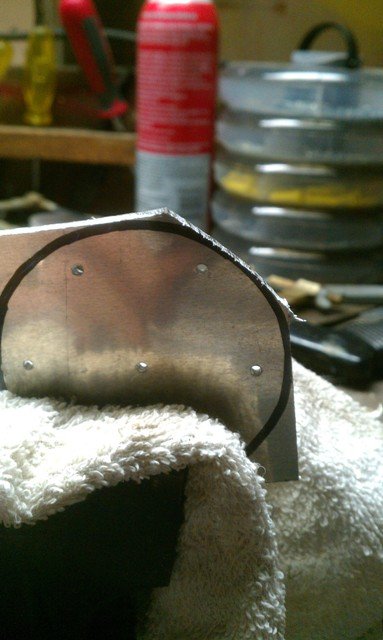
The first thing that I did was to make a pattern to make my rings from. I traced the origional ring onto the pie pan and then cut it out. I drilled the holes to match the origional ring. Then used a ruler to draw lines across the wheel from opposite holes in the template to find the center. Then I drilled a small hole.

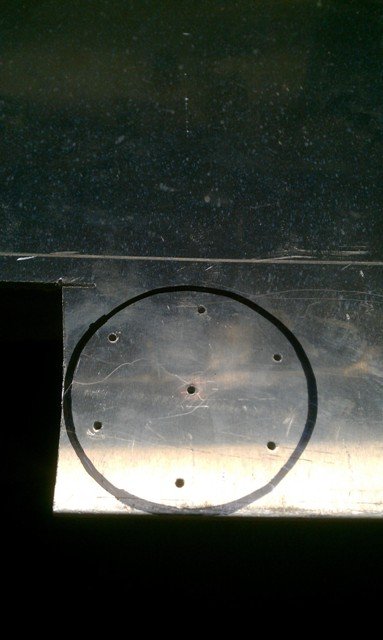
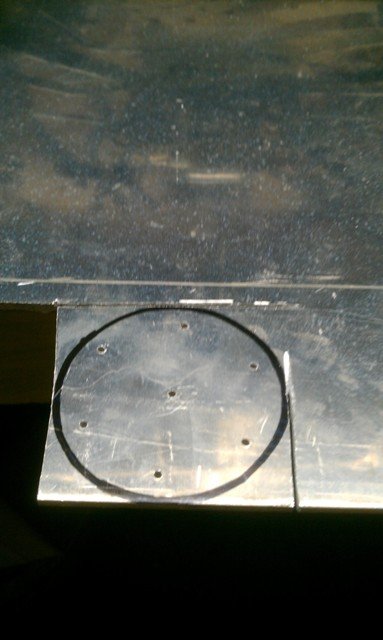
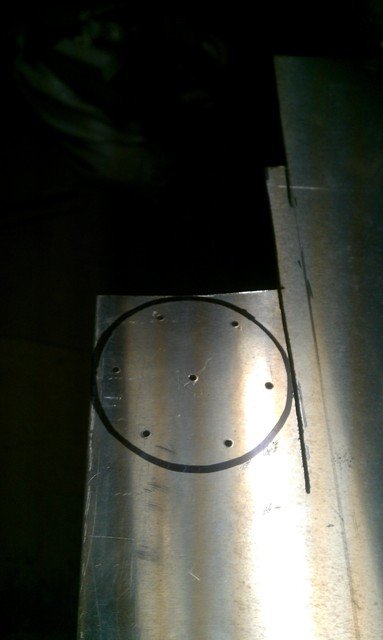
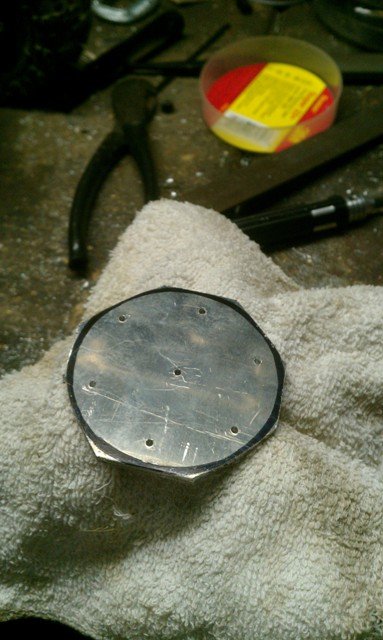
This is what I ended up with.
 

Attachments

  • IMAG0324.jpg
    IMAG0324.jpg
    42.4 KB · Views: 3,155
Last edited:
Re: Custom Beadlock Rings to fit 2.2 AXIAL wheels

Next I transfered my pattern to the aluminum and used a punch to punch a pilot hole for the drill. THen drilled out the center hole first. I used one of the stock screws to hold the template to the aluminum so that I could drill out the remaining holes. Then I traced the outside of the template so that I knew where to cut and file. The final picture is what I ended up with before cutting the aluminum.
 

Attachments

  • IMAG0337.jpg
    IMAG0337.jpg
    49.3 KB · Views: 2,764
  • IMAG0339.jpg
    IMAG0339.jpg
    48.3 KB · Views: 2,838
  • IMAG0341.jpg
    IMAG0341.jpg
    51.5 KB · Views: 2,841
  • IMAG0345.jpg
    IMAG0345.jpg
    47.2 KB · Views: 2,731
  • IMAG0343.jpg
    IMAG0343.jpg
    45.5 KB · Views: 2,727
  • IMAG0346.jpg
    IMAG0346.jpg
    52.3 KB · Views: 2,767
Re: Custom Beadlock Rings to fit 2.2 AXIAL wheels

The next step is to cut out the blank and shape the ring. First you cut out a square as close to the traced circle as possible, then you trim it as many times as you can with the hacksaw until you are as close to round as possible. You then put it in the vice and file it down until there is no more line left around the outside of it. This will give you the rounded shape. It takes some time and you have to be careful, but the end effect looks pretty good in my opinion. If you would like to counter sink the screw heads use a 9/64 size bit and drill out all of the holes about half way through.

Thanks for reading and let me know what you think of them.
 

Attachments

  • IMAG0354.jpg
    IMAG0354.jpg
    59.1 KB · Views: 2,640
  • IMAG0353.jpg
    IMAG0353.jpg
    55.3 KB · Views: 2,674
  • IMAG0352.jpg
    IMAG0352.jpg
    51.5 KB · Views: 2,669
  • IMAG0350.jpg
    IMAG0350.jpg
    39.1 KB · Views: 2,671
  • IMAG0348.jpg
    IMAG0348.jpg
    47.4 KB · Views: 2,676
  • IMAG0357.jpg
    IMAG0357.jpg
    61.3 KB · Views: 2,627
  • IMAG0359.jpg
    IMAG0359.jpg
    73.4 KB · Views: 2,660
  • IMAG0360.jpg
    IMAG0360.jpg
    62.8 KB · Views: 2,620
  • IMAG0361.jpg
    IMAG0361.jpg
    68.8 KB · Views: 2,648
  • IMAG0367.jpg
    IMAG0367.jpg
    79.5 KB · Views: 2,719
  • IMAG0347.jpg
    IMAG0347.jpg
    83 KB · Views: 2,676
What is the OD of the rings? Anyway a hole saw would have done the trick?
Ive tried hole saws in aluminum and they don't do that good... just my experiences tho! Mostly the issue is the teeth are cut for digging through wood, not slicing through aluminum. Now if you found a metal cutting hole saw for a decent price it maybe worth a shot but I really recommend it with a drill press... lot safer!

I got to say tho that you did a good job on those for a hand job! "thumbsup"
 
i made the ones on the front of my comp bug out of 2.25 o.d. grade8 washers"thumbsup"
1016111547a.jpg
 
Hooray for homebrew! I never get tired of seeing it....


even if its really crappy homebrew....


and these are not.....


just saying....
 
LOL my very first how-to was for DIY rock rings. Desktop grommets work great too. But i really enjoy seeing someone actually fab up a part, let alone the same part 4 times..good job!!
 
Pretty cool.. They turned out good for mostly hand work"thumbsup"

Thanks man!

I agree. I really like comp rings on the right vehicle.

I was hoping that they would look good, but I was kind of going for form over function.

I have most of the things so im glad to see this thread. I might give this a try thanks

I am glad to see that someone got motivitated by this. That is what I use this site for.

What is the OD of the rings? Anyway a hole saw would have done the trick?

THey should be close to 2.2. I have not measured them and currently dont have a hole saw. Mainly I just wanted to see how they would turn out with this method and am more than happy.

Ive tried hole saws in aluminum and they don't do that good... just my experiences tho! Mostly the issue is the teeth are cut for digging through wood, not slicing through aluminum. Now if you found a metal cutting hole saw for a decent price it maybe worth a shot but I really recommend it with a drill press... lot safer!

Great info. This is good to know. I am happy with how mine turned out and it really doesnt take that long.

I got to say tho that you did a good job on those for a hand job! "thumbsup"

Thanks I am good with my hands"thumbsup"
 
i made the ones on the front of my comp bug out of 2.25 o.d. grade8 washers"thumbsup"
1016111547a.jpg

Love the washer Idea. I would have never thought of that. I really wanted the center hole diameter a little smaller than that so I went as small as I could.

Hooray for homebrew! I never get tired of seeing it....


even if its really crappy homebrew....


and these are not.....


just saying....

Thanks. That is one of the things that I search out on the forum is how to make your own parts and what not. I really like seeing any and all parts that are hand made. Also thanks for saying that mine are not crappy. I think that they could have maybe turned out a little better, but they will work.

LOL my very first how-to was for DIY rock rings. Desktop grommets work great too. But i really enjoy seeing someone actually fab up a part, let alone the same part 4 times..good job!!


This is my first DIY myself. And thanks for the comments. I currently only have 2 and 3/4 of them completed. Since it takes about 20 min. a piece it is hard to find the time in this crazy busy world.
 
I did the same but i used washers from the hardware store they work great and all i had to do was drill the screw hole cus it was already round and had the hole in the middle for the wheel nut
 
Thanks. That is one of the things that I search out on the forum is how to make your own parts and what not. I really like seeing any and all parts that are hand made. Also thanks for saying that mine are not crappy. I think that they could have maybe turned out a little better, but they will work.

Everything can always turn out a little bit better, so its best not to get to heartbroken if you think something isn't perfect, especially when they're made by hand.

My first (and only, now that I think about it) set of rings, made very similarly to yours. Shiny, but far from perfect.

duuuuuuuude-18031-albums57-1863.jpg
 
I did the same but i used washers from the hardware store they work great and all i had to do was drill the screw hole cus it was already round and had the hole in the middle for the wheel nut

I would have done that, but I was hoping for the smallest possible diameter inner hole for as few hang ups as possible.

Everything can always turn out a little bit better, so its best not to get to heartbroken if you think something isn't perfect, especially when they're made by hand.

My first (and only, now that I think about it) set of rings, made very similarly to yours. Shiny, but far from perfect.

duuuuuuuude-18031-albums57-1863.jpg

Thanks man. I am not heart broken by any means. I just think that they could be a touch better. THey work awesome and that is really all that I was trying to accomplish. Yours are very shiny. What were they made of? They look like thinner diameter aluminum.
 
Yours are very shiny. What were they made of? They look like thinner diameter aluminum.

Just some cheap aluminum sheet I picked up at the hardware store and polished up. 1/16" if I remember....I could get away with going that thin because they don't actually hold the bead, they're just covers.
 
Just some cheap aluminum sheet I picked up at the hardware store and polished up. 1/16" if I remember....I could get away with going that thin because they don't actually hold the bead, they're just covers.


Thats what I thought it looked like. I wanted to be able to counter sink my screws so that they wouldnt hang up either.
 
Those turned out pretty nice for a hand fab. As for a hole saw in aluminum, I've never tried them in reverse. I will try that next time I use one. I tend to shy away from them because they are not the most accurate way to cut a hole. The times I've used them, I've had really good luck using some type of cutting fluid to lubricate the cutting edge. It keeps the aluminum chips from wadding up on the teeth. Any type of lubricant will help. WD40 is pretty common in most garages and works pretty dang good."thumbsup"
 
Back
Top