gone_wheelin
Rock Crawler
I decided after having to cut off my tires for the second time that there had to be a way to make some cheap functional beadlocks. While walking through Home Depot looking for large washers I stumbled upon the reducing washers in the Electric Department. They are the perfect fit and are the exact diameter of the Pede front rims. I picked up 4 packages and headed home to see how I could make them work. I decided that I would cut the outer bead off both the front and back of the rim; just like a 1:1 homebrew beadlock. I've used a hacksaw to cut off the beads before for narrowing and it works but leaves a nasty edge. I found that the 2.2 rims have the same size hex as a 1:10 touring car. A lightbulb went off and EUREKA!! I picked up a touring car tire arbor for my tire truer and now I have the perfect lathe for cutting rims. I was able to cut and smooth all four wheels in under 20 minutes. The cutting only took about 5 - 10 seconds per bead but I wanted to make sure I had a super flat surface to mount the rings to - I have found that this makes for a strong mounting surface. If you have a tire truer or have access to one I highl recommend spending the $25 for the 1/10 touring car tire arbor.
Anyway, I finished them up and mounted a set of Moabs to them and to my surprise they clamp down well enough to hold the air in. I actually had to make breather holes to allow the tires to compress. The entire process probably took about 3 - 5 hours most of which was spent drilling the holes in the rings. Since I do not have a drill press I had to work with 4 rings at a time making sure to keep everything lined up.
Well I finally got the time to document the process I used to make my beadlocks. All the parts cost under $30. I used Pede fronts cus they are always in good supply at my LHS and they are cheap.
Parts used:
Stampede Front wheels
Reducing washers 1 1/2" - 1". They come 4 to a package at Home Depot
UPDATE:
Brand: Halex
Part no: 26853
approx $2.00 per pack of 4
4-40 1/2" button head socket screws
4-40 nuts
Tools Used:
Tire truer w/1:10 touring car arbor; a hacksaw or drill press with cut-off wheel will work too
Heavy Duty X-Acto w/#19 blade
Sandpaper - Emory cloth, 220 grit, 120 grit (not necessarily in that order)
CA Glue
7/64" drill bit
Files - Flat and rat tail
Cordeless drill
Vice
Forecepts - The curved ones would work best but, small needle nose pliers should work too
Making the rings:
I layed the holes out using a piece of graph paper and a circle template. I tried to get the holes 45 degrees apart but they are slightly off. I'm going to be working on a better template and I'll upload that when I get it done.
Holes drilled with 7/64" bit and ring notched with a file for easy positioning. Since the holes are not perfectly spaced the notch was needed to keep me from going insane while trying to line up the holes.
Cutting the wheels and attaching the rings:
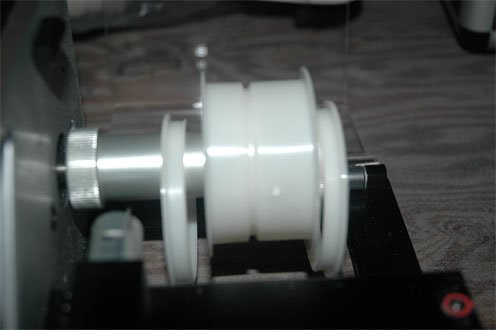
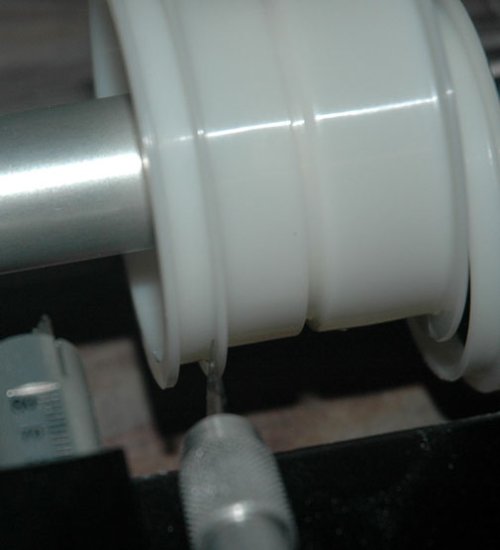
Pic 1: Wheel mounted for cutting on my tire truer
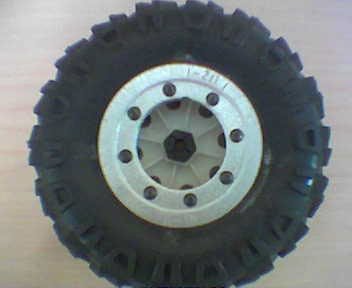
Pic 2: Outer beads cut off and mounting surface smoothed
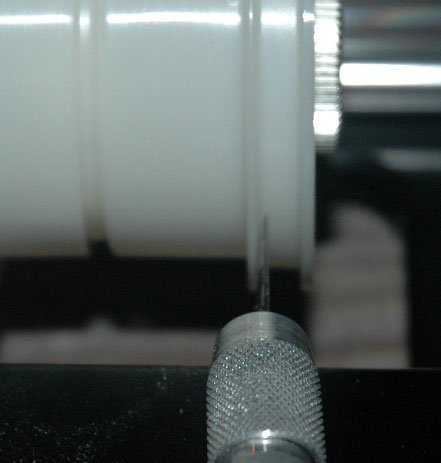
Pic 3 and 4: I used the Heavy-Duty X-Acto handle with a #19 blade. I used the backside of the blade (non-cutting side) to cut the beads off. I also used the blade to true the mounting face of the wheel. This made for a truely flat mounting surface. I finished it off with an emory board (borrowed from the wife but you could also used 220 grit sandpaper).
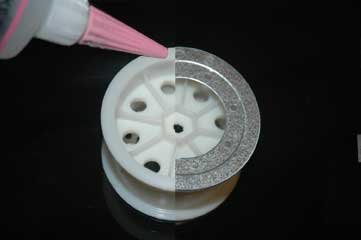
I used CA glue to attach the inner rings to the wheel. I also scuffed the matting surface of the ring with 220 grit sandpaper to allow more bitting surface for the glue.
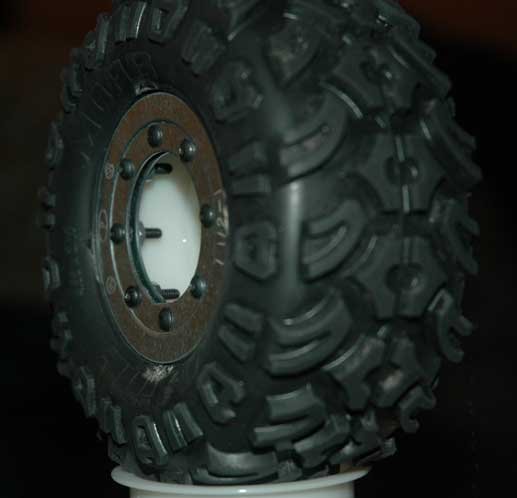
UPDATE: When mounting the washers, the stampings (visible in pictures) should be facing outward on both rings for Moabs.
Masher 2K's have a thinner bead and he outer washer should be mounted with the stampings facing inward.
UPDATE 9/19: Since posting this how-to, a problem was found when mounting Masher 2K's. The update listed above seemed to help remedy some of the bead slipping problem but I found that adding fuel tubing to the completed wheel/washer assembly greatly eased the mounting of both Moabs and Mashers and virtually eliminated the ability for the bead to slip free. Here are the links to what I did and some pictures of the assembly:
http://www.rccrawler.com/forum/showpost.php?p=330139&postcount=144
http://www.rccrawler.com/forum/showpost.php?p=341128&postcount=152.
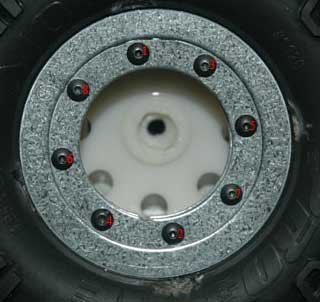
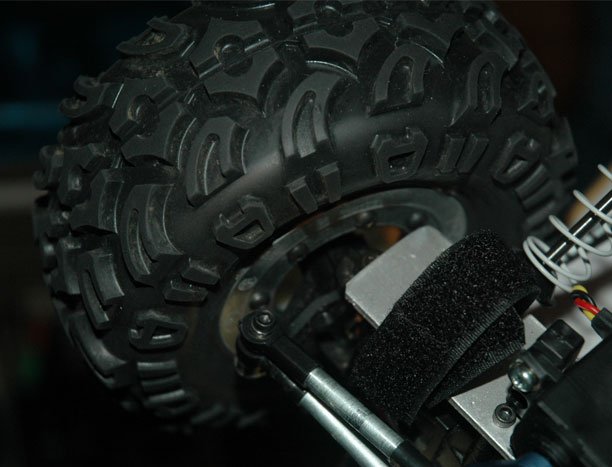
Pic 5 (coming soon): Front inner ring mounted. You will need to make sure that the ring is squarely mounted to the rim so that it is not offset creating an offset mount.
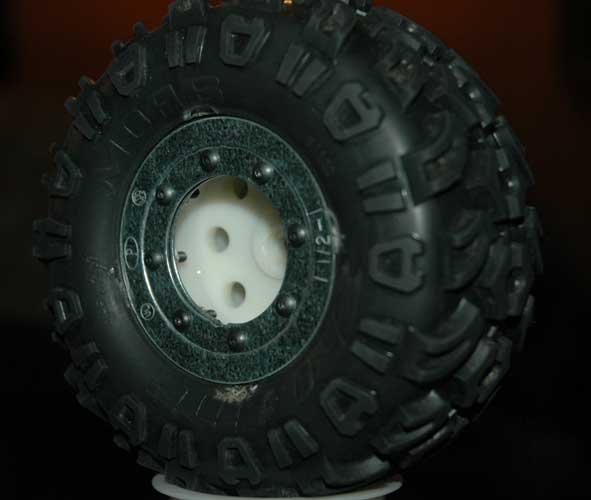
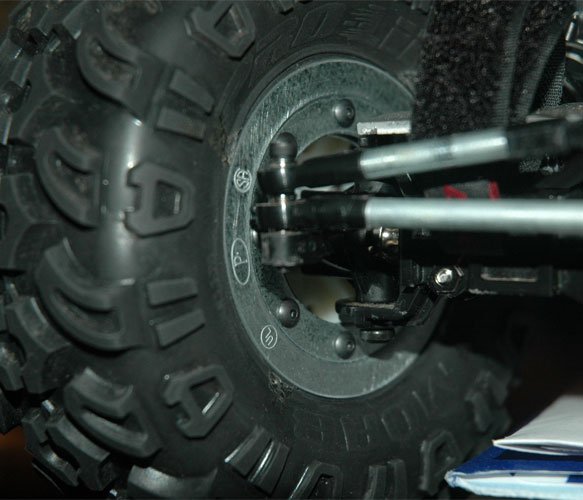
Pic 6: Back inner ring mounts the same as the front - Pay close attention to the position of the holes in the ring in relation to the holes in the rim. The holes in the ring must be mounted inline with the holes in the rim otherwise there will be interference.
EDIT: The images are not posting correctly and are a little out of sequence. The descriptions will point you to the right image though.
Continued on next post...
Anyway, I finished them up and mounted a set of Moabs to them and to my surprise they clamp down well enough to hold the air in. I actually had to make breather holes to allow the tires to compress. The entire process probably took about 3 - 5 hours most of which was spent drilling the holes in the rings. Since I do not have a drill press I had to work with 4 rings at a time making sure to keep everything lined up.
Well I finally got the time to document the process I used to make my beadlocks. All the parts cost under $30. I used Pede fronts cus they are always in good supply at my LHS and they are cheap.
Parts used:
Stampede Front wheels
Reducing washers 1 1/2" - 1". They come 4 to a package at Home Depot
UPDATE:
Brand: Halex
Part no: 26853
approx $2.00 per pack of 4
4-40 1/2" button head socket screws
4-40 nuts
Tools Used:
Tire truer w/1:10 touring car arbor; a hacksaw or drill press with cut-off wheel will work too
Heavy Duty X-Acto w/#19 blade
Sandpaper - Emory cloth, 220 grit, 120 grit (not necessarily in that order)
CA Glue
7/64" drill bit
Files - Flat and rat tail
Cordeless drill
Vice
Forecepts - The curved ones would work best but, small needle nose pliers should work too
Making the rings:
I layed the holes out using a piece of graph paper and a circle template. I tried to get the holes 45 degrees apart but they are slightly off. I'm going to be working on a better template and I'll upload that when I get it done.
Holes drilled with 7/64" bit and ring notched with a file for easy positioning. Since the holes are not perfectly spaced the notch was needed to keep me from going insane while trying to line up the holes.
Cutting the wheels and attaching the rings:
Pic 1: Wheel mounted for cutting on my tire truer
Pic 2: Outer beads cut off and mounting surface smoothed
Pic 3 and 4: I used the Heavy-Duty X-Acto handle with a #19 blade. I used the backside of the blade (non-cutting side) to cut the beads off. I also used the blade to true the mounting face of the wheel. This made for a truely flat mounting surface. I finished it off with an emory board (borrowed from the wife but you could also used 220 grit sandpaper).
I used CA glue to attach the inner rings to the wheel. I also scuffed the matting surface of the ring with 220 grit sandpaper to allow more bitting surface for the glue.
UPDATE: When mounting the washers, the stampings (visible in pictures) should be facing outward on both rings for Moabs.
Masher 2K's have a thinner bead and he outer washer should be mounted with the stampings facing inward.
UPDATE 9/19: Since posting this how-to, a problem was found when mounting Masher 2K's. The update listed above seemed to help remedy some of the bead slipping problem but I found that adding fuel tubing to the completed wheel/washer assembly greatly eased the mounting of both Moabs and Mashers and virtually eliminated the ability for the bead to slip free. Here are the links to what I did and some pictures of the assembly:
http://www.rccrawler.com/forum/showpost.php?p=330139&postcount=144
http://www.rccrawler.com/forum/showpost.php?p=341128&postcount=152.
Pic 5 (coming soon): Front inner ring mounted. You will need to make sure that the ring is squarely mounted to the rim so that it is not offset creating an offset mount.
Pic 6: Back inner ring mounts the same as the front - Pay close attention to the position of the holes in the ring in relation to the holes in the rim. The holes in the ring must be mounted inline with the holes in the rim otherwise there will be interference.
EDIT: The images are not posting correctly and are a little out of sequence. The descriptions will point you to the right image though.
Continued on next post...
Attachments

Last edited: