• Welcome to RCCrawler Forums.

    It looks like you're enjoying RCCrawler's Forums but haven't created an account yet. Why not take a minute to register for your own free account now? As a member you get free access to all of our forums and posts plus the ability to post your own messages, communicate directly with other members, and much more. Register now!

    Already a member? Login at the top of this page to stop seeing this message.

RWS Axial AX-10 Digital Logbook

Joined
Jan 19, 2007
Messages
34
Location
Washington DC
I'm new to the crawler scene, but not new to RC. I've learned so much from the contributions to these forums that I collect what I can and log it for future reference and hope it helps others as well. I have a pretty extensive XXX-SCT and LOSI-SCTE threads on the short-course forum.

I picked up this AX-10 years ago and after breaking a few parts early on I basically shelved the truck until now. I don't have the amazing fabrication skills like others here do, but I'd like to get something together that works well enough that I could try a comp at some point. Given some good dialog on other threads I thought I'd start up my own.

I like to make my posts picture intensive and I plan on covering a lot of really basic things so I have a complete reference. Feel free to chime in advice or recommendations, that is where the real value is anyways.

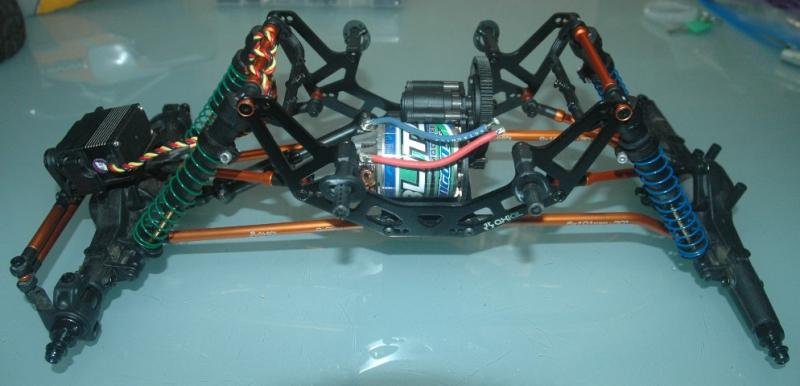
Here is the rig as I dusted it off from storage. If I remember correctly I swapped out the stock springs to softer more active ones, which made for terrible crawling. First order of business is to dig out the original ones and get back to square one.
DSC_5270ax.jpg

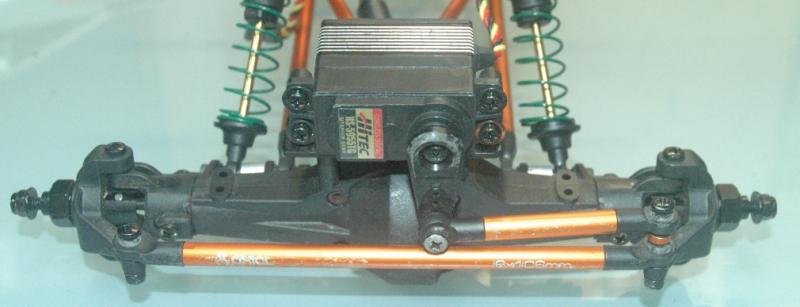
I broke the plastic drive shaft on the first battery pack.
DSC_5288ax.jpg

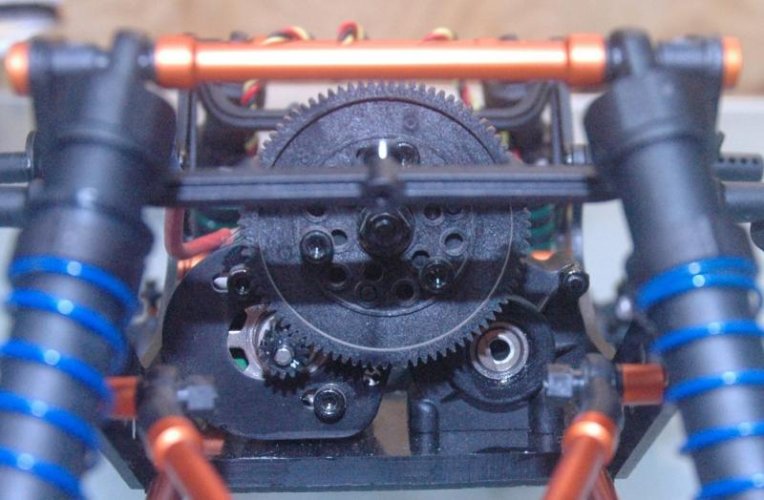
And then broke the trans output after installing the MIP driveshafts. Nothing like chasing the failure.
DSC_5282ax.jpg

I think I have a reasonable servo to use and the 55 Turn brushed motor has only logged 10min of driving. I'll dig up an Tekin FXR and figure out where to mount it. I really need to get some appropriate LIPO batteries and get them mounted up front. Anyone have a suggestion on size? I've read that the FXR can handle 3S with a large capacitor installed, what mAh should I be looking for?
 
Here is the capacitor recommended by Crawler Innovations so I can use 3S with the FXR.
cap.jpg
This Heavy Duty capacitor is twice the size of the original FXR capacitor and also made of better quality. It will handle 4S Lipo batteries but Crawler Innovations does not guarantee anything. With that said, I personally use them on every FXR I own. I do run 4S on them and have no issues. To me, it's cheap insurance to prevent a failure. I researched and found these capacitors and have been using them ever since with no FXR failures to report.


Specifications:

  • 25 Volt
  • 1000 UF
  • 105* C Temperature
 
I run 4s with that cap. Fxr goes to 3s with stock cap but for the couple bucks it cost why not. You might also want to check out the c.i. foams while your putting in your order. They are awesome!
 
Sweet RWS!

Subscribed, just like I did on the short-course forum.

Already dropping knowledge on me with the capacitor. You ought to get a cut for the ones you get sold, I'm heading there now.

2 words for you- Peeps Rock!
 
Feel free to chime in advice or recommendations, that is where the real value is anyways.

Okay, take 'em with a grain of salt....

I think I have a reasonable servo to use

Might want to consider a BEC to feed it. I went with the Castle 10 ampers and am happy with them. Also budget enough to score the CastleLink to bump the voltage up, as they come out of the package a little low. Once your BEC is feeding the servo, (or in my case receiver and servo), then your ESC becomes a whole lot more tolerant of moving up to 3S or more.

and the 55 Turn brushed motor has only logged 10min of driving. I'll dig up an Tekin FXR and figure out where to mount it

I'm sure the Tekin is a fine unit, but if you already need to buy a CastleLink for your BEC, perhaps Castle might also have an ESC you'd be okay with? Just thought you might wanna save a couple bucks over buying an FX-R and FireWire on top of a BEC and CastleLink.
I comped most of last season on the stock 55 turn and AE-1, but running 6 cell NiMhs was pointless. As my NiMh packs were dying, I was pulling out cells and combining packs to run 8, 9, & 10 cell packs. Gotta say, going to 3S LiPo has made me quite happy. This year, I'll be comping with a 35 turn Brood Apocalypse, and a Sidewinder Micro ESC.
I notice your gearing looks nice and low, I'd personally suggest keeping it that way and bumping up the voltage of your battery packs to 3S, and if you still want more wheel speed, look into a lower turn motor somewhere down the line.

I really need to get some appropriate LIPO batteries and get them mounted up front. Anyone have a suggestion on size? I've read that the FXR can handle 3S with a large capacitor installed, what mAh should I be looking for?

I like to have as many mAh as I reasonably can, so I run 3S, 1300 mAh packs. Never really timed how long it runs on those, but I know it's well in excess of 1/2 hour. Smaller 800-1000 mAh packs are a lot easier to tuck into a smaller space on the chassis or axle, though. I don't know that I'd recommend anything bigger than a 1300 LiPo, just don't think it's needed.
 
Both of my ax10's run a vanquish servo/link/battery plate on the front axle with a 1300 3s Lipo next to the servo. I run an old t maxx plastic driveline pin up through an optional hole for the servo and the battery slides in perfectly between the pin and servo. I put a Velcro strap around it and it doesn't have a chance to move. :D The pin can be seen in this wonderfully crisp photo. :lol:

IMAG0109.jpg
 
Last edited:
Might want to consider a BEC to feed it. I went with the Castle 10 ampers and am happy with them.

I'm sure the Tekin is a fine unit, but if you already need to buy a CastleLink for your BEC.

Thanks for the thoughts, I have a couple FXRs from racing Tamiya Minis so I will try to make use of them. I see Castle has quite a following here and I still have to tackle the BEC business. My e-buggy is the only non 2S RC I have and the speed control takes care of the bec function. More on this later.
 
Both of my ax10's run a vanquish servo/link/battery plate on the front axle with a 1300 3s Lipo next to the servo.

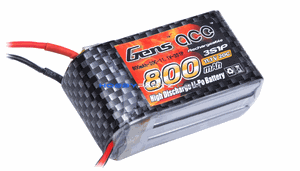
Thanks for the tip and even posting a photo! I'm all about the photos and links. I see that Gen Ace has 3s in 450 and 800 mAh and they are super cheap. Does anyone see any issue running with such a low C number (20 C)?

genace.gif
 
8* Chubs, knuckles and fancy knuckle weights showed up from VP
I set the caster at approx. 20* so, I hope that works cause I doubt I'll change it LOL.

turbofest-13854-albums1672-32269.jpg


I countersuck the C-hub screws for knuckle weight clearance. Now the knuckle weight hits the c-hub juust at the point of the Super 300 being maxed out so it has a nice positive lock. So, no overextending the 300's here!

turbofest-13854-albums1672-32268.jpg

CreationFab pre-fabbed wide splined housings in the new V2 flavor. The V2 isn't anything fancy. Simply keeps the ears you cut off using the V1 tubes, and use a cut down stock plastic chub to keep the ends from flaring out in extreme binds. The V1 has proven a great design.

For those that haven't heard of these, the tubes are meant to adapt XR10 universal axle shafts for more steering and much more strength. You just drop in your ring and pinion, bearings, a new set of XR10 universals, and XR10 chubs/knuckles. This puts you at XR10 width.

IMG_0639.jpg

VP wraith knuckles
VP c hubs
VP wraith steering link ti
VP SLW 1 wheels with .475 hubs
SCX10 hexes
CKRC alum servo mounts

the VP Wraith Titanium steering links, the drag link works fine, I had some binding on my servo plate....
bind.jpg


cleared.jpg

Ok guys, I know it is bad form to steal all of these photos from the great sporty builds on this forum, but I need some help picking out the correct parts for my front axle.

I see the XR mod is all about gaining steering throw by using some "tubes" to extend the axle housing, mount an XR chub and knuckle to it, then use an XR universal axle to drive it.

Other trends seem to be running Wraith chubs and knuckles with the XR universals.

I have to admit, with out having these parts in front of me to work with I'm confused as to which combination is preferred. Looks like everyone tunes with front knuckle weights and there are some nice ones for the XR knuckles. I am assuming I'm limited to the BTA steering with these XR knuckles. With the Wraith parts seems like I can connect them up high as Andrew did.

My real preference is running the servo in the center, with the battery inline and behind as they do on the evil crawler. I'm up in the air about the BTA or forward steering tie rod. I would also like to get the new VP locker and universals if I could figure out which ones to get. Please chime in if you have experience with these front axle combinations.
 
Thanks for the tip and even posting a photo! I'm all about the photos and links. I see that Gen Ace has 3s in 450 and 800 mAh and they are super cheap. Does anyone see any issue running with such a low C number (20 C)?


The battery I posted is a gens ace 25c. They have plenty of punch even at that low of a discharge rate. Personally I'd go for more Mah though. I'm getting around half an hour of run time out of 1300's. :D
 
I see the XR mod is all about gaining steering throw by using some "tubes" to extend the axle housing, mount an XR chub and knuckle to it, then use an XR universal axle to drive it.

There are shorter tubes available, used for strengthening the axle without extending it, so you don't have to use tubes to extend the axle housing. I did see a write-up where a guy put the XR c-hubs and knuckles right on the AX axle, but he has a mill and the capacity to shorten the XR shafts. Haven't heard overly great feedback from those who've gone that route.

Other trends seem to be running Wraith chubs and knuckles with the XR universals.............I have to admit, with out having these parts in front of me to work with I'm confused as to which combination is preferred. Looks like everyone tunes with front knuckle weights and there are some nice ones for the XR knuckles.

Open multiple tabs and download the instruction manuals for both the wraith and the XR, you'll find the part #s are exactly the same for knuckles and c-hubs on both those trucks.

I am assuming I'm limited to the BTA steering with these XR knuckles.

No. I just finished up my XR conversion, and my steering's all up front. There's a way.

I'm up in the air about the BTA or forward steering tie rod.

I comp mine in our Sportsman class which doesn't allow BTA setups, so that made my decision real easy. If all you're doing is bombing around with a few buddies, you might not care about that rule.
 
There are shorter tubes available, used for strengthening the axle without extending it, so you don't have to use tubes to extend the axle housing. I did see a write-up where a guy put the XR c-hubs and knuckles right on the AX axle, but he has a mill and the capacity to shorten the XR shafts. Haven't heard overly great feedback from those who've gone that route.

I run this setup on a scaler with good results. The universals have alot more throw than bones and have been durable enough for me. Sensored brushless and 3s.

Chop down the universals and double flat similar to what was chopped off. Clock the beef tubes so the holes are top/bottom like xr/wraith chubs rather than front/back of the ax chubs and drill some new holes in the plastic housing where the axle halves meet. Not much in the way of special tools needed "thumbsup"
 
P1060470.jpg


These VP CVDs are quite nice. They use the same bearings as the XR shafts and the same hub nut...

JeremyH has a great sporty build thread and he has helped me answer a lot of questions I had about setting up my front axle.

The real goal is increasing the steering throw at each wheel and that is best accomplished with the VP Wraith chubs and knuckles.
The VP knuckles are different from the XR10 versions in that they don't have the rearward facing "double steer arms", which may prevent steering throw in some applications.
Some folks use the XR10 knuckles and a BTA tie rod either under or over the driveshaft. I'd prefer to keep all the steering high and forward so I'm going to pursue a set up like Jeremy's or Andrew's.
The new VP universals for the XR10, unmodified, should drop right into an axle set up with the wide delrin tubes. Be sure that your tie rod, something of the bent XR version, clears everything before you set the caster.

I have to admit building up of an axle intensively with VP parts does add up. As with anything, going full out on hop ups is expensive. My racing rigs rarely have individual parts that cost over $90, so this might take some time to get use to (or complete). :oops:
 
I've been studying the effects of steer arm placement on wheel cuts and thought I would post an illustrative guide.

ackerman 2.jpg

For the crawler community I am thinking that maximum steer angle at each wheel is the most desireable goal, or maximizing steer angle with a given steering package. Since I don't have any crawling experience I'll leave that judgement up to you guys.

With parallel steer you get the same steer at each wheel in each direction. If you have front steer and you push the OTRB (outer tie rod ball) outside of the kingpin axis then the inside wheel will steer more than the outside wheel for a given tie rod displacement. Move inside the kingpin axis and the inside wheel will steer less than the outside for a give tie rod displacement.

If you are BTA then the opposite is true. Inside the kingpin axis and you get ackerman and outside you lose it. If you draw these out from the top view it the positions will follow an "ackerman" line back to the rear axle.

From a package perspective. If your front steer inside tire hits the spring and the outside is no where near the universal's limit, then move the OTRB in to "speed up" the outer wheel. If your outside wheel is limited by a knuckle weight (for example) and the inside wheel has room to move, the OTRB needs to go out. You can see from the diagram that the path of the tie rod can vary as well, so you can think about that if you are bumping into the axle housing at some point. Hope this helps.

Again, this is a log book to collect all of my notes so I can find them in a single source. ;-)
 
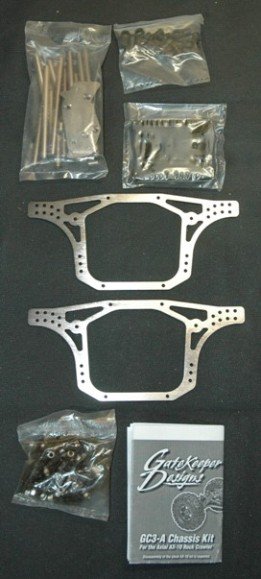
GC3A from Gate Keeper Designs.

DSC_5552 f.jpgDSC_5556 f.jpg

I decided to pick one of these up. While I was surprised how small the box was I am very impressed with the quality of the parts. I built up the links and chassis while tonight and it all went together nicely. I really like the color of the parts, sort of bronze.
 
Back
Top