| |
| |||||||
 |
| | LinkBack | Thread Tools | Display Modes |
 03-27-2011, 10:07 PM
| #21 | |
| RCC Addict Join Date: Feb 2006 Location: Medford, Oregon
Posts: 1,261
| Quote:
I'm only running 2s, but I'd like it as reliable as possible. | |

|  |
| Sponsored Links | |
| | |
|
03-27-2011, 11:24 PM
| #22 | |
| Oppan Gangnam Style   Join Date: Jun 2005 Location: Shingle Springs
Posts: 5,164
| Quote:
  | |
|
| |
|
03-28-2011, 06:29 PM
| #23 | |
| RCC Addict Join Date: Feb 2006 Location: Medford, Oregon
Posts: 1,261
| Quote:
| |
|
| |
|
04-08-2011, 10:13 PM
| #24 |
| RCC Addict Join Date: Feb 2006 Location: Medford, Oregon
Posts: 1,261
|
So my amazing wife gave me 3 hours of "family" time last night to work on this thing. First things first was to finally assemble my Cold case. Been sitting on this thing for 2+ years now. Just waiting for the right build. 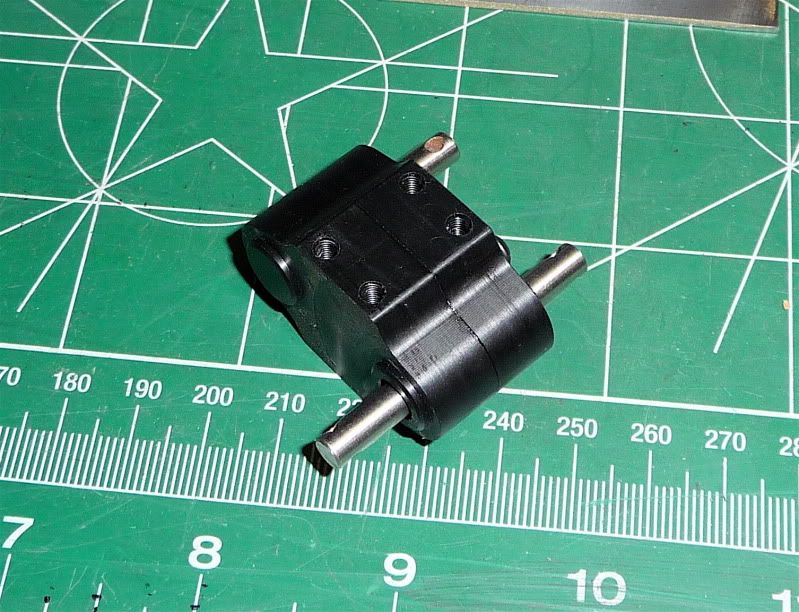 That went without issue. So I moved on to the axles. I had a pile of parts to put onto 2 little axles. Should be simple right? Well not when Murphy is your co-builder. I decide to head right to the center of the axle and do the lockers first, then work my way out. As I'm taking the locker cover off of my front axles, SNAP!! Actually it wasn't loud at all. I tiny little pop as the head of the screw breaks clean off. 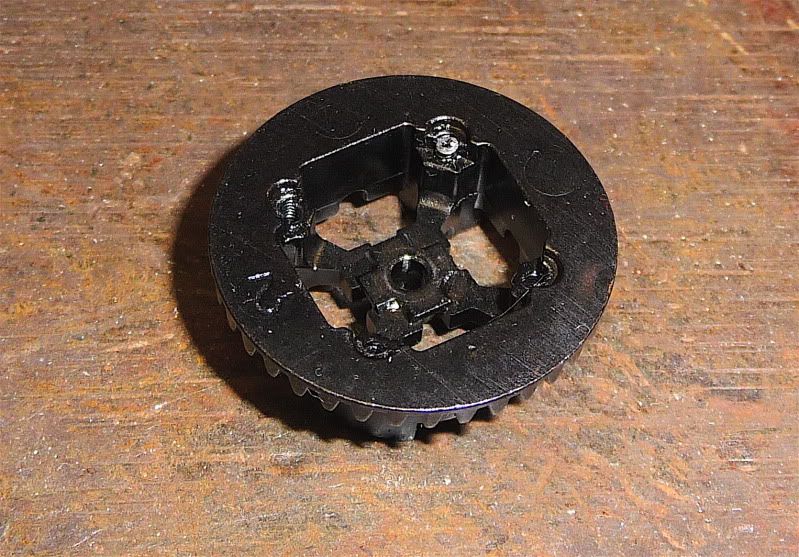 Now I've owned this mini for a little over a year. Crawled it maybe 6 times total. I don't drive hard, as the mint condition stock lockers can attest. I bought the crawler new, and have never opened these up for anything. So what gives Losi?! Gonna have to call them, and see if there is something they can do for me. Thankfully I recently traded for another mini roller, and took the ring gear out of that. So 2 1/2 hours after starting here's what I had. 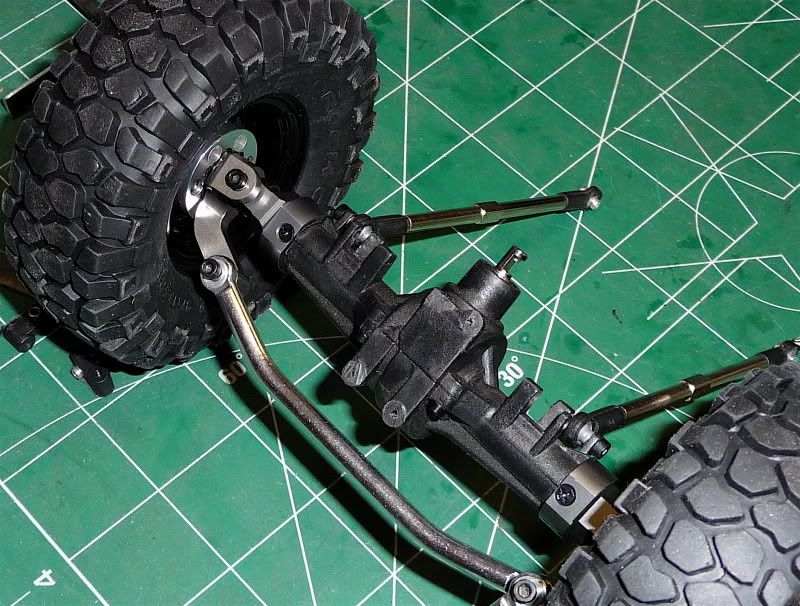 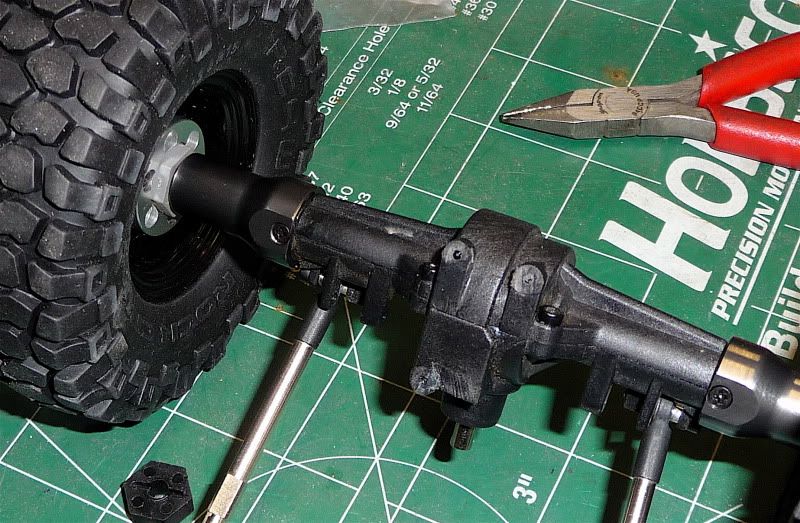 Anyone see anything wrong with this pic? 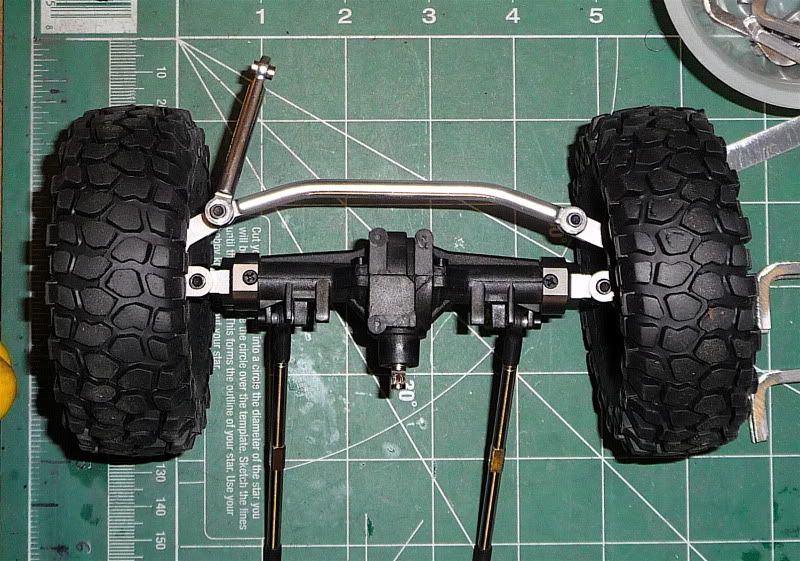 Yah I knew not to expect much from Integy, but this is getting ridiculous. The last three things I bought with their name on it weren't worth half what I paid. Not good considering how cheap their stuff is. So I guess I'll take it off, and do some massaging to get it to shape. So I only ended up with about 20 minutes to start doing any actual work. Cut and drilled the transfer case mount plate. Added some plates to the chassis to get it where i wanted, and tacked the whole thing together. 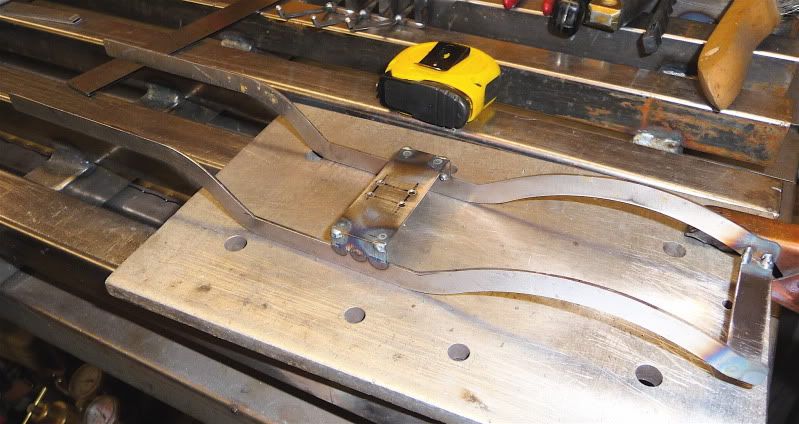 Hopefully I'll get some more time to work on it soon. |
|
| |
|
04-09-2011, 05:52 AM
| #25 |
| RCC Addict Join Date: Apr 2008 Location: Old Hickory
Posts: 1,137
|
Good ole intenegy  Anyway, As for the locker install you've had the same problem that 95% of all MRC guys have had. Here's a thread that may help ya get those Effin tiny Azz screws out Anyway, As for the locker install you've had the same problem that 95% of all MRC guys have had. Here's a thread that may help ya get those Effin tiny Azz screws outLocker install? I love the Transfer case! Curious though, I looked at the chassis picture, are you mounting the transfer case so that there will be no visable skid plate?
|
|
| |
|
04-09-2011, 08:24 AM
| #26 | |
| RCC Addict Join Date: Feb 2006 Location: Medford, Oregon
Posts: 1,261
| Quote:
Wish I would have seen the soldering iron idea. The transfer case will be sandwiched into the frame. Solidly on top, and a removable skid that mounts to the frame also on the bottom. I really love this case, but I've had bad experiences with delrin in the past for holding threads. Figured this way it's got the best chance of surviving a long life. | |
|
| |
|
04-09-2011, 08:30 AM
| #27 |
| RCC Addict Join Date: Apr 2008 Location: Old Hickory
Posts: 1,137
|
The problem with those screws is that you don't know it's a issue till they break. It looks to be a simple locker install...by the way I'm running 3 screws holding my lockers on now for about 2.5 years |
|
| |
|
04-18-2011, 09:49 PM
| #28 |
| RCC Addict Join Date: Feb 2006 Location: Medford, Oregon
Posts: 1,261
|
So here's what I really needed, inspiration. My painter sent me a pic. I also received a bunch of packages with all the other goodies I've been needing. So now my only real excuse is a lack of time. Just gotta make some time soon for this thing. Like I was telling Norm the other night, I really want to drive it at least once or twice before shipping it off to big sky country. |
|
| |
|
04-23-2011, 07:04 PM
| #29 |
| RCC Addict Join Date: Feb 2006 Location: Medford, Oregon
Posts: 1,261
|
So finally got some time to work on this thing. Spent a couple hours the other night doing some stuff. Here's where the chassis ended up that night. 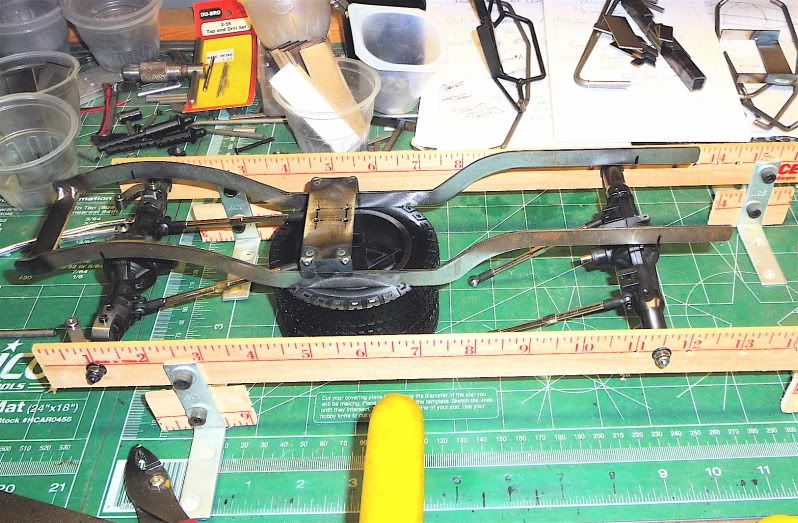 Put some axial bent ends on the stock Losi links (yes I know they're upside down). 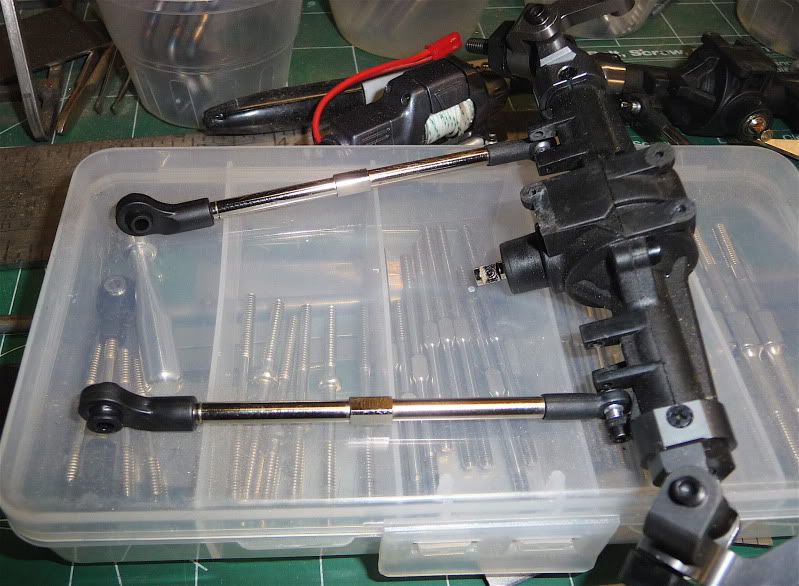 In the last week most of my other parts have come in. First, the power plant for this thing. Novak Mongoose 380 brushless crawler setup, and Hyperion 2500 25c 2s lipo's. 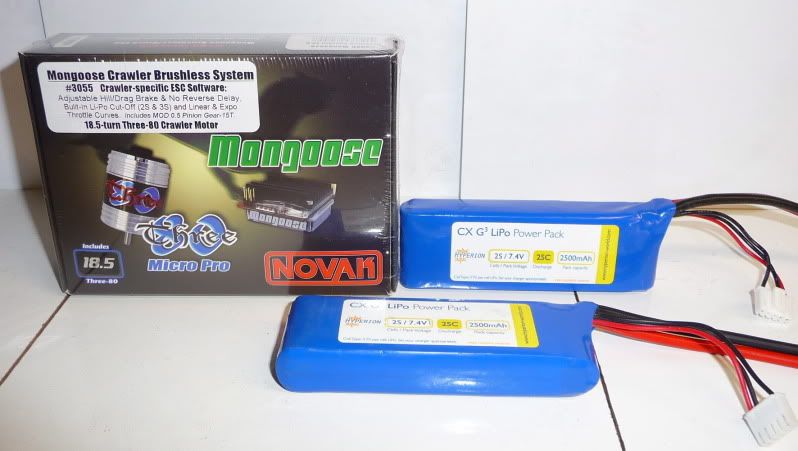 Since my original idea of an ax10 tranny wasn't gonna fit, I came up with this as a replacement. 1/16 Traxxa E-Revo trans assembly. 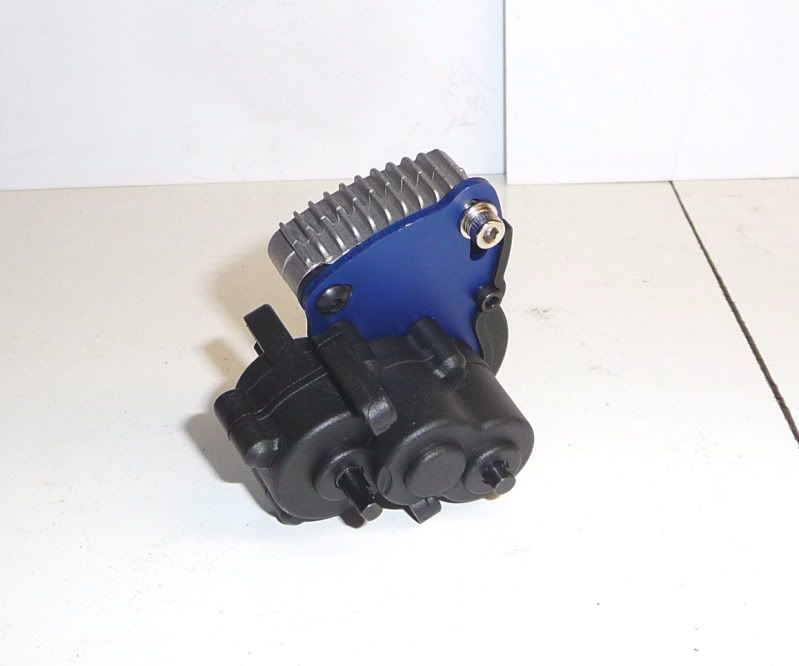 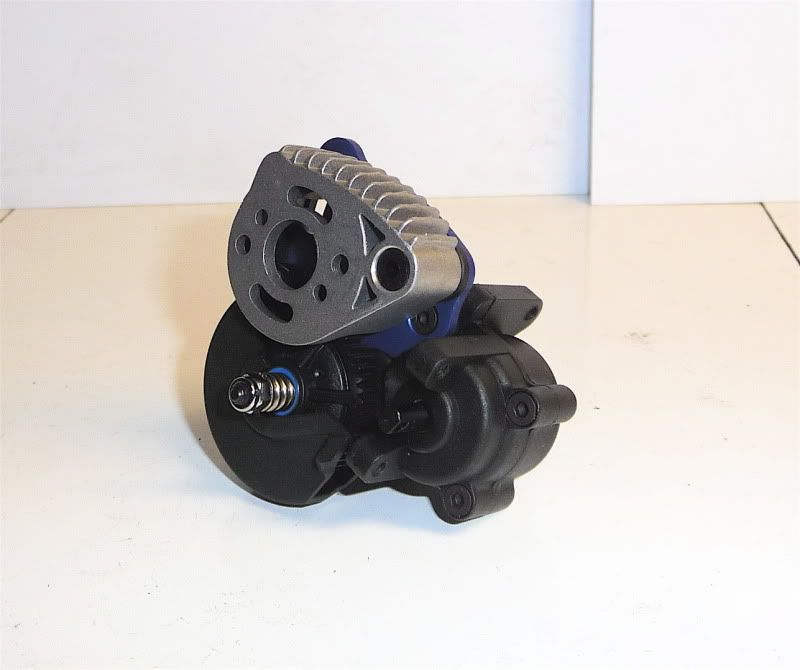 The two put together, and btw Novak is there a reason you can't include motor screws with the setup? Finding 2.5mm x 8mm countersunk screws is a royal pain the *&^&*%$^% butt. 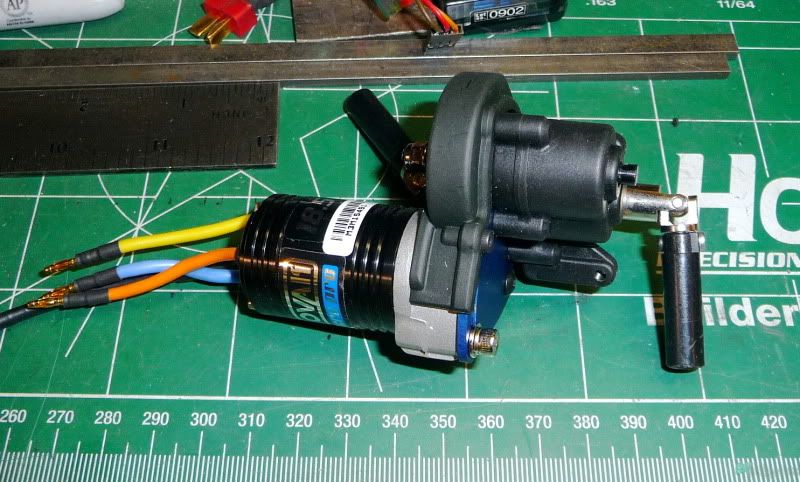 So after much measuring and head scratching, and cursing, and so on, I decided using this chassis on this project wasn't worth it. Left too many things to be done that I didn't have time for. So out comes the L trail that was sitting on the shelf. 20 minutes or so, and some delrin dowel later and... 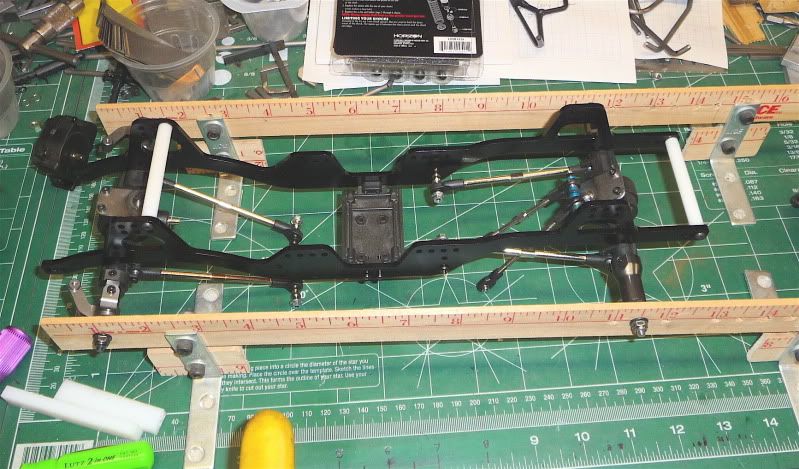 So at this point after much measuring and cursing again, I realize I'm not gonna have room for everything under the hood. Not to mention I don't have time to custom build driveshafts, so the transfer case will be going on another build. Gonna just put the motor/trans in the center as normal. But I have no way of mounting the trans? So out comes some delrin block I have a bunch of. Used my miter saw with a 200 tooth blade to chop it down to a small block. Then used my Drill press, HF cross slide vise, and HF end mill set to get to this point. 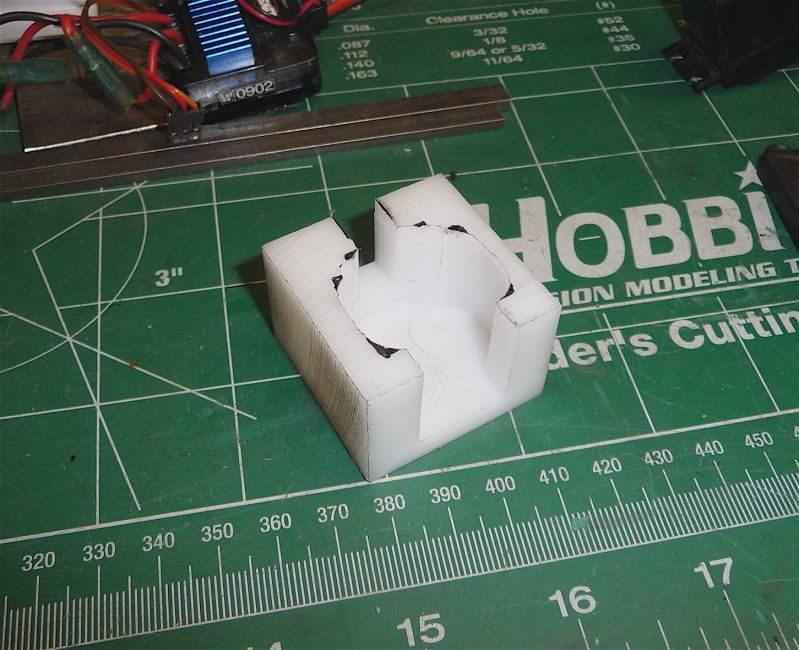 Then put the stock skid plate on my Sherline and milled a flat surface for the adapter to go on. 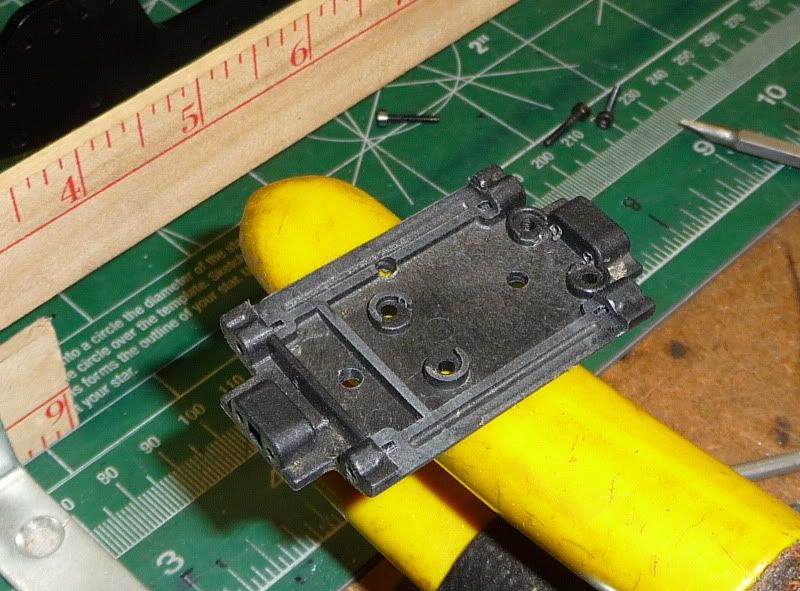 Then put the adapter on the Sherline to finish it up. I want to stress I am NOT a machinist, I just happen to own a few cool tools that I can play with. So don't make fun of my machining work 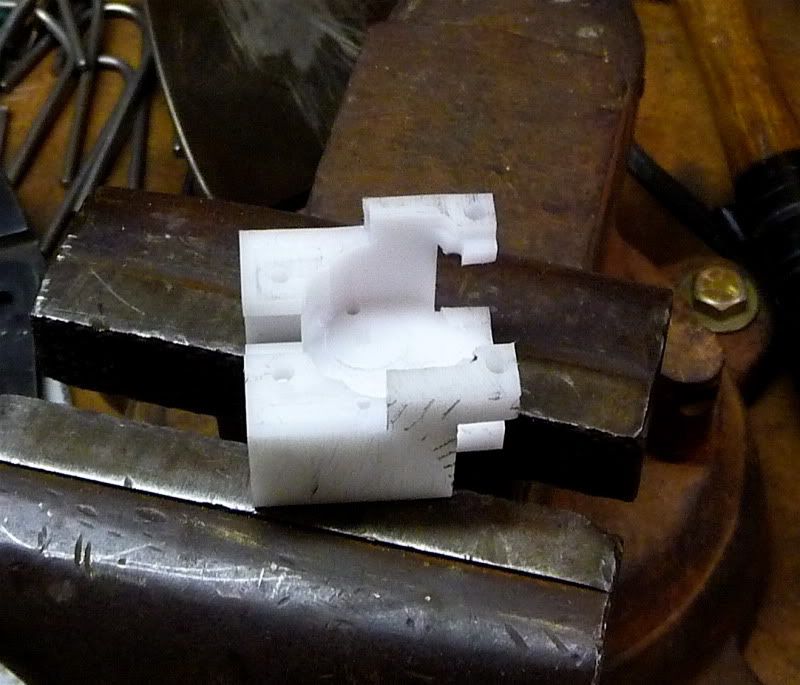 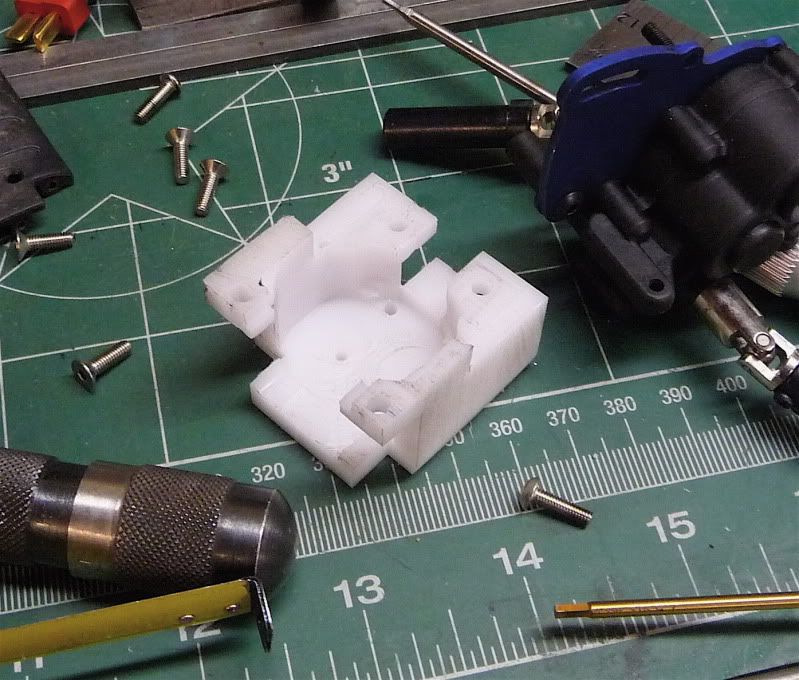 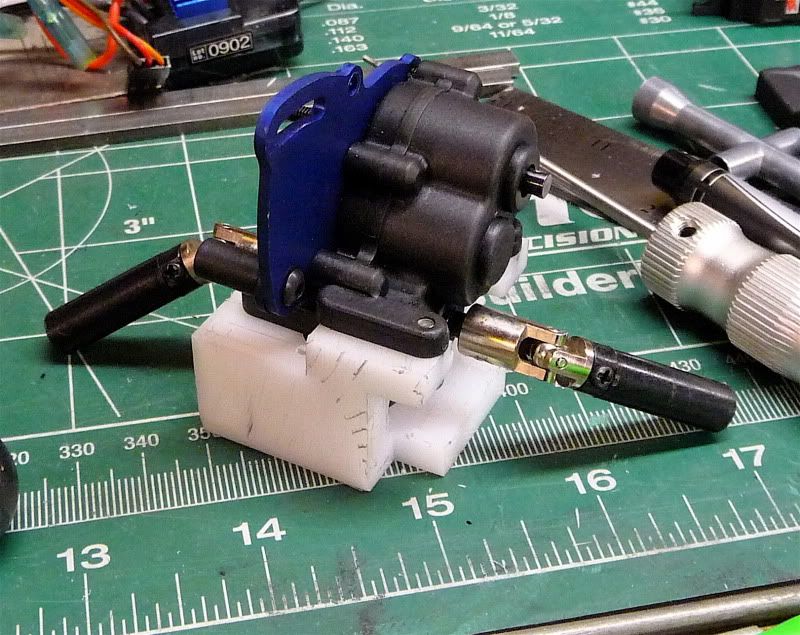 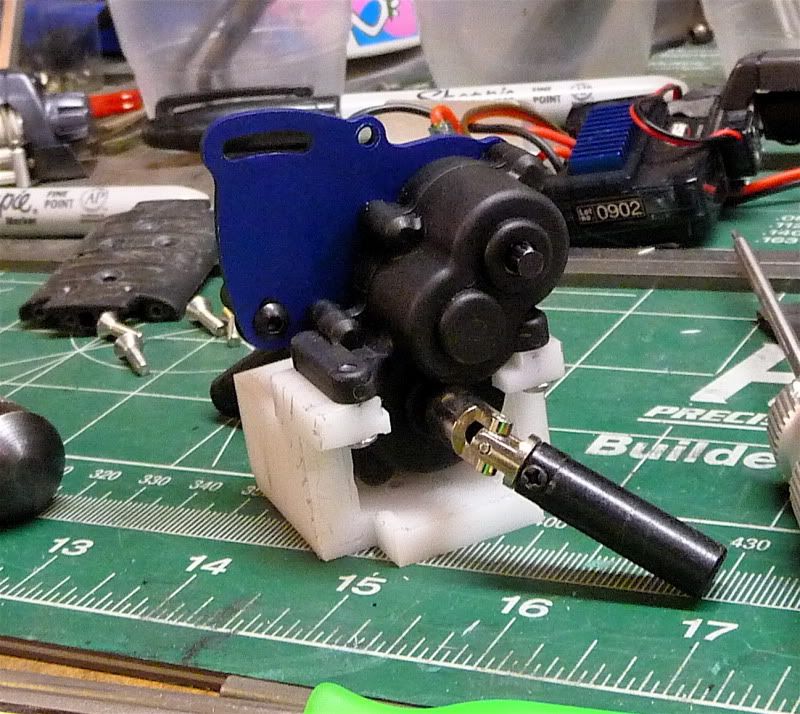 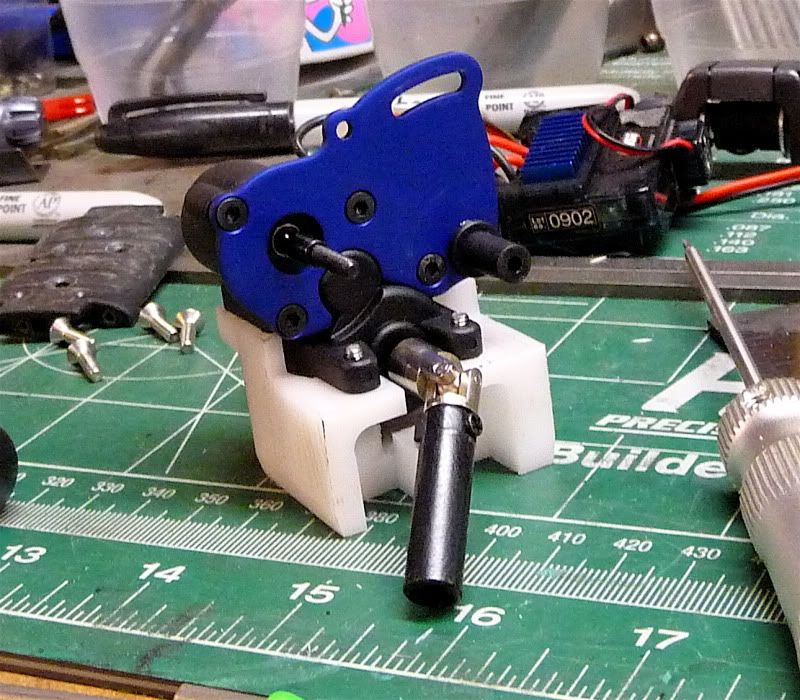 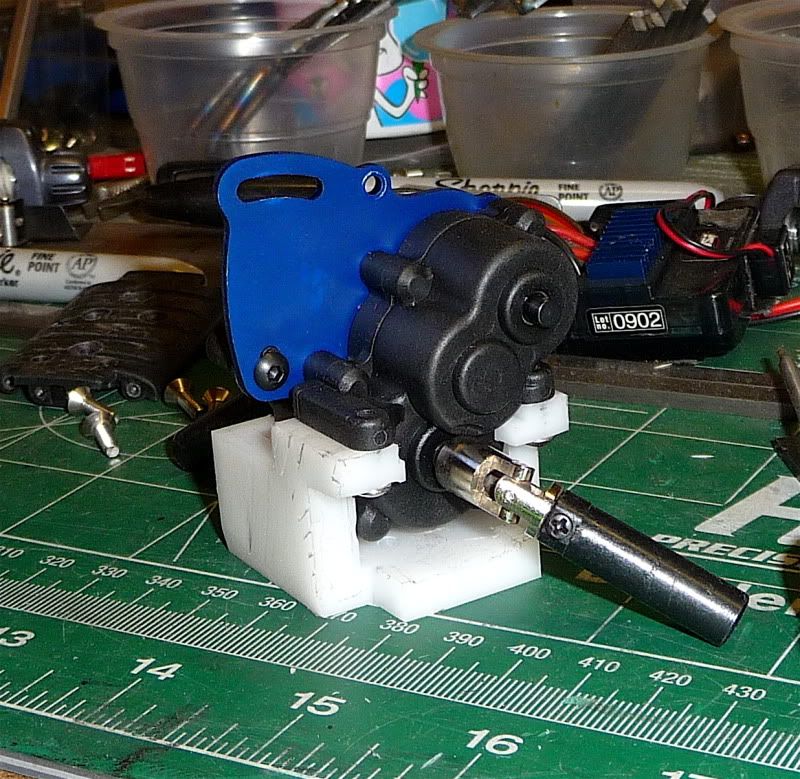 Drilled and countersunk a couple extra holes in the skid. Lastly tapped the adapter for 3mm hardware. Then put the two together. 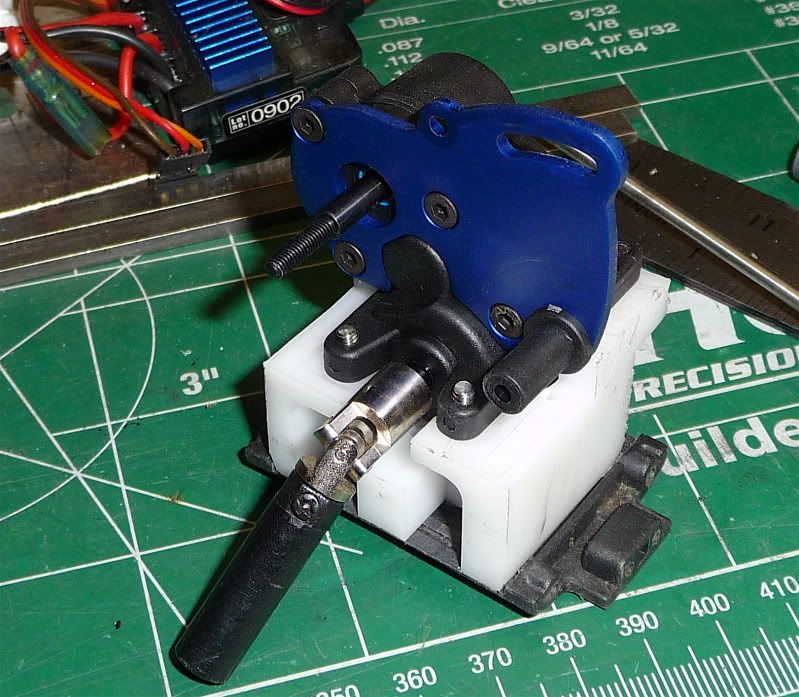 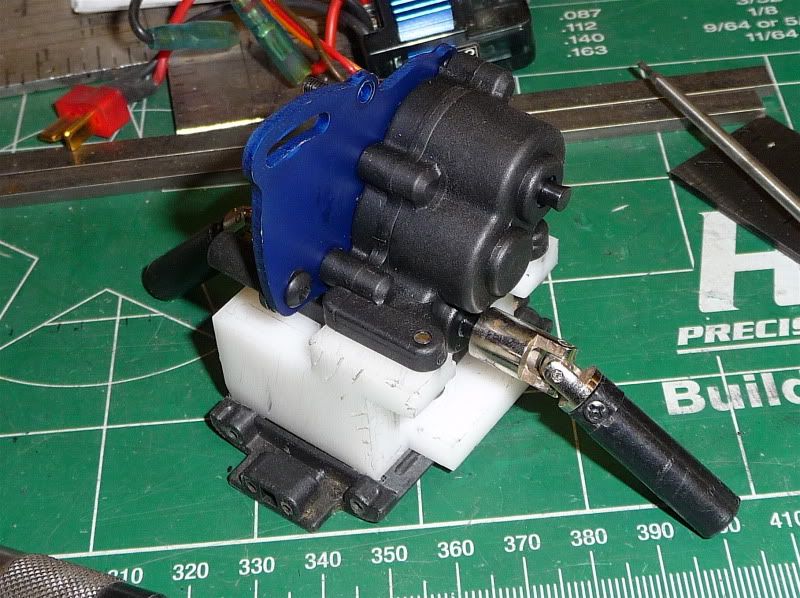  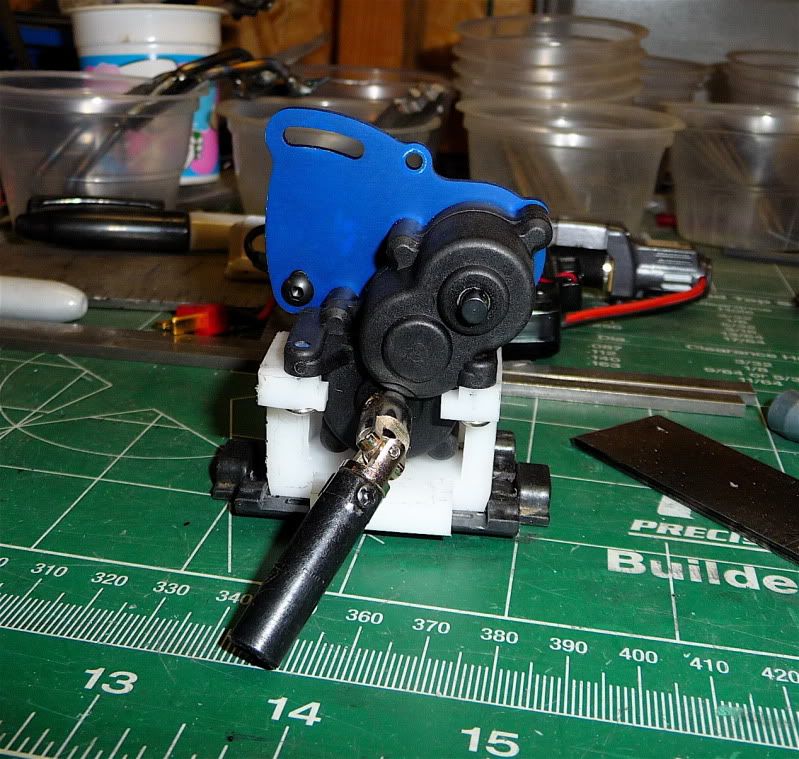 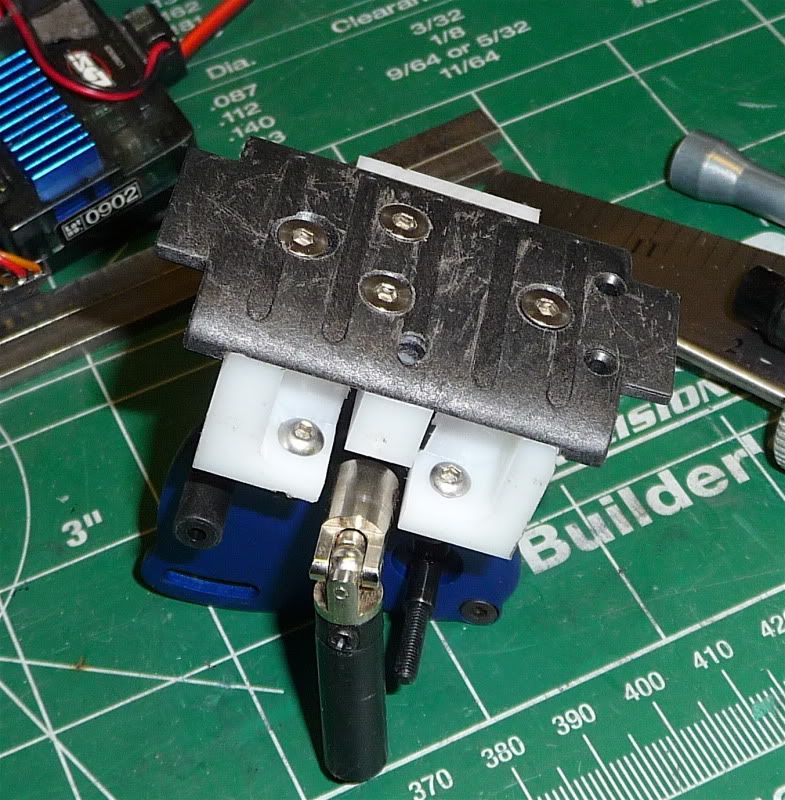 Got the rear links figured, just have to get the fronts. 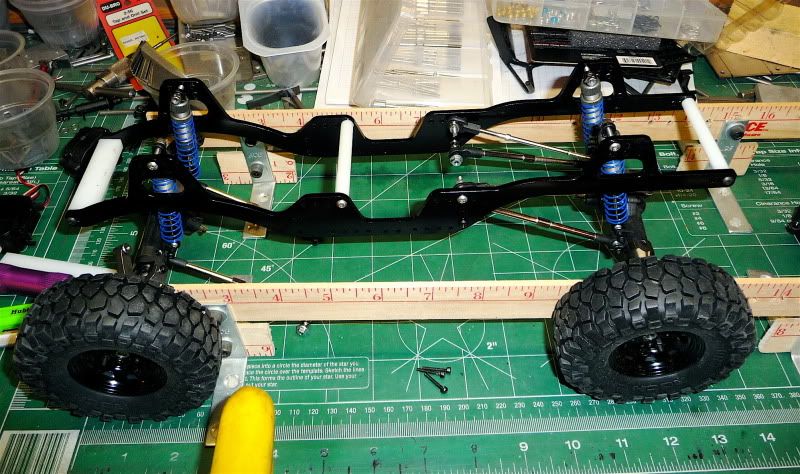 I really have to clean up the work bench lol 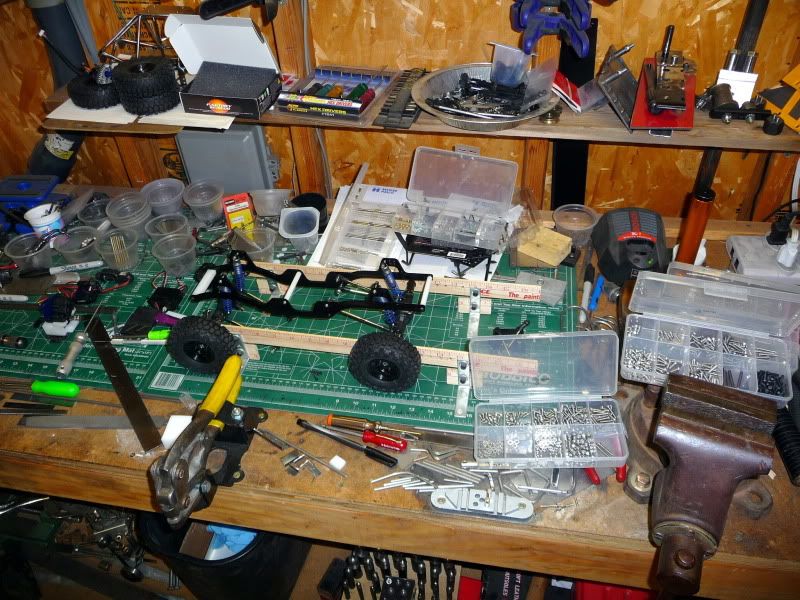 Nothing to do with this thread, more just to check and see who's watching my build. Look whats on the shelf above my bench, my Dingo with a shiny new Proline 2dr JK that should hopefully have some prototypes on it soon 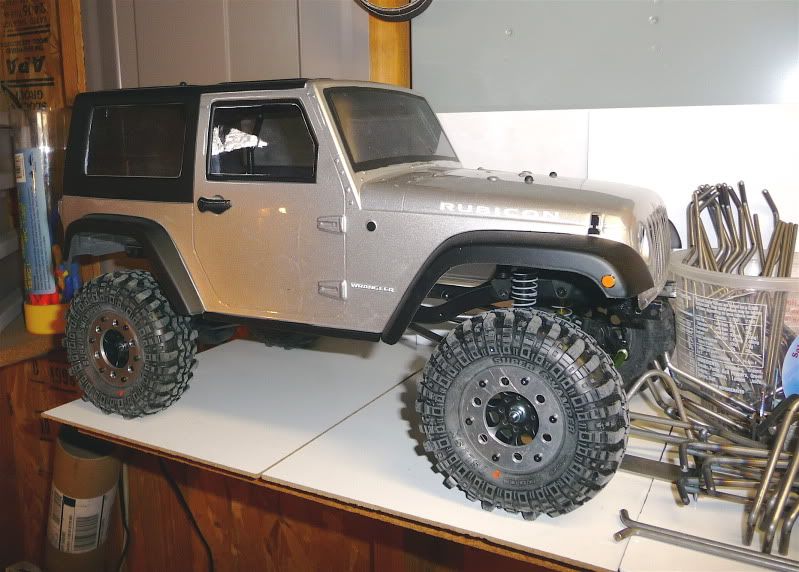 |
|
| |
|
04-23-2011, 07:39 PM
| #30 |
| RCC Addict Join Date: Apr 2008 Location: Old Hickory
Posts: 1,137
|
I was wondering if you were gonna give us a update soon, I know you ran into a hic-up with tools. I'm very impressed with the tranny mount, I hate to tell you this but there was a VERY easy way to do that......just kidding I would suggest looking inside the tires, they have a reinforceing ribs that in my opion make the tire way to stiff, I cut them out of my thrashers and with some softer foams these tires came to life! Very impressed with what they can do. I almost bought those tires for my sammi but inny miny minnie moe landed on the thrashers  |
|
| |
|
04-23-2011, 07:49 PM
| #31 | |
| RCC Addict Join Date: Feb 2006 Location: Medford, Oregon
Posts: 1,261
| Quote:
The original frame will end up used on something else. I do plan to build a sami afterall, maybe then it will see some use. I saw on your thread about modding the tires. I def plan to do that. They are a bit stiff, quite unlike the 1.55 mudslingers I have. They have great sidewall flex, while these crushers don't give at all. Maybe I'll stuff the foams out of my 1.9 proline tsl's in these. Those things are so darn soft they're useless in the tsl's. Looks like my JK has multiple flats lol. | |
|
| |
|
04-25-2011, 07:39 PM
| #32 |
| RCC Addict Join Date: Feb 2006 Location: Medford, Oregon
Posts: 1,261
|
Got a little more done. Got all the links figured. Drilled a few extra holes in the chassis, and put it together. 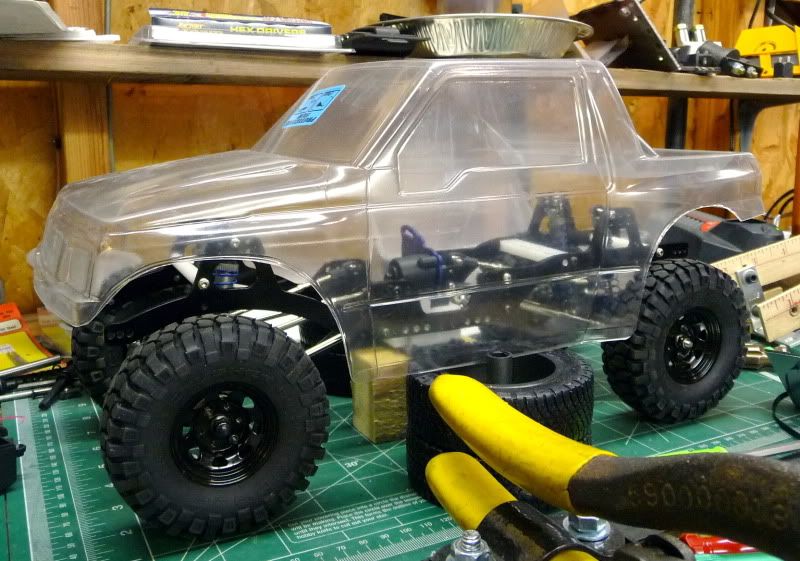 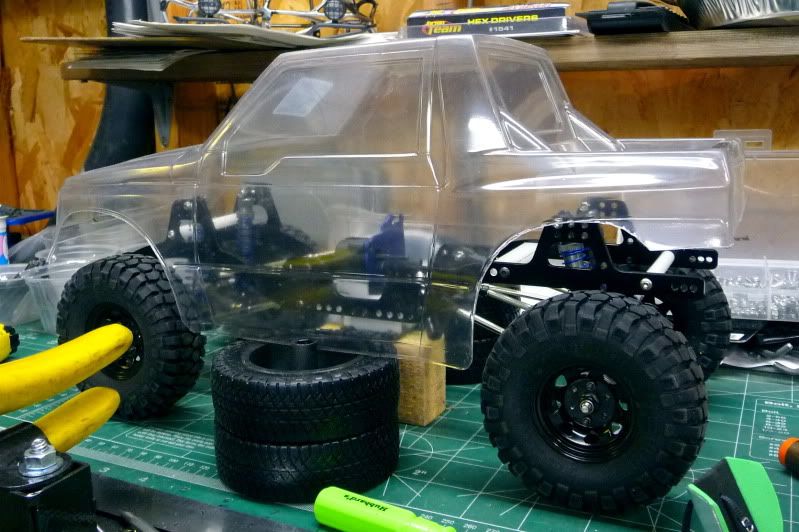 Bare roller trying to figure trans position and height. 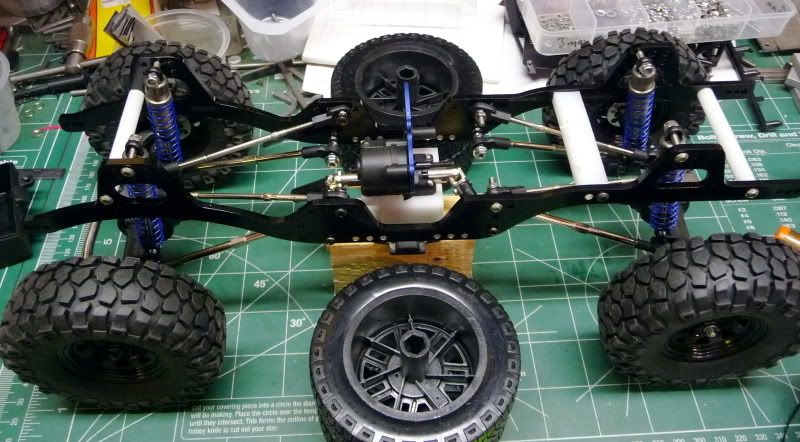 Once I've got that all figured and mounted, I can start figuring out my interior. These aren't the actuals seats for this rig, Norm made me something even sweeter 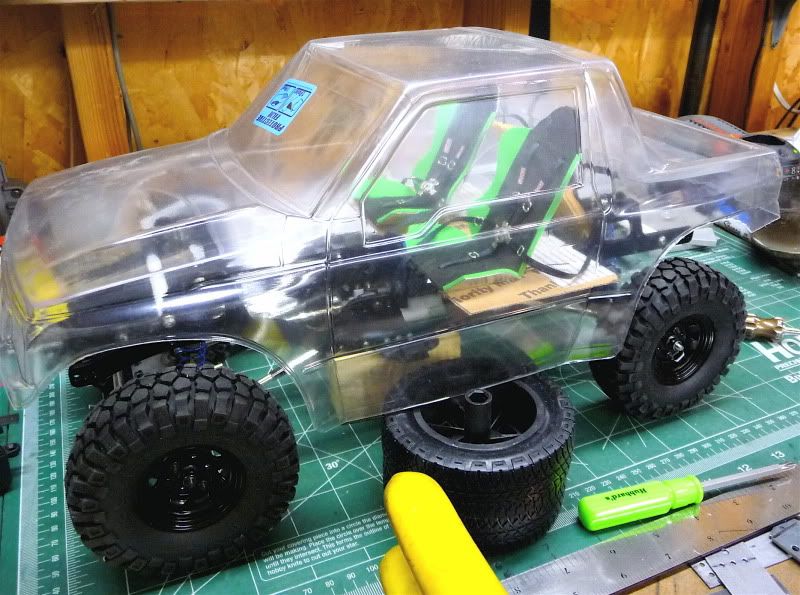 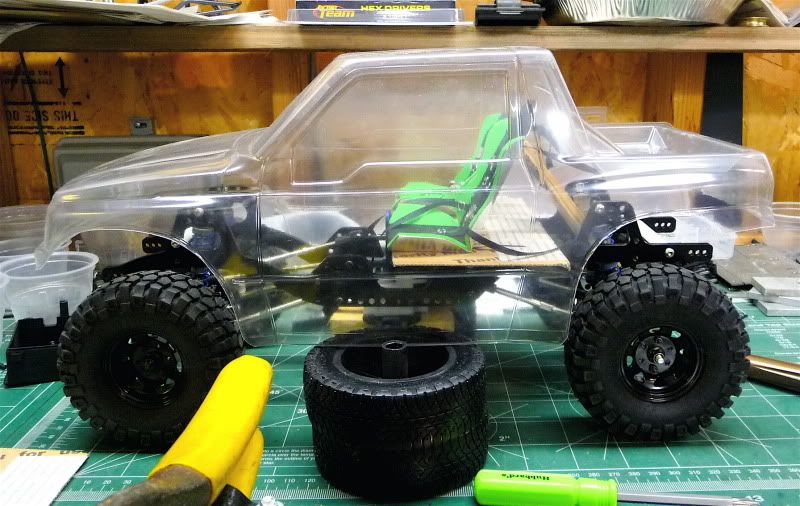 Things are finally rolling with this thing. More to come soon. |
|
| |
|
04-28-2011, 10:58 PM
| #33 |
| RCC Addict Join Date: Feb 2006 Location: Medford, Oregon
Posts: 1,261
|
Got more done. I didn't download pics off the camera for a couple days, so this is a few days worth of updates. Decided on the tranny position and built the tranny plates. Put together front 4 link, and finally a roller. 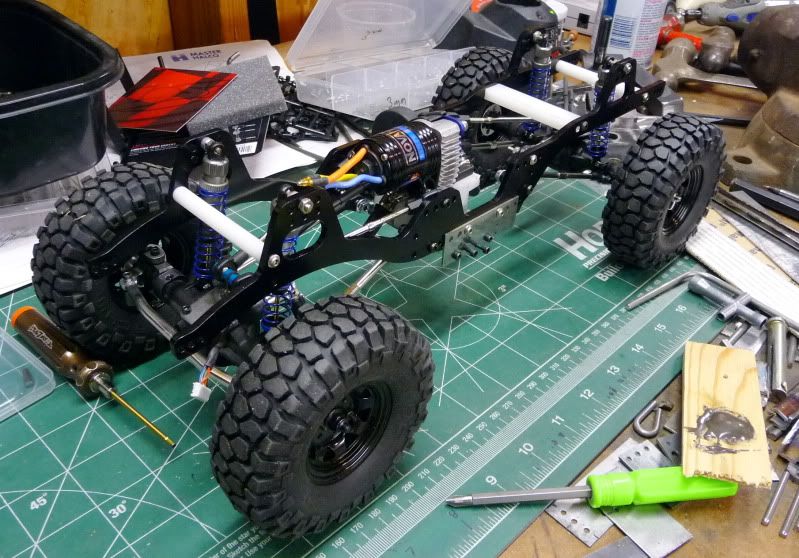 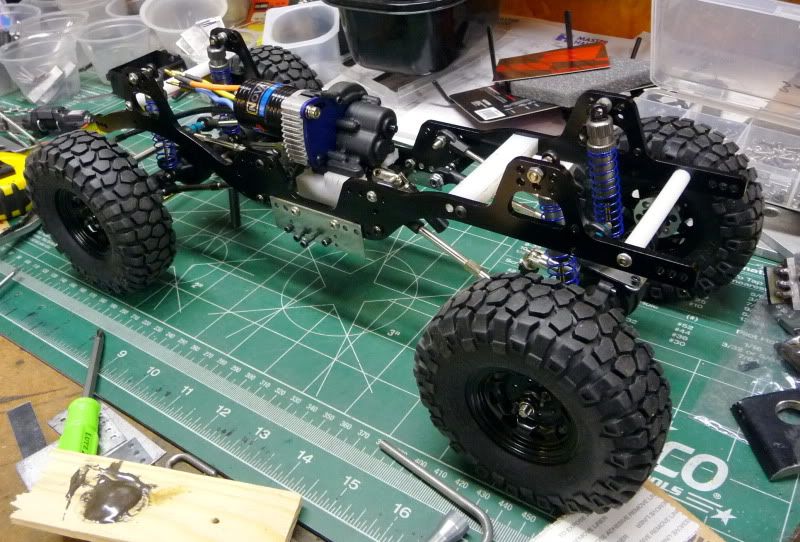 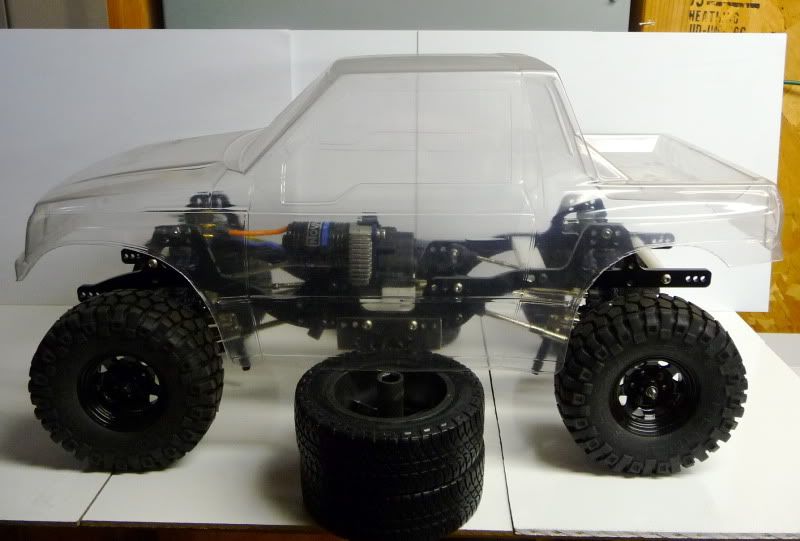 Started on the sliders as well. 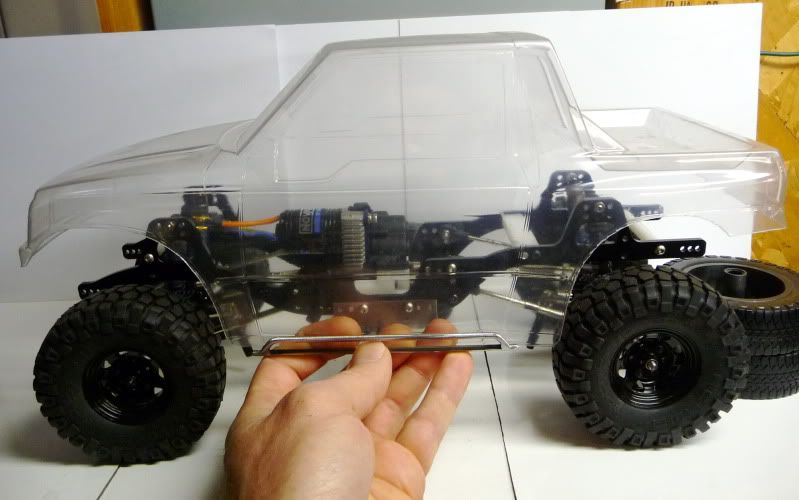 Also got going on the front bumper.  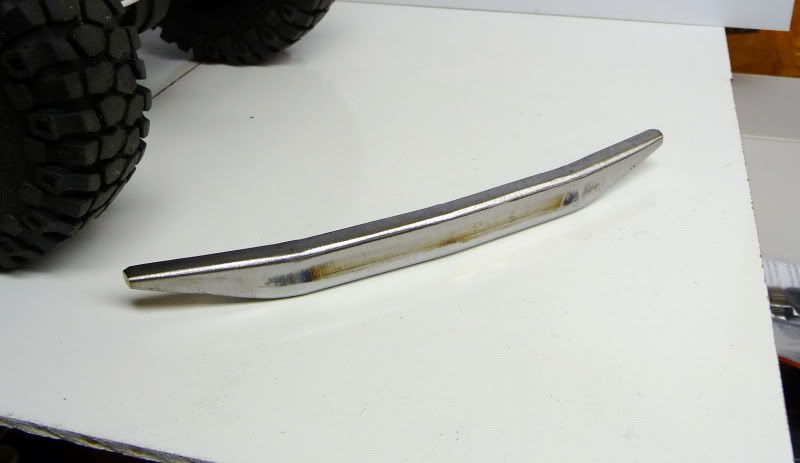 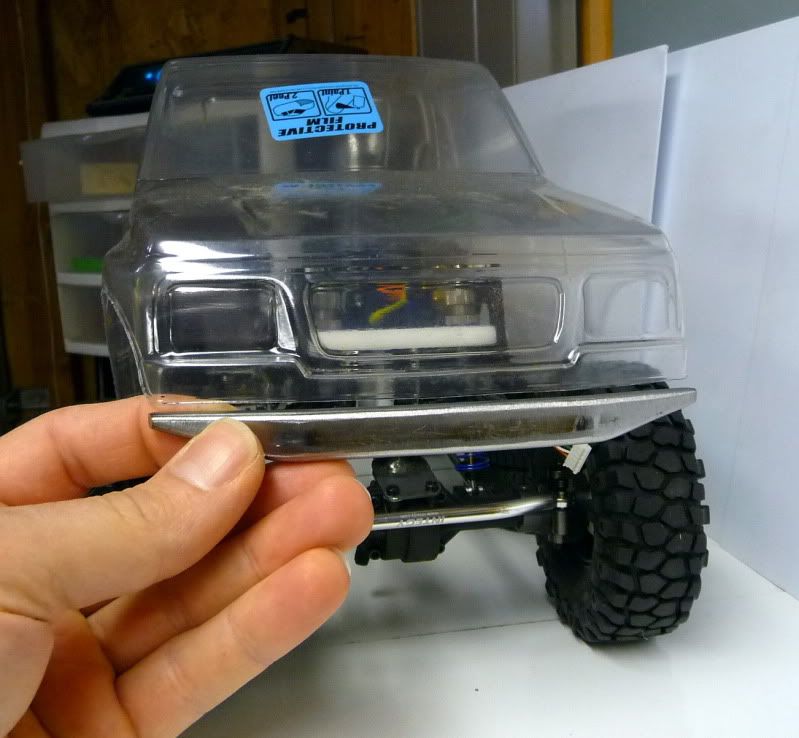 Aron says I have to have my rack on the roof for the points so.... 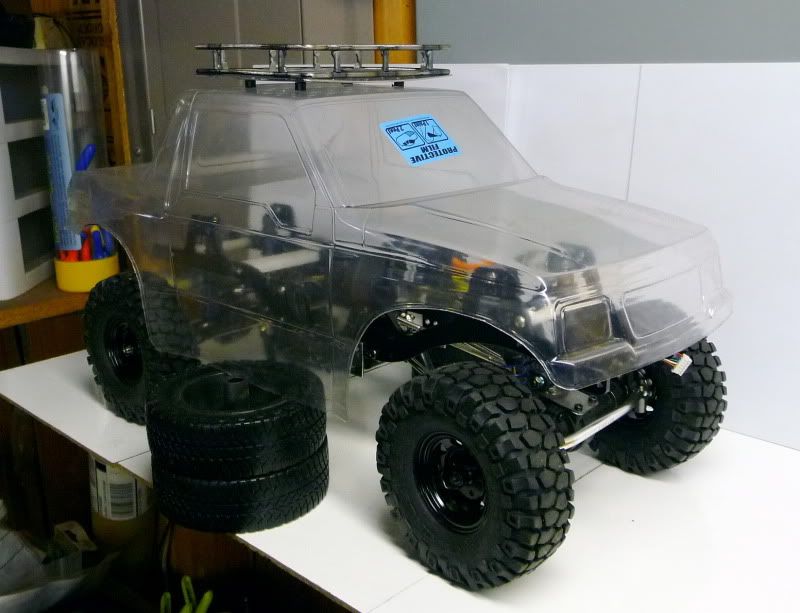 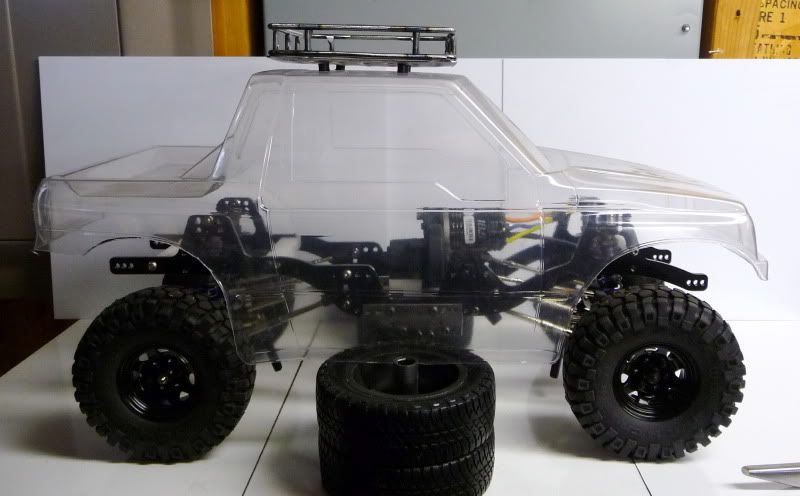 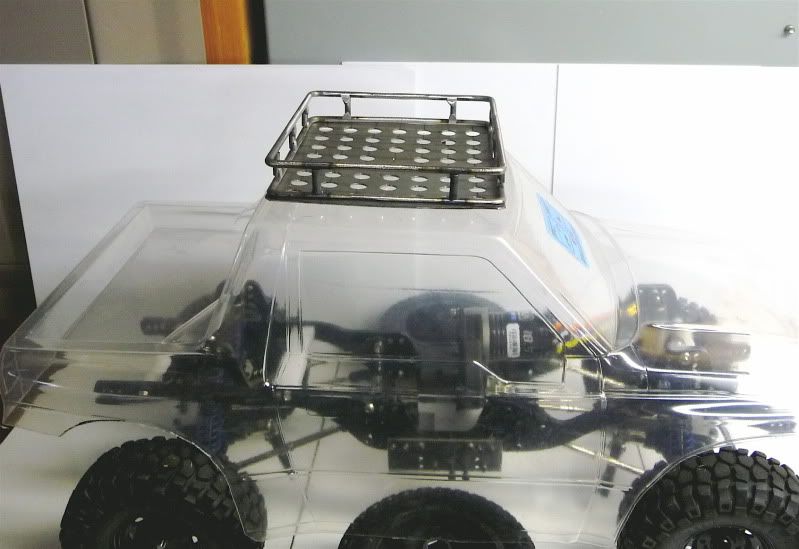 This was actually my first attempt, and I really don't like it. Doesn't fit this body properly. More on that below. Spent a while on the mill again, and a servo mount popped out. 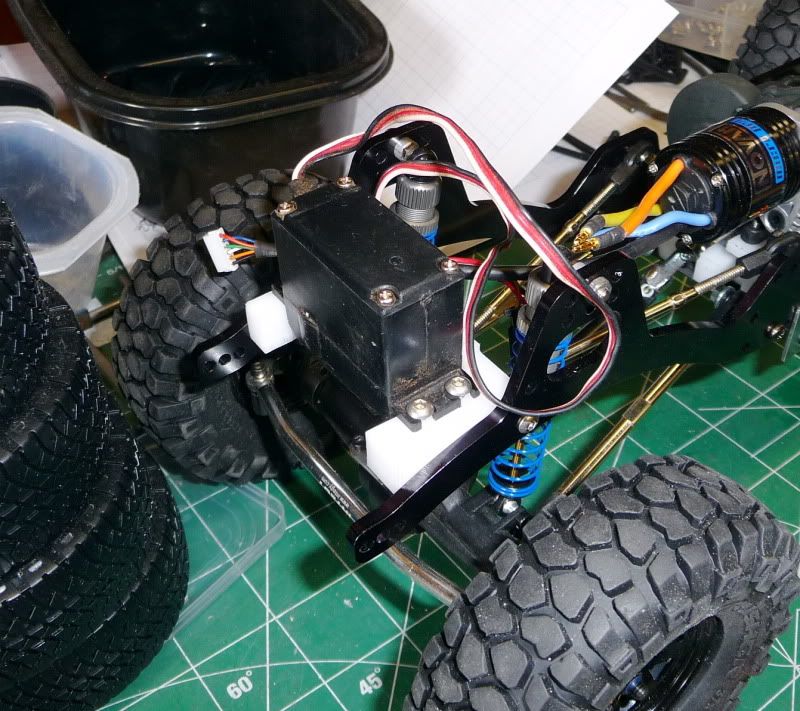 Now she's a real roller. Ended up making custom driveshaft extensions also. 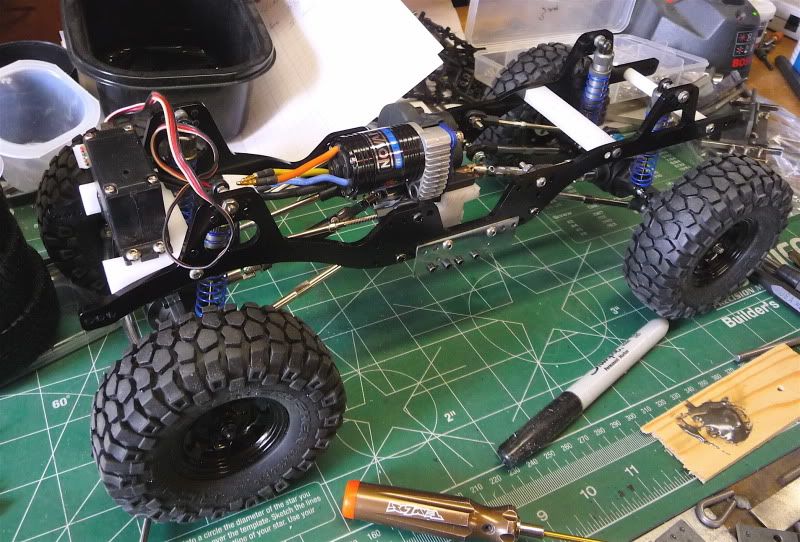 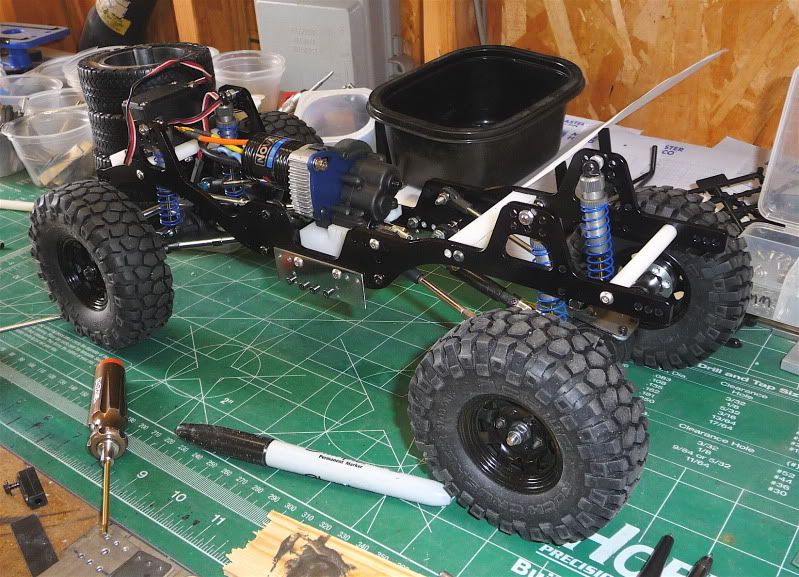 So I scratched the first roof rack, and here is number 2. Muuuch better. Fit's the roof panel much better, and sleeker. 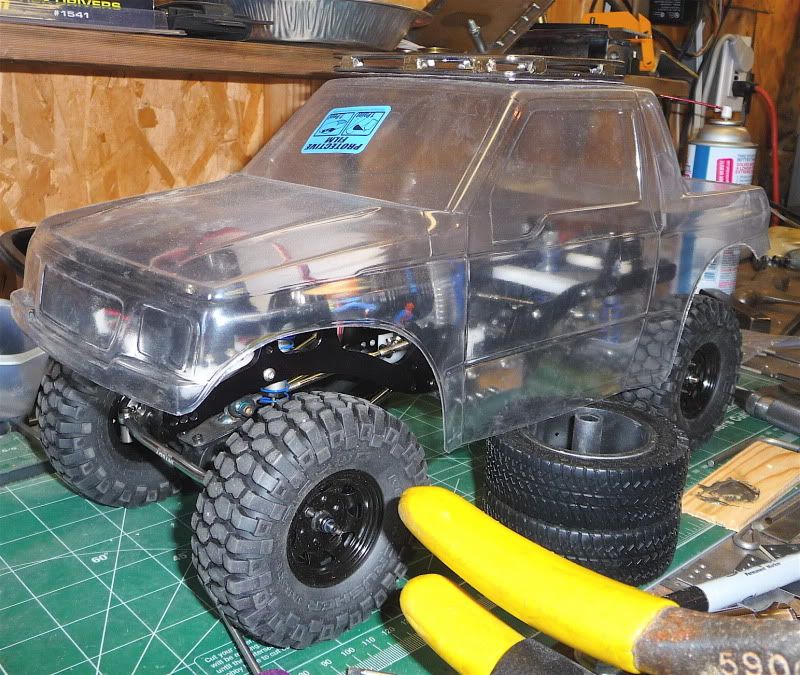 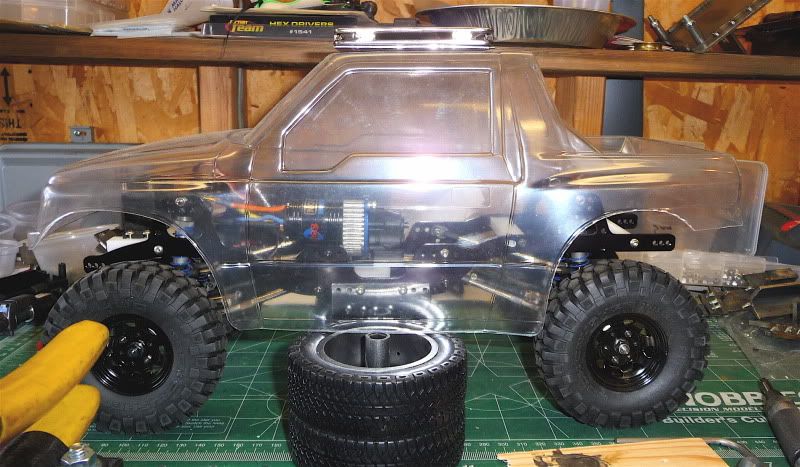 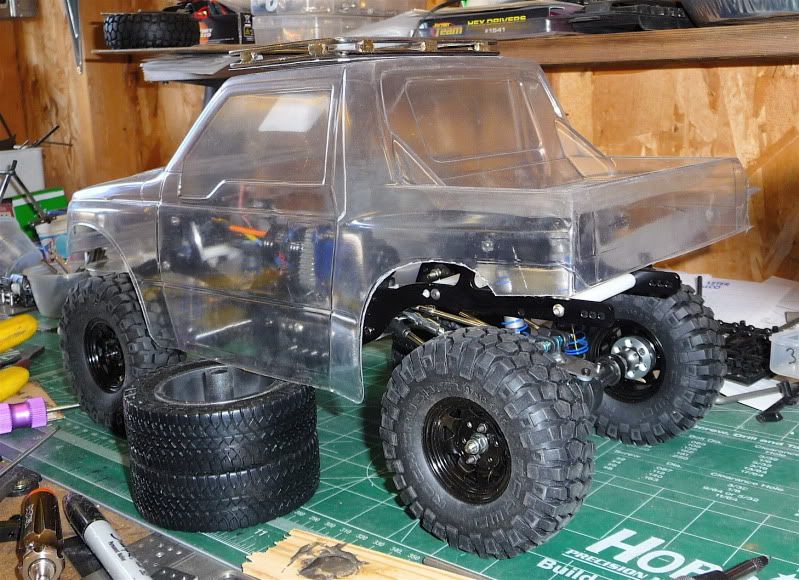 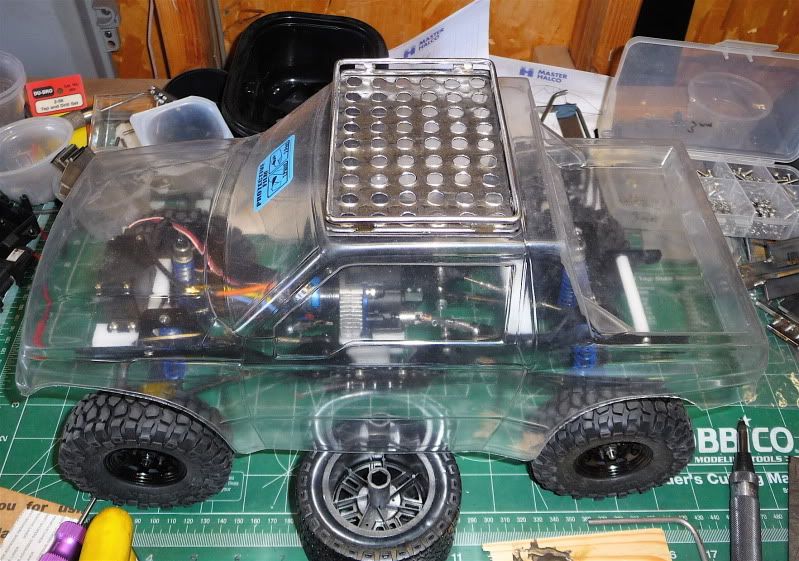 I just got a box I've been eagerly awaiting. It was like the briefcase in Pulp Fiction when I opened it. I'll show it's contents soon |
|
| |
|
04-29-2011, 03:11 AM
| #34 |
| RCC Addict Join Date: Apr 2008 Location: Old Hickory
Posts: 1,137
|
Lookin REAL good, me likey "Once I've got that all figured and mounted, I can start figuring out my interior. These aren't the actuals seats for this rig, Norm made me something even sweeter" Who is this Norm? And where can I see what else he has? Those seats would look GREAT in my sammi! Last edited by Mr. Ed; 04-29-2011 at 03:18 AM. |
|
| |
|
04-29-2011, 08:57 AM
| #35 |
| RCC Addict Join Date: Feb 2006 Location: Medford, Oregon
Posts: 1,261
|
Thanks man! Norm is the owner/operator of Team3six RC. He posts on here as Team3six. His website is http://www.team3sixrc.com/ Unfortunately he's currently not producing interiors until after the scale nats are done. Like me he has way too much going on. But he does amazing work, and has other sweet products as well. Check it out. |
|
| |
|
04-29-2011, 07:34 PM
| #36 | |
| Rock Crawler Join Date: Aug 2010 Location: Salt Lake
Posts: 605
| Quote:
| |
|
| |
|
04-30-2011, 06:31 AM
| #37 | |
| Rock Crawler Join Date: Oct 2009 Location: Washington State
Posts: 624
| Quote:
Also pretty excited to see what you come up with for the P-line Jeep. | |
|
| |
|
05-01-2011, 01:33 PM
| #38 | ||
| RCC Addict Join Date: Feb 2006 Location: Medford, Oregon
Posts: 1,261
| Quote:
Quote:
Here's the contents of the box. One absolutely killer painted body. It's a pearl orange that goes from dark orange to light yellow. 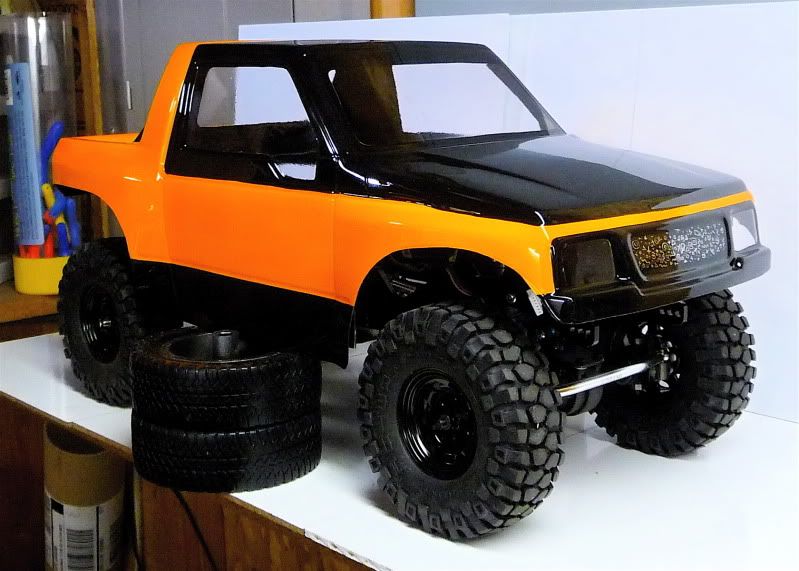 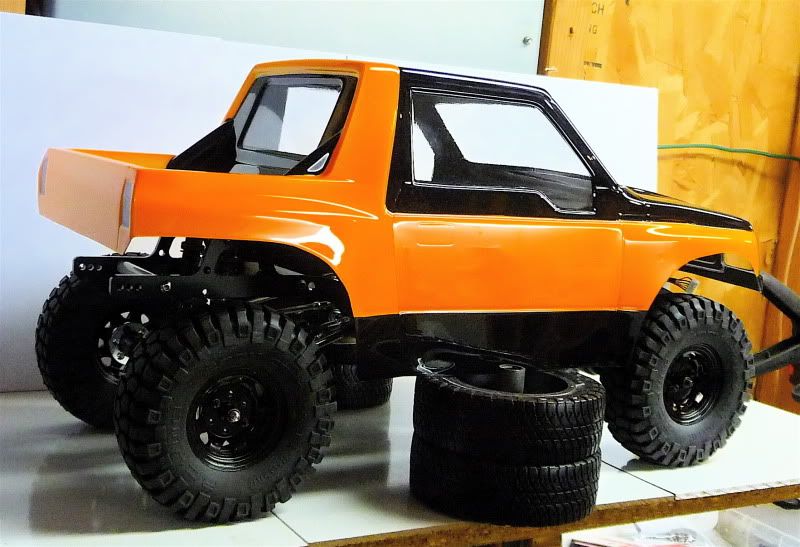 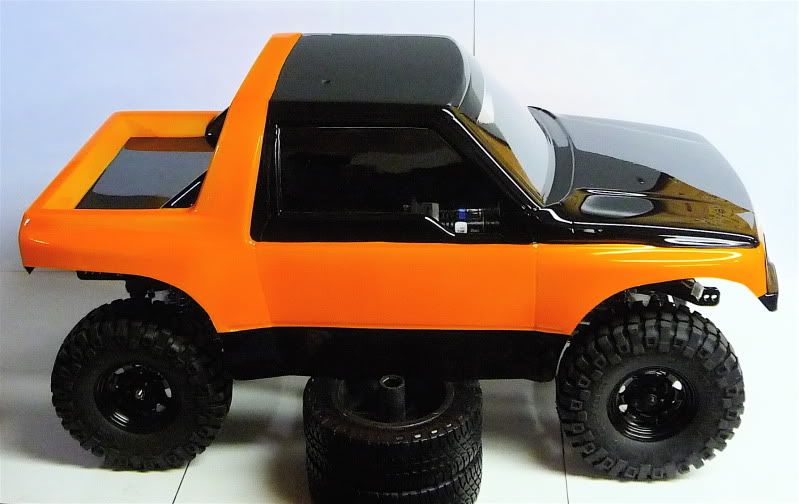 Also my new seats. Freakin sweet! 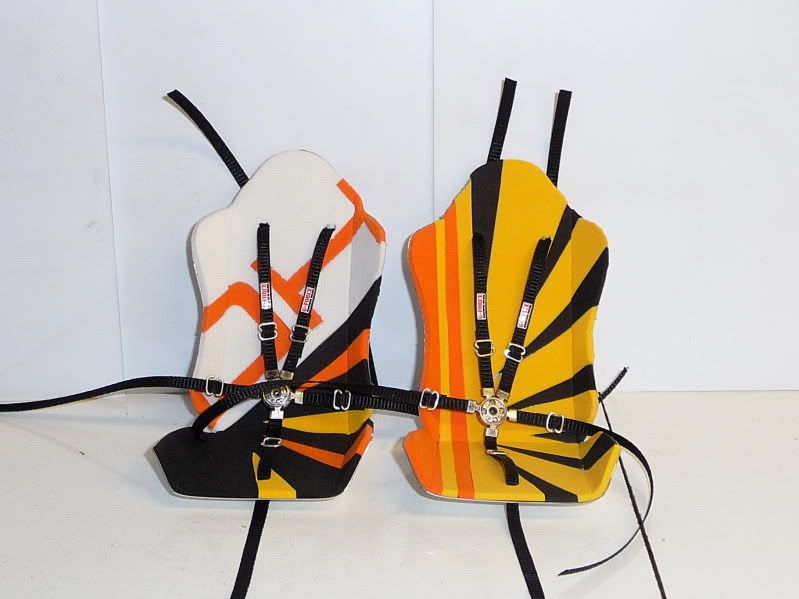 Lastly color matched tow ropes, and a new Team3six winch kit. 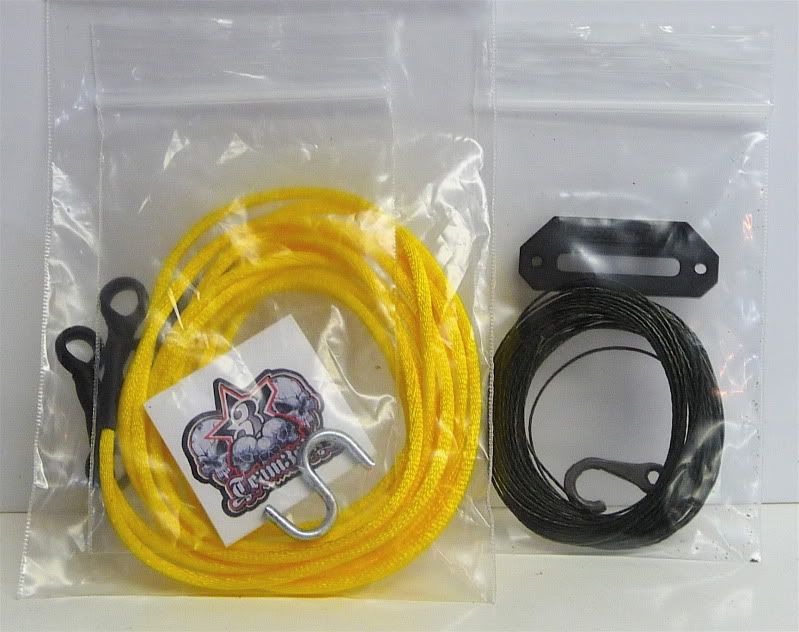 So here it is with the roof rack at proper height. 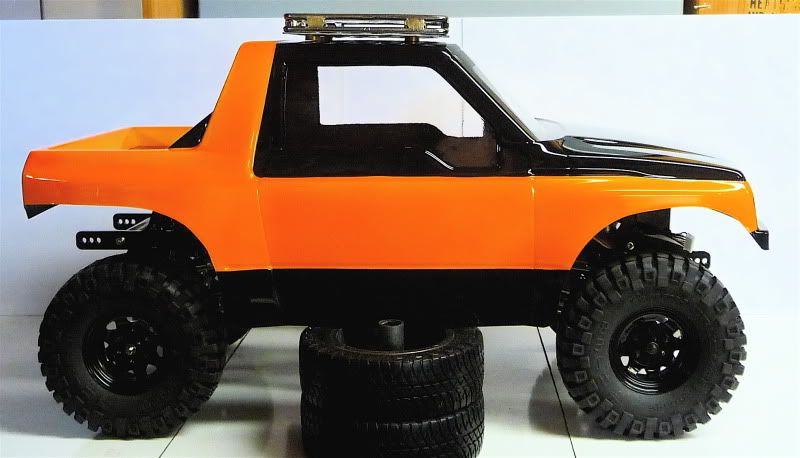 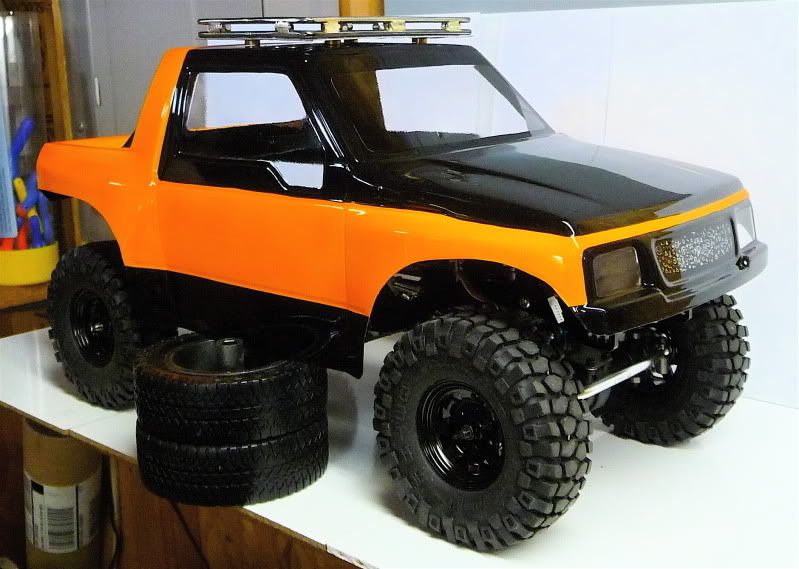 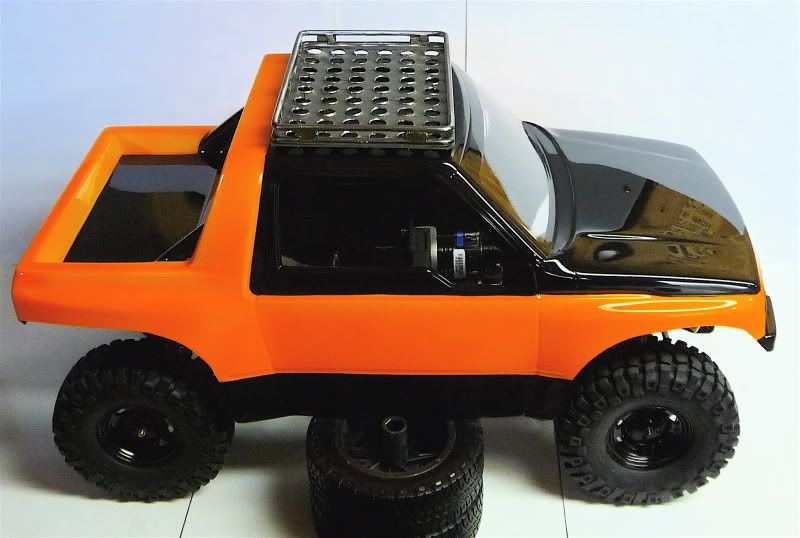 Here's the start of the rear bumper, with spare carrier and hi lift mount. Will also have a jerry can mount next to the spare. 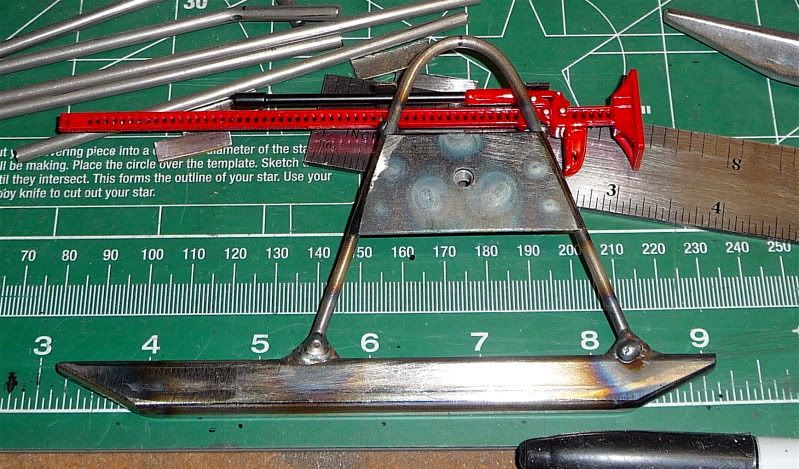 This was my original plan for the cargo, but for rules sake I needed the roof rack. Still gonna use this though, as I need a place for the cooler so it won't stick off the top of the tracker by an inch. Still gotta build a pull pal that will also reside on the cargo rack. 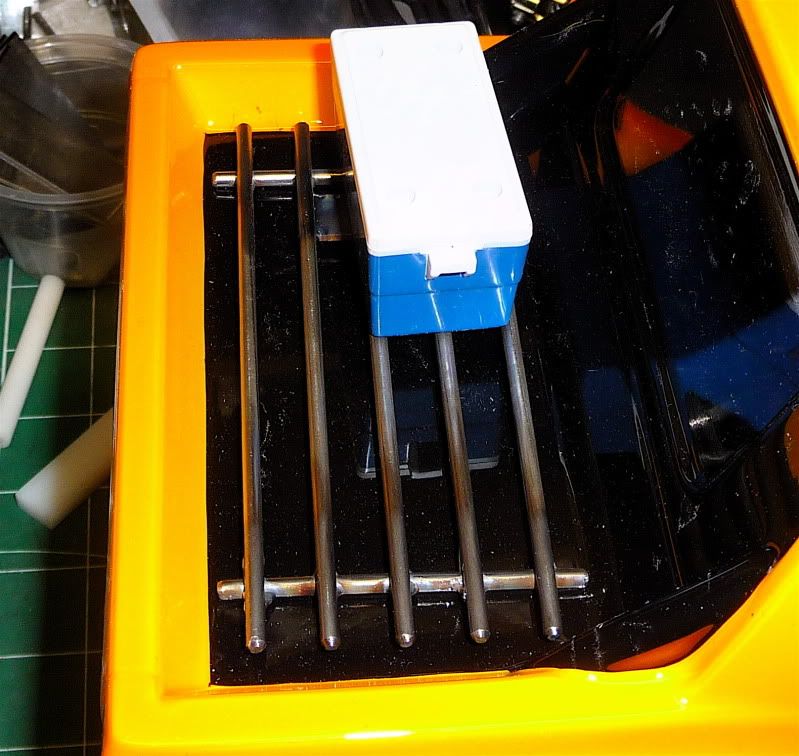 There's actually a bit more done than this, but that's all the pics I took. More soon as I'm running out of time. | ||
|
| |
|
05-01-2011, 05:50 PM
| #39 |
| Rock Crawler Join Date: Aug 2010 Location: Salt Lake
Posts: 605
|
That paintjob is absolutely awesome. Just enough flash.
|
|
| |
|
05-01-2011, 07:32 PM
| #40 |
| RCC Addict Join Date: Apr 2008 Location: Old Hickory
Posts: 1,137
|
Won't be long now, I know that close feelin, towards the end of a project and I know your getting there! Looks good, and I like the cargo rack!
|
|
| |
|
| |


 Linear Mode


