| |
| |||||||
 |
| | LinkBack | Thread Tools | Display Modes |
 08-11-2008, 03:53 PM
| #1 |
| Quarry Creeper Join Date: Feb 2006 Location: San Jose, Ca
Posts: 367
|
The Irie yota. I have had this set of t-rex mini 44 axles sitting around on my workbench for a while now. They are really nice axles, perfect for a 1.9 scaler, I was planning on waiting until rc4wd came out with a leaf spring mount for them but I had some free time this weekend and decided to go ahead and see if I could make some mounts to be able to run a coilover 4-link setup with them. My biggest issue has been having enough room to make everything fit being that the axle is so narrow. this is what I have come up with over the weekend. First I brazed a couple of nuts on the end of a steel bar that I had bent to fit over the axles pumpkin 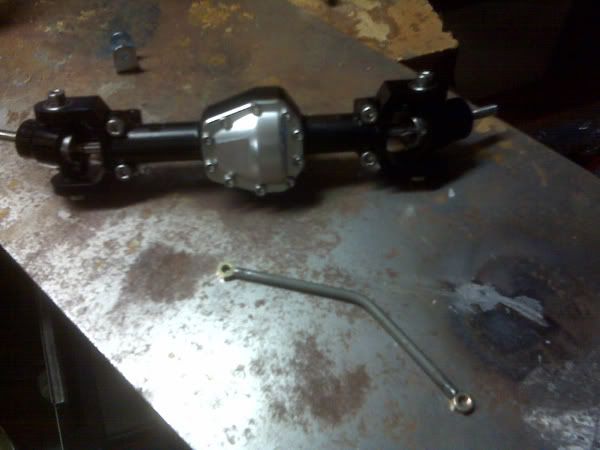 Then I brazed a couple of mounting tabs on the bar for the upper link mounts. 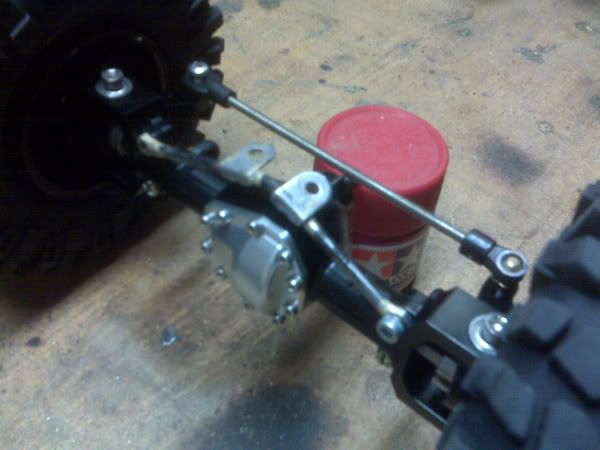 Heres a pic of both front and rear upper link mounts done 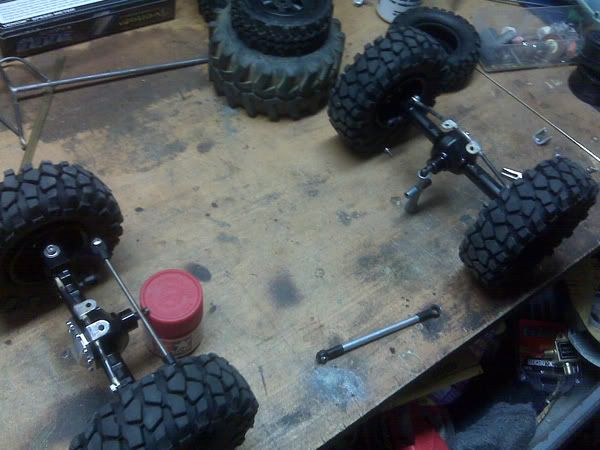 I struggled with the lower link mounts for a while making brackets and mounts of all different shapes only to find that they were over complicated, bulky and kept interfearing with the steering and tires. After a break I came back to the problem and came up with a much more simple setup. With some brass strips I drilled holes to match the holes on the axles and bent them 90 degrees to make a platform to mount the lower links to. 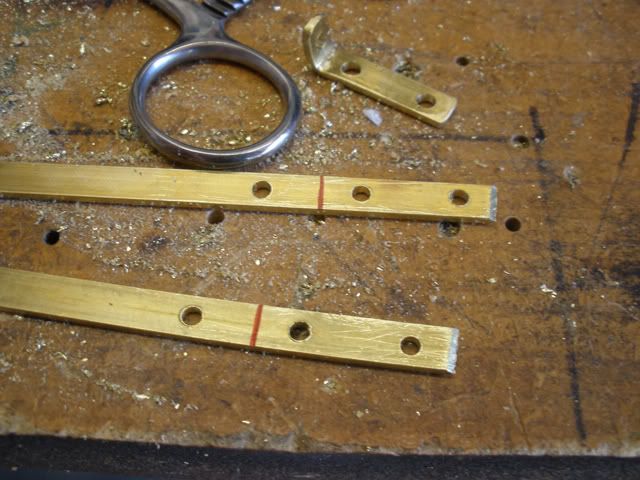 bent and installed.  For the front axle I made the mounts longer and bent them the other way over the top of the axle as well so I could braze another bracket over the axle to mount the front shocks vertically. front mounts 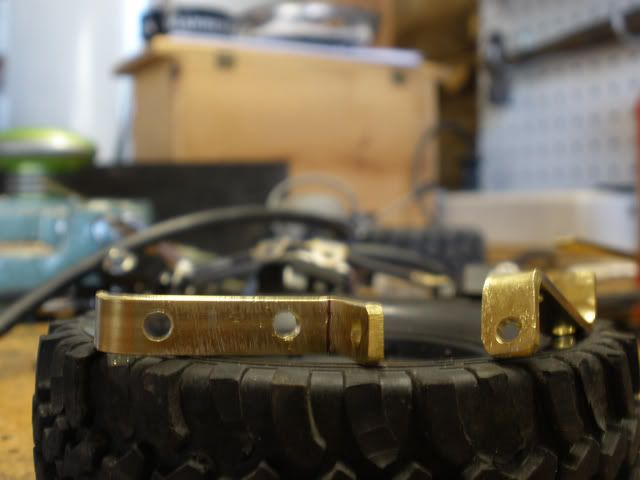 Front shock mounts brazed on and mounts installed 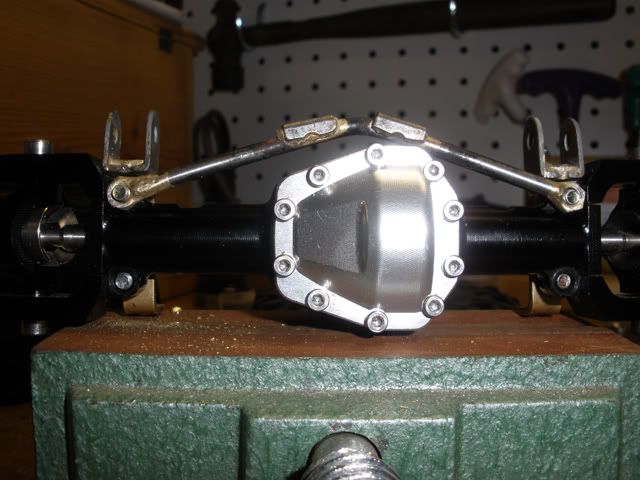 Now that I had sufficient mounting tabs on the axles I needed a chassis to use them with. all I had laying around at the moment was a k2-3l so I narrowed it down to fit snug around a R2D2 I had to and to better fit with the narrower axles. Linked up the rear. 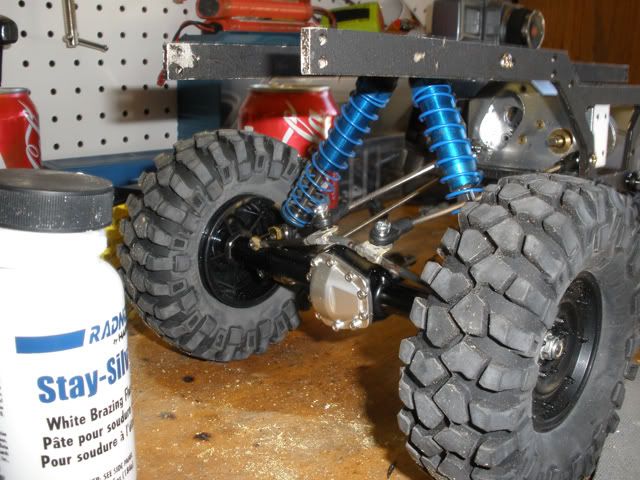 I used the same brass to make upper shock mounts for the front 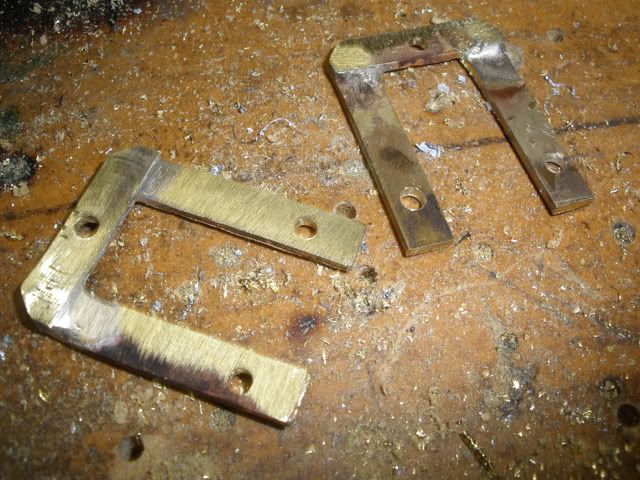 drilled and mounted the upper shock mounts for the front, then measured and 4-linked it. Now its a roller! I mounted up a servo for the steering and managed to keep the whole steering setup bta. Hooked up the shocks.. no rubbing at full steer but its a really tight fit. I dug around and found some electronics to go in it, not sure if im gonna keep them in this rig I am running a reversed R2D2 for 2wd - 4wd shifting so I want some decent wheel speed for er .. um burnouts n stuff im throwing in a 13t clod pinion to see what kind of torque / wheelspeed I get. now I just need to make some plates for the top of the chassis to mount the electronics and shifting servo. 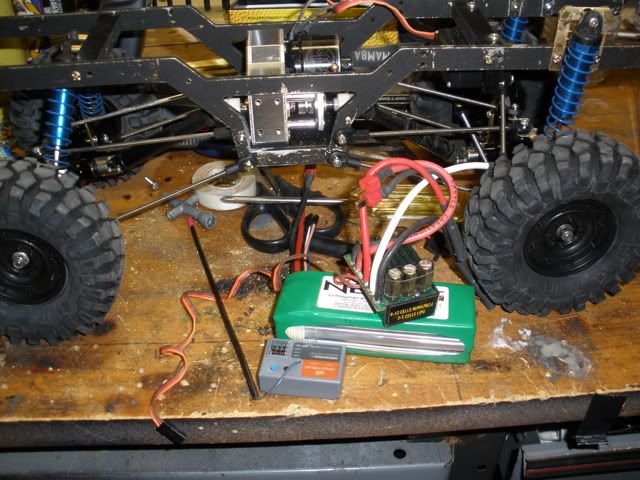 I have a few candidates as far as toyota bodies for the rig. but I think I am going to try and resurect the oldest fugliest one I got. its in pretty poor shape It looks as though someone busted out the rear bed and tried to fix it with balsa wood and its got a cracked pillar in front. but hey its still an og yota body. here is a couple shots of it resting on the chassis. 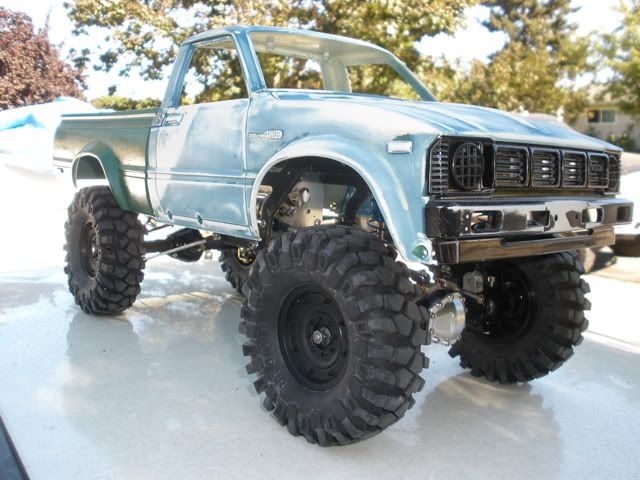 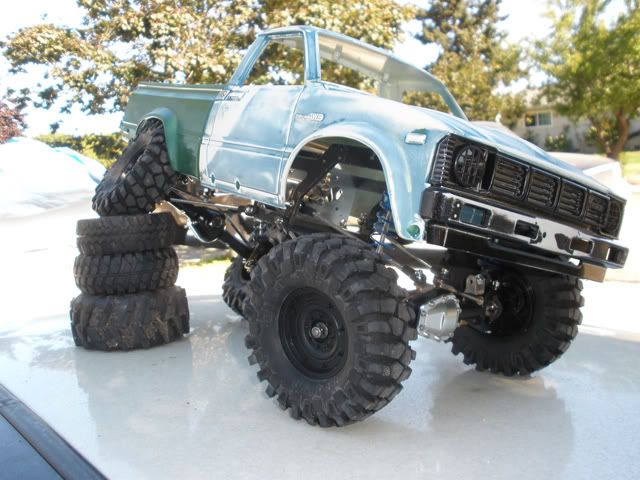 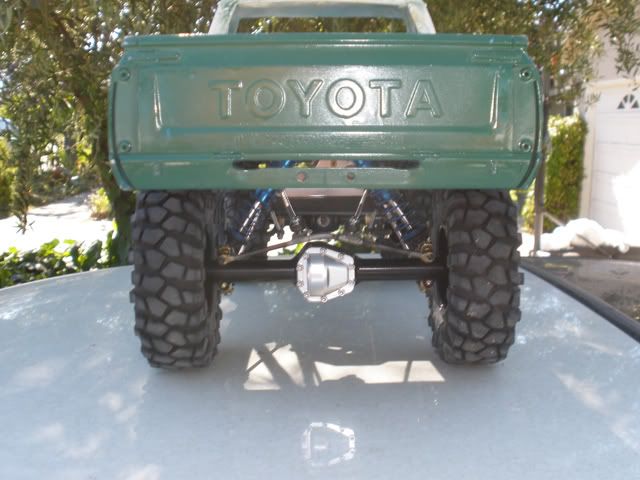 And thats about as far as I have gotten.. not bad for a weekends worth of work. Next I plan on mounting the body then making it a runner and working out any mechanical bugs before tearing the whole thing down and painting all the brackets, mounts and frame.. then on to the body work.. Last edited by dankycrawler; 08-22-2008 at 02:32 PM. |

|  |
| Sponsored Links | |
| | |
|
08-11-2008, 06:54 PM
| #2 |
| Quarry Creeper Join Date: Jan 2005 Location: GUAM
Posts: 479
|
looks good like the fab work
|
|
| |
|
08-11-2008, 07:01 PM
| #3 |
| I wanna be Dave Join Date: Apr 2007 Location: clarksburg
Posts: 2,009
|
Me want a toyota!!!!!!!!!!! Looks great keep those pics commin... |
|
| |
|
08-12-2008, 12:28 AM
| #4 |
| Pebble Pounder Join Date: Jul 2008 Location: Bournemouth
Posts: 128
|
Leave it old and fugly!!
|
|
| |
|
08-12-2008, 03:12 PM
| #5 | |
| Quarry Creeper Join Date: Feb 2006 Location: San Jose, Ca
Posts: 367
| Quote:
The only thing about making it look old n fugly is that it has such nice running gear underneath.. brand new bling bling axles.. not sure its gonna look right. and im not sure I want to give the brand new axles the weathering treatment. | |
|
| |
|
08-13-2008, 12:01 PM
| #6 |
| Quarry Creeper Join Date: Feb 2006 Location: San Jose, Ca
Posts: 367
|
Here is what the patch job looked like when I got the body. 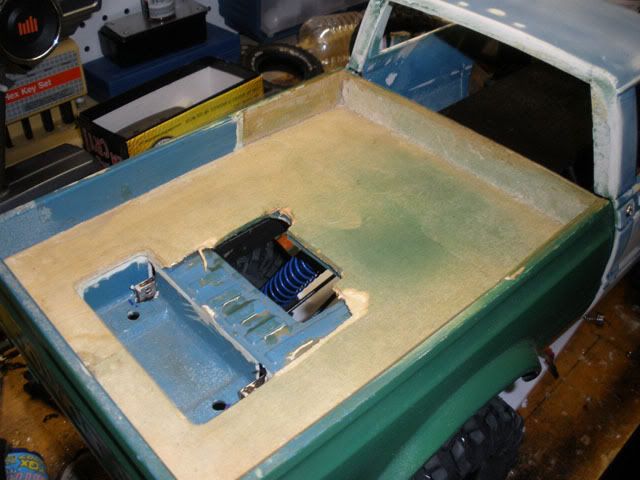 chop chop ... or uh thread thread ?? 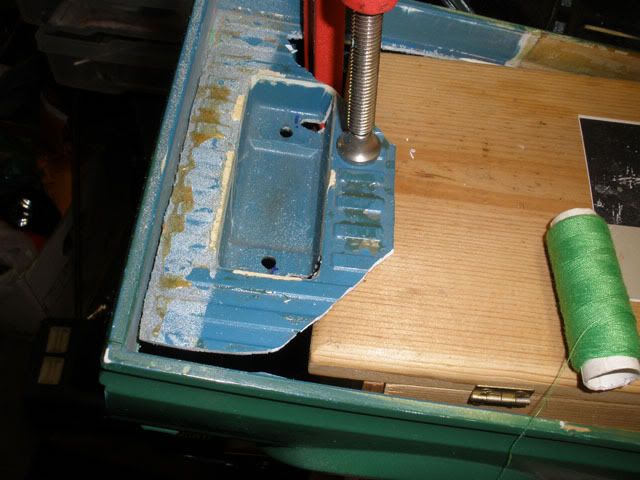 and the result 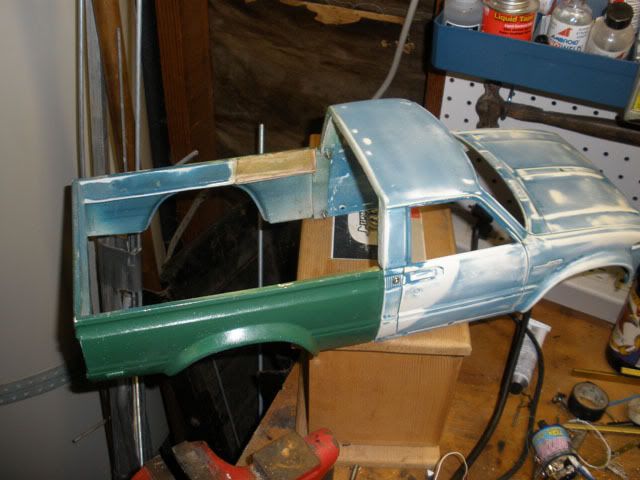 This is about as low as im gonna drop the new bed floor. Im not gonna go for the drop bed look like I said before but instead make it a closed compartment with a flat snug top that opens on hinges for easy access to the battery so I can hard mount the body to the chassis with bolts. 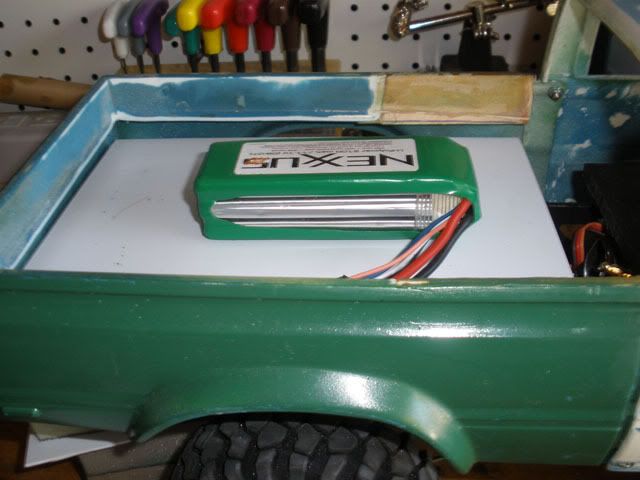 Next fix up some other damage and start stripping / paint. Any suggestions are appreciated. Last edited by dankycrawler; 08-13-2008 at 12:28 PM. |
|
| |
|
08-13-2008, 01:56 PM
| #7 |
| I wanna be Dave Join Date: Jun 2004 Location: Whales
Posts: 2,939
|
Very cool build. I dig the 4-link mounts  I have a set of the standard axles and can't wait to get them on my K2-5. I have a set of the standard axles and can't wait to get them on my K2-5. |
|
| |
|
08-13-2008, 03:09 PM
| #8 |
| RCC Addict Join Date: Dec 2007 Location: London
Posts: 1,950
|
This is sweet, those axles really do match up well with the Toyota Body. The sit really nice in the wheel arches when the suspension is compressed Nice job |
|
| |
|
08-13-2008, 07:45 PM
| #9 |
| RCC Addict Join Date: Mar 2007 Location: St. Louis (High Ridge)
Posts: 1,279
|
I'd almost leave the hood as is. maybe a little rust thrown in, otherwise it looks like good chalky sunfaded gritblasted desert paint
|
|
| |
|
08-14-2008, 11:59 AM
| #10 |
| Quarry Creeper Join Date: Feb 2006 Location: San Jose, Ca
Posts: 367
|
I think im leaning tawords giving the whole thing a coat of primer before giving a good weathering I filled in the hood and side holes and fixed the pillar on the cab but if I dont paint it its obvious where the holes used to be... it looks kinda wack. In fact I may even give it a decent paint job then rust n scratch it all up. I dont know .. decisions decisions.
|
|
| |
|
08-14-2008, 01:19 PM
| #11 |
| Quarry Creeper Join Date: Aug 2007 Location: Lumberton
Posts: 463
|
Looks good man!!!
|
|
| |
|
08-18-2008, 11:33 AM
| #12 |
| Quarry Creeper Join Date: Feb 2006 Location: San Jose, Ca
Posts: 367
|
More body work... 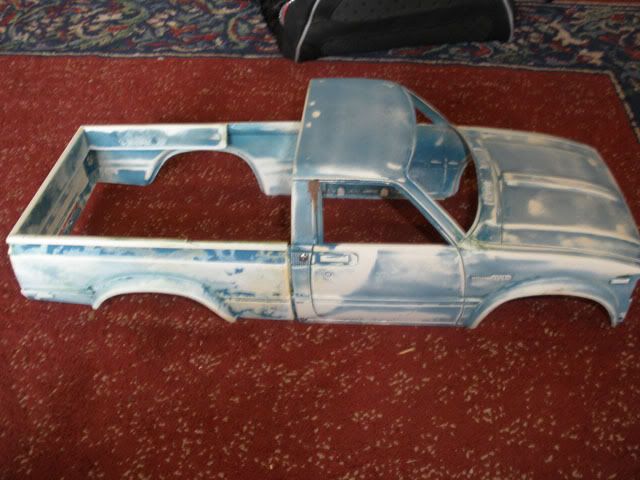 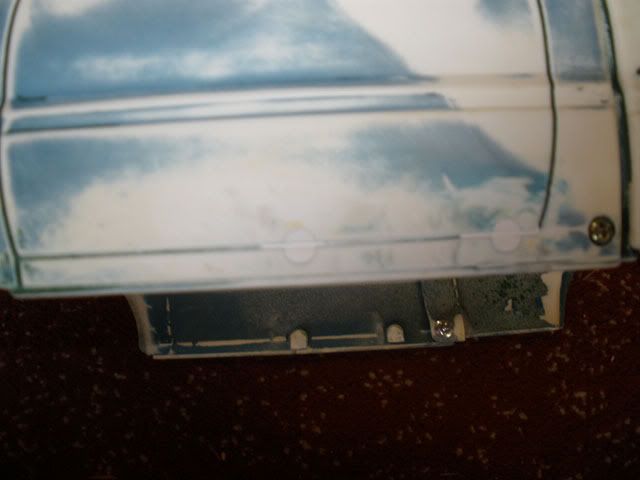 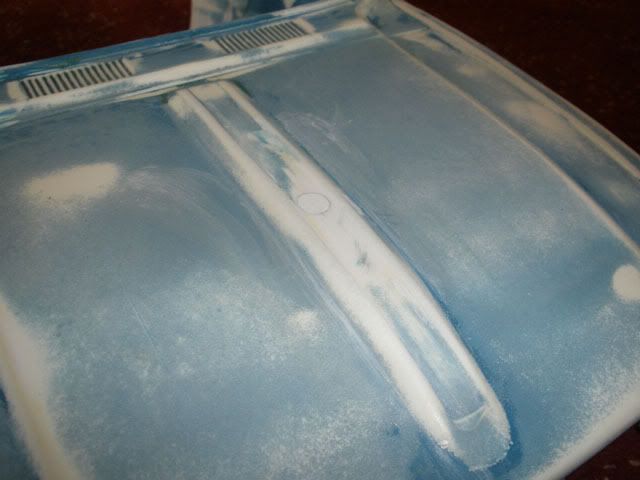 pretty much all 4 corners of the top of the cab were cracked or broken all the way through.. appears this body has had a tough life thats for sure 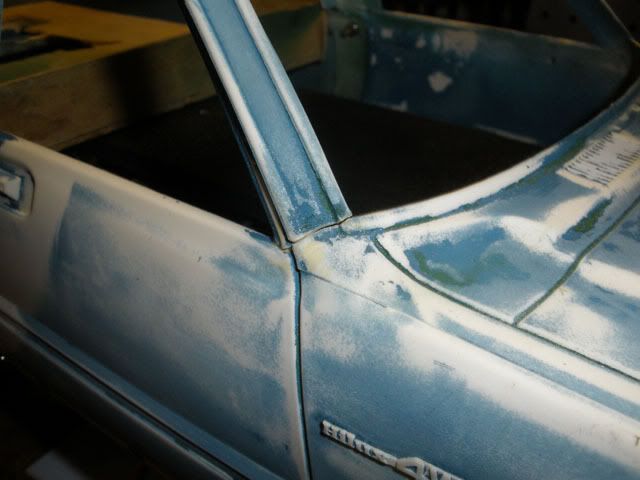 had to remove the rest of the wood that filled in the sides of the old patch job and replaced them with styrene 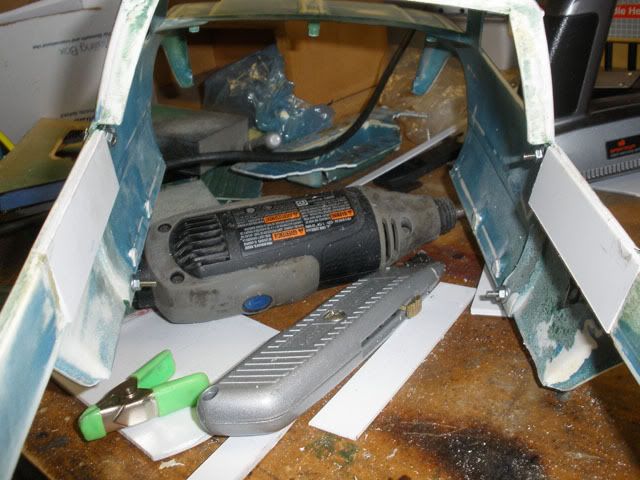 rear window in 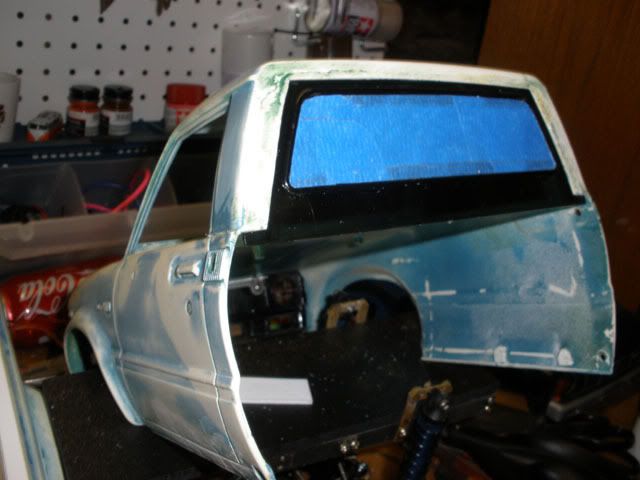 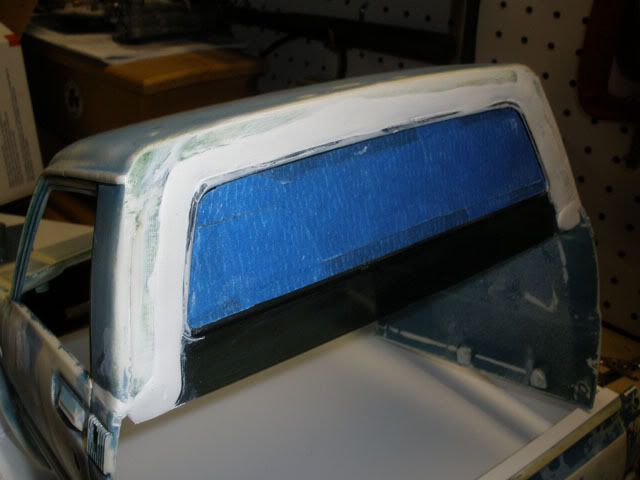 made a simple drop bed. I didnt add in fender wells cause I am going to cover the bed with a snug top and run all the electronics inside the bed, hopefully I can seal it pretty well my idea is to have the esc, receiver and battery sealed in the bed to keep it high n dry during muddin. 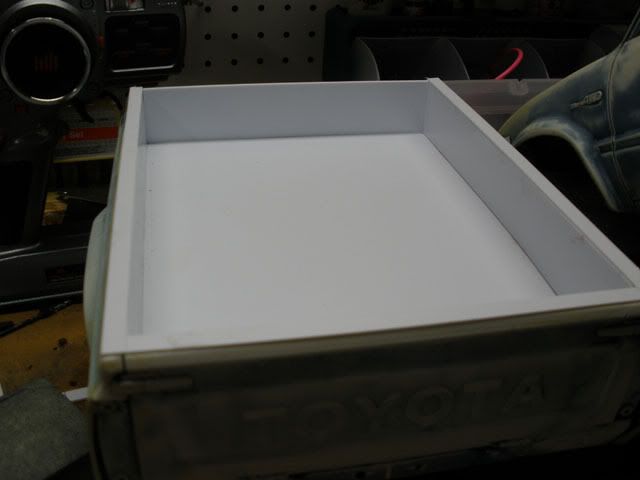 inital mock up of the cover 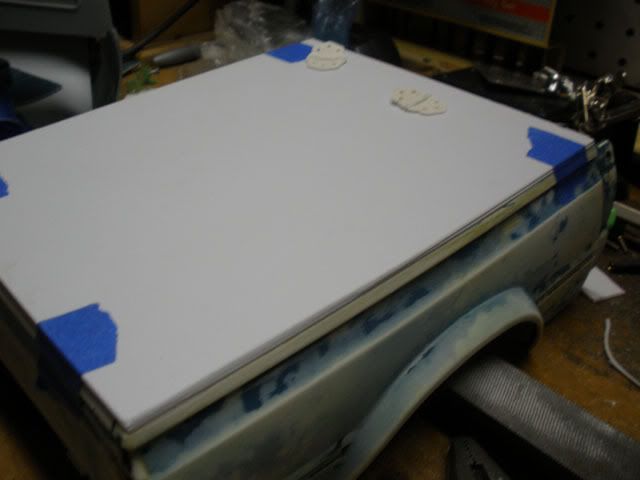 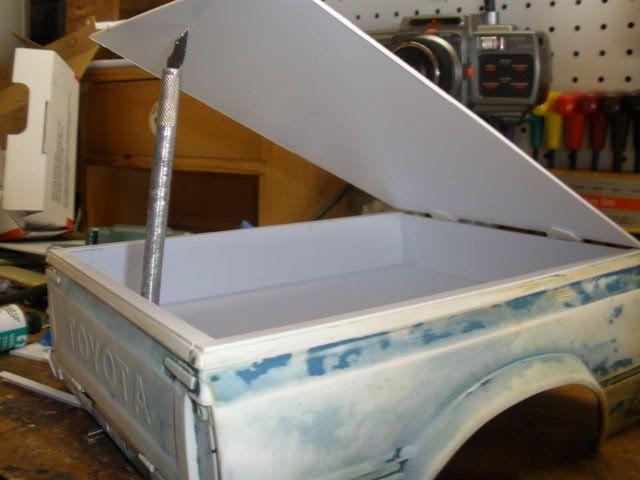 Im not going too nuts on the prep work for the body as I am shooting for the rusty old yota look. I got the primer and paint on Ill get some pics up soon. |
|
| |
|
08-18-2008, 12:07 PM
| #13 |
| I wanna be Dave Join Date: Aug 2007 Location: santa monica
Posts: 3,687
|
Looks great! I love those axles. I have to say I'm a bit jealous of them actually. I was trying to get a set but they kept going from "will be available soon" to "sold out" several times. that kinda pissed me off so I moved on... |
|
| |
|
08-18-2008, 06:48 PM
| #14 |
| Quarry Creeper Join Date: Feb 2006 Location: San Jose, Ca
Posts: 367
|
Kinda jumped right into paint without thinking about what color to go with.. after I had already started I kinda wish I had chosen something like white instead. but whatever it looks ok. 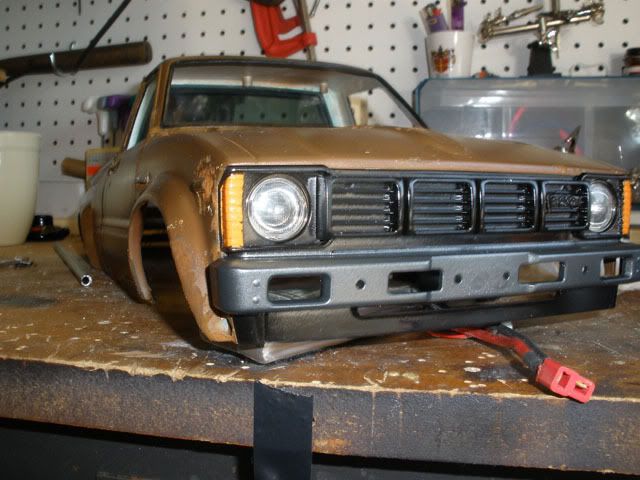 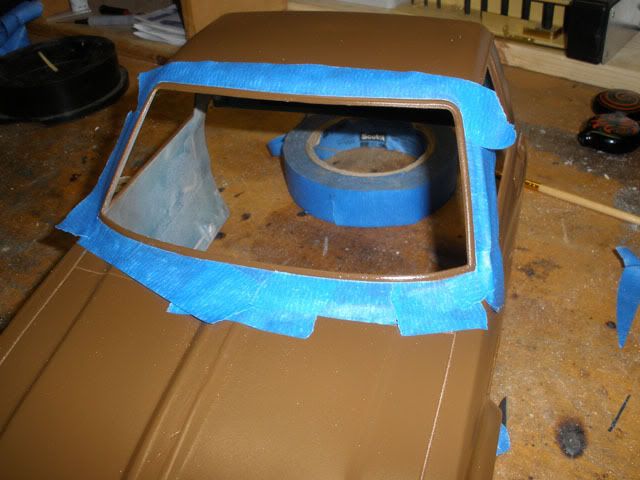 things starting to get a little rusty  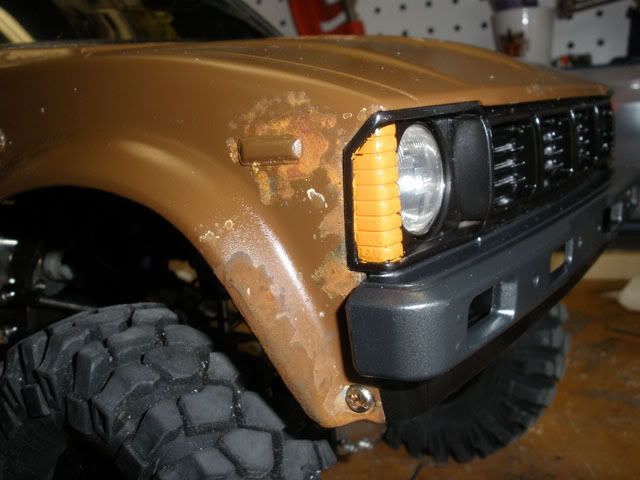 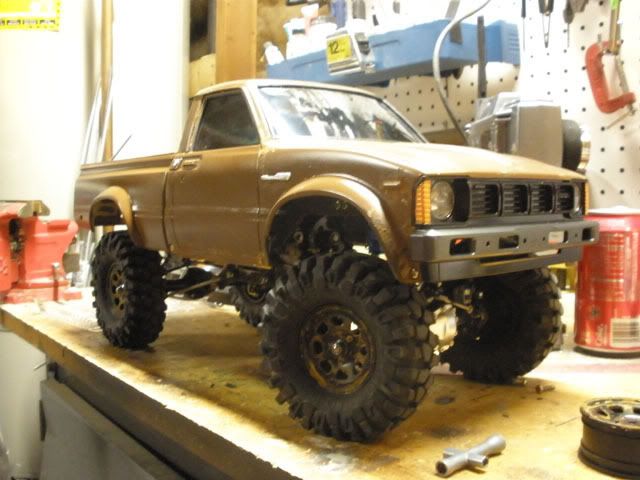 Im trying to decide weather or not to go with the original plan and stuff the electronics in the bed under the snug top. I think It looks a little better without it but the cover isnt that bad i guess ?? .. I think I should repaint it black instead of having it color matched. a little too much brown maybe? opinions? 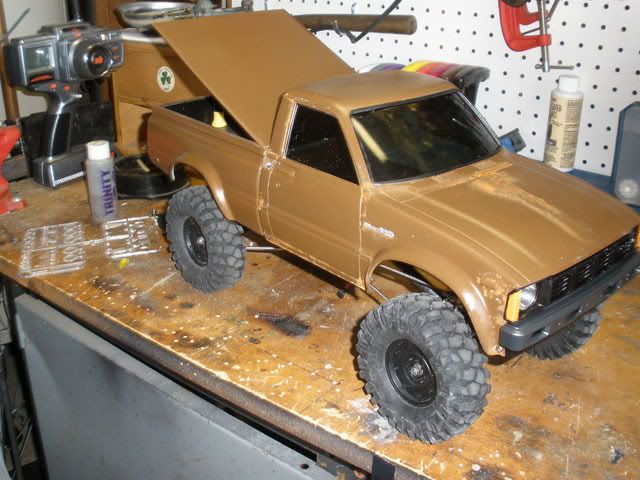 |
|
| |
|
08-19-2008, 10:51 AM
| #15 |
| Quarry Creeper Join Date: Feb 2006 Location: San Jose, Ca
Posts: 367
|
Heres a few more shots of it with the body resting.. im still undecided about either mounting the body with screws and using the cover to hold the electronics or mount the stuff under the cab and use good ol velcro and leave the cover off the bed. I have since weathered the body a bit more and and repainted the front marker lights white. although even if its not correct I kinda liked them orange.  I swapped out the hummer wheels for some stock car wheels that I rusted up a bit. the offset is higher on the new wheels so it tucks them even further under the wheel wells. not sure if its getting too narrow? 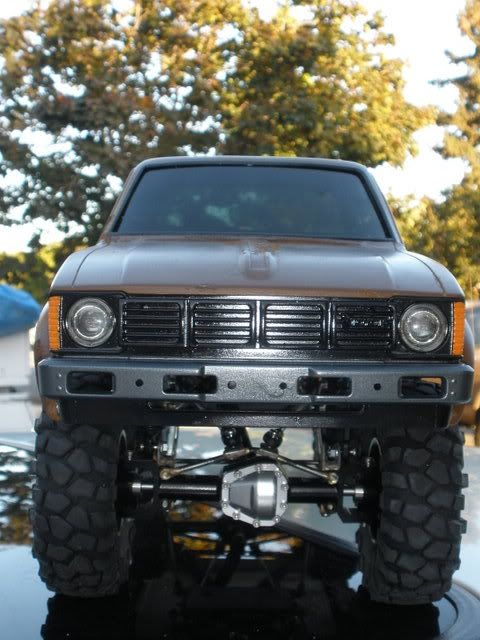 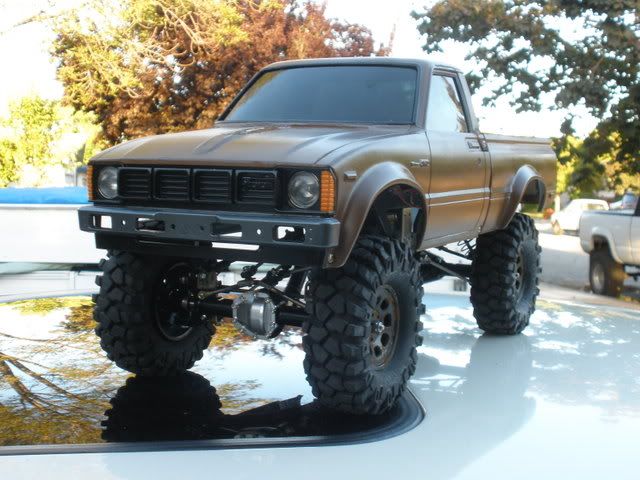 I am running rc10t springs right now I think I am going to pickup a set of rc10 buggy rear or maybe even front springs to see how I like it a bit lower than it sits now. 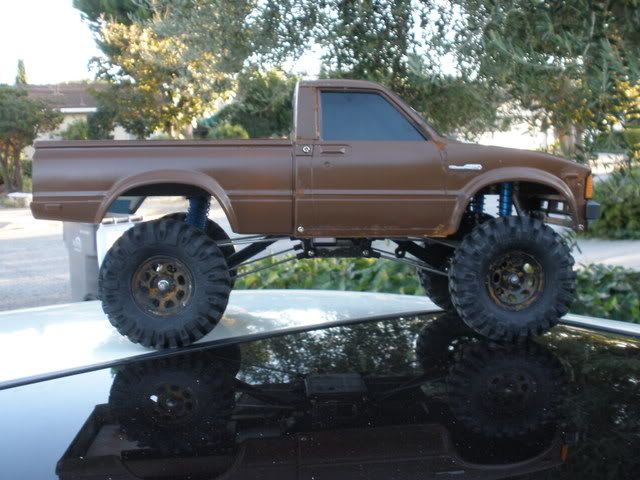 comments / sugestions appreciated. |
|
| |
|
08-19-2008, 04:41 PM
| #16 |
| Pebble Pounder Join Date: Jul 2008 Location: Bournemouth
Posts: 128
|
Looks cool mate- ditch the snug top though I recon. And maybe break up the brown with some retro decals? Any chance of a how to on the rust?! when you´ve done the details I recon it´ll be a really cool truck |
|
| |
|
08-19-2008, 06:23 PM
| #17 |
| Quarry Creeper Join Date: Feb 2006 Location: San Jose, Ca
Posts: 367
|
yeah im leaning towards not using the top. good idea with some decals.. its in need of something. The rust is .. well its really rust! I got this stuff from the craft store called sophisticated finishes. its a two part paint basically first you paint on some high iron content paint. then it has a ruster a watery solution of some kind that you paint on over it. let it sit for a few hours and its rusty.
|
|
| |
|
08-19-2008, 06:36 PM
| #18 |
| Adilynsdad too!   Join Date: May 2004 Location: G ville
Posts: 8,844
|
Nice looking rig... I'd give my left testi for some of those axles! |
|
| |
|
08-20-2008, 10:58 AM
| #19 |
| Quarry Creeper Join Date: Feb 2006 Location: San Jose, Ca
Posts: 367
|
I replaced the rc10t rear springs with some fronts to lower the yota a bit. Now I need to adjust the links again. once I get the body and suspension set where I want it I am going to sleeve them with aluminum tubing. 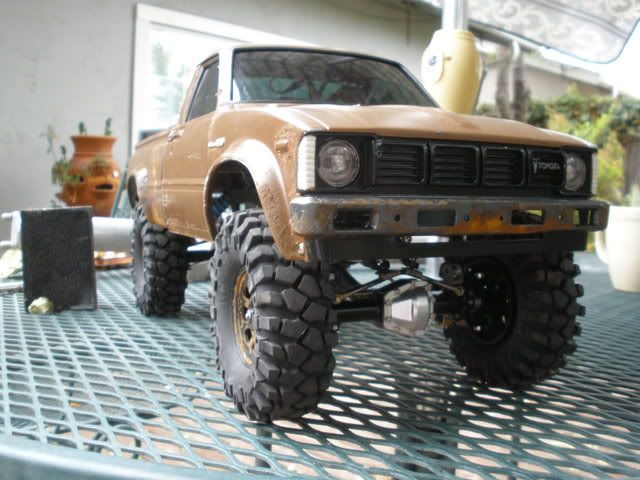 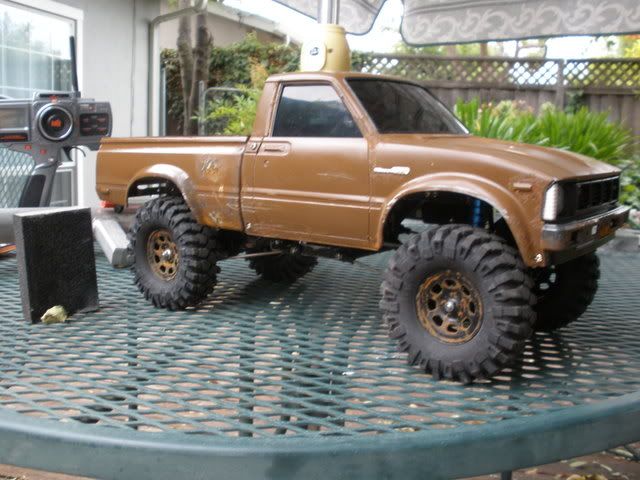 Dont have the reverse dig servo in yet but I locked it in 4wd by hand and did a little testing in the backyard and was really impressed with the way it performed. its got way more power than it needs, the only thing working against it is its narrow track width although its definetly more sure footed than I though it was going to be. some (prob too many 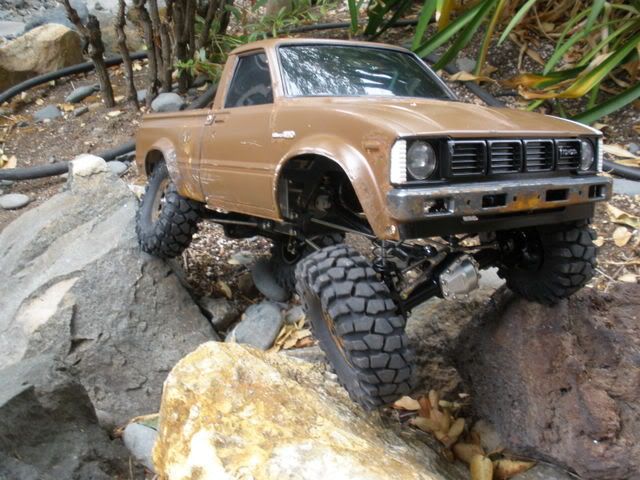 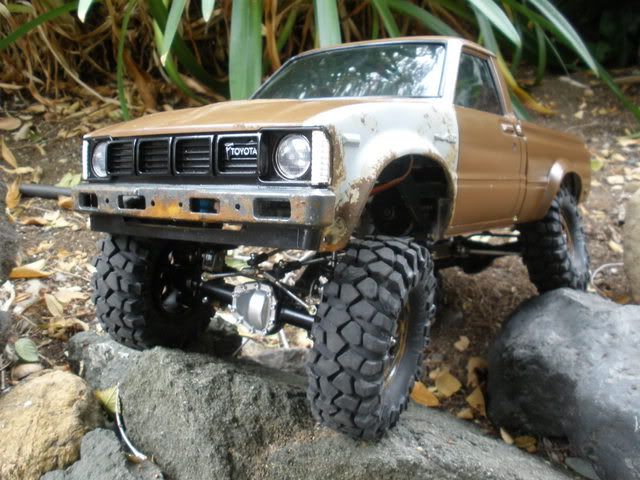 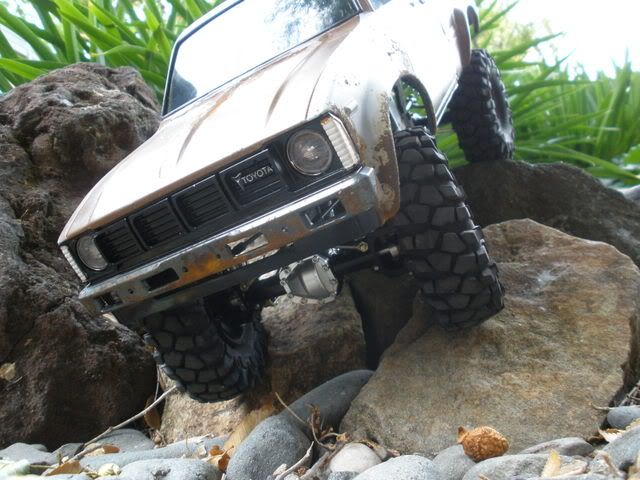 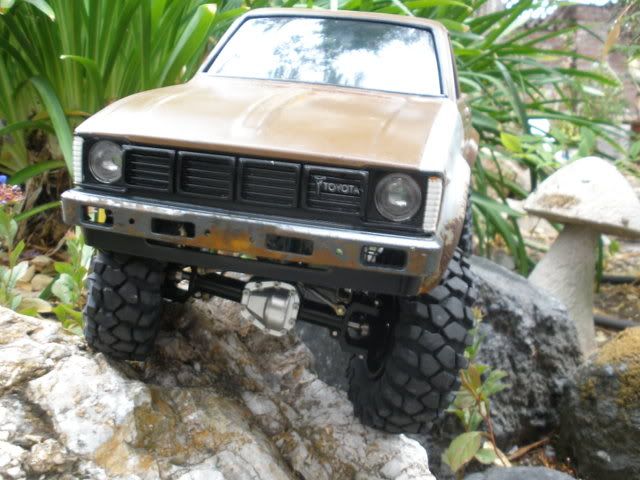 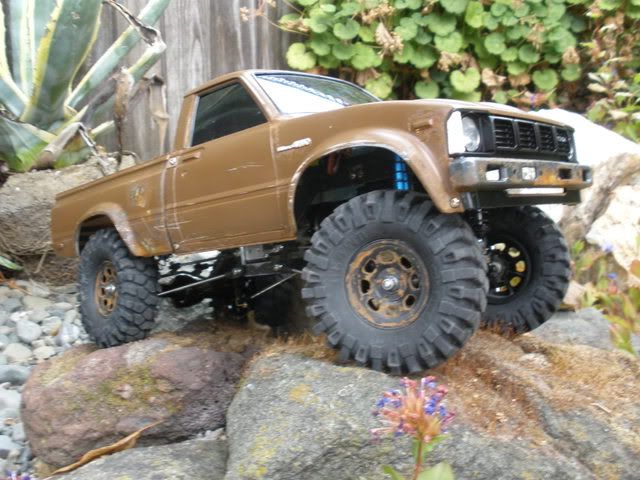 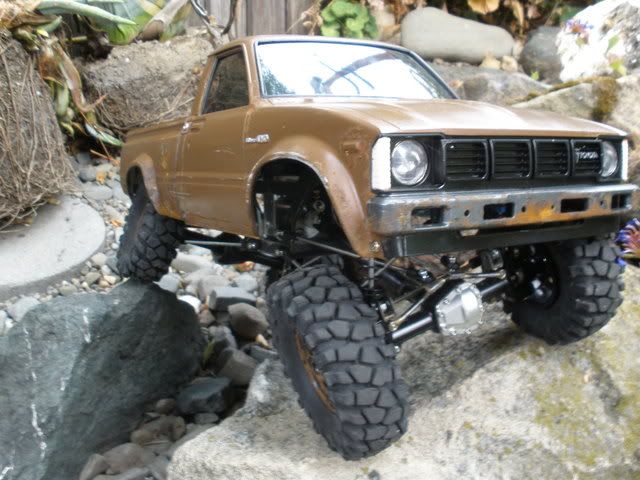 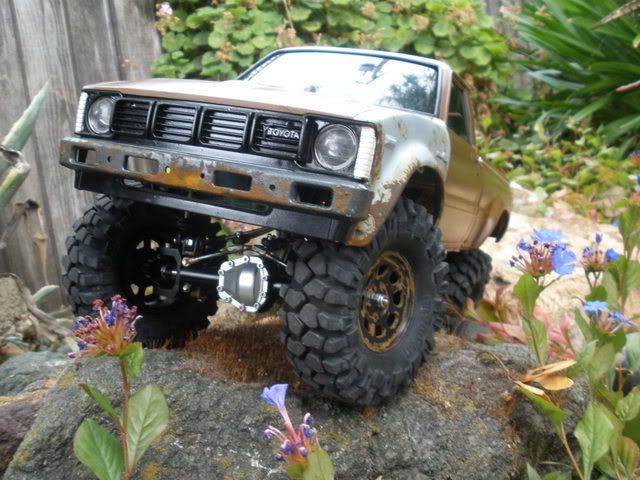 Now im just working out the bugs making sure I dont get any tire rub that kinda stuff. Once Im satisfied with the way it drives im going to tear it down and paint the suspension parts I made, sleeve the links and finish detailing the body.... I cant wait to finish this one up. parts are piling up for my next build and im getting anxious. |
|
| |
|
08-20-2008, 11:29 AM
| #20 |
| I wanna be Dave Join Date: Aug 2007 Location: santa monica
Posts: 3,687
|
looks great. if it were mine I would do the following though: -I think its a tad too narrow now, especially with the wide fenders on the yota body. I would either pull the wheels back out or trim the fenders to look more original. If the fenders didnt stick out so far it would be better I think. -the rust would have shown up better on a lighter truck I think. I like the rust effect. I might do that to the brat I'm building. not sure. The rust makes me think it should have more mismatched panels. Like the entire bed, lol. I would paint the bed in a different color, with either the bed or the cab having graphics, but not both but also leaving the tailgate brown. -I think it looks better without the snugtop only because the bed is black. I think if the snugtom were black it would look tons better. -If you're going to beat on it like I do I'd run screws instead of velcro for body mounting also. great build! |
|
| |
|
| |


 Linear Mode


