| |
| |||||||
 |
| | LinkBack | Thread Tools | Display Modes |
 06-26-2011, 12:57 PM
| #1 |
| I wanna be Dave Join Date: May 2007 Location: Fairfield ME
Posts: 3,886
|
Quite a while back I traded a LMC for a Hilux Highlift. The Lux was stock except for an r2 and rock crushers from rc4wd and a set of LMC wheels. I drove it a couple times and got bored driving a truck that didn't flex at all. I built this frame last year and then got busy with life and it got slid to the back burner. I have had more time lately and have been picking away at it. I figured if I started a build thread it might help motivate me to finish it.  When I built it last year I was still building it around stock leafs. When I started working on it again I decided to build my own packs so that it will actually flex and I can enjoy driving it when I'm done. My 1:1 '84 has rear leafs up front (RUFs) and 63" chevy leafs in the back. I built leafs out of weed eater recoil spring that match the scale length of the setup I am running on the 1:1. in these first pictures I have the RUFs on it but not the new 63s for the back yet. I have done a little bit of styrene work to the cab and grill/radiator support but have a long way to go. this is the first time I have ever used styrene so take it easy on me.  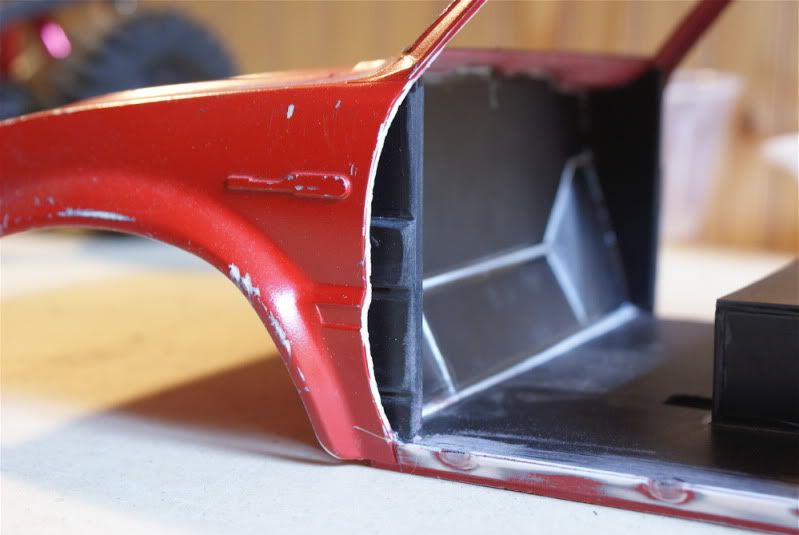  The body bolts onto the frame in the same locations as a 1:1 with rubber body mounts. The frame has 90% of the bends that a real one does and even sucks in at the front. I have some holes to weld shut from the old leaf setup though.  Here are the front shocks. I am really trying to build anything I'm capable of and not just buying crap to bolt together. I pulled some old AX10 kit shock shafts out of the parts box. I then replaced the pistons with trimmed down Tamiya o-rings. Then I made my big purchase, a $1.29 piece of brass tube (got all 4 bodies out of the one piece). I pressed a nylon bushing in one end to capture the shock shaft and pressed a Tamiya rod end in the other end. I think they came out pretty well. I think I actually like them better than whats commercially available. I think they will look like mini Bilsteins when they are painted.  I only have the highlift axles to work with for now so I will do what I can. I broke out the dremel and ended up here. Only the front is done for now. I think after they are sprayed black they will look ok. I'm hoping the paint hides the screws a little.  |

|  |
| Sponsored Links | |
| | |
|
06-27-2011, 06:11 AM
| #2 |
| I wanna be Dave Join Date: Dec 2006 Location: Goin broke losing weight.....
Posts: 2,262
|
Shock idea is sweet. Keep at it. Styrene looks good so far
|
|
| |
|
06-27-2011, 10:11 AM
| #3 |
| Rock Stacker Join Date: Dec 2006 Location: Logan
Posts: 81
|
looking good!
|
|
| |
|
06-27-2011, 03:12 PM
| #4 |
| ~ Got PROPANE ? ~   Join Date: Feb 2009 Location: East-Central
Posts: 1,166
| GREAT Looking rig so far. I really like your Chassis and I LOVE those shocks you made...makes me want to build about 10 sets of my own !  As for your Hilift axles....a trick that I've done in the past.....is to use Shoe Goo Glue...(or other similar...flexible...clear drying glues)......to fill the screw heads and the holes....and THEN paint over them. (You may have to glue them a few times because the glues might shrink a bit during drying) That way...you can dig the glue back out...if you need to take the axles apart for any reason......and it will help them to look a bit smoother. Last edited by BiG_DaWgZ; 06-27-2011 at 03:17 PM. |
|
| |
|
06-27-2011, 06:08 PM
| #5 | |||
| I wanna be Dave Join Date: May 2007 Location: Fairfield ME
Posts: 3,886
| Quote:
Quote:
Quote:
| |||
|
| |
|
| |


 Linear Mode


