| |||||||
Loading
 |
| | LinkBack | Thread Tools | Display Modes |
| |||||||
 |
| | LinkBack | Thread Tools | Display Modes |
| | #1 |
| Rock Crawler Join Date: Jan 2013 Location: Australia
Posts: 541
|
Hi All from Australia. H2Micr0 here. As a young fella I always wanted a radio controlled car, but life at that time didn't allow for luxuries of that sort. Now I am on the more mature side of life I am in a much better position to indulge. I discovered RC Rock Crawling on You Tube earlier this year and was enthralled by what these scale RC trucks could do. So a few months later I purchased an RTR SCX10 Honcho. Out of the box was a lot of fun and quite capable, as you all know. 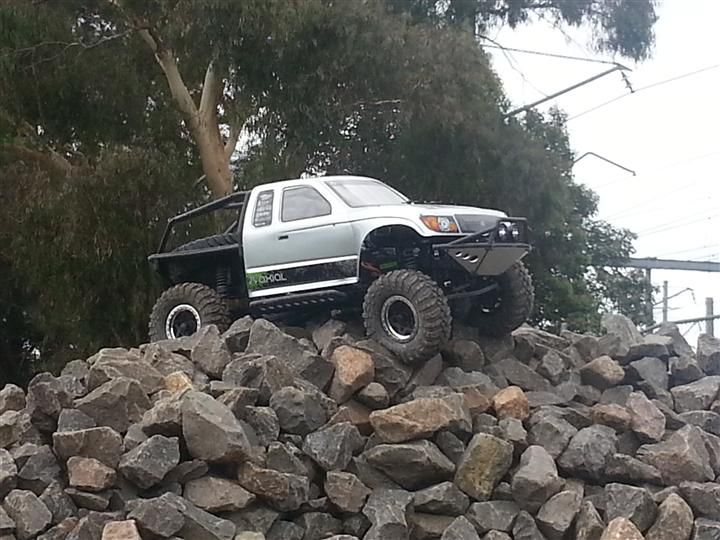 One week after purchase I 'upgraded' to some cheap ebay plastic beadlocks, and a set of Pit Bull Rock Beasts. I also discovered how easy the factory plastic four links, and steering, bend under load, and using some 4mm all-thread, aluminium tubing and RC4WD ball ends, made my own links. I also removed some of the Axial stickers. 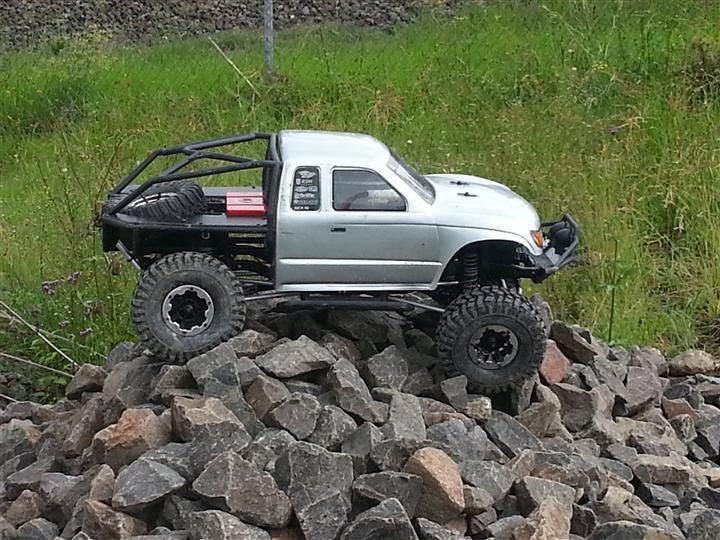 The plastic beadlock rims were really poor quality and the screws were stripping easily, so I ordered some cheap chinese alloy wheels from Ebay. I also purchased some cheap Topcad 110mm shocks from a local seller. I attended my first comp and after the first run I heeded advice given and quickly removed the factory rock sliders and cut down the Honcho front bar. Second run went much better and the bug had bitten. I was lucky enough to have been given a used set of the R1 Gmade Portal differentials a new mate after I helped him out with a ride and a fix on his rig at the comp. I was able to mock them up before I headed to the USA for 2 months. 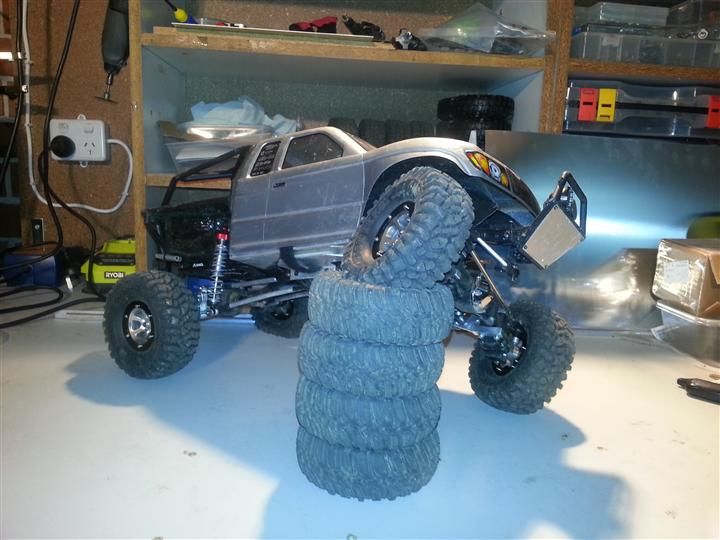 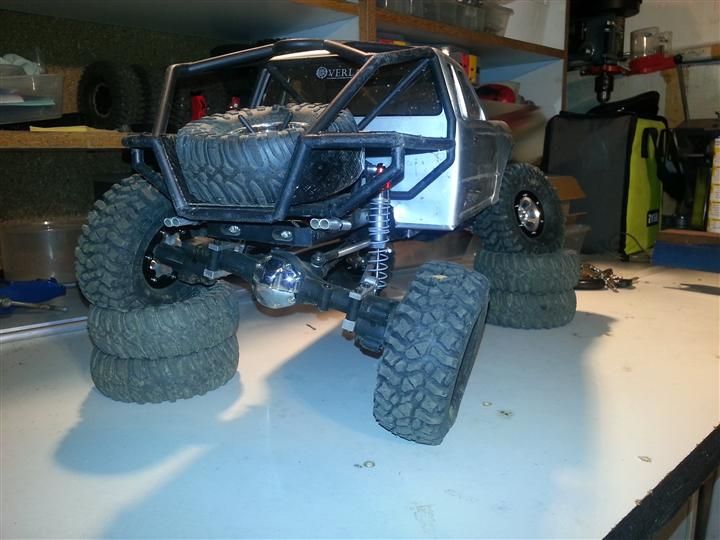 Using the Topcad shocks, with the SCX10 springs I was quite surprised at the articulation I could achieve. After much research I went ahead and purchased some new R1 Gmade differentials and the alloy upgrade parts to go with them, including the 8 degree castor hubs and CVD front axles. I also ordered some Junfac drive shafts. Arriving back from the USA on May 18 I attended the May 19 comp. I ran the R1 differentials my mate had given me, as I didn't have time to assemble the new ones before the comp, and unfortunately, my Axial 27T motor went up in smoke. Luckily I had acquired a cheap spare Novak 35T motor, along with some other goodies, while in the USA, and after I got home was able to get the truck back up and running. During the comp I discovered I REALLY needed to improve the steering, and the Pitbull's stock foams were useless if you wanted to turn. With the Nationals fast approaching I got to work. I customised the Honcho body, built a rear tray to suit, adjusted the wheel base and built new links for the suspension. I was able to improve the turning circle quite a bit, and sorted the Pitbull's sad turning circle by inserting some cut down tire sides and stock base inner foams. I had previously fabbed up some battery trays, and am running two 3300mah 2s lipos in parallel. I still have a lot of work to do to tidy up the wiring etc, but with plans for the future of the this truck, it can wait. I was able to pick up some sweet Mayhem Engineering Crazy 8 alloy wheels, with Putbull tires off TCP for a good price and they finish the whole lot off nicely. Enough chatter, some pics. 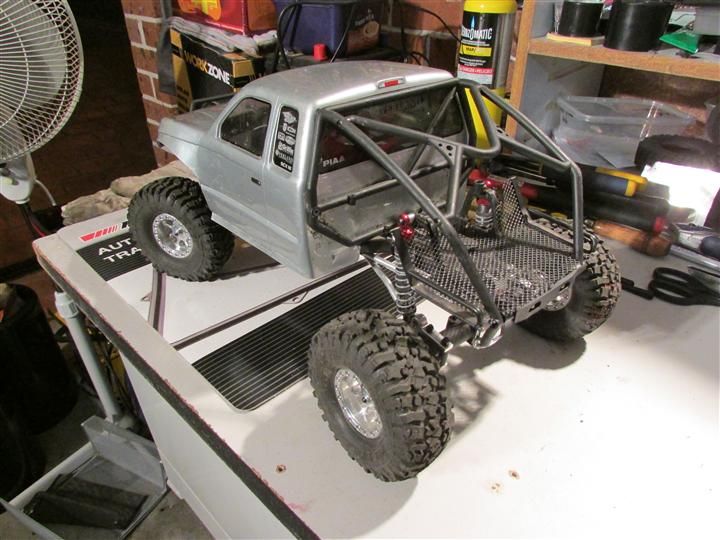 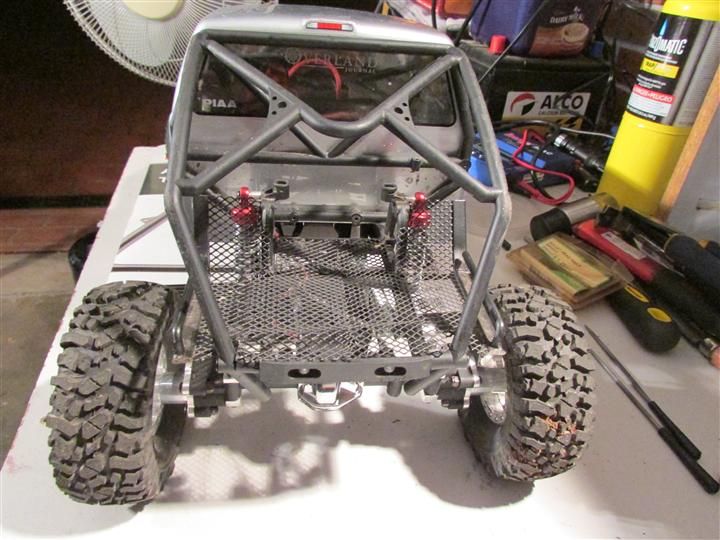 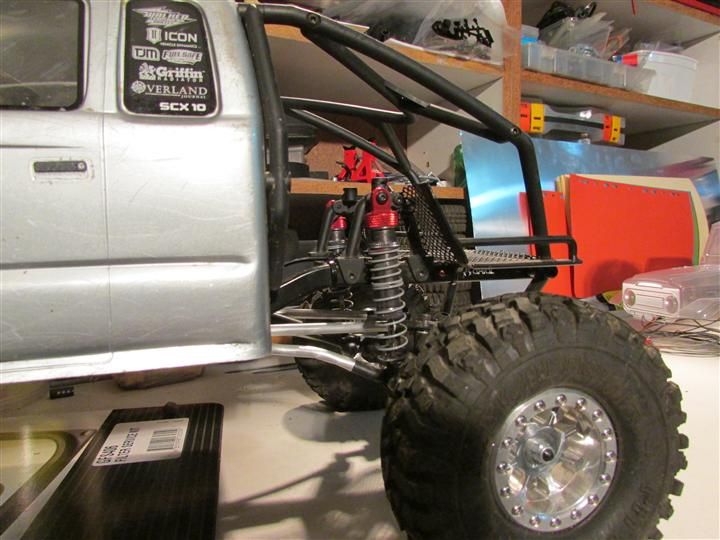 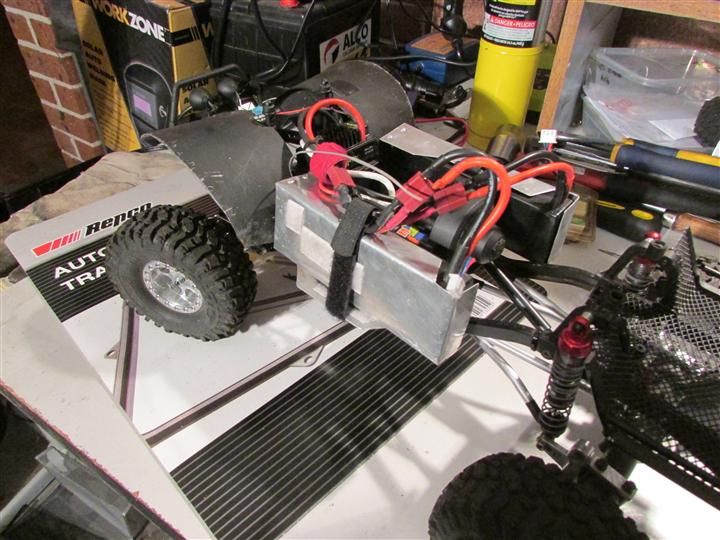 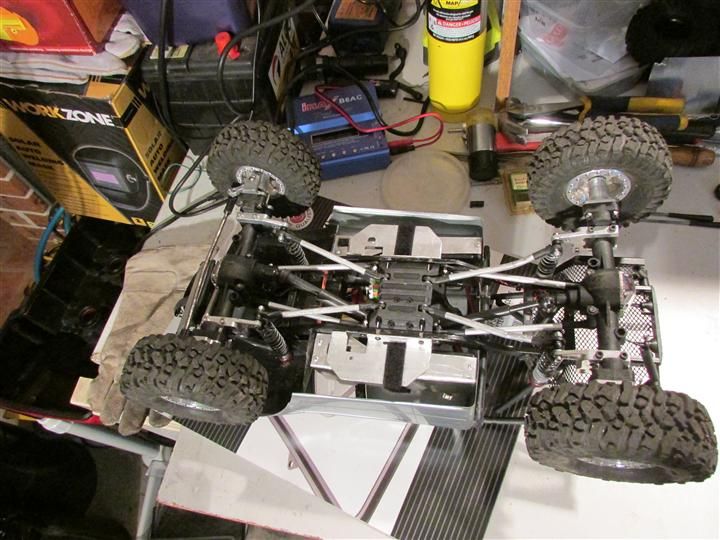 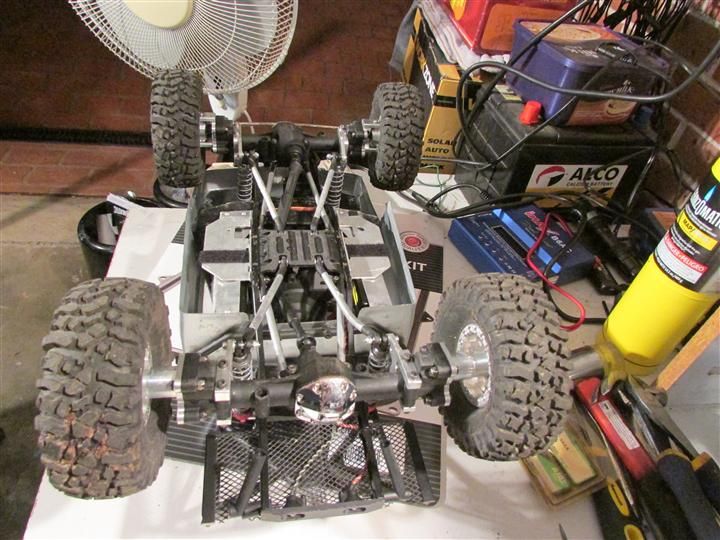 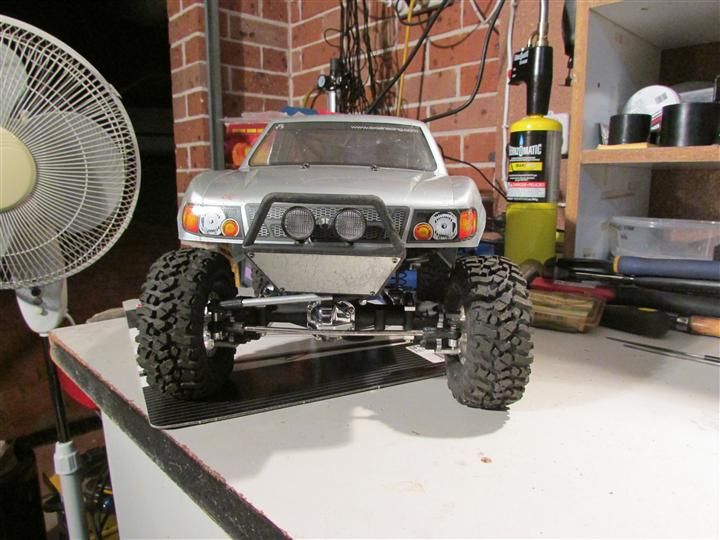 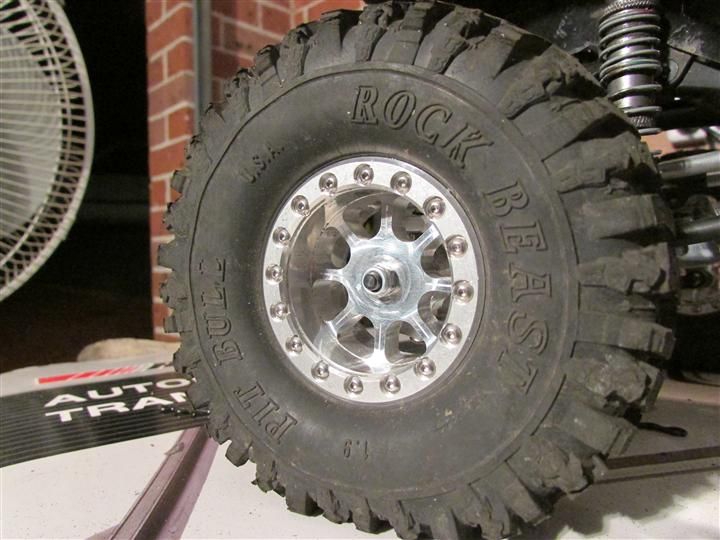 Future plans include a complete rebody with this. 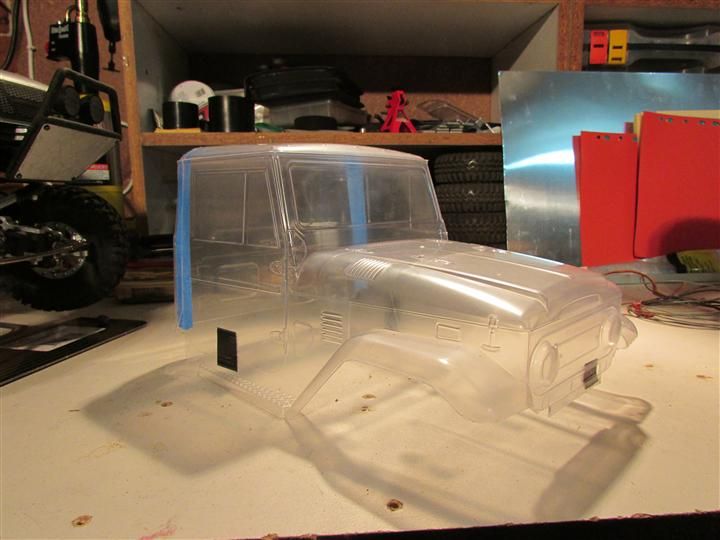 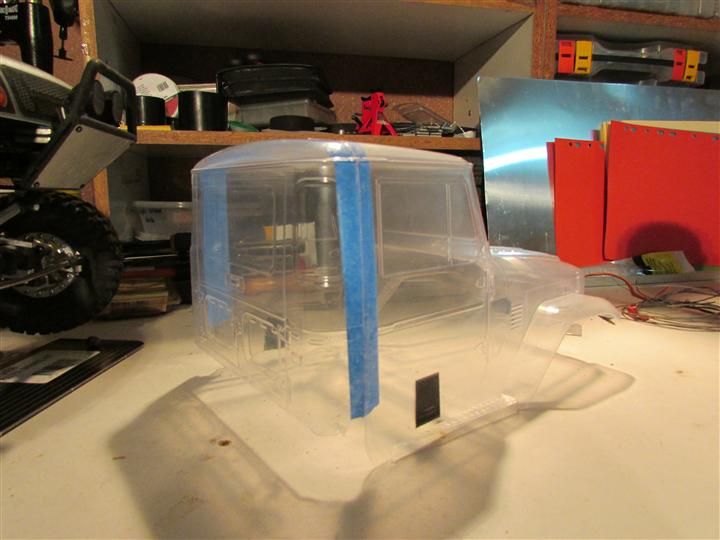 I have many questions on a number of different topics, which I hope all you very knowledgeable fellow enthusiasts will be able to help me with. Please feel free to comment and offer suggestions and advice. Here are a couple of pics with the Honcho in Trail Run mode at Lake Parramatta on a shake down run. 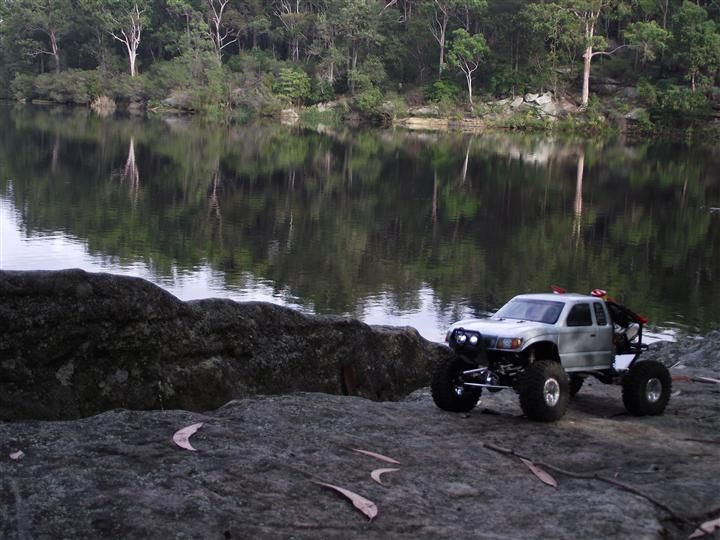 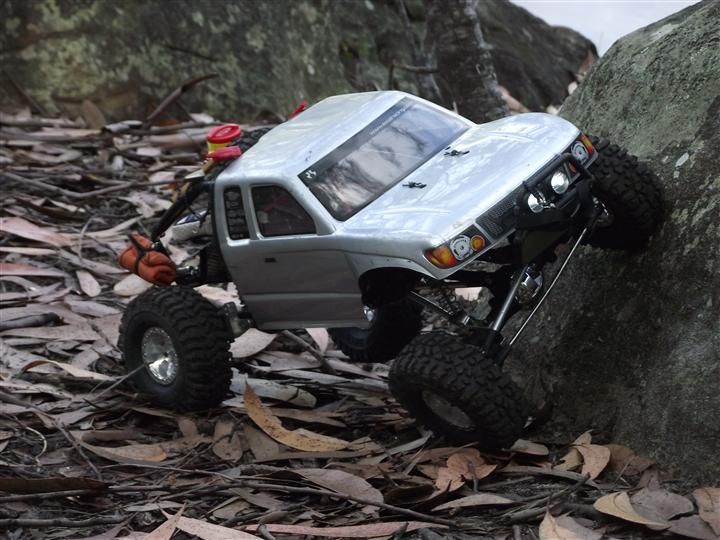 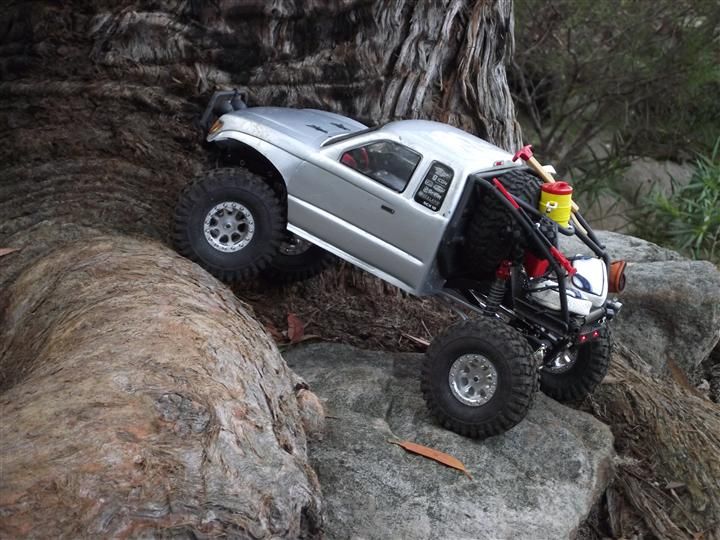 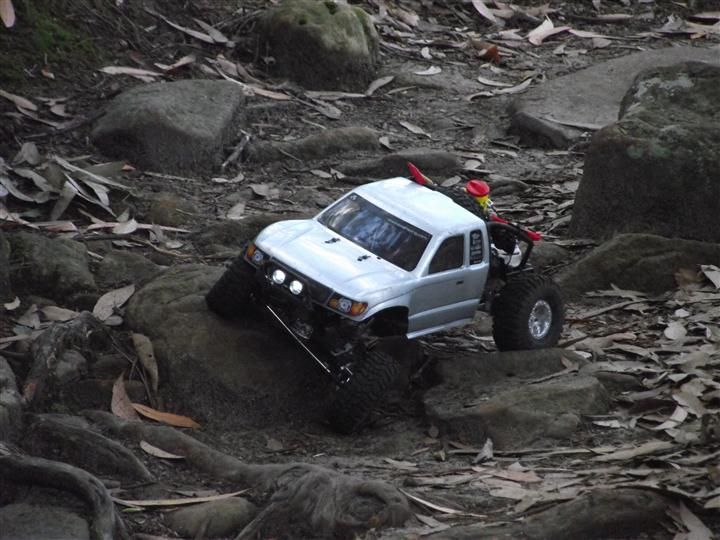 Cheers H2Micr0 |
| |  |
| Sponsored Links | |
| | #2 |
| Rock Crawler Join Date: Jan 2013 Location: Australia
Posts: 541
|
After spending some $$$ today on a Holmes Hobbies 35t Torquemaster Expert motor, a BR-XL Waterproof ESC and a Castle Creations BEC I went home from work all enthused to do a bit fabrication. I have made good progress on mounting the front of the FJ40 Cab. I settled on a theme for the rig. I have decided to make it look like it was an old farm truck that has been fixed up for some off road fun. In keeping with this I started building a rear tray. I am about half way done and am happy with what I have so far. Enough chatter, some pics. I have built a temporary flat bar, that is actually legal for Scale 2. 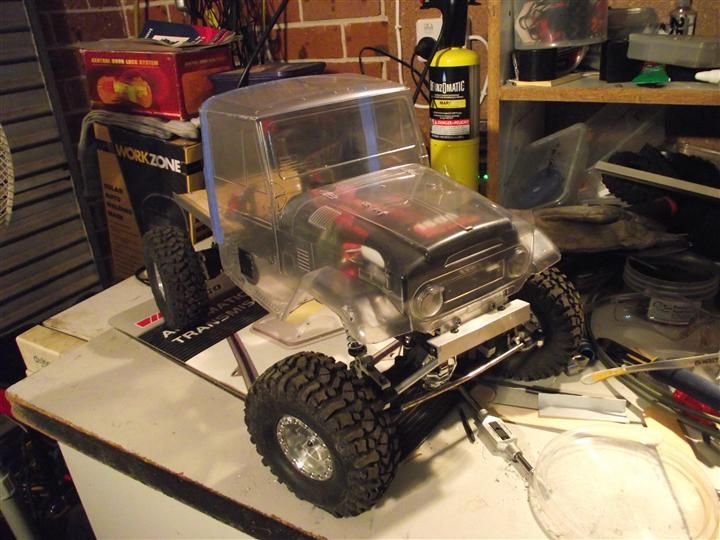 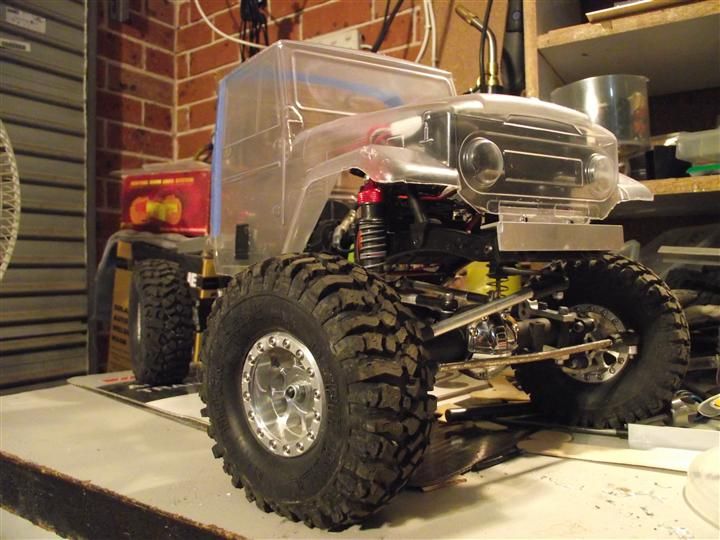 Here you can see the new battery location. 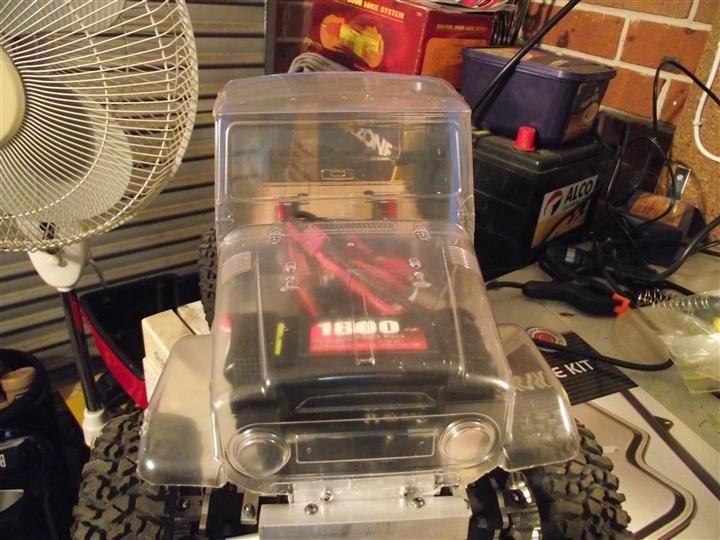 The rear tray was built using aluminium right angle and flat bar from bunnings, and some large 'paddle pop' type sticks from a local craft shop. The really good thing is that it weighs very little. There is still more to come. 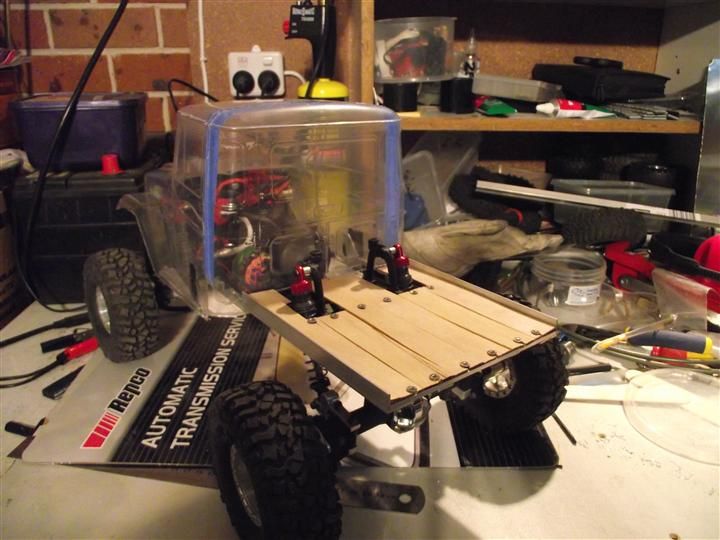 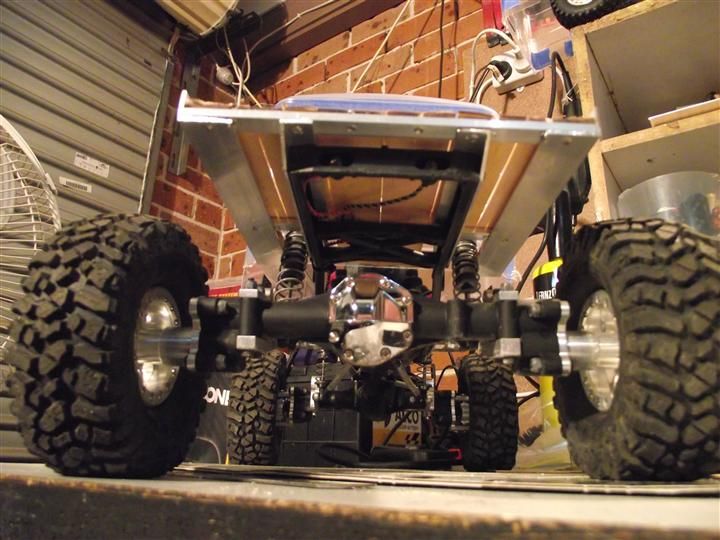 The obligatory flex shot. 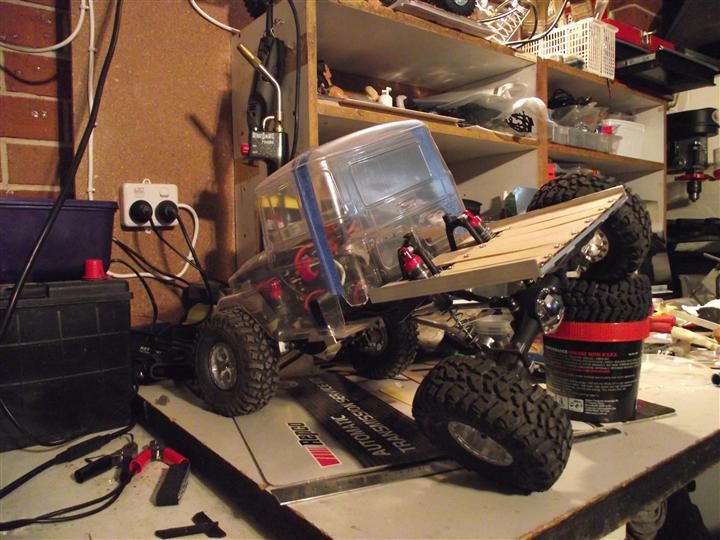 And these turned up today. 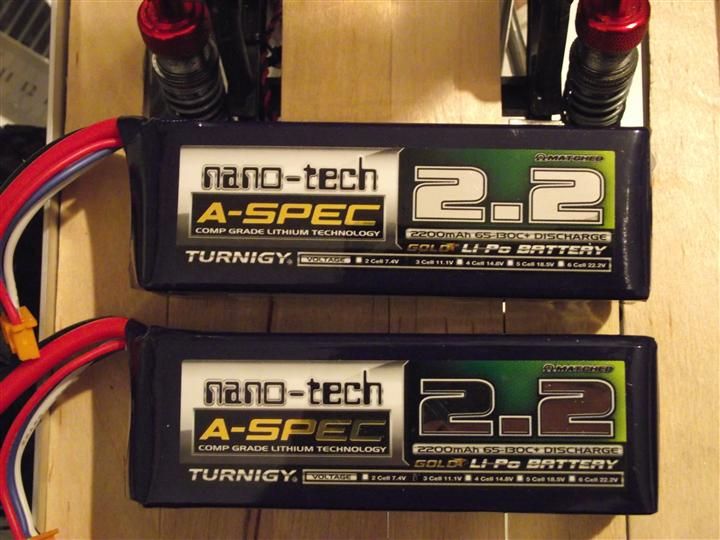 I am led to believe that the higher the C rating the better, so I got some 3s 2200mah 65C lipos. Looking forward to trying these out after the BEC gets here. Cheers H2Micr0 |
| |  |
| | #3 |
| Rock Crawler Join Date: Jan 2013 Location: Australia
Posts: 541
|
Last night I finished mounting the body. In the end I am mounting it with stainless screws into aluminium that has been drilled and tapped for the M3 thread. It will take a bit longer to change a battery, but looks good and is secure. I also started gluing the cab back onto the shell using strips of lexan and Shoe Glue. Seems to be working so far. The cab back has no structural mounting so shouldn't have any forces acting on the join. And with the new roll bar in place the rear tray is mostly finished. Just some cosmetic detail touches to complete it. Photos. Side Mounts. 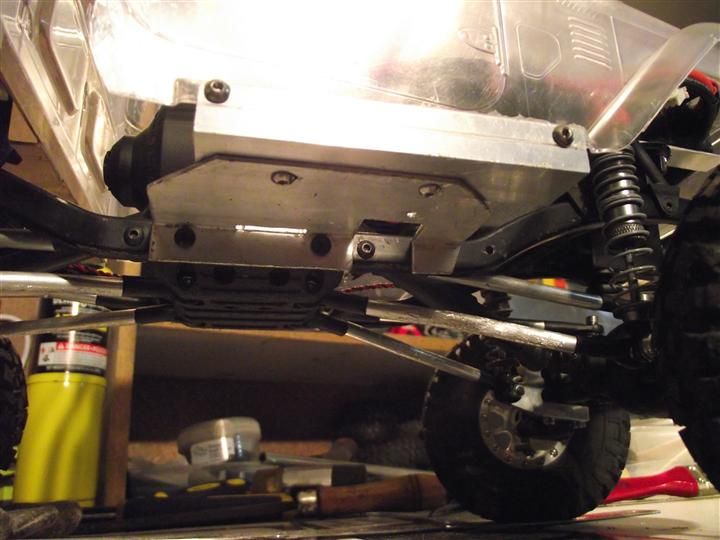 Completed Tray and Roll Bar. 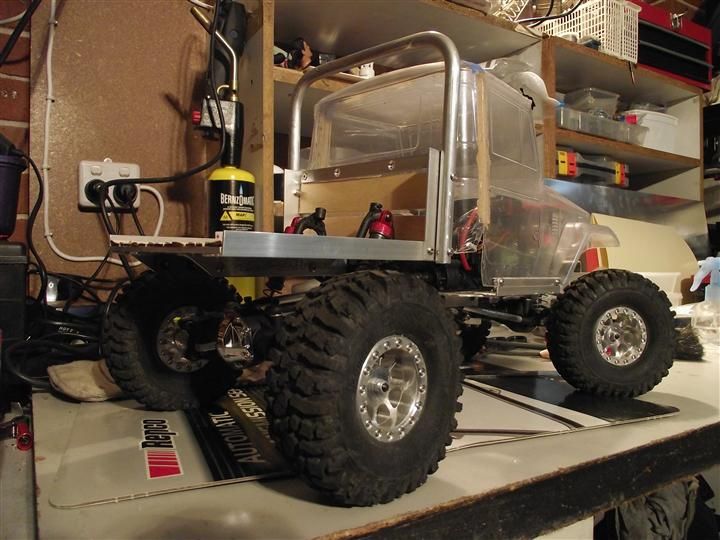 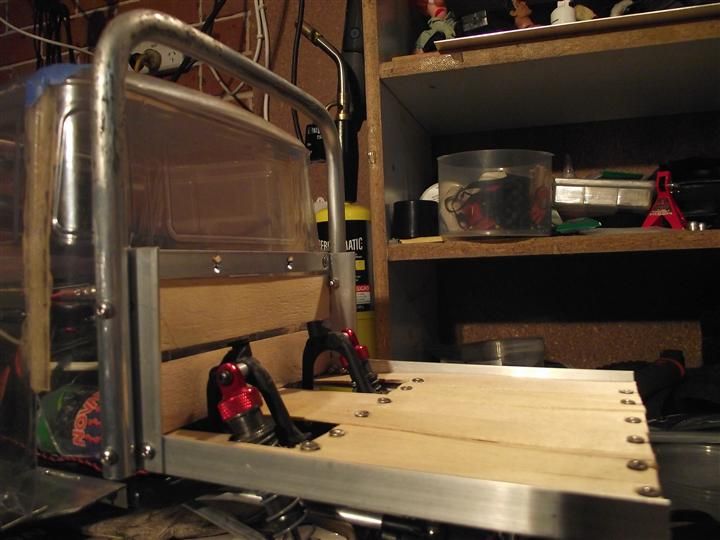 Shows bent rear links and shock hoop mounting in it's forward position. 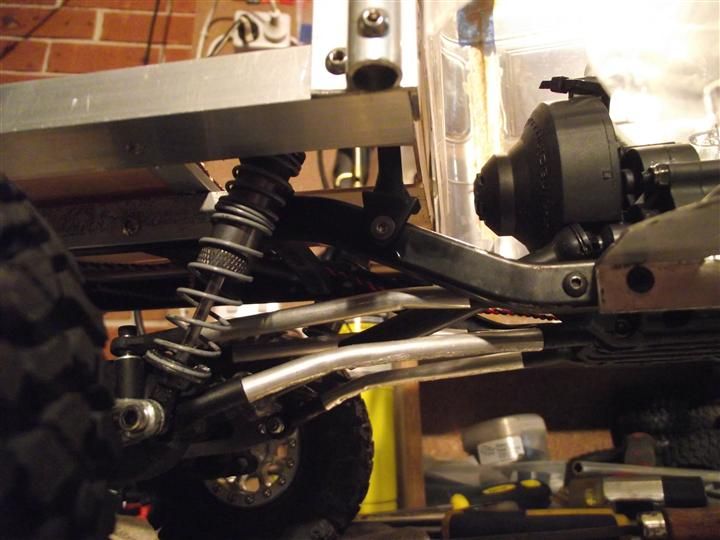 Overall View 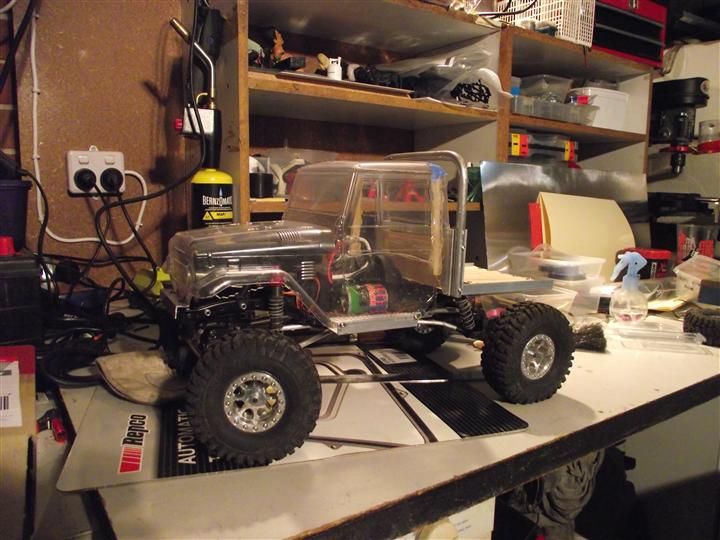 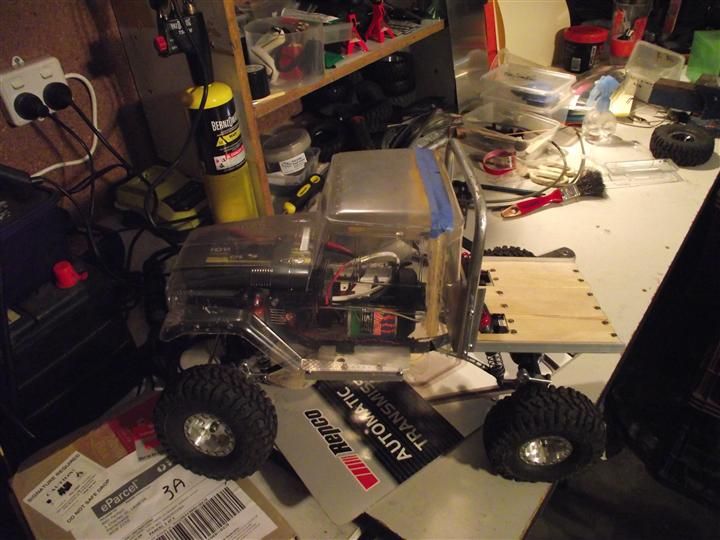 So, then. Any thoughts on what colour I should paint it? Cheers H2Micr0 |
| |  |
| | #4 |
| Rock Crawler Join Date: Jan 2013 Location: Australia
Posts: 541
|
Hello Again. I have decided in the end to go for a FlySky GTB3. For under $50 delivered, and with the hack options available, I really couldn't go past it. As for colour, I have settled on a choice very close to an original colour. I have to paint the shell on the outside due to gluing the two parts together, and I believe I should use a lexan suitable paint, and Tamiya only has a limited range of colours. I have now finished gluing the shell. 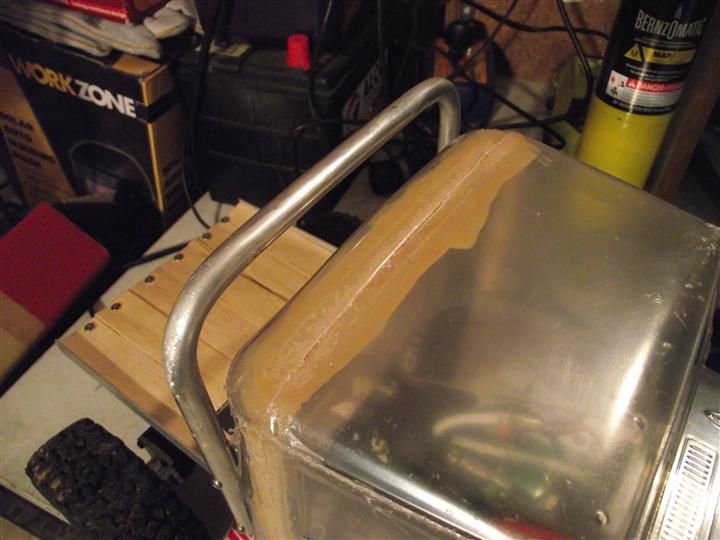 There is a small gap, and am considering using spot putty to fill it. If I do that I will have to sand the putty, and and not sure if I should sand lexan. I will have to try it first on an off cut. The join is strong yet flexible. I went out with Bitsa on Saturday to Lennox for a couple of hours. The rig rolled a number of times and there was no signs of failure. There are a few scratches now though LOL. The crawling session highlighted a few areas that need attention. Firstly, I needed to add some weight up front, so I have added a strip and a bit of lead stick on wheel weights to the front wheels. Secondly, I needed a front bar that would stop the leading edge of the bonnet scraping on the rocks when inverted. Thirdly, some inner wheel wells need to added. It started to rain at the end and the short trip back to the car proved too much water was flicking up off the tires. I picked up a couple of these for $4 from the local supermarket. 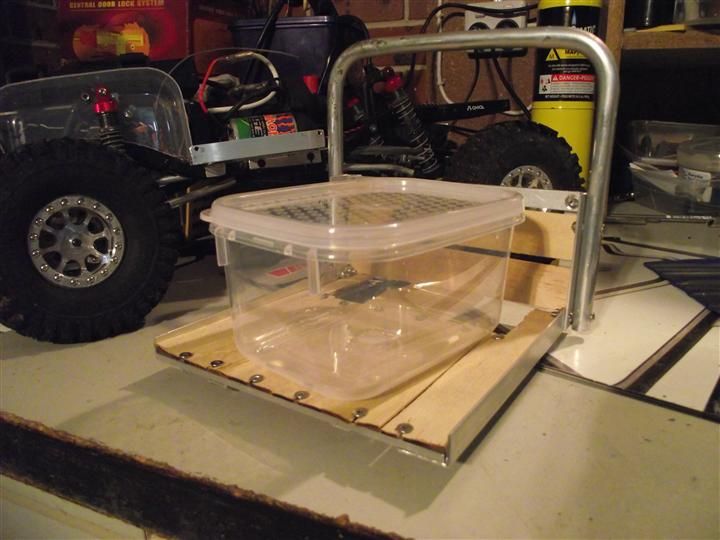 and after much careful consideration followed by judicious use of the dremel, turned them into this. 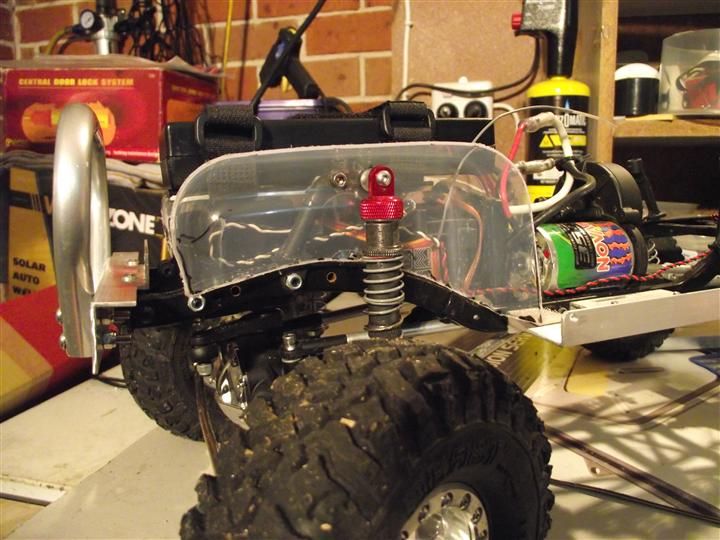 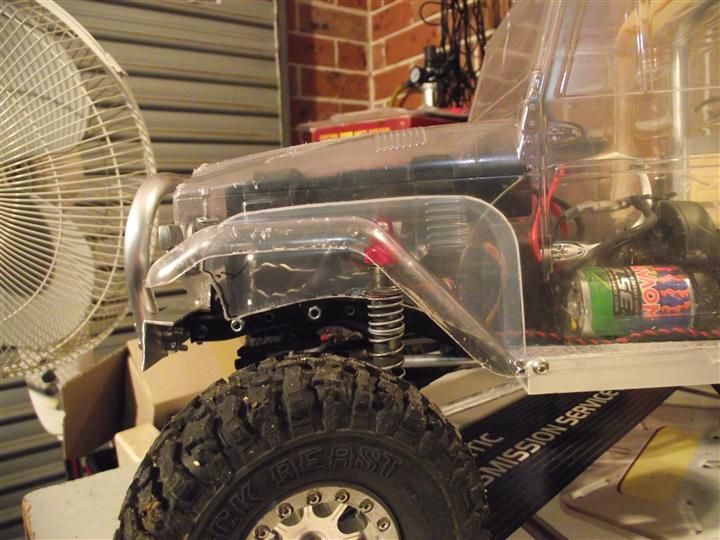 For the front bar, I wanted something simple and functional. Using the same tubing as the rear roll bar, I came up with this. 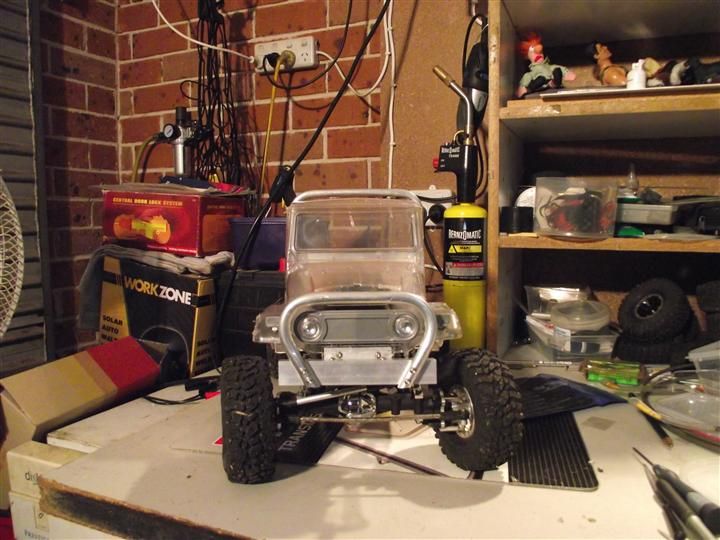 Plenty of tire clearance. 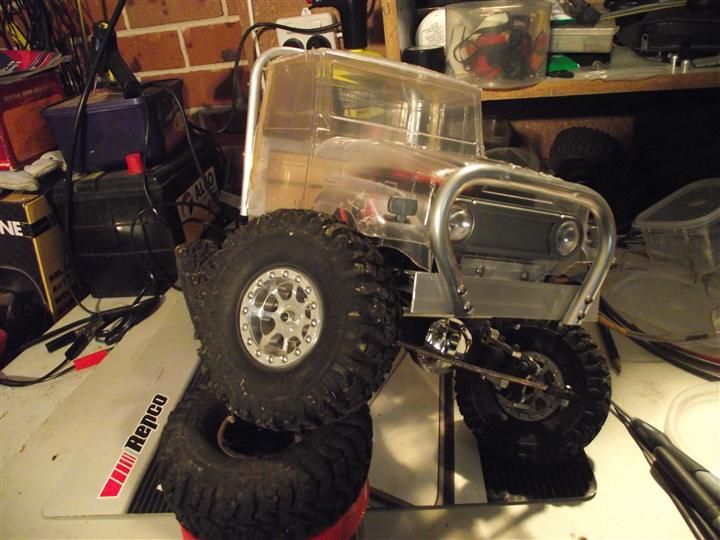 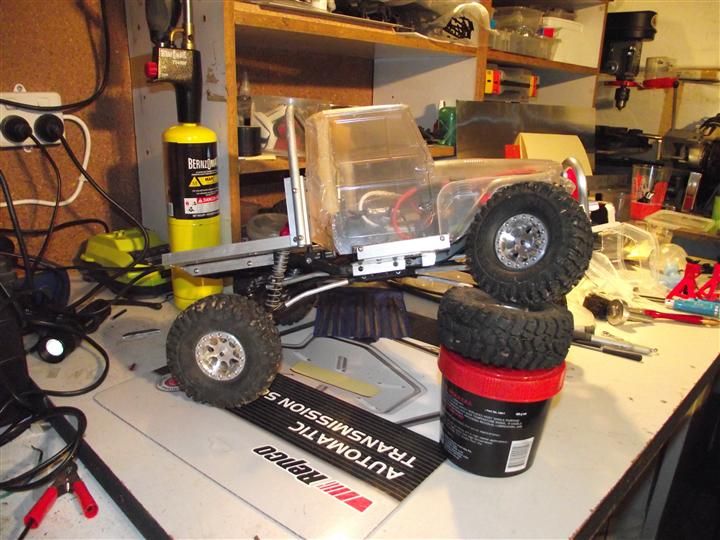 I am pretty happy with the overall look of the FJ40 now. 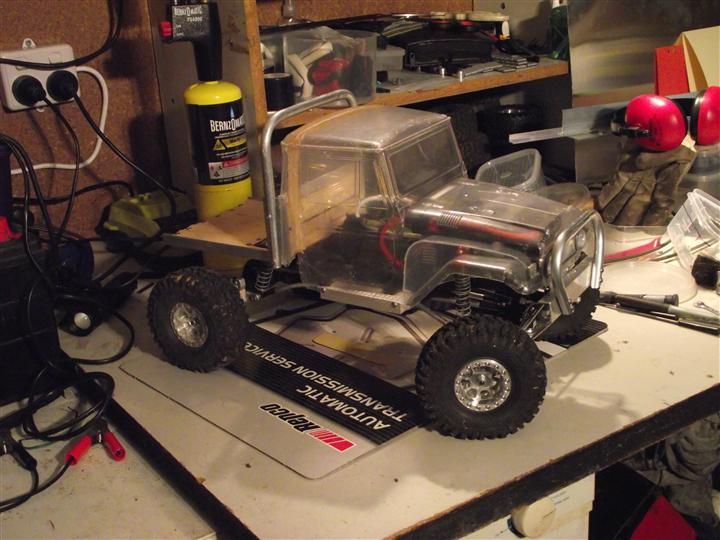 I am looking forward to the upgrades arriving next week, and will try to get it painted soon too. I have a 20t pinion that Bitsa gave me I would like to try out to gear it down slightly for better low speed control, but will wait until after the HH and BR-XL are in. I also want to build in some protection across the front of the roof to protect the shell in a rollover and will play with some ideas, and finish off the lower part of the cab back. Cheers H2Micr0 |
| |  |
| | #5 |
| I wanna be Dave  Join Date: Nov 2008 Location: Chillin in Utardia
Posts: 2,561
|
Sanding, and painting on the outsixde is very cool looking in my opinion....let it get aged and layer more and more for cool effects. I would like to know how you bound the two pieces for the cab? |
| |  |
| | #6 |
| Quarry Creeper Join Date: Nov 2010 Location: Toney/Huntsville, AL
Posts: 243
|
Looking very, very good!
|
| |  |
| | #7 |
| Rock Crawler Join Date: Jan 2013 Location: Australia
Posts: 541
|
Thanks for the comments. To join the two pieces I used some Shoe Glue, can't seem to find Shoe Goo here in Australia, and strips of lexan left over from when I trimmed the body. Seems to be holding up well for now, but there is no structural pressure on the joins. Cheers H2Micr0 |
| |  |
| | #8 |
| Rock Crawler Join Date: Jan 2013 Location: Australia
Posts: 541
|
Well, it has been an exciting week. I received a number of new parts for the FJ40 and I have installed them all. New Parts List. Jazrider Aluminium Transmission Case Jazrider HD Steel Gears + new Slipper Clutch Jazrider Bearing Set HH 35t Torquemaster Pro HH BR-XL CC BEC Hitec 7955TG Servo FlySky GT3B Transmitter I have only had a quick wheel around the yard and the extra punch and wheel speed is awesome, especially with the 3s 65C Lipos installed. It brakes far to hard and will flip it over if I am not careful. This should be able to be changed with a Castle Link when I can get one. The 7955TG Servo has made a huge improvement in the steering. Here are some pics of the Jazrider trans parts going together. 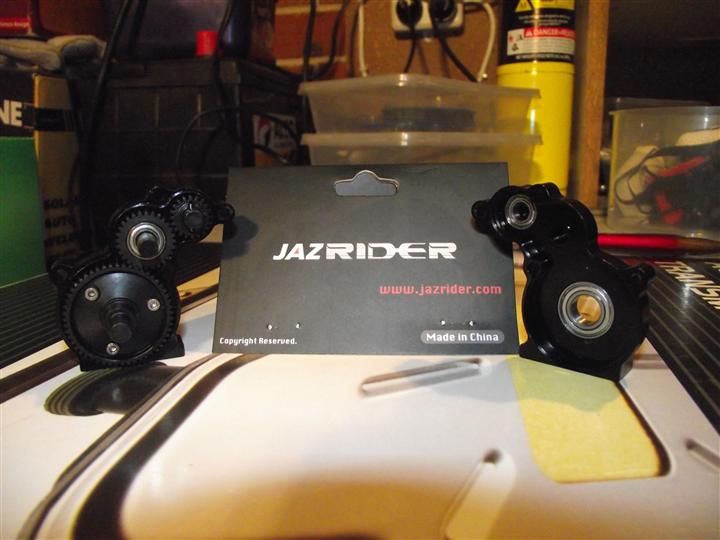 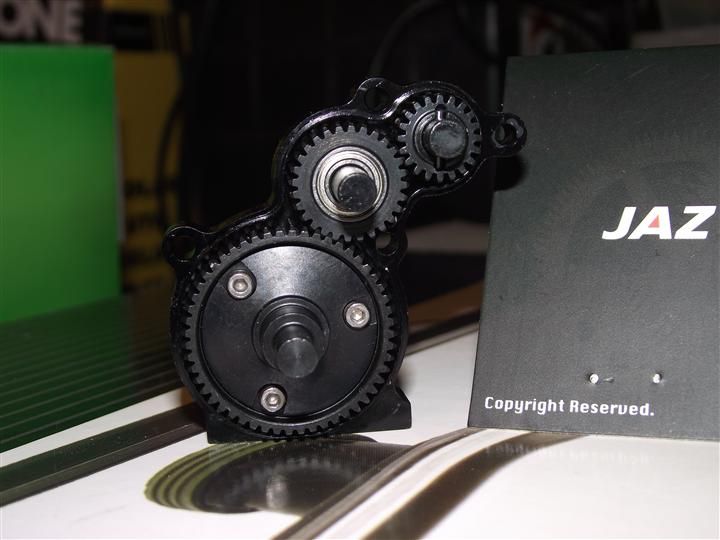 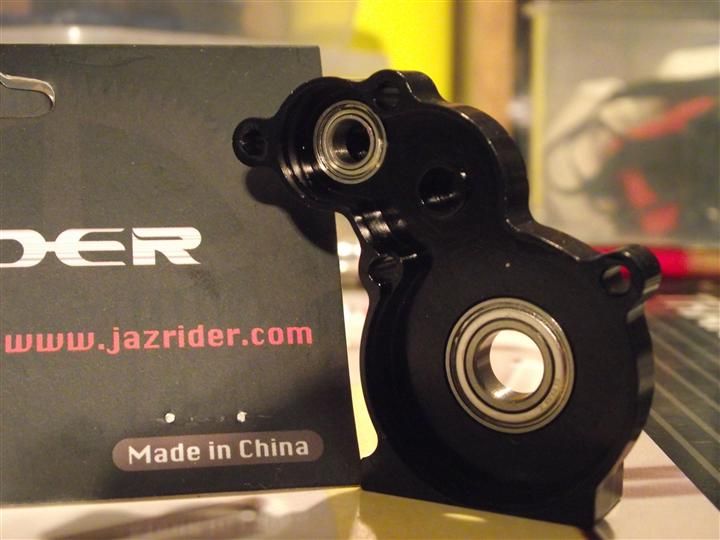 Marine grease applied. 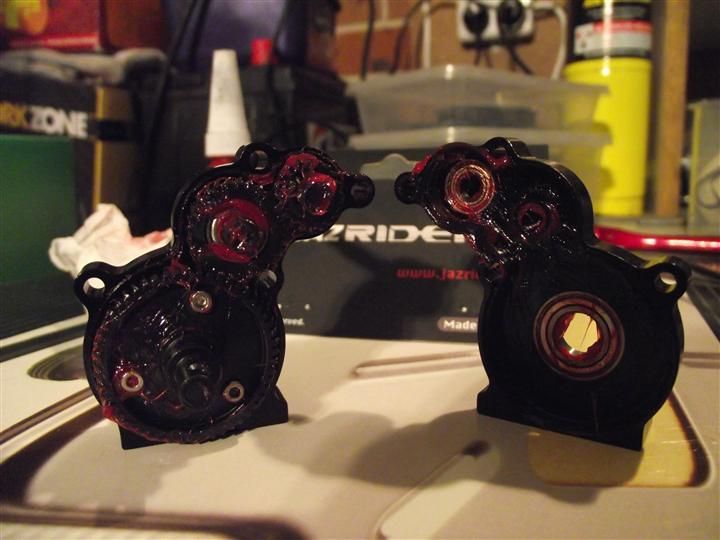 Considering how cheap these parts were, $57 delivered, I was quite impressed with the quality. The only issue I discovered was the main shaft the drive gear and slipper clutch mount on was a tiny bit shorter and I couldn't install the spring. I swapped in the Axial one to fix it. The bottom one is the Axial shaft. 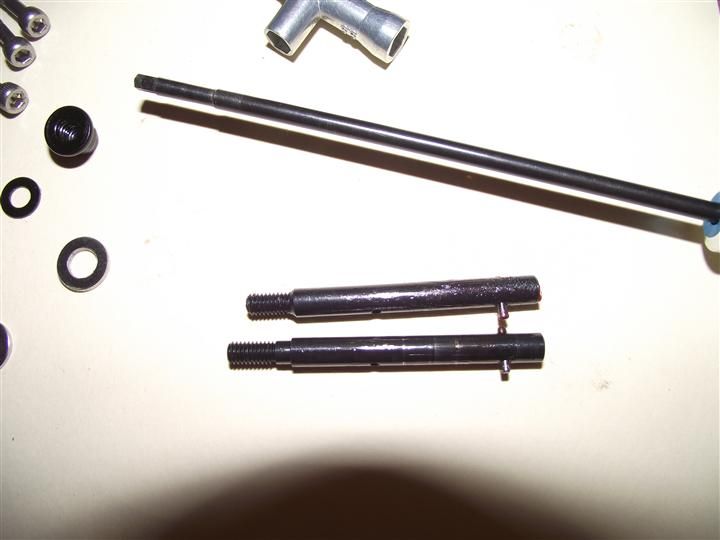 I successfully installed the BR-XL, HH motor and CC BEC, then added the FlySky receiver and got it all working. Then the new servo arrived and it was also added into the mix. 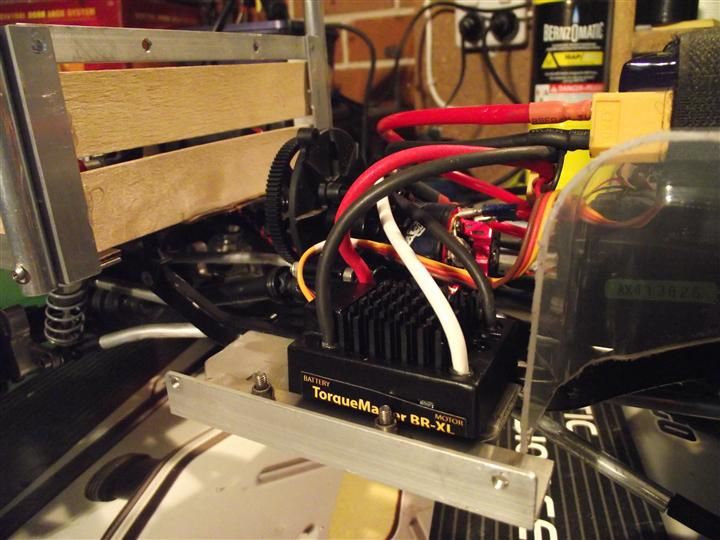 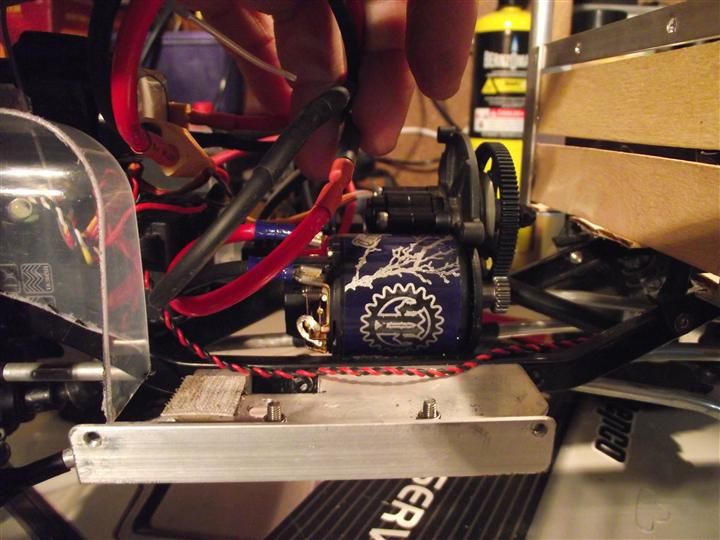 I of course discovered while installing the ESC that the BR-XL doesn't have an on/off switch. Considering how my shell is mounted, I didn't want to have to undo six screws just to disconnect the battery, so after a bit of research I found a solution I could adapt. This is an inline jumper that is inserted into the negative wire between the battery and the ESC and before the CC BEC. 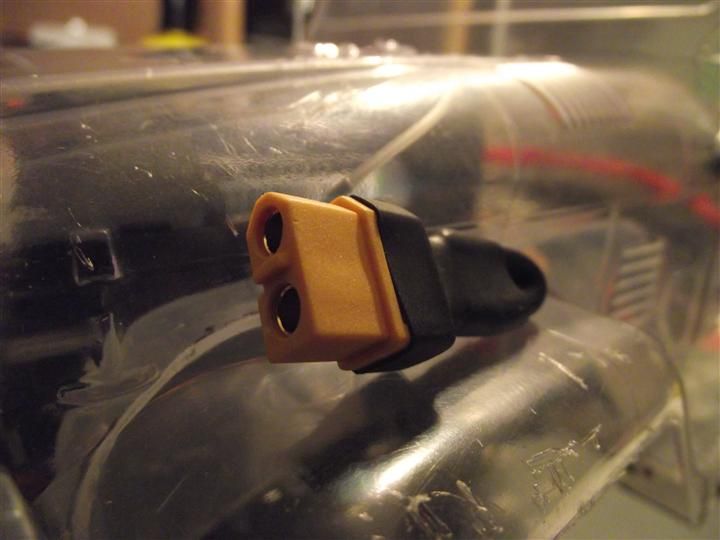 It plugs into the loom here, which is accessible and has enough reach to be inserted and removed painlessly. 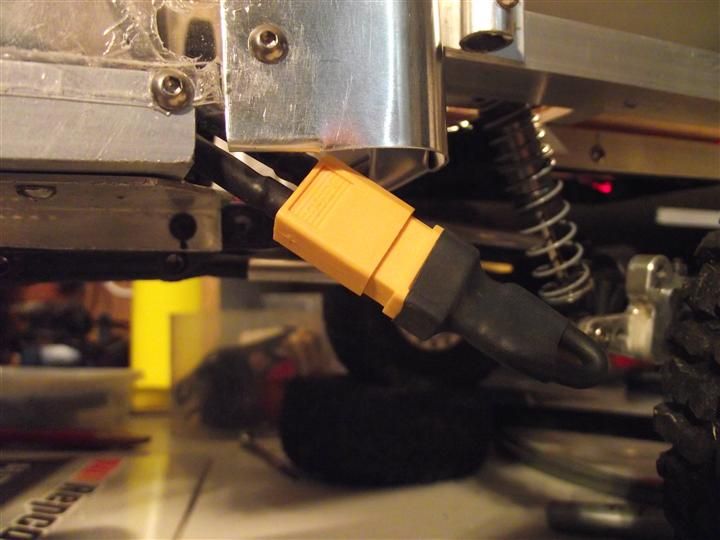 And this is where it will sit inside the shell. I may yet have to fab something up to hold it in place. 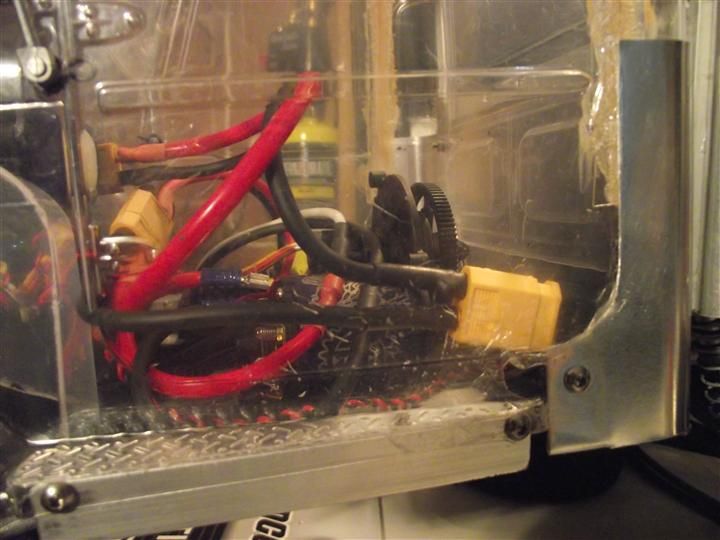 I have to secure some more of the wiring and once happy with the slip setup, reinstall the gear cover. The other part I made this week for the body was an aluminium rear cover. The idea was to hide the cut marks of the lower join area, provide some strength to this area, and provide some protection. 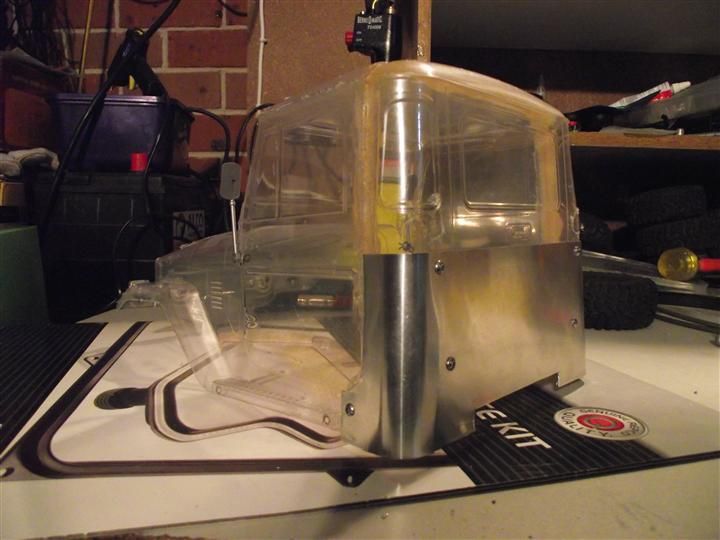 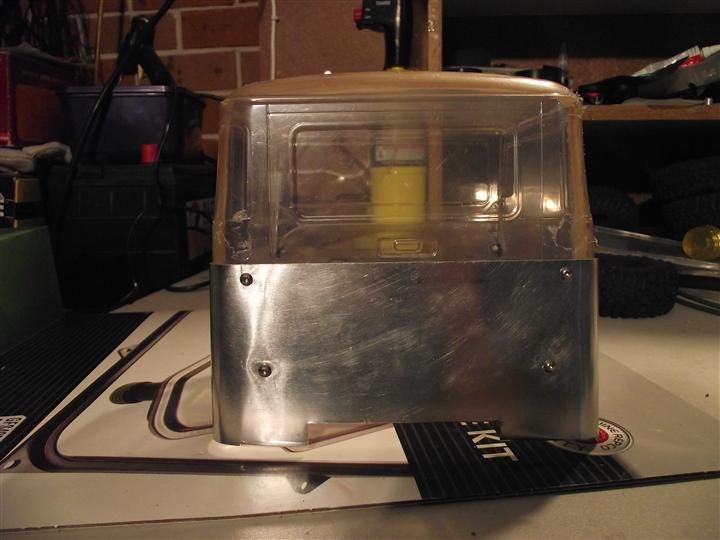 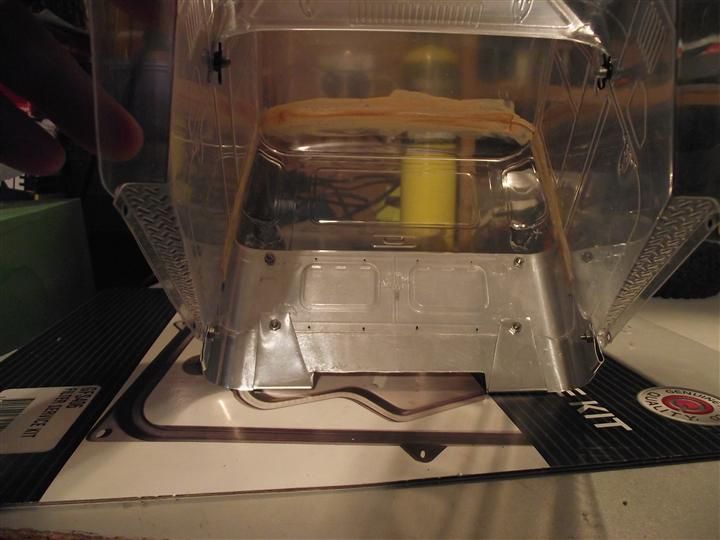 I expect this will sustain damage over time and add to the used and abused look. I think it fits in well with the rest of the rig. 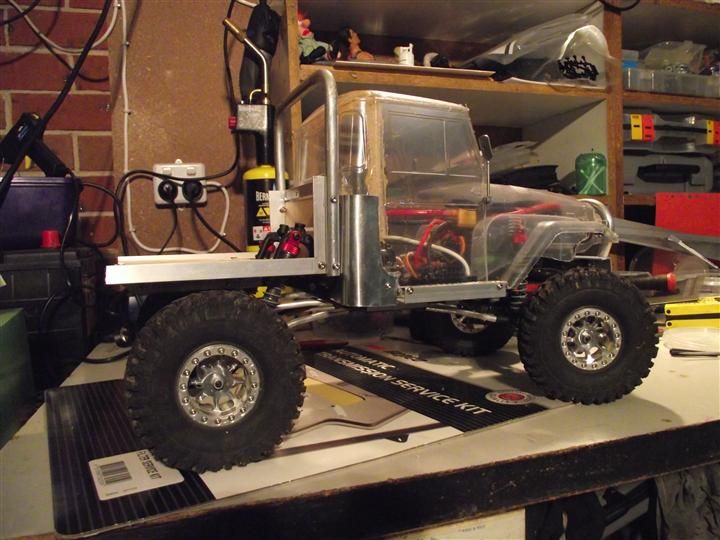 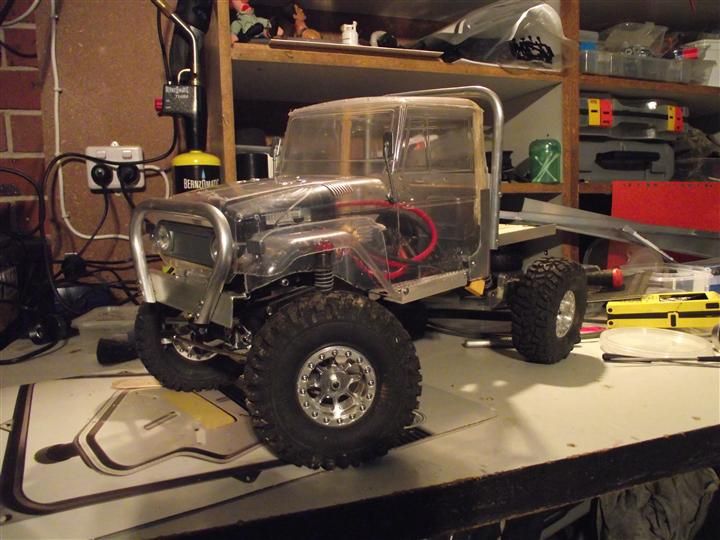 I need to fab up some sort of flare/front guard widener and then paint it. Cheers H2Micr0 |
| |  |
| | #9 |
| Quarry Creeper Join Date: Apr 2012 Location: San Jose, CA
Posts: 234
|
Love the look of this beast. I made the same kind of switch for my BRXL and am also working on a permanent mounting spot for it.  |
| |  |
| | #10 |
| Rock Crawler Join Date: Jan 2013 Location: Australia
Posts: 541
|
As I intend to go to TCP TTS Interstate Titles this weekend, I took the rig out this weekend to test that all the new components worked as they should. It has been raining quite a bit, and am not one for sending my rig swimming. But I have a CMS so there is plenty of clearance for some sensible water fording. 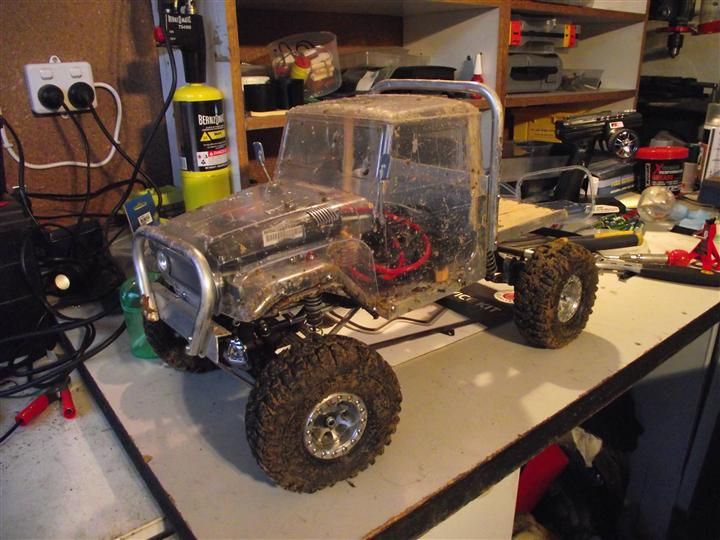 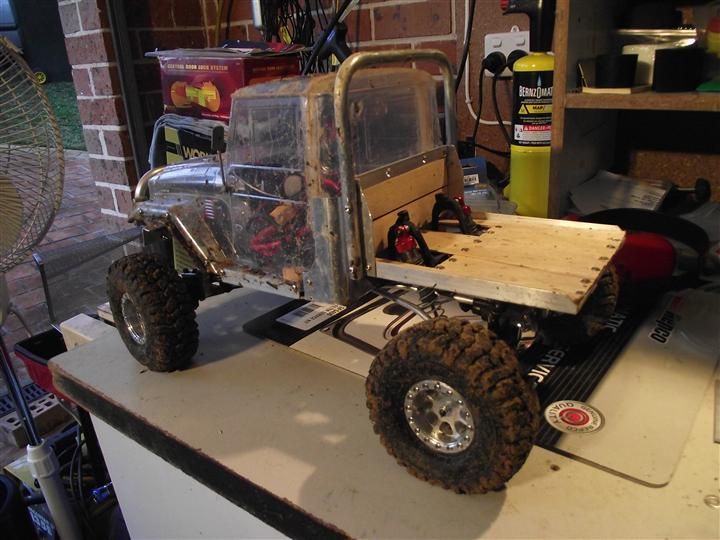 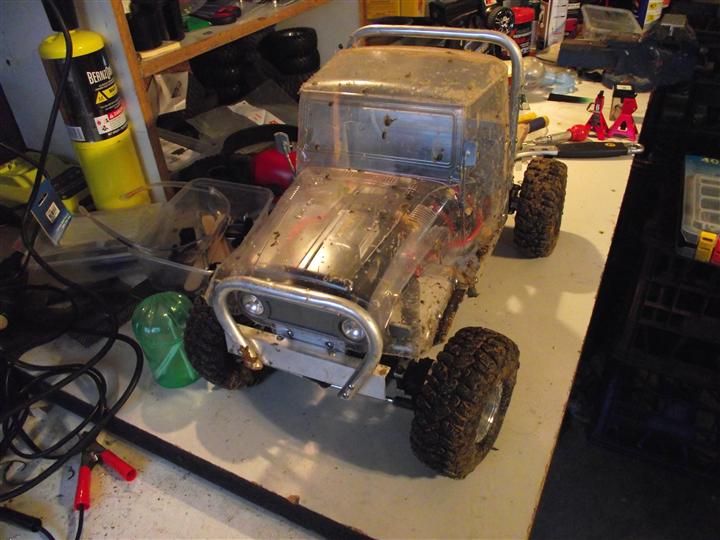 The driveline upgrades have really enhanced the overall performance, not only in terms of increased wheelspeed, but in outright grunt when really crawling those rocks. I had also added weight to the front wheels, and I was able to climb sections in the wet, that I couldn't get in the dry the week before. I do need to tinker with the ESC programming as at the moment going flat out and releasing the throttle induces a forward roll. Not really a problem inching down a rock face though. I was also able to test my new flares on the front wheel arches. They are metal and also act as a rock slider. I have now cleaned the chassis and wheels etc, and the shell is currently being painted. Will see soon if my masking skills are any good. Hopefully in a day or two the colour will be done and photos will be up. Cheers H2Micr0 |
| |  |
| | #11 |
| Rock Crawler Join Date: Dec 2008 Location: Fortuna Calif.
Posts: 997
|
Nice build, I love anything that is early FJ. When I chopped mine to make it a short cab I used drywall tape (the kind that looks like netting) and Super 6000 Shoe goo. Really strong. You asked about a color earlier, almost any colorbut with a white roof.  |
| |  |
| | #12 |
| Rock Crawler Join Date: Jan 2013 Location: Australia
Posts: 541
|
I am happy to confirm a white roof is done. The join is pretty obvious, and am not sure if I can fill it and sand lexan. Still, it is fun learning it all and having a go. Cheers H2Micr0 |
| |  |
| | #13 |
| Newbie Join Date: Feb 2010 Location: houston
Posts: 32
|
What glue did you use for the body? Did u put a pice of plastic under the joint to support it?
|
| |  |
| | #14 | |
| Rock Crawler Join Date: Jan 2013 Location: Australia
Posts: 541
| Quote:
And yes, I used strips of lexan left over from when I trimmed the shell down as a joiner piece. The joint has so far proven to be very strong as the FJ40 has had numerous roll overs. Cheers H2Micr0 | |
| |  |
| | #15 |
| Rock Crawler Join Date: Jan 2013 Location: Australia
Posts: 541
| |
| |  |
| | #16 |
| Rock Crawler Join Date: Jan 2013 Location: Australia
Posts: 541
|
Well, seeing as I was home sick today with the damn flu, I thought it wise to spend some time sitting in the sun while building my very first styrene piece. 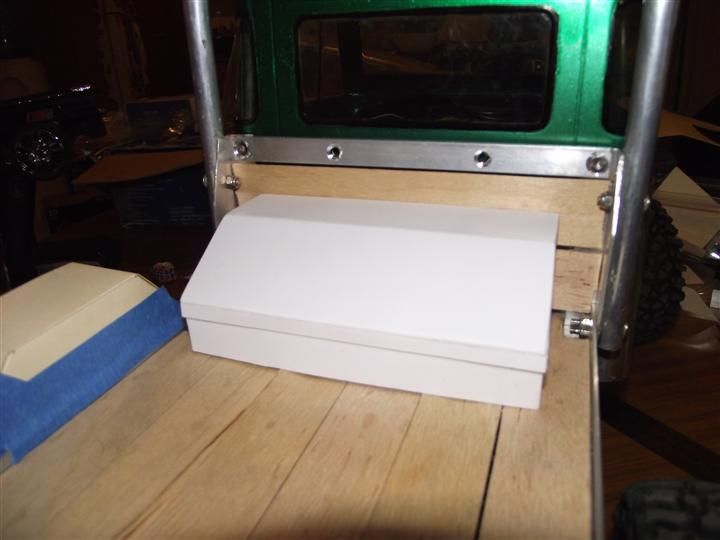 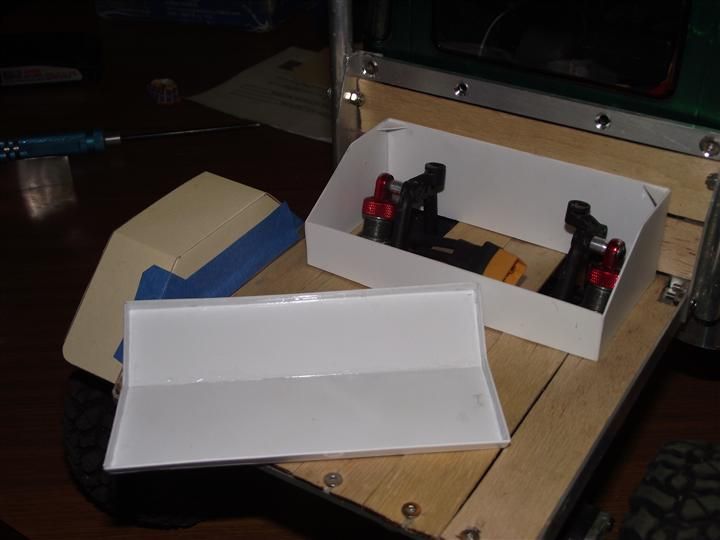 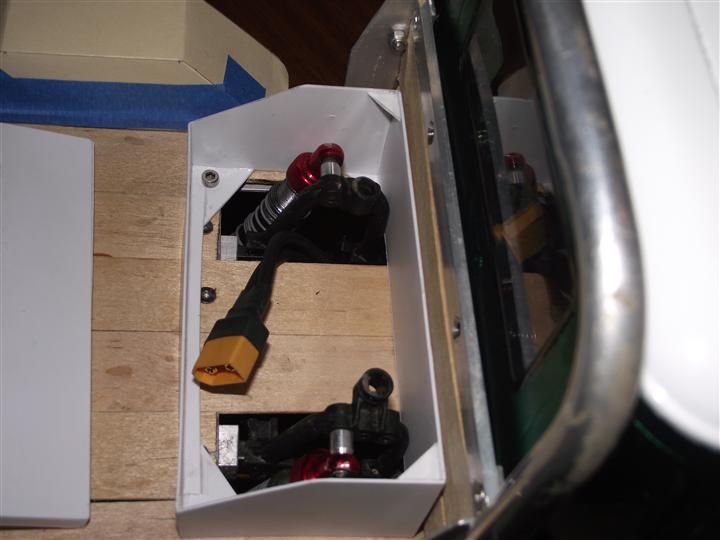 I am quite stoked with the result and learnt a lot in the process. Definitely will be doing some sort of interior now. Now have to work out what colour to paint it. Good old Aluminium might be the go, but green lower with a white lid is also under consideration. Any suggestions? Seeing as I was in a creative mood, I started toying with the idea of running rear wheel arches. I made up a pattern using cardboard to help with the visuals. 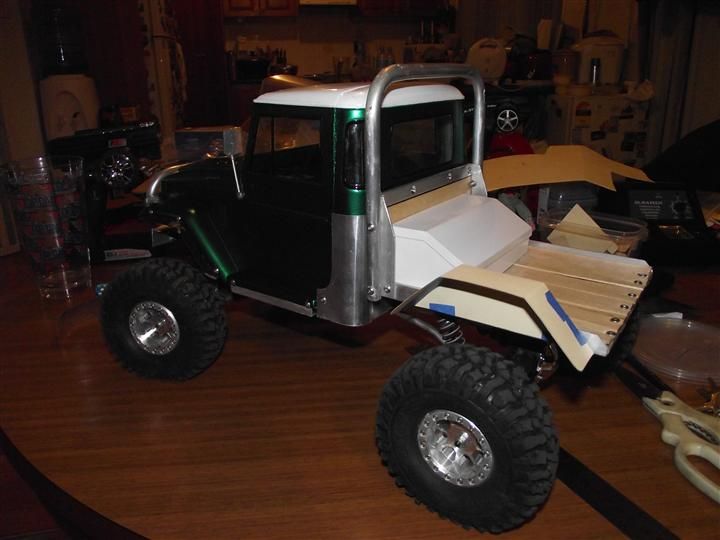 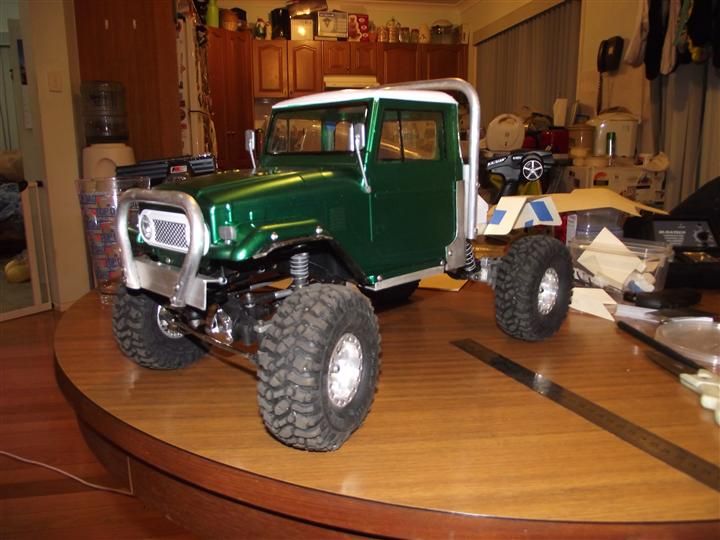 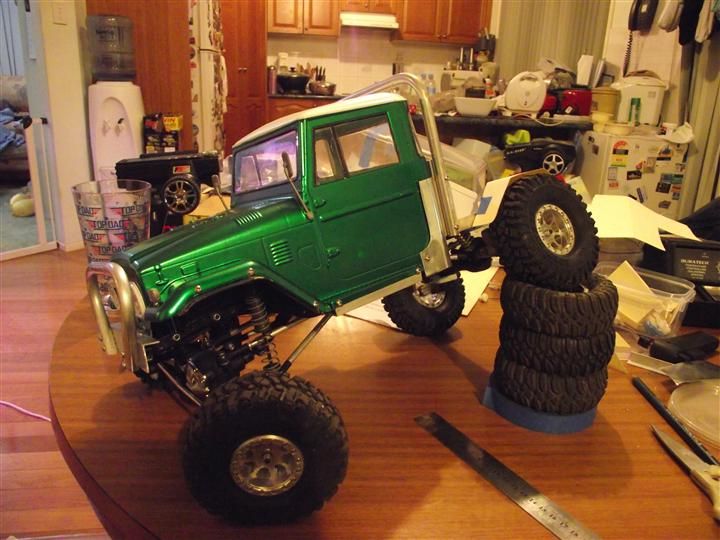 I could make these out of either styrene or the aluminium sheet the cab back is made from. They will be able to be unbolted if so desired. I also made up a wire mesh grill. 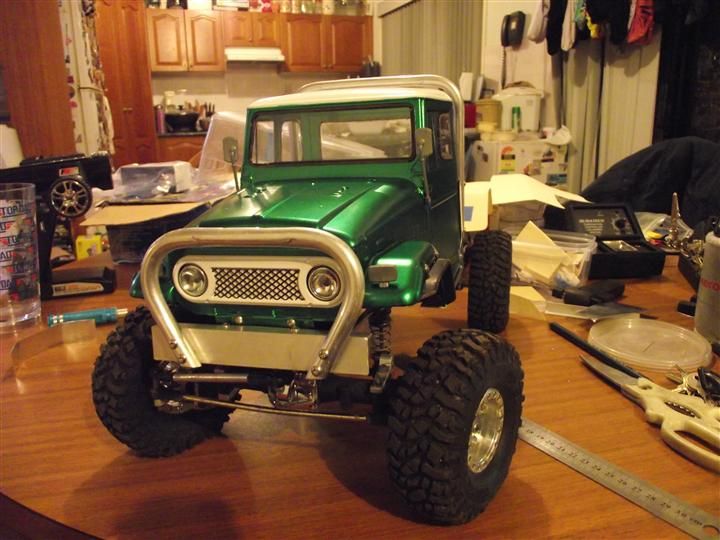 Again, not sure on what colour if any should go behind the grill. Cheers H2Micr0 |
| |  |
| | #17 |
| Rock Crawler Join Date: Jan 2013 Location: Australia
Posts: 541
|
Well today I went to the TTS TCP Interstate Titles at Kiama and competed in Tuff Truck 1.9, eqiv to CANZ Scale 2 class. Seeing as I still consider myself somewhat a newbie at all of this I went to observe and learn, as much as to have some fun and develop my own driving skills. We ran 3 TT coursed during the day, and they were quite tough, on par with the courses at the CANZ Nats recently. I am quite happy with my results. Course 1 - DNF - ran out of time - some very tough gates Course 2 - Finished course just in time despite changing a battery half way through - lesson learnt Course 3 - 10 gates in 6 mins? I finished in 4.58 But the FJ40 has now earned its battle scars, and will wear them with pride. 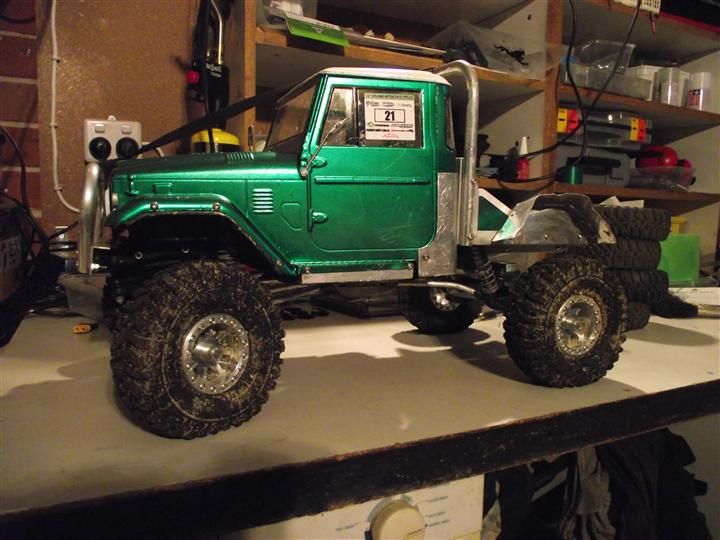 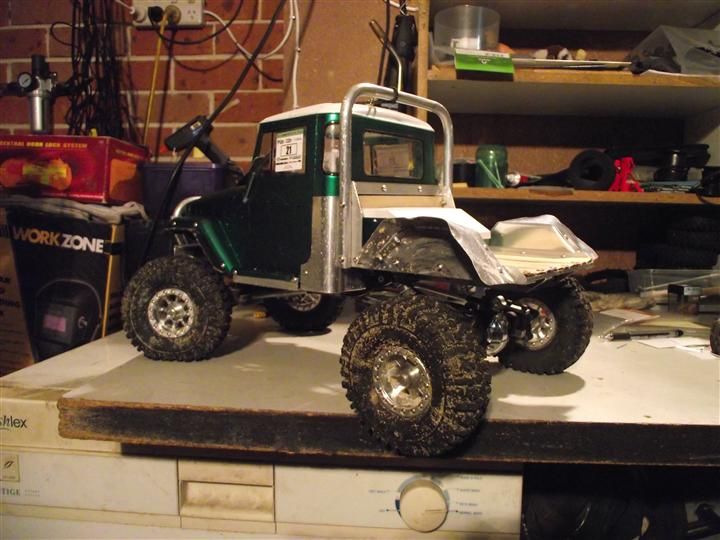 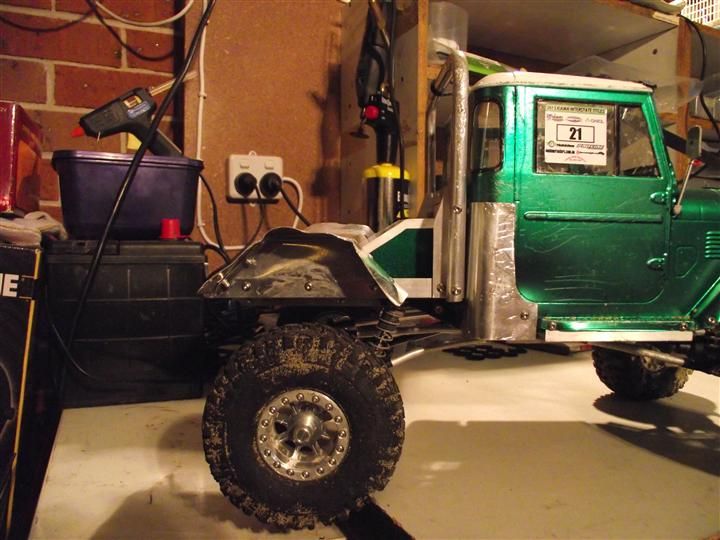 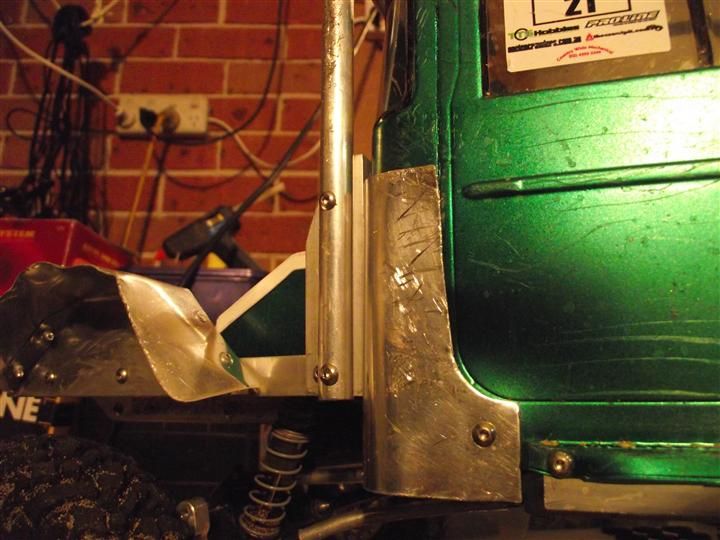 And I lost my grill somewhere amongst the rocks. 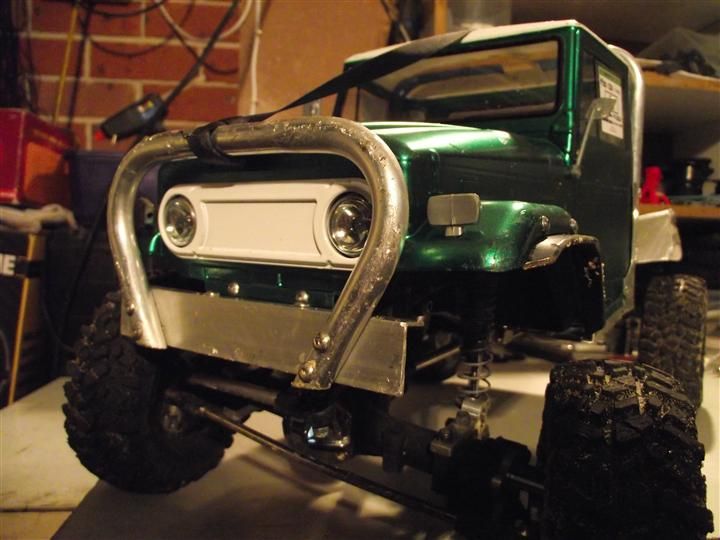 The shell also developed some cracks around the lower sills. Well it did spend a reasonable amount of time on it's side and roof today. I did some emergency reinforcement tonight with Shoe Glue, Dry Wall Tape and Lexan strips. A more permanent solution will be built later on. No mechanical failures though which is great. So far the FJ40 is proving to be quite capable and the portal axles really proved their worth today. Less diff hang ups for me and the wider track helped too. Have now cleaned him up, straightened the bent metal as best I can, just like a 1:1 truck, and checked for loose parts etc. I will try to get some photos of him out on the rocks tomorrow. Cheers H2Micr0 |
| |  |
| | #18 |
| Rock Crawler Join Date: Jan 2013 Location: Australia
Posts: 541
|
Went back to Kiama today for the last Tuff Truck course. Started out well and progressed through 4 of the 10 gates, then this happened. 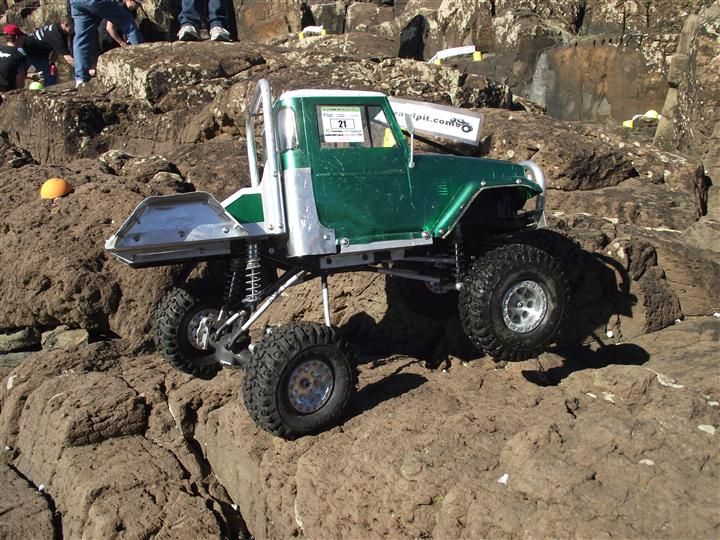 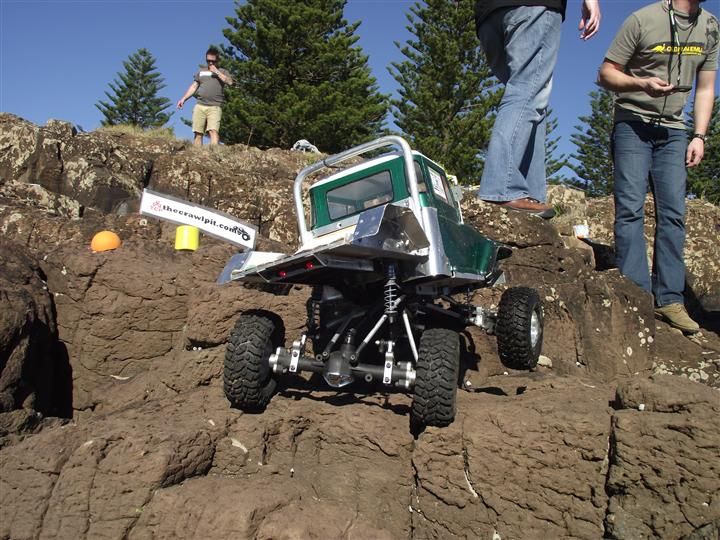 Broke the rod end on the lower right link, and the bottom rod end of the shock followed soon after as I attempted to keep going. So a DNF was the result. Of the 16 competitors, only three actually finished this very tough course. Many breakages occurred. I repaired the FJ40 shortly afterwards and once the comp was over I drove through the course and was able to make it through all the gates. Getting much better at picking the best lines and learning more about what my rig is actually capable of. Here are some more photos I took while just crawling around having fun. 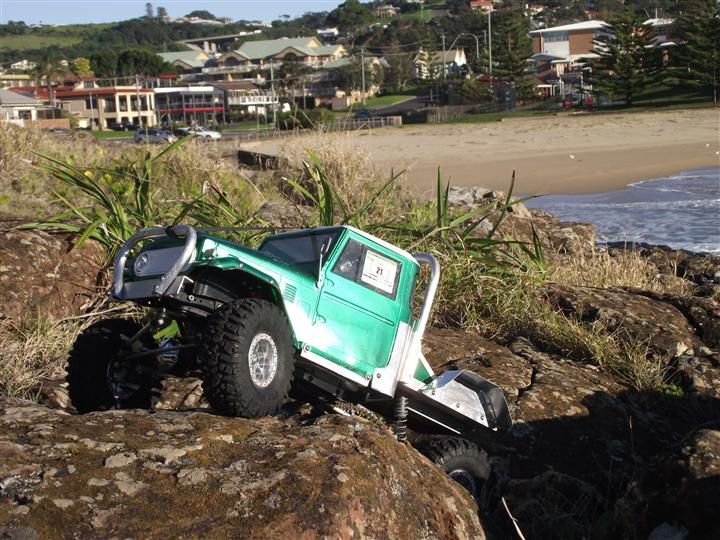 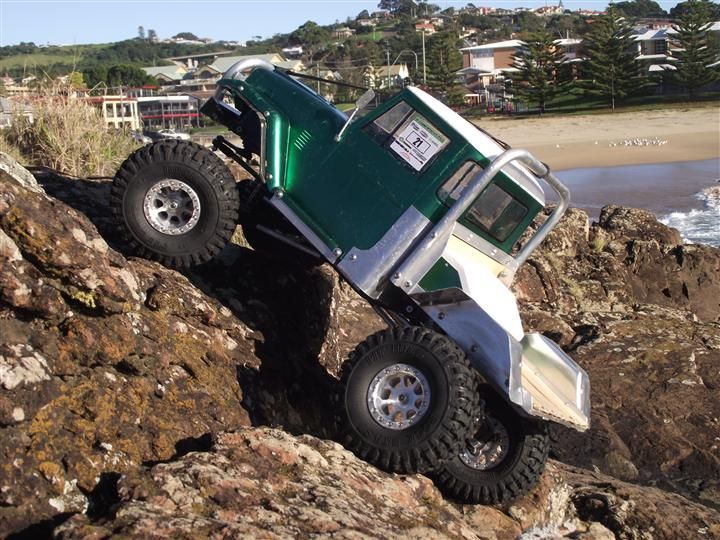 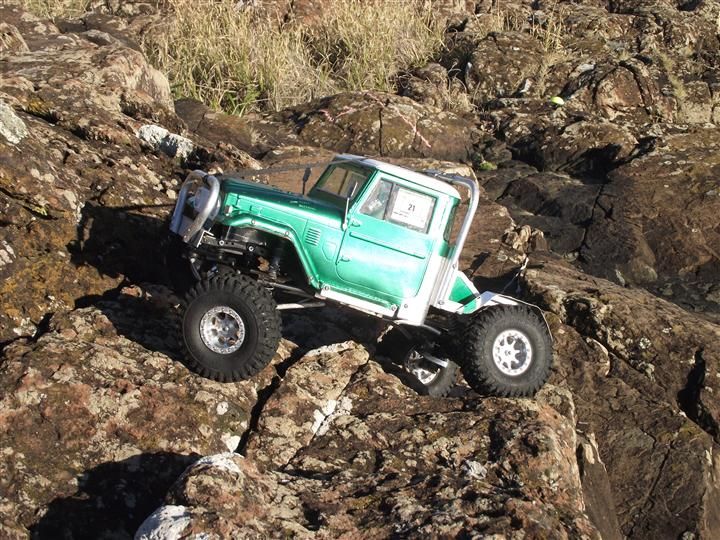 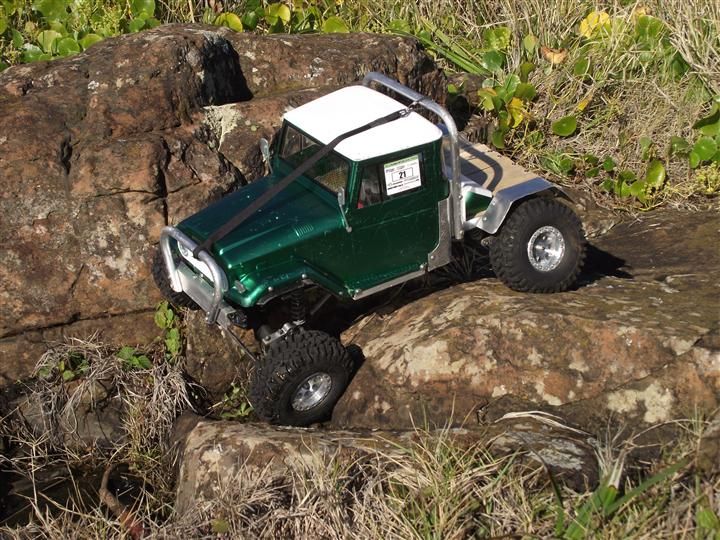 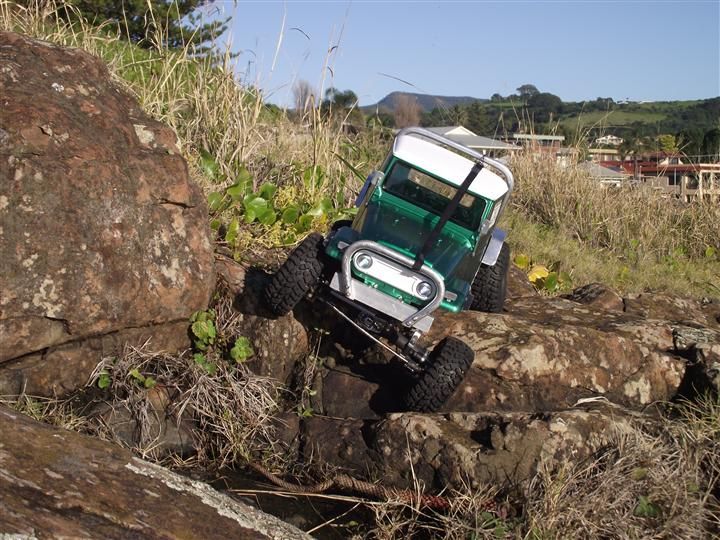 And this photo is of all the rigs together. 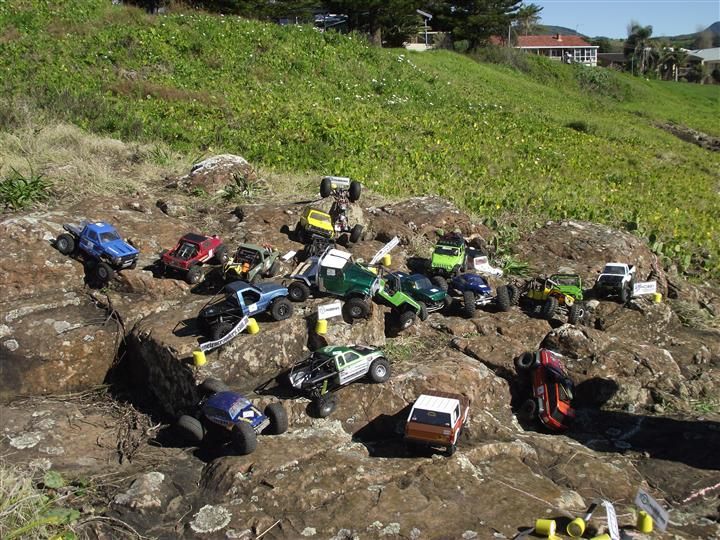 Cheers H2Micr0 |
| |  |
| | #19 |
| I wanna be Dave  Join Date: Jun 2013 Location: Ramona, CA
Posts: 2,178
|
Wow. Awesome build and really like the details and outcome.
|
| |  |
| | #20 |
| Pebble Pounder Join Date: Sep 2012 Location: Queensland Australia
Posts: 193
|
Very nice work mate!
|
| |  |
 |
 H2Micr0's SCX10 FJ40 Trayback - Similar Threads
 | ||||
| Thread | Thread Starter | Forum | Replies | Last Post |
| Land rover Discovery Trayback | George014 | 1.9 Scale Rigs | 7 | 12-14-2011 08:26 AM |
| Defender 90 Tube Trayback | tuffrangie | 1.9 Scale Rigs | 3 | 12-28-2010 09:14 AM |
| |