| |
| |||||||
 |
| | LinkBack | Thread Tools | Display Modes |
 09-20-2010, 11:53 PM
| #1 |
| Pebble Pounder Join Date: Jul 2010 Location: Colorado Springs
Posts: 183
|
Like an old fairy tail beginning with "once upon a time," a good build begins with a box. A Dinky box is ideal.  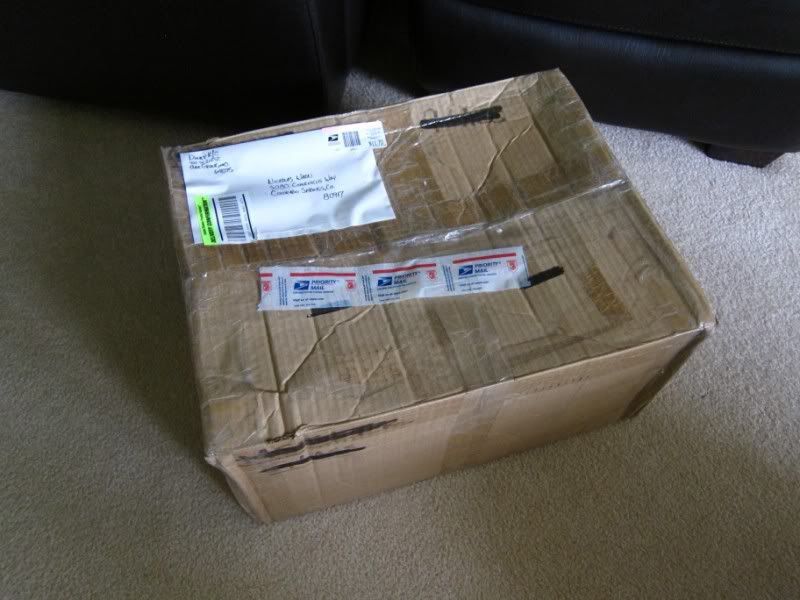 But that was just a temporary imprisonment... 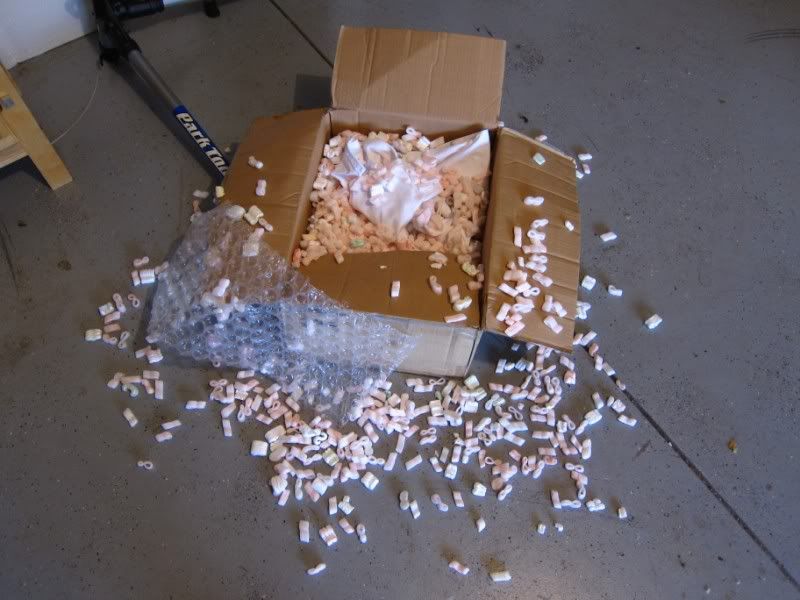 ... for this little gem. For those who don't know, this rig began life in muddauber7's original thread, Dinky R/C Series-5 KOH Jeep.  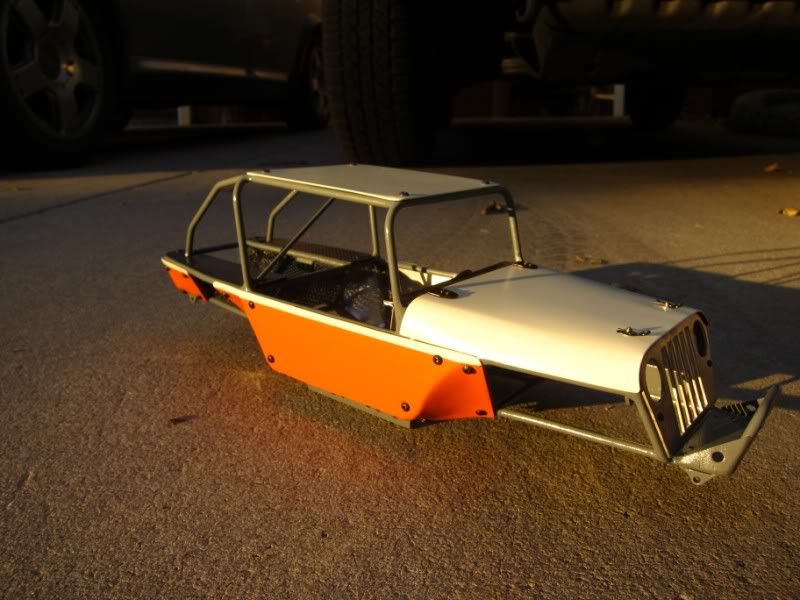 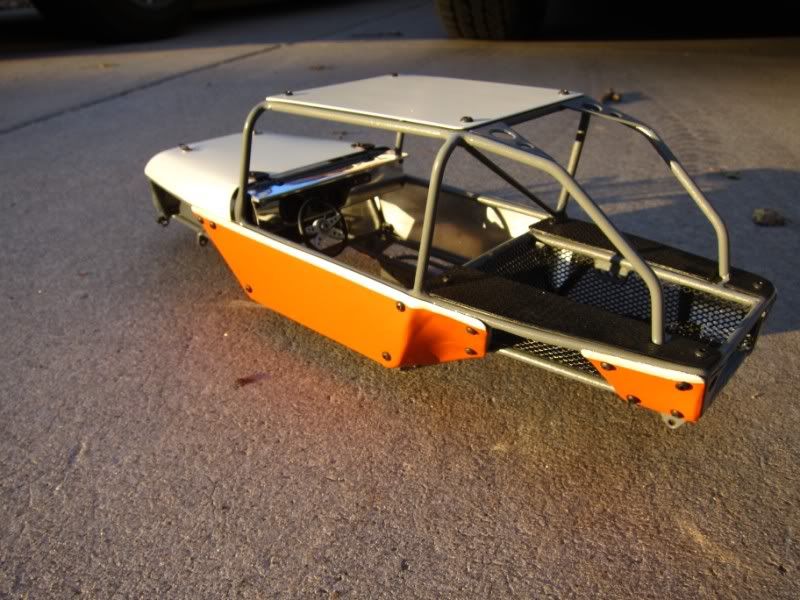 This is number one of ???. That's up to Matt, but if he continues to fabricate rigs are beautiful as this one, he'll have a long line of happy customers. 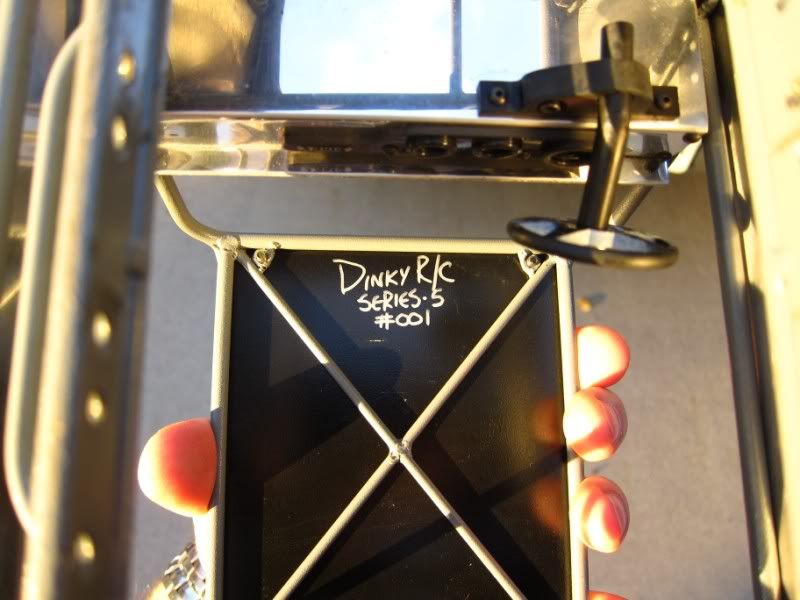 As a side note, here's my current rig that will become the organ donor for Small Change. 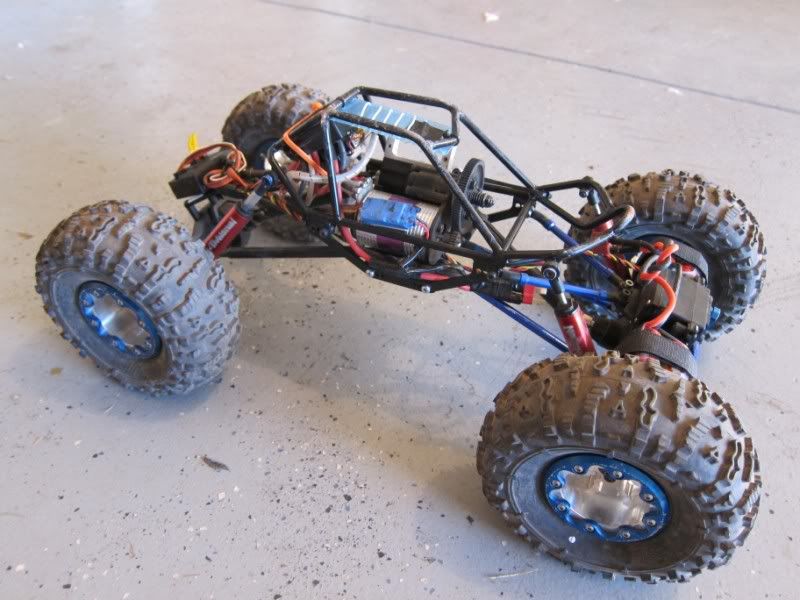 So I go in for dinner and come out to find it on blocks. Dang, I gotta move to a nicer neighborhood. 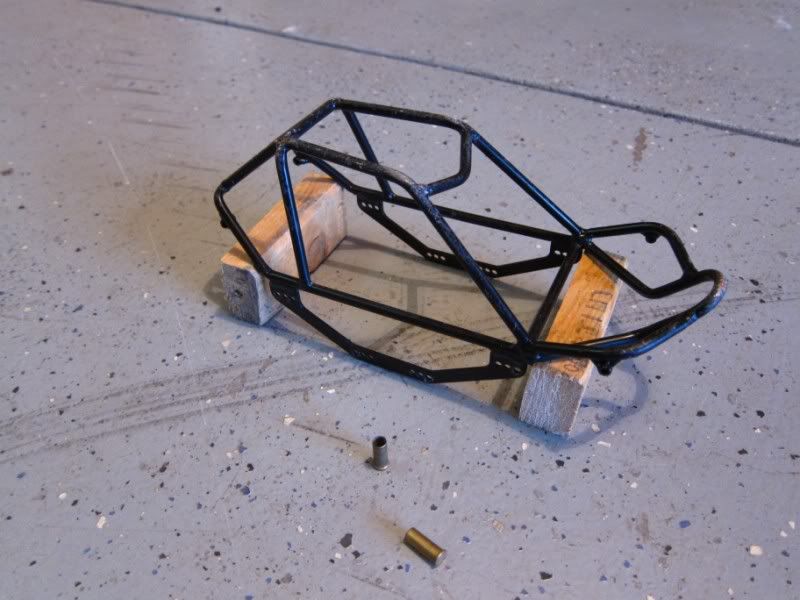 Good thing I ordered some spares. 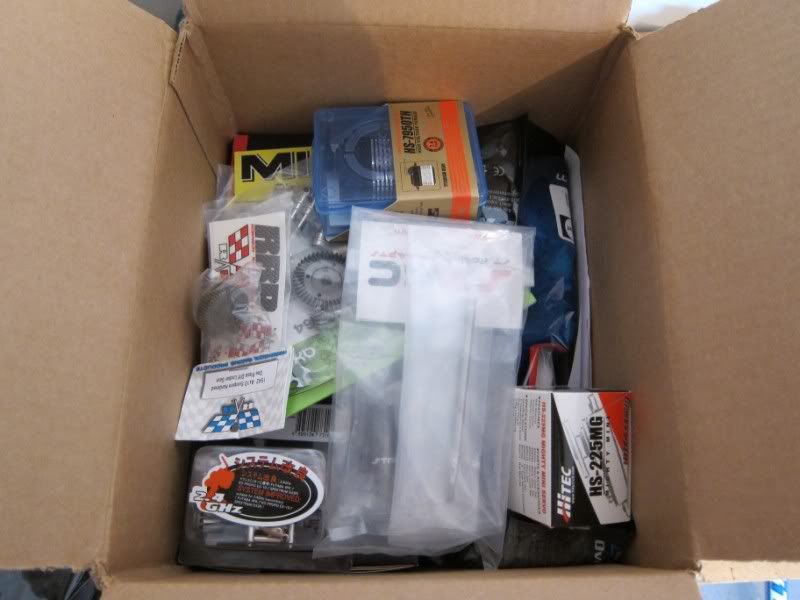 So let's get started. Gotta make some tools first. 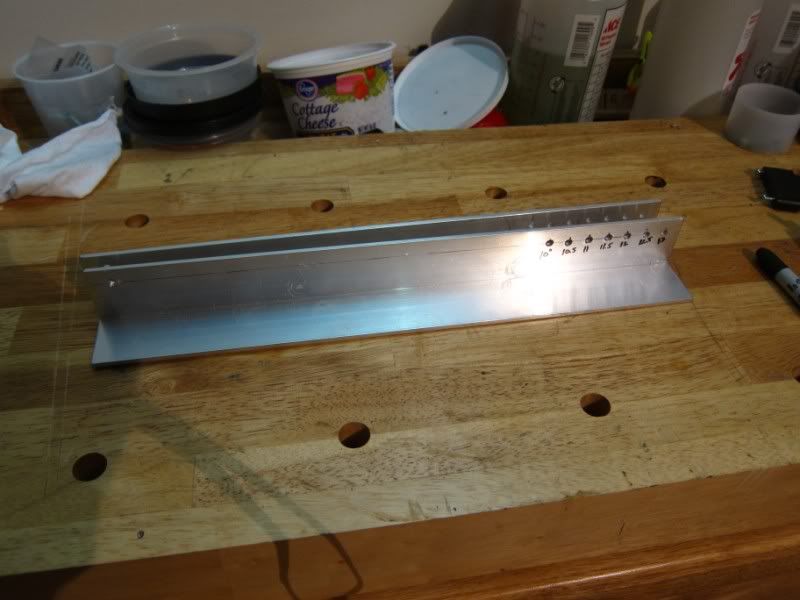 I started with the axles. Axial HD underdrive, STRC straight axles (beefy), Axial HD locker, and Dinky 4-Link Truss in the rear. The front got built up with stock Axial R&P (might need to go HD though), Axial HD locker, RC4WD clocked Cs, RC4WD knuckles, and Axial Universal Joints in the front. I was pretty disappointed by the size of the Axial Universals. They seem kinda tiny and under-gunned considering they're touted as competition shafts. 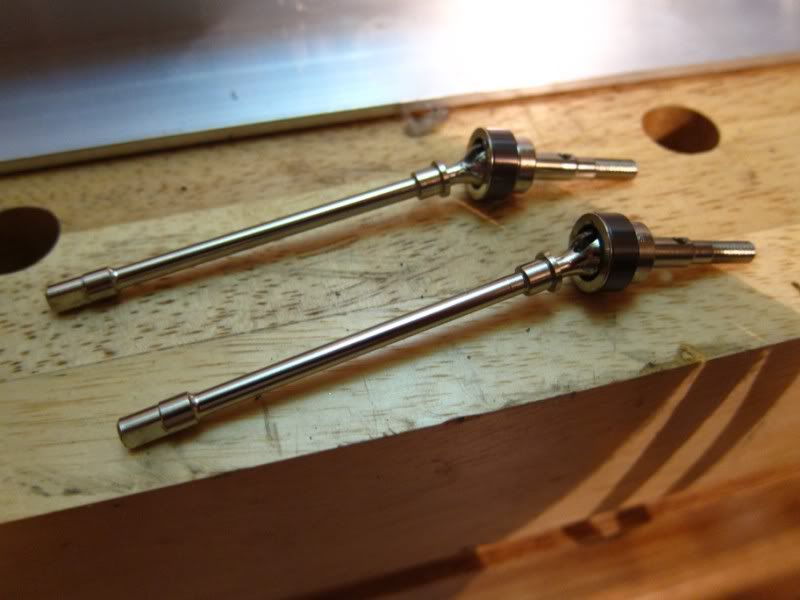 That's a fine looking rear end you got there. 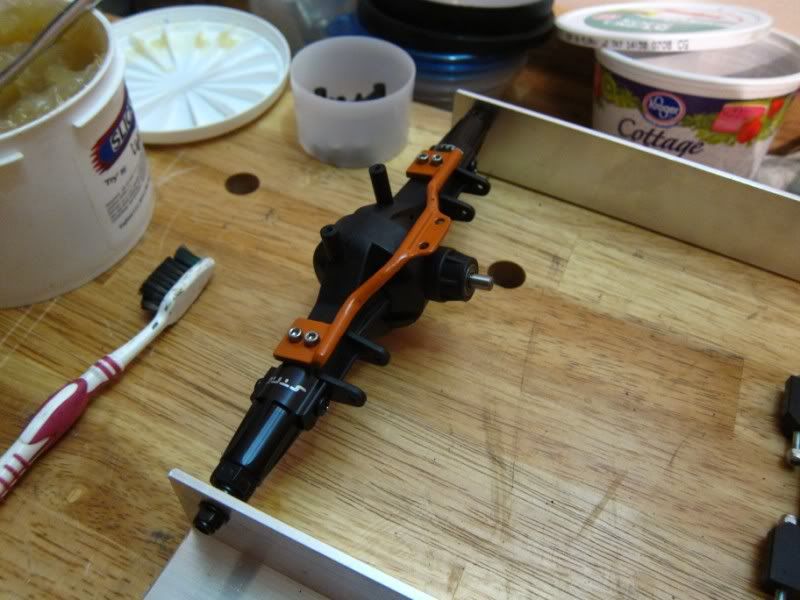 Got the MIP drive shafts assembled between yawns. 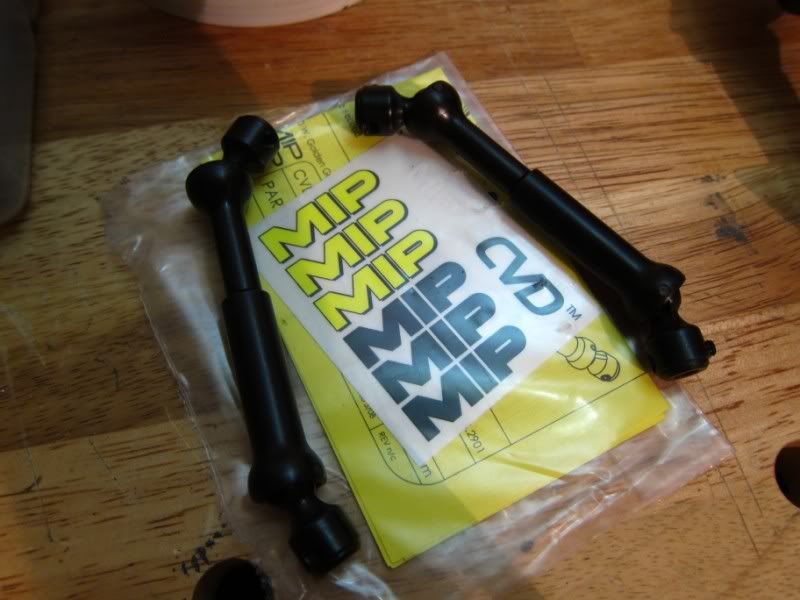 And snapped one mock up with the frame resting on a 3" tall cottage cheese container (the best use for that food product, BTW) and the wheelbase sitting at 12". The 28mm lens makes the wheelbase seem longer than it is, but in person, I'd say it either needs to go longer or lower. We'll see. 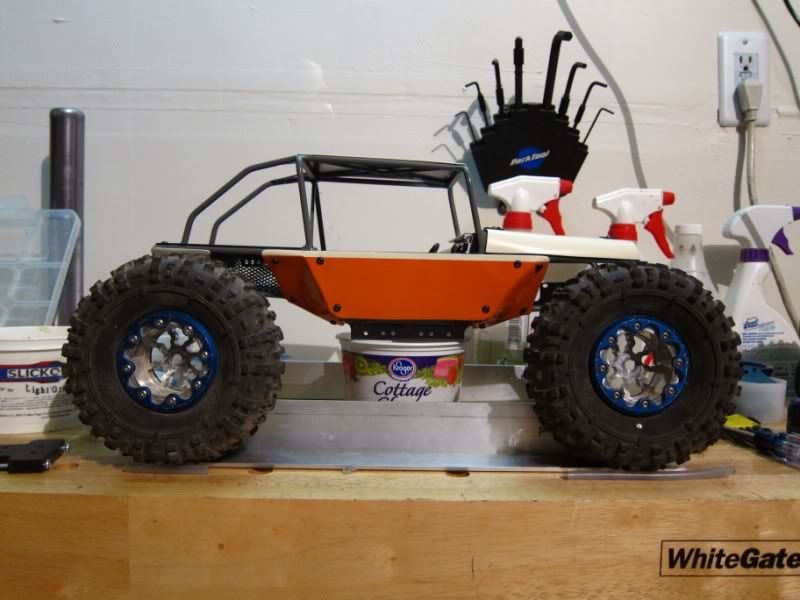 That's all for tonight. I hope to revisit it tomorrow night, but Mrs. Nickle announced a surprise date for us, so no promises. Last edited by Nickle; 10-09-2010 at 08:10 PM. |

|  |
| Sponsored Links | |
| | |
|
09-20-2010, 11:59 PM
| #2 |
| I wanna be Dave Join Date: May 2006 Location: FOUR 8 OH
Posts: 4,913
|
Looks like a good start... but I'm wondering what it would look like with some 1.9 Rok Lox.
|
|
| |
|
09-21-2010, 04:10 AM
| #3 |
| Quarry Creeper Join Date: Feb 2009 Location: Seattle, WA
Posts: 374
|
nice rig....good to follow with |
|
| |
|
09-21-2010, 05:57 AM
| #4 |
| RCC Addict Join Date: Jan 2006 Location: The "Hive"
Posts: 1,547
|
Nice! I'll be watching...
|
|
| |
|
09-21-2010, 03:10 PM
| #5 |
| RCC Addict Join Date: Oct 2008 Location: PA
Posts: 1,594
|
Subscribed |
|
| |
|
09-21-2010, 04:55 PM
| #6 | |
| I wanna be Dave Join Date: Jul 2008 Location: Southwestern, Ohio
Posts: 2,671
| Quote:
 Go with the 2.2 Rox Lox! Go with the 2.2 Rox Lox! | |
|
| |
|
09-21-2010, 05:41 PM
| #7 | |
| RCC Addict Join Date: Oct 2008 Location: PA
Posts: 1,594
| Quote:
| |
|
| |
|
09-21-2010, 05:47 PM
| #8 |
| I wanna be Dave Join Date: Dec 2005 Location: Orlando
Posts: 7,420
|
Done yet??? |
|
| |
|
09-21-2010, 10:59 PM
| #9 | |
| I wanna be Dave Join Date: May 2006 Location: FOUR 8 OH
Posts: 4,913
| Quote:
My next rig will for sure be a 2.2 though. | |
|
| |
|
09-22-2010, 12:38 AM
| #10 | ||
| Pebble Pounder Join Date: Jul 2010 Location: Colorado Springs
Posts: 183
| Quote:
Quote:
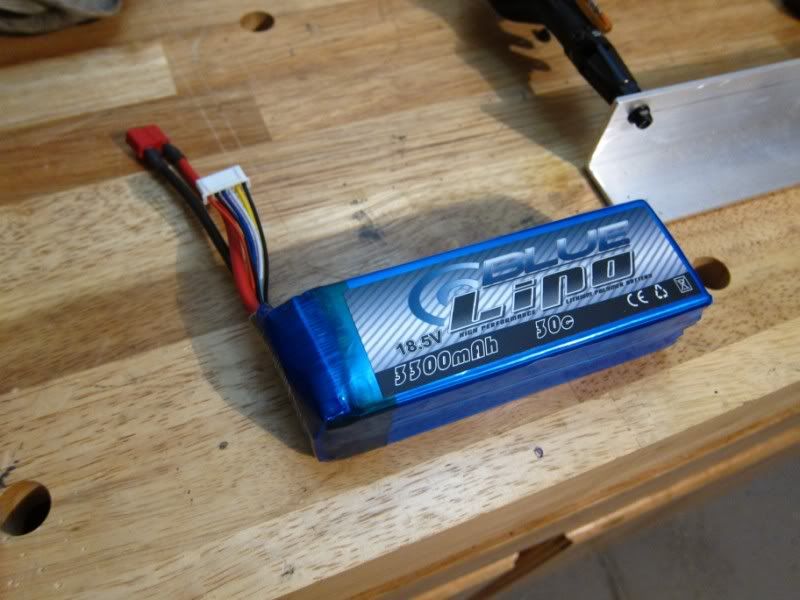 I've never owned an SXC10, so all the donor parts I intend to use are from an AX10. This includes the East End Machining skidplate, which needed to be narrowed caveman-style (i.e. 8" hand file) in order to fit between the SXC10-width skidplate mounts on the frame. 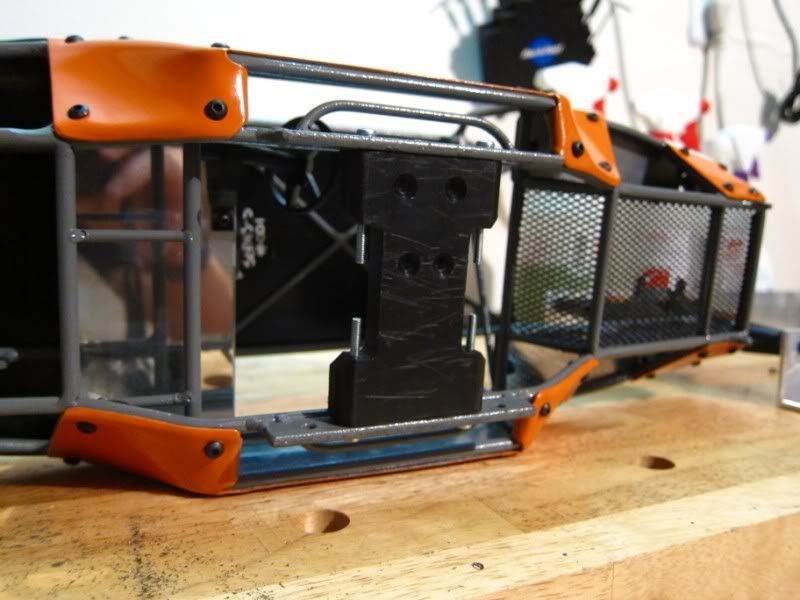 I also stripped her down and took dirty pictures of her in the nude. 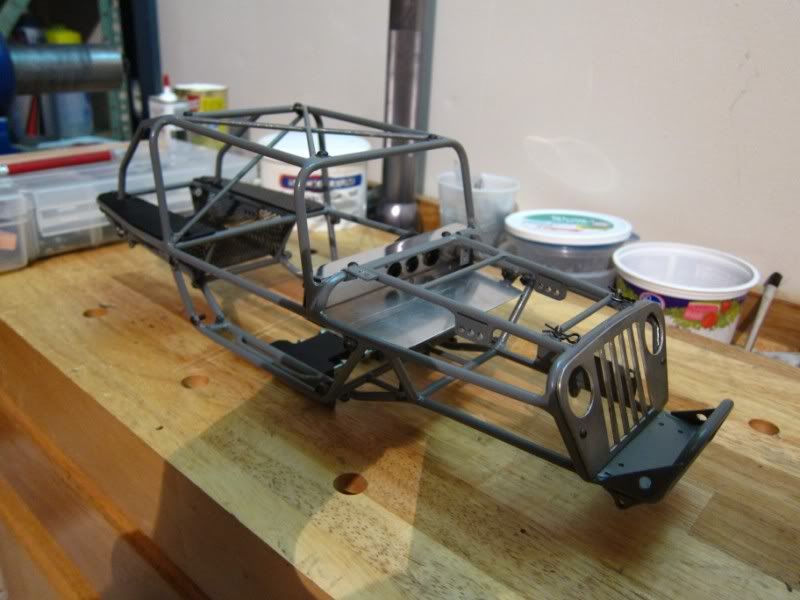 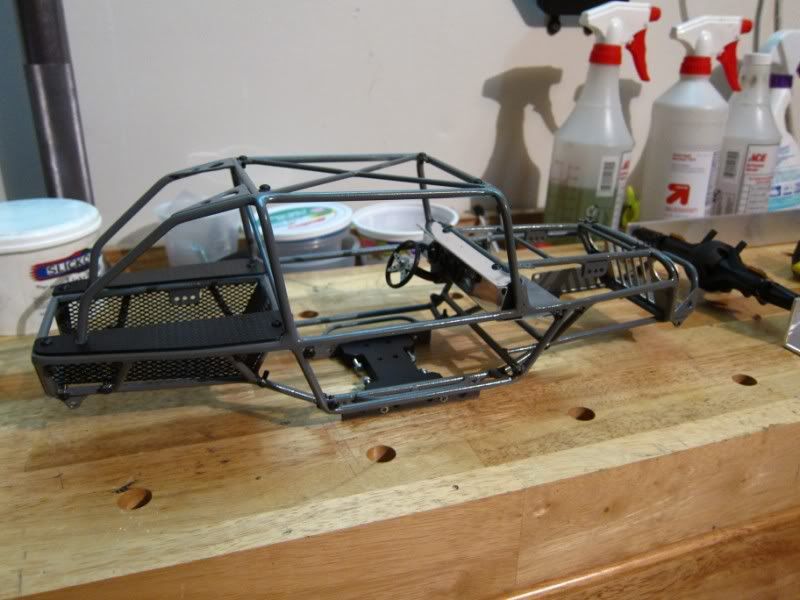 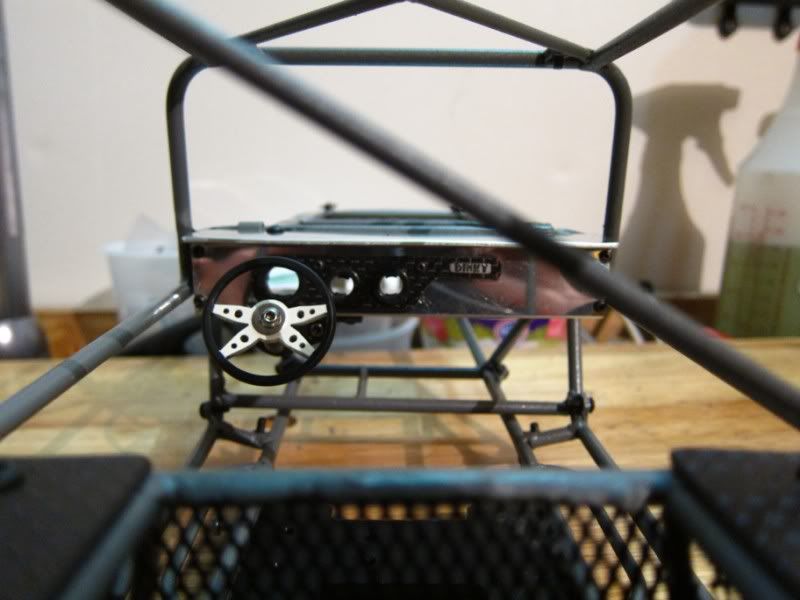 I wrapped up the pretty parts... 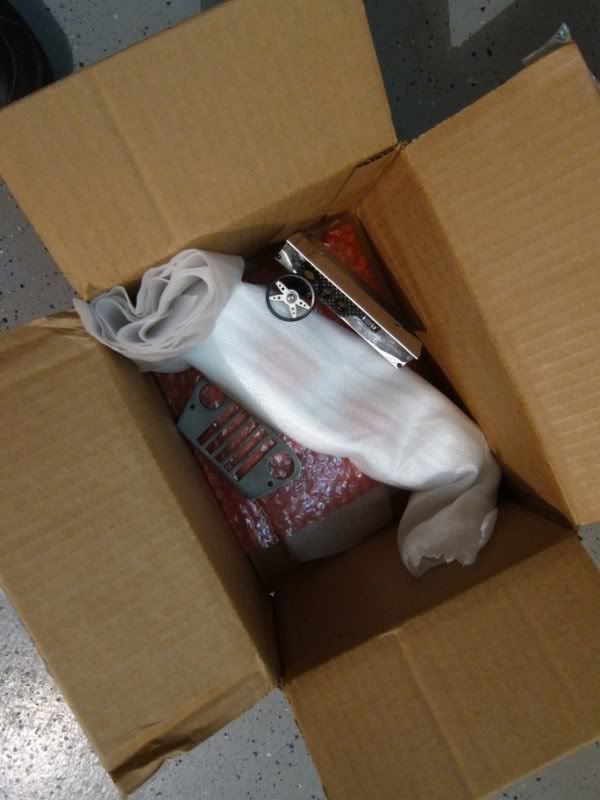 ... and hid them out of my reach. Hopefully this will avoid a body panel catastrophe before I get glamor shots.  With the body panels off, I did a little test fitting. I can tell that things are going to be tight with that giant battery hogging space. The most potential I've ever run was 9.6V NiMh. 18.5V LiPo better be worth it. 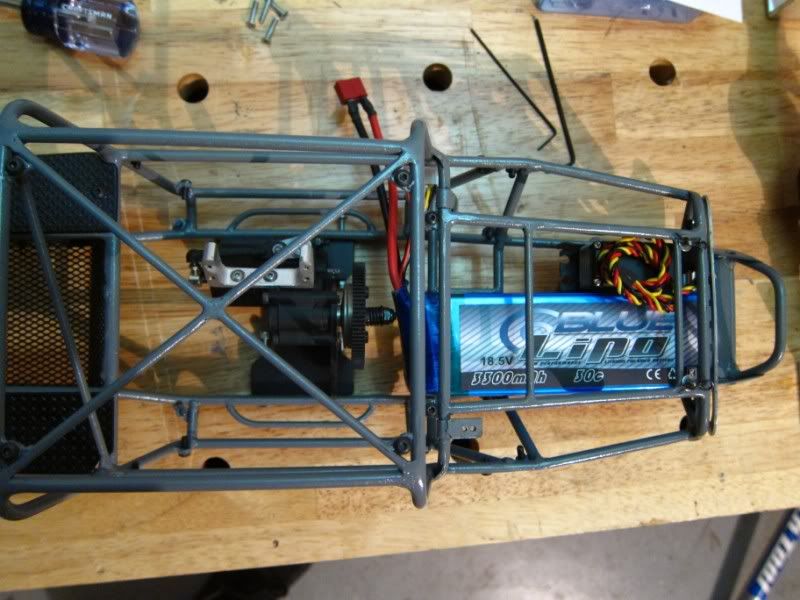 With the LiPo in its home and against the grill, the slipper nut still makes contact with the battery. I might need to either move the skid plate back some or remove the slipper clutch. I'm leaning toward option A because I'd like to keep the slipper as my drive train "fuse." 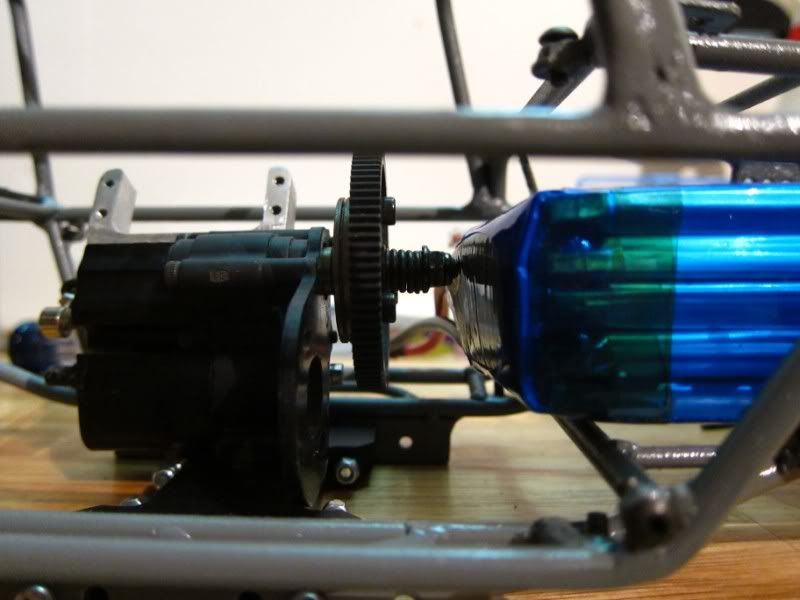 When I originally ordered this battery, Small Change was still in Matt's shop and didn't have a dash. I took my battery real estate measurements with the rig in that state; not realizing that he was going to fab up and include the gorgeous aluminum and carbon dash. The dash's built-in electronics tray hangs about 1/4" too low and interferes with the intended home for the LiPo. Gonna have to figure out a solution here without desecrating his art. 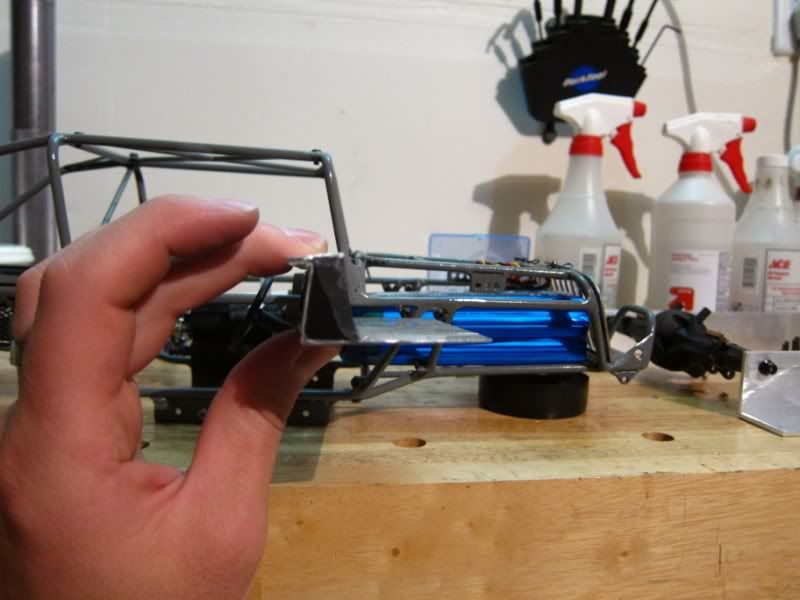 That's all for tonight. I hope to get a little time in tomorrow, but I'd like to actually go to be on time for once since receiving this rig. | ||
|
| |
|
09-22-2010, 05:47 AM
| #11 |
| RCC Addict Join Date: Jan 2006 Location: The "Hive"
Posts: 1,547
|
5s!? Holy Cow Man! What if the tranny was flipped around, would that work to get the clearance you need? I know the problem then, might be the motor. But it's worth a shot. I'm sure you could make it work, but I would suggest getting an actual SCX skid. The lower link location will be slightly different than the AX skid. I'm suspect that it will cause some type of interference during assembly. Good call with the stashing of the body panels. But with 5s, they won't be nice for long I bet! But I didn't build it to set on a shelf! Tear it up! Last edited by muddauber7; 09-22-2010 at 05:52 AM. |
|
| |
|
09-22-2010, 07:49 AM
| #12 | ||
| Pebble Pounder Join Date: Jul 2010 Location: Colorado Springs
Posts: 183
| Quote:
Quote:
| ||
|
| |
|
09-22-2010, 02:32 PM
| #13 |
| RCC Addict Join Date: Oct 2008 Location: PA
Posts: 1,594
|
Flip the battery so the wires come out on the passenger side? Might gain an 1/16", but a 1/16" is all it needs.
|
|
| |
|
09-22-2010, 06:28 PM
| #14 |
| Rock Crawler  Join Date: Apr 2008 Location: Boise, Idaho
Posts: 954
|
subscribed! Sweet rig, can't wait to see this come together.
|
|
| |
|
09-22-2010, 10:46 PM
| #15 | ||
| Pebble Pounder Join Date: Jul 2010 Location: Colorado Springs
Posts: 183
| Quote:
Quote:
Did a test fit of different foams into the Losi Comp Claws tonight. I built one wheel up with the stock Losi memory foam and one up with Proline 2-stage foam. Wow, what an incredible difference between the two. The Proline foam makes the tire much more firm; maybe too much so. The Losi foam felt good, but was significantly softer and more complaint. Both foams have a better feel than whatever is in the Rovers off my last rig. My biggest complaint is that both foams made the tire have a round profile in the tread area. I'm really after a more square profile, similar to real tires. How should I cut the foam to achieve this? The Comp Claws that Matt used for test fitting in the below picture have the profile that I'm after. Matt, what foams are you running and are they cut?  | ||
|
| |
|
09-23-2010, 06:36 AM
| #16 | |
| RCC Addict Join Date: Jan 2006 Location: The "Hive"
Posts: 1,547
| Quote:
Are ya done yet!? DInky- | |
|
| |
|
09-23-2010, 07:31 AM
| #17 | |
| Rock Crawler Join Date: Apr 2008 Location: Boise, Idaho
Posts: 954
| Quote:
We have some cool things in mind for it... Have to wait and see. | |
|
| |
|
09-23-2010, 07:13 PM
| #18 |
| I wanna be Dave  Join Date: Dec 2005 Location: Happiness is a warm AK.
Posts: 12,563
|
Looks like numba~waun found a good home. Looking forward to some action shots! |
|
| |
|
09-24-2010, 12:10 AM
| #19 | |
| Pebble Pounder Join Date: Jul 2010 Location: Colorado Springs
Posts: 183
| Quote:
So I made a little progress tonight after irrosponsibility... errr... I mean, fate slapped down my ride plans. Maybe it was for the best because I finished the wheels. I purchased these off the classifieds for a fair price, but they arrived in a little worse condition than I had hoped. No worries though because it really made my decision to color match the rings or leave them silver an easy one. Sanded them with 220, shot two coats of etching primer, and four light coats of ivory. I think they will look pretty good. So in your opinion, which center cap configuration looks best to you?* *Only post once. You must be star holding member to participate. No team members. Must be 18 years of age or older. Winner will be chosen at random, etc., etc.. Option A 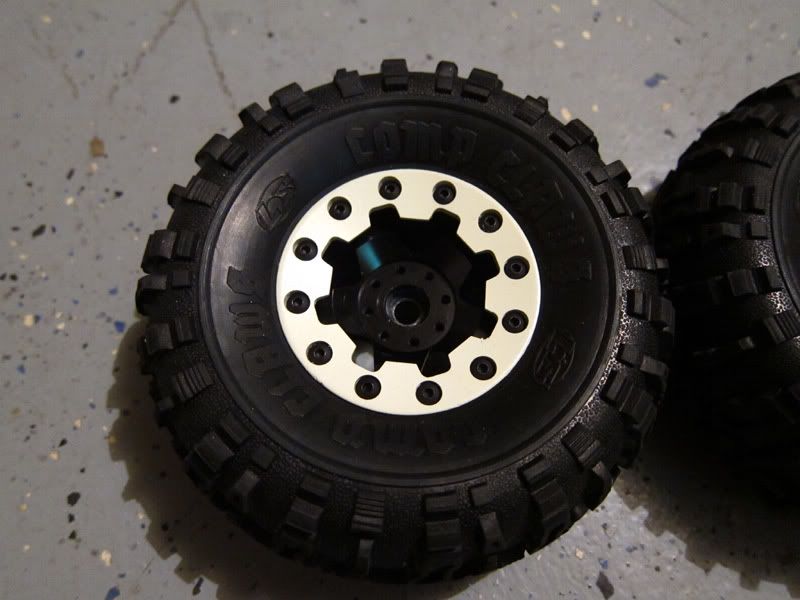 Option B 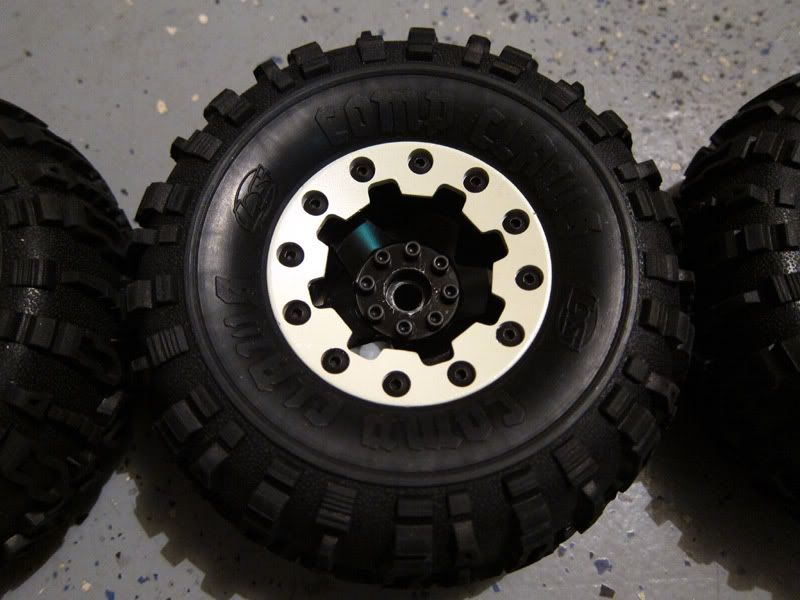 Option C 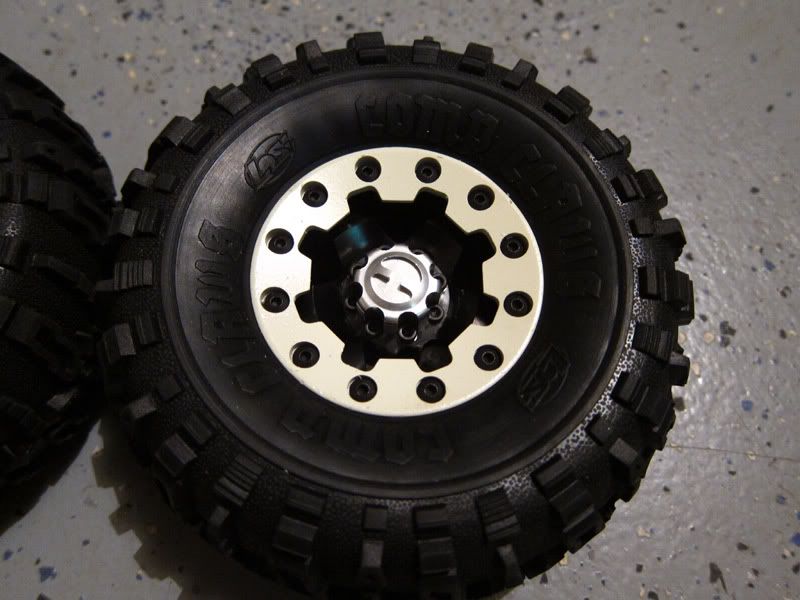 If you chose Option B, you are correct! Good work, here's a cookie. 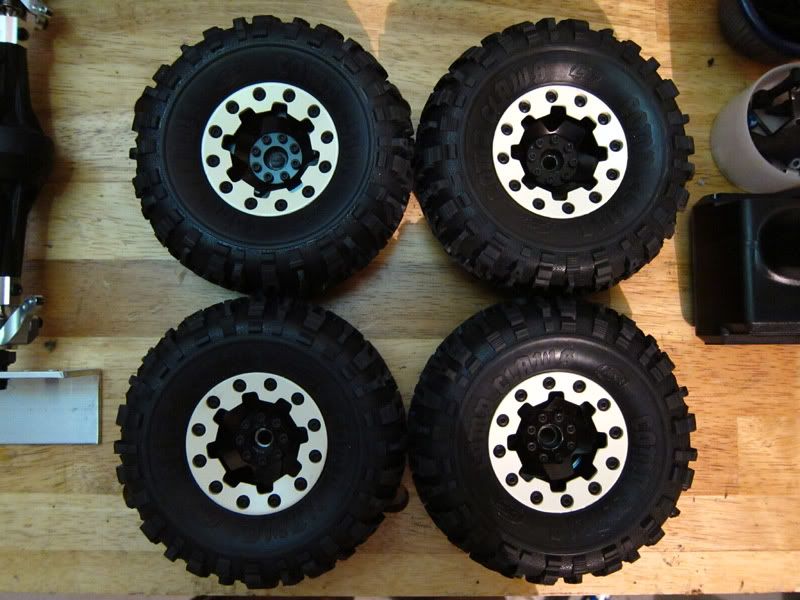 Also, I mounted the 7950TH and the battery per Gimp's recommendation. He was right. Thanks for the tip, dude. The kicker is that battery lead is oriented away from the prospective location of the ESC. Might have to get creative with the wiring.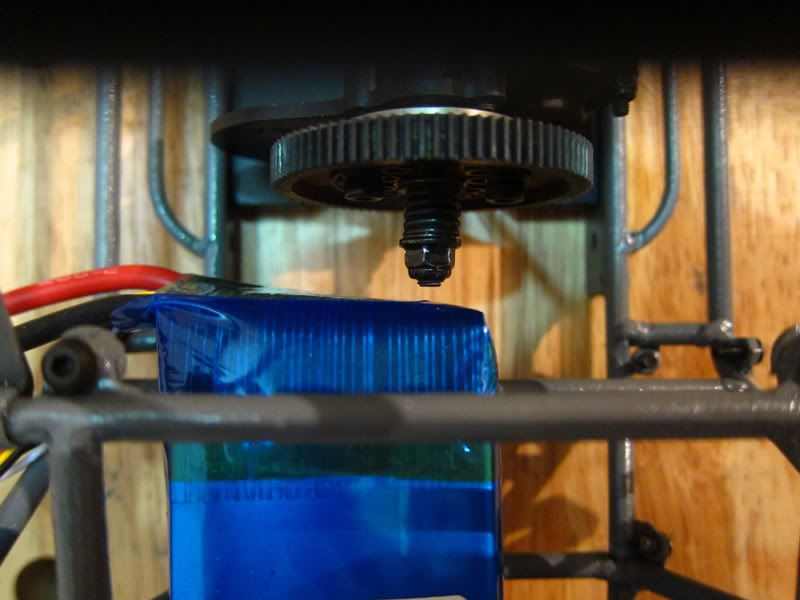 Also, stepping back and seeing that blue mass is hideous. Fender liners are going to be a must for this rig.  Same goes for the grill. I'll probably cover the LiPo in black tape and try to find a mesh similar to what Matt used on the back of the rig. Also, I have no idea how I'm going to fit headlight buckets, unless the slipper clutch leaves this build. Things are really working against the existence of that little guy. 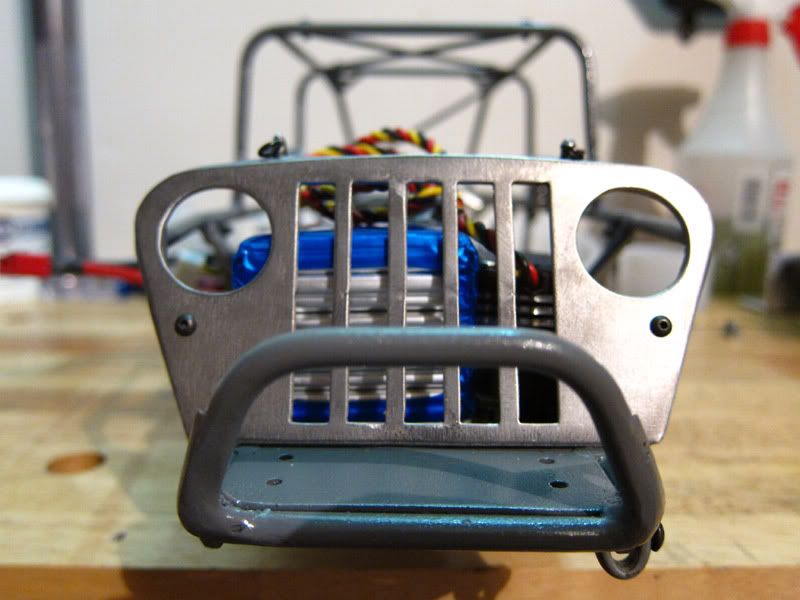 And finally, a mock up before another late bedtime. 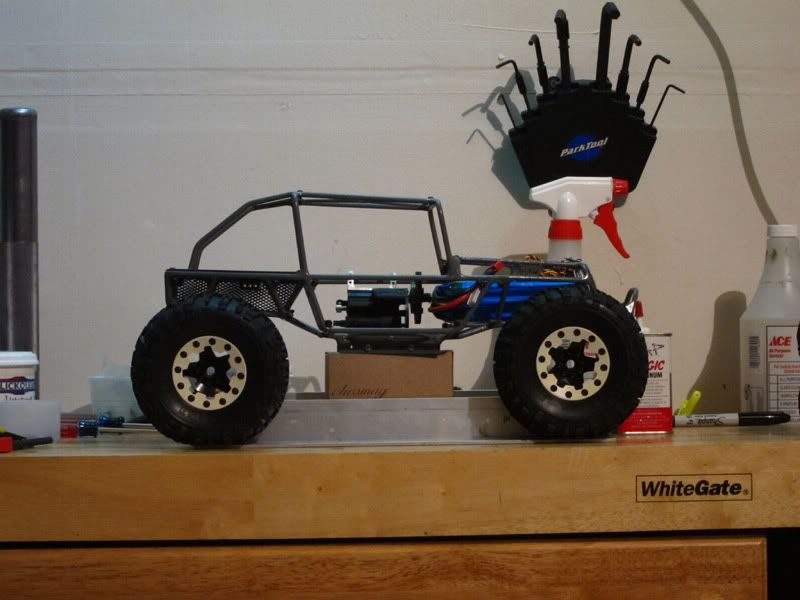 | |
|
| |
|
09-24-2010, 07:20 AM
| #20 | |
| RCC Addict Join Date: Oct 2008 Location: PA
Posts: 1,594
| Quote:
On War pig's EB Truggy, he used a special LED/bucket that was extremely low profile. From what I remember, it looked like you could angle the LED while the bucket stays flush with your angled grill. Might be something to look into, I'm pretty sure he mentioned they were pretty darn bright. Truck is lookin awesome | |
|
| |
|
| |


 Linear Mode


