| |
 12-31-2010, 12:24 AM
| #1 |
| Quarry Creeper Join Date: Mar 2007 Location: Sneads Ferry
Posts: 430
|
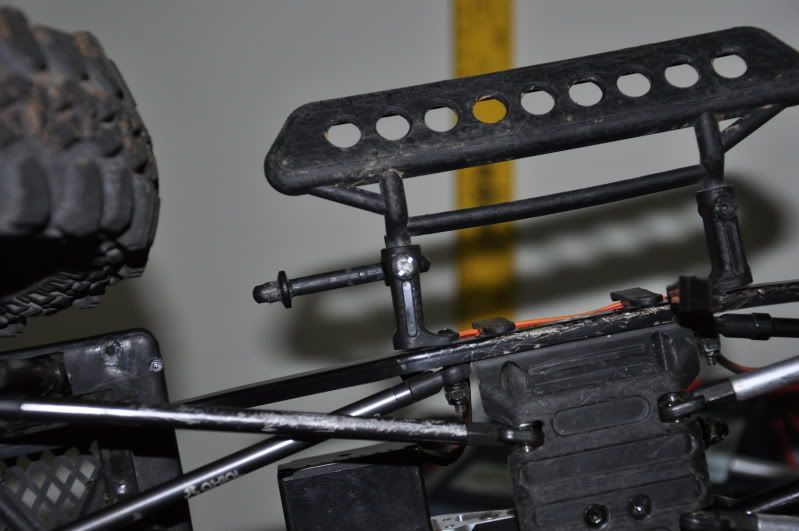
Not sure where I'm going with this one, love the scaler idea, but comp crawling is so much more fun for me. I've been into RC cars since I was a kid, mostly Associated buggies and touring cars, but dabbled in 1/8th scale buggy racing with an Xray XB8. Now here I am with crawlers, my new found love since I'm currently 1:1-less since I've moved to Hawaii. It started out as everyone else here, SCX-10 base, mine was the RTR version which is quite possibly the worst value of the SCX-10 line, but I should have known that. Shortly after I got the rig, the 4 link went in, plastic was replaced with aluminum, all the electronics upgraded and bam, beat the snot out of her. Plans for the future are: 12.5-13" wb Revised link geometry New link mounts JK New Bright body Metal front and rear bumpers Metal cage That's about all I'd like to get going on now, but we'll see how it turns out. Right out of the box, I replaced the ESC and receiver with Specktrum running gear and Novak Roster Crawler (1st edition I had sitting around in my garage) and a 2S battery. Anyhow, onto the pictures: 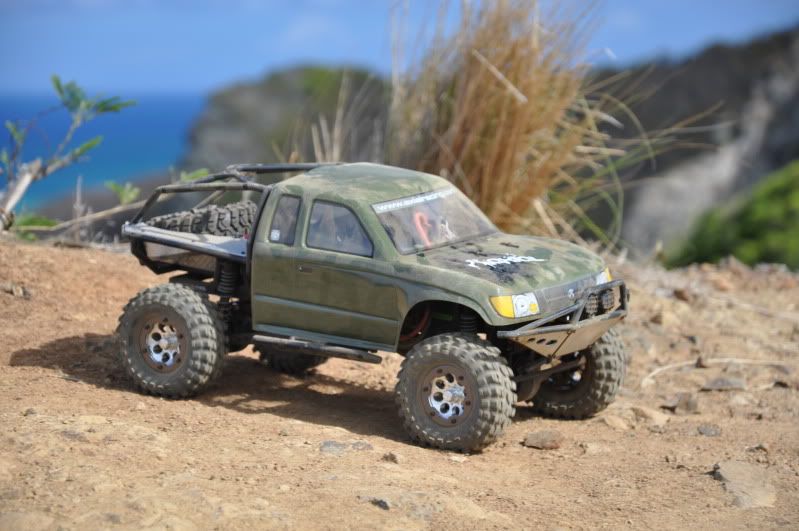  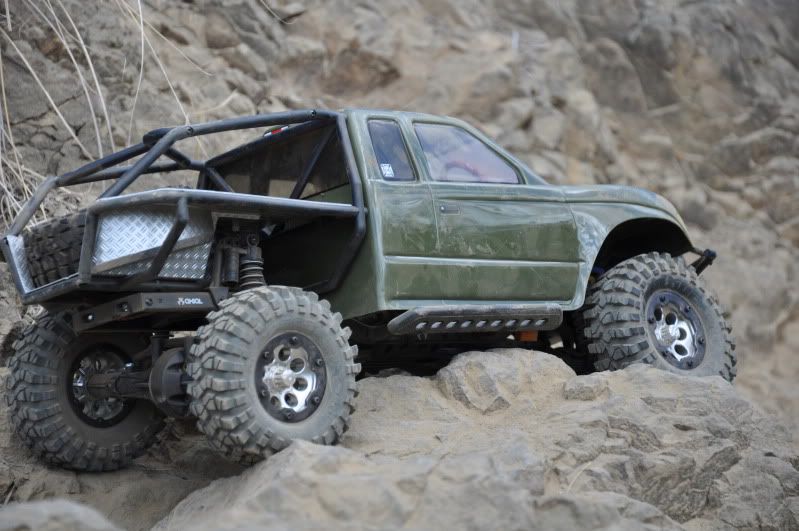 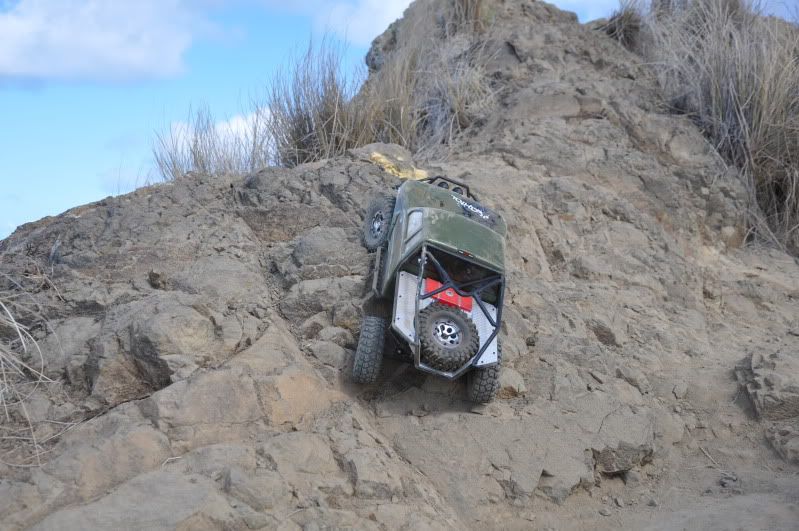 Last edited by NGreen; 12-31-2010 at 01:45 AM. |

|  |
| Sponsored Links | |
| | |
|
12-31-2010, 12:25 AM
| #2 |
| Pebble Pounder Join Date: May 2006 Location: Brentwood/Bay Area
Posts: 133
|
Sweet dude. You'll get dragged in just like I am right now. Its addicting!
|
|
| |
|
12-31-2010, 12:28 AM
| #3 |
| Quarry Creeper Join Date: Mar 2007 Location: Sneads Ferry
Posts: 430
|
Kaneohecrawler and I made a three month trip to Yuma, AZ and had a blast crawling one the one little wanna-be hill in the entire city. Better crawling was had outside town, but without a car and not wanting to pay taxi fare, we made the best of it. 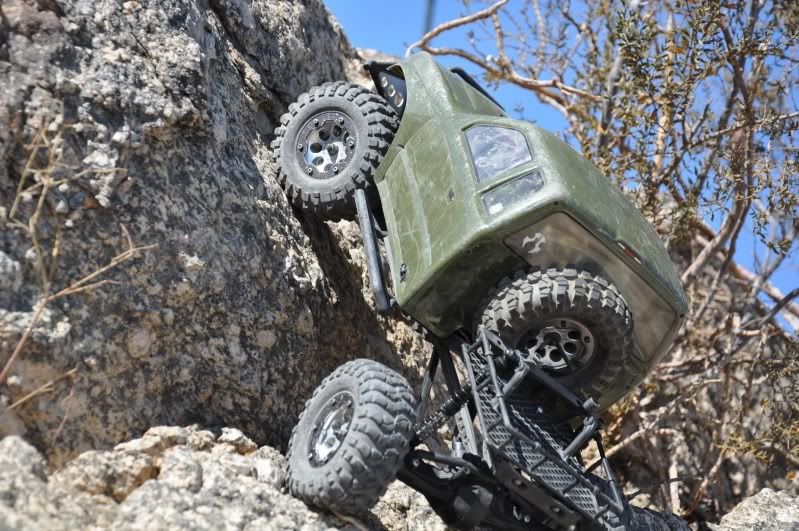 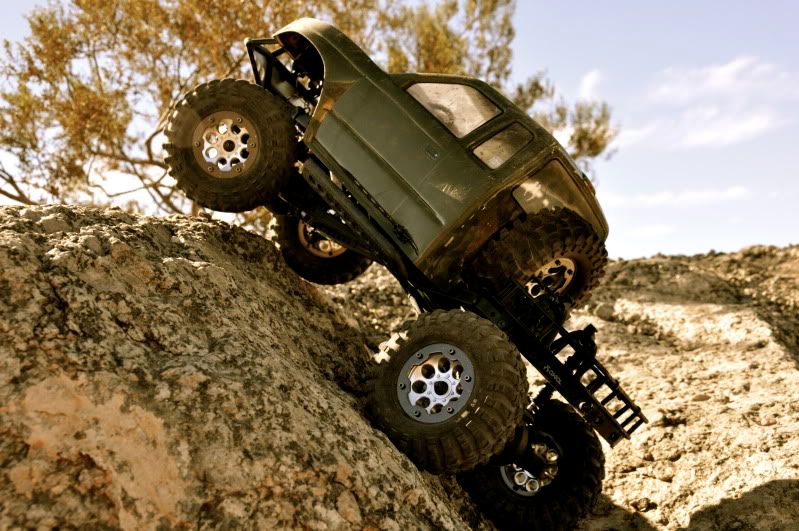 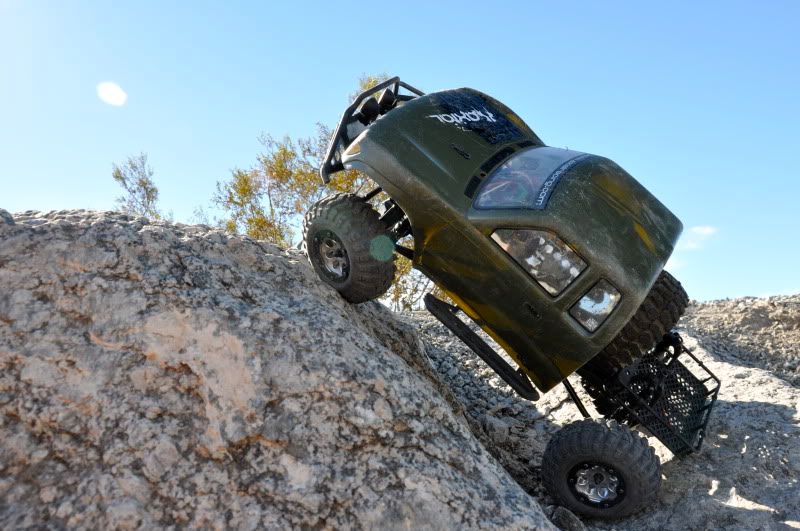  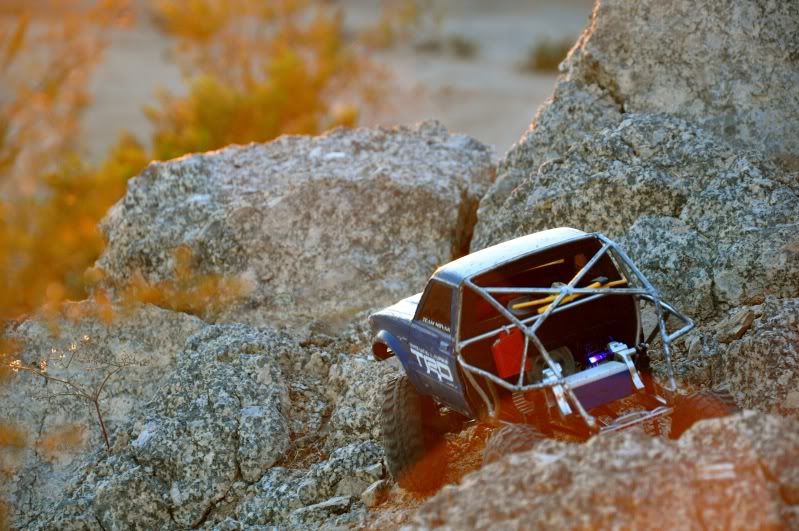 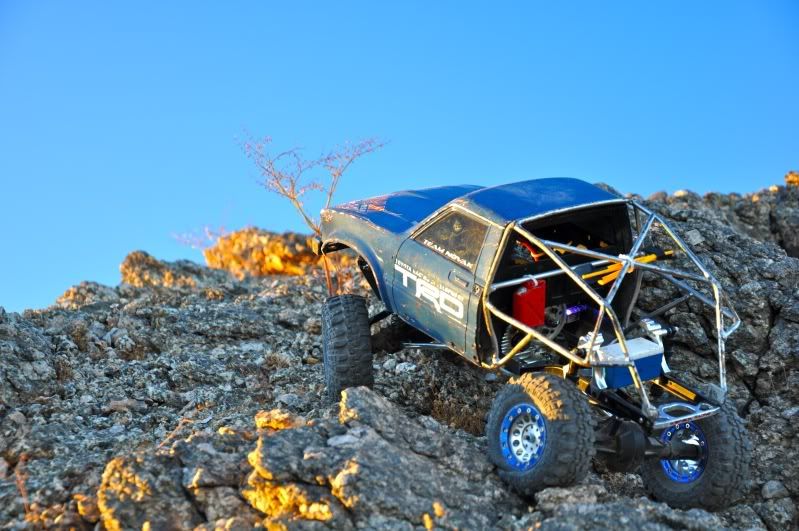 Last edited by NGreen; 12-31-2010 at 01:16 AM. |
|
| |
|
12-31-2010, 12:28 AM
| #4 | |
| Quarry Creeper Join Date: Mar 2007 Location: Sneads Ferry
Posts: 430
| Quote:
| |
|
| |
|
12-31-2010, 12:35 AM
| #5 |
| Quarry Creeper Join Date: Mar 2007 Location: Sneads Ferry
Posts: 430
|
Broke a bunch of stuff, replaced what I broke with the same or better parts. Now she had a few parts installed on her that were worth a damn.... Specktrum servo Axial front and rear lockouts Axial aluminum body front shocks G-made 110 rear shocks I got off of Kaneohecrawler Axial TR kit Was always excited about 2.2's and found I was really wanting more than 1.9's. I think that the honcho body is really a 1/8 scale body and looks funny with the 1.9 Flat Irons, so on with 2.2 TSL's and Vanquish rims! I also couldn't resist their military discount, so I got Vanquish high steer knuckles (with ackerman...although, its funny, it seems that unless they're run with BTA steering, they seem to have reverse ackerman tendencies.... *shrug*) and the Vanquish dig. 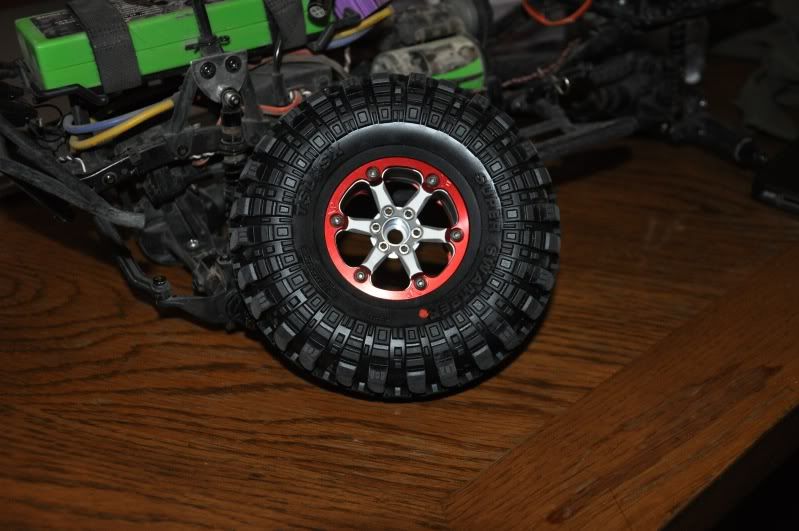 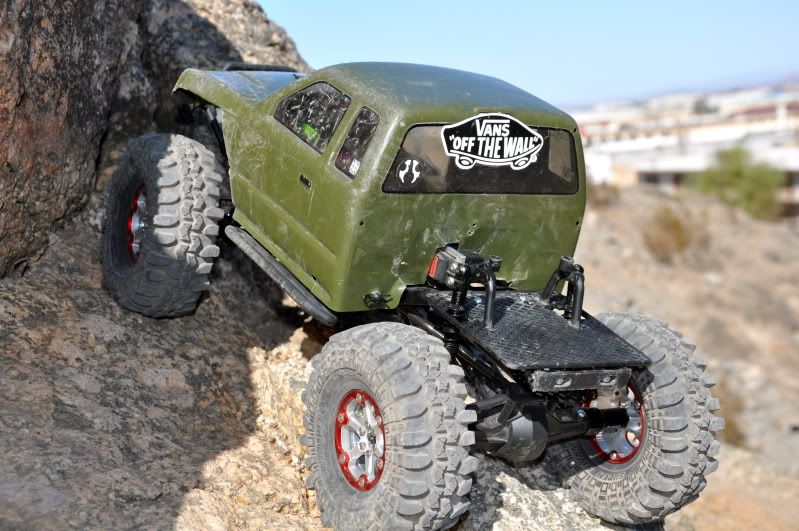 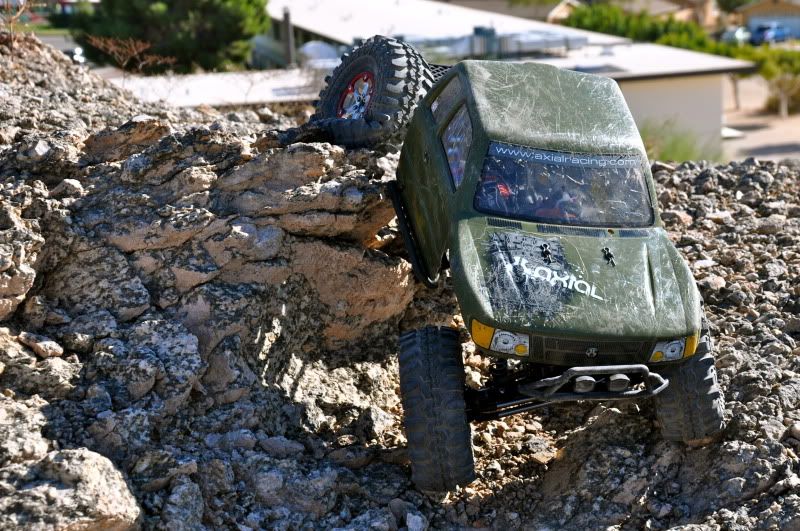 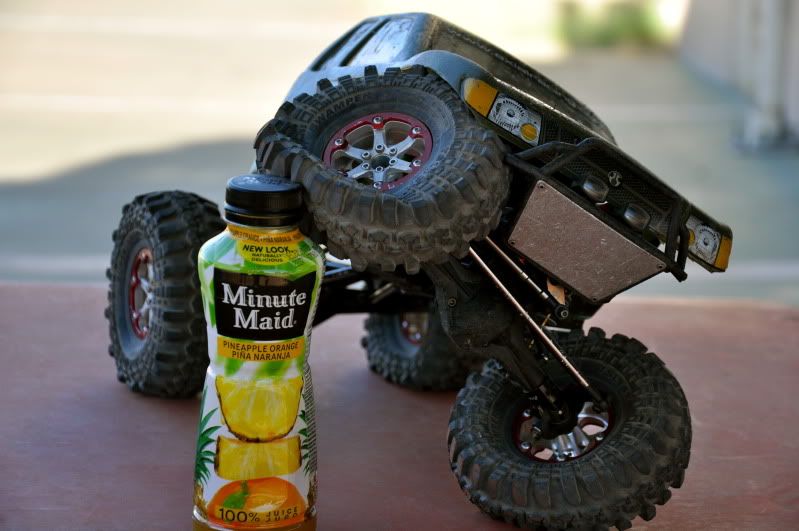  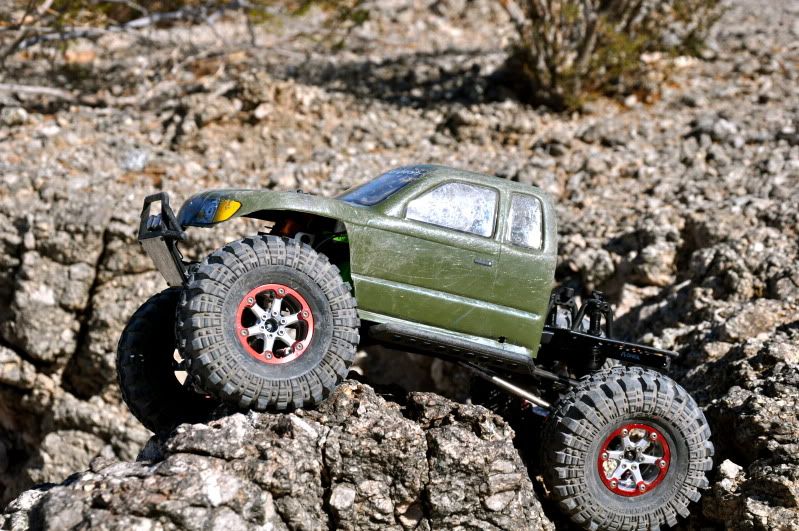 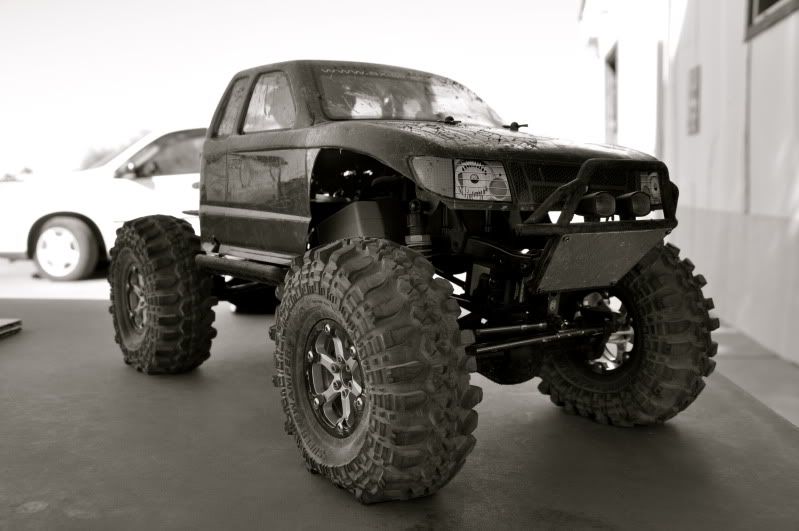 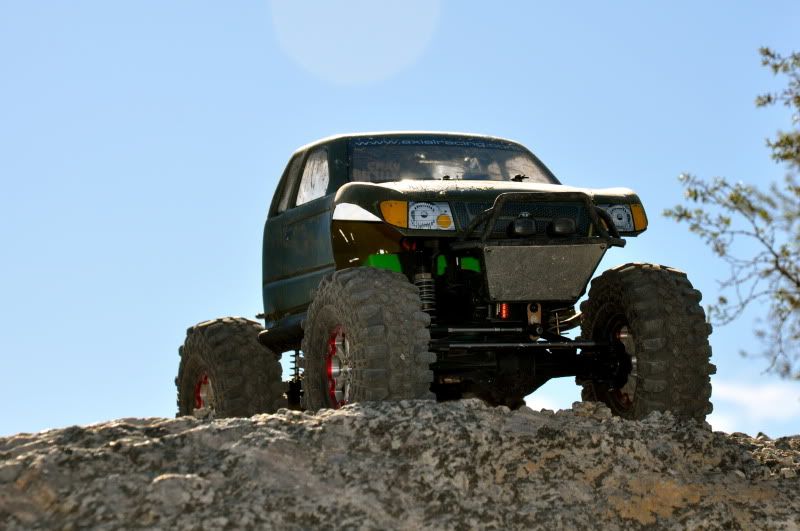 Last edited by NGreen; 12-31-2010 at 01:15 AM. |
|
| |
|
12-31-2010, 12:45 AM
| #6 |
| Quarry Creeper Join Date: Mar 2007 Location: Sneads Ferry
Posts: 430
|
I can't seem to leave well enough alone and ended up running the rig with the stock 20T pinion, 2.2's, the el cheepo 27 turn axial motor, all in a compact 8lb package. Needless to say, she wasn't happy and wasn't really thrilled to go anywhere, so out with the smoking 27 turn and in with an RC4WD 35 turn. Again, not wanting to wait 3-5 business days for new pinions in the seemingly hobby-store-less Yuma, AZ, I ran the 45 turn with the same set up and fried that as well. No worries though, I had two Novak 55 turn's just sitting around! Yup, again, too impatient and fried a 55 turn in short time. Realizing I was in love with wheel speed as well as low speed controllability of the brushed low turn motors, I needed to figure out my next plan. Two speed tranny or a brushless system. Well, again, Novak to the rescue, purchased a Goat 3S system with an 18.5 Ballistic motor. Nirvana has been achieved in my rig! With 3S motors and the silky smooth Ballistic motor, it was back to Hawaii for some more trails. 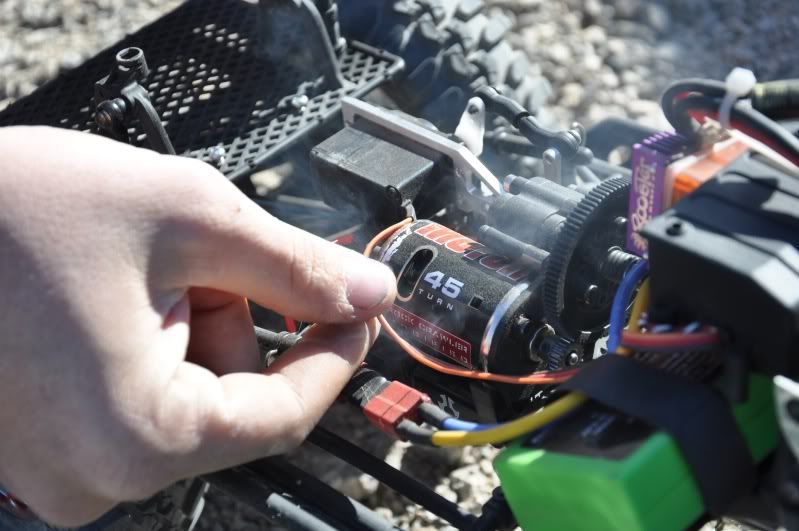 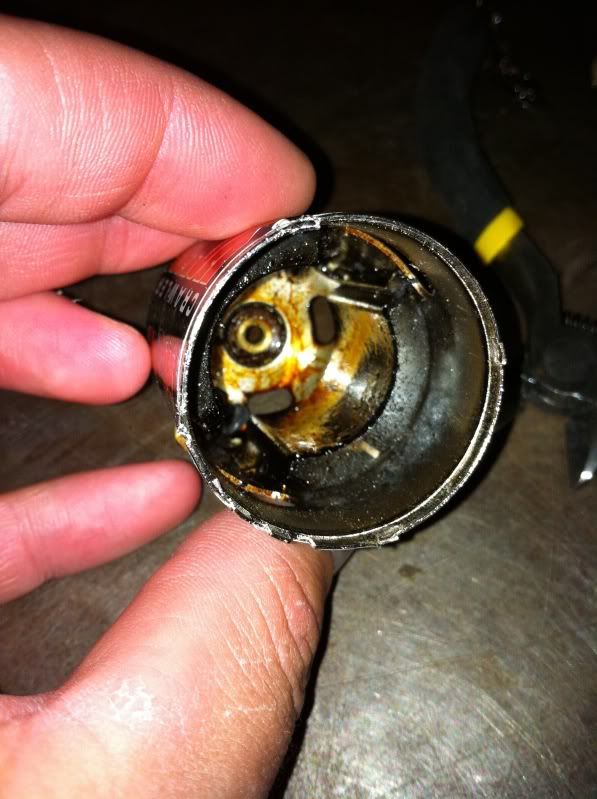 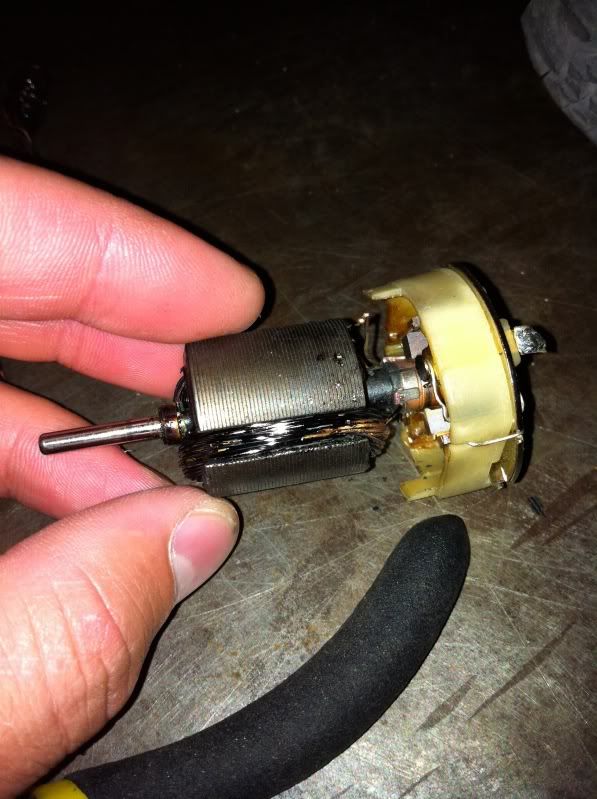    Last edited by NGreen; 12-31-2010 at 01:15 AM. |
|
| |
|
12-31-2010, 01:34 AM
| #7 |
| Quarry Creeper Join Date: Mar 2007 Location: Sneads Ferry
Posts: 430
|
I've been having too much fun crawling and trail running and my karma must have run out because after about 2 weeks and 10 2200mah packs of having that Goat 3S system, I put it away for the night intending on making it to a GTG the next day with all of the Hawaii guys. Got it out the next morning to make sure I had everything, decided to give it a good around the block drive to make sure it was fine, and sure enough, motor problems. Within a minute of turning it on, I was off on the concrete sidewalk about half throttle and she just locks up for no apparent reason. Figuring it was just a radio glitch, I let it chill for a minute and off we were again. This time, in the grass, enjoying my wheel speed, I slammed the throttle and not two inches later, locked up again. Pulled the body off while scratching my head to find nothing out of the ordinary. Motor was fine, well below its normal running temp of 140* and no trouble lights. Well, with the body off this time, part throttle was ok. Full throttle and bam, locked up again. This time I was able to see the codes flashed from the ESC and for some reason I got the motor over temp code. WTF? So back home to call the boys and say I'm not gonna make it and try to figure out what was up with the rig. Put her up on a few bricks with wheels off the ground and ran it half throttle for a minute....normal running temp, no issues. Let off the throttle and the motor is making this noise...kinda like I have a partial throttle input going but not enough to turn the motor over. Nope, no input from the radio, ESC is still centered, no issues there, but the funny part is the motor is building heat like crazy. She's now reaching 155* and I decided it was time to stop playing with it and call Novak. It's Sunday. FML. So after a few hours of brainstorming and thinking, I take the motor apart to see if I've somehow managed to get FOD inside the motor. Nope, clean as a whistle. No grime on the rig at all, no shorted out wires anywhere, nothing. This thing really has me stumped now. I go and put it all back together and try it again. This time, partial throttle for 5 minutes, no issues. From part throttle I punch it and bam, locks up, this time throwing the motor as well as the ESC over temp codes. At this point, I'm completely stumped and frankly, pretty annoyed at the situation. So I call Novak the next day and talking to their tech support, we come to the conclusion that it's either a bad sensor board or a bad ESC. They were kind enough to send me a new sensor board to swap out, hoping to fix the problem and save time in shipping. Well, it got here and I put it in. Damn it if it wasn't the issue. So all the running gear was taken out and shipped to Novak to see what they could make of it....still no word back yet, but they've only had it two days, so I'll give them a few more. Anyways, onto the tutorial about replacing the sensor board on a brushless motor! Step one: Remove motor from transmission 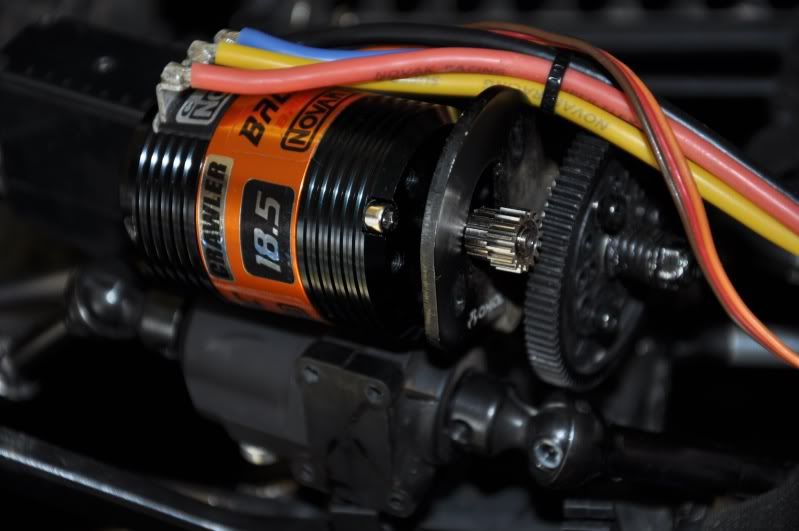 Step two, disassembly: Remove sensor cable. Remove the pinion. Remove the three bolts holding the can together. Separate the individual parts of the motor: The front case, the center case, the back case. You can leave the stator inside the coils, there's no real need to remove it, but I did just because.  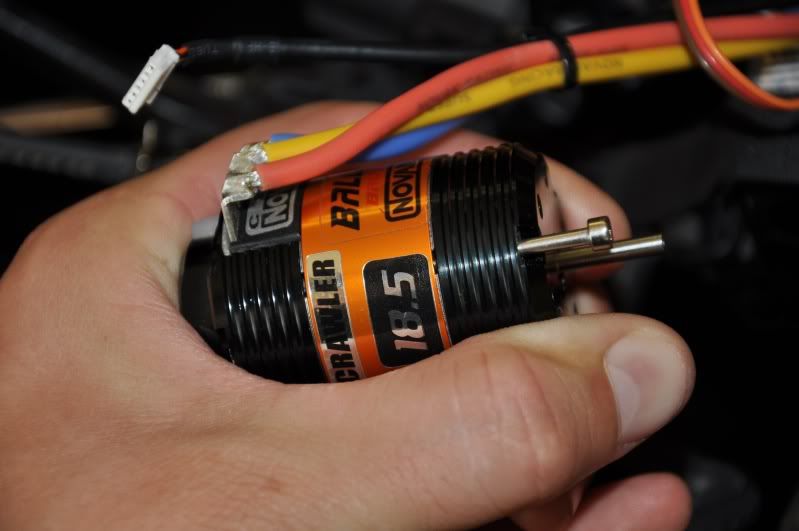 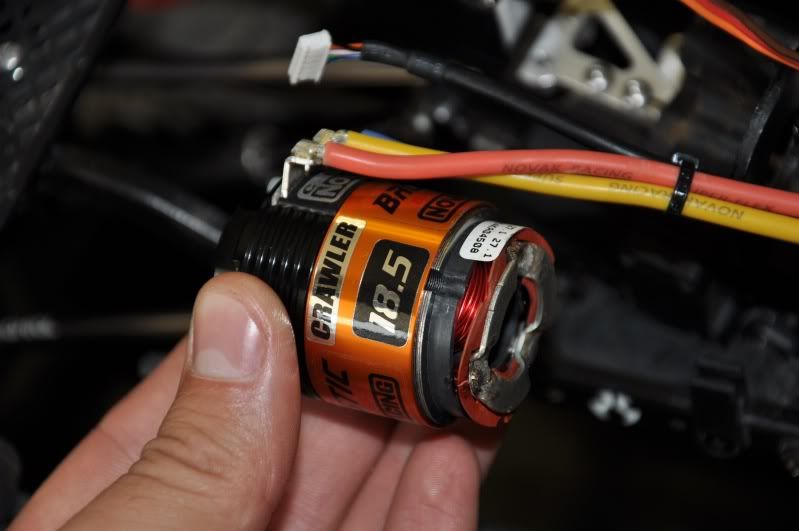 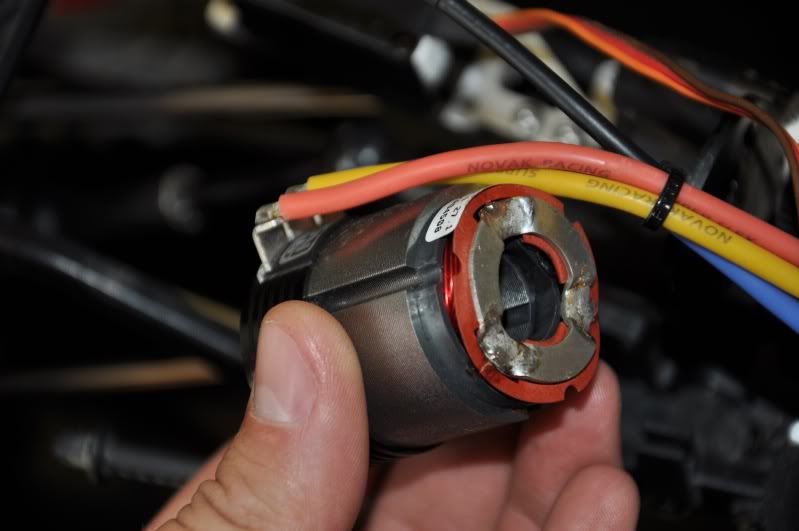 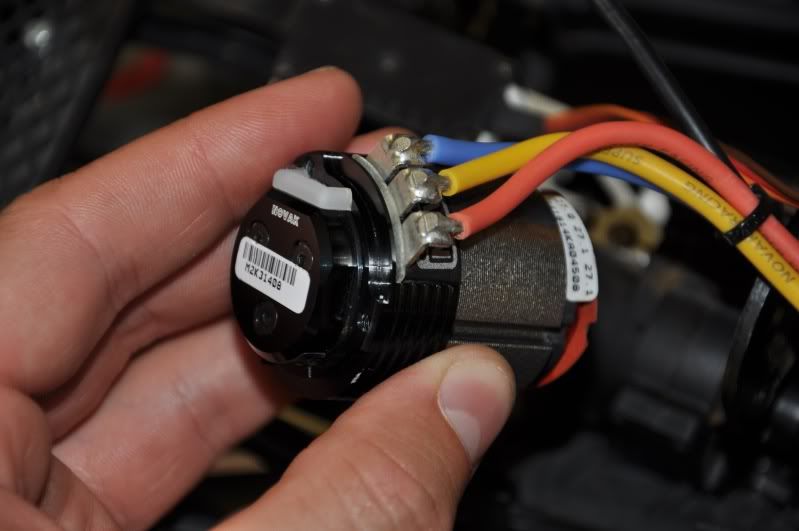 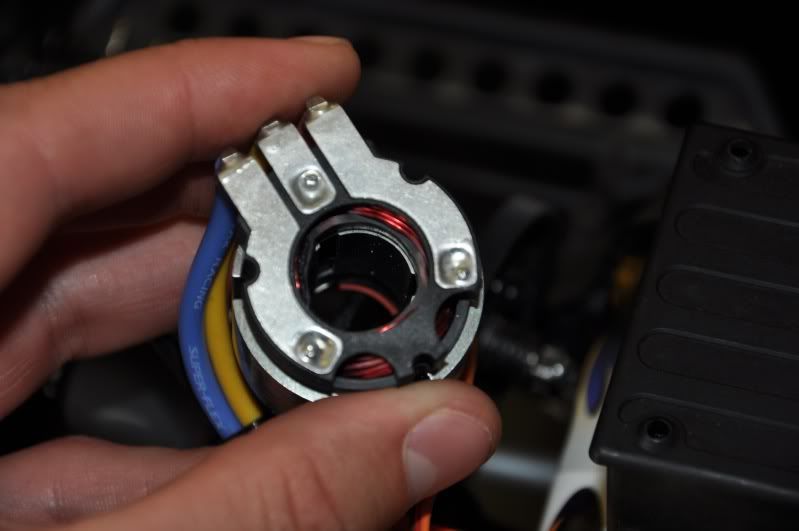 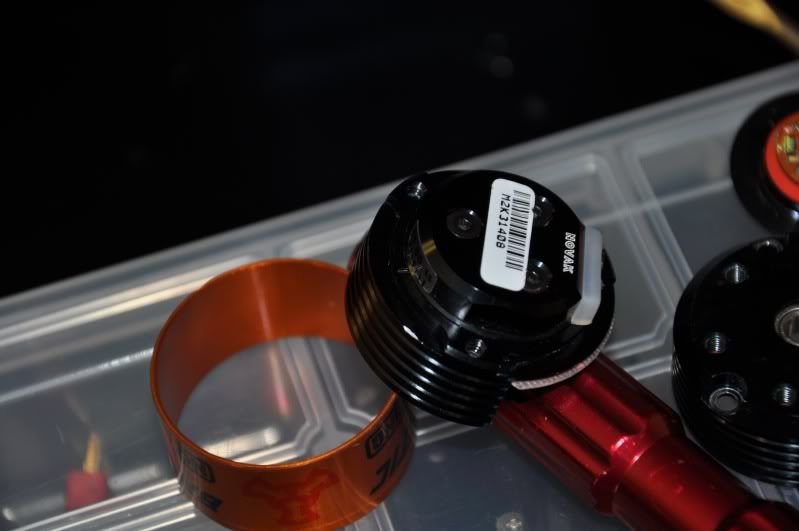 Step three, sensor board removal: Peel the motor serial number tag up carefully so you can remove the three screws holding the sensor board inside the endbell. Be sure to mark the timing of the motor or take note of the sensor board position in the endbell before removing the screws. Remove the screws holding the sensor board in. Turn the endbell over and remove the wafer type washer without destroying it. The sensor board should now fall out easily. Remove it and replace it with the new sensor board, sensors towards the coils. 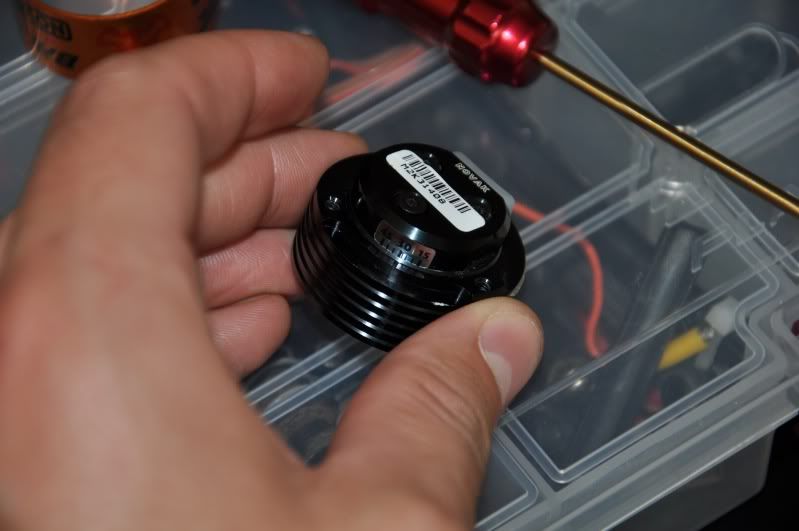 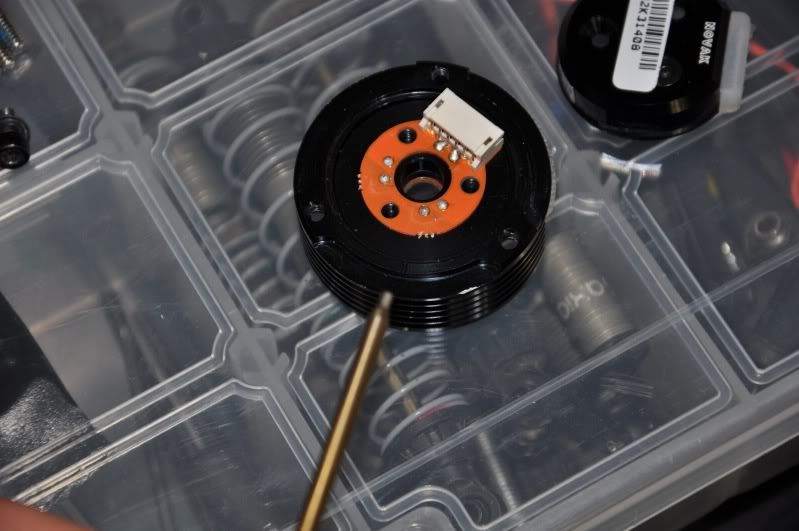 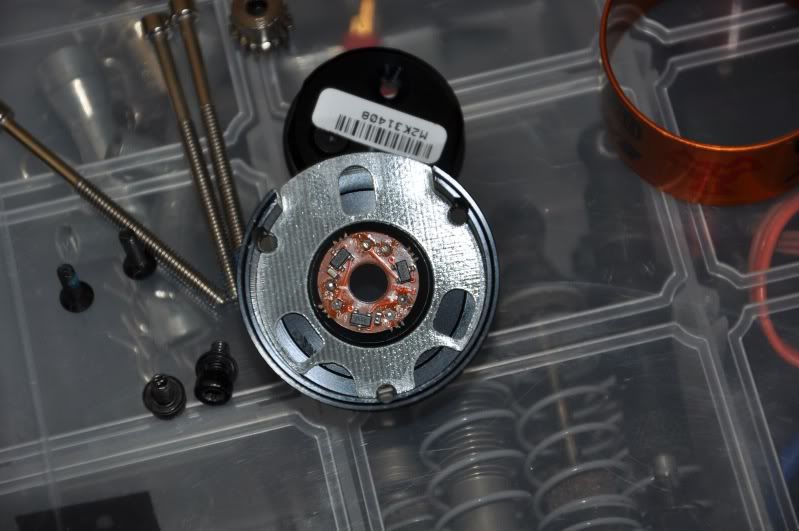 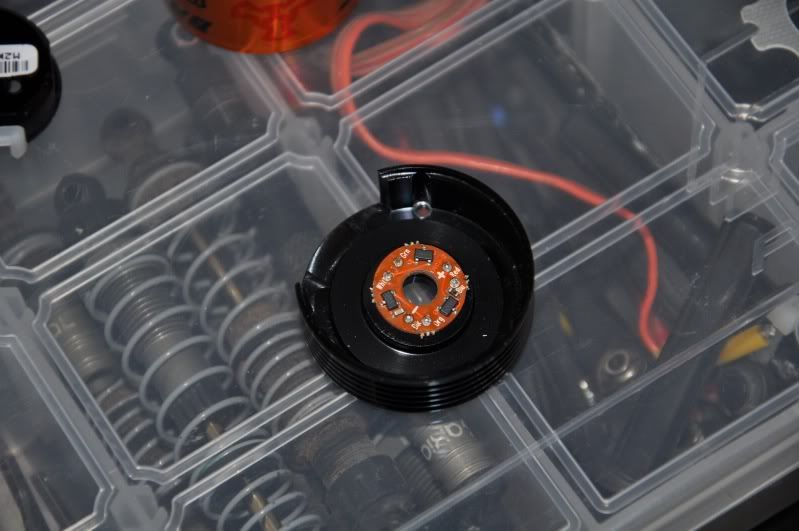 (note the discolored sensor...weird, eh?) 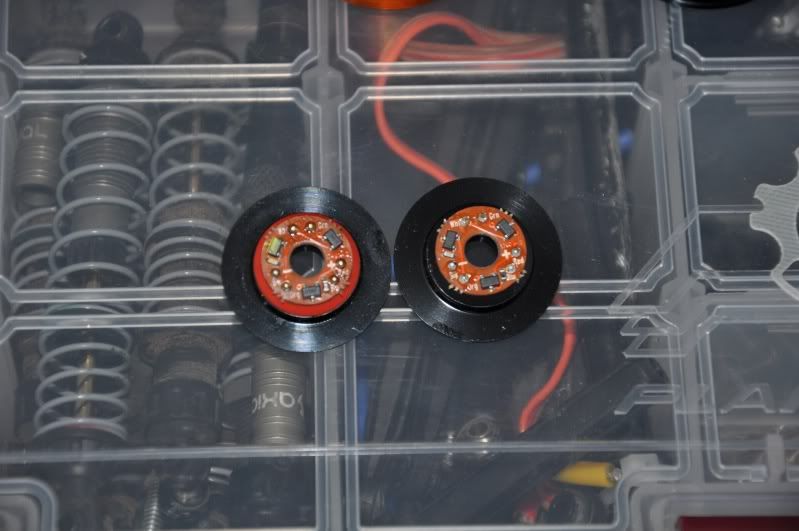 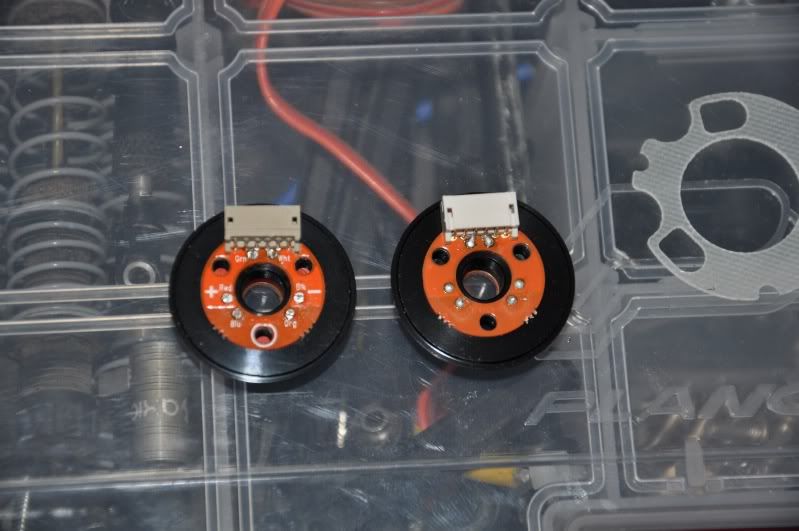 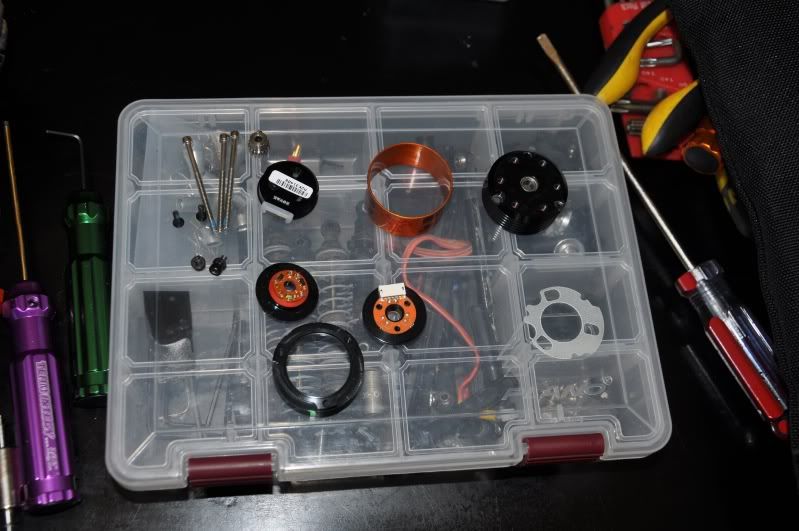 Step four, reassembly: Install the sensor board, sensors towards the coils, install the three screws loosely in the endbell. Install the wafer. Flip the endbell over, tighten the screws snug and adjust the timing...then tighten all the way. Place the coils into the endbell, making sure that the stator seats in the bearing in the endbell. Install the sleeve, install the front bell, put the screws back in and tighten. Reinstall the pinion and the sensor wires, reinstall in the truck and off you go. Too bad this simple procedure didn't work out for me! |
|
| |
|
12-31-2010, 01:44 AM
| #8 |
| Quarry Creeper Join Date: Mar 2007 Location: Sneads Ferry
Posts: 430
|
Well, in my down time that I haven't been able to crawl, I've been productive as much as possible. I managed to snag a new work space other than the kitchen table! 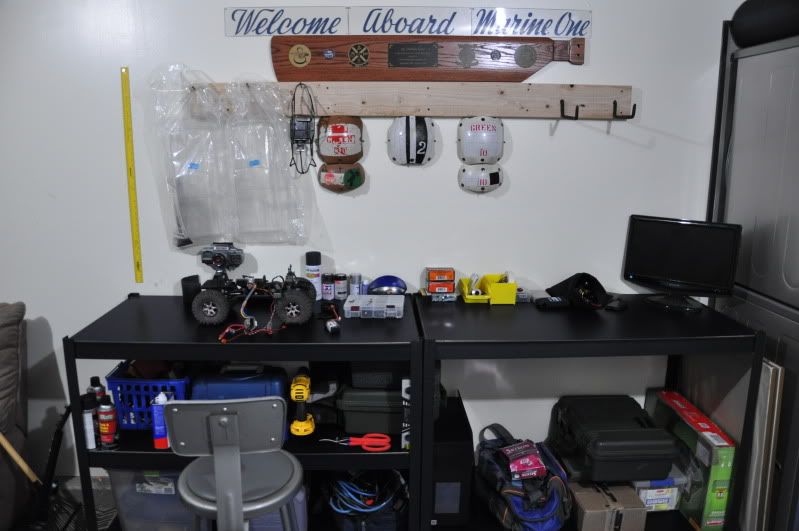 In addition to my new workspace, I also decided it was time for a new body. Being indecisive and having too many plans for too many rigs, I ended up with three bodies. A 1970's C-10, a 70's F-100, as well as a New Bright JK. I haven't decided yet which one I'm going to run first, but it'll probably be the F-100 or the C-10...Thoughts? I'm thinking I'll dove tail the lexan bodies and do a cage for them as well. Maybe I'll do those bodies and detail the JK out some before I install it. Luckily for me, Kaneohecrawler has been on vacation and managed to hit up RoxBox and destroyed his frame....of which he says he's going to kindly donate to my cause for a little bit of tube work on his rig. Pretty excited to get two frames going at the same time. I think I might do a 1.9 Rox Lox JK and go from there. I've got the rig currently droop set up for a comp crawler with the lexan bodies, but that can be changed quickly. I think while I'm waiting for the motor and ESC to get back from Novak, I'll dabble in tube work for the comp guy....maybe a truss or two, some new shock hoops, some new bumpers...I donno, just kinda let the imagination flow. 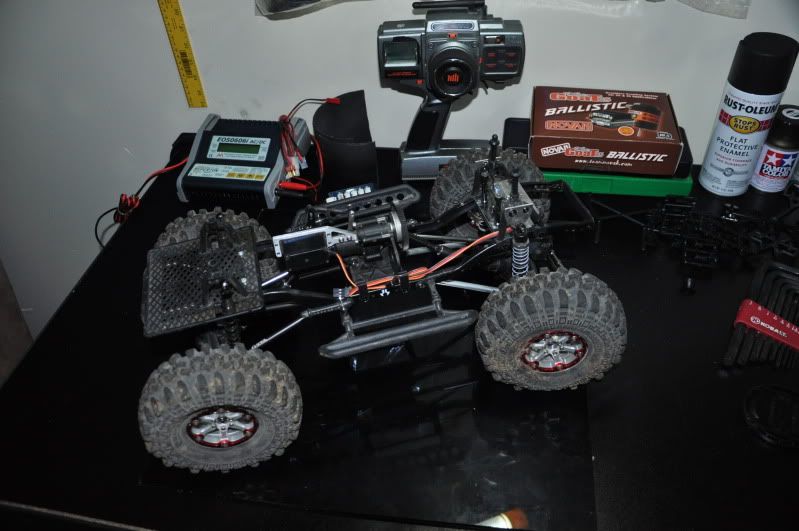 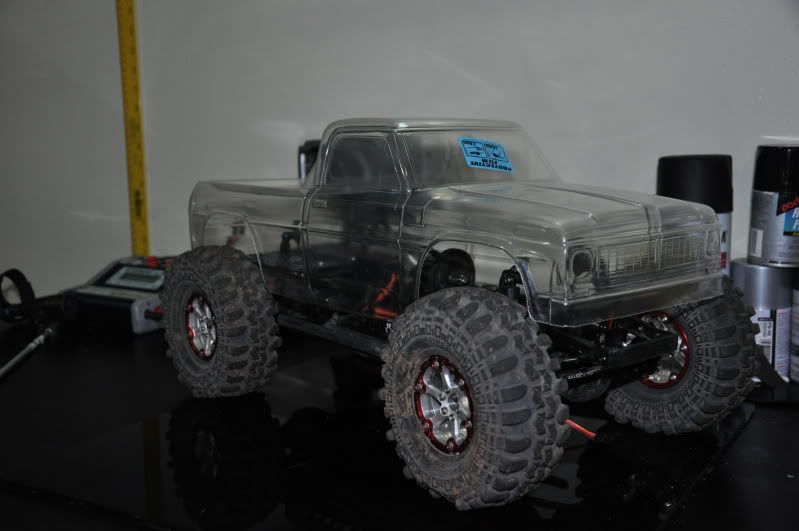 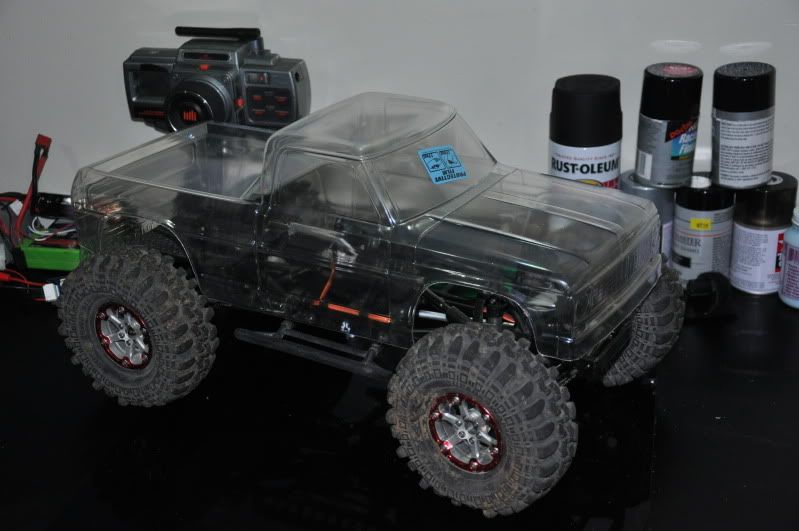 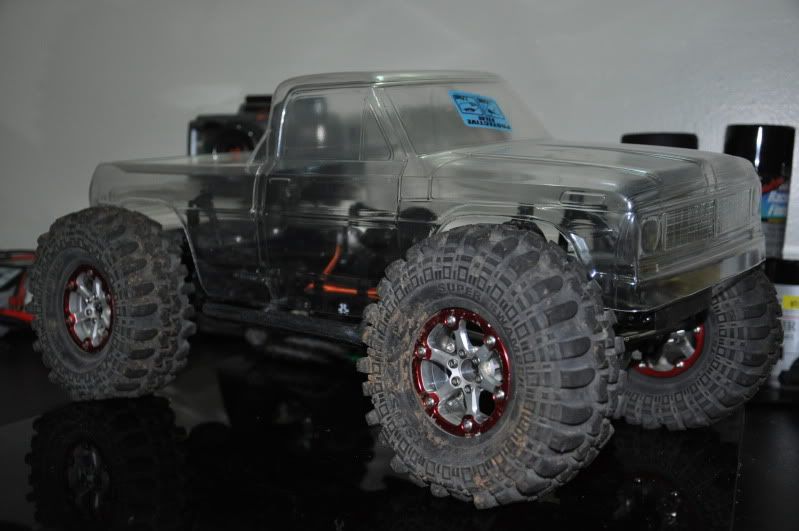  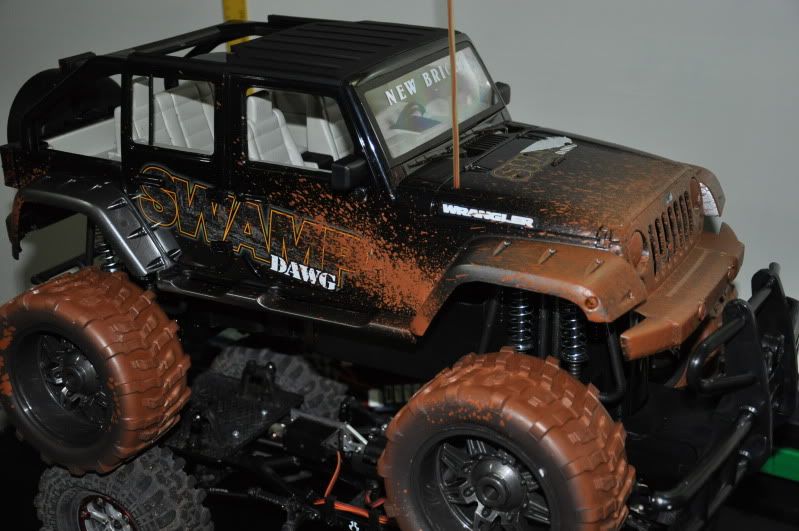 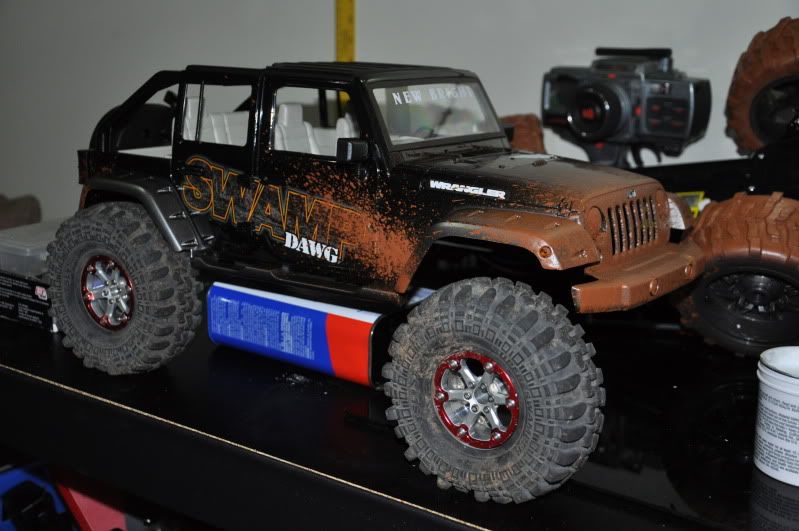 |
|
| |
|
12-31-2010, 04:18 PM
| #9 |
| RCC Addict Join Date: Dec 2009 Location: Rock Bouncin' with the Patented Technique
Posts: 1,374
|
Looks good. How did you have your body posts mounted on your honcho cab coming out of the back?
|
|
| |
|
12-31-2010, 05:33 PM
| #10 |
| Quarry Creeper Join Date: Aug 2009 Location: Golden, CRAWLERADO
Posts: 491
|
nice honcho. i love the 2.2 tsls on mine sucks about the motor issues tho. i couldnt help but notice the MARINE ONE stuff on your wall. i served on the h60 flightline from 99-03. SEMPER FI.
|
|
| |
|
12-31-2010, 06:16 PM
| #11 | |
| Quarry Creeper Join Date: Mar 2007 Location: Sneads Ferry
Posts: 430
| Quote:
| |
|
| |
|
12-31-2010, 06:18 PM
| #12 | |
| Quarry Creeper Join Date: Mar 2007 Location: Sneads Ferry
Posts: 430
| Quote:
  | |
|
| |
|
12-31-2010, 06:24 PM
| #13 |
| Quarry Creeper Join Date: Mar 2007 Location: Sneads Ferry
Posts: 430
|
Made a bit more progress today. Cut the step rails off of the JK body and decided I'd put that one on hold until I could get the other frame in. I've got a few ideas from Pirate I'd like to see made into 1/10 scale. Started work on the tube fenders and fenderwells today on the Ford body. I'm cutting it up in a droop setup but I'm still torn on if I'm going to run it droop or sprung. We'll see. 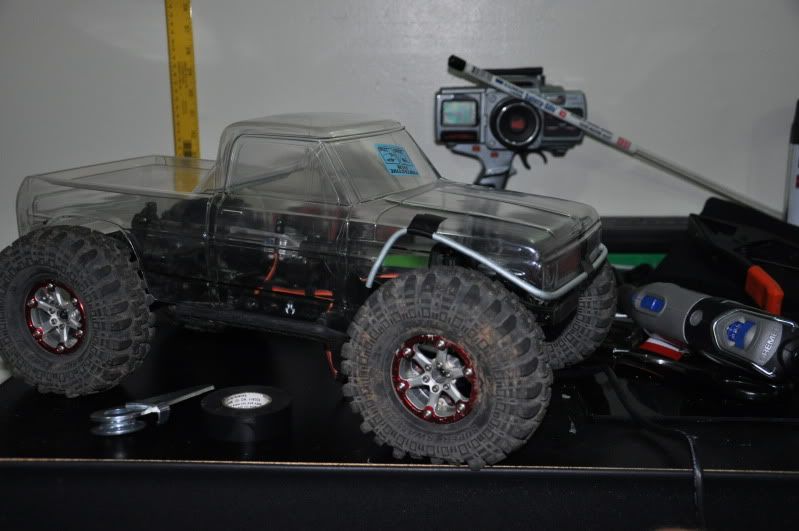 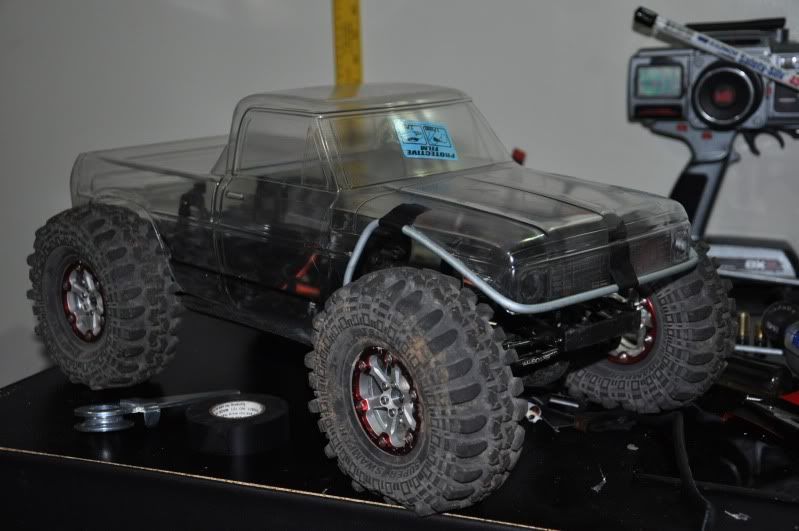 |
|
| |
|
12-31-2010, 07:01 PM
| #14 |
| Rock Crawler Join Date: Apr 2010 Location: America
Posts: 607
|
i like ur tire/rim combo looks great
|
|
| |
|
12-31-2010, 08:25 PM
| #15 |
| Quarry Creeper Join Date: Jan 2004
Posts: 276
|
Good read, really like how you went through this thing  That's a bummer about your esc/motor. That's a bummer about your esc/motor.The Ford body looks good on there as well |
|
| |
|
12-31-2010, 08:29 PM
| #16 |
| Newbie Join Date: Dec 2010 Location: follansbee
Posts: 33
|
looks good. are you planing an exo cage around the chevy body.
|
|
| |
|
12-31-2010, 11:33 PM
| #17 | ||
| Quarry Creeper Join Date: Mar 2007 Location: Sneads Ferry
Posts: 430
| Quote:
Quote:
I don't plan on doing a full cage. I plan on dove tailing it, tube fenders front and rear that hug the fender opening, kinda to be used as a rub bar. I am hoping to have the boat sides done tomorrow so I can tie everything together and start on the internal cage. The bumpers will also tie into everything, but as far as a complete exo goes, no, I won't have one. I will probably do a partial internal one to support the body when I roll it off of rocks. For paint, I'm going to do white and a red stripe down the side. I'm trying to decide on backing colors, but I'll probably go with silver/chrome backing and then a black behind that. I have yet to find a red that I like, but I'm trying to match the beadlock rings color. Last edited by NGreen; 12-31-2010 at 11:35 PM. | ||
|
| |
|
03-03-2011, 01:22 AM
| #18 |
| Quarry Creeper Join Date: Mar 2007 Location: Sneads Ferry
Posts: 430
|
Back from some training for the past two months so it's on again.... The past two days have been pretty successful and yet again, I'm torn between building the JK or the Ford....sigh. Anyways, the updates: 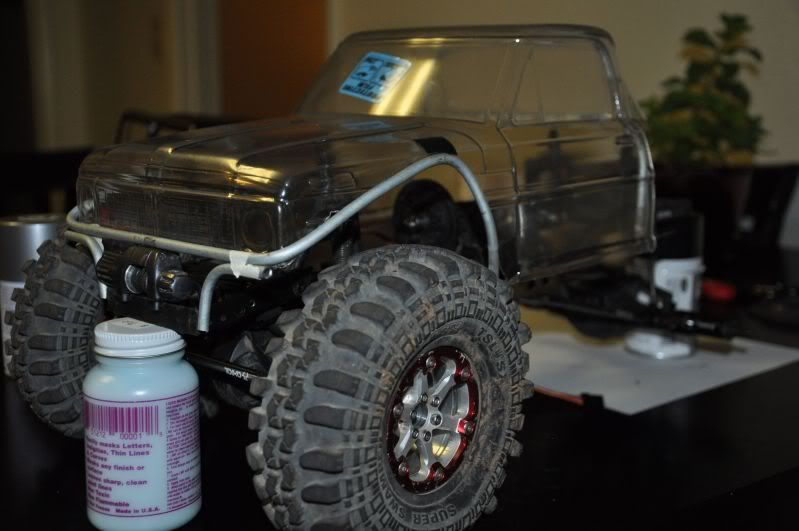 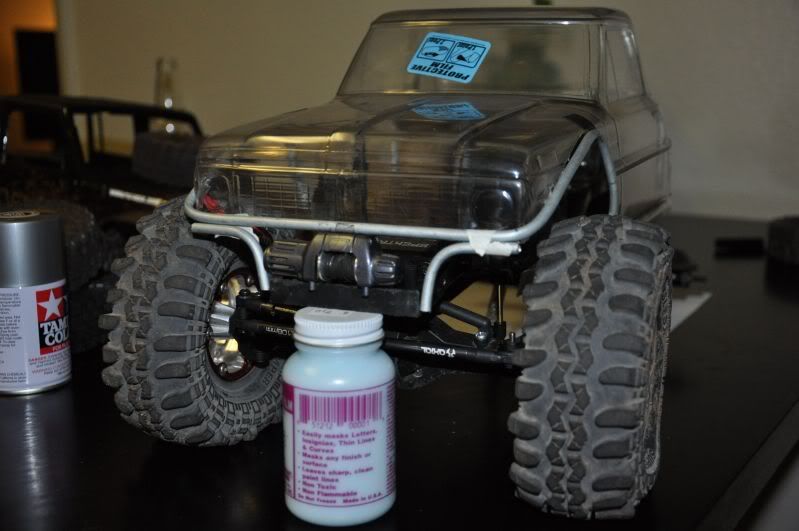 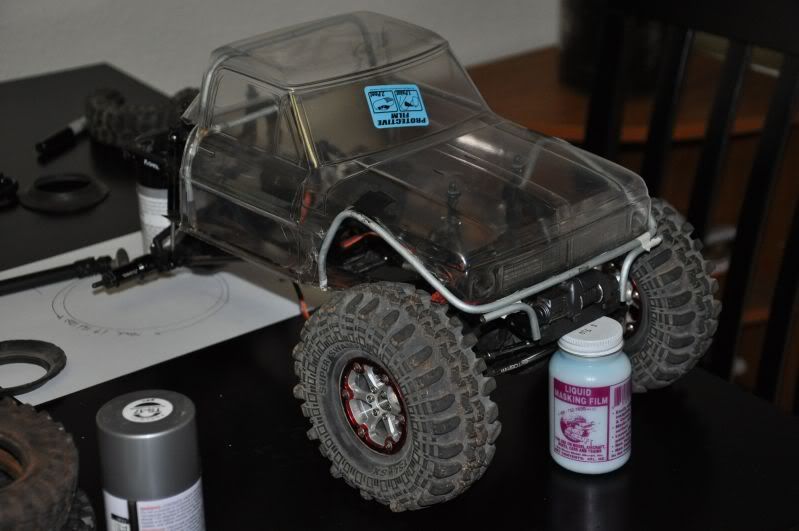 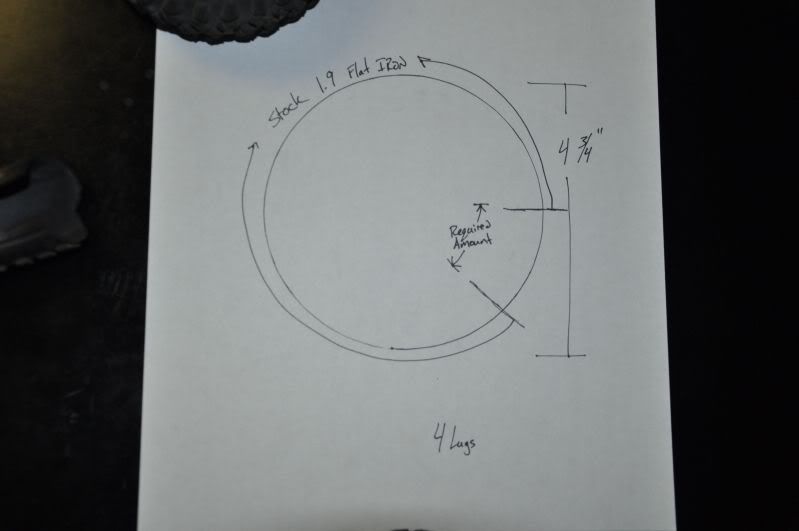 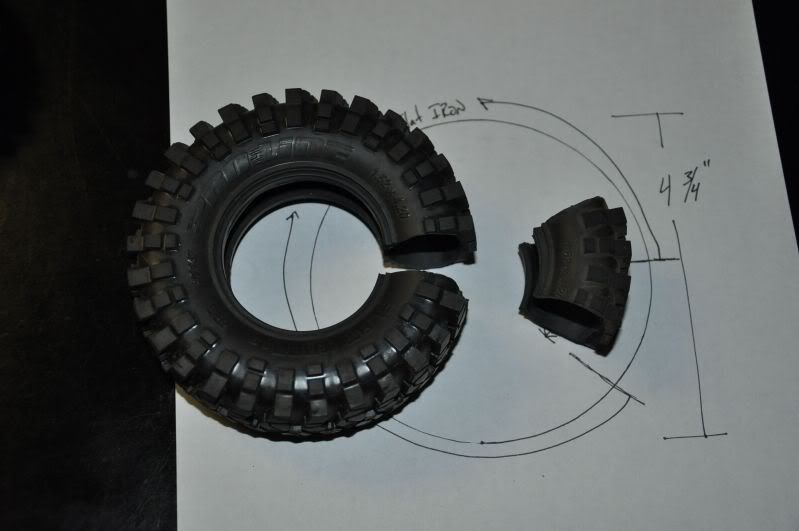 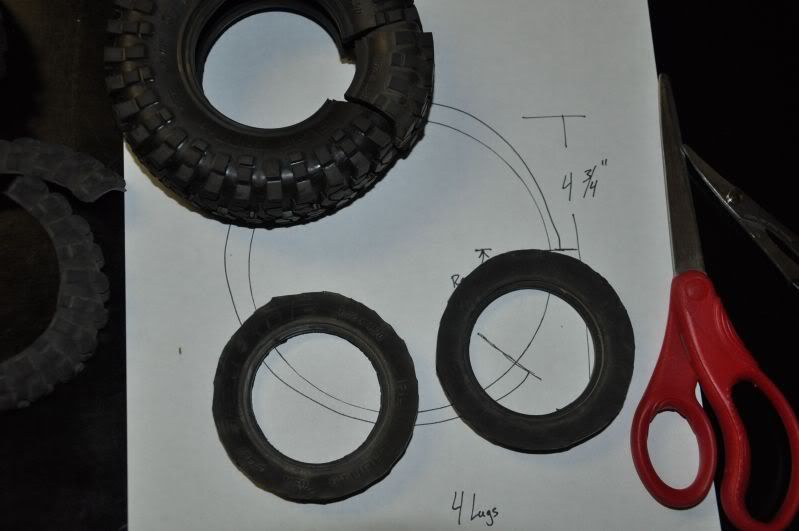 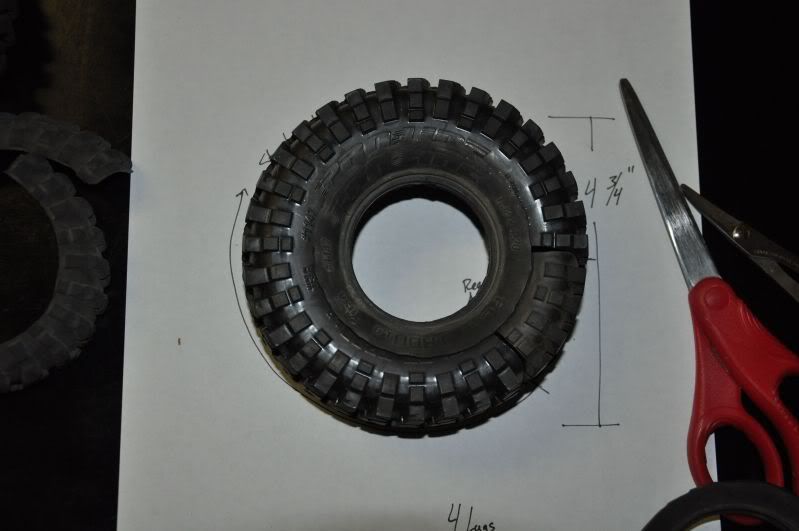 Now I've just got to find my CA glue. |
|
| |
|
03-03-2011, 11:39 AM
| #19 |
| RCC Addict Join Date: Aug 2010 Location: wherever paypal sais.
Posts: 1,740
|
Those 4.75 flatirons are gonna be bad ass they are pretty soft hope they don't fold over to much.. should be good tho
|
|
| |
|
03-03-2011, 12:42 PM
| #20 |
| Quarry Creeper Join Date: Mar 2007 Location: Sneads Ferry
Posts: 430
|
I plan on using Crawler Innovations Nova foams. They're working on a dual stage set of foams for 4.75" tall tires like the RC4wd Boggers. Should be awesome as soon as they are released. The thread is here ---> Crawler Innovations Proto type 4.75 Dual Stage Lil' Nova Foams for Scale Crawlers |
|
| |
 |
| |


 Linear Mode


