| |
| |||||||
 |
| | LinkBack | Thread Tools | Display Modes |
 08-08-2011, 11:04 AM
| #1 |
| Pebble Pounder Join Date: Jul 2010 Location: Bay Area
Posts: 159
|
So can you guys post your custom chassis mounted servo setups? I do not mind the bump steer and don't want to shell out $50 for a hand bros kit. Want to learn more DIY tricks  So what custom setups do you guys have for the frame mounted servo? |

|  |
| Sponsored Links | |
| | |
|
08-08-2011, 11:25 AM
| #2 |
| N.E.R.C.C Uncle Blinky   Join Date: Dec 2008 Location: RUKDNME...
Posts: 976
|
cut your batt plate out like in the pik and bam..your good Drail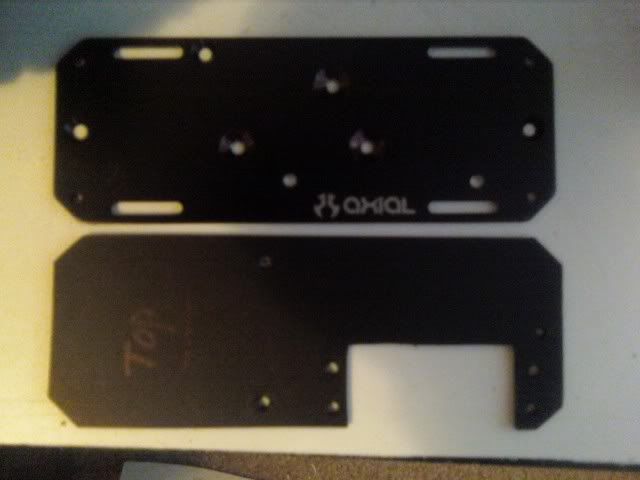 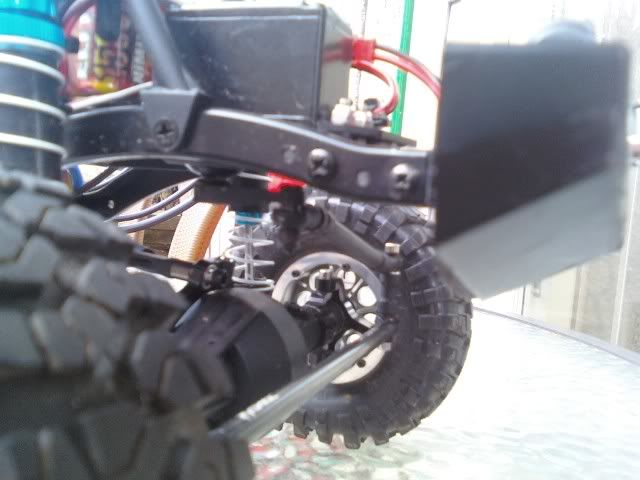 |
|
| |
|
08-08-2011, 11:44 AM
| #3 |
| Pebble Pounder Join Date: Jul 2010 Location: Bay Area
Posts: 159
|
Lol thats a good looking setup! Quick question though! Did you cut your actual battery plate? Or did you trace out a new plate and then drill and mount everything?
|
|
| |
|
08-08-2011, 01:11 PM
| #4 |
| N.E.R.C.C Uncle Blinky Join Date: Dec 2008 Location: RUKDNME...
Posts: 976
|
i made one out of some trashcan plastic i had for a mockup. than used that to cut the batt plate. Drail
|
|
| |
|
08-08-2011, 01:40 PM
| #5 |
| RCC Addict Join Date: Jul 2011 Location: Orlando
Posts: 1,153
|
Wow, that looks awesome and may have to steal the idea from you. Real nice DIY. Came out clean, how does it perform? Any issues with binding or anything else.
|
|
| |
|
08-08-2011, 02:03 PM
| #6 |
| N.E.R.C.C Uncle Blinky Join Date: Dec 2008 Location: RUKDNME...
Posts: 976
|
get alittle bump steer but that's it. and your not steeling it my friend i posted it up for all to see. did this when the SCX-10 first came out cuz thare was no CMS out at the time. i still run it in 2 truck's today. i can post up some better piks if need be or pm me if ya need more info. Drail
|
|
| |
|
08-08-2011, 02:44 PM
| #7 |
| RCC Addict Join Date: Mar 2010 Location: Alburtis
Posts: 1,227
|
You can get just the axle mount from HB and make all the rest yourself. Just grab some metal and start cutting. Wes |
|
| |
|
08-08-2011, 07:26 PM
| #8 |
| I wanna be Dave Join Date: Jun 2004 Location: San Jose
Posts: 5,207
|
Here's an axle truss I built for my TLT axled Jeep XJ. I've also made them for axial axles as well.  I just used the axial aluminum servo mount and mounted it to the frame rail of the chassis.  I know it's not an SCX but you get the picture |
|
| |
|
08-09-2011, 10:42 AM
| #9 |
| Quarry Creeper Join Date: Jul 2011 Location: Lake City, Fl
Posts: 380
|
I whipped this up last night. I'm waiting on my Traxxas rod ends to show up (hopefully tomorrow) so I can make my own links, and I knew this had to be done before I could 4-link the font, so I figured I'd go ahead and tackle this. I ended up doing something I haven't seen done yet. I wanted to try and retain the original battery mount to keep it centered and up front, and this seems to work fairly well. I ditched the metal servo mounting plate completely used the extra blank frame end cross-member that came with the SCX10, and mounted the servo to it with the plastic mounts on the ends. This meant some cutting and shaving of the ends of the blank cross-member to get it to fit down inside the frame rails, and then drilling a hole on each side to secure it with, but it seems to hold VERY strongly. I also remounted the front bumper ON TOP of the bumper mount to get a little more room for the servo horn, and even then still had to trim a little of the inside of the bumper mount to give the servo horn room to get a full swing. Everything clears as it is set up now and it has full movement, so we'll see if that stays the case after setting up the linkages. The battery tray still mounts up using the center two posts, but the front just kind of flops around... Tonight after work I'll see if I can figure out a way to secure it. Probably just make a mount of some sort that rests on the servo itself. 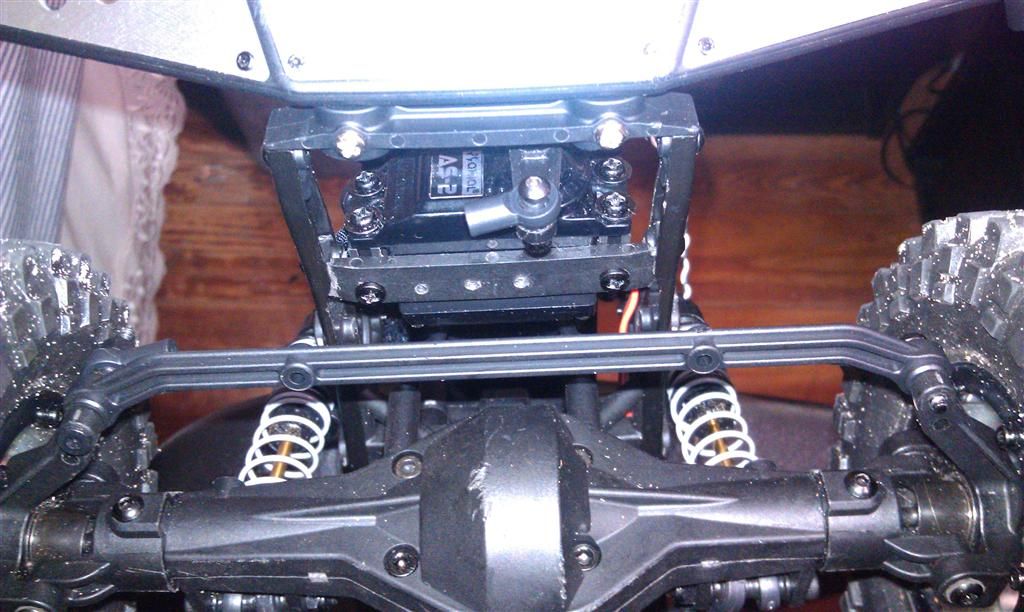  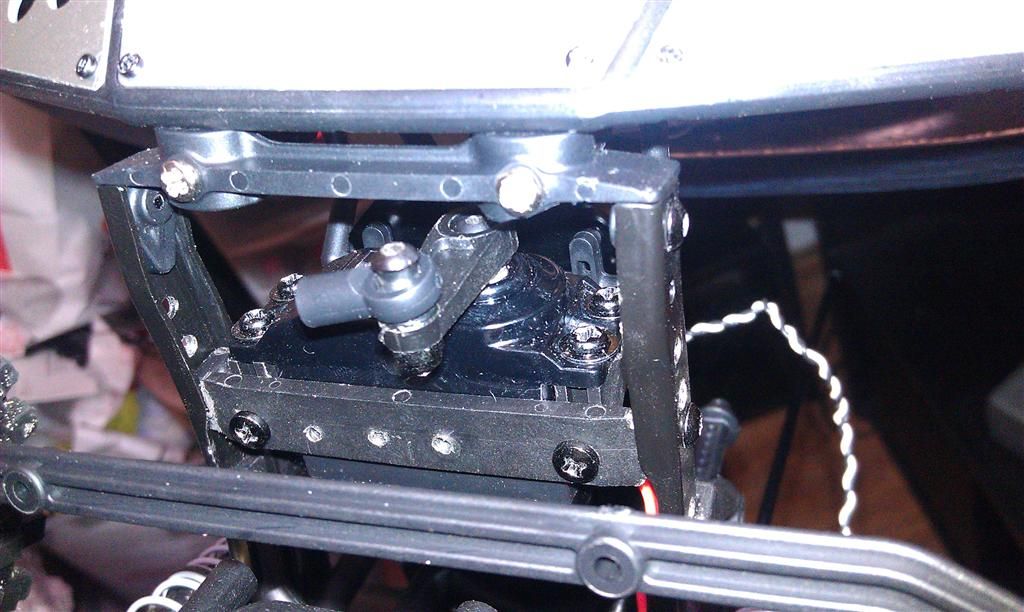  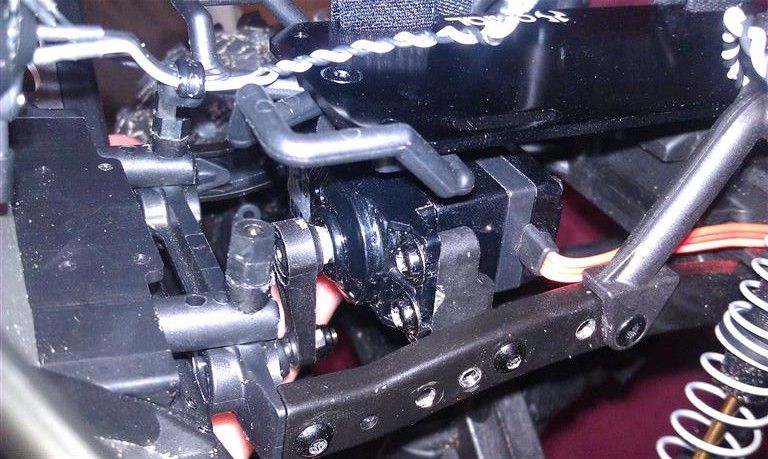 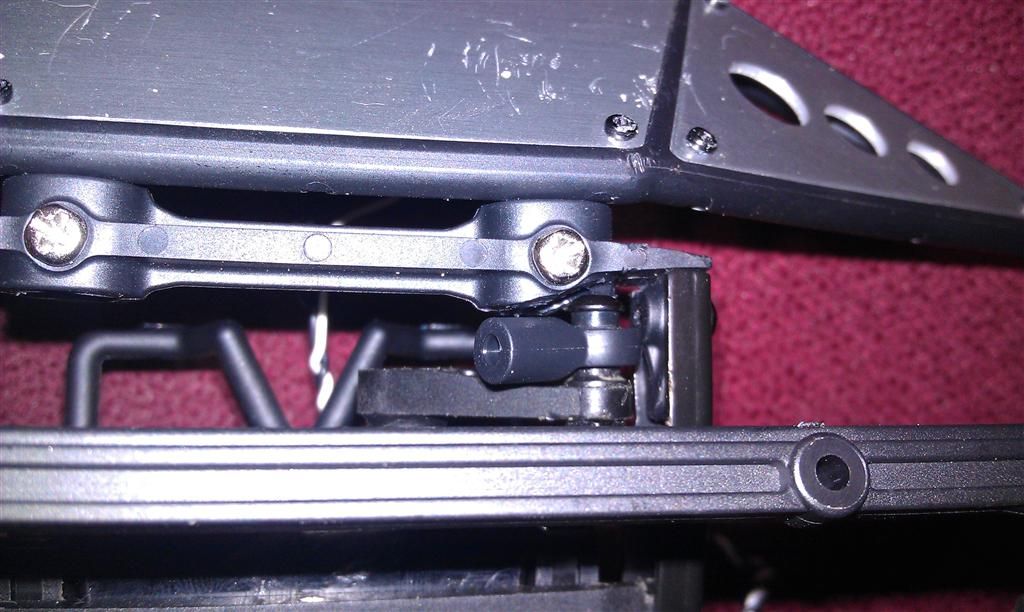 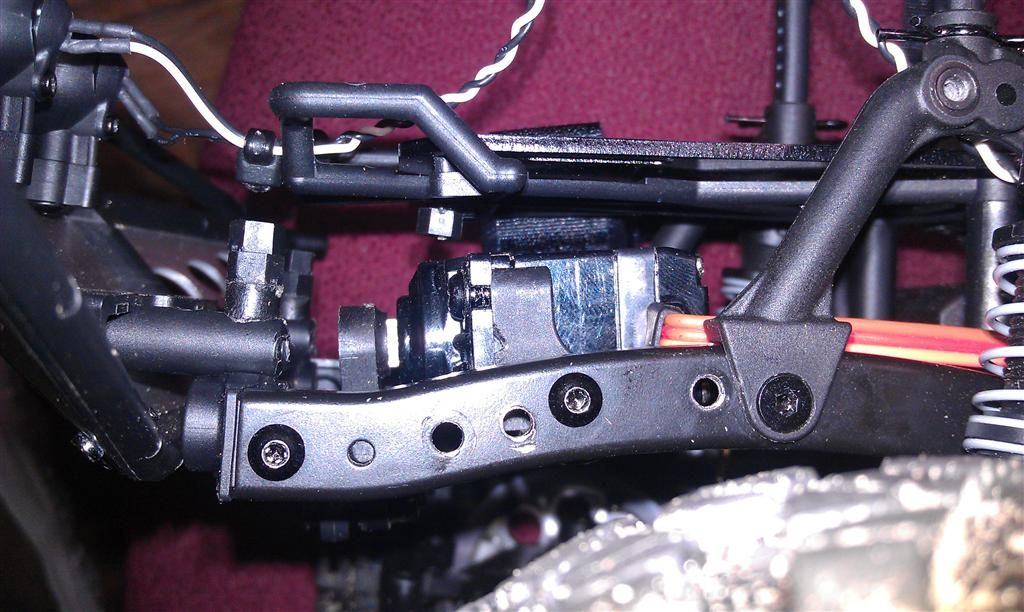 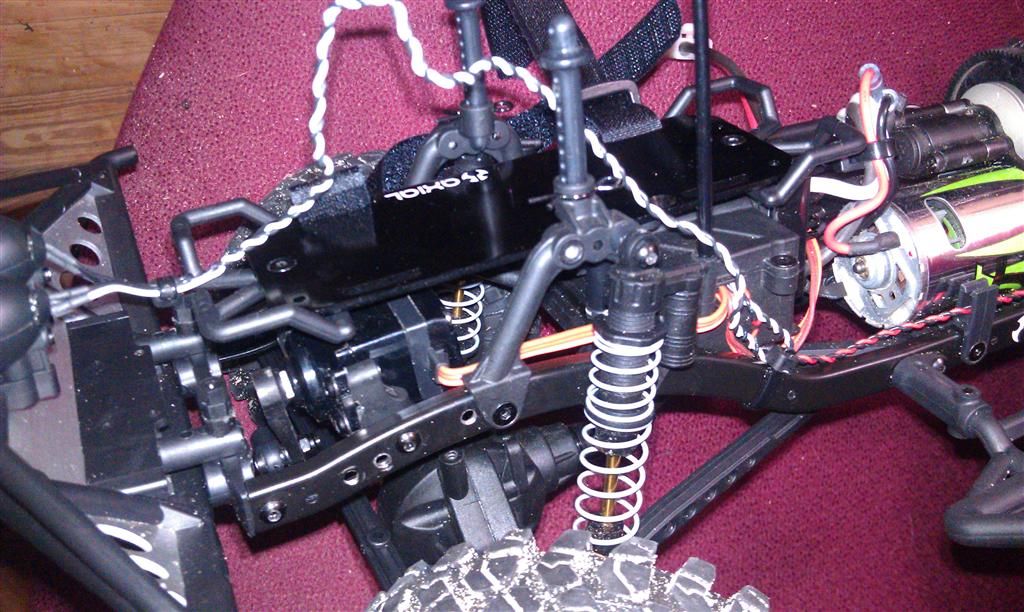 |
|
| |
|
08-09-2011, 10:55 AM
| #10 |
| RCC Addict Join Date: Mar 2010 Location: Alburtis
Posts: 1,227
|
I am not sure you have your servo over far enough. Most set ups work best when the servo is moved close up against the chassis rail. It looks like yours is in the middle. take a look at the HB kit. Take note where the servo arm actually sits in relation to the chassis rail. Wes |
|
| |
|
08-09-2011, 11:02 AM
| #11 | |
| Pebble Pounder Join Date: Jul 2010 Location: Bay Area
Posts: 159
|
[QUOTE=iamsuperbleeder;3224230] Good looking setup! How do you think the factory crossmember will holdup? I want to do that and I guess if it breaks just buy some plastic crossmember again Have you tested it? Quote:
| |
|
| |
|
08-09-2011, 11:27 AM
| #12 |
| RCC Addict Join Date: Apr 2007 Location: Murfreesboro
Posts: 1,537
|
Here is how I have it set up on both my Broncos and how I had it setup on the Courier before I went back to the axle.  Stupid simple, just screw some servo mounts into the front crossmember and there ya have it. On the BlueBronco its a little different cause the winch is up front but all I did was cut the ends off the front crossmember so it would fit inside the frame and moved it back. Same idea. Matt |
|
| |
|
08-09-2011, 12:16 PM
| #13 |
| RCC Addict Join Date: Mar 2010 Location: Alburtis
Posts: 1,227
|
I had to move mine up due to space issues. I basically have it the same way, just moved over as close to one side as possible. I got a little closer since I was able to tuck the ears into the chassis rail. Wes |
|
| |
|
08-09-2011, 07:59 PM
| #14 |
| Quarry Creeper Join Date: Jul 2011 Location: Lake City, Fl
Posts: 380
|
I haven't tested my setup yet. I'm still waiting on my rod ends to come in so I can make the links... just waiting on the USPS man... sucks living in BFE where the closest hobby shop is 45 minutes away. I'd rather just order stuff online and pay for shipping, LOL Sent from my space age wireless communication device. |
|
| |
|
08-10-2011, 09:20 AM
| #15 |
| Rock Crawler Join Date: Jul 2011 Location: Placer County
Posts: 843
|
My first setup was almost identical to Rckjeep's setup, only 4-linked. I didn't realize there was a switch to reverse the steering, so I changed it around. Current version is this: 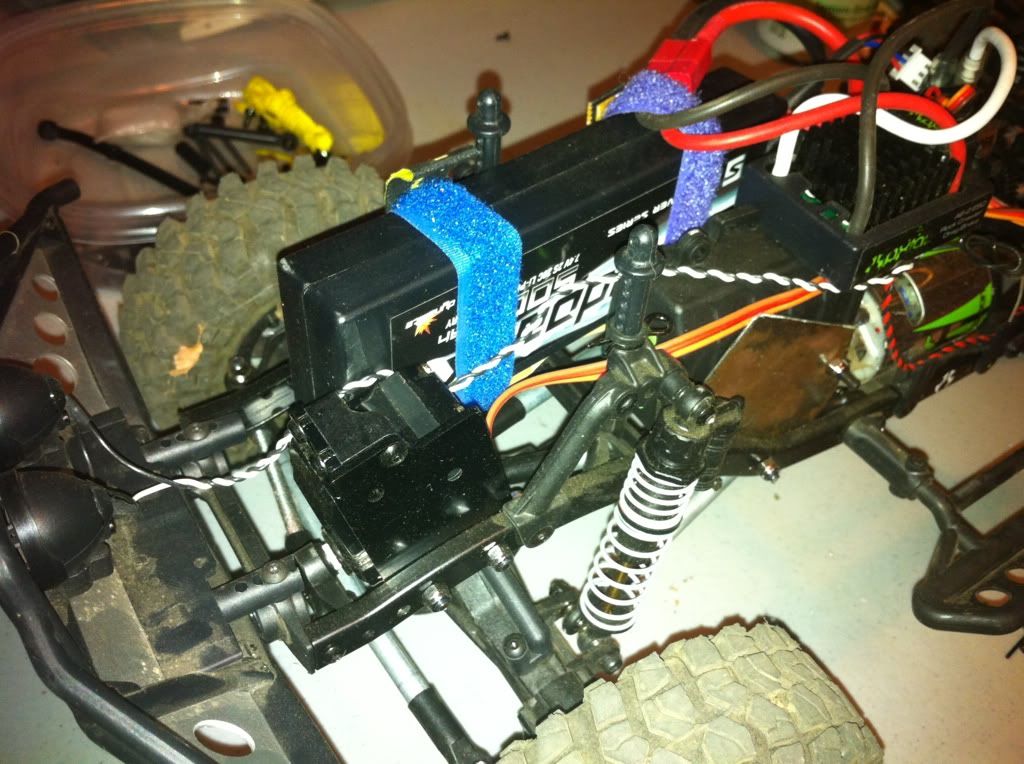 Basically just mount stock servo plate to frame rail with one extra hole added. I mounted it pretty far forward to clear axle and give full up-travel. I think my forward bolt passes through one of the existing holes of the servo plate as well as the small hole that the middle crossmember "pin" used to occupy. 2nd hole had to be drilled. Mounted it slightly cocked forward to keep plate flush with frame and push servo up away from articulating axle. So far have run one battery through this setup and all seems good. All electronics weight is on left and battery on right - seems fairly well balanced.   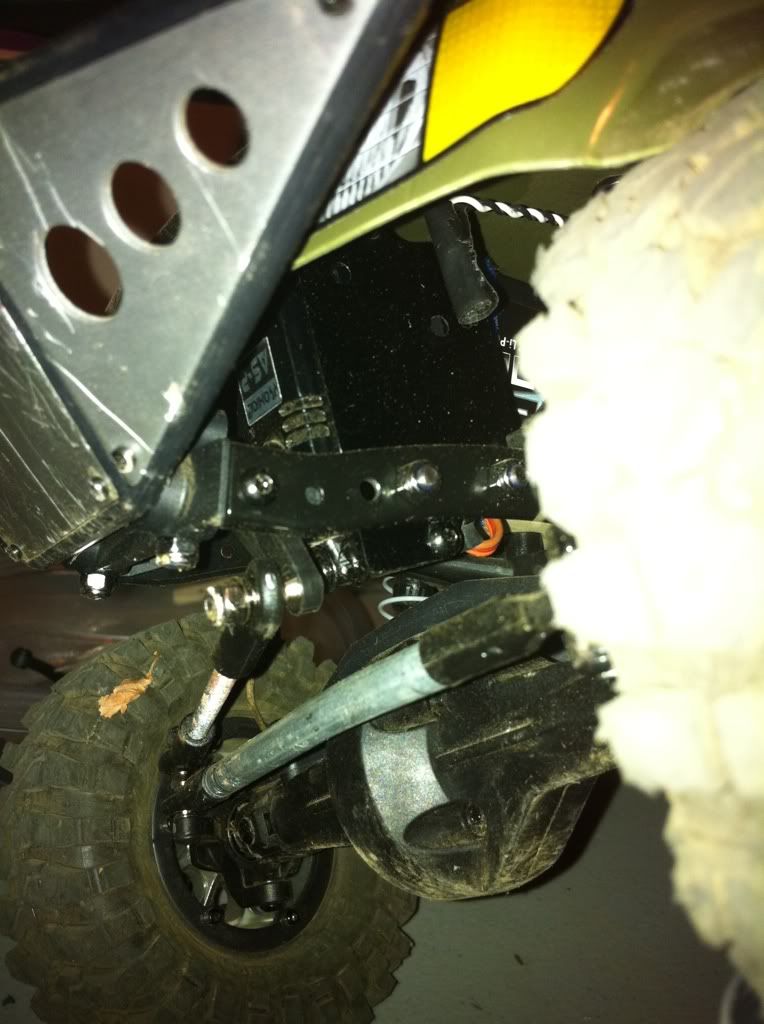 |
|
| |
|
08-10-2011, 10:57 PM
| #16 |
| Pebble Pounder Join Date: Jul 2010 Location: Bay Area
Posts: 159
|
So I got around to making my cms mount. Cost $5 to make. It was an RPM skidplate for a tmaxx. Its real sturdy yet easy top cut with a dremel. Also, the skidplate has two holes in it that match the 2075 or any similar servo perfectly. Pics speak for themselves. Hope this setup works out, I am going to make a link tomorrow For those who want to do this in the future, here are the pictures 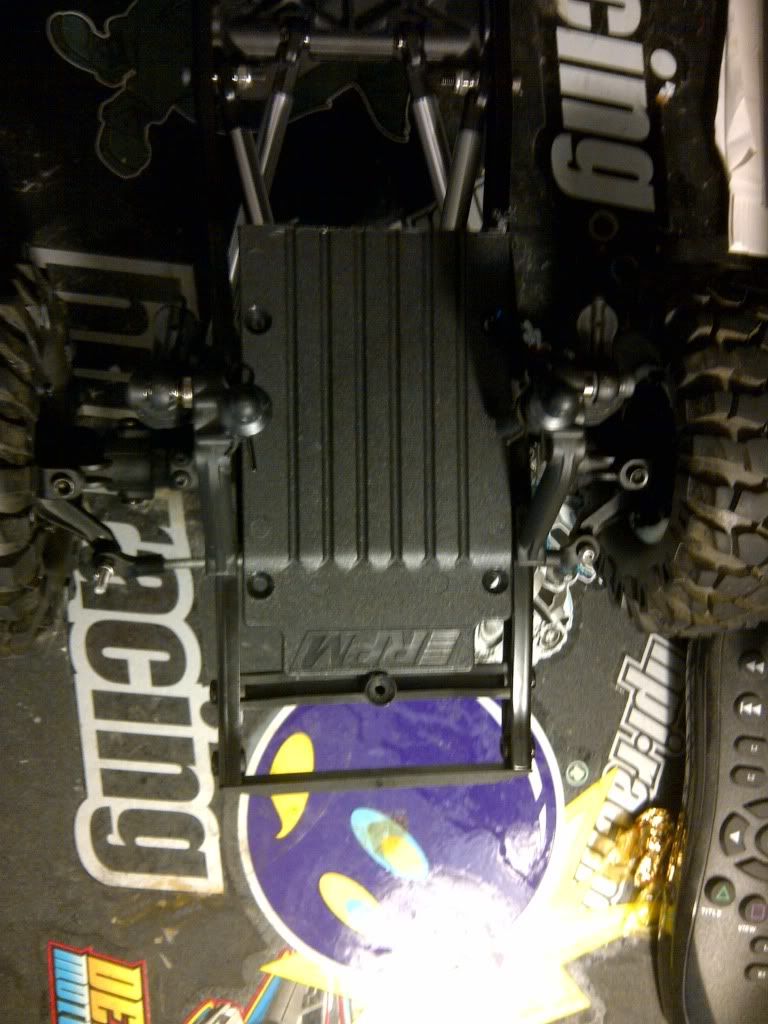 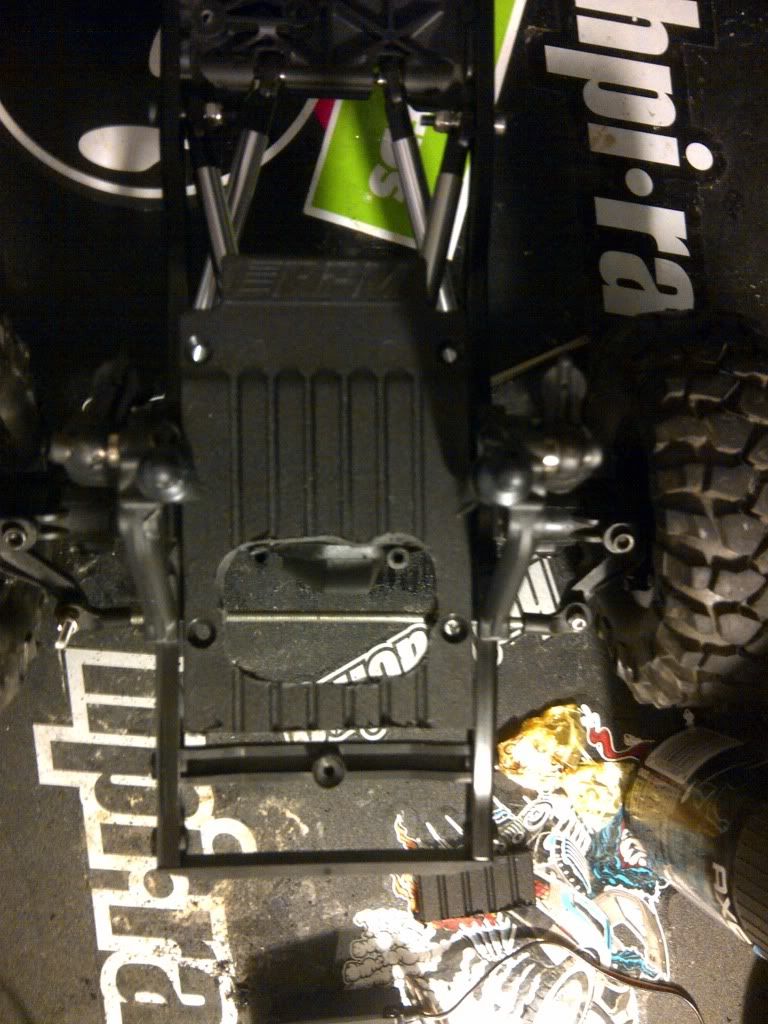 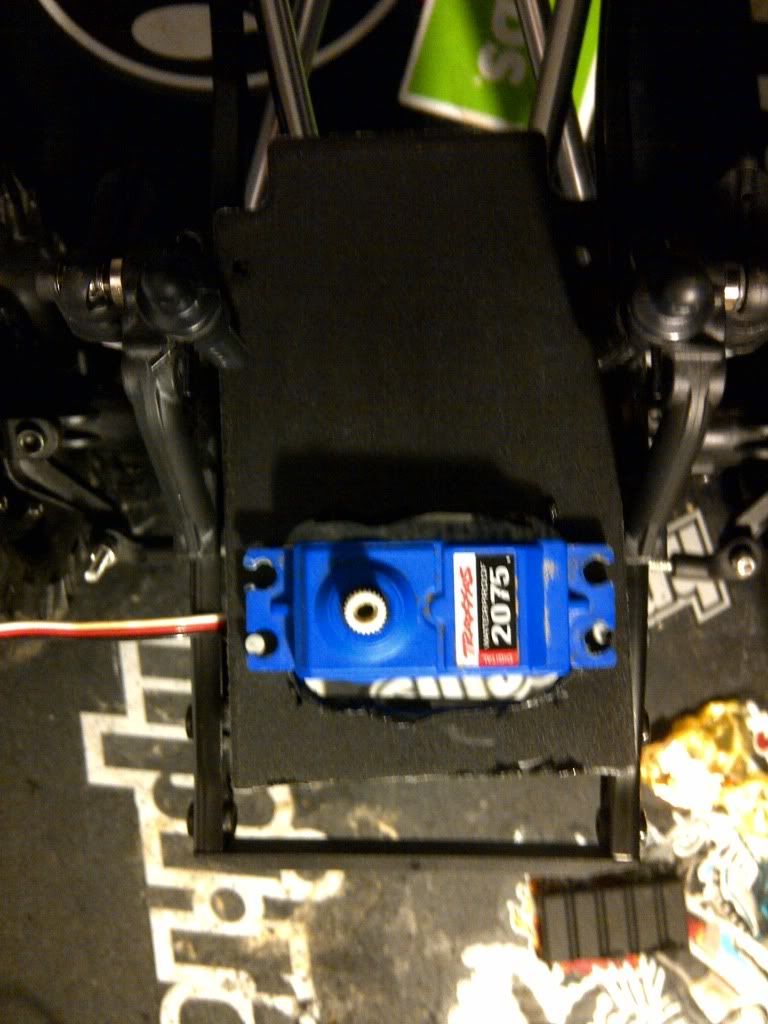 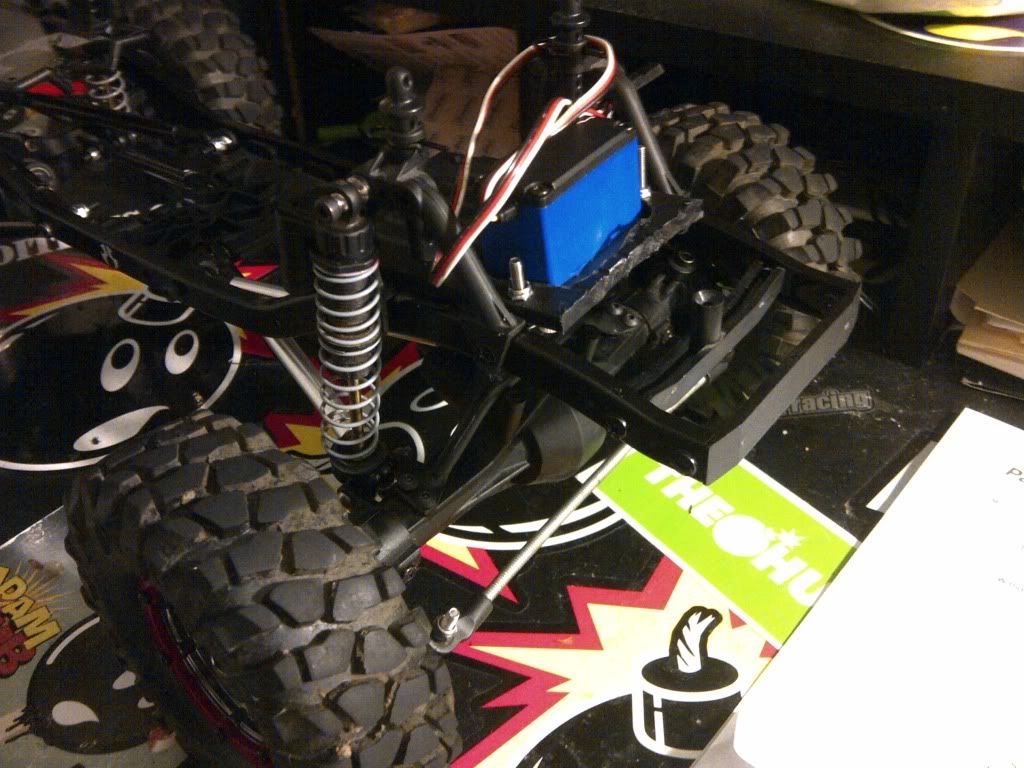 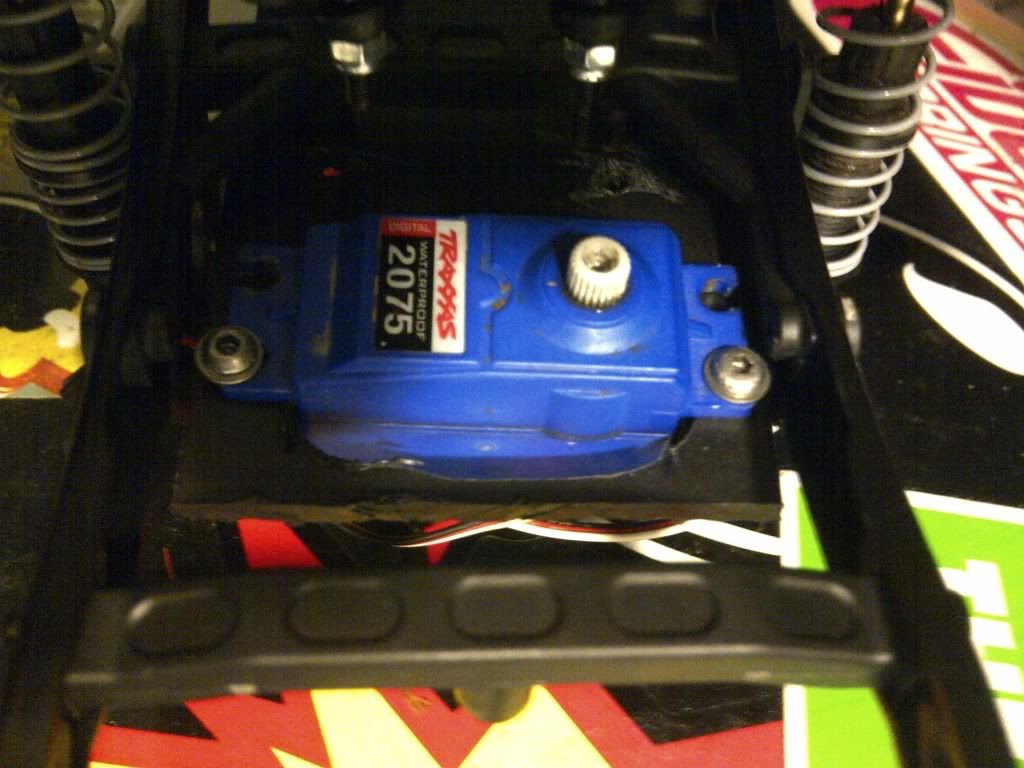 |
|
| |
|
08-10-2011, 11:03 PM
| #17 |
| Rock Crawler Join Date: Aug 2010 Location: Surrey BC
Posts: 497
|
here is my chassis mount its integral with the front bumper ....seems to work great  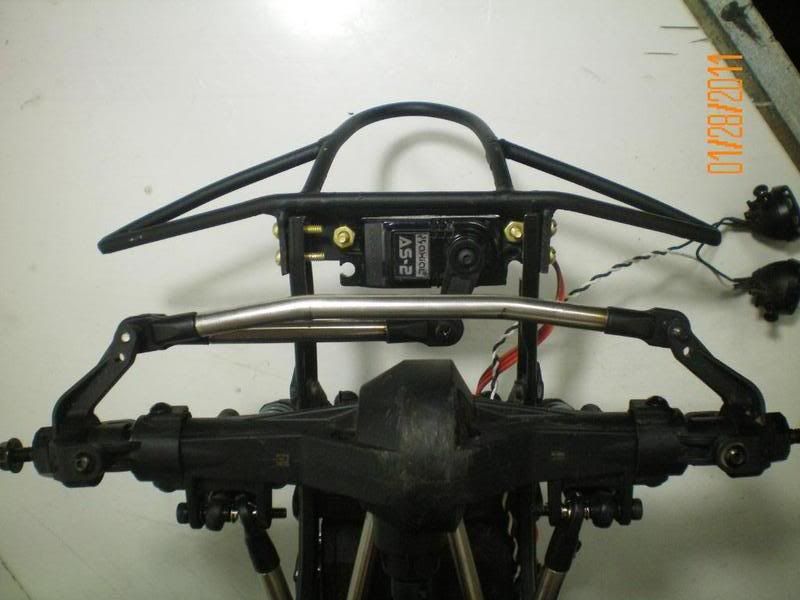 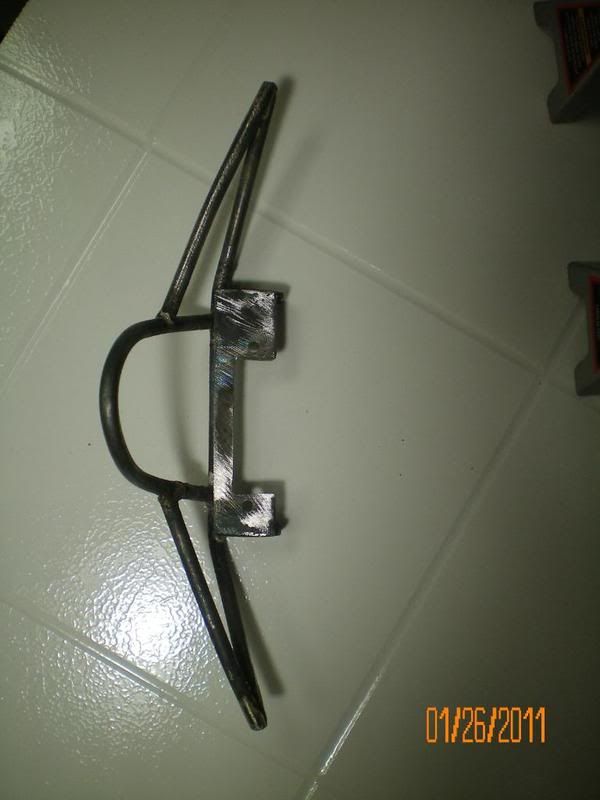 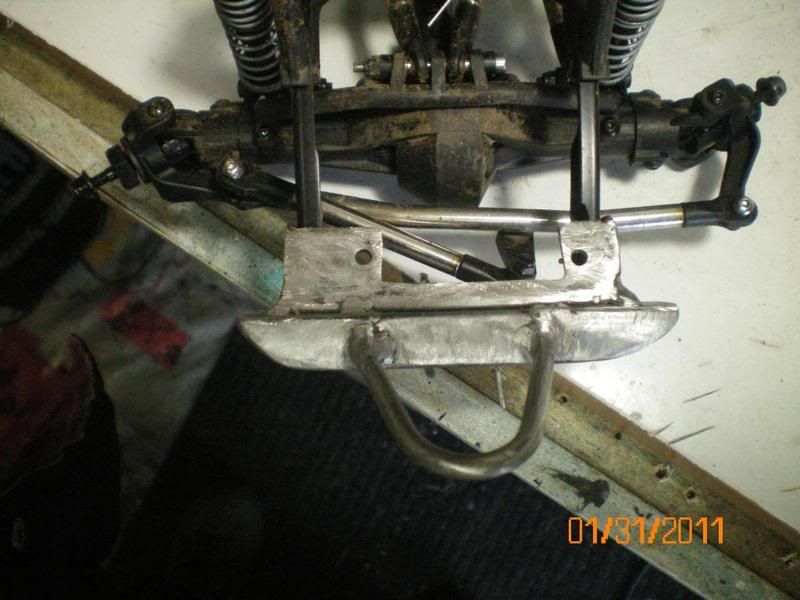 |
|
| |
|
08-10-2011, 11:47 PM
| #18 |
| Quarry Creeper Join Date: Jul 2011 Location: Lake City, Fl
Posts: 380
|
^ that's killer right there! I like it! |
|
| |
|
08-11-2011, 12:25 AM
| #19 | |
| Pebble Pounder Join Date: Jul 2010 Location: Bay Area
Posts: 159
|
Awesome setup! Are you planning to run a winch at any time in the future? Quote:
| |
|
| |
|
08-11-2011, 12:27 AM
| #20 |
| I wanna be Dave Join Date: Jun 2004 Location: San Jose
Posts: 5,207
|
Can I ask a question to the guys going a different route than the Hand Bros setup. Why aren't you just copying the location of the servo Hand Bros does? The reason I ask is because if you look underneath a real 4x4 the pitman arm is in the exact location of the servo arm. Any other setup just doesn't seem scale to me. Of course that's just my opinion.
|
|
| |
|
| |


 Linear Mode


