| |
 03-16-2013, 12:05 PM
| #1 |
| Pebble Pounder Join Date: May 2012 Location: Sherwood Park
Posts: 151
|
There are tons of jeep threads here, so I'm not going to waste space with every assembly step. I finished my chassis setup. I built everything kit stock. I wanted to run stock for a bit so I have a reference for improvements. I encountered a problem with the steering link at the servo arm making contact with the front crossmember behind the bumper mount. Anyone else have this problem? 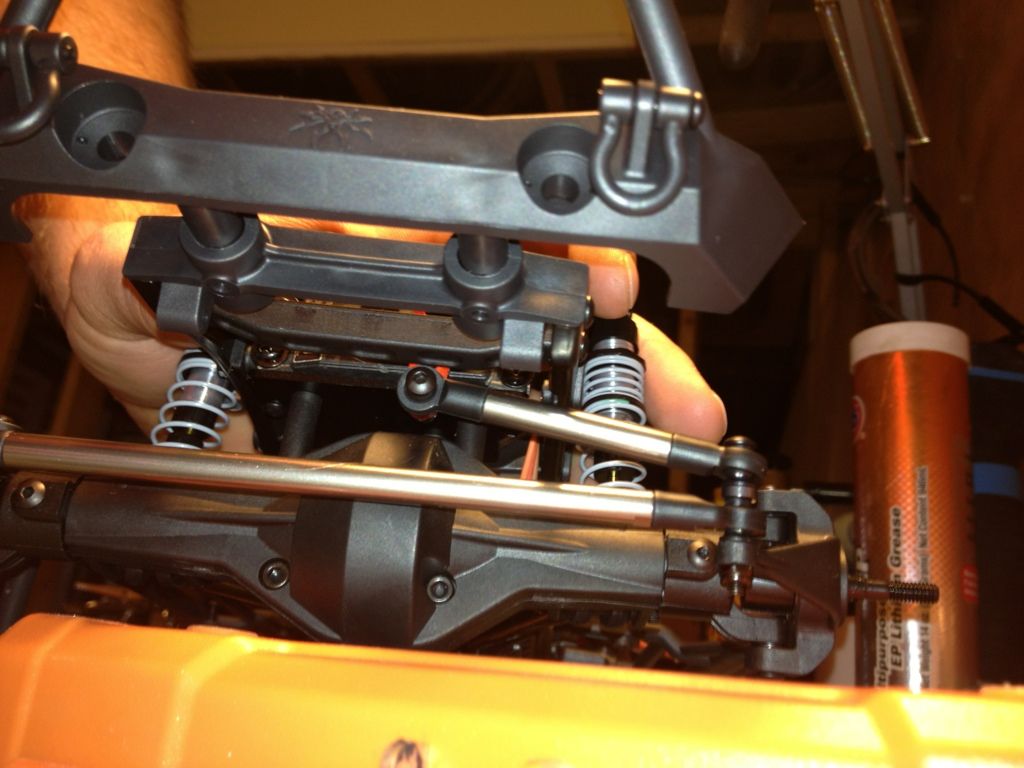 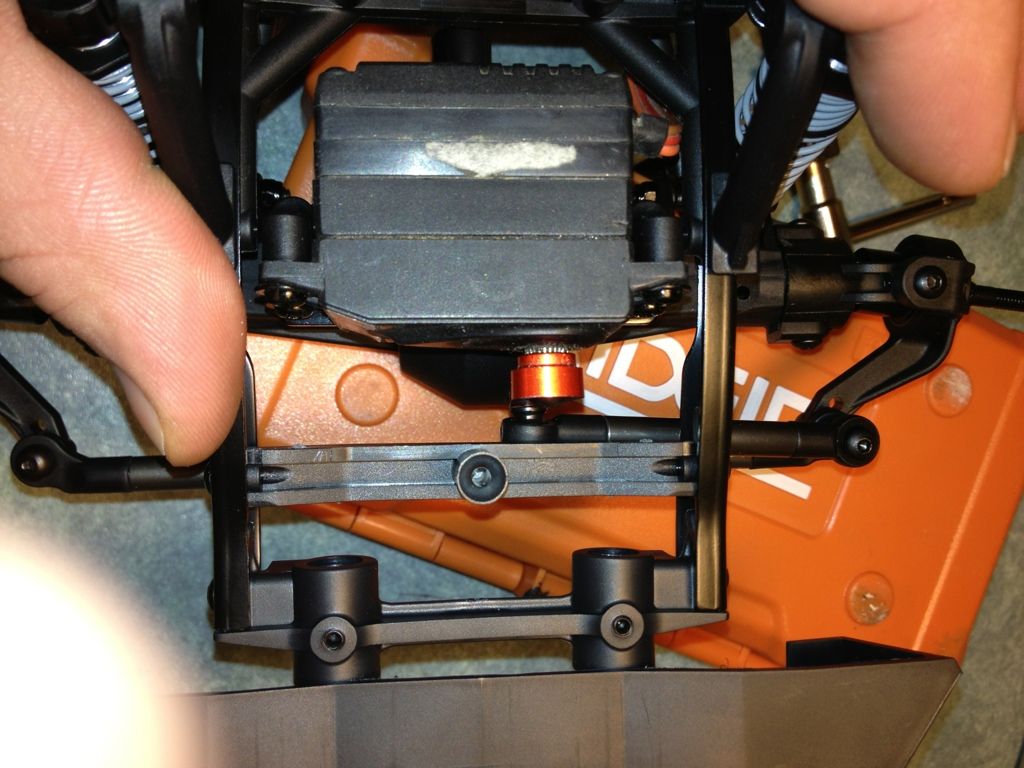 Last edited by project_mayhem; 03-16-2013 at 12:11 PM. |

|  |
| Sponsored Links | |
| | |
|
03-16-2013, 12:12 PM
| #2 |
| Newbie Join Date: Feb 2013 Location: Rexburg
Posts: 33
|
Yes it's the same way on mine. I'm pretty sure that's just how it is. One thing you can do is use and angled rod end on the servo horn side of the linkage, it will give you a few more mm, but it seems like more.
|
|
| |
|
03-16-2013, 12:48 PM
| #3 |
| Pebble Pounder Join Date: Aug 2012 Location: Gadrock, Al
Posts: 126
|
Or you can use a longer servo horn
|
|
| |
|
03-16-2013, 12:53 PM
| #4 |
| Rock Crawler Join Date: Jan 2013 Location: Cen Cal
Posts: 556
|
Yup, that servo horn is very short. With a longer horn your drag link should actually be angled up slightly to the knuckle. Here's a shot of mine before I put an Axial clamping horn on mine, and it's even longer than that blue Hitec arm.  |
|
| |
|
03-16-2013, 01:14 PM
| #5 |
| Quarry Creeper Join Date: Sep 2012 Location: Grande Prairie Alberta
Posts: 216
|
I just took the cross member out
|
|
| |
|
03-16-2013, 02:06 PM
| #6 | |
| Rock Crawler Join Date: Nov 2005 Location: Fremont/Newark, California
Posts: 710
| Quote:
| |
|
| |
|
03-16-2013, 02:39 PM
| #7 |
| Rock Crawler Join Date: Jan 2013 Location: Cen Cal
Posts: 556
|
That's definitely a quick fix, but there's still the clearance between the link and the frame. Another benefit of getting a longer horn that lowers your drag link is that it will increase clearance for the drivers side tire to flex higher before the link hits the frame rail. If you turn your truck to full lock to the drivers side this link-to-frame clearance decreases even more. In other words, I'd be more concerned with clearance for flexing, and not so much clearance for full bump travel.
|
|
| |
|
03-16-2013, 11:23 PM
| #8 | |
| Pebble Pounder Join Date: May 2012 Location: Sherwood Park
Posts: 151
| Quote:
| |
|
| |
|
03-17-2013, 12:27 AM
| #9 |
| Rock Crawler Join Date: Jan 2013 Location: Cen Cal
Posts: 556
|
Well the chassis-mounted servo will provide it's own clearance limitations. I think the stock servo mount with a combination of a longer servo horn like the Axial clamp-on and/or an angled rod end on the servo end of the drag link will be your best bet for max flexing clearance which is what I was going for in that photo above. That standard aluminum horn wouldn't stay tight for more than a day and I've since installed high clearance knuckles and a clamp-on style servo horn so my geometry is slightly different now, but allows plenty of flexation.
Last edited by 05Fronty4x; 03-17-2013 at 12:30 AM. |
|
| |
|
03-17-2013, 03:45 AM
| #10 |
| Pebble Pounder Join Date: Jan 2013 Location: Zürich
Posts: 179
|
Had the same problem.fixed it by putting shorter upper links in and now its clearing fine. I have that same problem on my wraith since i put my titanium links in
|
|
| |
|
03-18-2013, 10:11 AM
| #11 |
| Pebble Pounder Join Date: May 2012 Location: Sherwood Park
Posts: 151
|
I wanted to make a cms setup on my jeep anyways. I was just hoping to run it a bit before I installed one. We got a foot of snow, so I figured I'd just do it now since I'm not going to see dirt for a while. I'll post up pics once I'm finished. It was tricky to make it without frame contact.
|
|
| |
|
03-18-2013, 03:26 PM
| #12 | ||
| I wanna be Dave  Join Date: Jan 2006 Location: Corruptifornia
Posts: 12,107
| Quote:
Quote:
Last edited by Natedog; 03-18-2013 at 03:30 PM. | ||
|
| |
|
03-19-2013, 05:54 AM
| #13 | |
| Pebble Pounder Join Date: Dec 2012 Location: The fun house
Posts: 188
| Quote:
I used shorter upper links and shaved the crossmemeber down where it would hit at full compression. rubicon kit | |
|
| |
|
03-19-2013, 08:53 PM
| #14 |
| Pebble Pounder Join Date: May 2012 Location: Sherwood Park
Posts: 151
|
Here's some pics of my setup so far. The mounts need to be cleaned up and painted. The links are temporary, and the pan hard bar needs to be shaped to clear the bell housing. The shocks will be able to fully compress to the bumpstops, and everything clears during articulation. I put in the blank frame truss just to hold the frame width so the bumper didn't get damaged. I also realize the tires are in the wrong direction, lol. 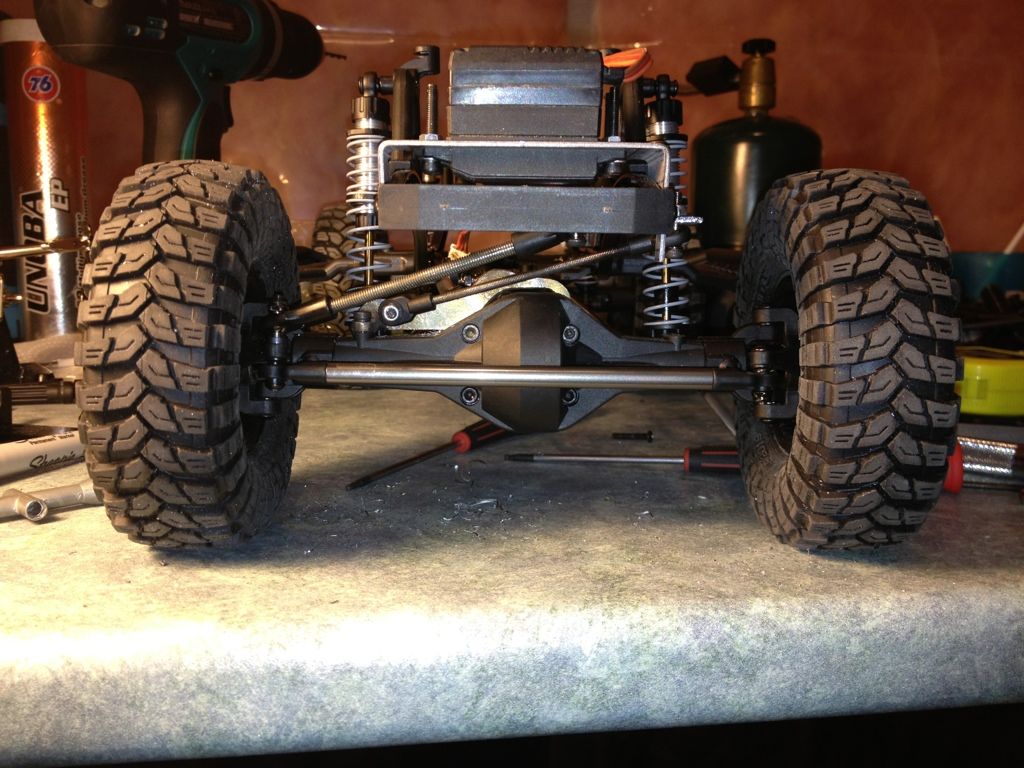 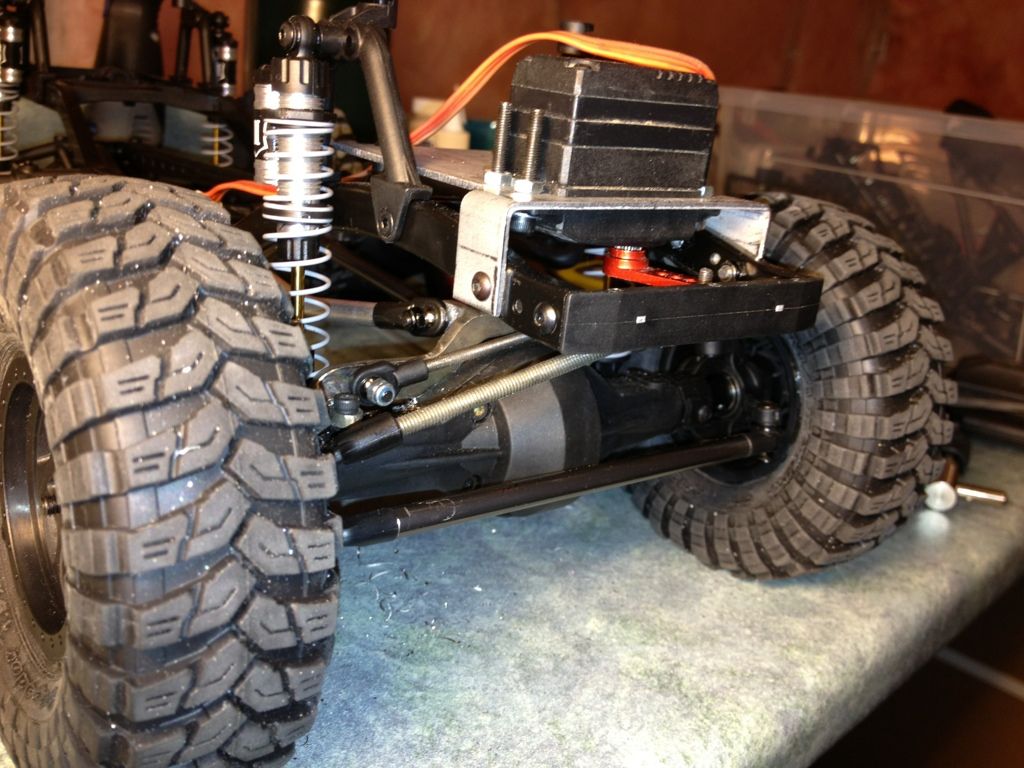 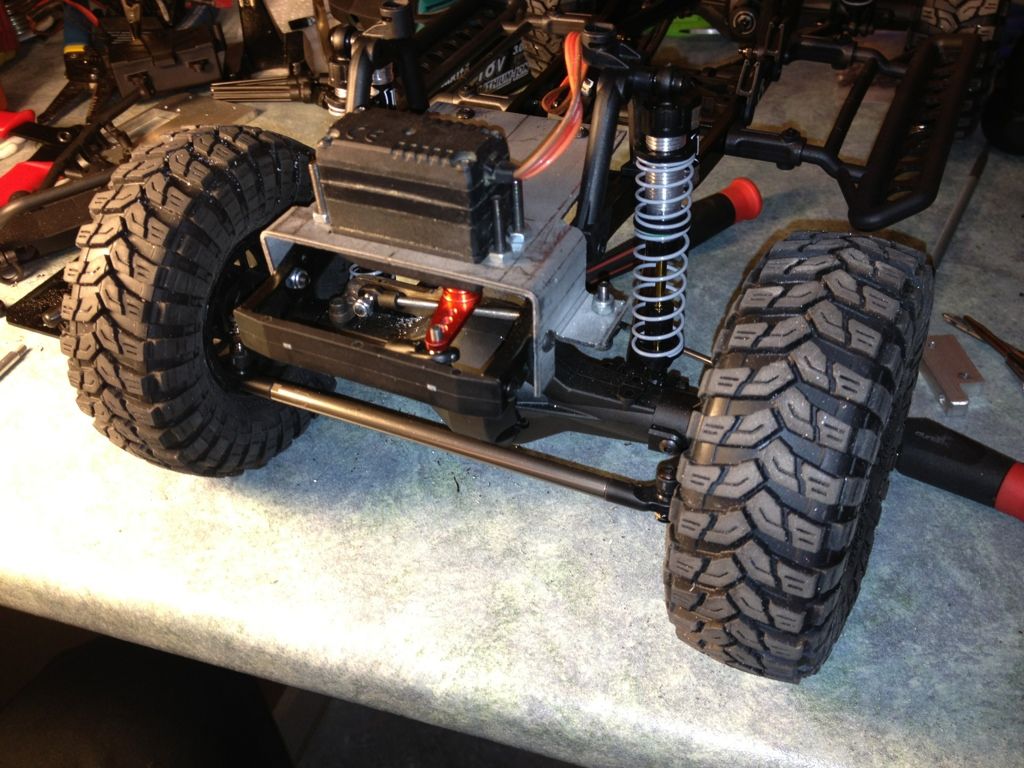 |
|
| |
|
03-20-2013, 10:53 AM
| #15 |
| Newbie  Join Date: Sep 2004 Location: Ohio
Posts: 11
|
Looking good.
|
|
| |
|
03-20-2013, 11:16 AM
| #16 |
| Rock Crawler Join Date: Jan 2013 Location: Cen Cal
Posts: 556
|
Nice and clean looking. Did you make the panhard/3-link mount as well. Could you snap a pic of how it mounts up to the axle? I've wanted to take on something similar but about all I could do is hack something up with a dremel. I'd probably add a little support to the tab on the bracket that the panhard mounts to, maybe a gusset on the top side there. |
|
| |
|
03-20-2013, 12:27 PM
| #17 | |
| Pebble Pounder Join Date: May 2012 Location: Sherwood Park
Posts: 151
| Quote:
| |
|
| |
|
03-20-2013, 08:28 PM
| #18 |
| Pebble Pounder Join Date: May 2012 Location: Sherwood Park
Posts: 151
|
Here's the pic of the axle mount. 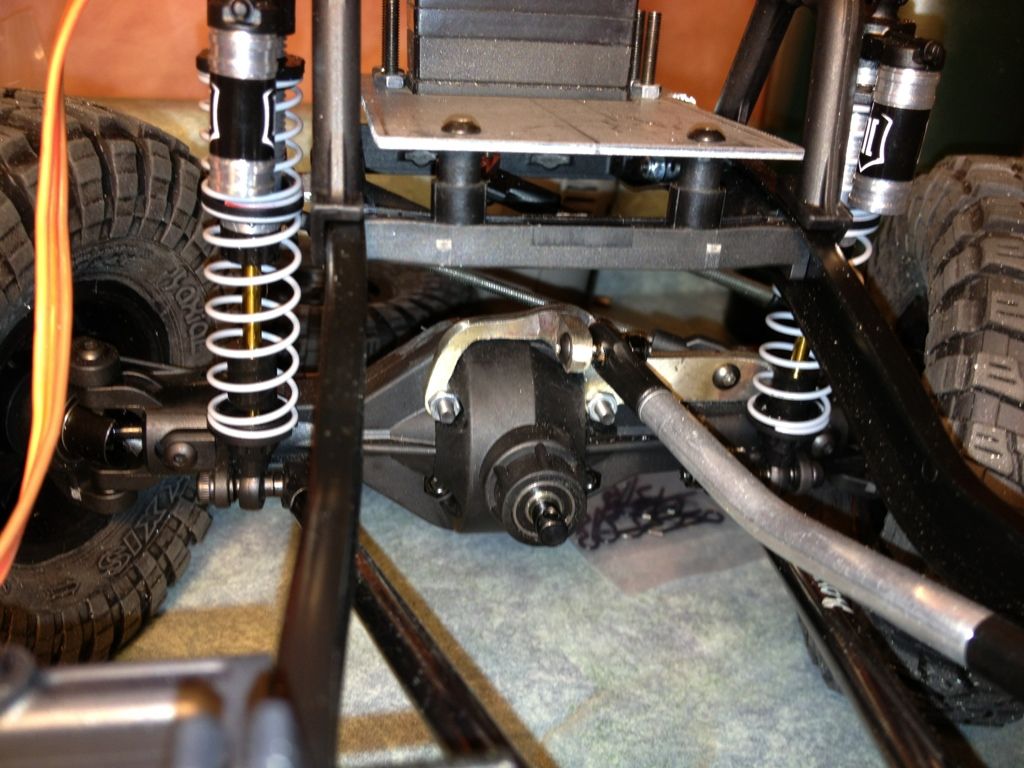 |
|
| |
|
03-20-2013, 08:45 PM
| #19 |
| Rock Crawler Join Date: Jan 2013 Location: Cen Cal
Posts: 556
|
Keep in mind when you bend the panhard you are shortening the eye to eye distance as well. No biggie as it looks like it's longer than your drag link as is. Very nicely done. |
|
| |
|
03-21-2013, 08:38 AM
| #20 | |
| Pebble Pounder Join Date: May 2012 Location: Sherwood Park
Posts: 151
| Quote:
Here's a pic of my mounts cleaned up and ready for paint. 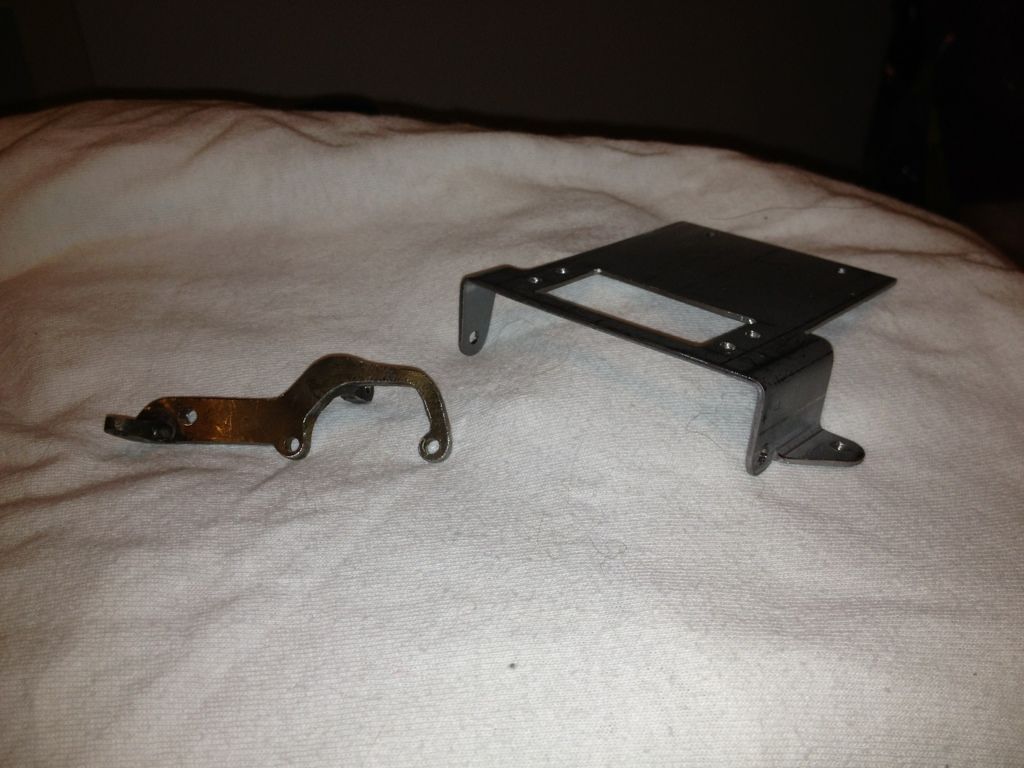 | |
|
| |
 |
 My JK kit assembly. - Similar Threads
 | ||||
| Thread | Thread Starter | Forum | Replies | Last Post |
| SCX-10 Assembly Help | mhuffman_81 | Newbie General | 2 | 03-11-2013 07:55 PM |
| about to start assembly | docsrcrepair | Axial XR10 | 9 | 06-30-2011 12:06 PM |
| Help on Honcho assembly | Scott VA | Axial SCX-10 | 4 | 12-27-2009 09:08 PM |
| axle assembly help | oilylizard | Axial SCX-10 | 6 | 09-22-2009 08:48 PM |
| 80´s Colnago Roadbike assembly kit | Unimog | Chit Chat | 3 | 04-08-2009 09:01 AM |
| |


 Linear Mode


