| |
 03-28-2015, 03:40 PM
| #1 |
| Rock Crawler Join Date: Oct 2011 Location: Corona, CA
Posts: 533
|
My old thread does not have any pics showing, and is 4yrs old, so I thought I'd remake it, with some updates I've been doing the last few weeks I got the kit version of the Honcho back in late 2011 Redrilled the rear body mount pins as I knew they were going to be a big pain to start 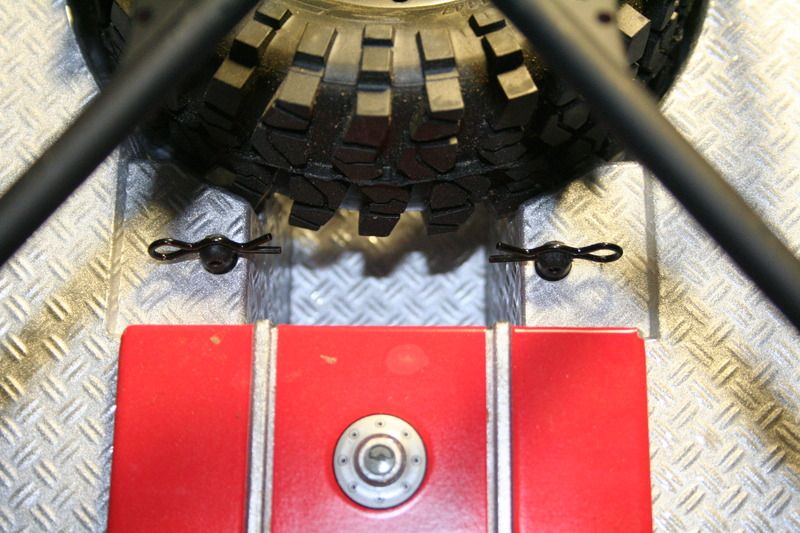 Maiden voyage in the local mnts 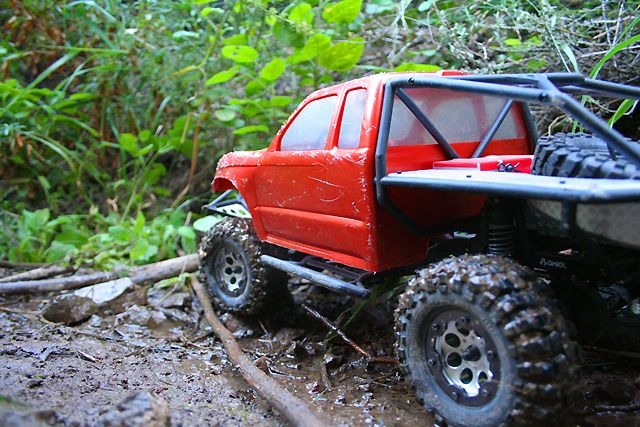 Did a shroud around the spur gears. I can't recall if the kit had the diff cover, or if it was a later kit/ RTR. Also, I made a holder to relocate the battery lower and it helped out a lot  My brother machined me some bumper brackets that moved the bumper up 3/8" and looked a lot better 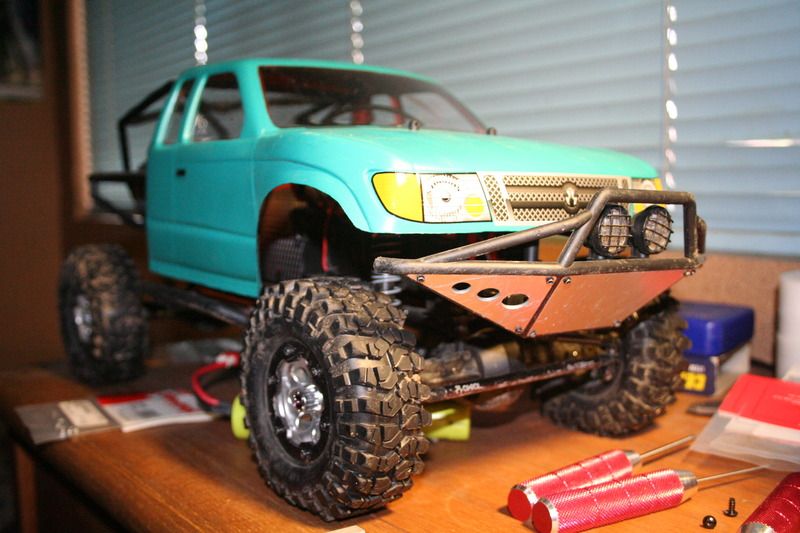 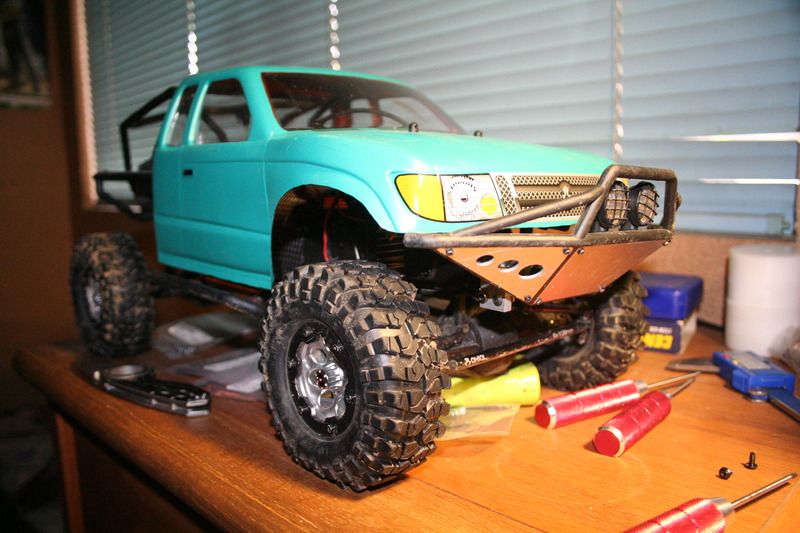 A vid in my local mnts. Not sure what's up with the aspect ratio https://www.youtube.com/watch?v=lynD...ature=youtu.be I made some shock relocation plates. Got major flex out of it and if I recall, it actually did pretty well (After some testing, I had to redrill holes to find the sweet spot, so the actual plates have more holes than what's shown in the photo) 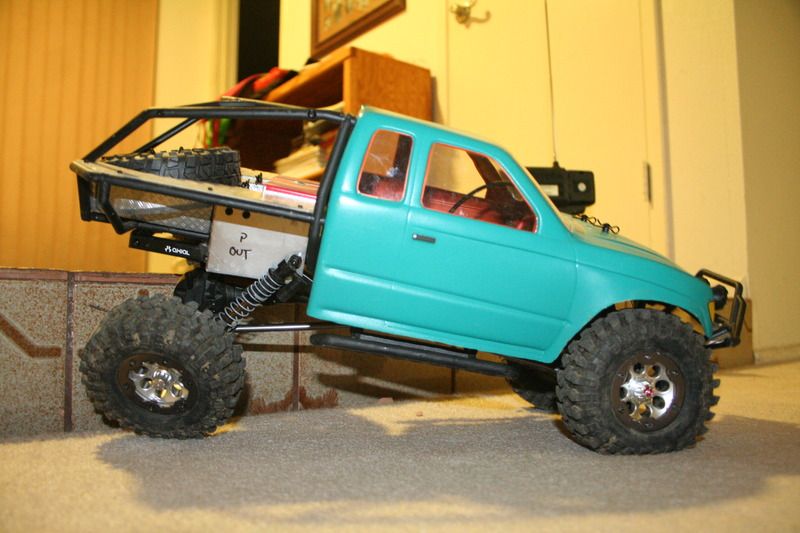 Up in SLO for Christmas 2011 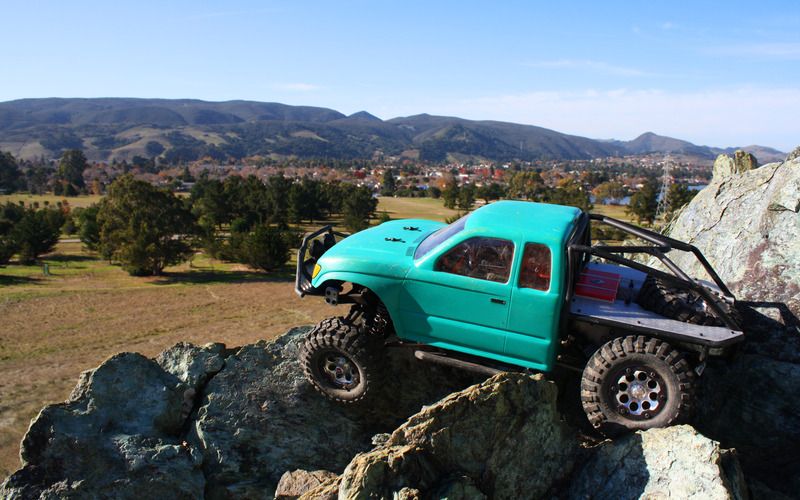 Made a 4-link plate on the rear at some point. I believe this is after breaking the stock 3-link 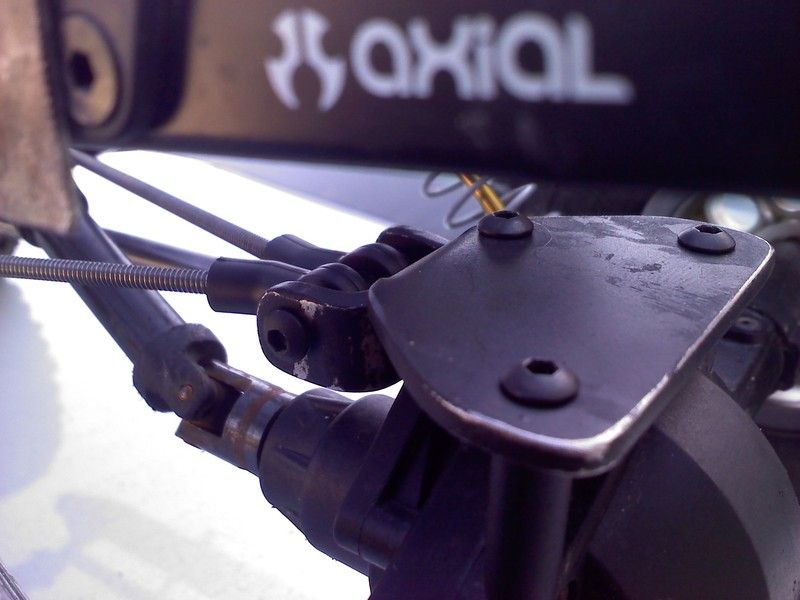 Also got the RC4WD chassis mounted servo. Got some PitBull tires sometime before I did the 4-link plate  My review of the RC4WD CMS in Aug 2012: "So, here's my review of the RC4WD CMS: Installation: Pretty straight forward. All the pieces look like the stock pieces, so it's easy to figure out where everything goes. I made the mistake of using the stock coarse thread screws before realizing the kit comes with fine thread screws. Whoops. One problem was the rear plate the servo sits on has a notch as well as an angled cut. It took a few tries to figure out where that notch went. There was no instructions (though anyone can figure out how to mount it and which screws go where), but a diagram of that notched plate would've been nice, or even a note, but not a big deal. The notch is on the bottom, so the servo mounts under that plate, and the front of the servo mounts on top of the front crossbar A spacer for the front battery plate standoff and a longer screw will be needed to secure the front of the plate down as the servo sits tall and hits the tray. The rear 2 mounts are fine though This kit allows the use of the stock Rx box as well. I don't have my Rx in there, but use the rear mounting holes to mount my battery holder (can be seen up at the top) The front crossmember feels to be slightly shorter than the stock crossmember. My bumper was really tight going in, so much that it was bending. I don't thing my bumper's relocation brackets are the problem as they were just fine with the stock setup. It was enough to be a hassle, but just tightened the screws in and it's good enough to take most of the bending out of it Performance: Without actually crawling (did a few hot laps in the living room), steering seemed to be fine. My Tx used to be set to Reverse steering, but had to be switched to Normal steering. Did some manual flexing and have gained travel on the driverside! The stock steering link would bottom out on the frame, but now with the new steering link, it sits lower so my shock's bumpstop hits way before the steering link, so I'm happy with that. I did lose some travel on the passenger side as one of the stock servo mounts now hits the servo. This can be taken care of by cutting it with dikes. However, I'll be getting new axles, so won't bother Going with the CMS has also relieved me of the stock servo mount causing the servo's mounts to slightly rub the frame. I'm not sure if anyone else has noticed that. Manual flexing felt easier since there was no more rubbing To me, there seems to be no need for a panhard. There is some slight body roll when turning, but it's probably 2mm of dip/ rise, so it's not even a problem. I've seen other CMS systems with worse roll. (EDIT): After some playing with, I notice that there is some bumpsteer. When going from ride height to full compression, the tires turn to the right enough to be noticeable. However, due to crawlers going off of articulation than actual suspension cycling, I can't see the bumpsteer being any problem at all. I won't even worry about it Looks: Well, you can't see the servo anymore so it now looks more like an actual truck than an RC car, duh, lol Overall, I'm quite happy with it, and can't wait to take it out and thrash it a bit tomorrow morning" Made my own bedsides out of fiberglass. The black is a textured paint to look like RhinoLining  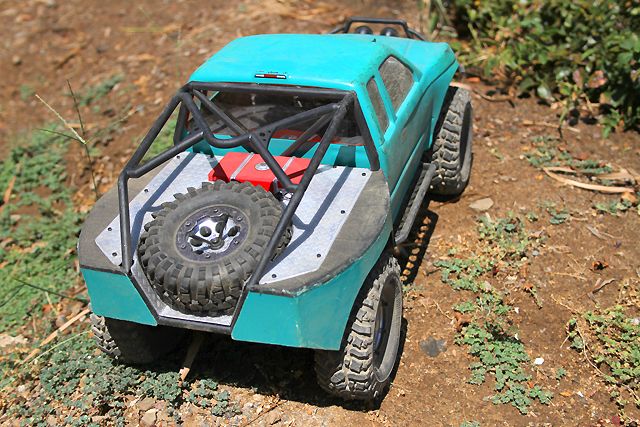 Next up were some RC4WD Ultimate Scale Yota 1.9 axles. They're narrower than the stock axles. Due to them being narrower, I had to redo my steering linkage 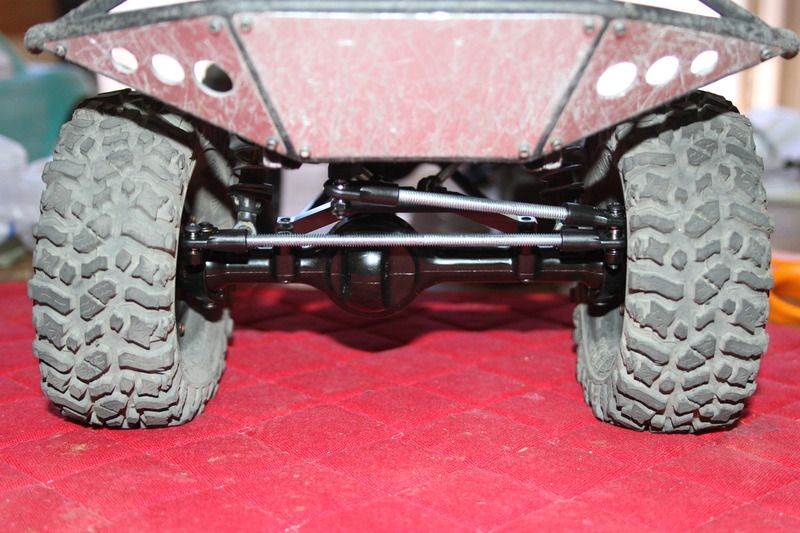 G6 RECON in Feb 2012. I had bumpers made because I got a winch (RC4WD Bulldog 9300XT) and a mount for my HiLift too. Also had some misc stuff like a little tool box with tools (lost the tools on obstacle #4, lol) and a chainsaw  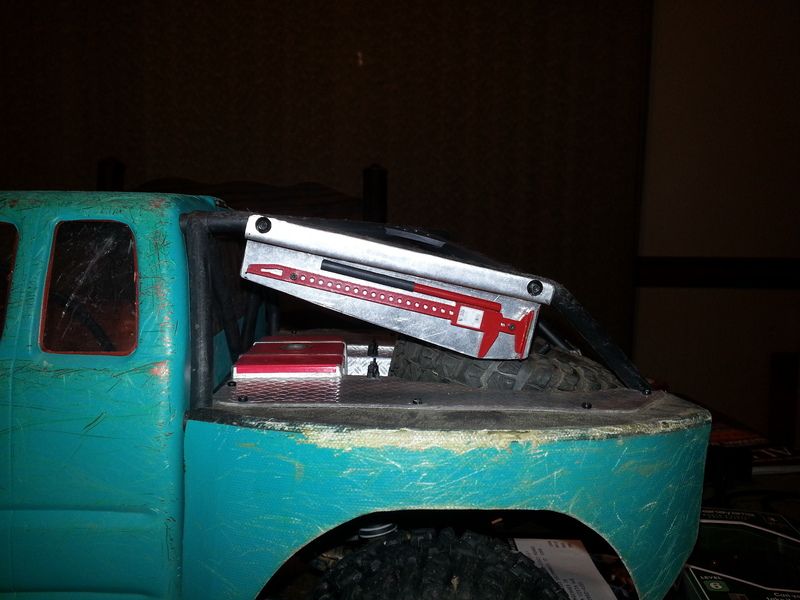 Then my Honcho sat and did nothing for 2yrs |

|  |
| Sponsored Links | |
| | |
|
03-28-2015, 03:56 PM
| #2 |
| Rock Crawler Join Date: Oct 2011 Location: Corona, CA
Posts: 533
|
Ok, now for what I've done in the last 2wks Tore all the electronics off and washed her down. Still had mud caked on from the G6 On the lineup was to fix the front bumper: redrill holes as the winch's fairlead stuck out a bit, get a skidplate on it, and paint all bumpers I played with the idea of a half skid because I'd have to machine out a slot for the fairlead. Then I realized we had a hole press at work, dur, and was able to use a 5/8 x 1 1/4" slot punch. It's a bit on the low side, but will work. It's also a little too squareish for me. I have plans to add some diagonal braces from the frame horn to the upper bar and let the skid wrap around the whole front more. It will look similar to the stock one Next was the electronics/ batt tray. Was able to bend up the sheet aluminum at work and came out great. I'll make it black to blend in 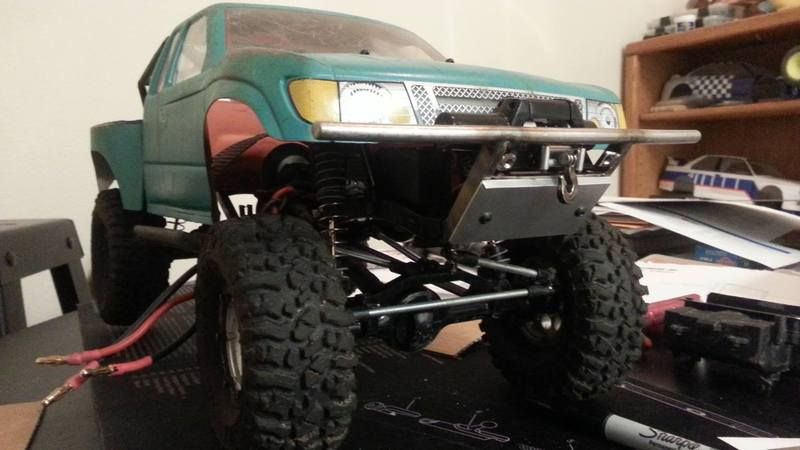  Party! Also got some RC4WD Rock Creeper tires and stock Axial wheels to check out. Tires are about 1/4" smaller than the PitBulls. (Background is chassis and axles for my Wroncho build) 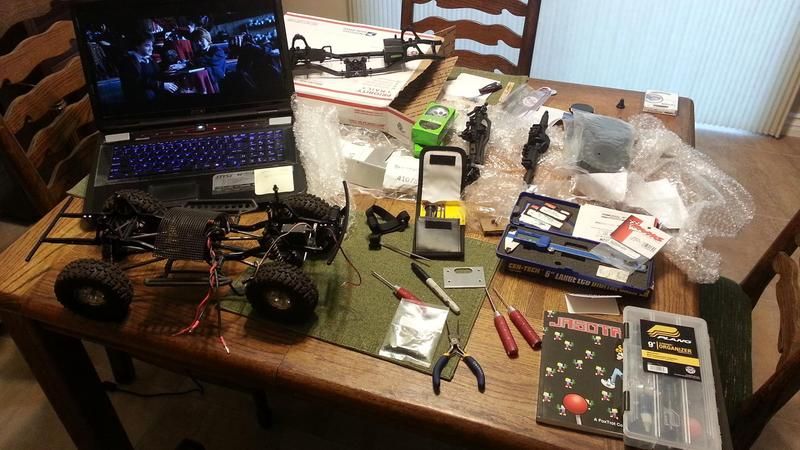 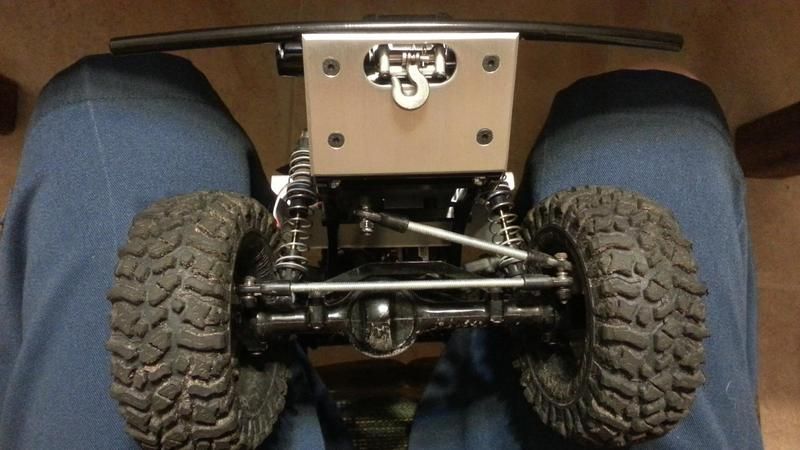 Batt part will have the stock batt mount mounted to the mount (Mountception) 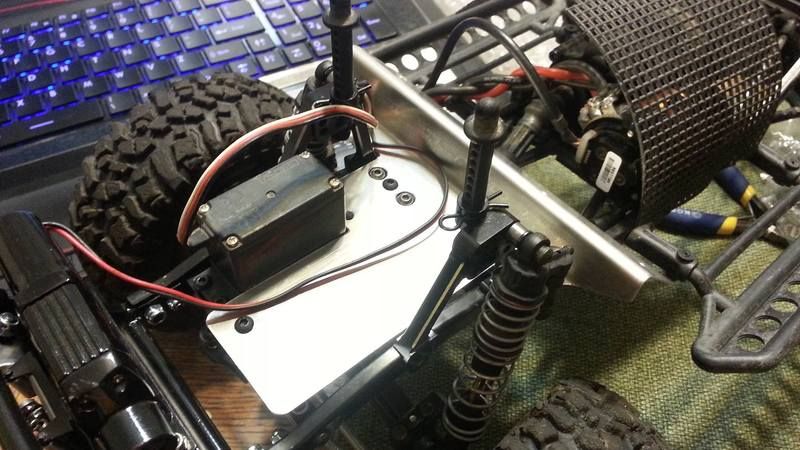 Now I need to get all the electronics mounted and take her for a spin |
|
| |
|
03-29-2015, 11:51 AM
| #3 |
| RCC Addict Join Date: May 2008 Location: Southern,WV
Posts: 1,136
|
I like the bed.OH.. And welcome back to the hobby.
|

| |
|
03-29-2015, 03:56 PM
| #4 |
| Rock Crawler Join Date: Oct 2011 Location: Corona, CA
Posts: 533
|
I, too, really like the bedsides. They're getting a little thrashed though, so dreading having to make another set Anyway, some of today's work. Mocked the batt. Also some side by side comparison of my PitBulls and the Rock Creepers 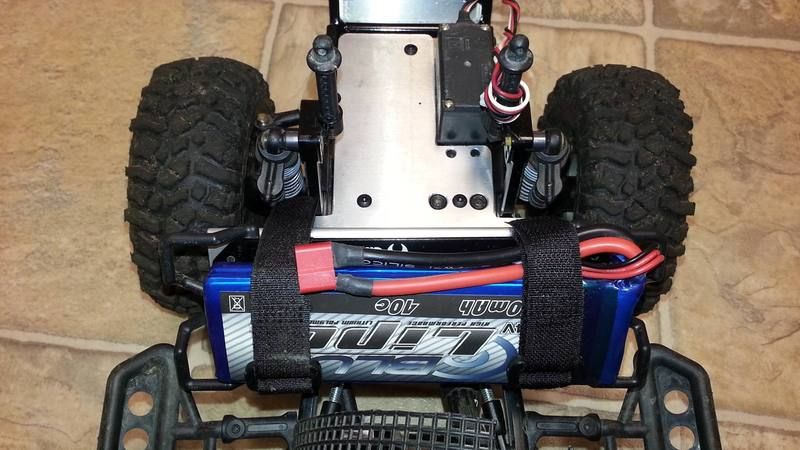 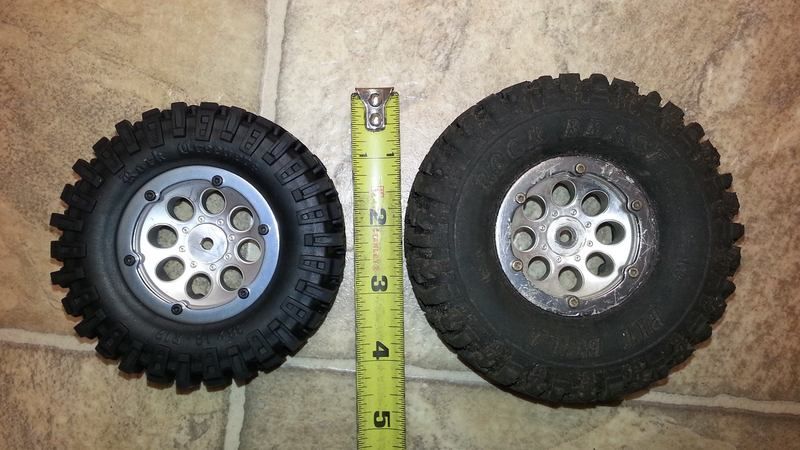 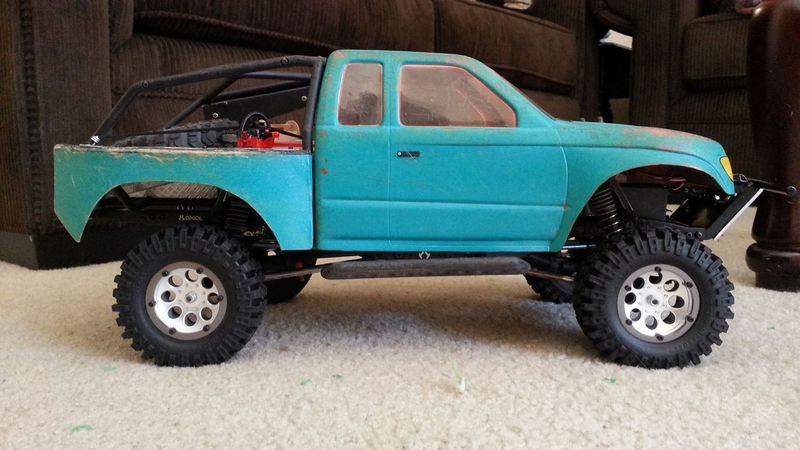 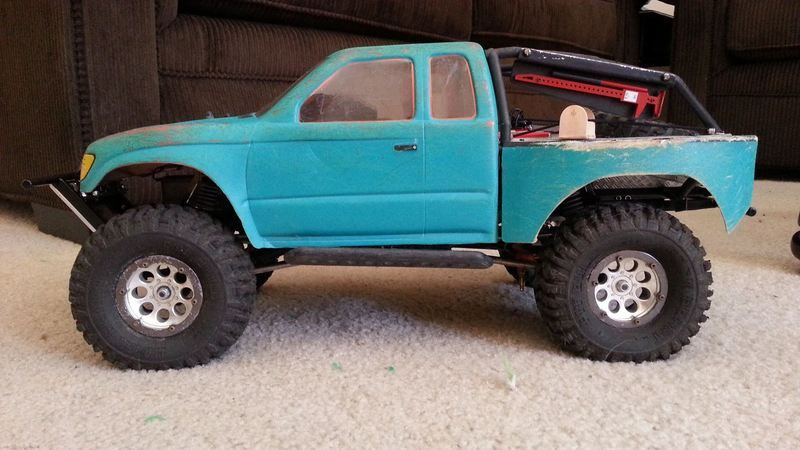 |
|
| |
|
03-29-2015, 07:50 PM
| #5 |
| Rock Crawler Join Date: Oct 2011 Location: Corona, CA
Posts: 533
|
Can't seem to get my steering set. Running a Futaba S3305 servo. I can turn all the way to the right, but turning left fades out. Also, I can zero the steering, and after turning it back and forth multiple times, the steering comes off zero. I've tightened the steering arm screw many times. Not sure if it's the splines in the arm that are worn out, or if the internal gears are worn. If I recall, I did start having servo issues just as I got out of RCs Anyone have any possible ideas? My only thought is to buy a better servo. Or buy a super cheap one to see if that's actually the problem, and if it is the problem I go buy a good servo to use and keep the cheapy as a backup for another RC car... my stadium truck or rally car Last edited by Armistice; 03-29-2015 at 08:29 PM. |
|
| |
|
03-30-2015, 01:42 PM
| #6 |
| Quarry Creeper Join Date: Jul 2011 Location: Temecula
Posts: 417
|
Yeah, with it coming off zero after moving it back and forth I would think to check the splines. It could be that simple. If that's not the problem, you could try this Tactic servo that Axial is using on the RTR's now. It has more power than your Futaba, same spline count so you can reuse your horn, and is pretty cheap. Axial 1/10 Yeti Rock Racer Tactic TSX45 High Torque Metal Gear Steering Servo - Yeti Rock Racer - Axial |
|
| |
|
03-30-2015, 07:30 PM
| #7 |
| Rock Crawler Join Date: Oct 2011 Location: Corona, CA
Posts: 533
|
I've had that servo for a while. I think replacing the horn would be best EDIT: I just looked and there're hardly any splines left. I play hard, lol  Last edited by Armistice; 03-30-2015 at 08:42 PM. |
|
| |
|
03-31-2015, 08:12 PM
| #8 |
| Rock Crawler Join Date: Oct 2011 Location: Corona, CA
Posts: 533
|
Ok, got a new servo horn on and that has solved the problem! I'm ready to wheel!
|
|
| |
|
04-04-2015, 03:59 PM
| #9 |
| Rock Crawler Join Date: Oct 2011 Location: Corona, CA
Posts: 533
|
I need to adjust the ESCs braking Took Gumby out for a shakedown run. Did well other than taking a tumble down a face due to the ESC braking My scale chainsaw broke off the bar and chain part at some point :( The lower C Hub screw came out again, but I had a spare bolt that was almost long enough, so threw that on and kept going. I need to go to the LHS and make sure I have extras of that. The only part I hate about the Scale Yota axles is that lower bolt backing off during runs I got some pics, and will post a little bit of vid later tonight maybe I need to get the elec/ batt tray painted and get the elec stickied down. I had them loose and my Rx kept falling out here and there, lol |
|
| |
|
04-04-2015, 04:41 PM
| #10 |
| Rock Crawler Join Date: Oct 2011 Location: Corona, CA
Posts: 533
|    |
|
| |
|
04-10-2015, 09:30 AM
| #11 |
| Rock Crawler Join Date: Oct 2011 Location: Corona, CA
Posts: 533
|
Was talked into some Super Swamper XL tires by a buddy. I have them on and I can stuff the rear, but some slight rubbing in the front on the body and on the shocks. I'll grab some pics today. Going to try out a new spot
|
|
| |
|
04-10-2015, 02:05 PM
| #12 |
| Rock Crawler Join Date: Oct 2011 Location: Corona, CA
Posts: 533
|
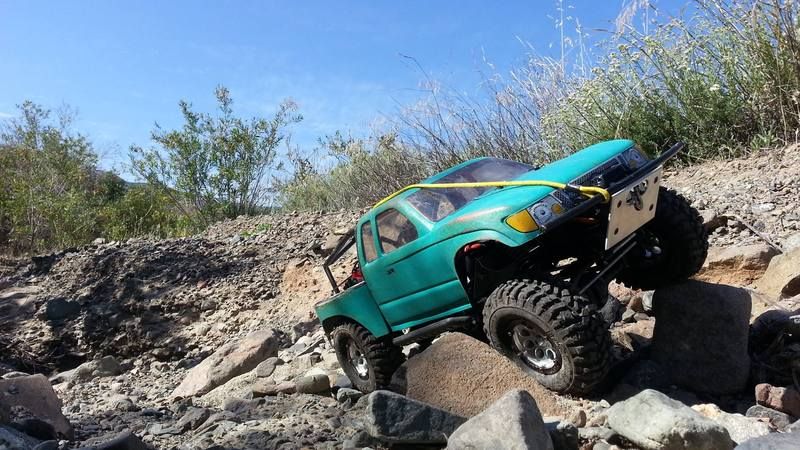
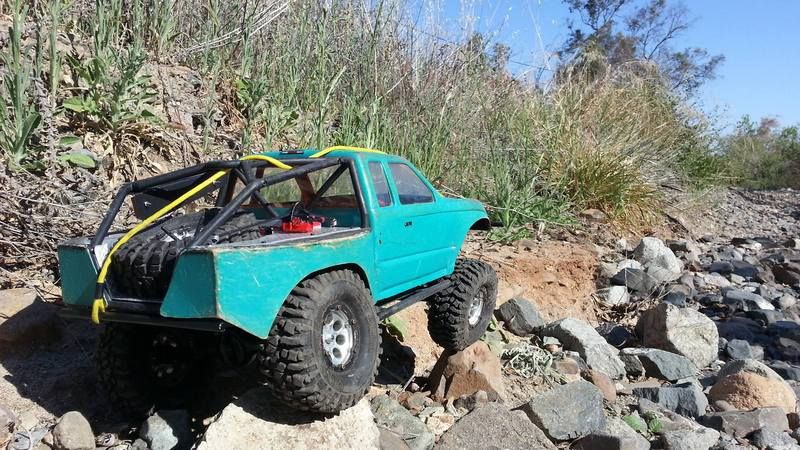
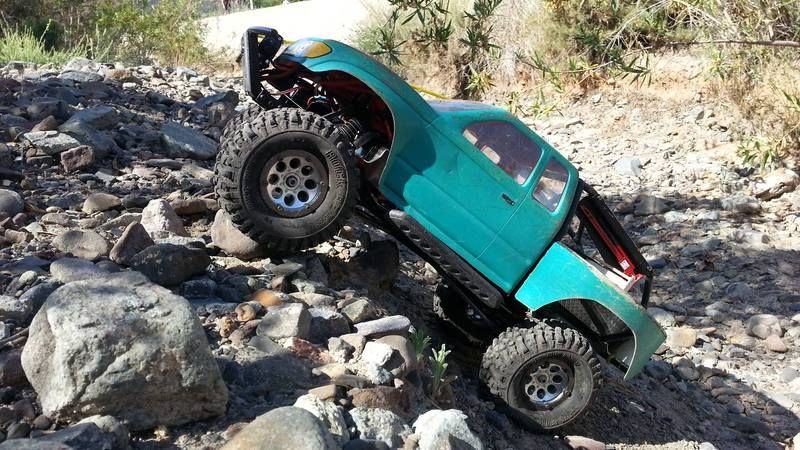
Tires seemed to do just fine. Foams are huuuge in these. I may swap them out for smaller foams and weight them Not a lot of stuff to crawl on though There are a few lines I'd like to see if my PitBulls could do Yes, it was steep 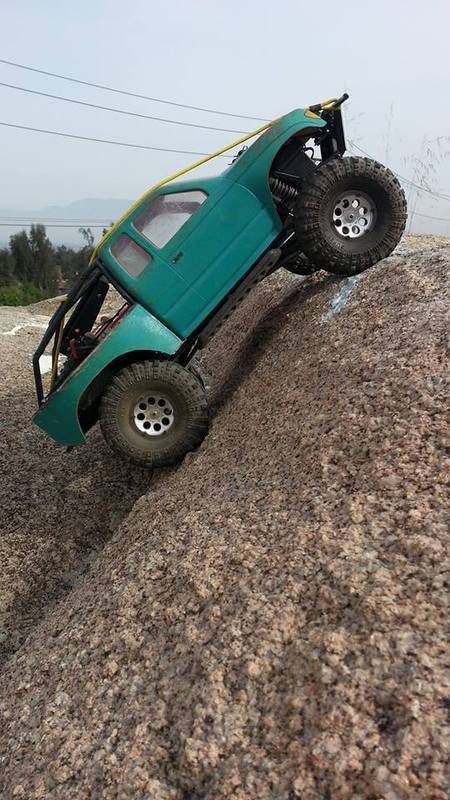 Some 3 wheel action 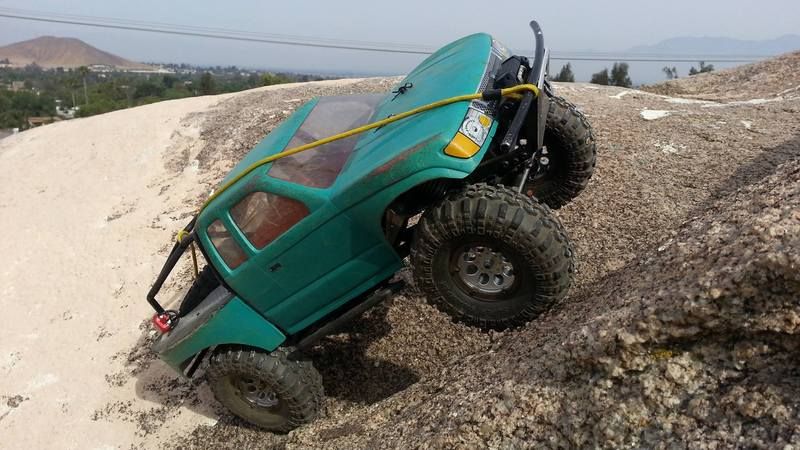 This one worked if you crawled up to it, then mashed it right before your rear tires hit the wall. This photo was the 3rd successful climb. And sorry for my finger. It was bright and was trying to see my phone's screen 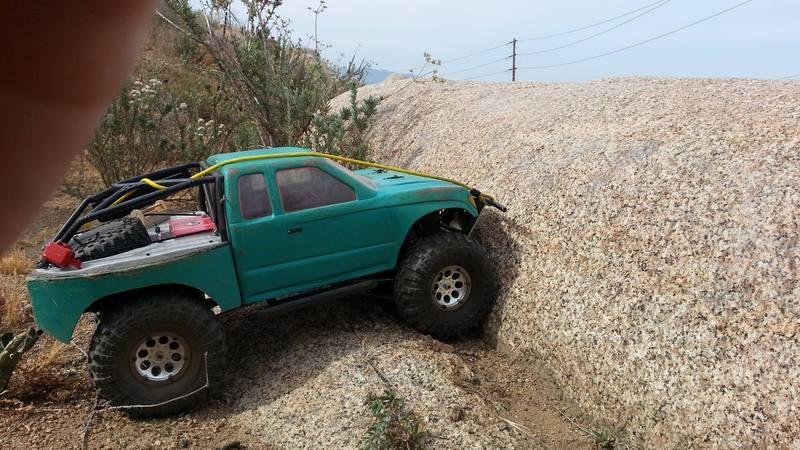 |
|
| |
|
04-11-2015, 04:54 PM
| #13 |
| Rock Crawler Join Date: Oct 2011 Location: Corona, CA
Posts: 533
|
Did some crawling today with the Temecula Valley guys. 50' left on the trail I snapped my front output shaft Now, I can't remember if the Honcho kit, that's now discontinued, had plastic or metal tranny gears. I'm going to get the Robinson Racing solid output shaft gear, but will get the all metal gear set too if the stock set is plastic. I'll tear into it by Monday and find out Might also be looking into a new motor/ ESC combo. I'm running a Novak 18.5T Crawler motor and CC Mamba Max ESC right now. I want a slower motor and a buddy suggested looking into a 30T. His rig had a 35T and I like how smooth it runs |
|
| |
|
04-11-2015, 05:10 PM
| #14 |
| RCC Addict Join Date: Mar 2013 Location: Commerce Township
Posts: 1,594
|
Like the boat sides, and your fab work is very good. You have some awesome places to crawl! It's cool to see the progression from stock to where you are now.
|
|
| |
|
04-11-2015, 05:52 PM
| #15 |
| Rock Crawler Join Date: Oct 2011 Location: Corona, CA
Posts: 533
|
Thanks! I'm a stainless steel fabricator by day I'm still looking for nice local places. There's a nice faux rock spot near where I live, but it's more for comp crawlers which I've taken my Night Crawler on a few times Maybe I'll actually bike up to the spot I wanted to get to last weekend and get more photos and vid. It's a really cool spot Might get a new body and make some new bedsides and retire this body before it gets too thrashed Last edited by Armistice; 04-11-2015 at 05:58 PM. |
|
| |
|
04-11-2015, 11:28 PM
| #16 |
| Rock Crawler Join Date: Oct 2011 Location: Corona, CA
Posts: 533
|
Some photos from today's crawl Found a rattlesnake! 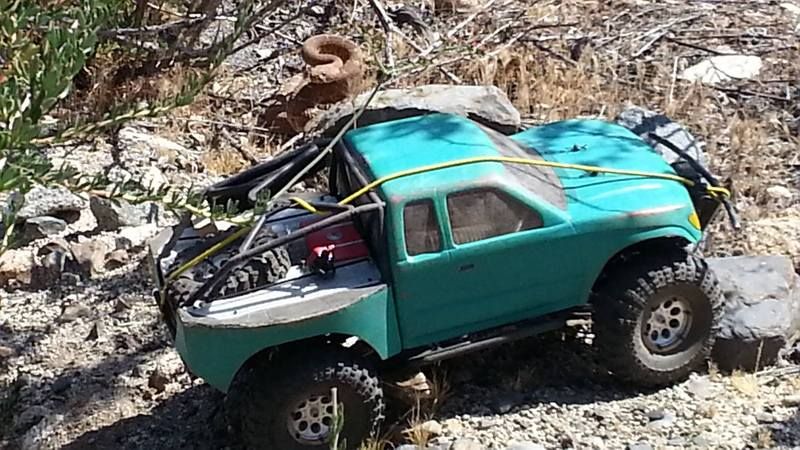 50' left on the trail and I snap my output shaft. Time for a tranny build!  |
|
| |
|
04-12-2015, 12:00 PM
| #17 |
| Rock Crawler Join Date: Oct 2011 Location: Corona, CA
Posts: 533
|
Tore into the tranny and the 2 lower gears are plastic, so I will buy an all metal gear set soon
|
|
| |
|
04-13-2015, 09:45 AM
| #18 |
| Newbie Join Date: Mar 2015 Location: Round rock
Posts: 23
|
Nice build! I have the RTR honcho and I had to rebuild the tranny (I have only had it for 4 weeks) I got the axial hardened tranny gears Sent from my iPhone using Tapatalk |
|
| |
|
04-26-2015, 07:49 PM
| #19 |
| Rock Crawler Join Date: Oct 2011 Location: Corona, CA
Posts: 533
|
Been doing some other things as of late, but after finishing messing with my Wroncho build, I decided to drop in the new gears Axial hardened gears and Robinson Racing solid output gear The only trouble I had was the pin for the slipper gear. The slot is a tad small for that holding pin. I had to hit it to get it in there Used some high temp, heavy duty, red marine grease 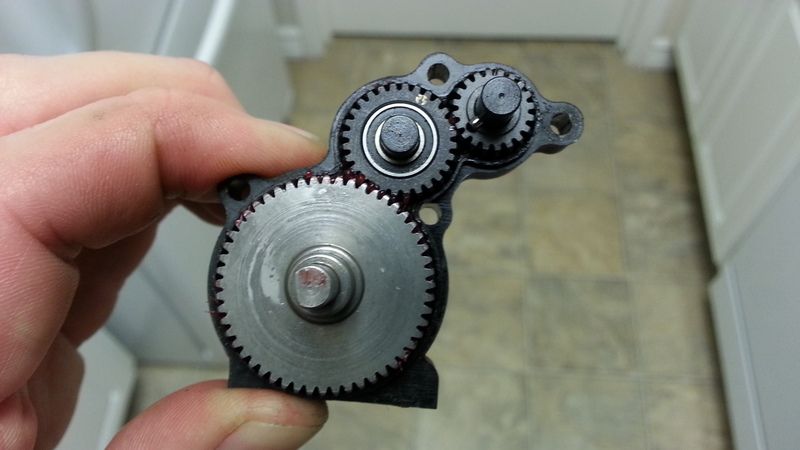 I'll get the new motor/ ESC in later |
|
| |
|
05-03-2015, 06:17 PM
| #20 |
| Rock Crawler Join Date: Oct 2011 Location: Corona, CA
Posts: 533
|
Got the new Tekin Pro 30T motor and Tekin FX-R Pro installed. Ran it a tad around my place and the control seems much smoother than what I had before. Can't wait to get it on the rocks
|
|
| |
 |
 Gumby build - Similar Threads
 | ||||
| Thread | Thread Starter | Forum | Replies | Last Post |
| Gumby Build | Armistice | Axial SCX-10 | 78 | 12-31-2012 09:33 PM |
| ~53 Willys 2010 Comp Rig Build~ RC4WD MOA Worminator Build~ | 53 willys | General Crawlers | 108 | 11-28-2011 12:42 AM |
| ~~ Happy Birthday Mn Gumby ~~ | Stormin2u | Minnesota | 1 | 01-16-2011 02:35 PM |
| Happy Birthday MN GUMBY. | partsman | Minnesota | 4 | 01-19-2010 03:00 AM |
| |


 Linear Mode


