| |
| |||||||
 |
| | LinkBack | Thread Tools | Display Modes |
 11-18-2015, 04:04 PM
| #1 |
| Pebble Pounder Join Date: Jan 2015 Location: South Central PA
Posts: 171
|
I just got my Tamiya Bullhead body today. I hope to build a 4x4 flatbed or maybe tow truck using this body on my trail honcho frame. I couldn't wait to see how it would look and here it is just thrown on there to get an idea of it. 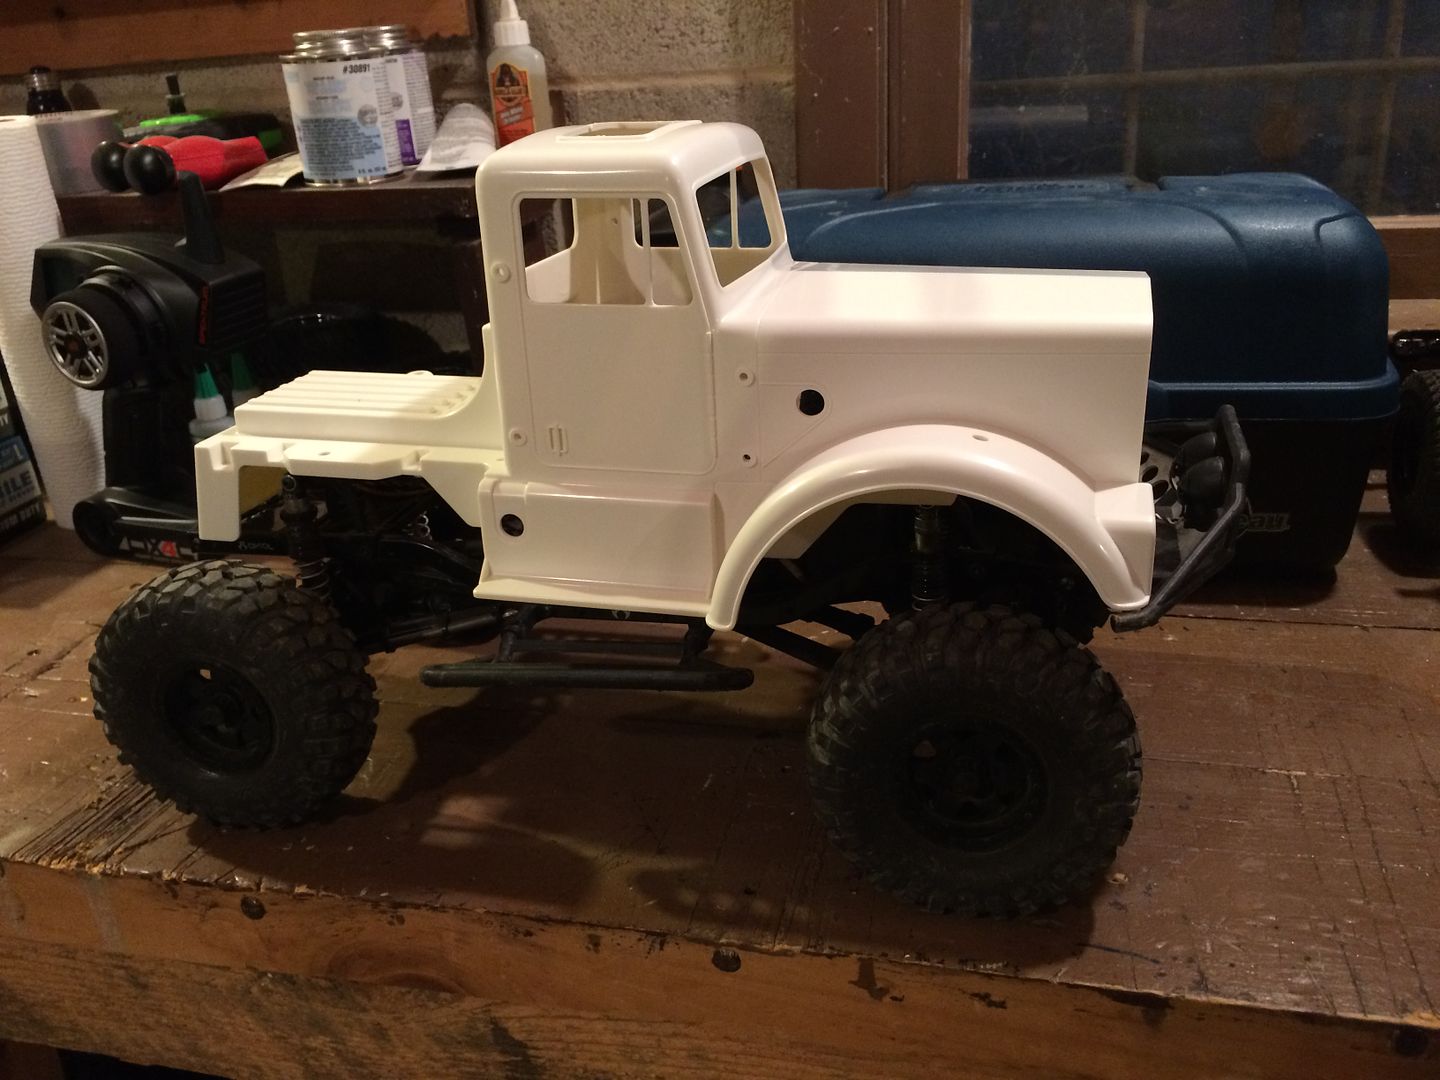 It's a good fit. I will still need to modify it and figure out how to build a tow setup or flat bed. I have never done any styrene or body modifications before. I'm pretty much an RTR guy but did recently build a Gelande II Cruiser kit. We'll see how things go. This will have a steep learning curve I think so I don't know how quickly it will progress. Last edited by jeff22; 11-26-2015 at 03:30 AM. |

|  |
| Sponsored Links | |
| | |
|
11-18-2015, 04:07 PM
| #2 |
| RCC Addict Join Date: Mar 2013 Location: Commerce Township
Posts: 1,594
|
Really like the way these bodies fit on the SCX10 platform. Nice start. You can also use wood as a deck, I've seen scale diamond plate from RC4WD used, very cool.
|
|
| |
|
11-22-2015, 02:47 PM
| #3 |
| Pebble Pounder Join Date: Jan 2015 Location: South Central PA
Posts: 171
|
Made some progress today. One of the things I want to be able to do with this is to switch back to a Honcho body if I ever want to so I will be avoiding any chassis modifications where possible. I cut the back of the body off using a hacksaw. 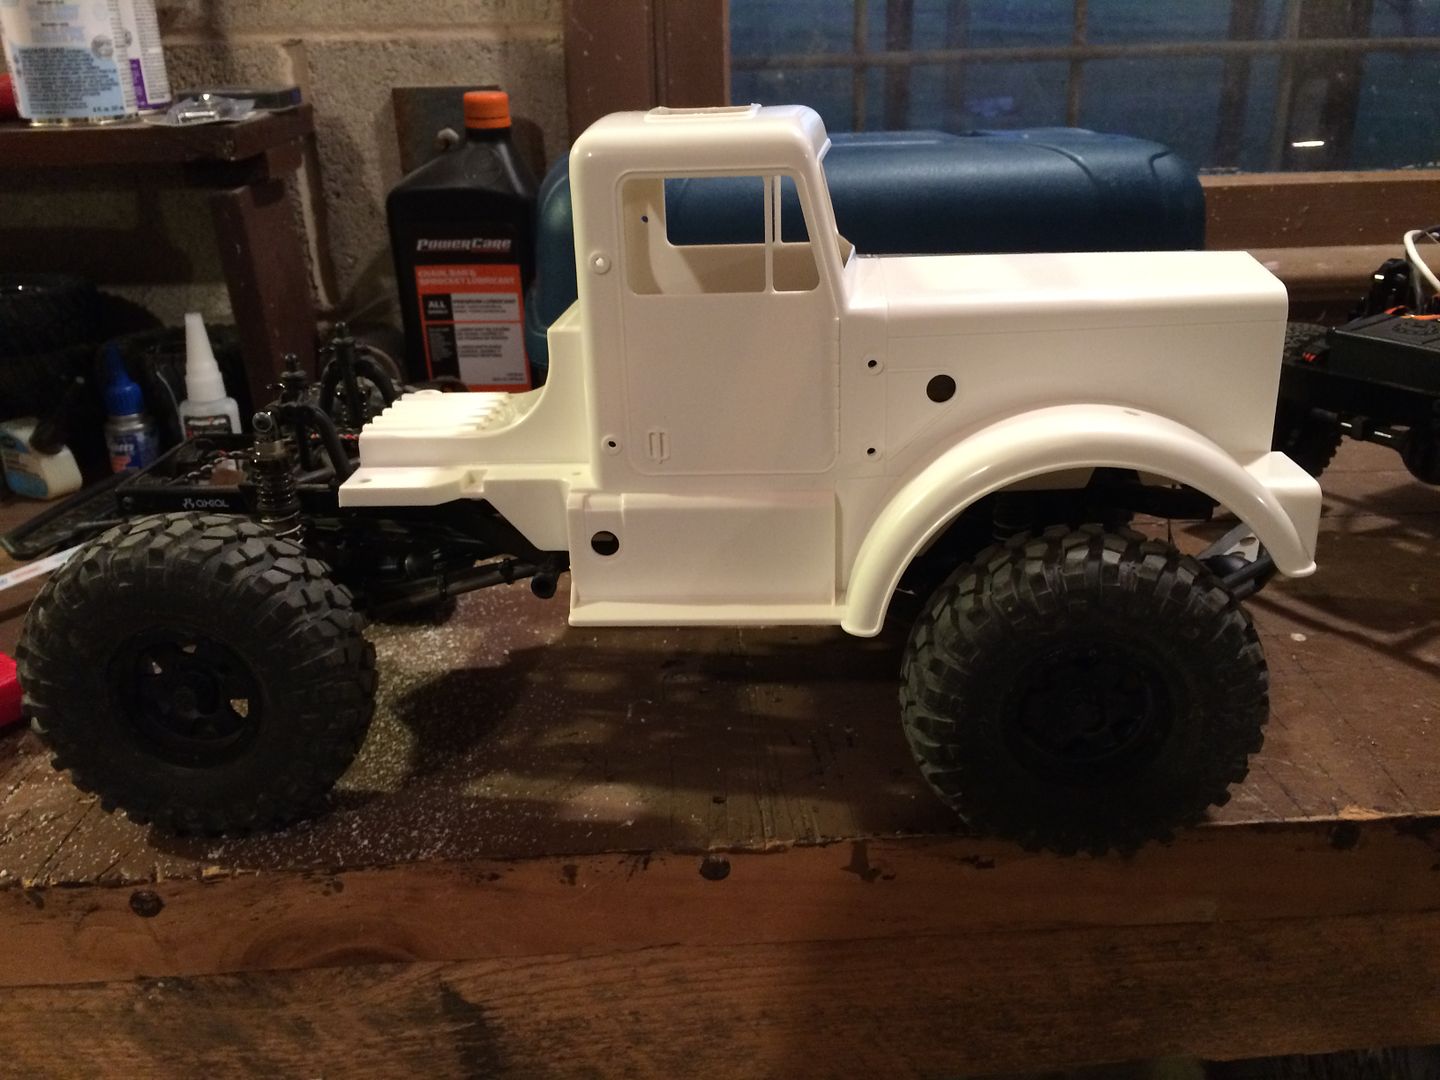 Then I built some rails out of 1/2" hobby wood to fill in the huge gap between the frame and the bed. Doing it this way you get a nice flat bed and avoid chassis modifications so I can still go back to a Honcho body easily. I put the stock bumper back on which lifts the body up a bit which is needed to clear the 1.9 bfg krawlers when the suspension is fully compressed, but the bumper mounts are too short. I ordered a Dingo bumper which I will cut to hopefully get a nice flat bumper the front of the body will then sit on or just behind. 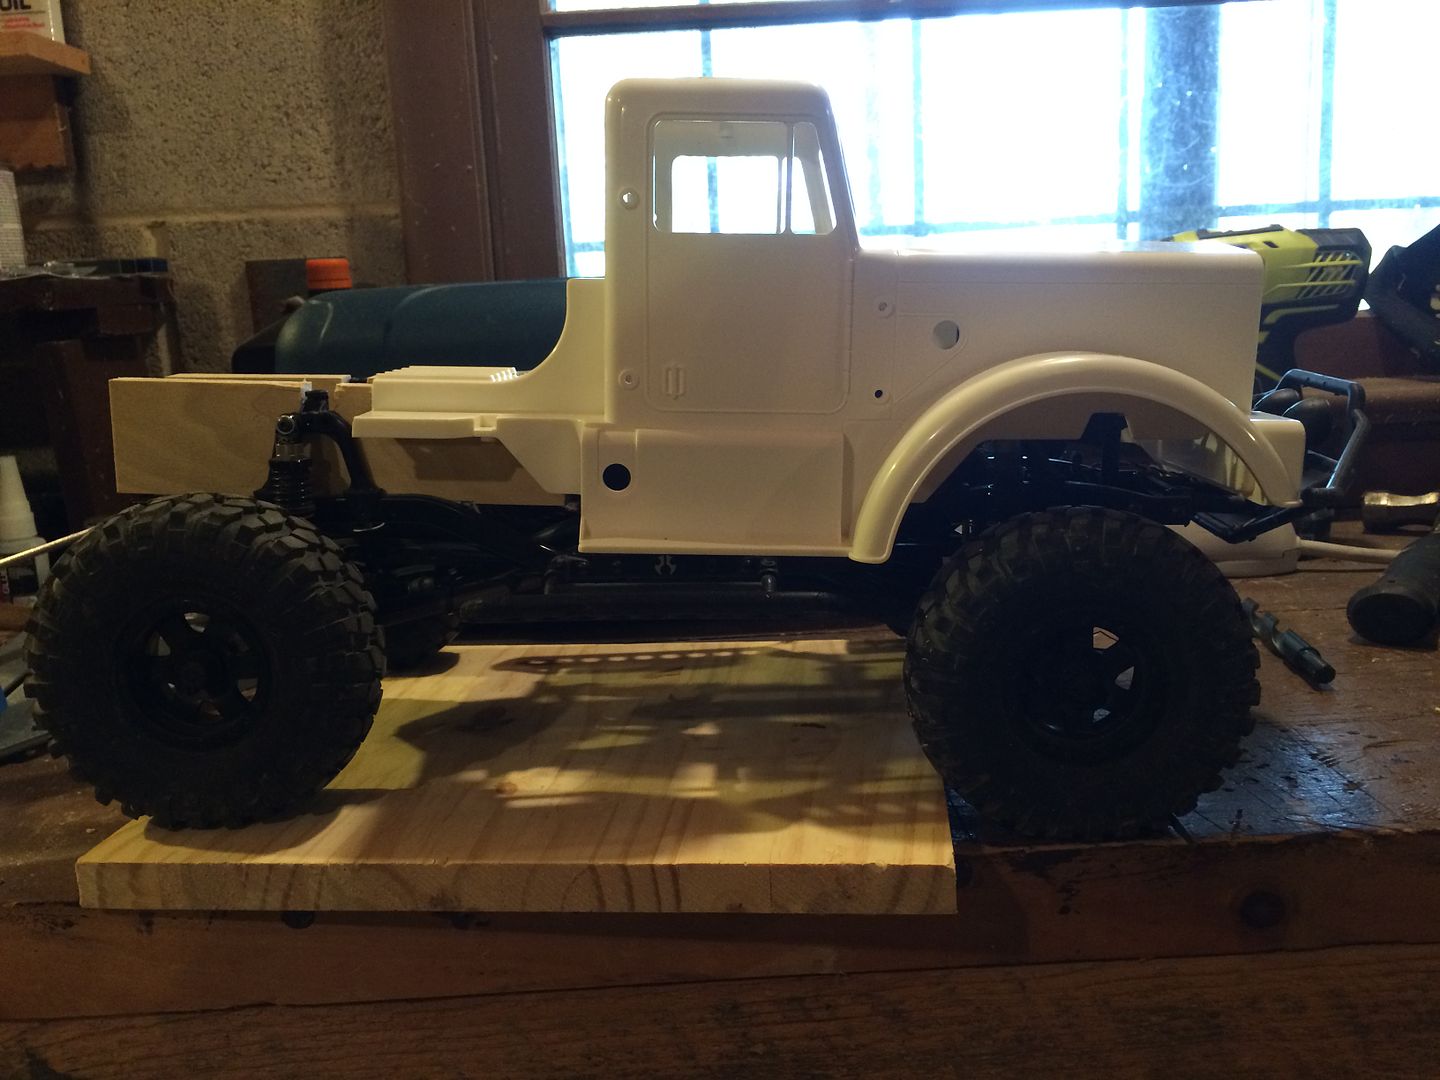 Here you can see how I notched the wooden rails to allow the shock mounts to fit. I didn't have to cut the shock mounts this way. The dowel rod isn't permanent, it's just to hold everything in place until I put the back piece on. 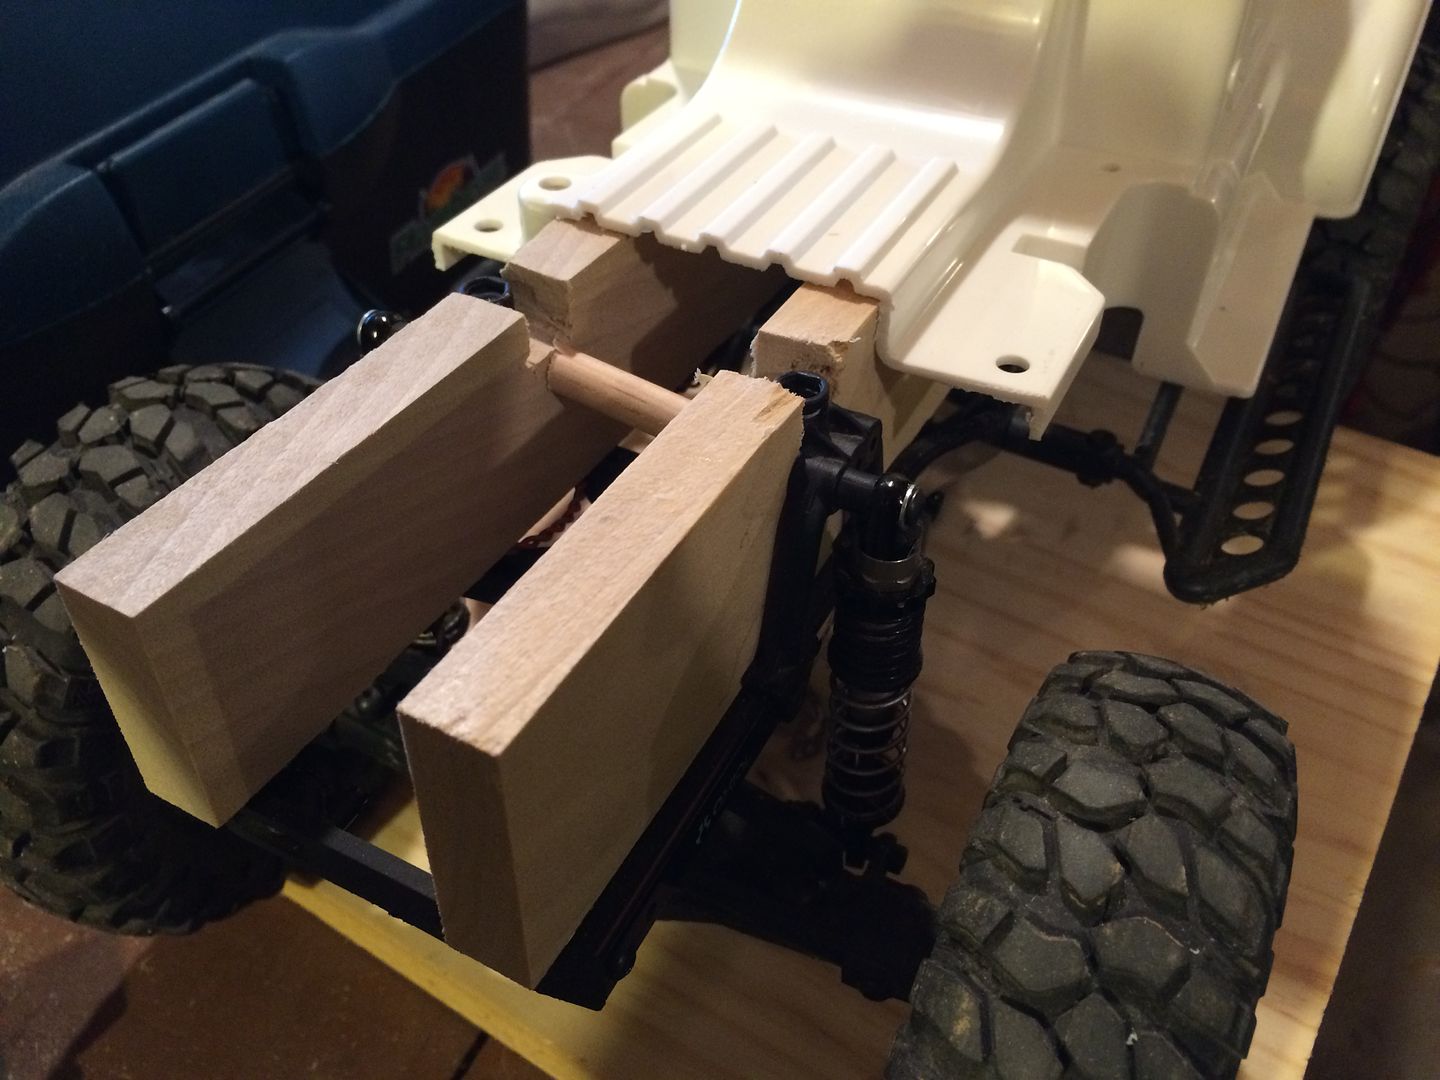 Last edited by jeff22; 11-22-2015 at 03:17 PM. |
|
| |
|
11-22-2015, 02:58 PM
| #4 |
| Pebble Pounder Join Date: Jan 2015 Location: South Central PA
Posts: 171
|
Then I put on a back cover piece and a top cover piece both made out of 1/4" hobby wood. The top cover was needed to fill in a small gap between the frame rails and the bed. By taking out the 4 screws everything comes apart and can be removed, giving you a stock chassis again. 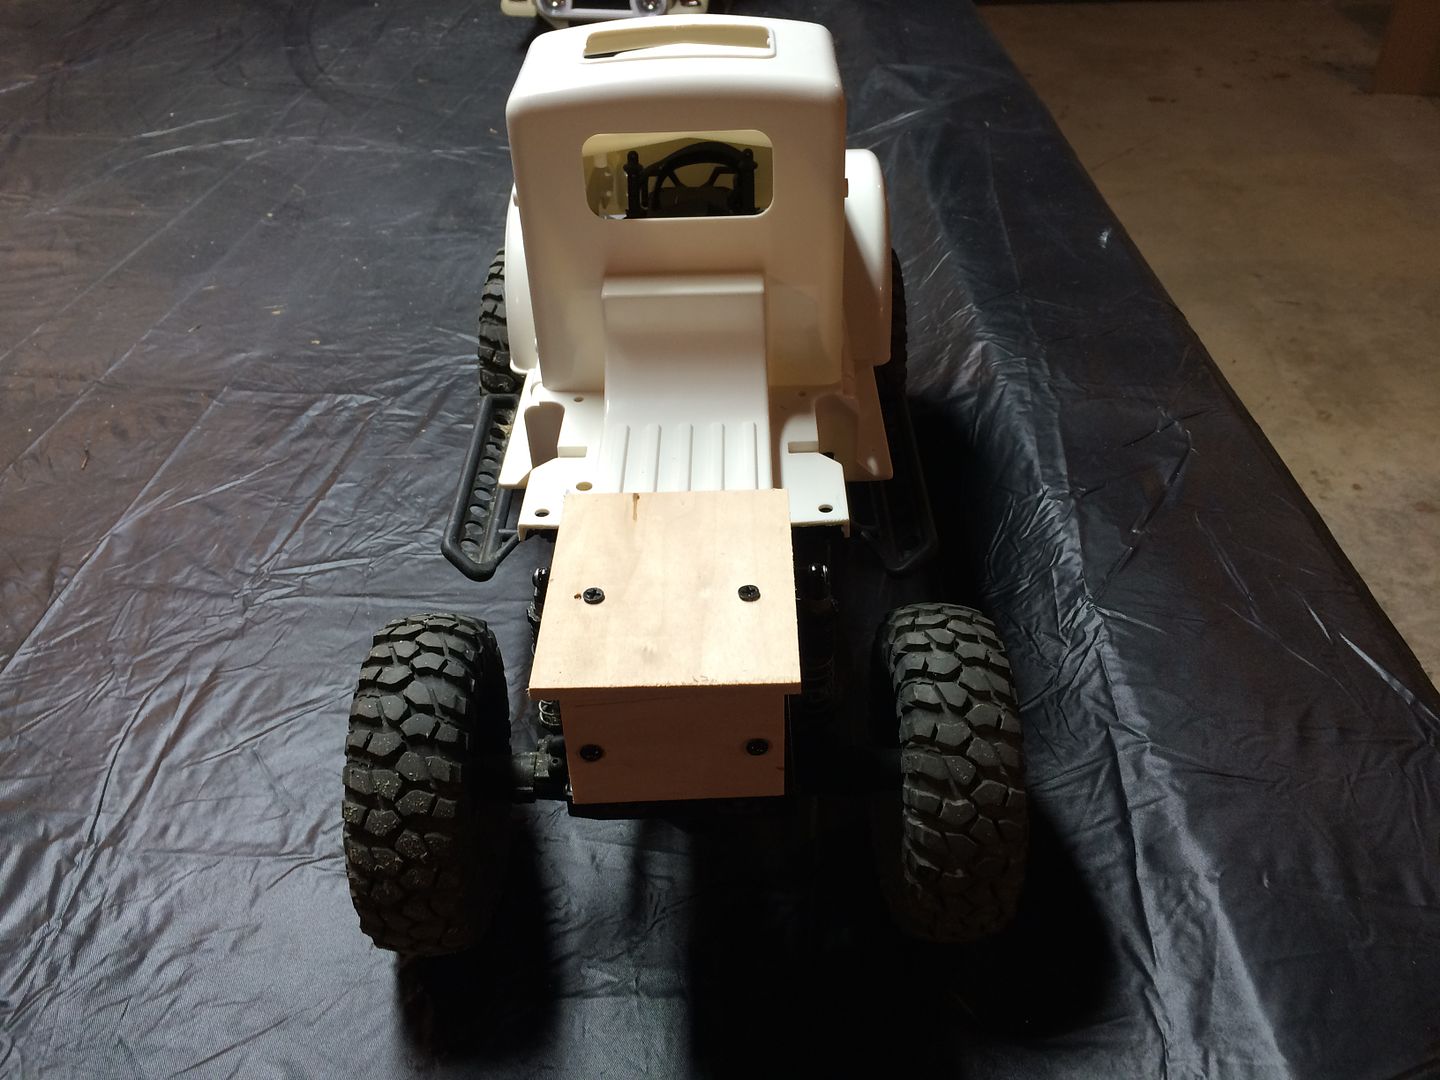 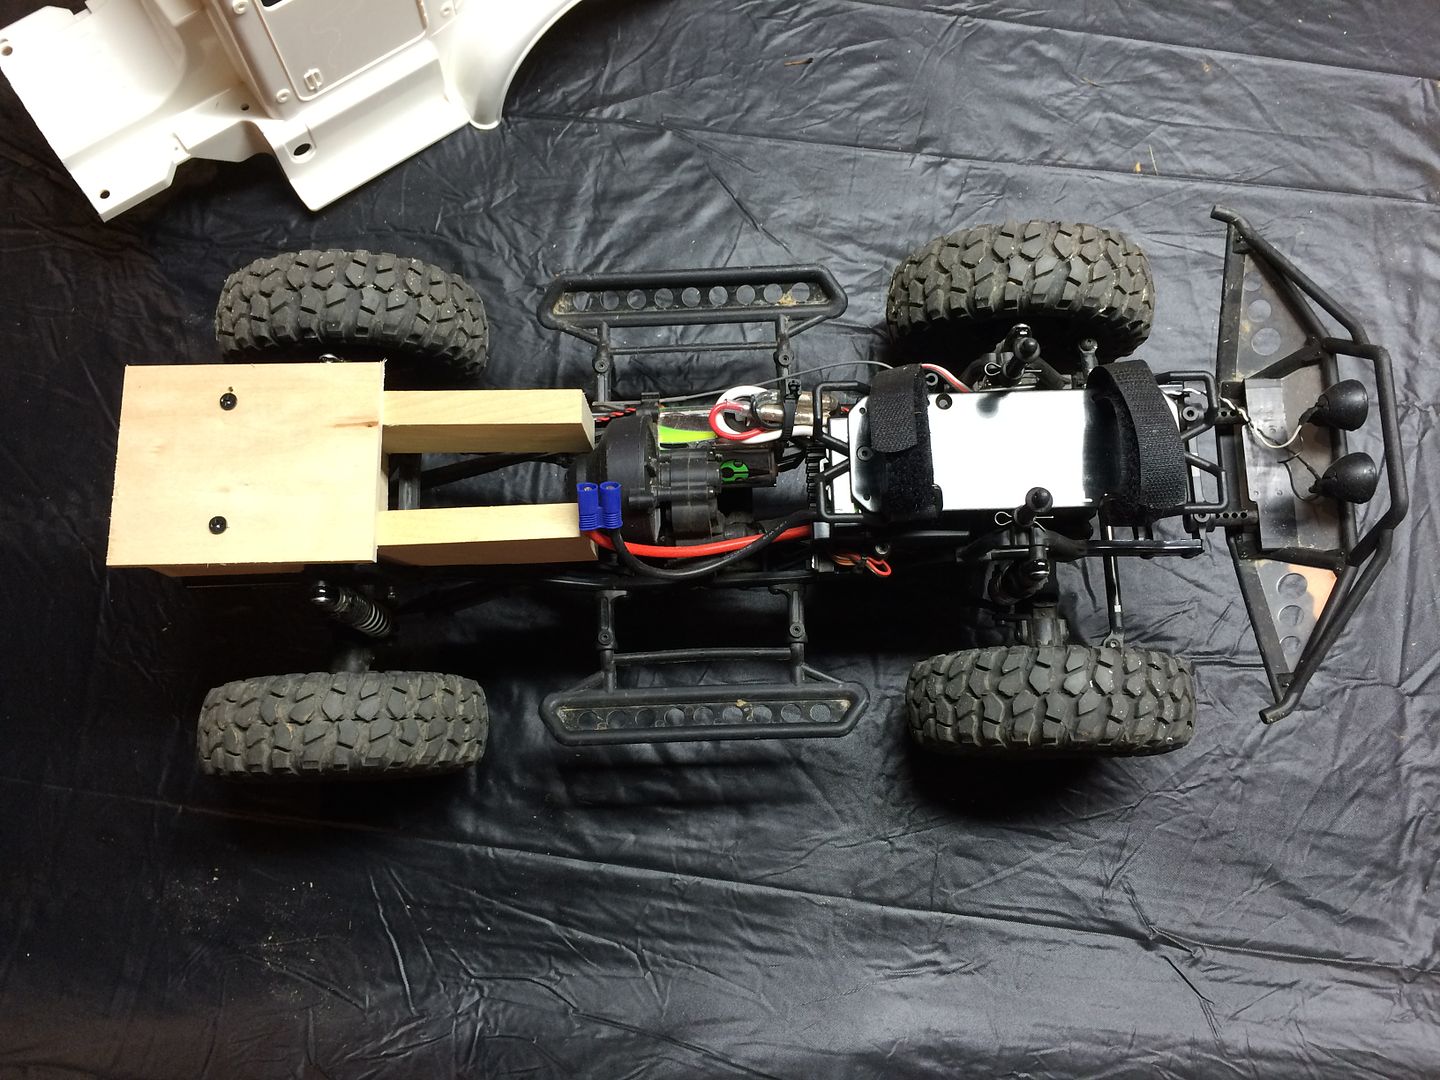 Now for the bed. This is 1/4" backer board I think it was called. From Home Depot. 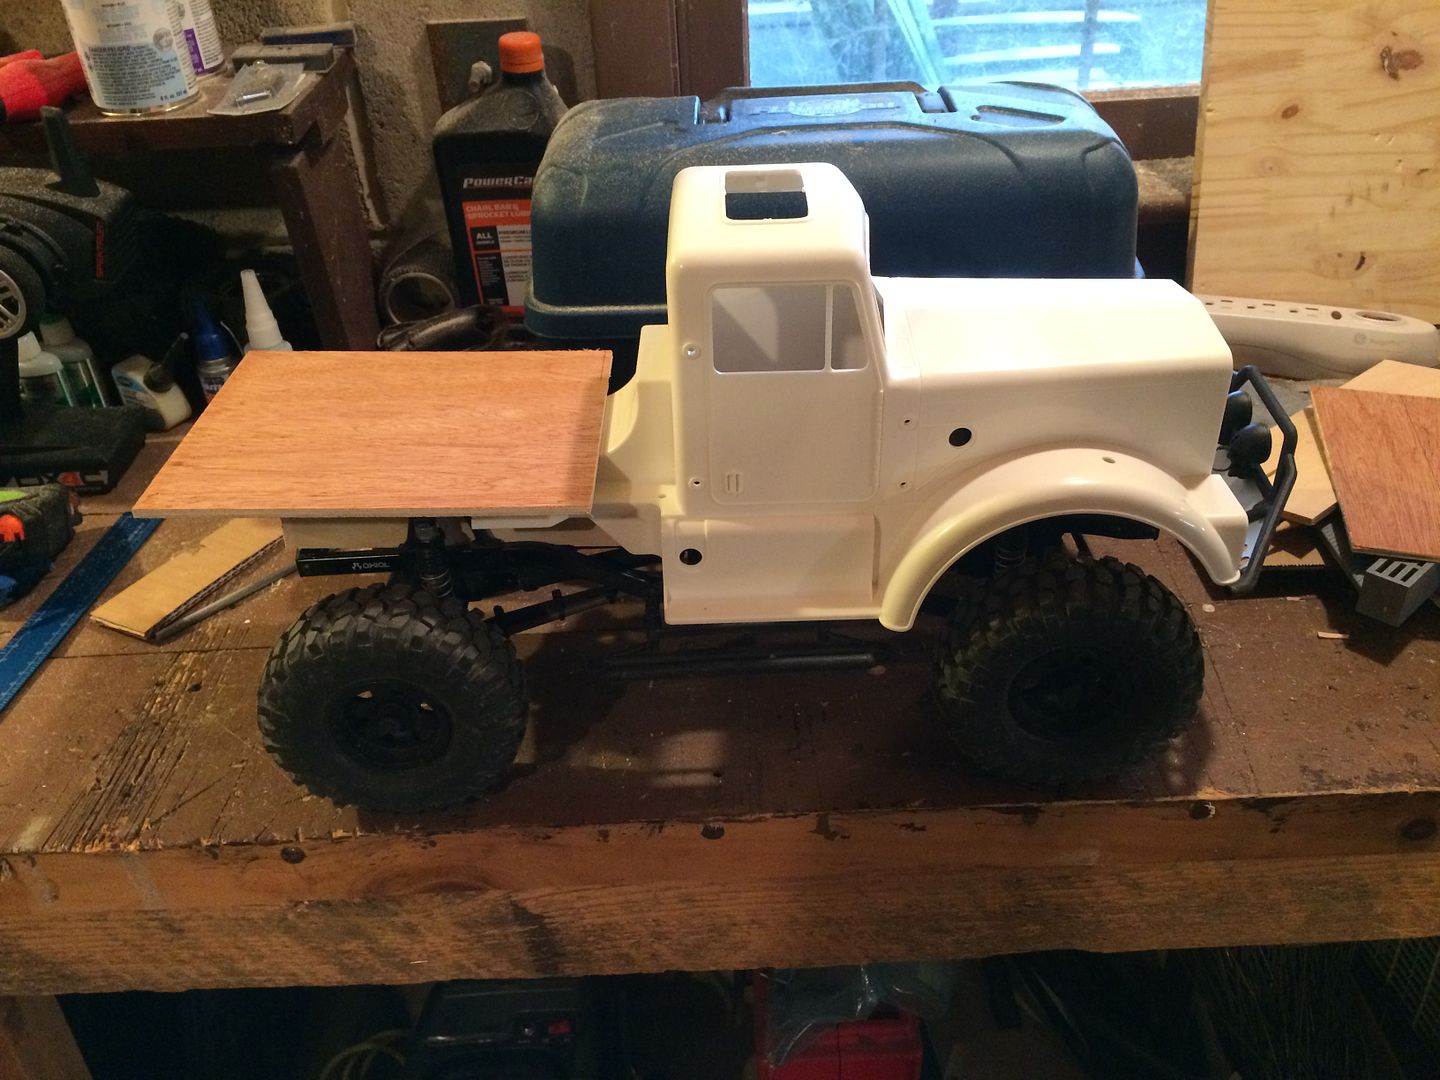 I used wood glue to attach the front of the bed. It seems plenty strong, I thought about brad nails also but this material is very thin and light so I will just leave it glued. 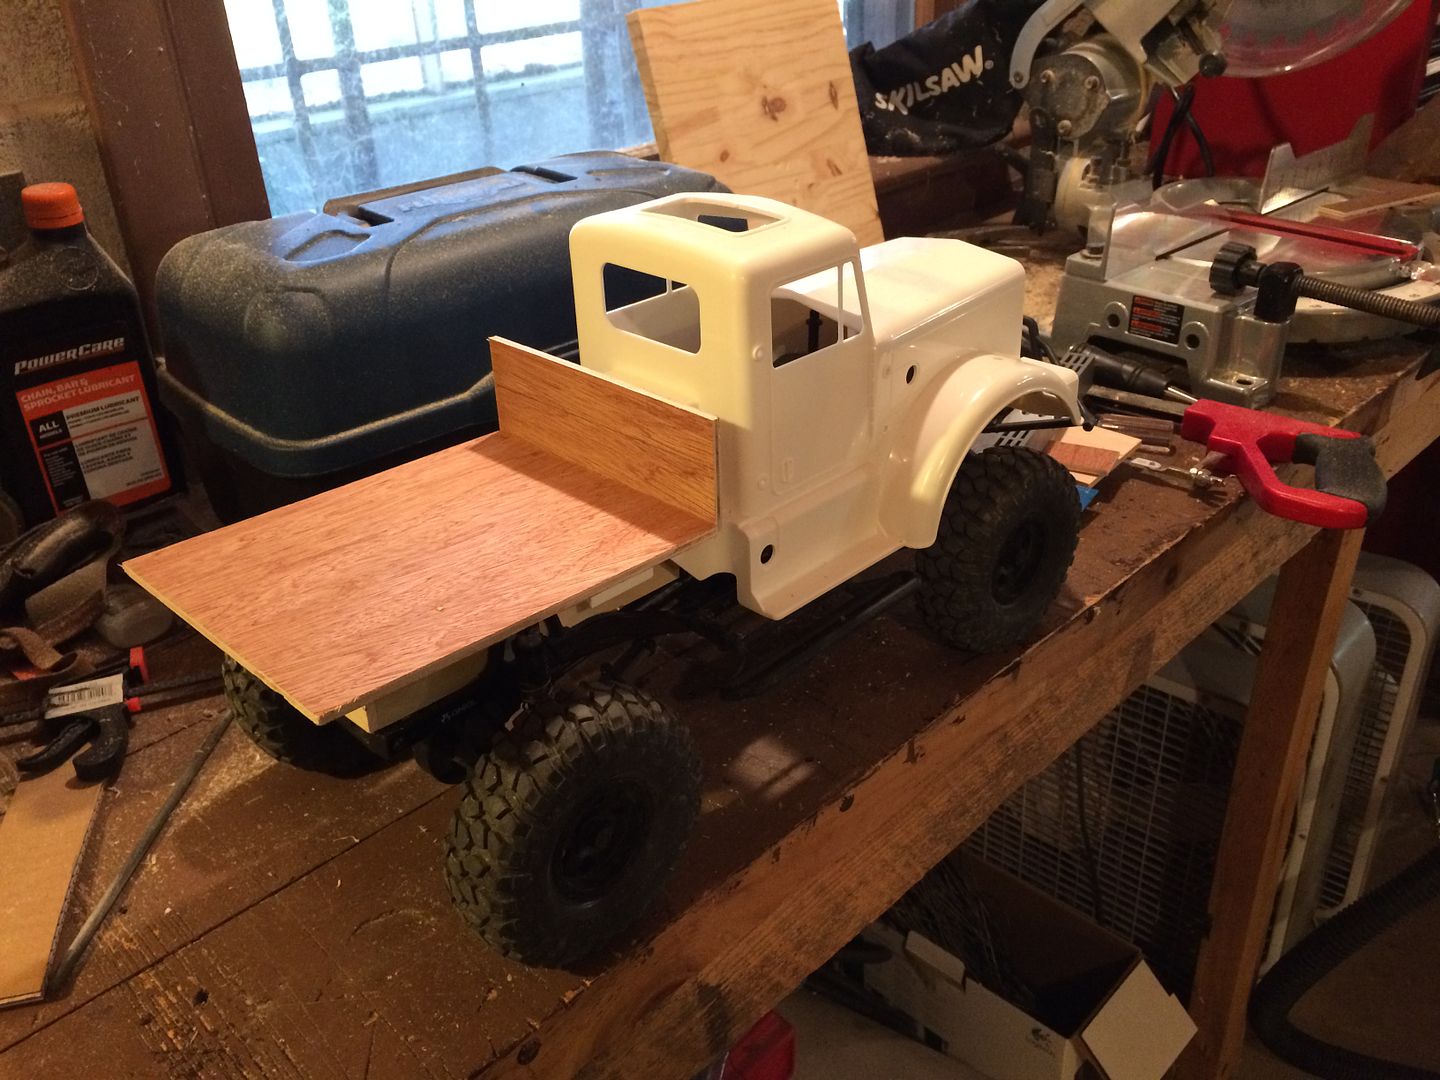 |
|
| |
|
11-22-2015, 03:03 PM
| #5 |
| Pebble Pounder Join Date: Jan 2015 Location: South Central PA
Posts: 171
|
Random Pics 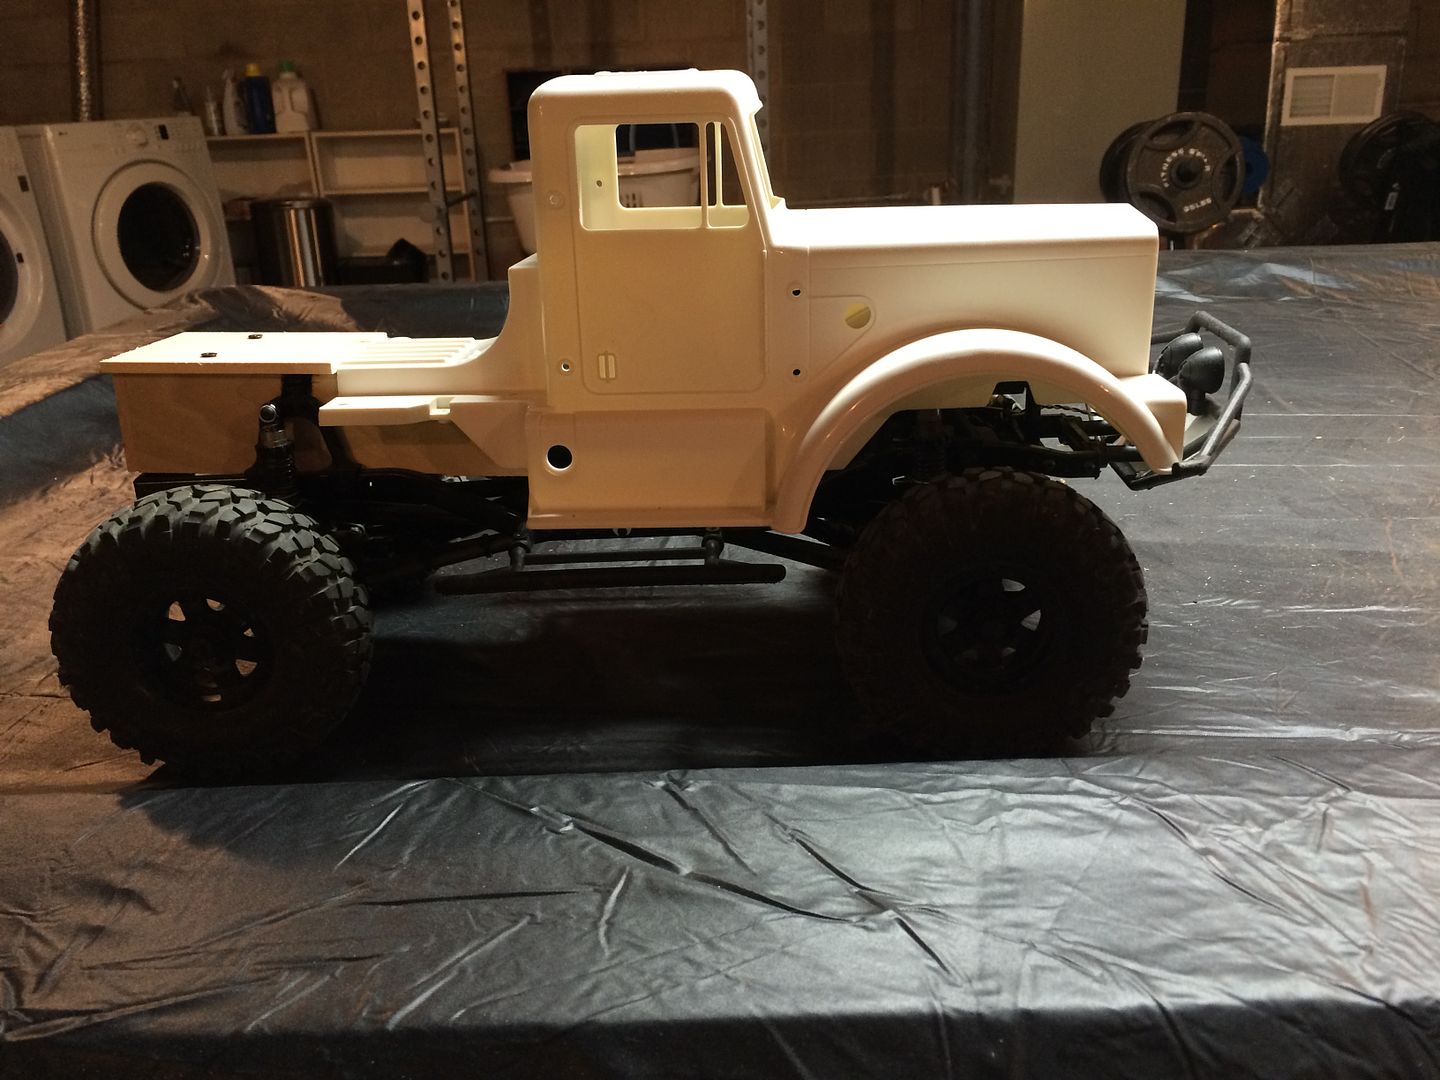 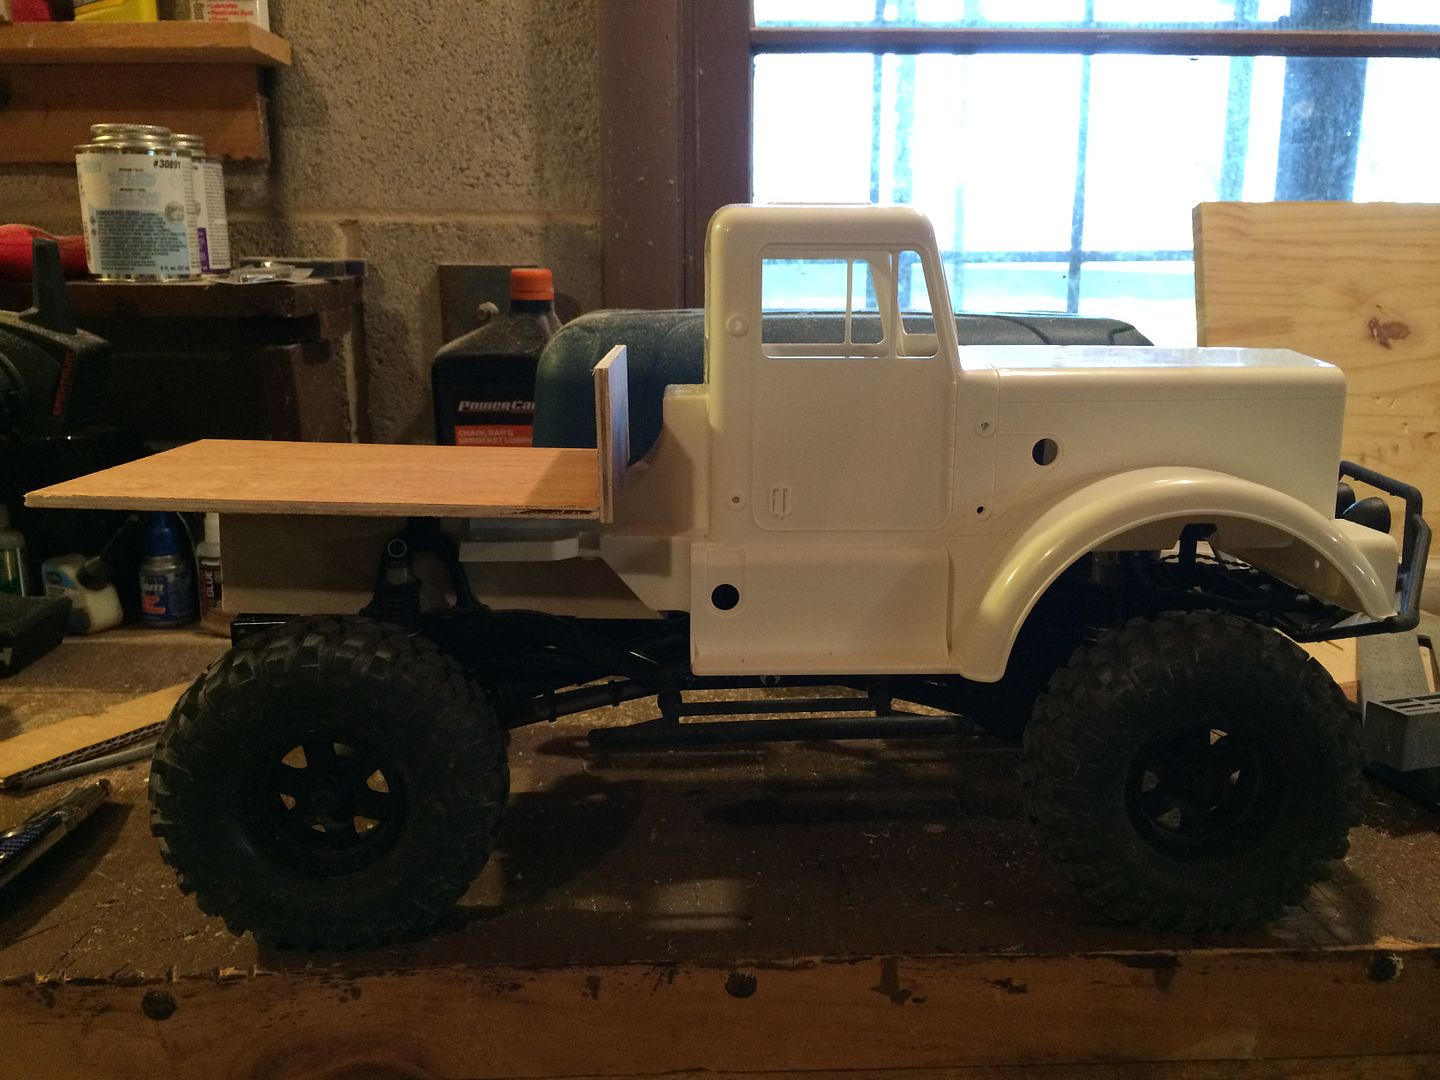 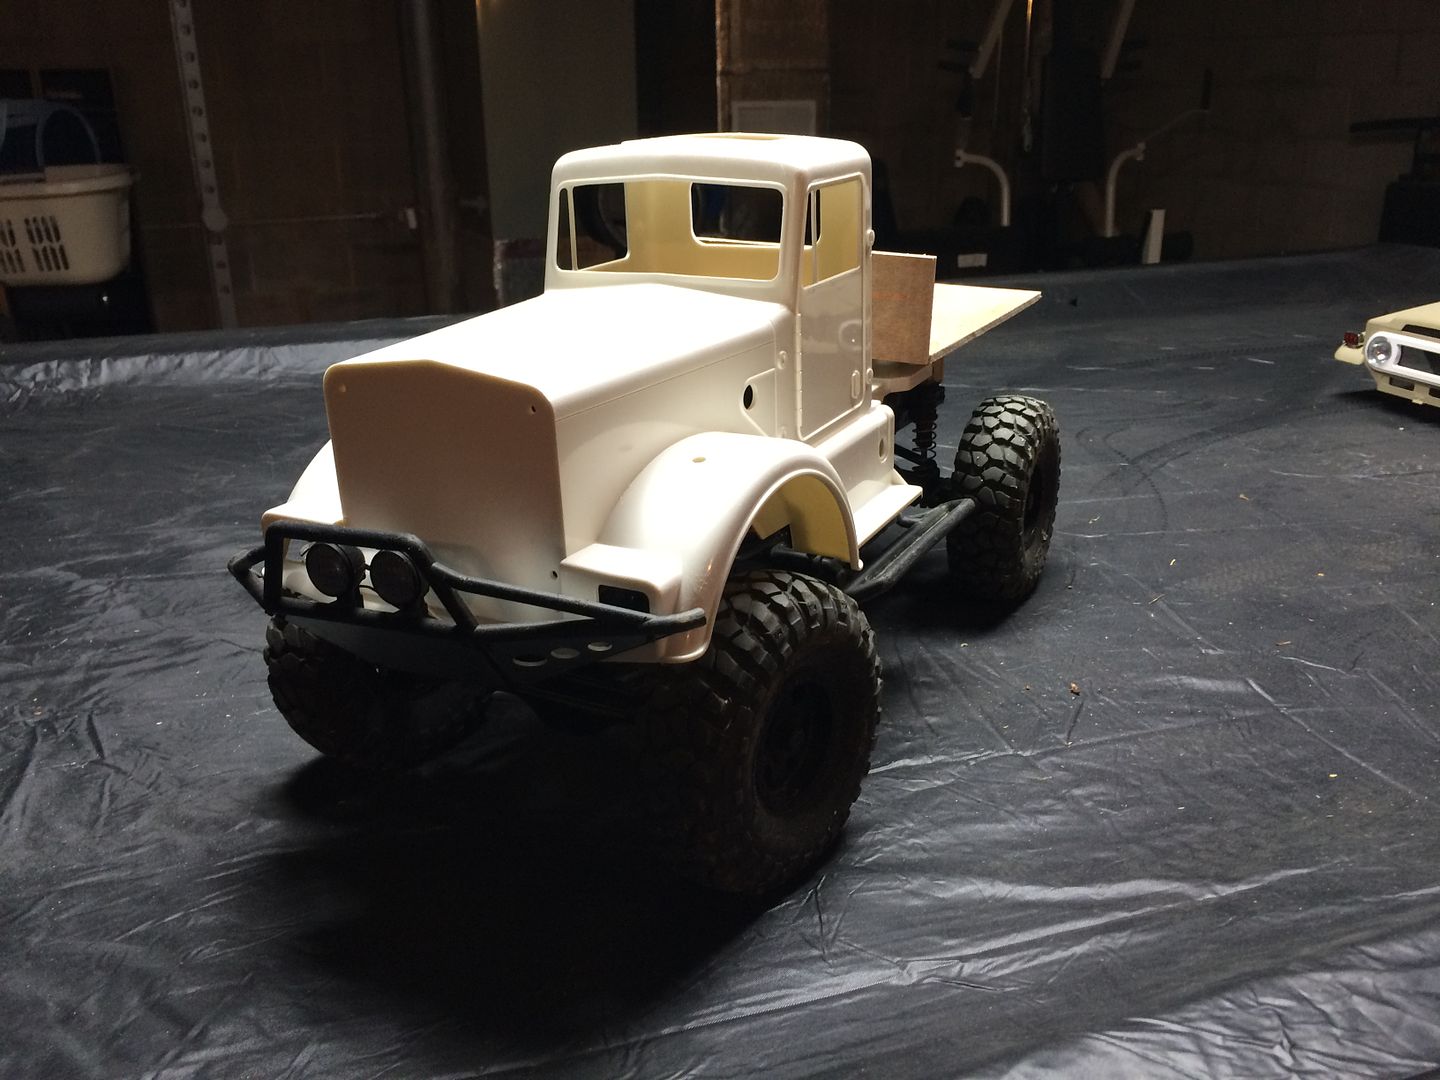 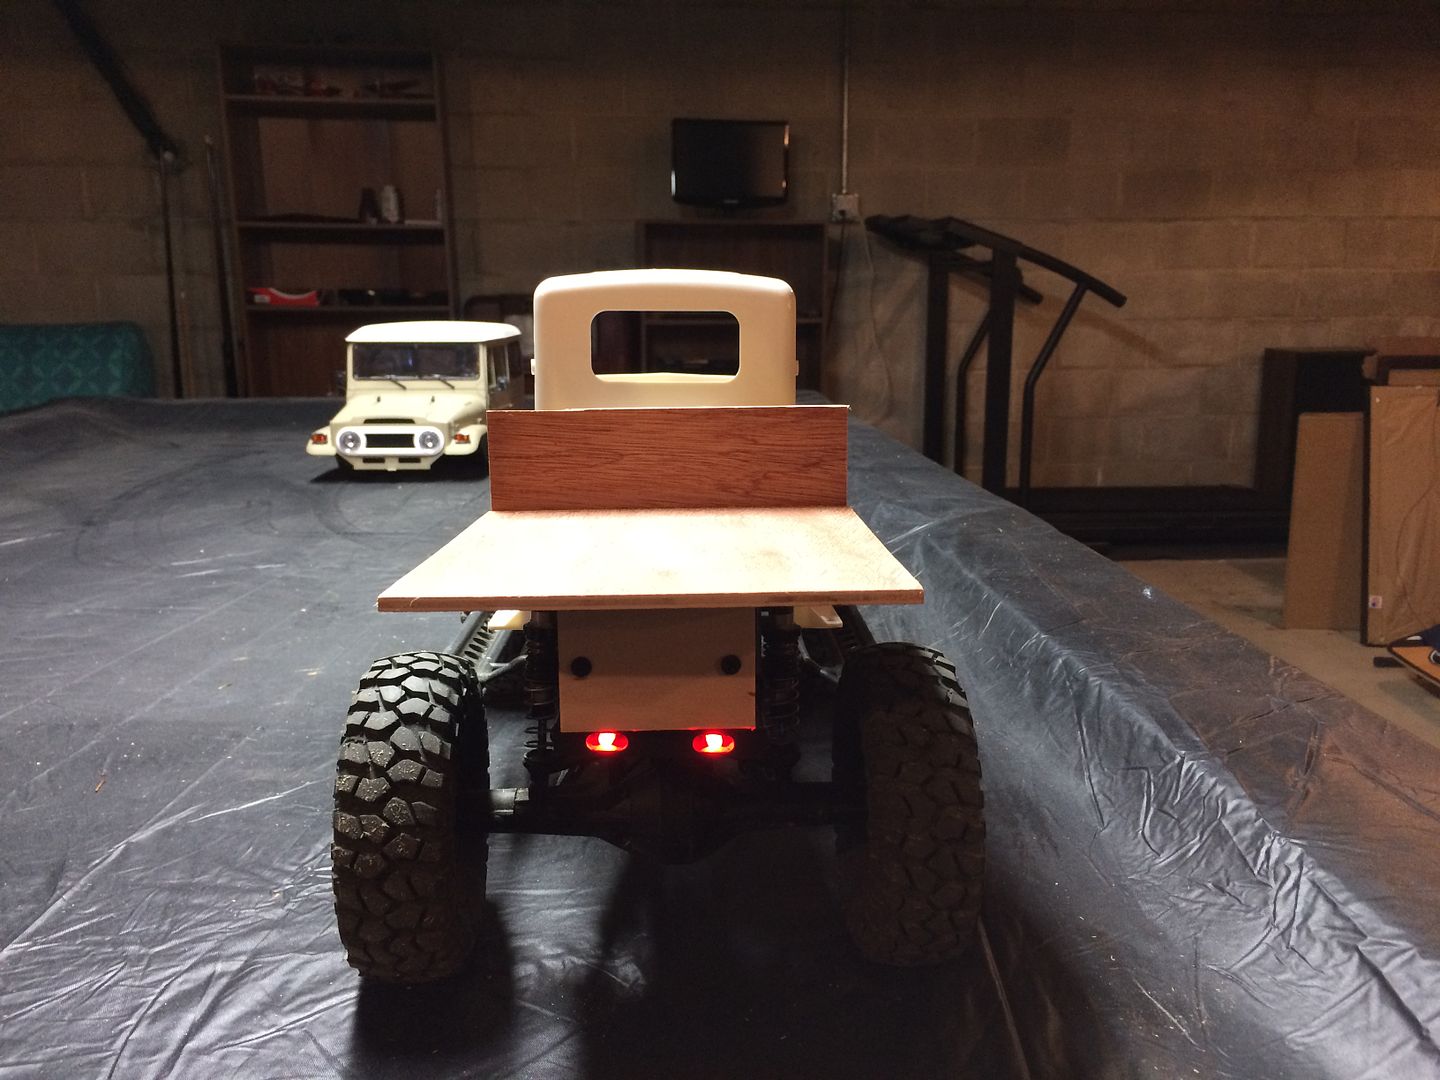 Last edited by jeff22; 11-22-2015 at 04:21 PM. |
|
| |
|
11-23-2015, 02:30 PM
| #6 |
| Pebble Pounder Join Date: Jan 2015 Location: South Central PA
Posts: 171
|
Started filling in the sunroof. I sanded the lip around the sunroof flat. Then glued in a backing sheet of styrene. I then cut another piece as close to the size of the sunroof opening as I could and glued that on top to fill in as much of the gap as possible. I started filling in the sunroof with Bondo Glazing Putty but noticed that there was still some give and the putty was cracking. I cut another bigger piece to cover the initial backer and it seems sturdier now. This is the final layer, letting it set up then a final sanding and it should be good.  I will be filling in about 16 holes in the body as well. I don't want to run the air cleaners and probably won't put on the exhaust stacks either so all those holes will need to be filled as well. I really like the clean look of these old rigs: 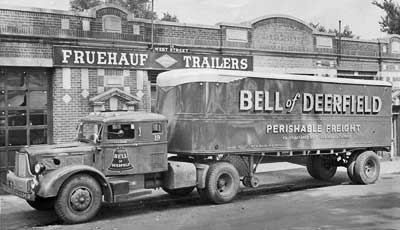  Last edited by jeff22; 11-23-2015 at 02:53 PM. |
|
| |
|
11-24-2015, 02:39 PM
| #7 |
| Pebble Pounder Join Date: Jan 2015 Location: South Central PA
Posts: 171
|
I got the Dingo bumper today and it works perfectly. It doesn't even need to be cut, other than maybe the ends that curve toward the tire. They may rub at full compression but I'm going to leave it as is until I do some test runs. 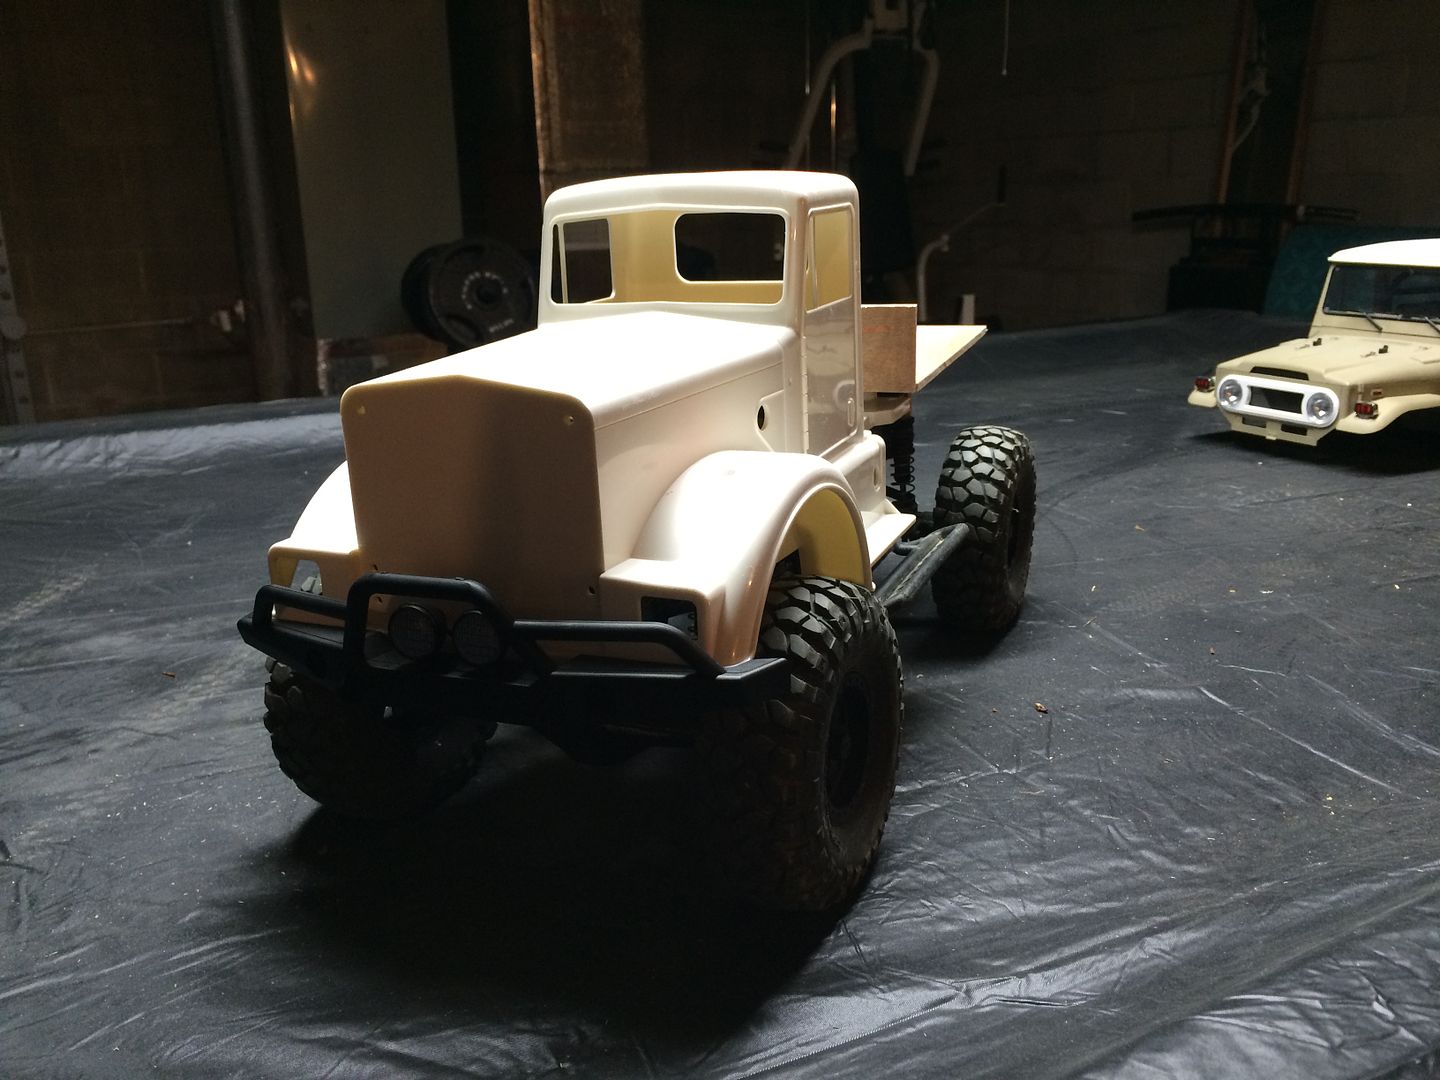  In other news I had to redo the sunroof because the glazing putty kept cracking even after the reinforcement. I think it was on too thick. It wasn't easy to start over because I had to remove the 2 pieces of backer that were glued in plus a good amount of glazing putty. I managed to get it all cleaned up and sanded back to bare plastic for attempt #2. I cut another piece of backer this time it was the thickest styrene I have I think .080. I also managed to do a better job cutting the filler piece to fit more precisely in the gap between the backer and the body. Much less putty is needed this time, so hopefully the cracking issue will be resolved. I also filled in the holes in the fenders and sanded down the protruding screw holes the exhaust and air cleaners mount to. The large holes are 3/8" which seemed like they would be difficult to deal with but I managed to find some 3/8" round styrene rod on amazon, it should be here before the weekend. I will follow some advice I saw on here and glue in pieces of rod then sand smooth which should take little to no putty. Last edited by jeff22; 11-27-2015 at 08:57 PM. |
|
| |
|
11-24-2015, 03:06 PM
| #8 |
| RCC Addict Join Date: Sep 2007 Location: Port Orange
Posts: 1,855
|
Not a bad start , I like the bumper. I switch out the headlight for the old school look.
|
|
| |
|
11-24-2015, 03:47 PM
| #9 |
| Pebble Pounder Join Date: Jun 2006 Location: newark
Posts: 120
|
rig looks great . have you thought about making a roll back bed
|
|
| |
|
11-24-2015, 04:12 PM
| #10 |
| Quarry Creeper Join Date: Oct 2010 Location: Rhode Island
Posts: 285
|
Diggin this!! your build is inspiring another project for me! Keep up the good work!  |
|
| |
|
11-24-2015, 05:38 PM
| #11 |
| Pebble Pounder Join Date: Jan 2015 Location: South Central PA
Posts: 171
|
Old man 52 that is a nice build. How did you cut the square lights out? I like the round lights a lot. Full size crawler I will probably redo the bed but it will probably be another flat bed with sides. I'm starting to picture this build as a big old farm truck of some kind. Thanks hot rod.
Last edited by jeff22; 11-24-2015 at 06:04 PM. |
|
| |
|
11-24-2015, 05:55 PM
| #12 |
| RCC Addict Join Date: Sep 2007 Location: Port Orange
Posts: 1,855
|
Jeff if you look at my build thread '' OLD MAN 52 First 6x6 '' on page 2 i have pics , I'ts not hard to do. If you need anything just pm me. Last edited by old man 52; 11-24-2015 at 05:58 PM. |
|
| |
|
11-24-2015, 06:29 PM
| #13 |
| Pebble Pounder Join Date: Jan 2015 Location: South Central PA
Posts: 171
|
Thanks for sharing 52 that might be beyond my skills at this point. If this first one turns out alright maybe I'll get another one of these bodies and try something like that.
|
|
| |
|
11-24-2015, 06:58 PM
| #14 |
| RCC Addict Join Date: Sep 2007 Location: Port Orange
Posts: 1,855
|
Do you have the two air filter housings.
|
|
| |
|
11-24-2015, 07:27 PM
| #15 |
| Pebble Pounder Join Date: Jan 2015 Location: South Central PA
Posts: 171
|
I had to order all the parts trees to get the grille, light buckets, and lenses. I think these come with the cleaners and stacks but don't have the parts yet. I don't plan on using the stacks or cleaners on this build.
|
|
| |
|
11-26-2015, 02:46 AM
| #16 |
| Pebble Pounder Join Date: Jan 2015 Location: South Central PA
Posts: 171
|
I didn't think this body was really a scale version of any particular 1:1 truck other than trying to replicate the Super Pete monster truck which uses a Peterbilt cab. But it looks like it's about dead on for a Kenworth w900. I'm trying to decide what color to paint it and while googling for inspiration I came across this picture.  Not that this is a scale build in anyway. Just thought it was interesting. Last edited by jeff22; 11-26-2015 at 03:27 AM. |
|
| |
|
11-27-2015, 07:05 PM
| #17 |
| Pebble Pounder Join Date: Jan 2015 Location: South Central PA
Posts: 171
|
I got all the holes in the body filled and some color on the body tonight. It's not perfect but it came out better than I thought it would for never having done anything like this before. I also painted all the wood pieces flat black so they will blend in with the frame. I painted it with rustoleum painters touch 2x flat red primer. The flat paint helps hide a lot of the imperfections in the body so I will be leaving it flat red. I used this same type of paint in flat khaki on my Gelande II Cruiser body and the paint takes a few days to totally cure when using it on plastic. 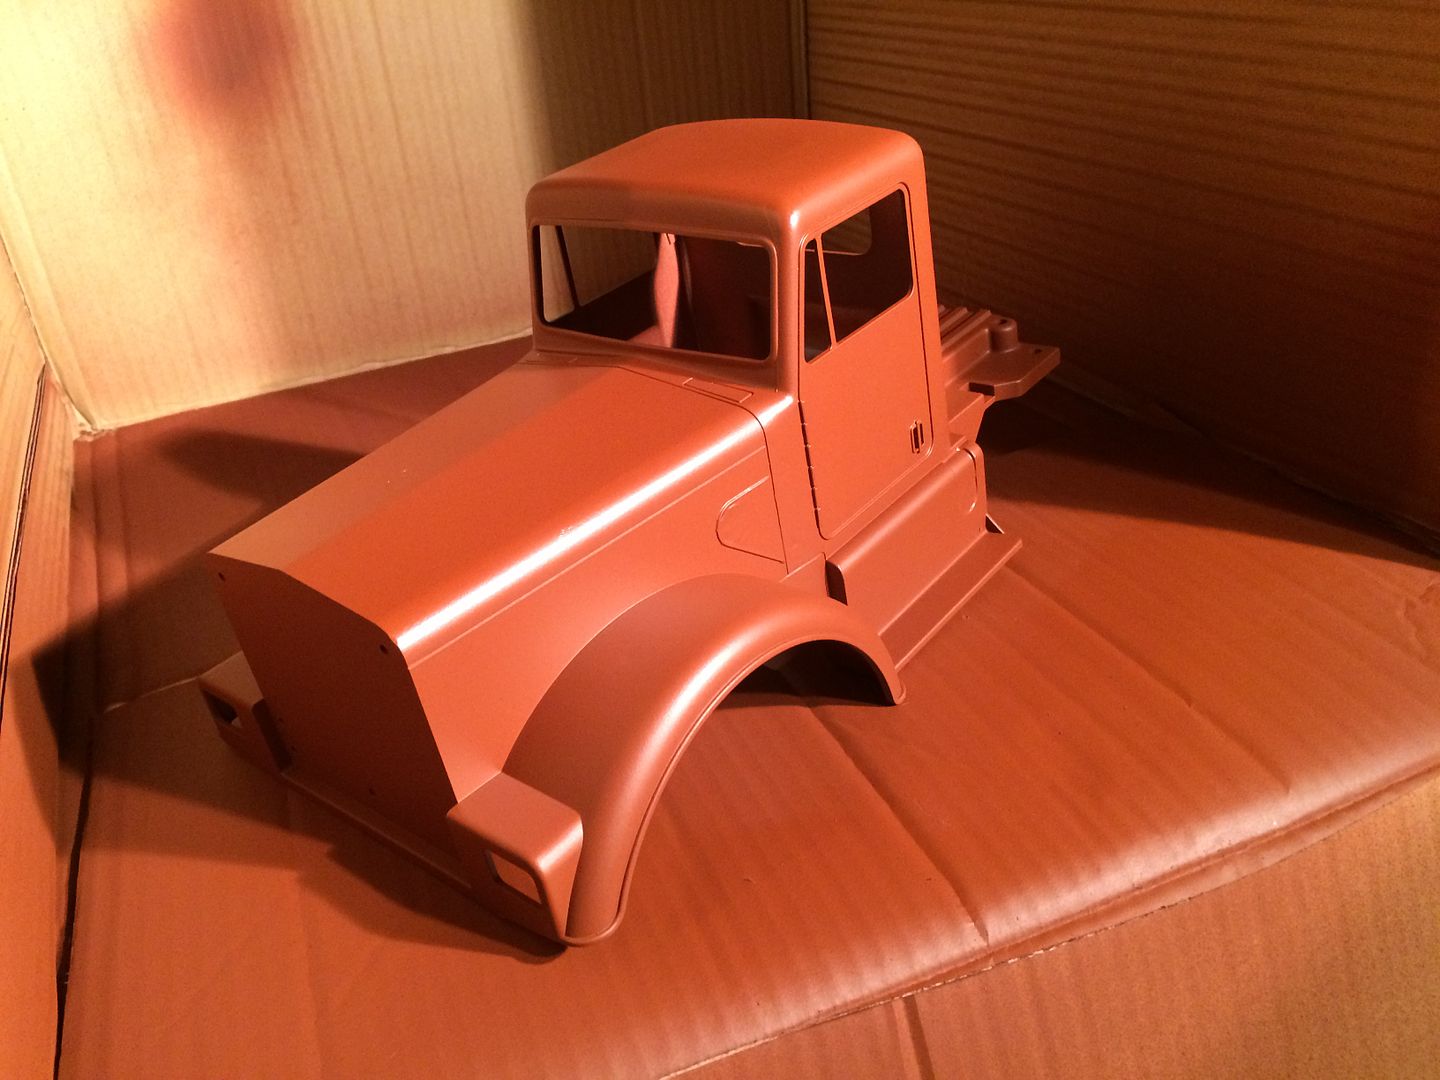 |
|
| |
|
11-28-2015, 05:55 AM
| #18 |
| Pebble Pounder Join Date: Jan 2015 Location: South Central PA
Posts: 171
|
When I bought the paint I also bought some easy off oven cleaner. I was going to remove the chrome from the grille and paint it flat black. But then I thought maybe the chrome would look ok with the faded old paint look and help brighten things up since the paint color is so dark. So back to google for ideas. A lot of rusted and faded trucks still have shiny grills and I kind of like the look. I'm thinking I'll leave it chrome and see how it looks. I'm tempted to try to do a black wash or something to weather it. I have never weathered anything before either. Might have to do a test on a piece of scrap sprue. 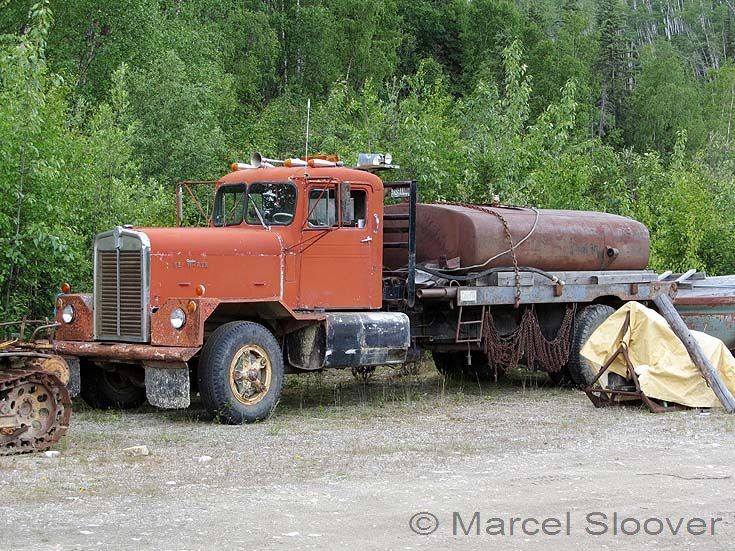  Last edited by jeff22; 11-28-2015 at 06:20 AM. |
|
| |
|
11-28-2015, 12:36 PM
| #19 |
| Pebble Pounder Join Date: Jan 2015 Location: South Central PA
Posts: 171
|
I stained the bed and did a quick mockup to see how everything is going to look together. I like the way this turned out. The last thing I need to do is make some windows for the cab and figure out a way to mount the bed so it is easily removable, I have some industrial strength velcro that I might use. I will also eventually be building another bed for it as well, this one seems a bit small and I think some bed sides would look good. 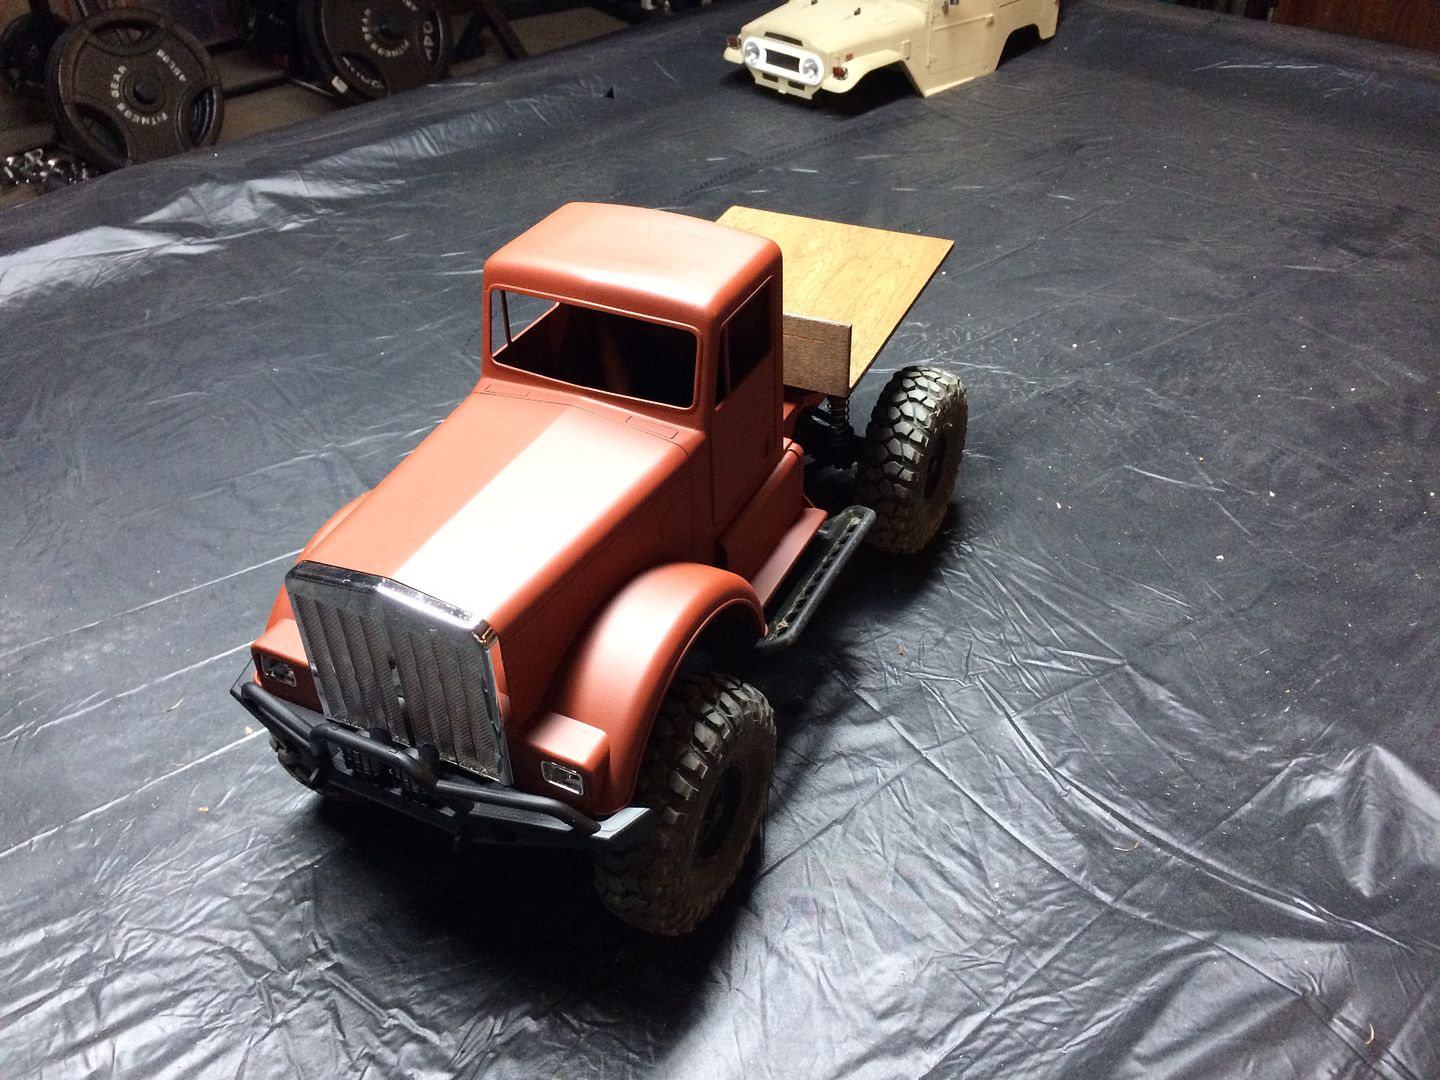 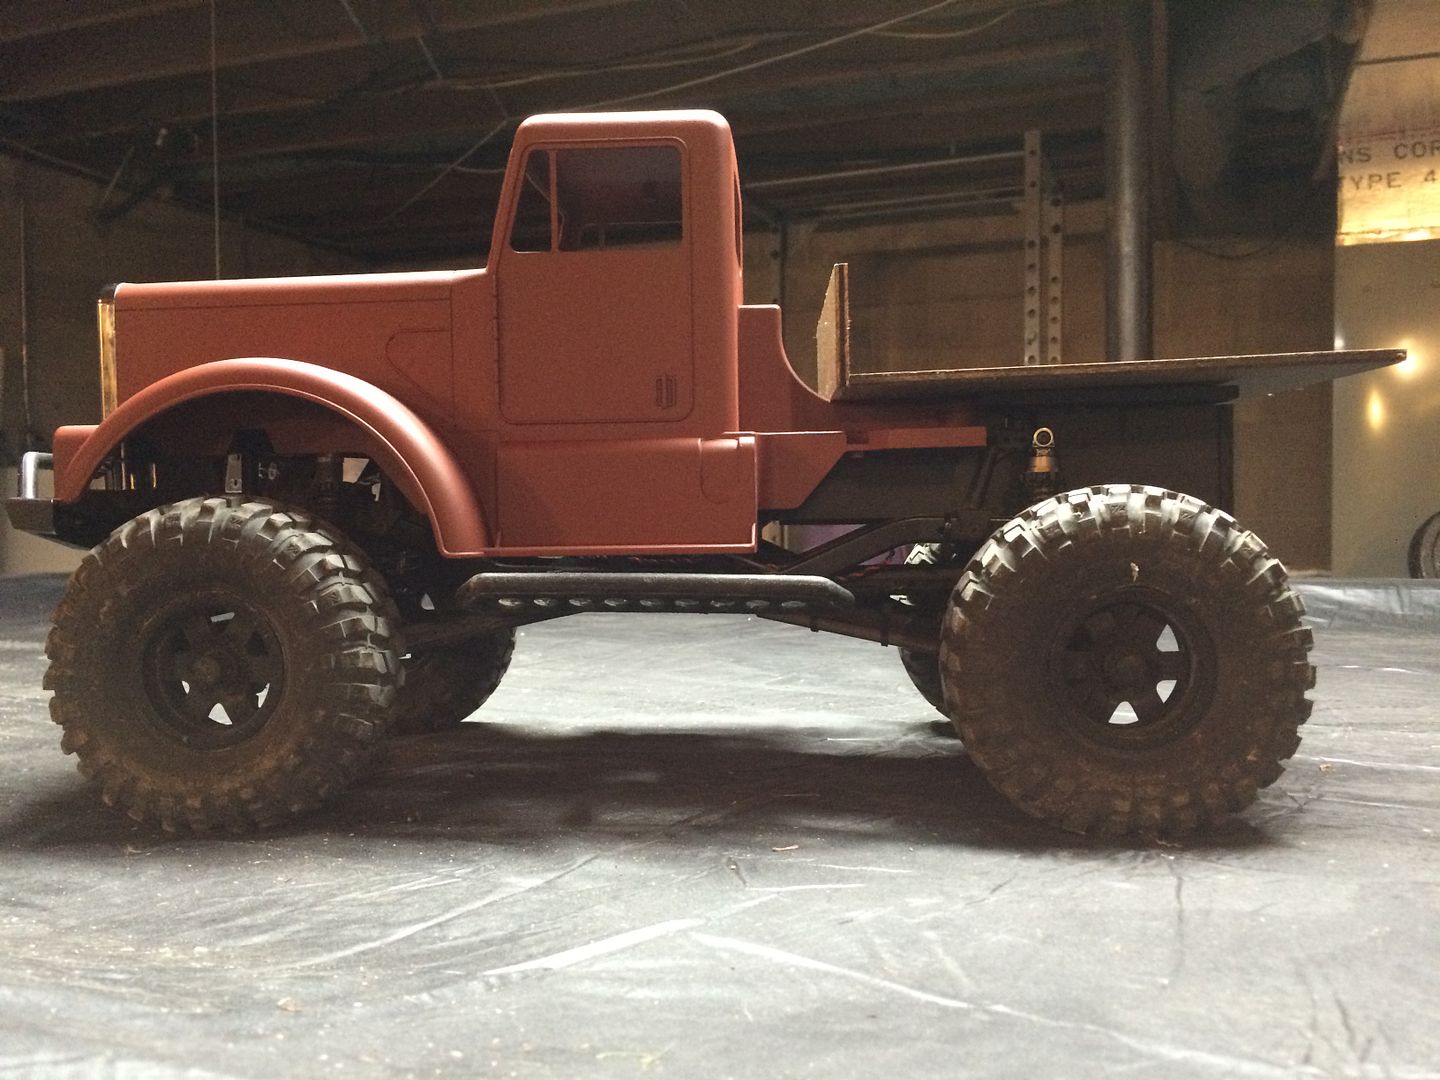 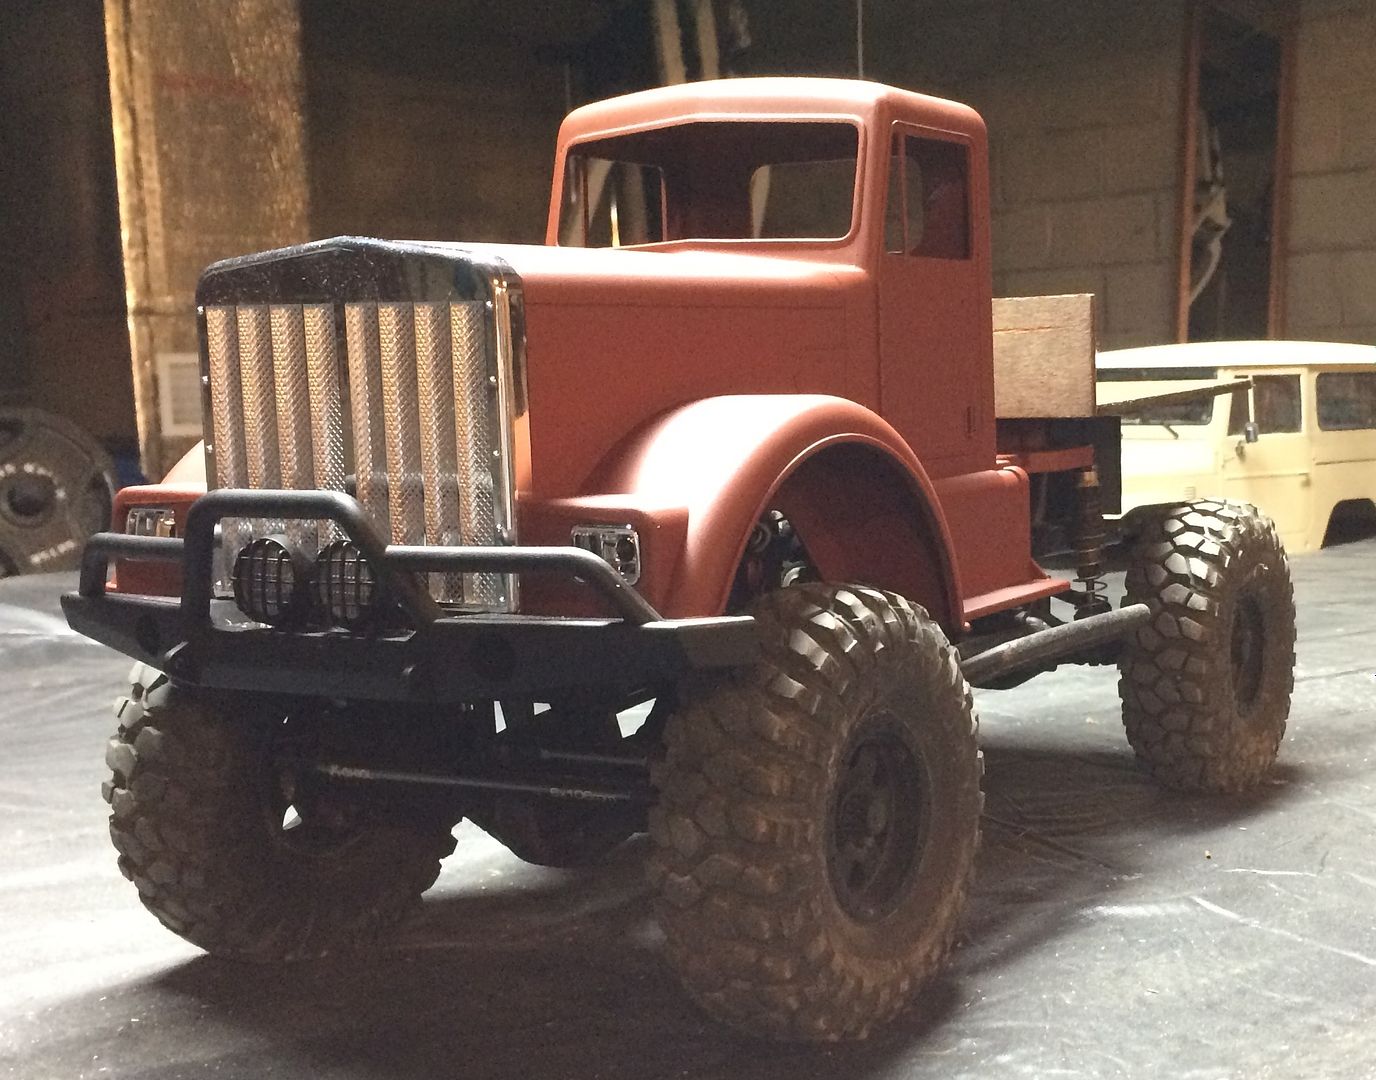 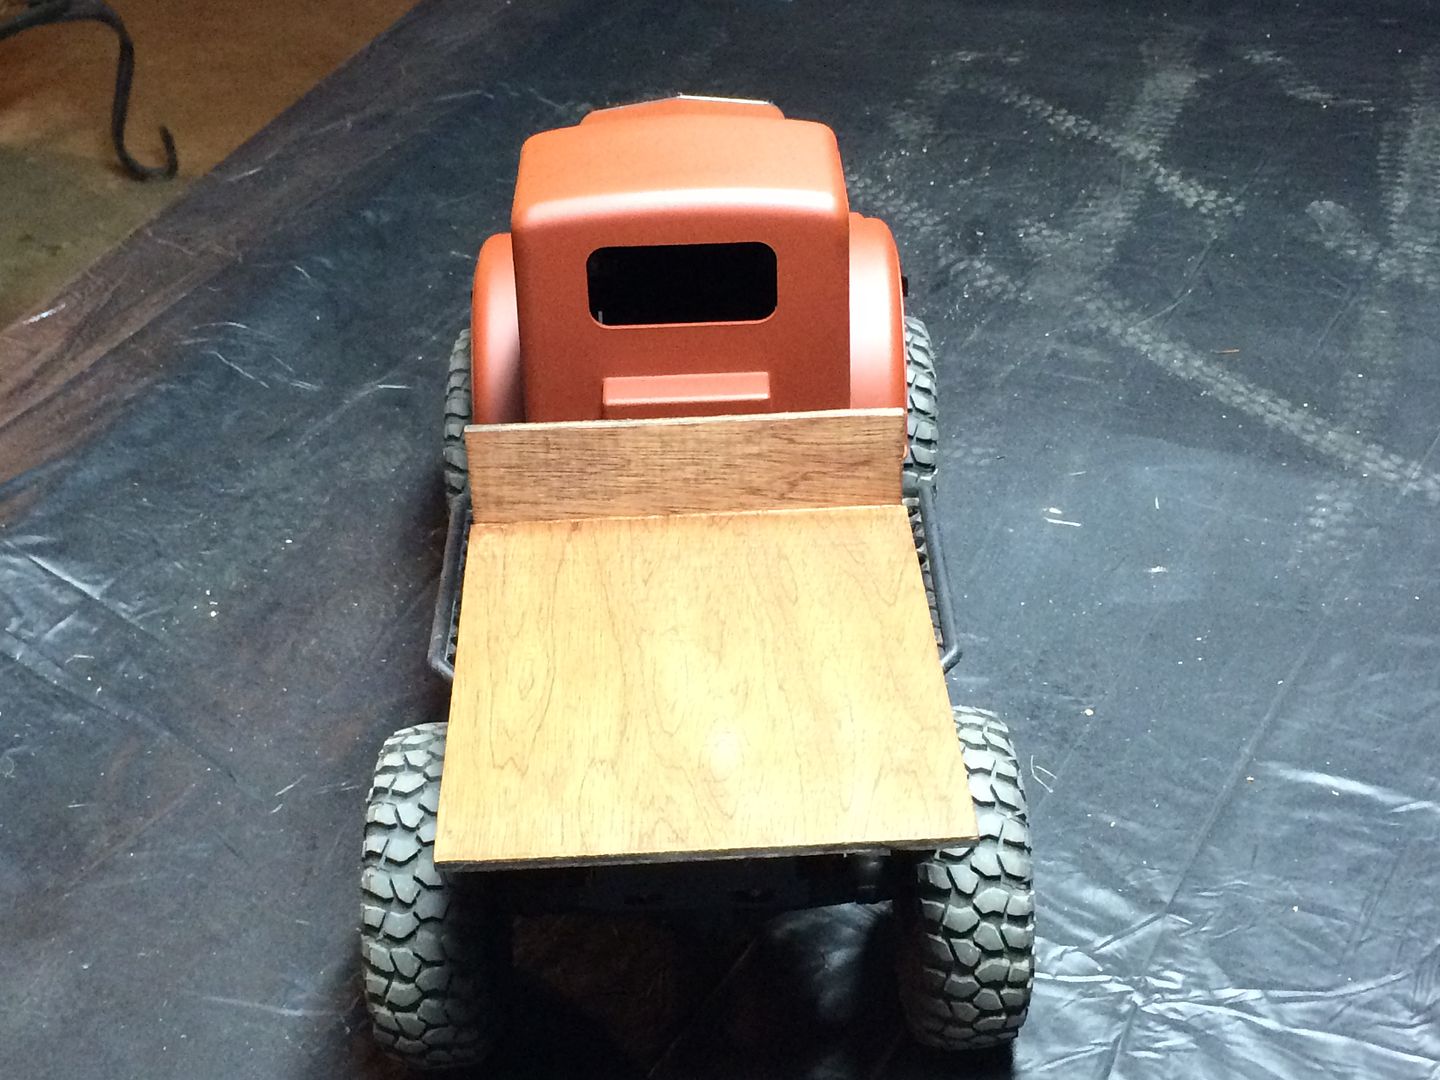 Last edited by jeff22; 11-28-2015 at 12:47 PM. |
|
| |
|
11-29-2015, 10:41 AM
| #20 |
| Pebble Pounder Join Date: Jan 2015 Location: South Central PA
Posts: 171
|
This progressed much quicker than I thought it would, I made some windows and glued them in this morning. I attached the lights and grille and the velcro works ok to hold the bed on until I find a better solution. So this build is done for now. Sometime in the future I will be making a new bed or possibly a couple different beds that I can swap out when I want to. 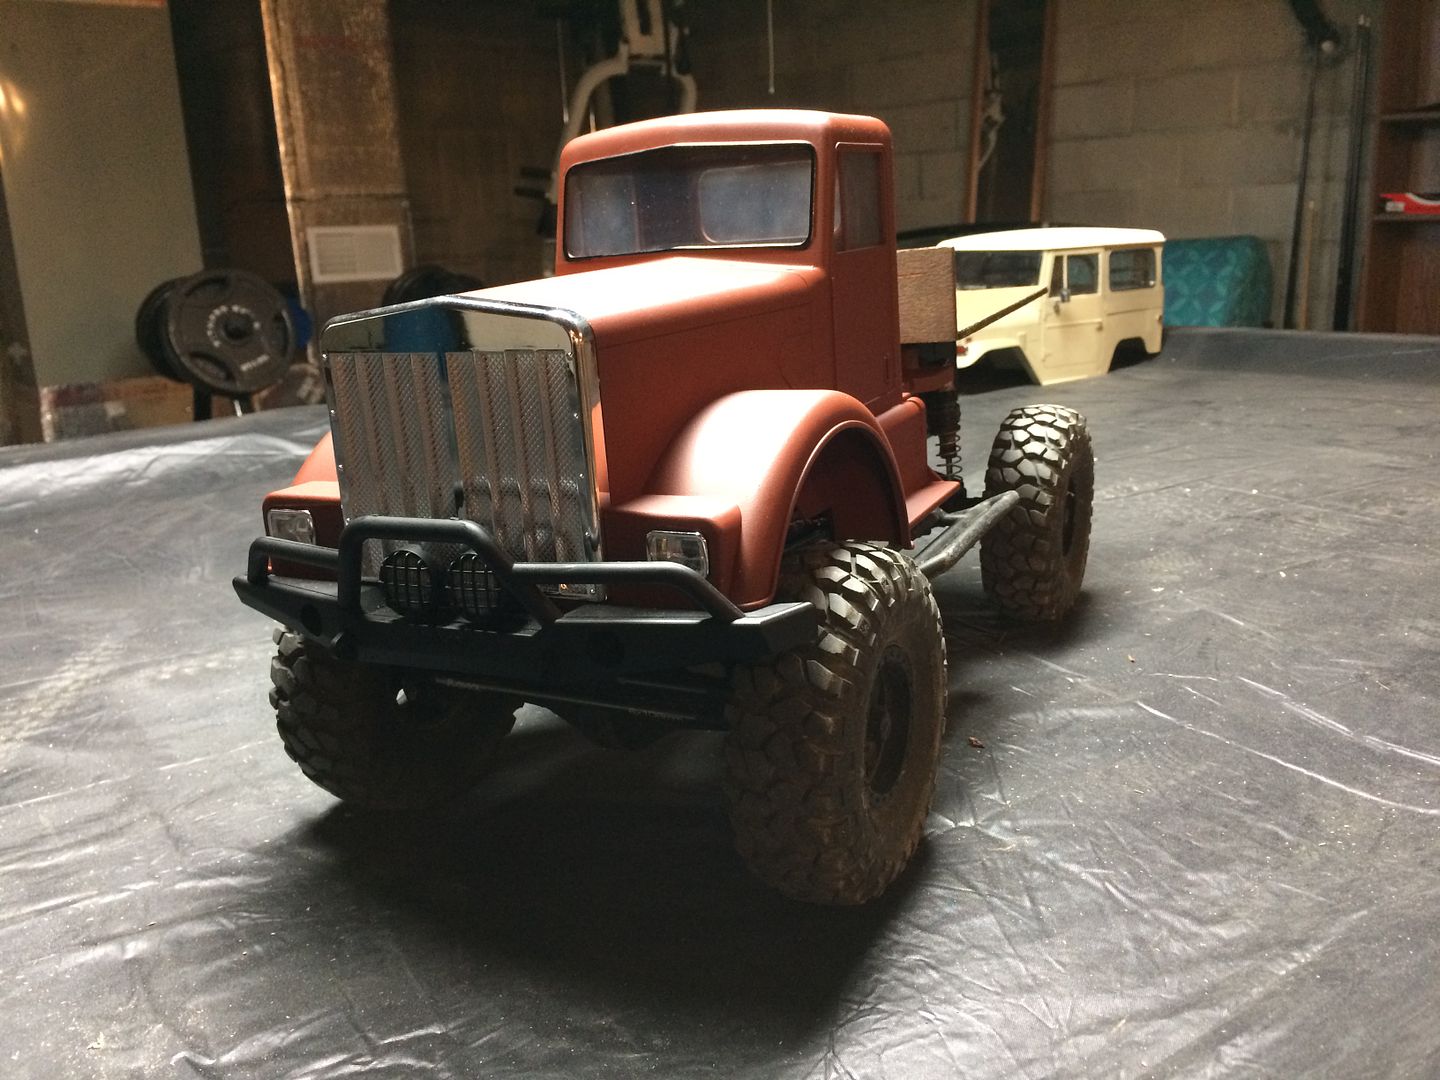 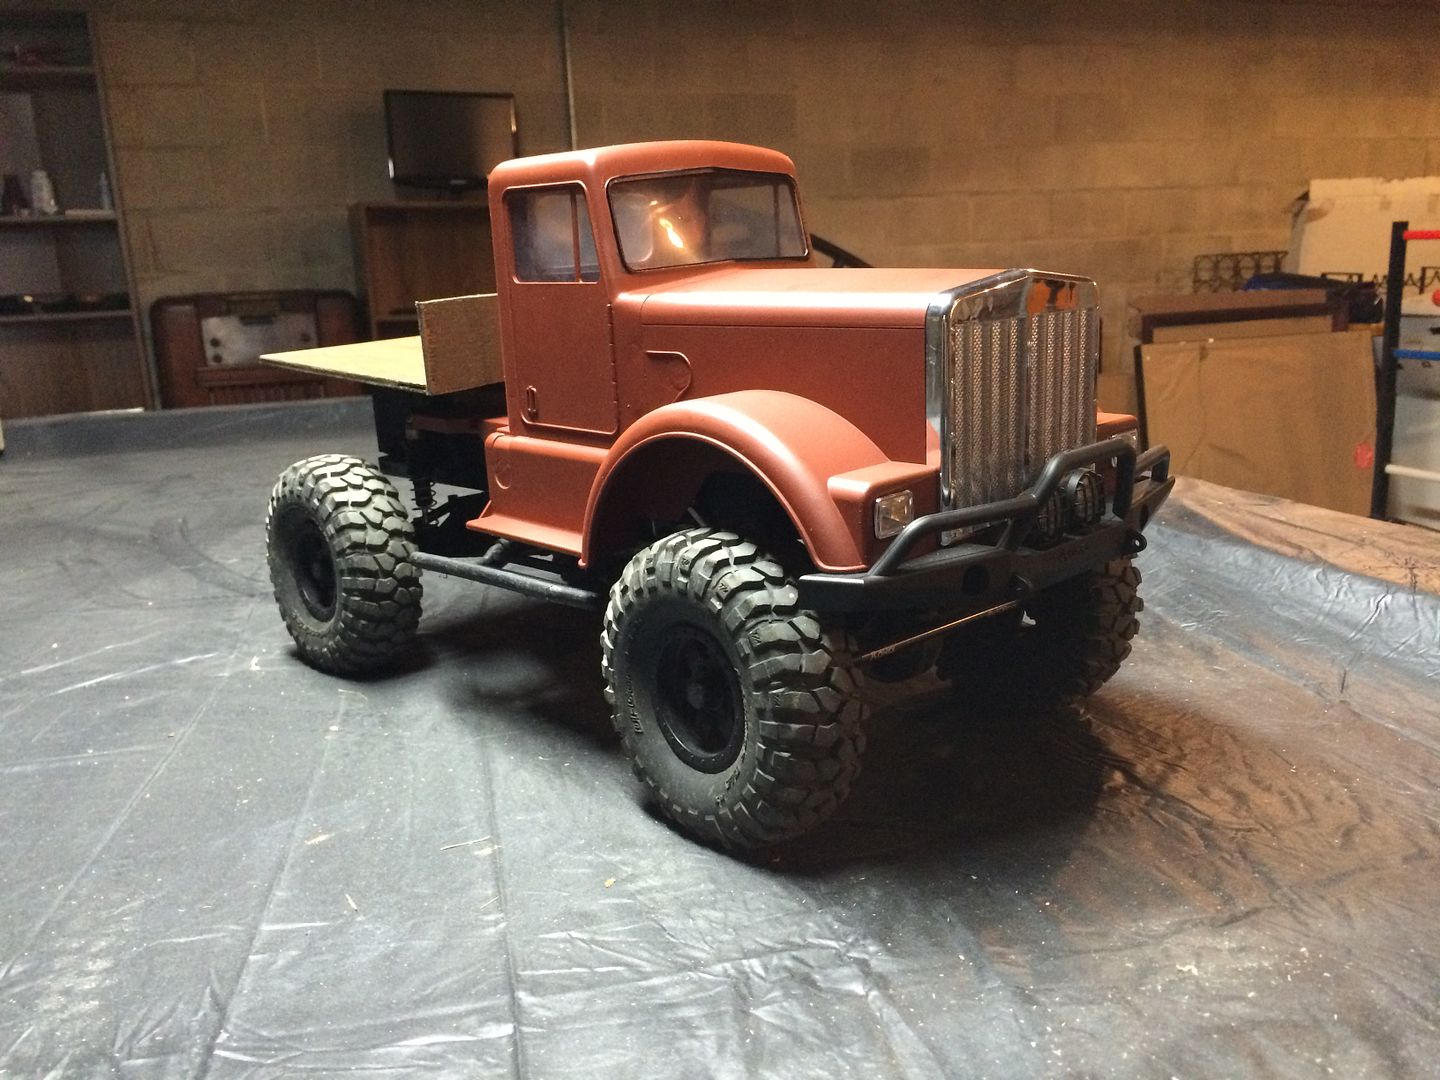 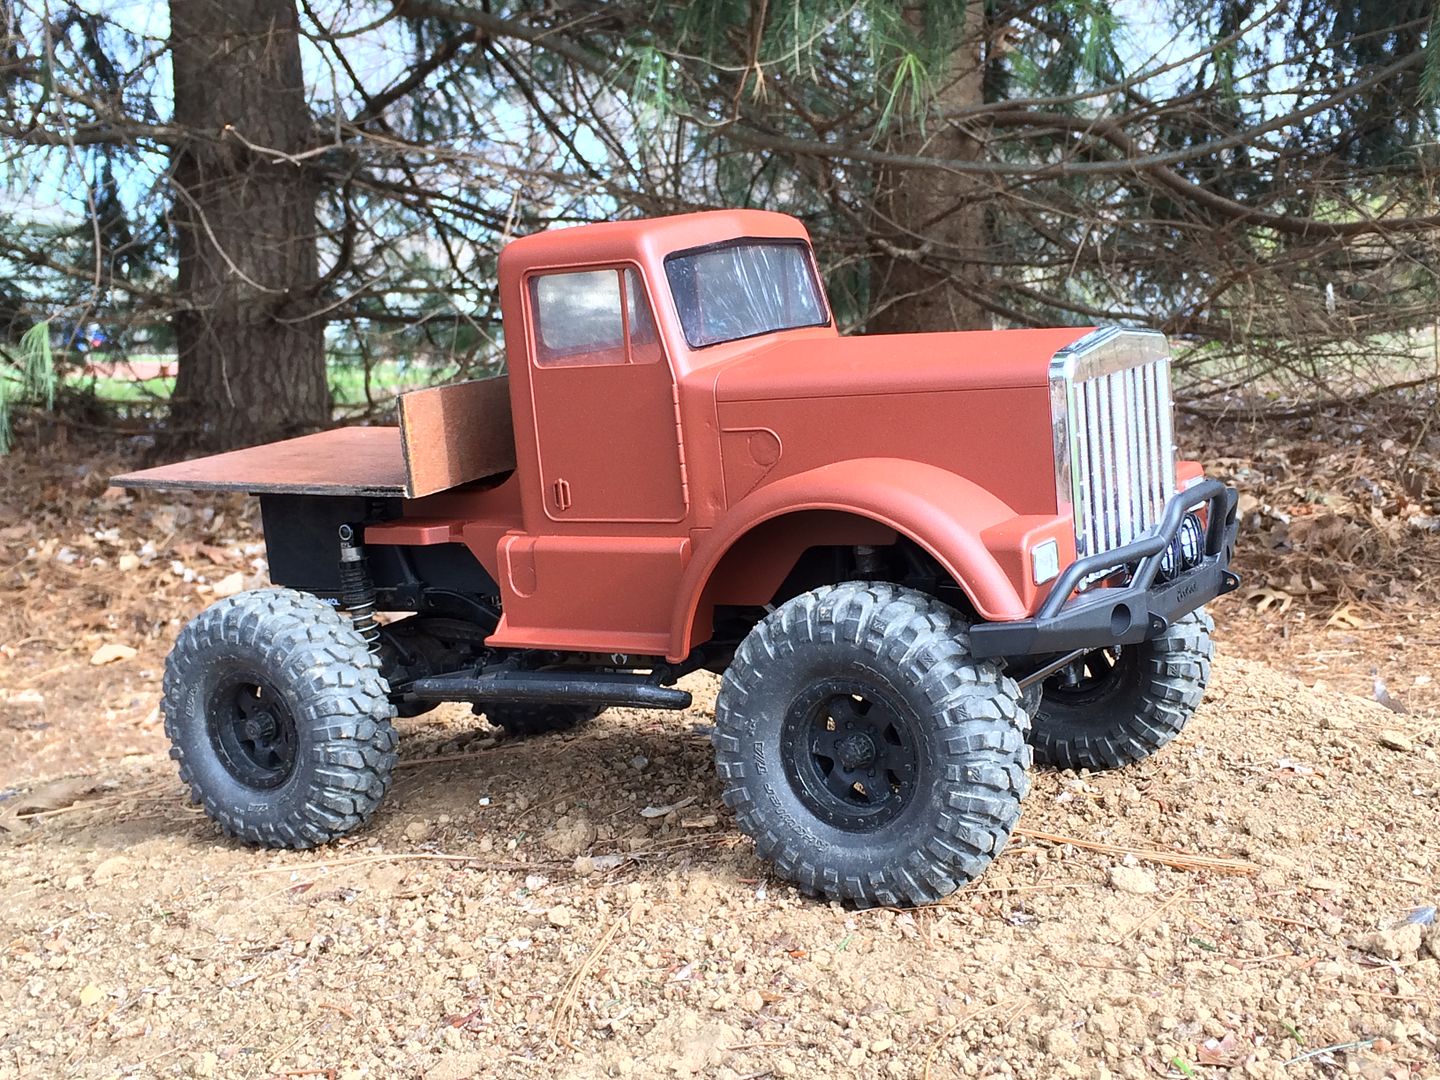 |
|
| |
|
| |


 Linear Mode


