| |
 01-24-2011, 05:27 PM
| #1 |
| RCC Addict Join Date: Mar 2010 Location: Alburtis
Posts: 1,227
|
I finally found a set of XR10 axles for the right price. I wasn't really crazy about the stock chassis and body. Besides, I already have a good chassis, FF4, that should work out great. My first picture and it is swiped from a website. I ordered the Vanquish XR10 gear plate upgrade. My delrin rods also arrived today. Planning a trip to the LHS for the Traxxas ends. I opted out for 8-32 screws instead of sourcing the more pricey 4 mm screws, for the links. All I need now is a body, paint, pinions and another motor. 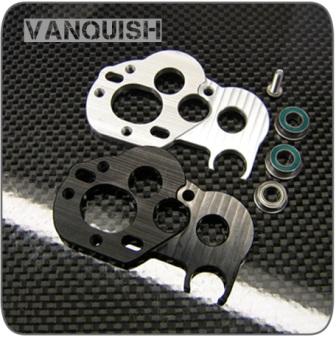 Already Have: FF4 Chassis XR10 Axles Integy MSR4 Shocks Losi Springs (White rear, Gray front) 45T HH 5mm web 10mm Comm 45T HH 4mm web 10mm Comm Futaba Rx Sidewinder ESC 10A BEC Sedonas VP DH II (front) AX10 Wheels (rear) Patriot HT Servo Punk Dig 15T pinion (front) 14T pinion (rear) VW Bug Body Delrin Links CI Drag Link RR Battery Tray VP Motor Plate (front & rear) VP Trans (front & rear) VP Knuckles 1300mAH 30C 3S battery Need: D-Lux Knuckle Weights VP Upper Mount Futaba 9157 or Hitec 7950??? Wes Last edited by brazwewn; 03-22-2011 at 08:22 PM. |

|  |
| Sponsored Links | |
| | |
|
01-24-2011, 05:37 PM
| #2 |
| RCC Addict Join Date: Mar 2010 Location: Alburtis
Posts: 1,227
|
I started the tear down and rebuild of the Gator. There ended up with two piles. One pile is what is going and the other is what is being used on the rebuild. I am throwing some links to get it close. Once I get the bugs worked out, I will run the numbers in the calculator. 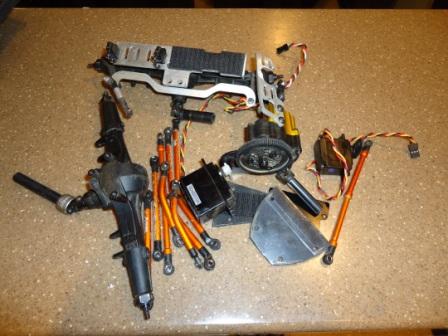 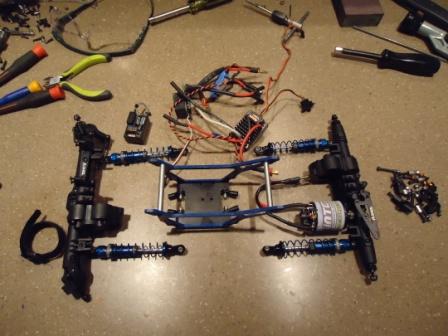 I got the bent upper links made and moved the lower ones to the outside of the frame. I need to put some limiters in the shocks, this thing has awesoem articulation. 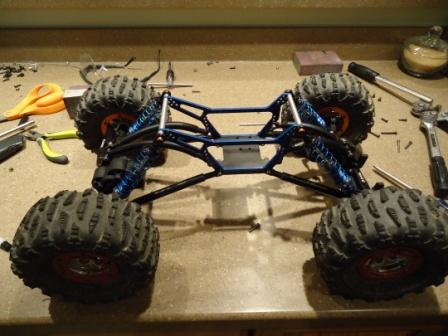 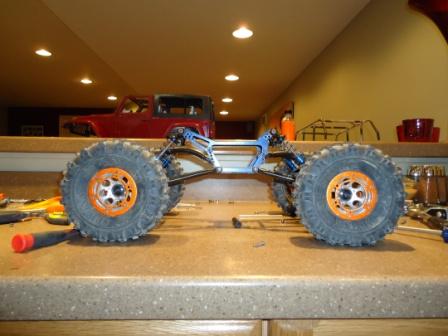 Time for some wiring. 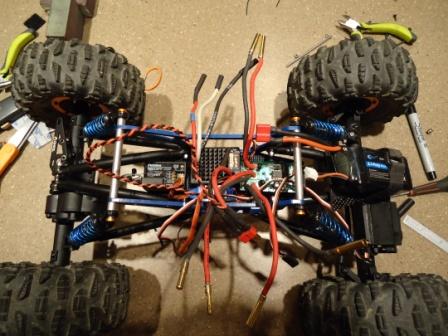  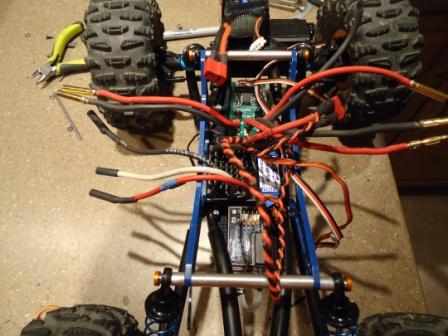 Wes |
|
| |
|
01-24-2011, 06:20 PM
| #3 |
| RCC Addict  Join Date: Nov 2008 Location: I don't think theres rocks in Florida
Posts: 1,228
|
Interresting build, can't wait to see your finished product.  |
|
| |
|
01-24-2011, 06:24 PM
| #4 |
| I wanna be Dave Join Date: Oct 2007 Location: Scumrise, Flooriduh
Posts: 5,181
|
Nice recycle of the shafty chassis Looking forward to build progress. Have you considered making a narrower skid?
|
|
| |
|
01-24-2011, 07:32 PM
| #5 |
| RCC Addict Join Date: Jan 2010 Location: Dallas
Posts: 1,848
|
That is exactly what I was thinking Dickyt. narrow would be pretty duable. I also think running a much smaller battery across the bottom of the front upper links is a decent idea as well. Regardless very cool build for sure.
|
|
| |
|
01-24-2011, 09:28 PM
| #6 |
| No idea what I'm doing Join Date: Oct 2008 Location: Underground, CO
Posts: 4,529
|
Very interesting!!! Looking forward to more information on this one.
|
|
| |
|
01-25-2011, 04:35 AM
| #7 |
| RCC Addict Join Date: Mar 2010 Location: Alburtis
Posts: 1,227
|
I am glad everyone is excited about this one as I am. I absolutely love the FF4 chassis and was so excited it worked out with the XR10 axles. I wouldn't mind a slightly narrower skid with electronic extensions built in. Maybe even a tapered piece like the original XR10 skid plate. I am just not set up for doing that type of work with Delrin. Not sure where to have one made either. I guess for now I will deal with what I got. My electronics are velcroed in, so all I would need to do later is drop in a new piece. Trying to think ahead for maintenance and repair. Got burned with things like that on my old shafty design. Wes Last edited by brazwewn; 01-25-2011 at 04:40 AM. Reason: Typo |
|
| |
|
01-26-2011, 10:12 AM
| #8 |
| RCC Addict Join Date: Mar 2010 Location: Alburtis
Posts: 1,227
|
I liked the VP steering knuckle because of the length of the arm, but didn't want to buy one. So out comes my pile of scrap metal. Twenty minutes later I have a longer arm I can use on the stock knuckle. I think it turned out pretty well I also got the longer servo wire soldered on the Punk Dig and protected the circuit board with some liquid tape. Once the dig was back in the wires were cleaned up a bit. The rear lower link was replaced with one that has a bend in it. I couldn't get the exact bend I was looking for, but got close. I had some clearance issues with the larger Traxxas ends. 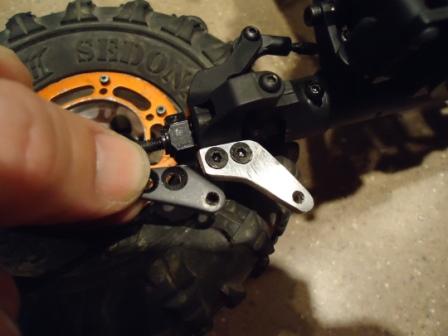 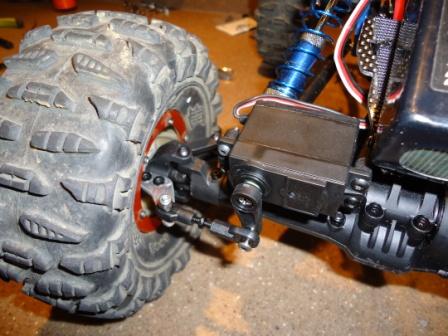 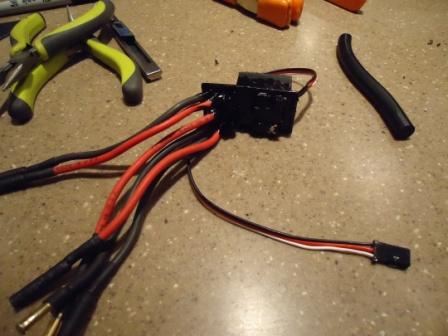 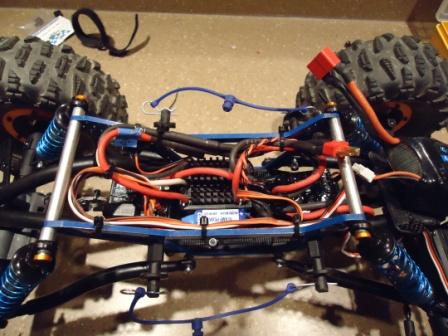 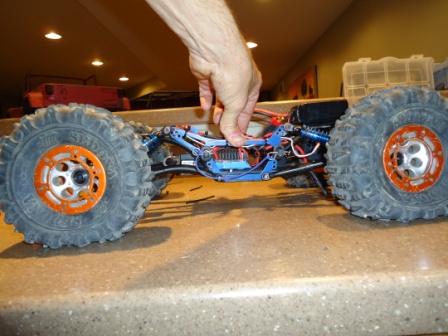 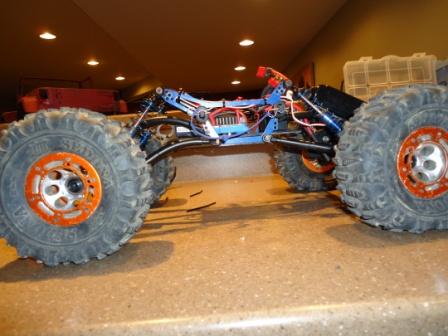 |
|
| |
|
01-26-2011, 10:54 AM
| #9 |
| I wanna be Dave Join Date: Oct 2007 Location: Scumrise, Flooriduh
Posts: 5,181
|
You won't know for certain until you get it out on the rocks, but you may want to lay the rear shocks down a bit. If you drop to the bottom hole of the outside set it should not change your ride height do to the radiused mounting holes and help keep the rear axle from wanting to drive under the rig, especially in rear dig. It is coming together nicely! Great work on the steering arm. |
|
| |
|
01-26-2011, 12:26 PM
| #10 | |
| RCC Addict Join Date: Mar 2010 Location: Alburtis
Posts: 1,227
|
I will give it a try. Do you think I should limit the shocks, it looks to be sitting a bit high to me. Maybe I am just used to running droop though. I have to say, the steering arm turned out better than I thought it would. Wes Quote:
| |
|
| |
|
01-26-2011, 12:54 PM
| #11 | |
| I wanna be Dave Join Date: Oct 2007 Location: Scumrise, Flooriduh
Posts: 5,181
| Quote:
Last edited by DickyT; 01-26-2011 at 02:17 PM. | |
|
| |
|
01-26-2011, 02:14 PM
| #12 |
| RCC Addict Join Date: Mar 2010 Location: Alburtis
Posts: 1,227
|
I moved the shocks as far as I could without causing clearance issues. Below are the numbers. shocks e2e extended - 4 1/4" shocks e2e collapsed - 3 1/8" belly clearance extended - 3 1/4" belly clearance collapsed - 3/4" Wes 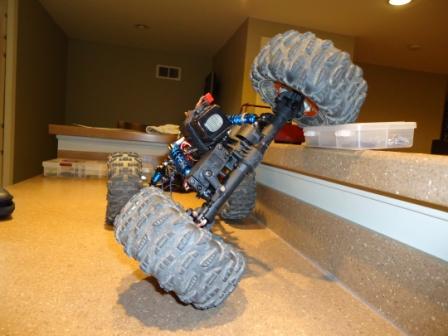 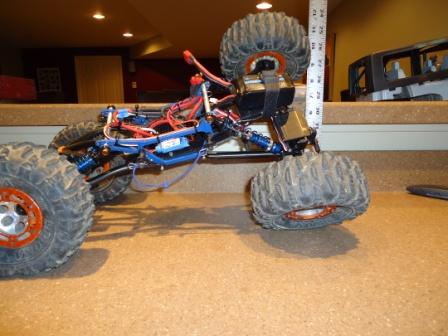  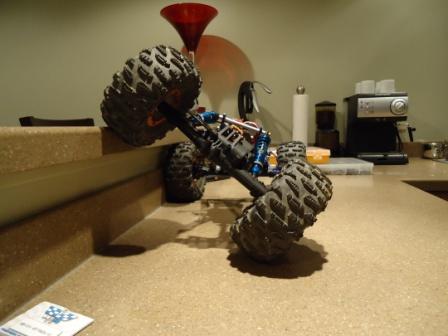 |
|
| |
|
01-26-2011, 02:20 PM
| #13 |
| I wanna be Dave Join Date: Oct 2007 Location: Scumrise, Flooriduh
Posts: 5,181
|
Belly clearance is in a good place, articulation looks good. I like a little less personally (external limiters). Before you do too much more, get it running and on the rocks. Find the weaknesses then tune from there. You might want to internally limit the shocks so fully extended is 4". That is what the chassis was designed for, though using moa axles with it kinda tosses original design out the window. Drive it first. If the rear is trying to drive under limit the shocks to 4" Let me know how it goes and we can go from there. |
|
| |
|
01-26-2011, 03:20 PM
| #14 |
| RCC Addict Join Date: Mar 2010 Location: Alburtis
Posts: 1,227
|
Thanks for the advice. I will need to wait for the post man and the snow to clear first. Winter sucks for crawlers, but is awesome for running my scaler. Wes |
|
| |
|
01-26-2011, 03:27 PM
| #15 |
| I wanna be Dave Join Date: Oct 2007 Location: Scumrise, Flooriduh
Posts: 5,181
|
Another key to dialing a rig in is. only adjust one thing at a time. If you change more than one thing you do not know what worked or did not. the only time I ever change more than one thing is if I am completely changing the setup, then I will set what I want for a baseline and tune one thing at a time from there. |
|
| |
|
01-26-2011, 07:22 PM
| #16 |
| RCC Addict Join Date: Mar 2010 Location: Alburtis
Posts: 1,227
|
Ok, who actually runs rear steer on a 2.2 crawler. After I did some research and realized the rear bracket was so long for mounting a servo. That is when I decided to get rid of the bracket and replace it with one that will get hung up a lot less! Nothing special just some aluminum scrap metal and time. Wes 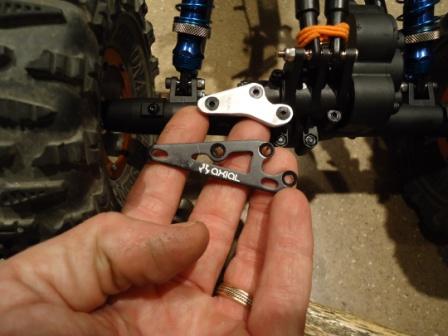 |
|
| |
|
01-26-2011, 07:47 PM
| #17 | |
| No idea what I'm doing Join Date: Oct 2008 Location: Underground, CO
Posts: 4,529
| Quote:
| |
|
| |
|
01-27-2011, 03:59 AM
| #18 | |
| RCC Addict Join Date: Mar 2010 Location: Alburtis
Posts: 1,227
|
Oh, I saw somewhere, can't remember where, that it was for rear steering. I thought that was odd. I clamped the old plate on top of the aluminum I had and drilled the holes all at the same time. I then countersunk to the same depth as factory. Would there be others issues to be concerned about. I will check out Brandon's thread soon, thanks Wes Quote:
| |
|
| |
|
01-27-2011, 08:16 AM
| #19 | |
| I wanna be Dave Join Date: Oct 2007 Location: Scumrise, Flooriduh
Posts: 5,181
| Quote:
| |
|
| |
|
01-27-2011, 10:25 AM
| #20 | |
| RCC Addict Join Date: Mar 2010 Location: Alburtis
Posts: 1,227
|
Ok, not a problem here. If anything it might be a fraction thicker. The material I used was thicker, but I countersunk the hole an additional amount to make the screw depth about the same. I apprecaite the heads up. Now, what can you do to help my packages arrive sooner!!! Wes Quote:
| |
|
| |
 |
| |


 Linear Mode


