| |
| |||||||
 |
| | LinkBack | Thread Tools | Display Modes |
 12-06-2010, 08:18 PM
| #1 |
| Rock Crawler   Join Date: Jun 2009 Location: vacaville
Posts: 786
|
So I have been running a Chump V1 chassis for a year or so. Well Mr. Chump dropped off a few bodied chassis at HobbyTown Concord last week and I picked one up and thought I would do a build on it. Here is a little run down on what im running. Berg V1 axles 2nd and 3rd Mann Gears front and back CDW Chump V2 Bodied Chassis CDW Upper Link mount in the front CDW Chump Sticks Lungsfurd Upper Links 110mm rear 55mm front for the moment Revo rod ends Traxxas Big Bore Socks JeepinDug Shock caps Homemade 86's Jeep style streering with 1/4" tied rod SLW's V4 White Rovers Nova 5.5 two stage with 5.5 tunner rings on inside of tire only 9157 Futaba streering srevo Blitzs Custom made 42 turns x2 13 t pinion 850mah battery's FXR Punk Dig Axail body painted by Roksloski Here is a old outside shot Right after I got the body back form Sloski (it don;t look this good anymore haha)  here is the old wiring 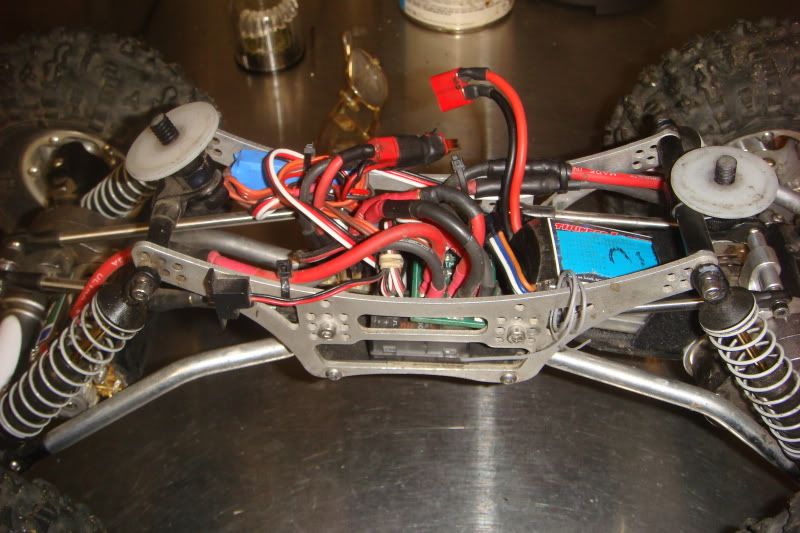 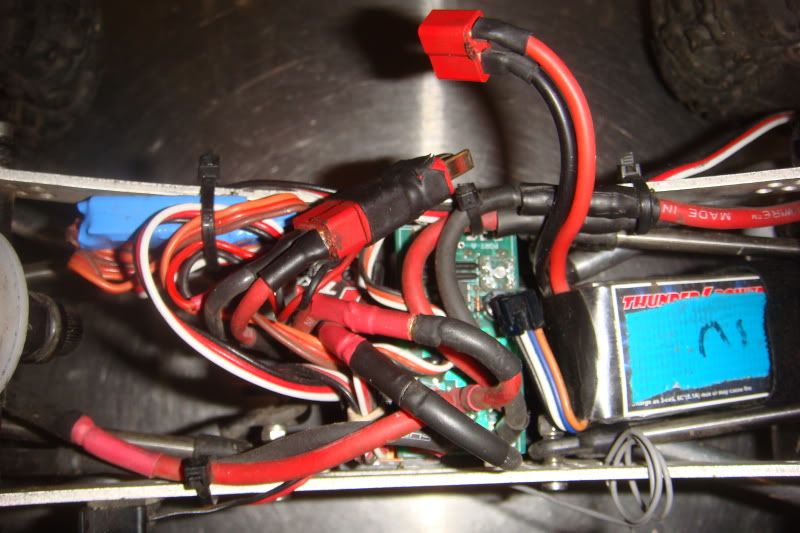 The old measurements 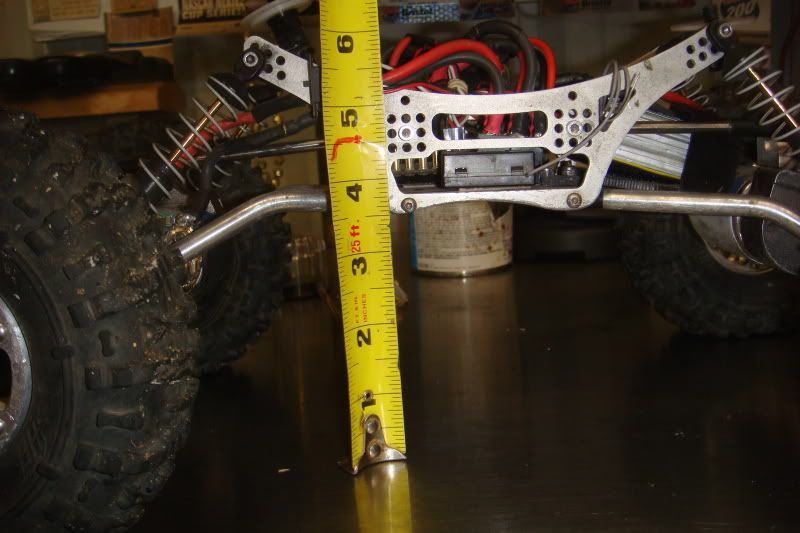 The unwrapping of the new chassis 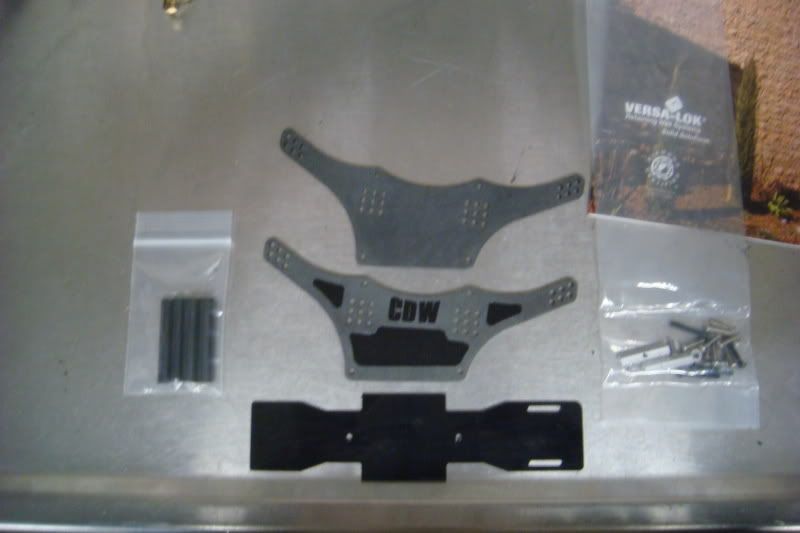 The new lower link mounts. I mounted the flanged side down to the skid per Chumps suggestion so the screw is flush with the top of the mount 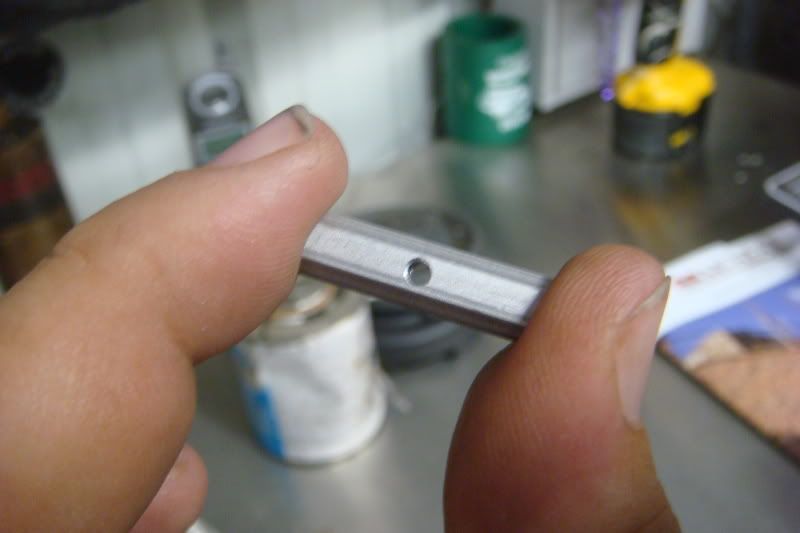 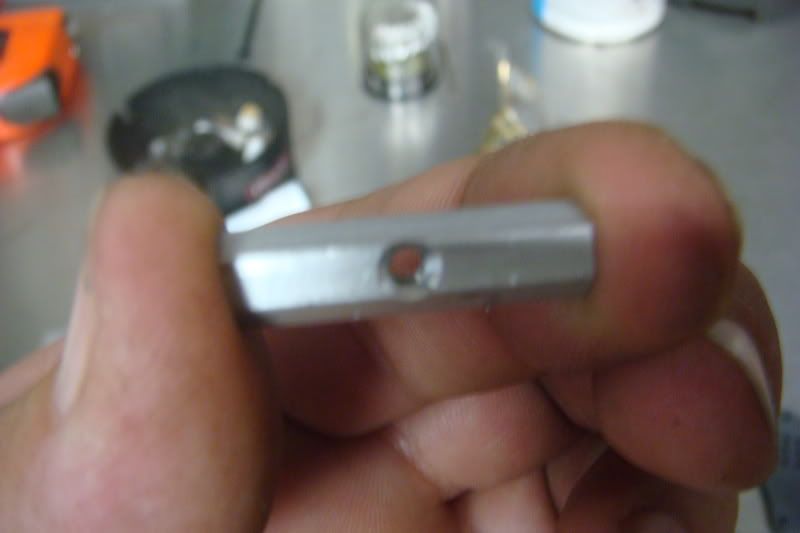 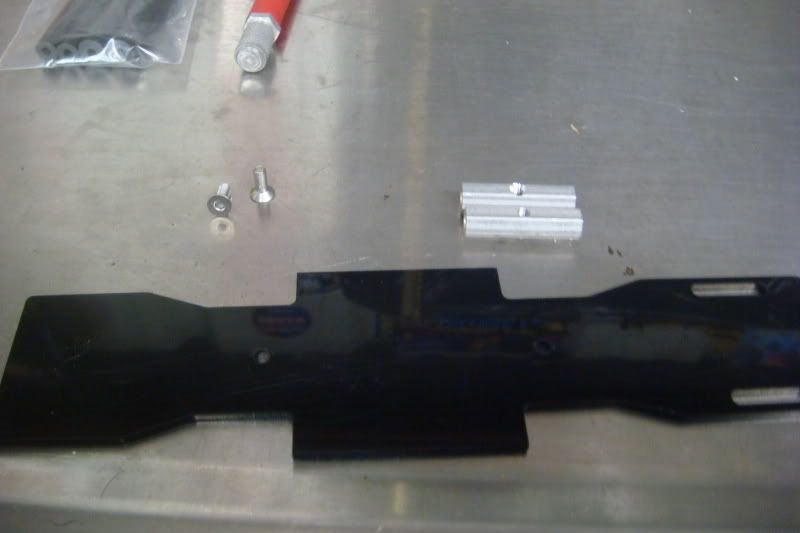 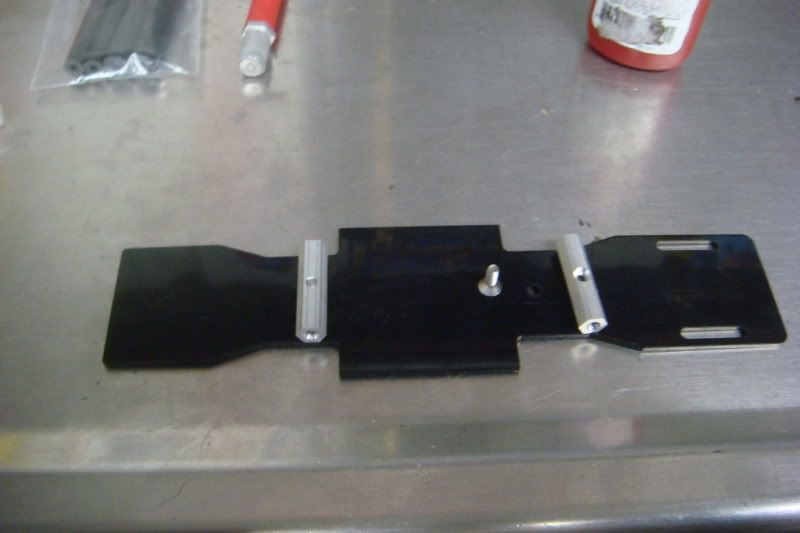 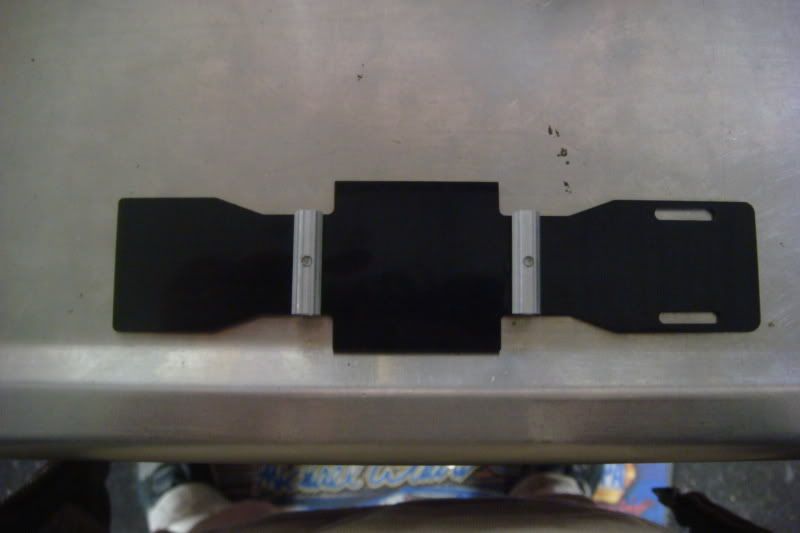 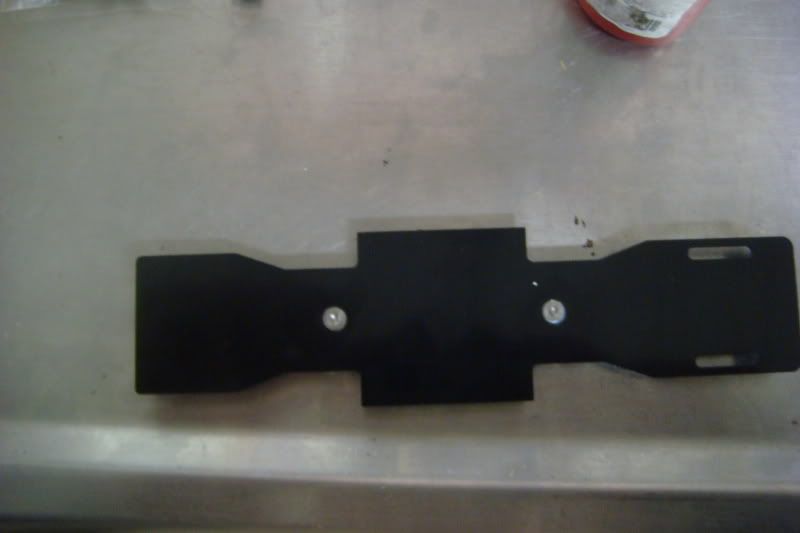 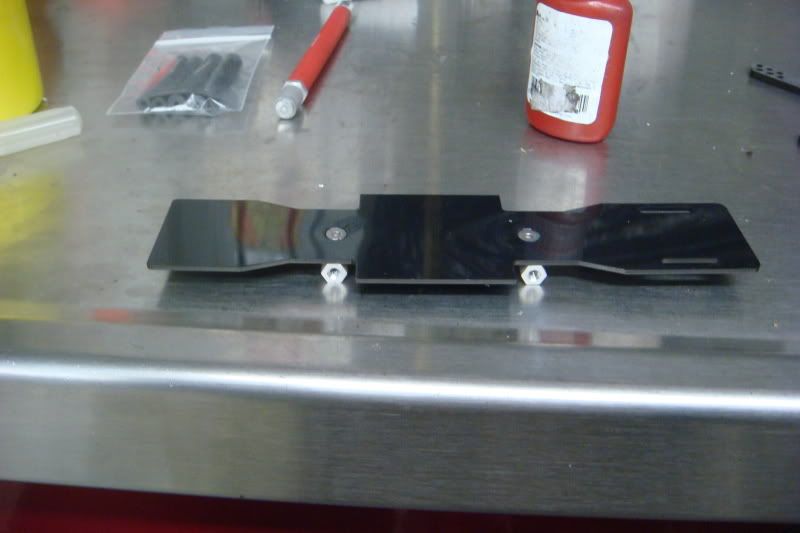 Rear lower links mounted 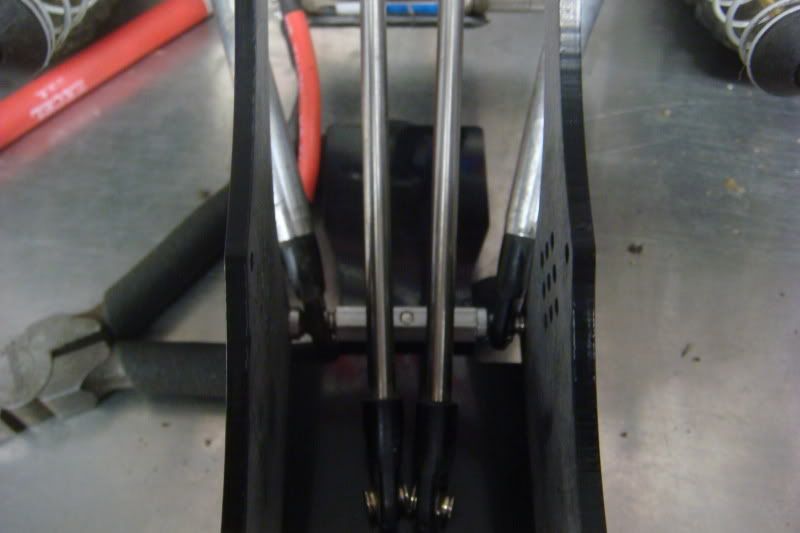 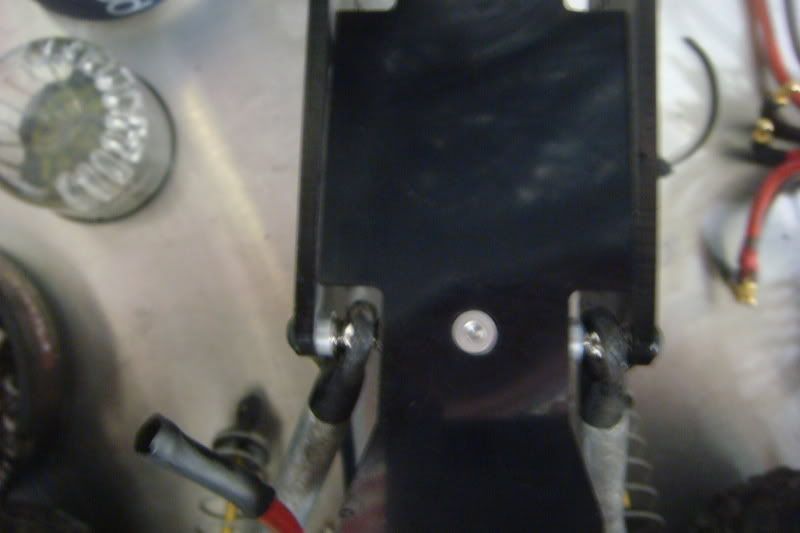 Rear upper link mounted inside but this might change 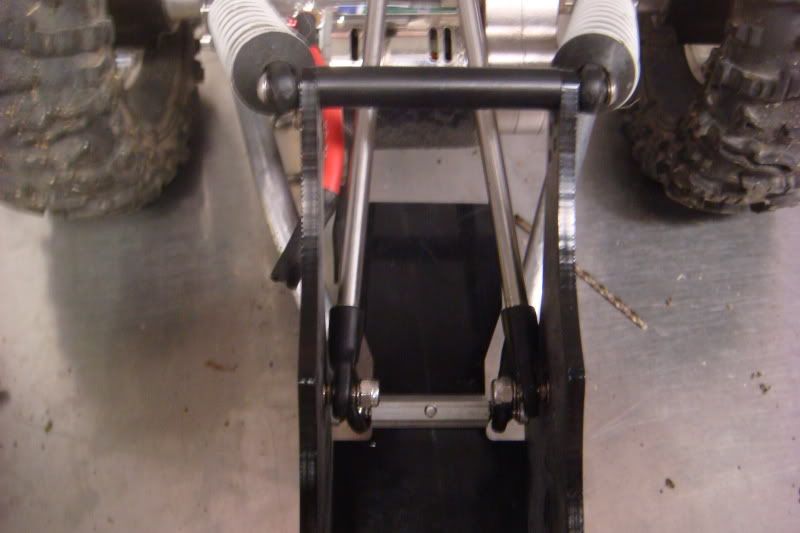 Side view with rear mounted 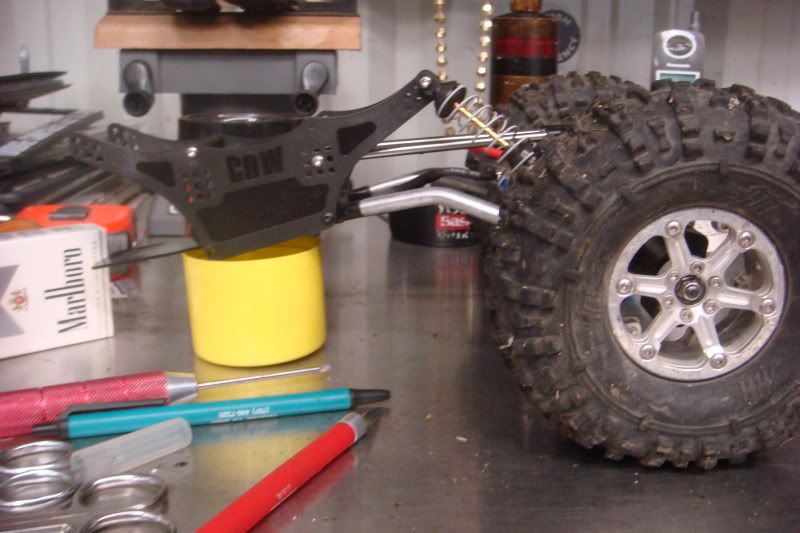 Here it is all mounted up 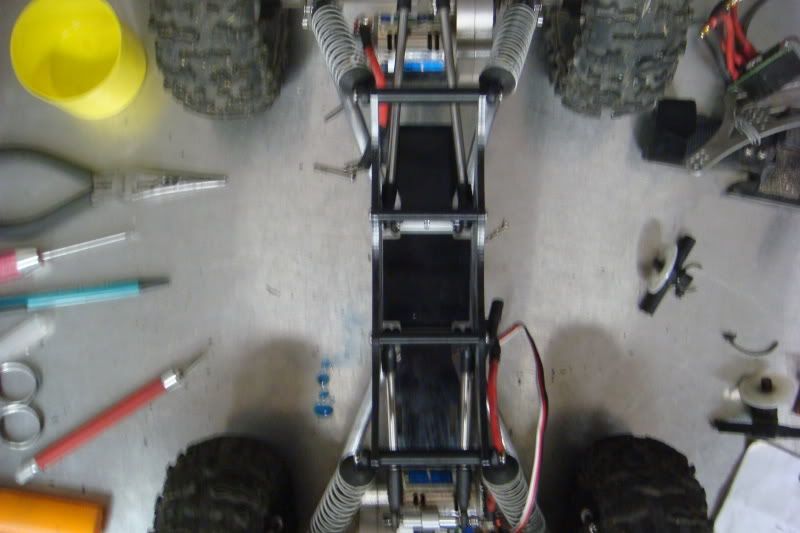 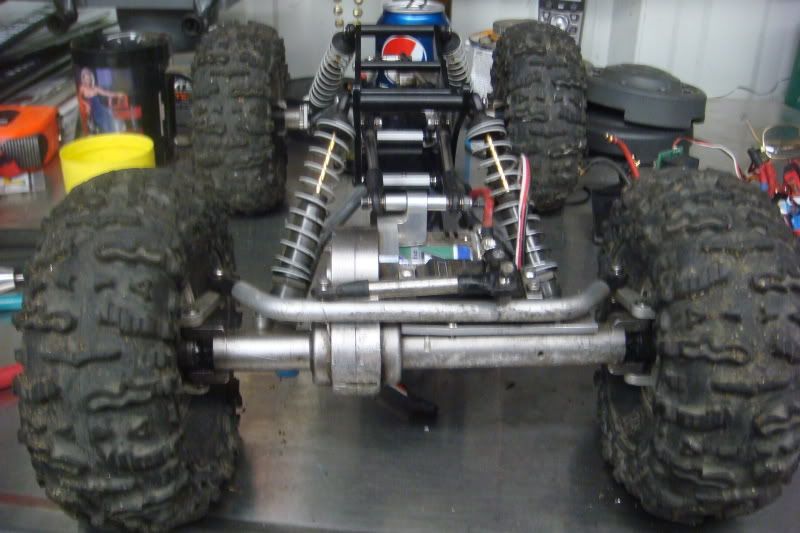 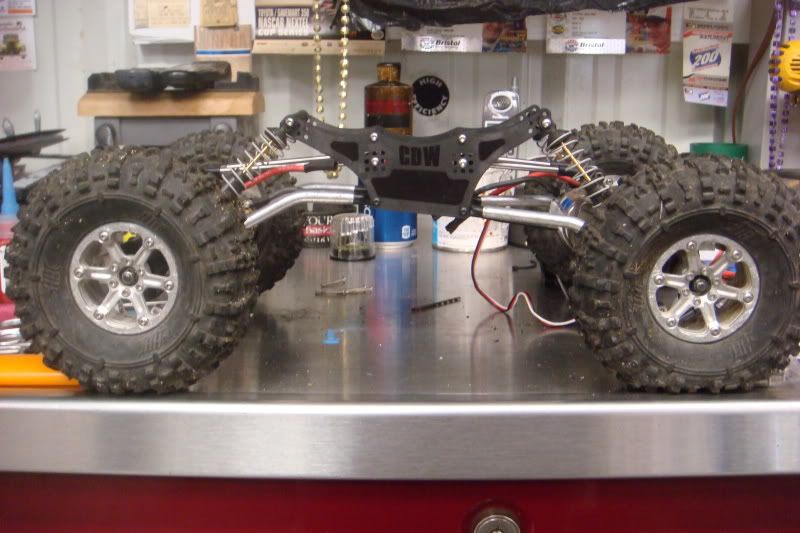 Here are the new measurements pertty much the same as my old chassis with the mods I did to it. 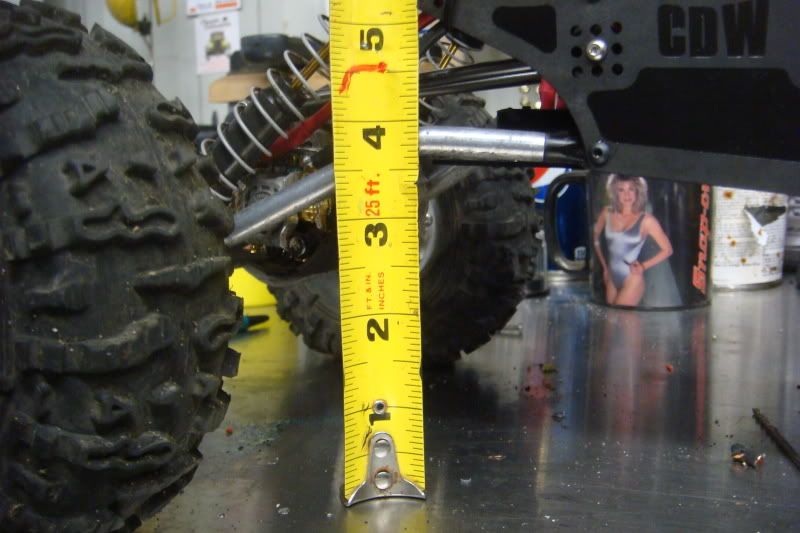 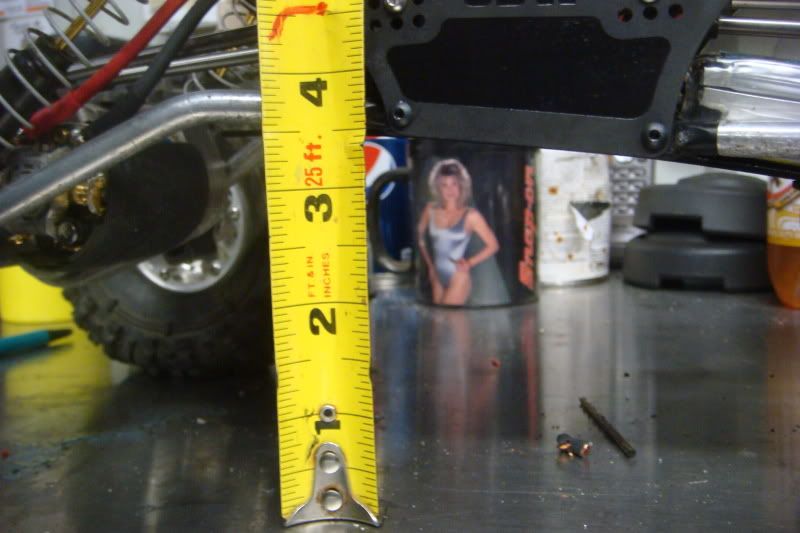 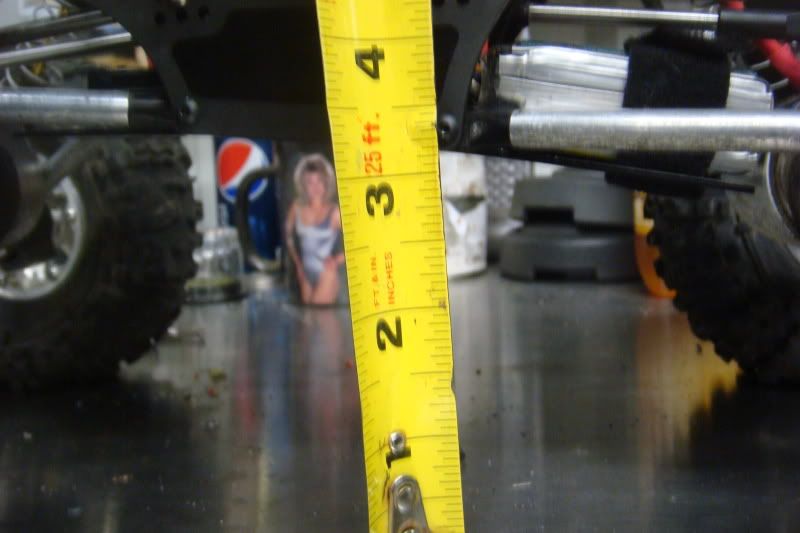 Last edited by jammin311; 12-07-2010 at 08:56 AM. |

|  |
| Sponsored Links | |
| | |
|
12-06-2010, 08:25 PM
| #2 |
| Rock Crawler Join Date: Jun 2009 Location: vacaville
Posts: 786
|
So as you could see from my pic's above my old wiring was a mess I had bullet conncetors on the motor and ESC. This time I wanted to hard wire everything for a cleaner look and less wire wieght up top. This is what I came up with. 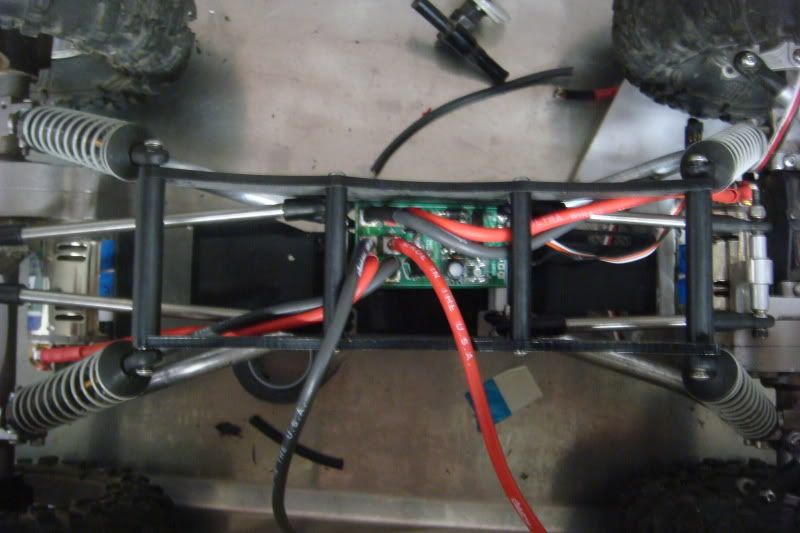  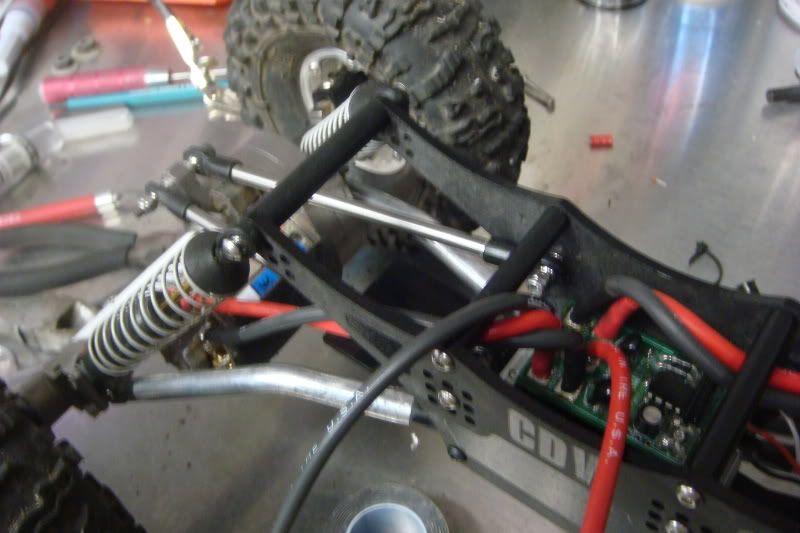 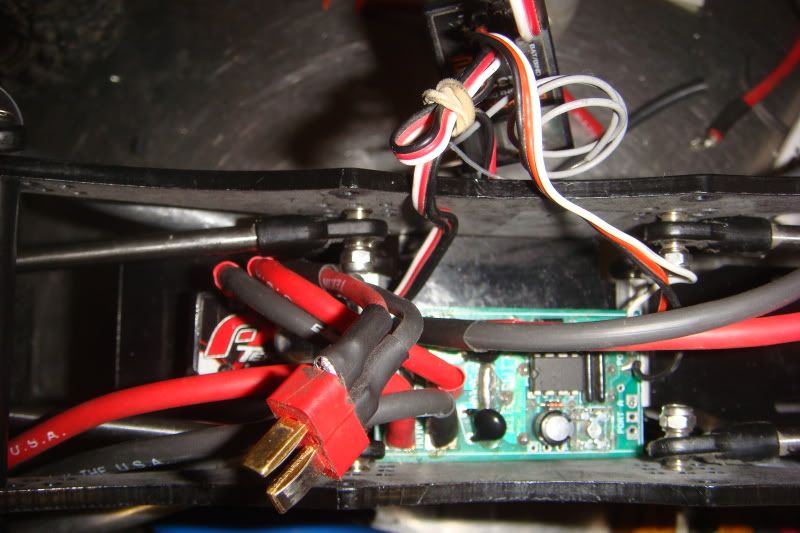 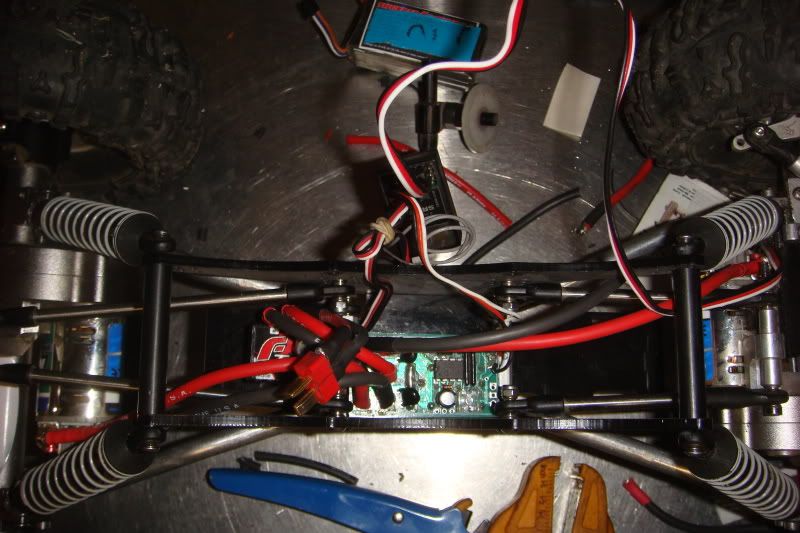 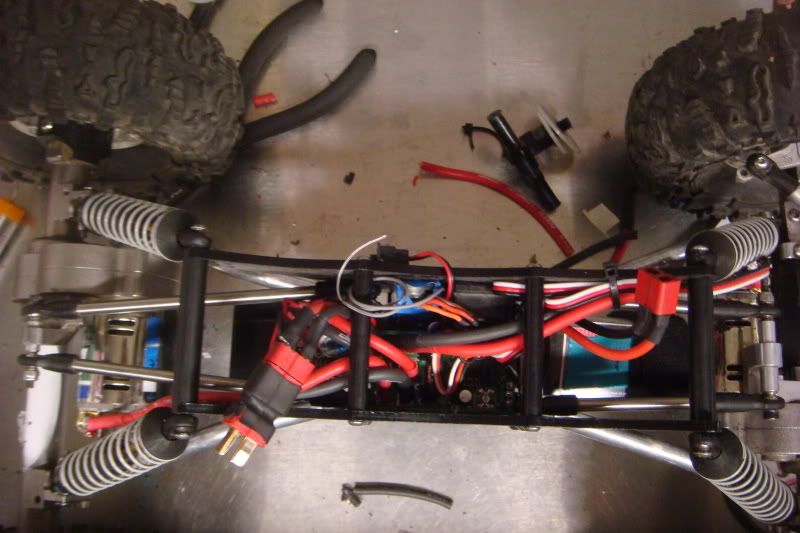 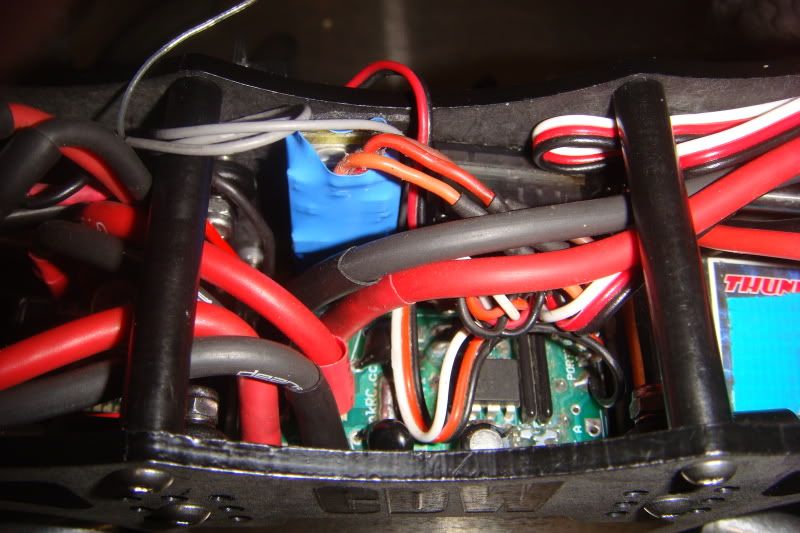 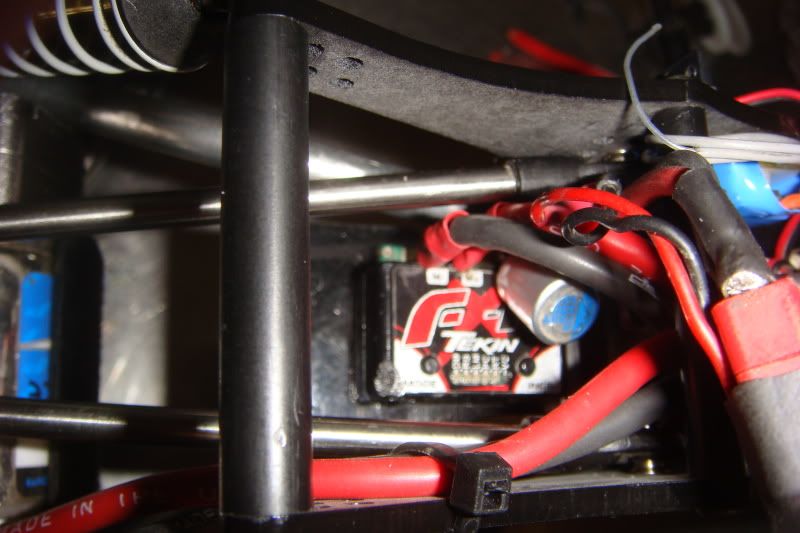 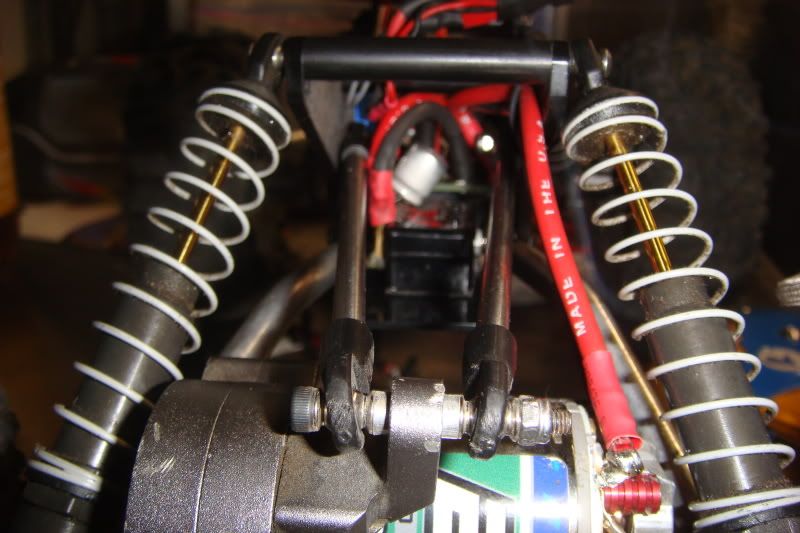 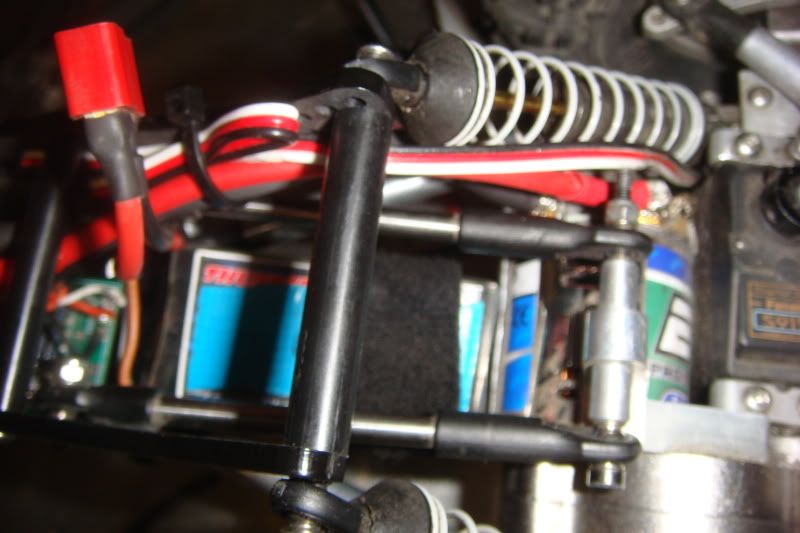 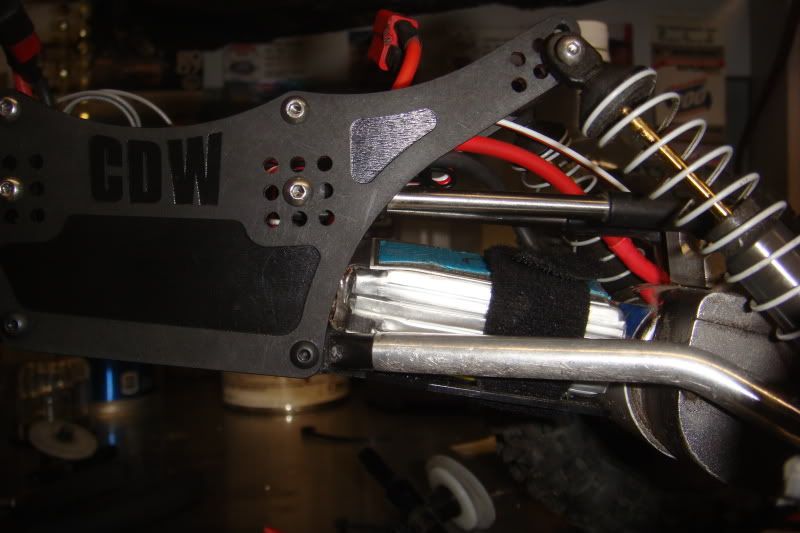 And then here is a few of it done for the night 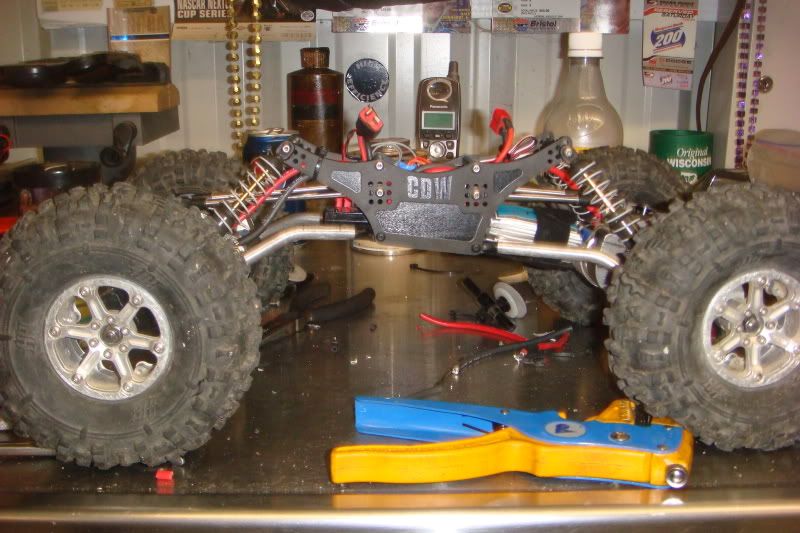 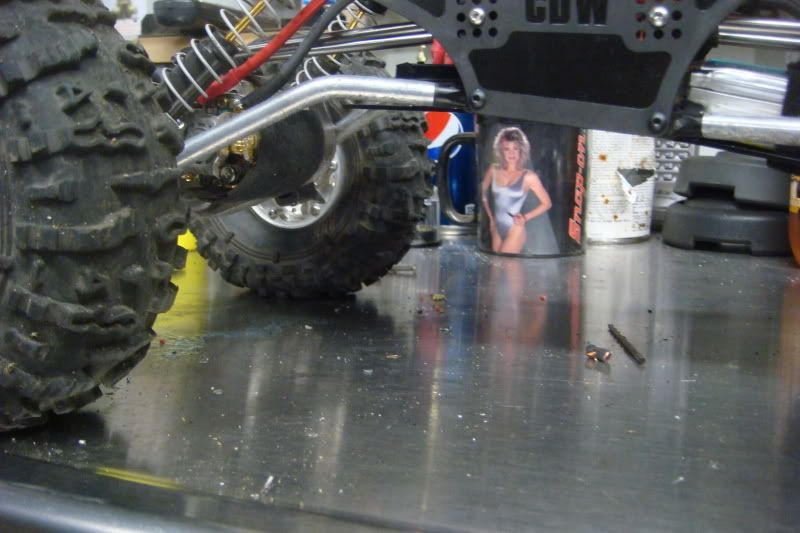 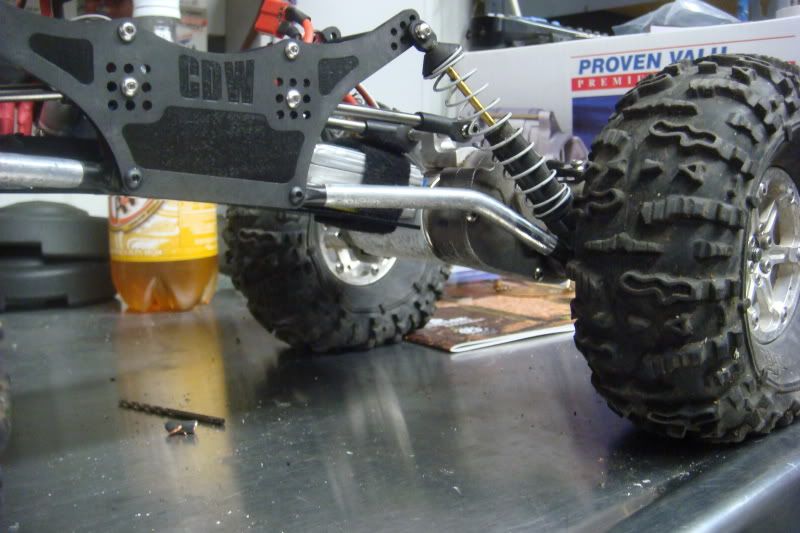 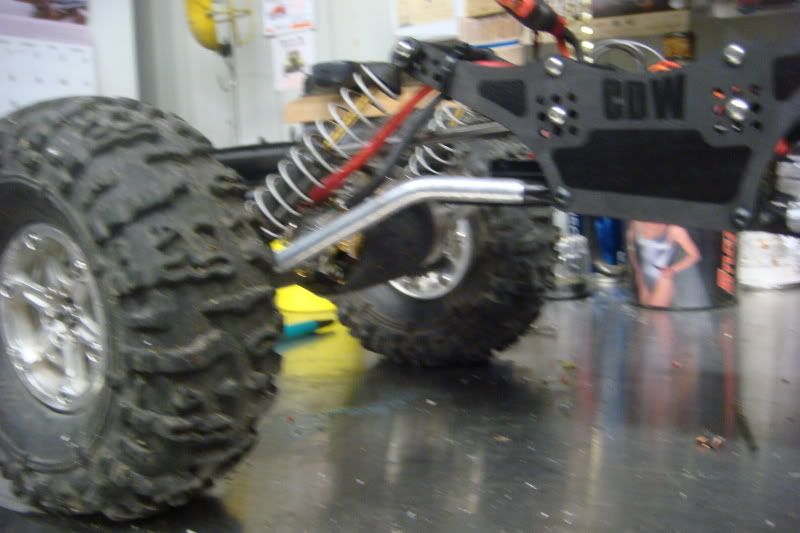 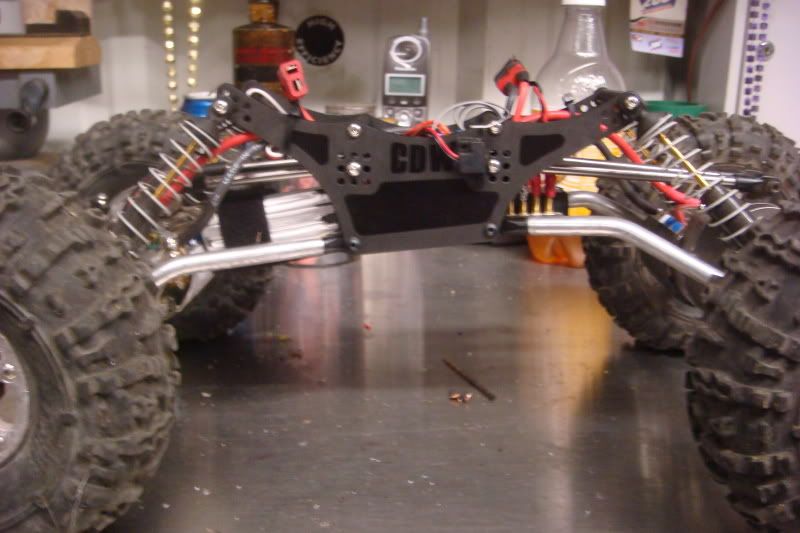 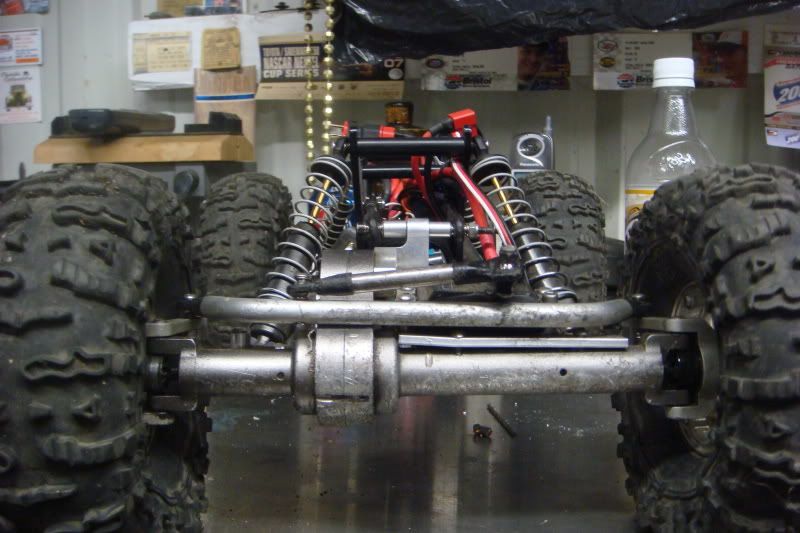 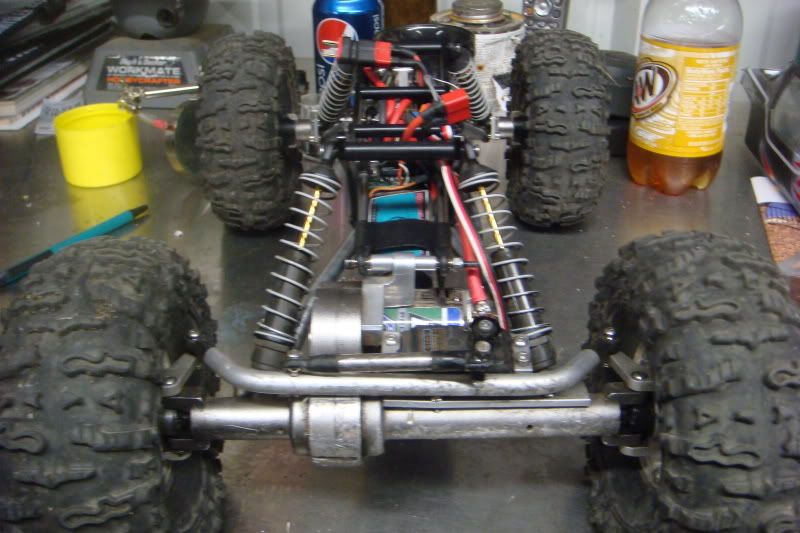 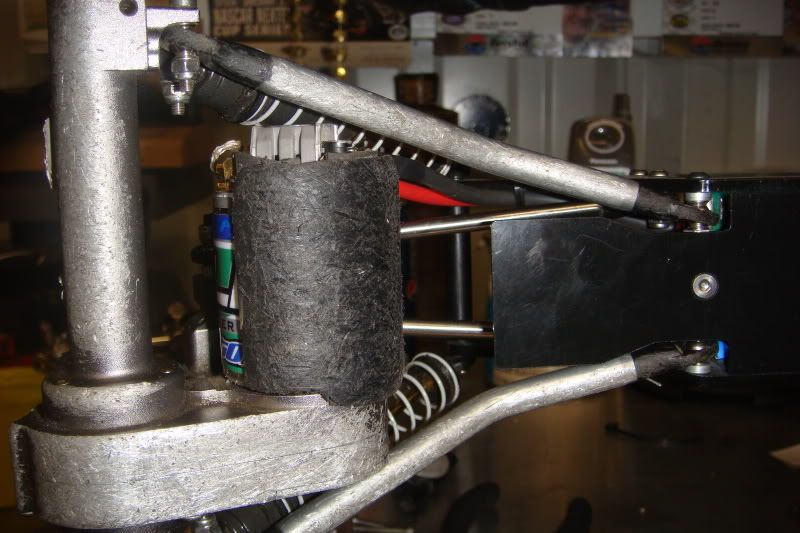 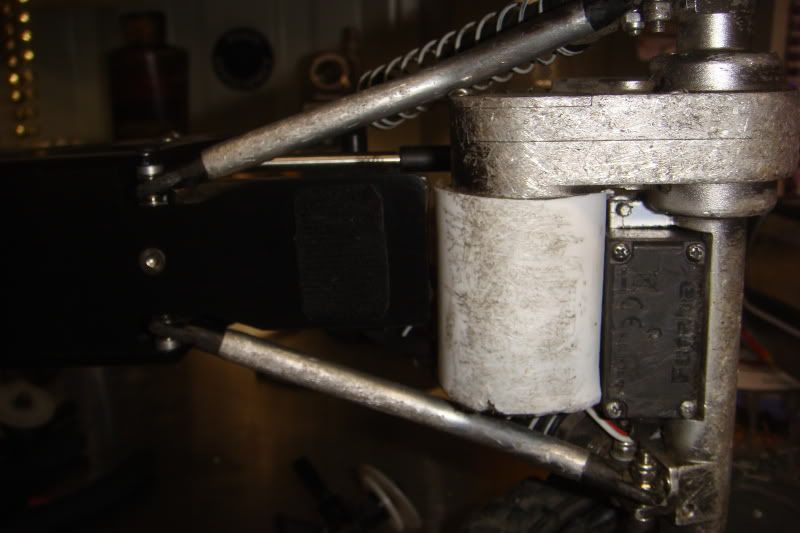 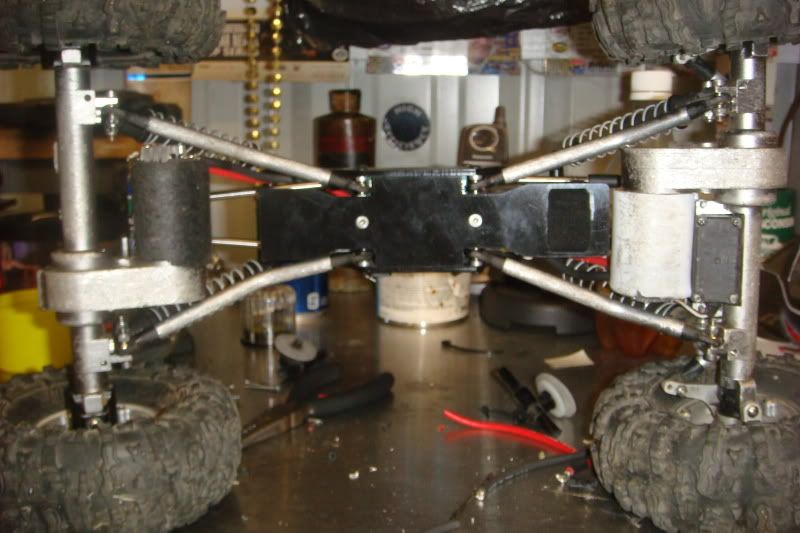 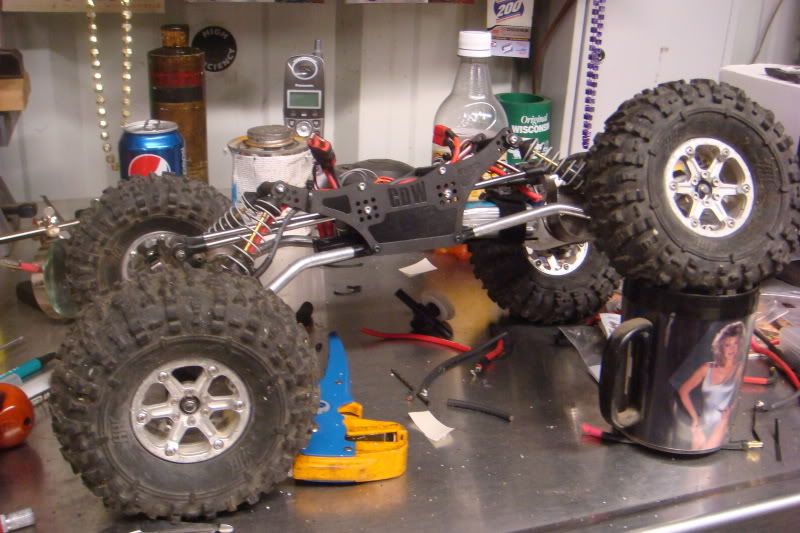 Tomorrow Im going to mount the body mounts, spacing out the shocks and start the BIG job of changing out all my bearings  Last edited by jammin311; 12-06-2010 at 09:32 PM. |
|
| |
|
12-06-2010, 08:30 PM
| #3 |
| Ex Nor-CalRCRC slave  Join Date: Dec 2008 Location: San Mateo, CA.
Posts: 2,242
|
Rebuild looks great James Good job on the wiring too. I'll have to get to HT so I can see it in action sometime |
|
| |
|
12-06-2010, 08:57 PM
| #4 |
| Rock Crawler Join Date: Jan 2006 Location: Vacaville, CA
Posts: 743
|
damn you use your 0g wire from your car stereo on that thing? Looks good!
|
|
| |
|
12-06-2010, 09:04 PM
| #5 |
| RCC Addict Join Date: Jul 2009 Location: Santa Rosa, CA
Posts: 1,349
|
That's looking real nice. The wiring came out much cleaner than the first time. I'd like to eventually try out that chassis on my xr. |
|
| |
|
12-06-2010, 09:25 PM
| #6 | |||
| Rock Crawler Join Date: Jun 2009 Location: vacaville
Posts: 786
| Quote:
Quote:
Quote:
| |||
|
| |
|
12-06-2010, 09:28 PM
| #7 | |
| RCC Addict Join Date: Jul 2009 Location: Santa Rosa, CA
Posts: 1,349
| Quote:
| |
|
| |
|
12-06-2010, 11:38 PM
| #8 |
| RCC Addict Join Date: Jul 2009 Location: AT THE DRAGON'S LAIR
Posts: 1,319
|
Looking great James! It looks like a performer! |
|
| |
|
12-06-2010, 11:50 PM
| #9 |
| Rock Crawler Join Date: Aug 2008 Location: Wine Country
Posts: 899
|
Nice looking, I'll have to see it in action on Thursday |
|
| |
|
12-07-2010, 09:00 AM
| #10 | ||
| Rock Crawler Join Date: Jun 2009 Location: vacaville
Posts: 786
| Quote:
Thanks yup il be there testing and tunning Quote:
| ||
|
| |
|
12-07-2010, 09:54 AM
| #11 |
| I wanna be Dave Join Date: Sep 2005 Location: Houston, TX
Posts: 16,952
|
Very nice work! I like the new skid design!
|
|
| |
|
12-07-2010, 10:44 AM
| #12 | ||
| ghetto fabulous newbie Join Date: Sep 2007 Location: with your mom
Posts: 2,526
| Quote:
Quote:
| ||
|
| |
|
12-07-2010, 01:12 PM
| #13 |
| I wanna be Dave Join Date: Aug 2008 Location: Deep in Swing Town
Posts: 3,011
|
Jammin, lookin good.... wiring looks great also... a fry cry from before.... as soon as chump does those in Alum. I'll switch....(hint-hint) till then ..... nah.......... |
|
| |
|
12-07-2010, 02:09 PM
| #14 | ||
| Rock Crawler Join Date: Jun 2009 Location: vacaville
Posts: 786
| Quote:
Quote:
Good luck with that wait I think it took 2 months of me buggen chump just to get these few chassis in the shop to buy. | ||
|
| |
|
12-08-2010, 06:35 AM
| #15 |
| I wanna be Dave Join Date: Nov 2009 Location: Chico now
Posts: 2,384
|
Big improvement, lookin' good James. |
|
| |
|
12-08-2010, 02:01 PM
| #16 |
| Rock Crawler Join Date: Apr 2009 Location: Sonoma County
Posts: 677
|
Nice work James! That wiring job looks better than what we have seen in the past. |
|
| |
|
12-08-2010, 02:10 PM
| #17 | ||
| Rock Crawler Join Date: Jun 2009 Location: vacaville
Posts: 786
| Quote:
Quote:
Little update: Last night I replaced every bearing in my rig and spaced out the shocks. I'll have pic's up later. Tonight is finding the bind in my real axle (something did not get reinstalled right im thing) and to mount up the body. Then I should be ready for thursday nights comp at HobbyTown Concord. | ||
|
| |
|
12-08-2010, 02:30 PM
| #18 | |
| Pebble Pounder Join Date: Jul 2010 Location: Nor*Cal
Posts: 115
|
Lookin' good James! Quote:
| |
|
| |
|
12-08-2010, 03:13 PM
| #19 | |
| Rock Crawler Join Date: Jun 2009 Location: vacaville
Posts: 786
| Quote:
Two weeks means 3 months | |
|
| |
|
12-08-2010, 10:28 PM
| #20 |
| Rock Crawler Join Date: Jun 2009 Location: vacaville
Posts: 786
|
So Like I said last night was bearing replacement night I replaced every single bearing in the rig. I have been running most of them for well over 6 months and it was starting to show. 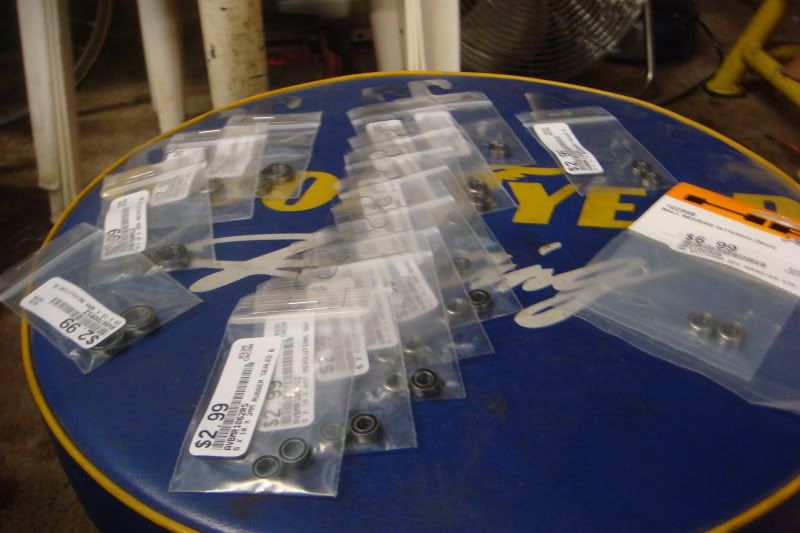 Some had more wear then others these 2 were done completely. 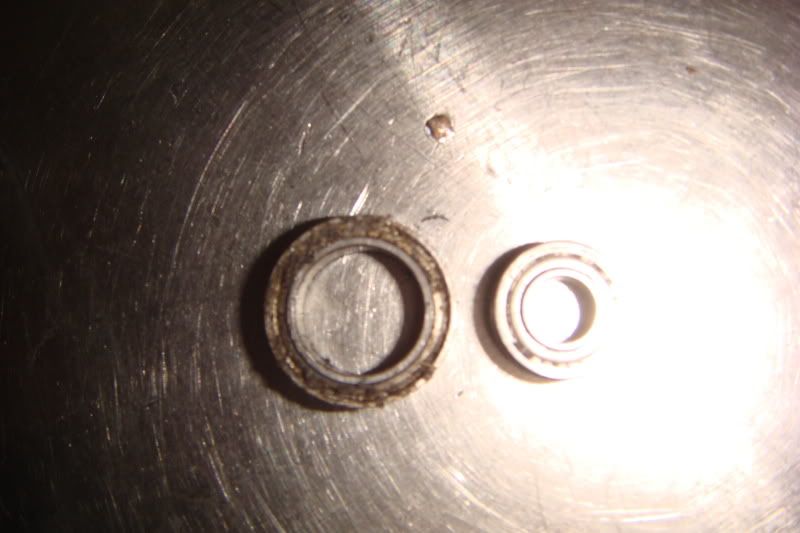 Last weekends comp had a bit of water so some of these look bad but most were still good but I replaced anyway. 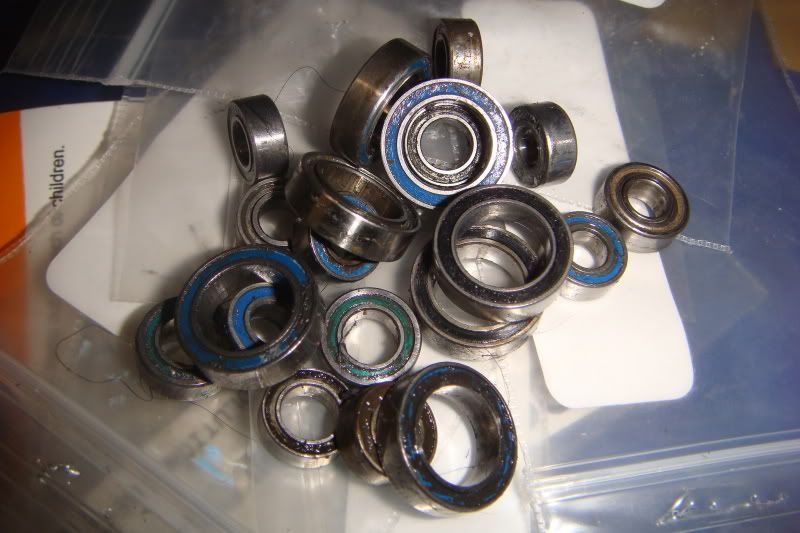 While I was in the axles I noticed me new Locker came loose from the gear. Like everyone I know said it would after I already bout it and installed it. The damage was nothing really but it shows.  So I replaced it with my old stock one for now. 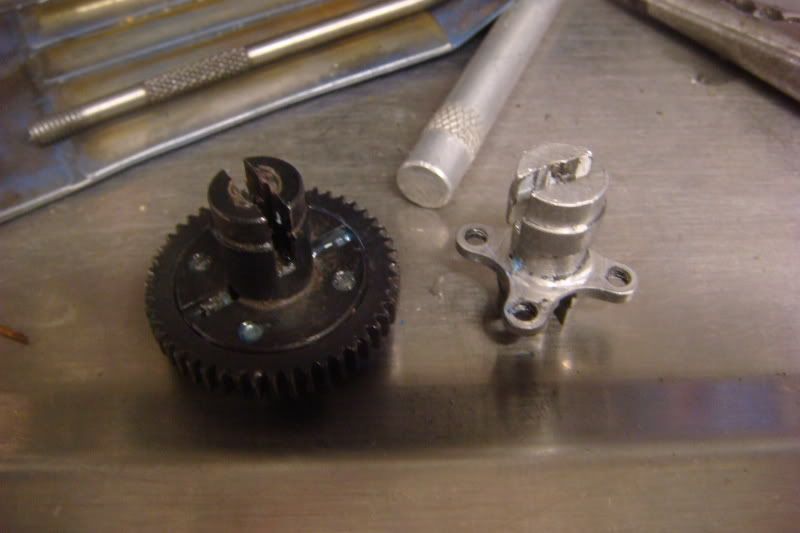 The Mann gears are holding up great!! I have a small chip in one of the 2nd gears as you can kindof see in the pic, the one on the right. but man these gears are tough. I have put them through soo much and they are still going strong. 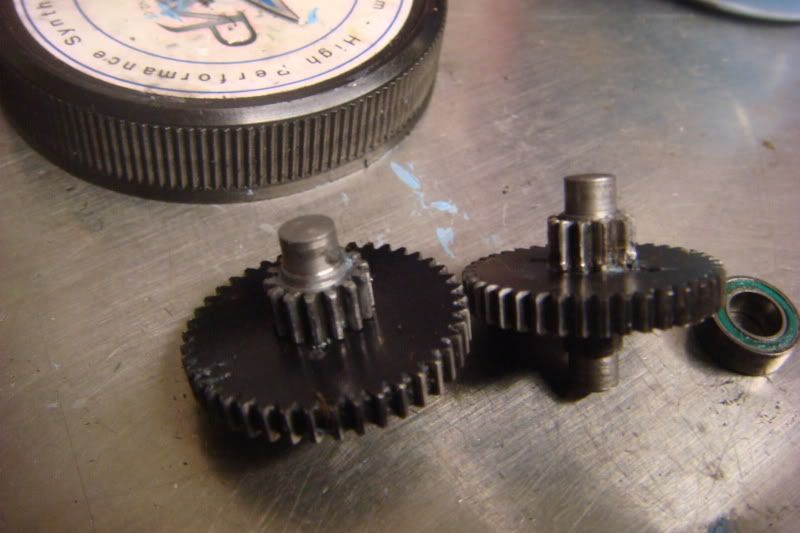 Tonight I installed some new Gunner body mounts. and took a few pic's whit body on. 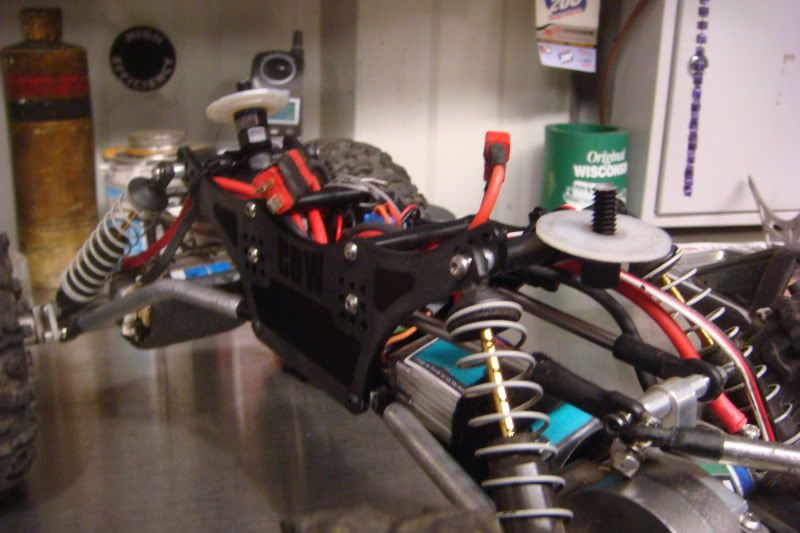 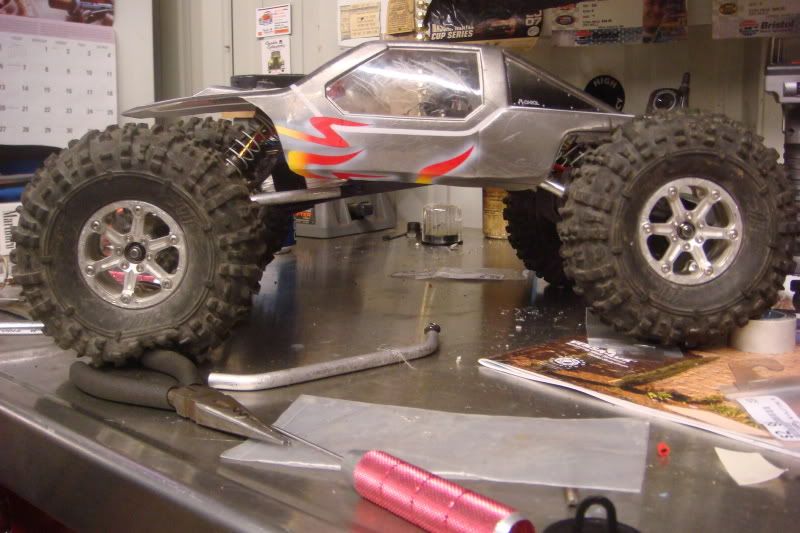 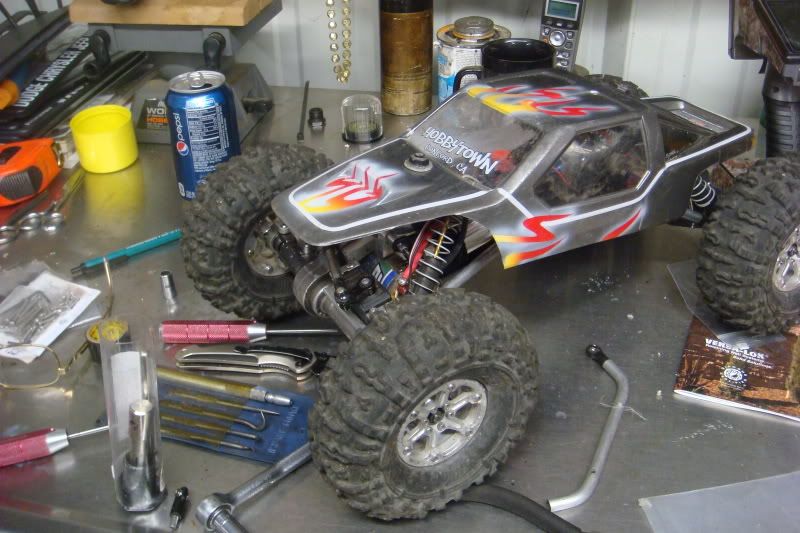 Notice any thing wrong in the pic's above?  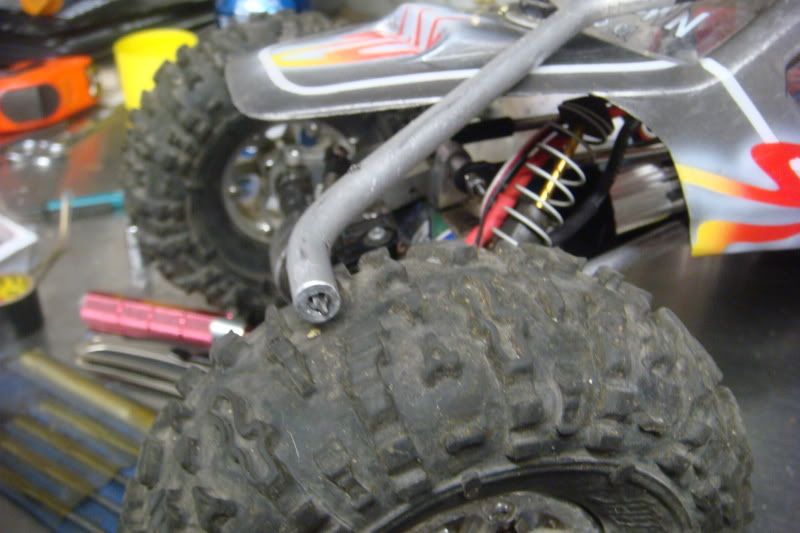 OOPS!!! I noticed on my streering tie rod That one of the rod ends was not moving very well so I decided to replace it and drill the hole deeper and re tap it well I tapped to hard and snapped the tap in the hole. Oh well we move on. 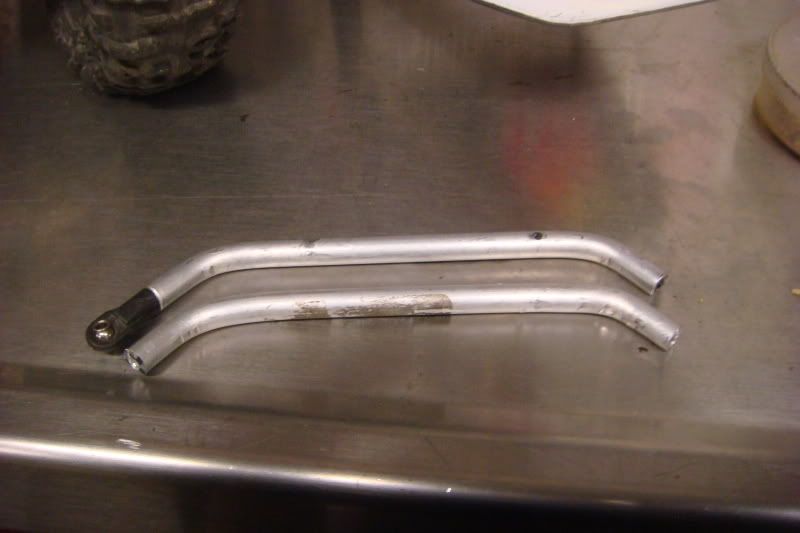  I made a new one and drilled the holes but I have to wait till tomorrow to get to HTC. and get new taps. |
|
| |
|
| |


 Linear Mode


