| |
 09-13-2018, 06:58 PM
| #1 |
| I wanna be Dave  Join Date: Apr 2014 Location: North Carolina
Posts: 2,254
|
Cue the opening music: https://youtu.be/17lkdqoLt44 As you've probably figured out, I got one of these: 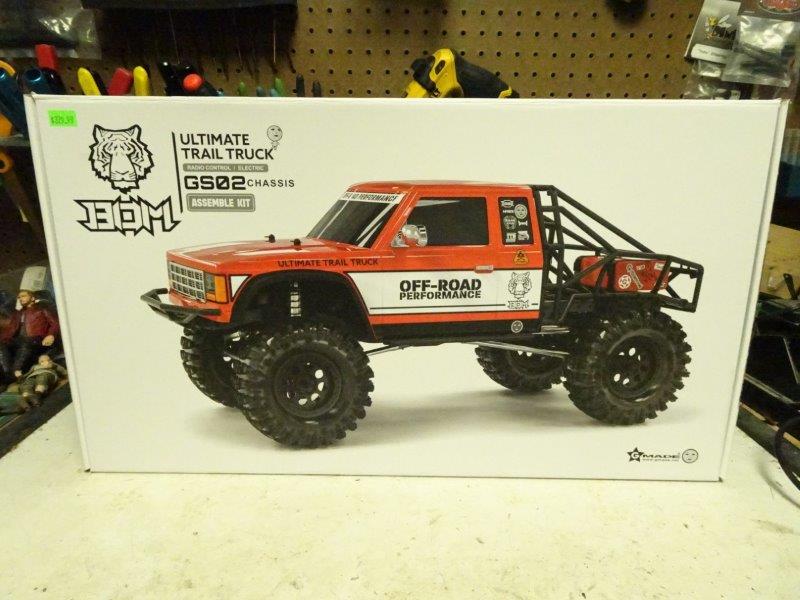 Why, you ask? Well...I've never built a GMade kit before (my R1 Frankenstein doesn't count since it uses all Axial running gear), and this seemed a good place to start. Plus, Roo decided he was bored with building CMAXs after assembling his 3rd (true story...he refused to help with the F350 build), and I needed something else to keep him entertained. This seemed like a good excuse to try something different. The box is rather bossy: 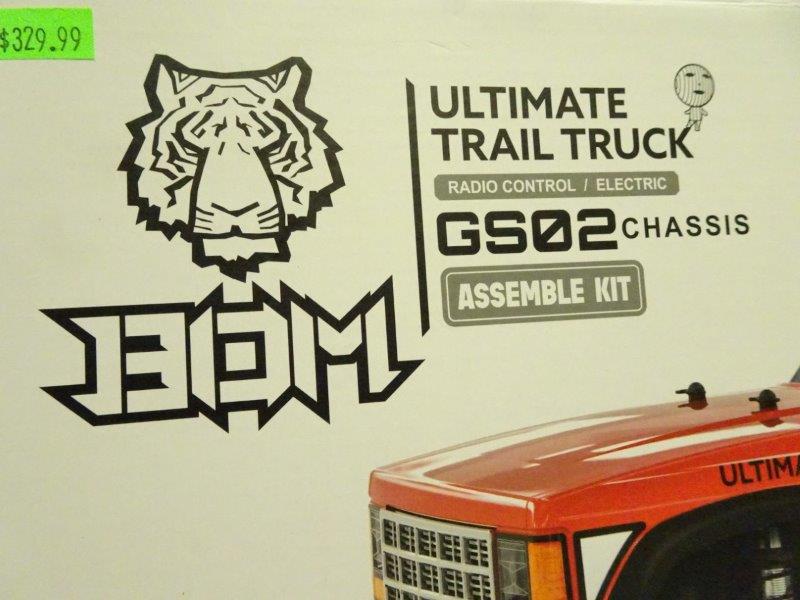 "Assemble kit." Already it's trying to tell me what to do. I don't like taking orders, so I ldelegated: 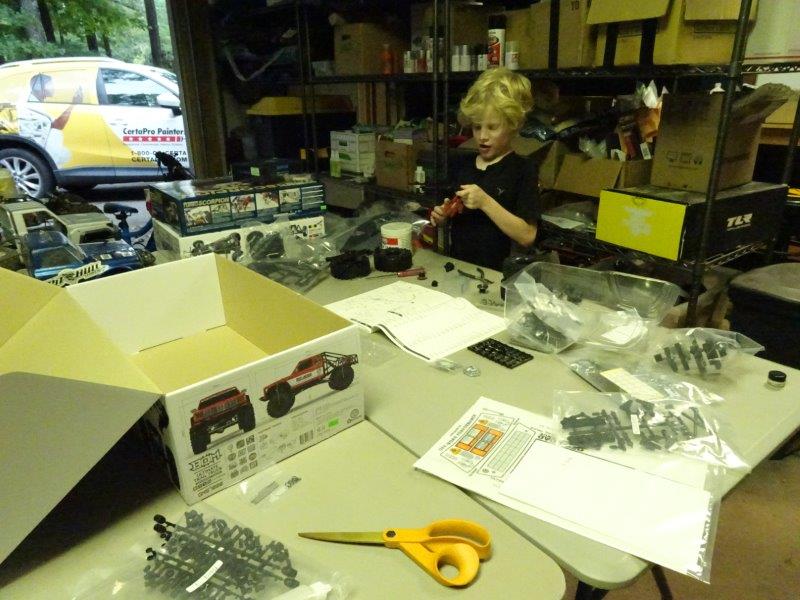 Roo noticed right off the bat that the axle housings were on a tree: 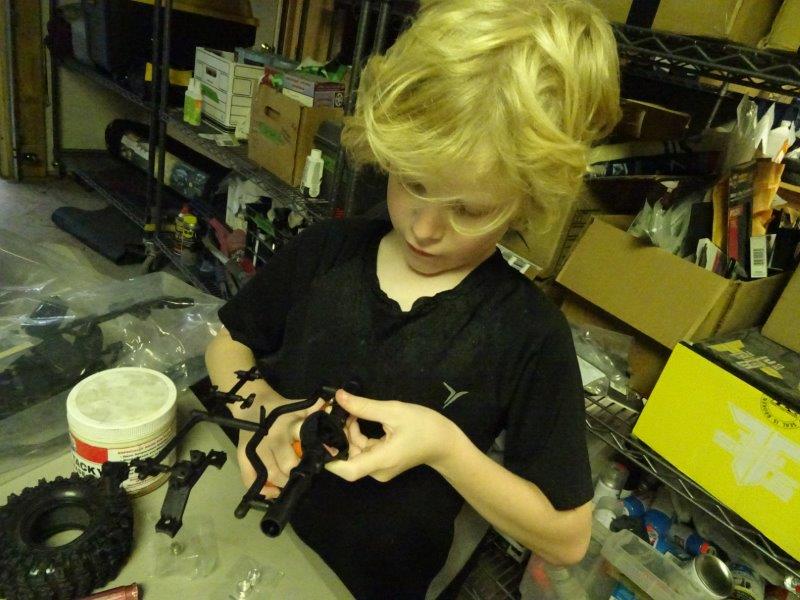 He wondered why they couldn't mold them without a tree like everyone else seems to do these days. Tough audience. Tires are fun: 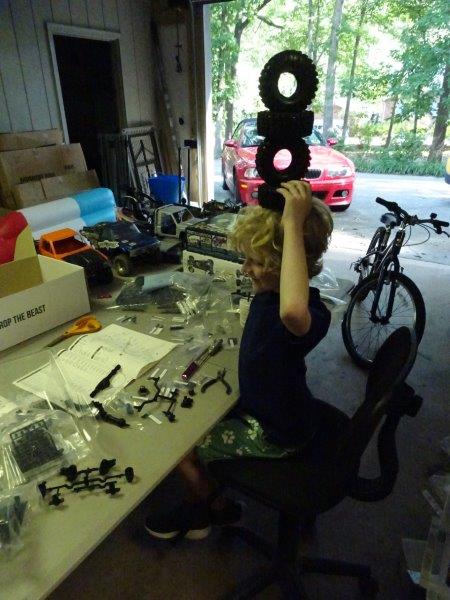 E-clips aren't: 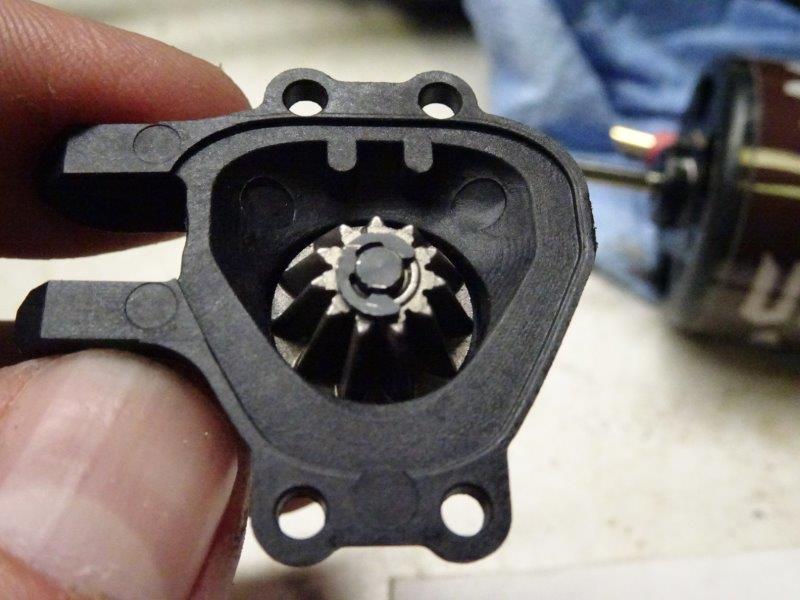 When was the last time you built a kit that had more e-clips than M3 lock nuts? I'm guessing never (unless you just happened to finish a BOM in the past week or so). One of them tried to escape for greener pastures (Roo's words, not mine) by jumping off the table. But we managed. The tranny has an interesting design. The top section has 3 gears with an open bottom: 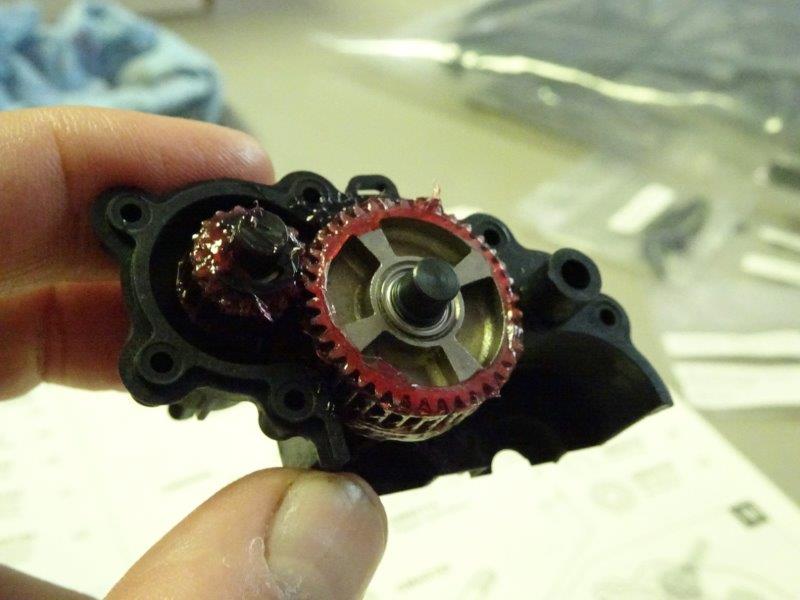 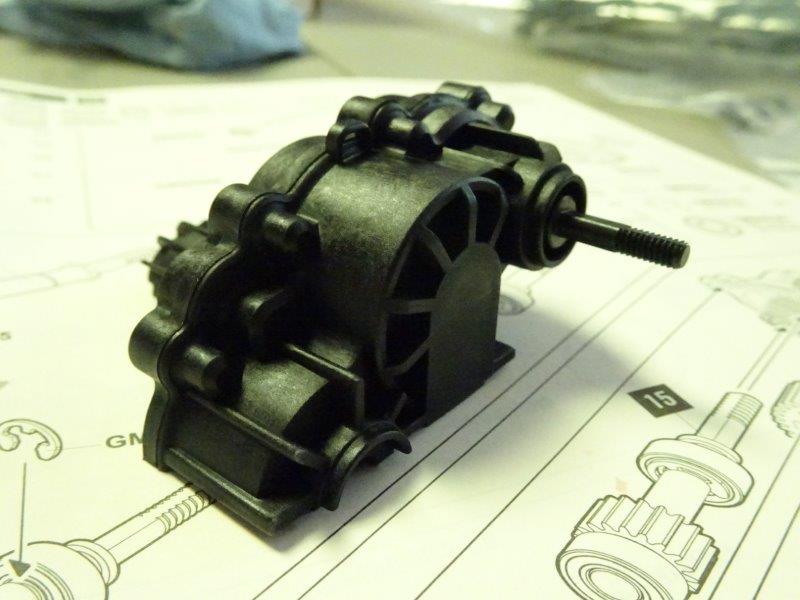 There are two other gears with shafts that rest in the skid: 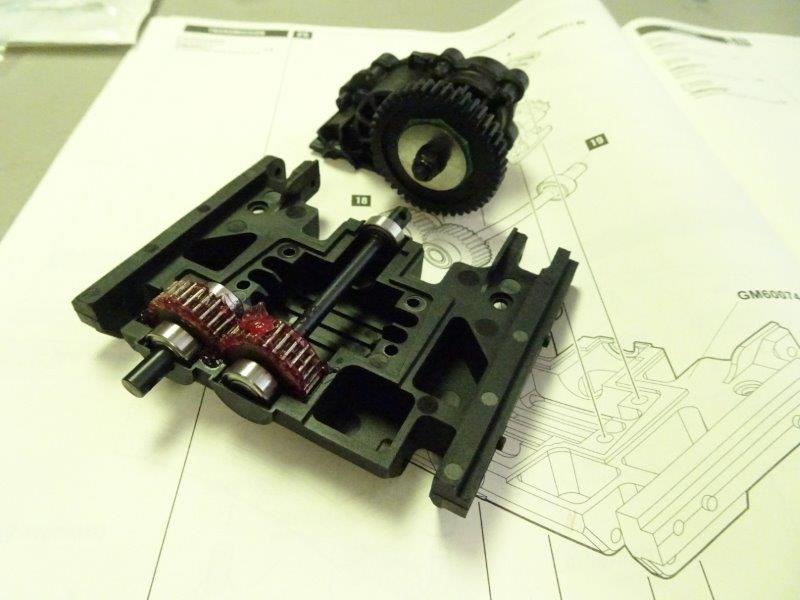 The tranny then rests on the skid, turning these two shafts: 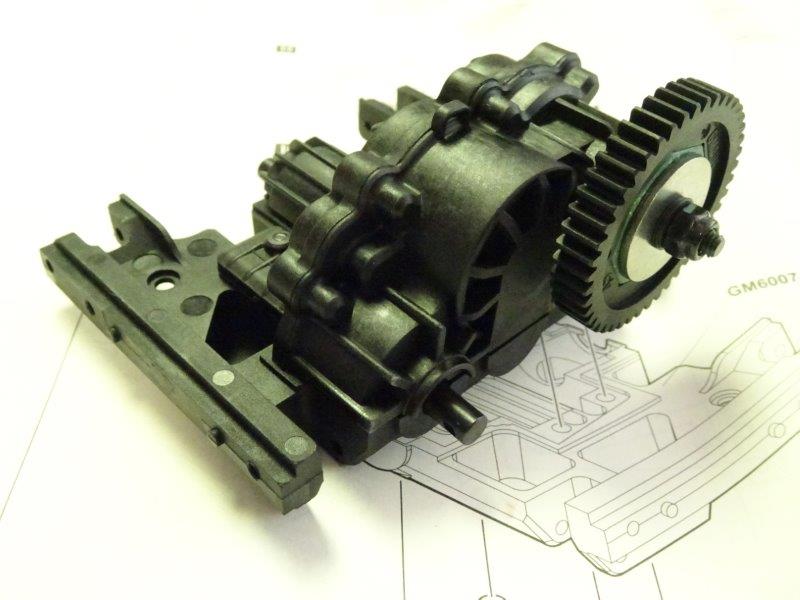 This makes the front and rear driveshafts rotate in the opposite direction, presumably to help eliminate torque twist. Unfortunately, the rear suspension design is very (very) conducive to torque twist, so it will take some tweaking to get things working the way I'd like. There's one other peculiarity with the tranny. Instead of using a conventional spring to keep pressure on the twin-plate clipper clutch, the BOM uses conical spring washers: 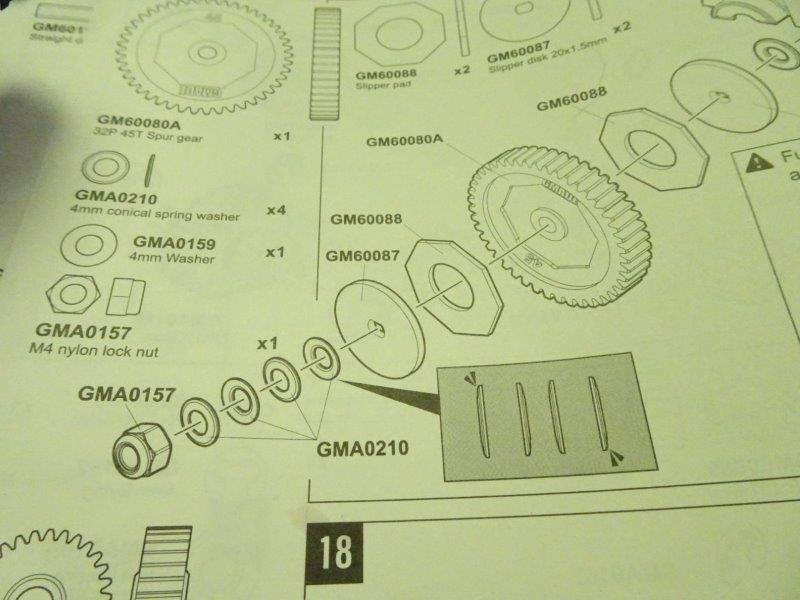 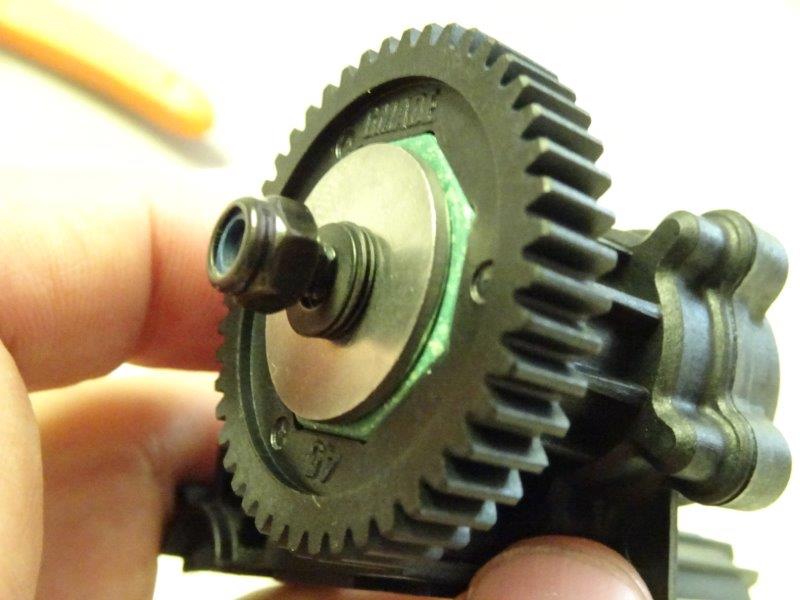 There's another oddity. The instructions call for assembling the two lower output shafts, with loose bearings on the end of each shaft, but not installing them right away: 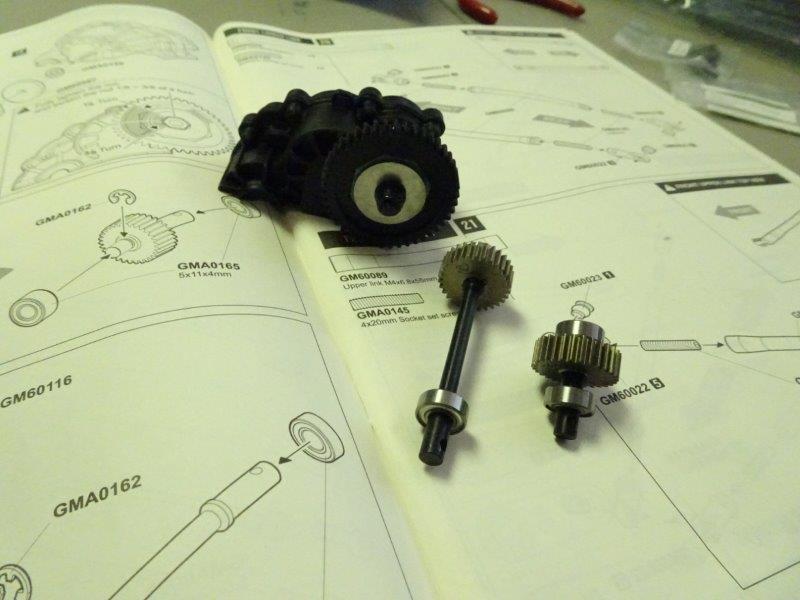 Instead, the instructions call for assembling (but not installing) the links before installing the tranny and output shafts on the skid. I chose to switch that around, installing the tranny on the skid first and then assembling the links: 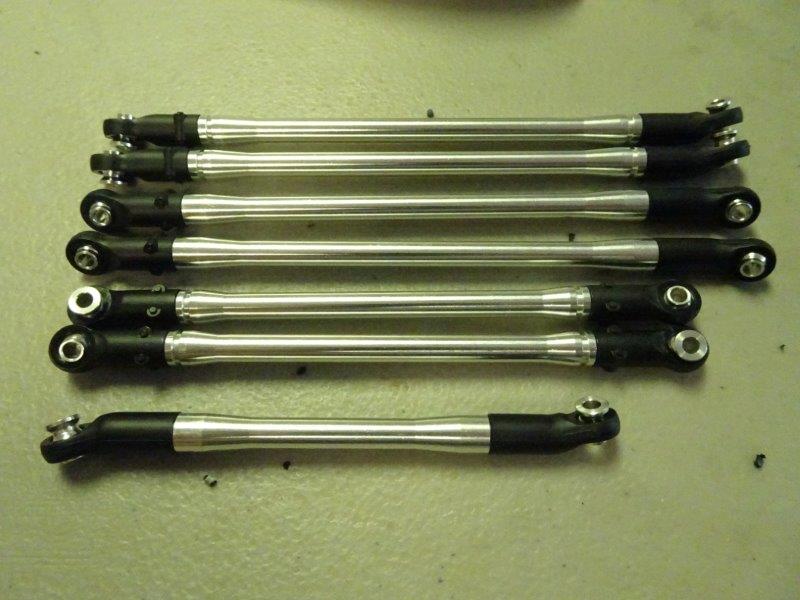 Roo did not take kindly to my act of rebellion. There's nothing like getting lectured by your 9 year-old for not following the rules. More updates to come... Last edited by new2rocks; 09-13-2018 at 07:39 PM. |

|  |
| Sponsored Links | |
| | |
|
09-13-2018, 09:41 PM
| #2 |
| I wanna be Dave Join Date: Sep 2012 Location: Victoria, BC
Posts: 2,257
|
I'm looking forward to your guys take on the newest crawler in town.
|
|
| |
|
09-14-2018, 05:51 AM
| #3 | |
| Rock Crawler Join Date: May 2013 Location: Uniontown
Posts: 588
| Quote:
Thats a very interesting transmission for sure. I presume the axles are unique front and rear or have reversible ring gears (like an ar60)? Sent from my SM-G950U using Tapatalk | |
|
| |
|
09-14-2018, 07:39 AM
| #4 |
| Moderator   Join Date: Sep 2008 Location: PA
Posts: 13,935
|
Great thread title! Also, sweet E46 in the background! Is that an M3 or a standard 3 series?  I don't think I've seen axles on the tree since the OG SCX10. Minor gripe except for a child. Then it's a major annoyance. Ah to be a kid again! I saw your Facebook post about this truck. Very interesting. I won't give that spoiler though. The input shaft housing on the axle looks almost 3D printed with all the striations. |
|
| |
|
09-14-2018, 08:00 AM
| #5 |
| I wanna be Dave Join Date: Aug 2016 Location: Orange County, CA
Posts: 3,643
|
Awesome, another build! I finally started mine last night as well. Will be watching your build too.
|
|
| |
|
09-14-2018, 10:22 AM
| #6 | |||||
| I wanna be Dave Join Date: Apr 2014 Location: North Carolina
Posts: 2,254
| Quote:
Quote:
Quote:
Quote:
-- Re the car, in the words of my wife after we test drove both, "You gotta get the M." one of many reasons I love her as much as I do. -- Kids are great, and Roo is a trip and a half. -- I'll do the spoiling in a bit, lol. -- Those lines in the input shaft housing are just on the inside, probably from the machining of the mold. There aren't any visible lines like that on the outside of any of the molded parts. Quote:
Let's get back to the build, with apologies in advance for skipping around a bit. The battery tray and servo mount combo looks familiar: 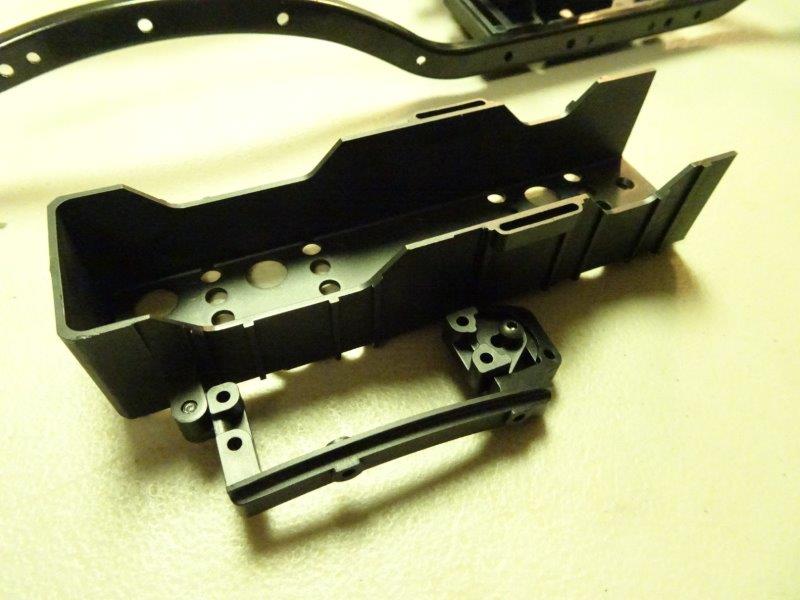 If imitation is the highest form of flattery, Axial should be flattered. Unfortunately, the GMade version is every bit as rubbery as the Axial version: 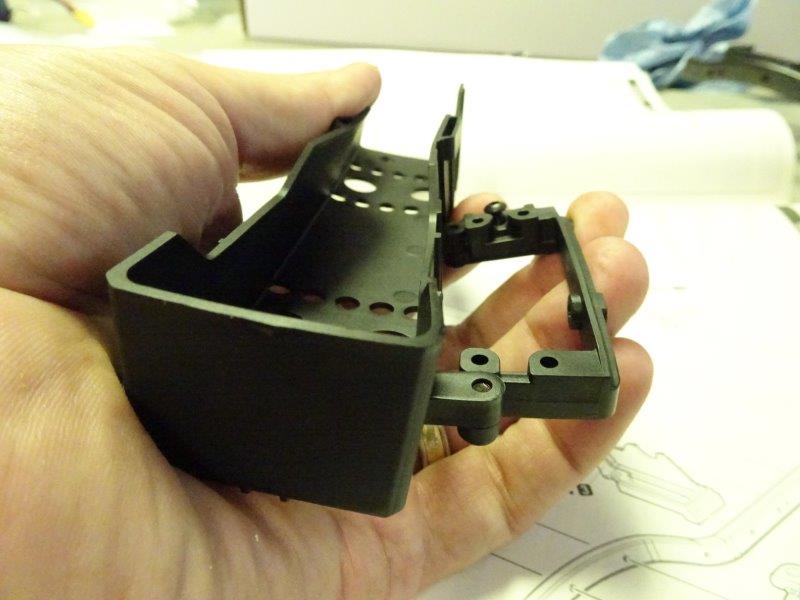 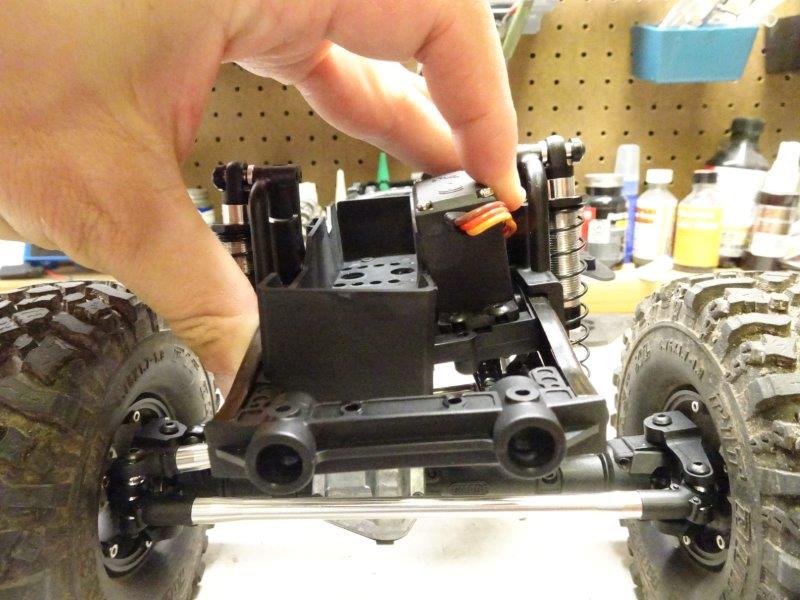 We have an easy fix for that (more on that later). Here's a neat little feature. GMade included an extra little receiver box that mounts underneath the battery tray. Before: 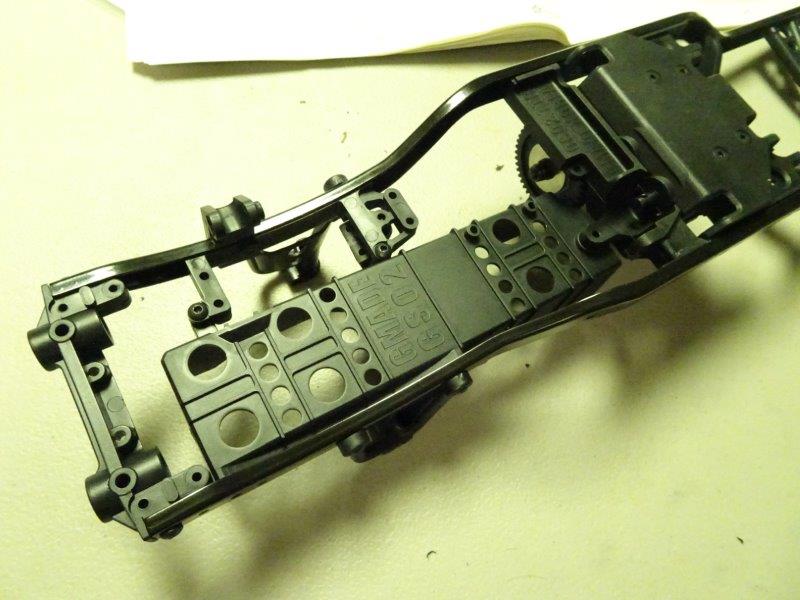 After: 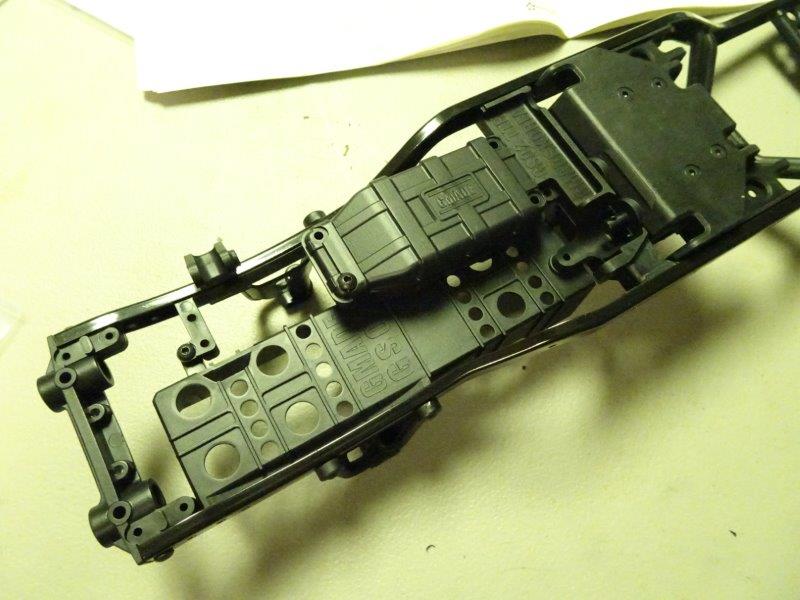 I can't recall any other scale platforms that utilize that space. It's a nice touch, though one I won't need on this build. Roo wasn't pleased that I took on some of the assembly, so he sprung back into action: 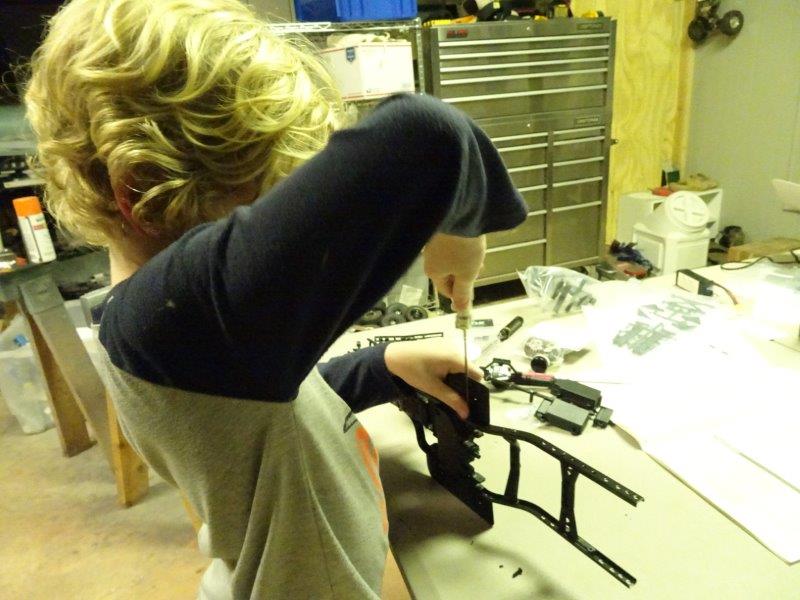 The aluminum bodied shocks went together very nicely and are what I've come to expect from GMade (silky smooth and unlikely to leak): 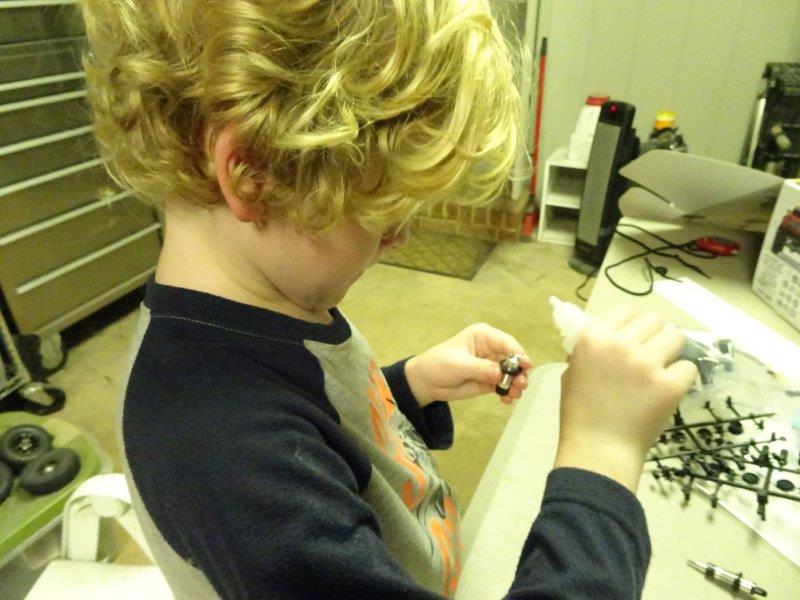 Next up was the cantilever rear suspension. I had heard reports of significant torque twist on this truck. With 3:1 gear reduction in the axles and counter-rotating front and rear driveshafts, the most logical culprit was suspension geometry, and it didn't take long to figure out why. Here are a few pix of the assembly: 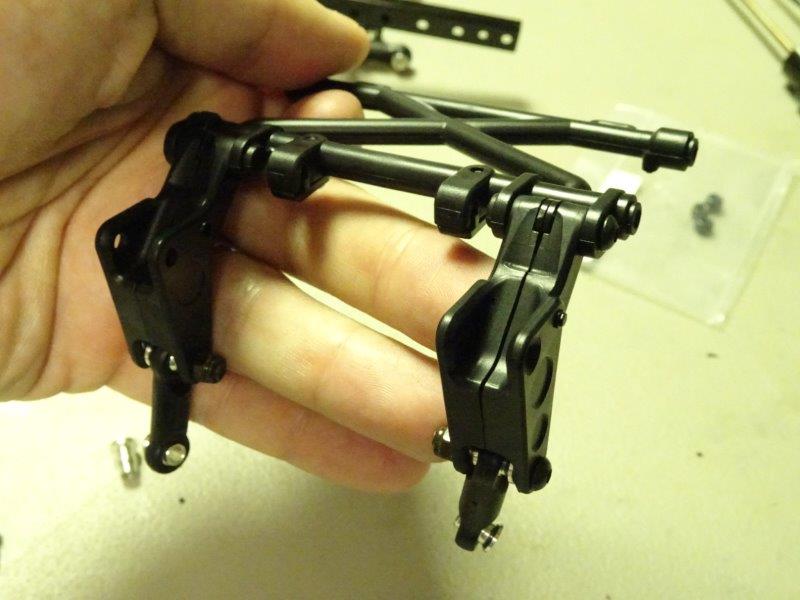 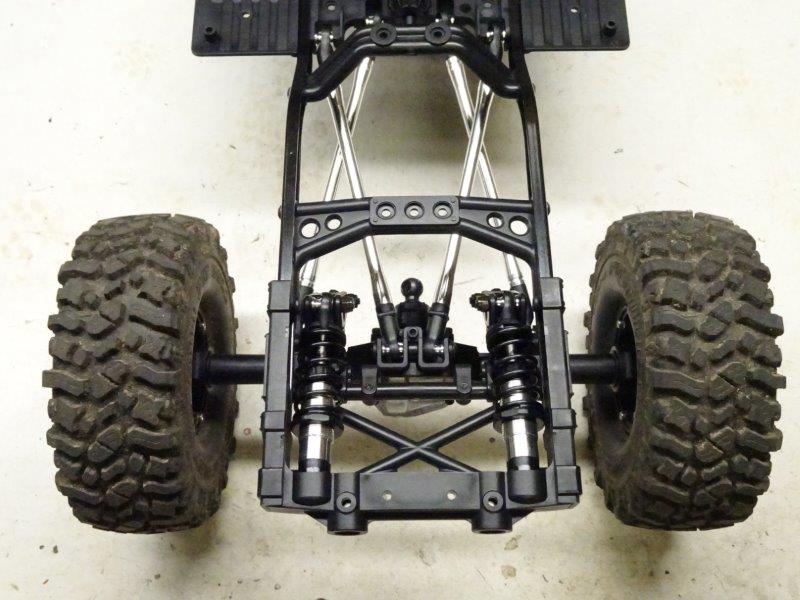 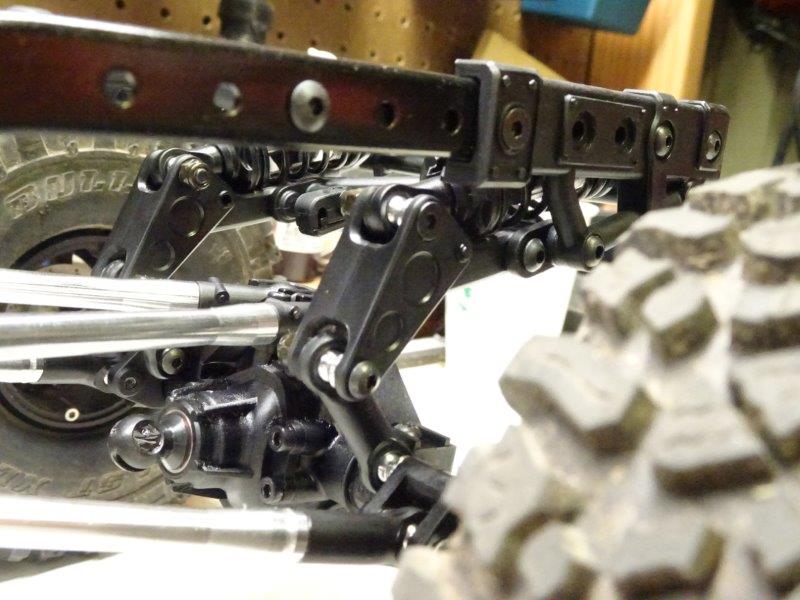 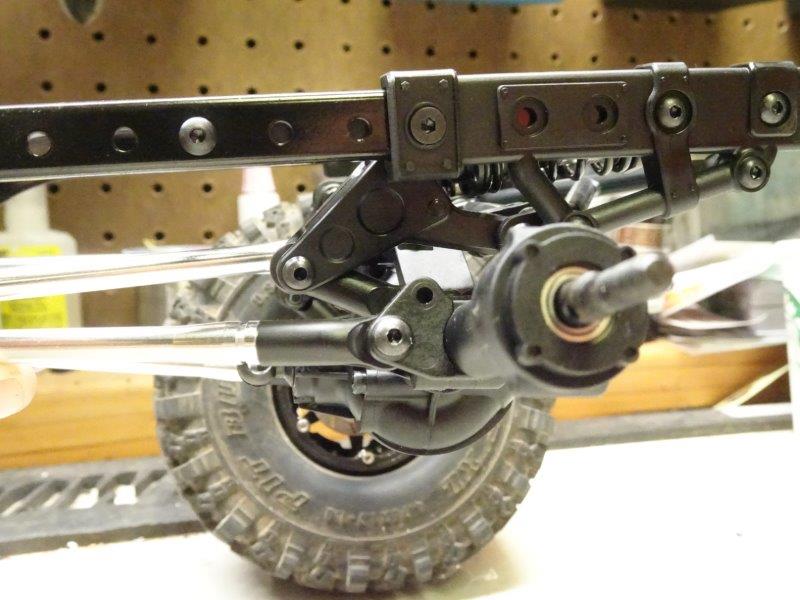 The narrow mounting position of the cantilever struts at the axle (to the inside of the lower link mounts) and the acute angle between the strut and rocker make for a very wobbly rear end. A quick test drive in the yard confirmed that it was comically wobbly (it rolls over faster than my pooch looking for a belly rub), but I already had an idea for a simple fix. More on that later, as well. (Or if you can't wait, go check out my post in the GMade BOM group on FB.) Last edited by new2rocks; 09-14-2018 at 10:30 AM. | |||||
|
| |
|
09-15-2018, 06:06 AM
| #7 |
| Quarry Creeper Join Date: May 2017 Location: UK
Posts: 230
|
Saw your FB mods, copied them. Waiting on parts from Junfac, which will iprove things again. Out tomorrow most of th day with it, should hopefully see an improvement.
|
|
| |
|
09-15-2018, 07:31 AM
| #8 | |
| I wanna be Dave Join Date: Apr 2014 Location: North Carolina
Posts: 2,254
| Quote:
Time for more of this: https://youtu.be/a3HemKGDavw More on the theme of borrowing...note the general similarity in the bottom of the BOM's skid vs. a TRX-4 skid: 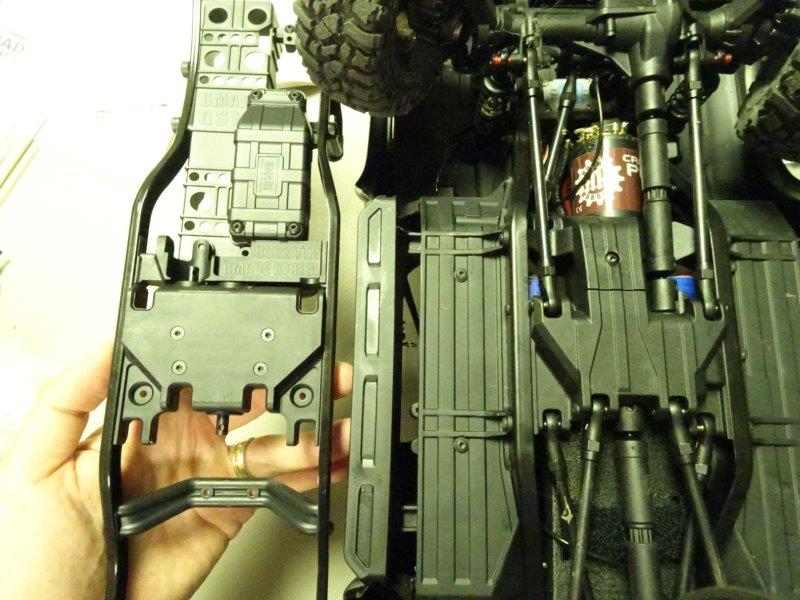 But GMade's is better in part because it is smoother and tucked closer to the chassis rails. Even the receiver box (with "ESC" puzzlingly molded into the underside of the lid even though no proper ESC could fit in there) is similar in concept to the Traxxas designs:  At this point, the guys at Vaterra are probably starting to feel like the red-headed step-child seeing how many ideas GMade borrowed from Axial and Traxxas. Don't worry...Gmade borrowed from you, too, Vaterra: 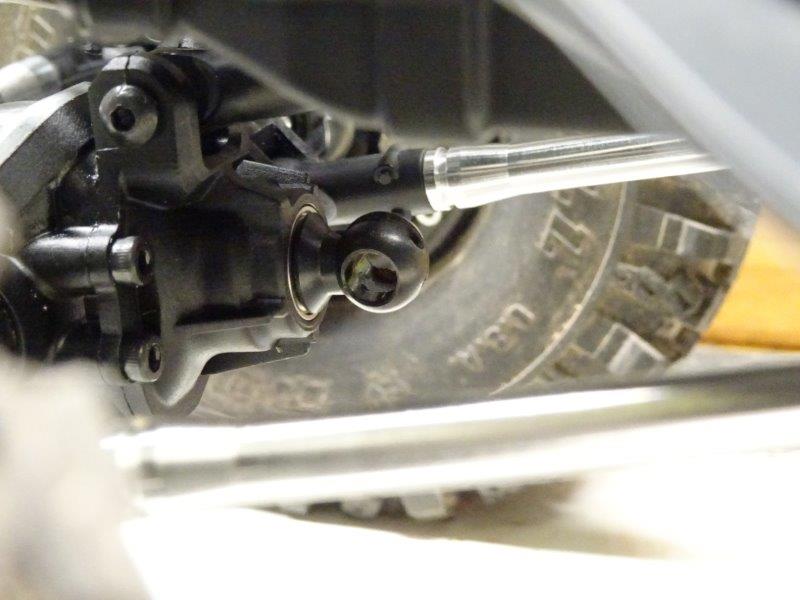 I like GMade's captured input shaft better than Vaterra's because it's more compact and you can put a Junfac shaft on it with no mods. But if you really want to run something else, Gmade/Junfac has already released a universal diff input shaft set for a whopping $7, so no griping about that one, please. What they didn't borrow from any of the mass market scale platforms is the off-centered front pumpkin: 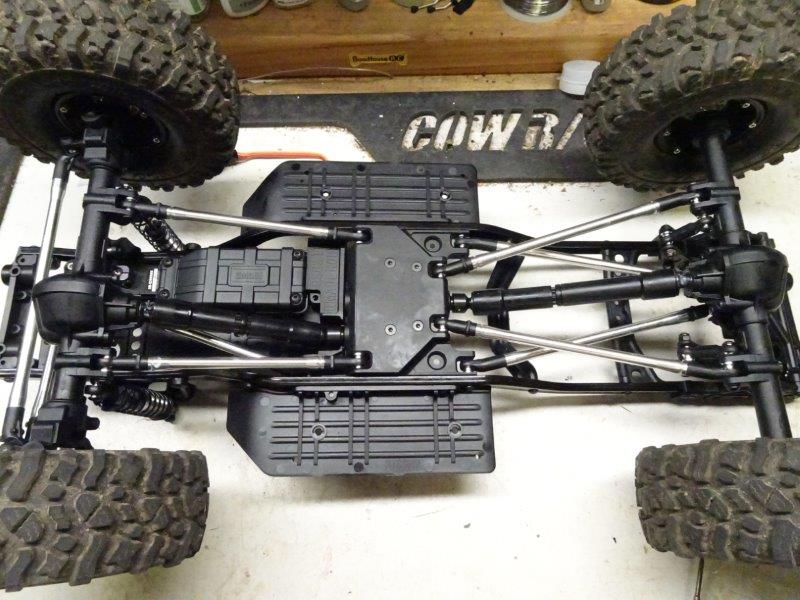 Hooray! Now you're probably wondering how we fixed the floppy steering servo mount and battery tray. I'm glad you asked. On a whim, I decided to try our HD Battery Tray + Servo & Bumper Mount for SCX10 seeing as how the stock tray and servo mount looked so much like those from the 10.2. As it turns out, the front of the BOM's chassis rails is identical to the front of the SCX10 rails (the rear is different). So it was a direct, bolt-on fit with no mods needed: 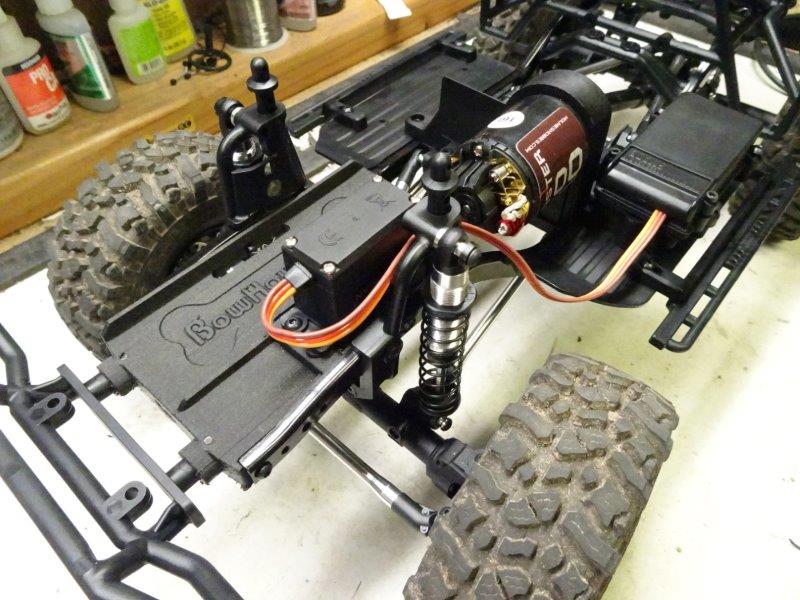 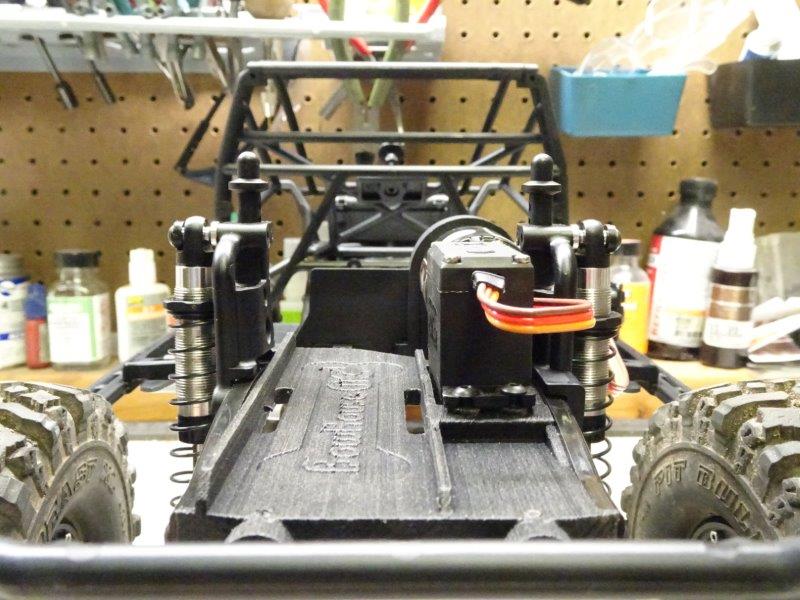 No more crazy chassis flex when trying to turn. And that's now officially our easiest ever product release. After adding a Holmes Hobbies Crawlmaster Pro 16T (one of my all-time faves), a set of Pit Bull 1.9 Rock Beast XLs mounted on Super Shafty Upper Halfty wheels, and the rear cage, it looked like this: 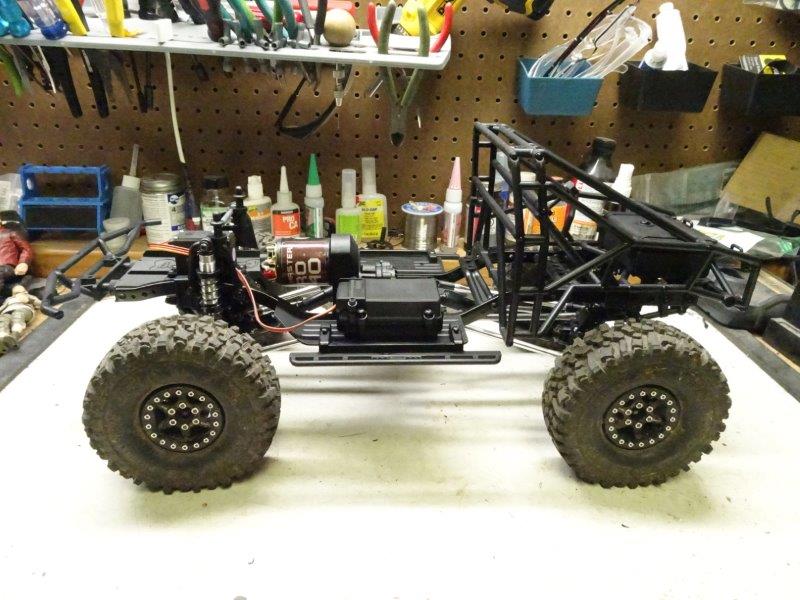 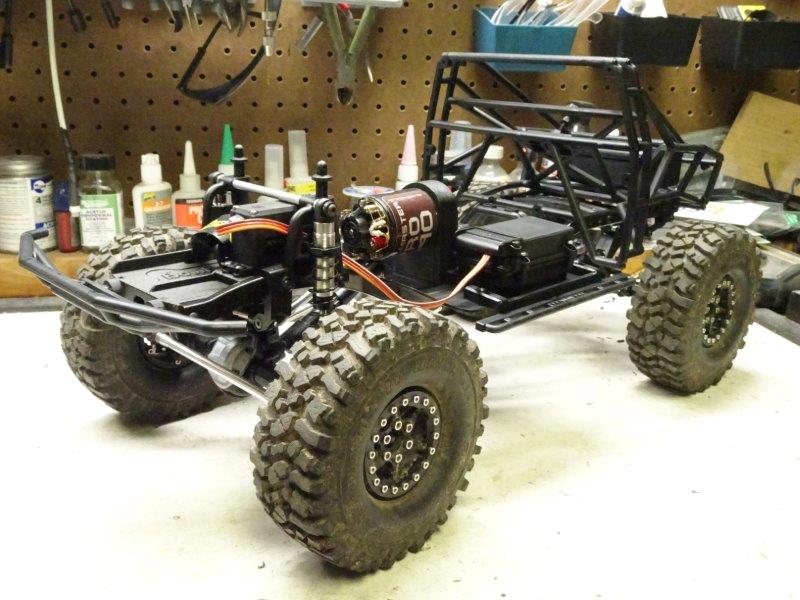 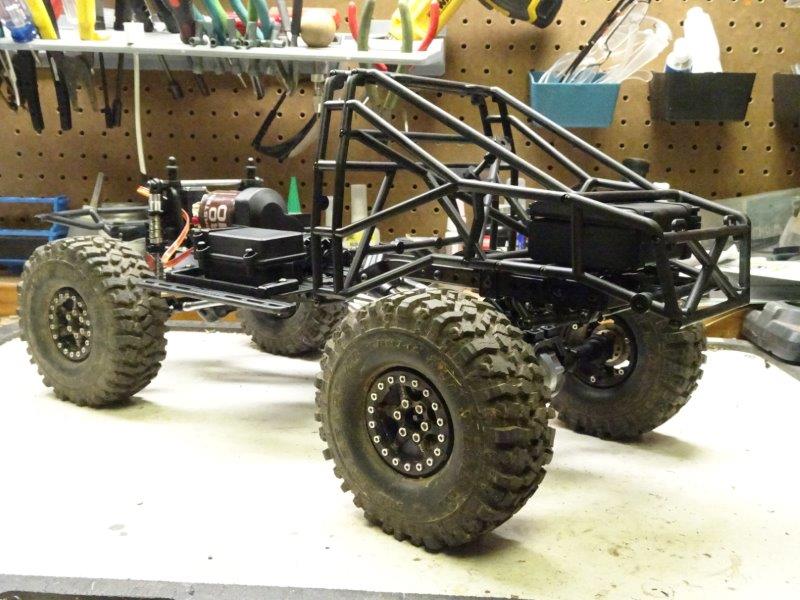 At that point, is was time to take on the body. Normally, bodies take me forever and half. I wasn't expecting to think much of this one, so I decided to do a quick and dirty. Based on what I've shared about the rest of the truck, you shouldn't be surprised that the body has some interesting surprises (in which case are they really surprises?), some more welcome than others. Let's start with a bit of cleverness. GMade decided to mold a chrome grille as a separate piece while still using the lexan from the body for headlight covers: 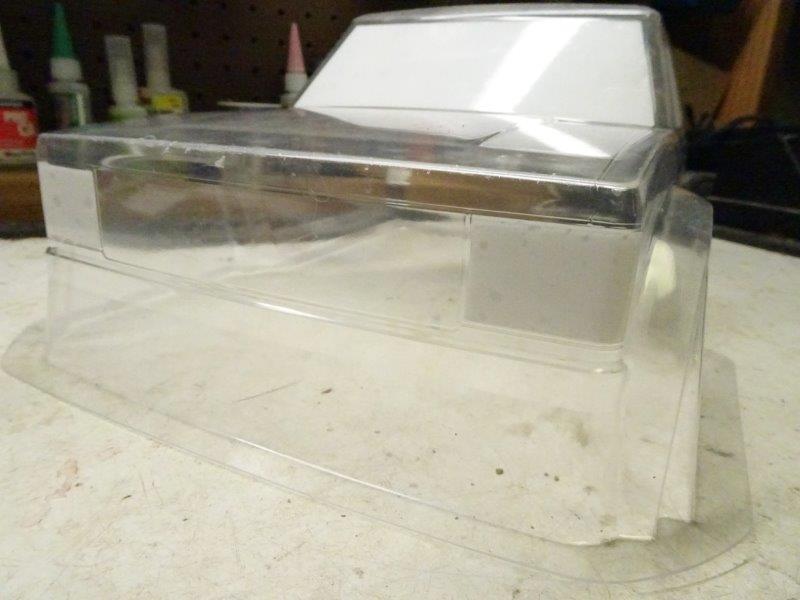 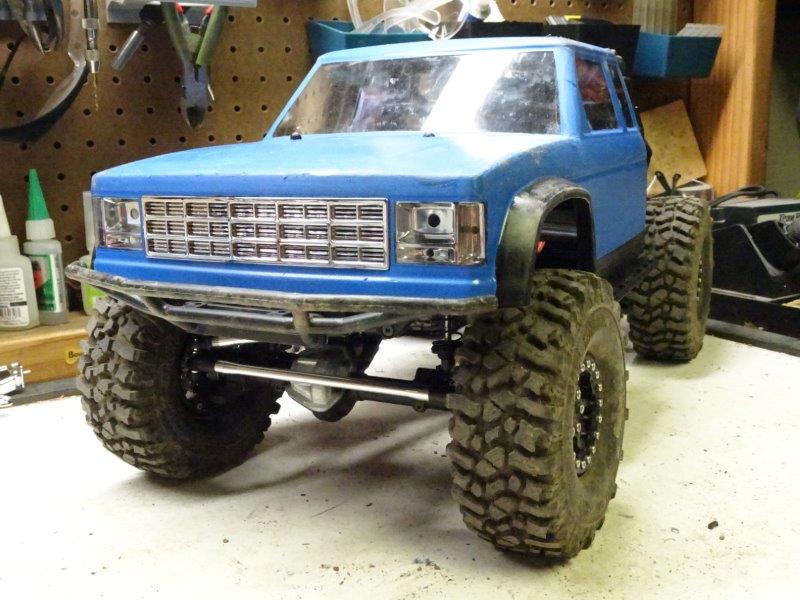 I would have preferred a clear lens tree, but it comes out looking surprisingly good...much better in person than in pictures. Plus, I have to keep reminding myself that the price point for this truck is really good, so what's a little nit here and there. The chrome grille, on the other hand, is a revelation: 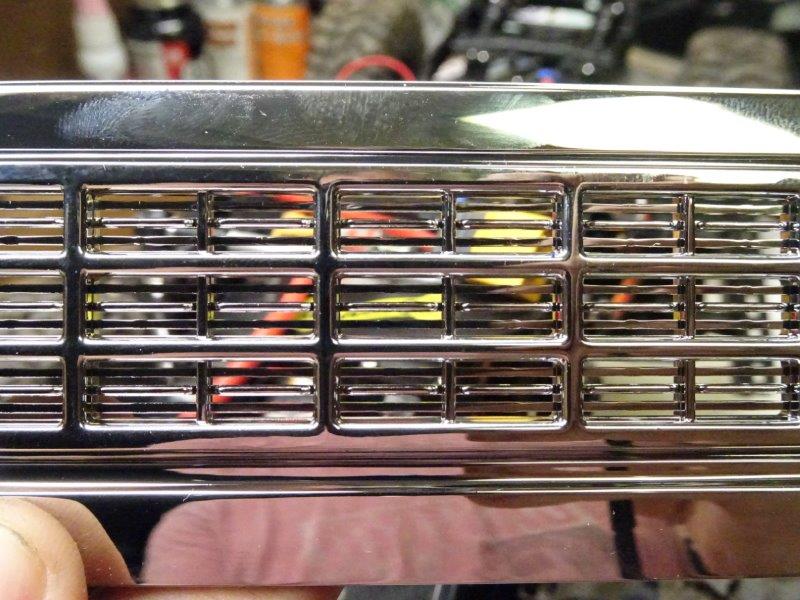 Are you paying attention, RC4WD (not to mention Axial and Vaterra)? No Dremel required. I want to hug the person at GMade responsible for that decision! But I'm not going to hug the person that decided to leave 4 very pronounced plug holes in the side view mirrors (not to mention have them attached to the tree on a visible side of the housing instead of the back side of the housing: 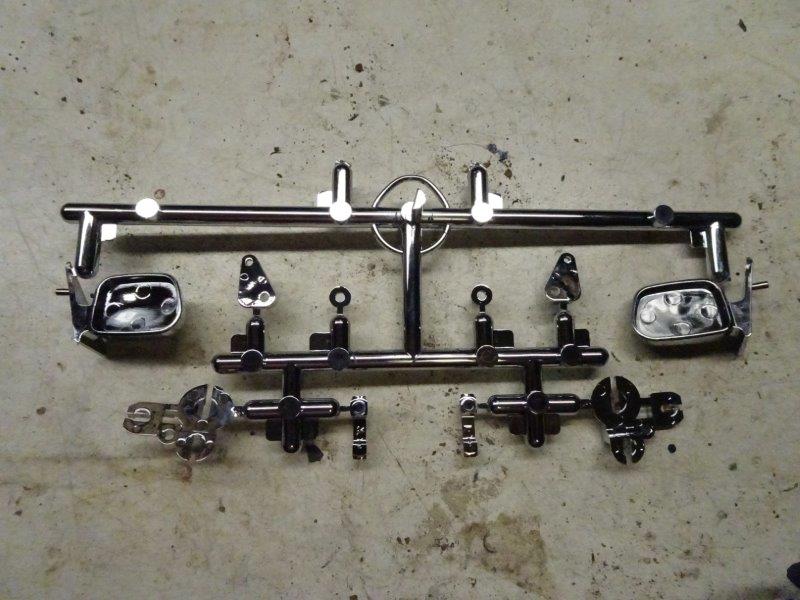  Wipers would have been nice, but again, I'm picking nits. More on the body and the cantilever setup in a minute... | |
|
| |
|
09-15-2018, 07:37 AM
| #9 |
| I wanna be Dave Join Date: Apr 2014 Location: North Carolina
Posts: 2,254
|
The mirror situation was an easy fix: 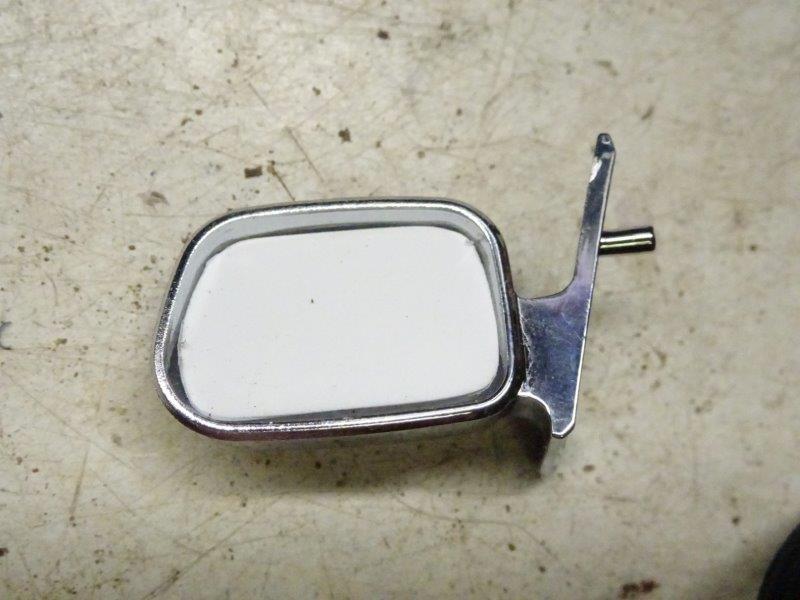 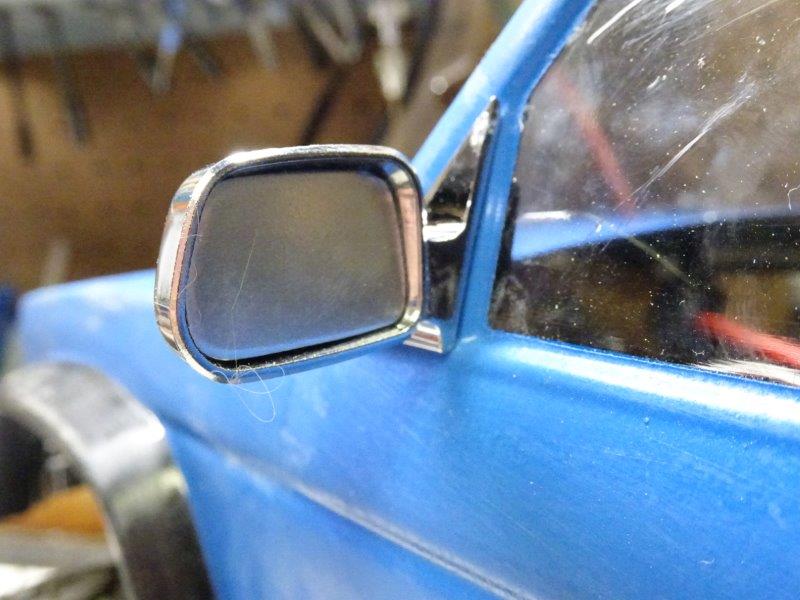 Roo helped with some of the other details: 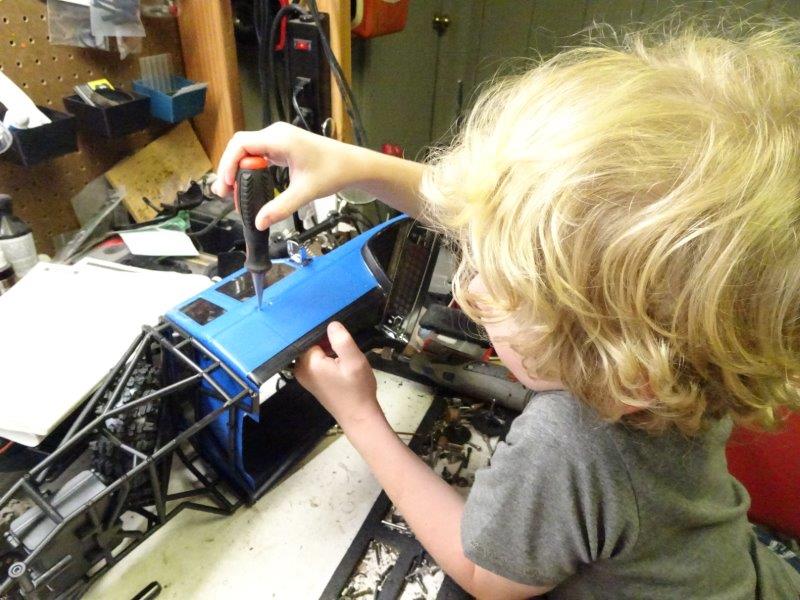 Stickers, of course: 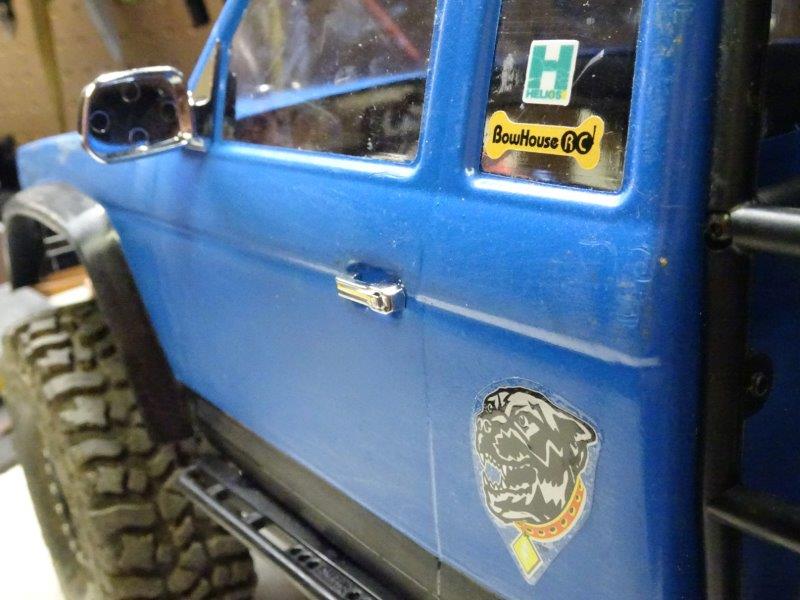 And since this was a quick and dirty job, I messed up plenty: 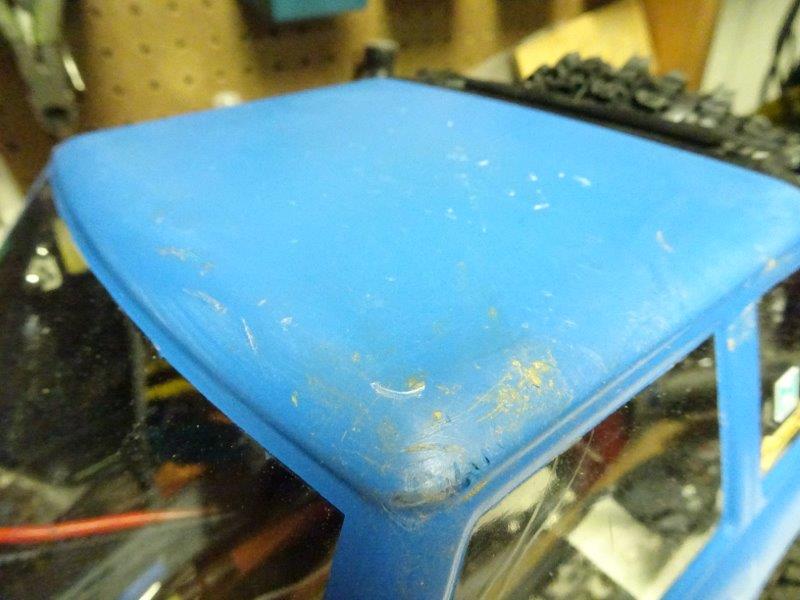 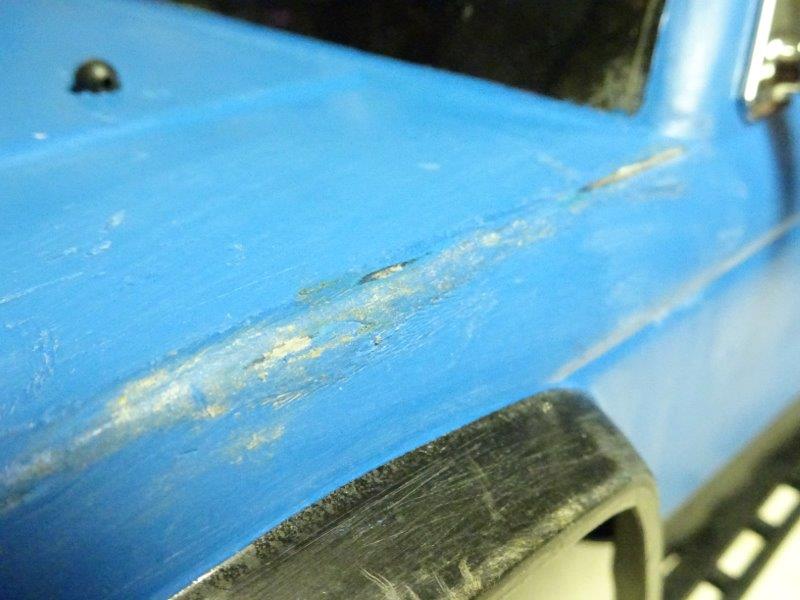 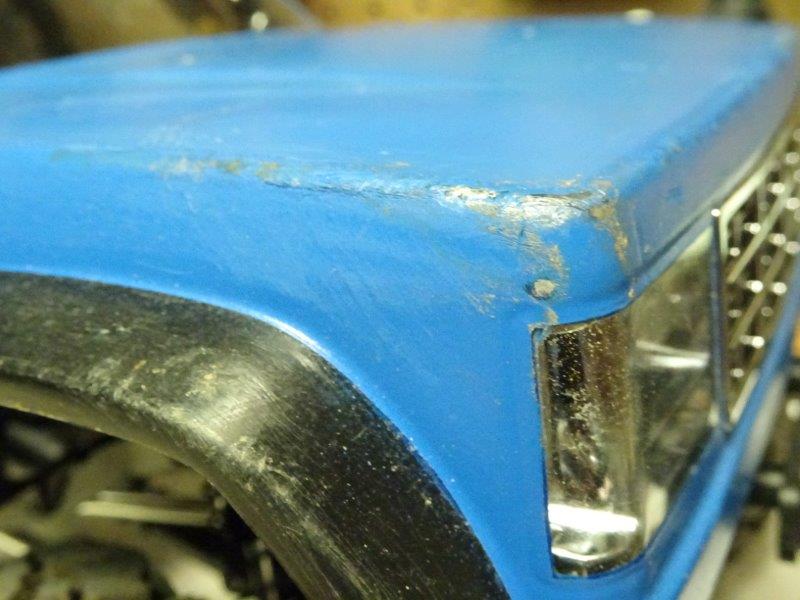 But when all was said and done, I ended up liking the body a lot more than I was expecting:  Maybe even enough to keep it, but we'll see how that goes. Let's get back to the cantilever setup. My very first test run in the yard confirmed that the stock setup was as unstable as a drunk guy riding a unicycle blindfolded (that's pretty unstable, in case you were wondering). It's worth noting that the kit includes rear shock towers, so going to a traditional upright shock setup in the rear is an option if you a body other than the truggy (the cage of this truggy would get in the way of shock towers). Since I was committed to the truggy body, I needed another option. As I began contemplating different ways to fix the rear suspension, I decided to try the first and simplest fix I thought of. Pictures will tell the story: 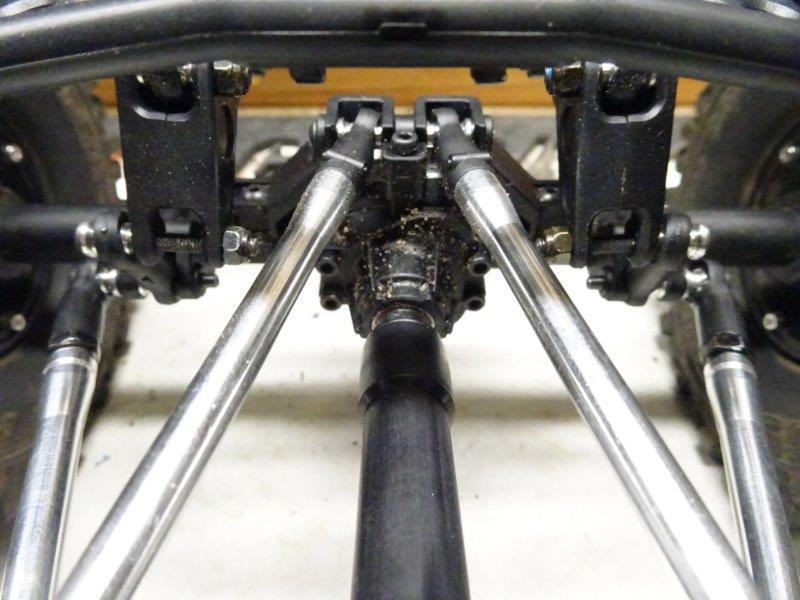  You'll note in the last picture that I added M4 lock nuts as spacers on the lower links to maintain the WB with the wider spacing of the links. A few test runs confirmed that this setup is much, much better than stock, because the suspension now has proper leverage to resist the twisting of the axle and body. It seems good enough so far that I might not even make any more changes. One more item to note about the suspension - I added a shock tower strut to give the towers some rigidity and allow the shocks to do their job: 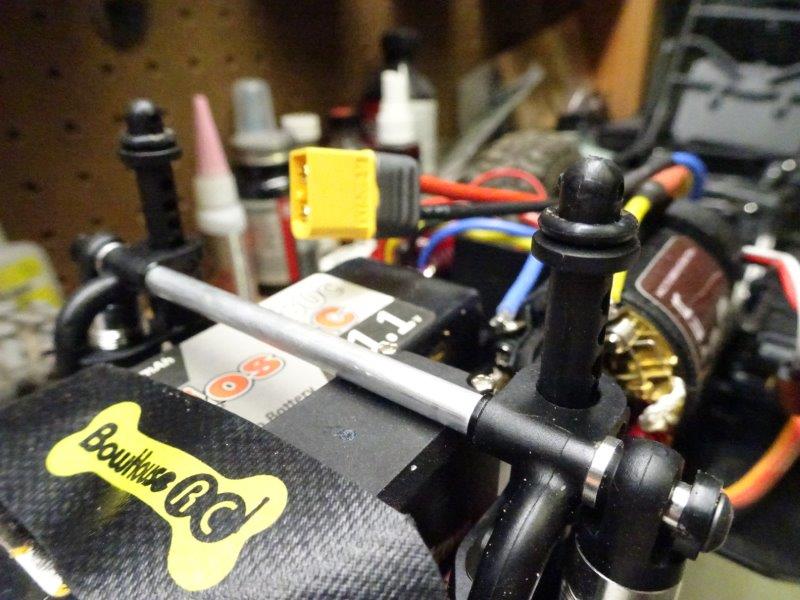 Here are a couple of quick pix I was able to sneak in while Roo and I tested it out between Florence's rain showers today:  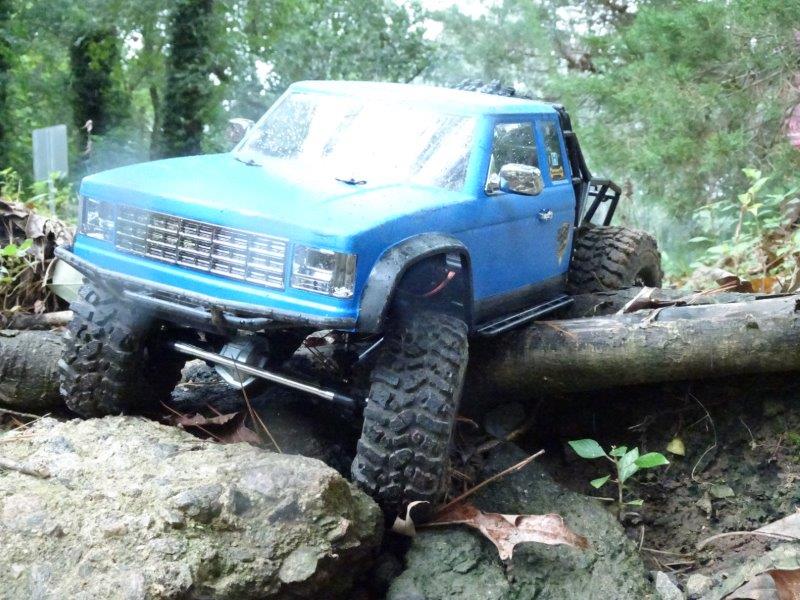 As for my overall impressions, I really, really like this truck. It drives very well and, with the simple rear suspension mod, can easily hold its own with stock versions of the 10.2, TRX-4 and Ascender. And most importantly, it puts a smile on my face when I drive it. I'll try to get a video up this weekend. In the meantime, thanks for following along. |
|
| |
|
09-15-2018, 08:26 AM
| #10 |
| I wanna be Dave Join Date: Sep 2011 Location: Douglassville, PA
Posts: 4,227
|
Nice write up as always. I really like the look of the body - something different from all the Jeeps, Yotas and Chevy's. Very Ranger-esque. Mine comes today - very excited!! |
|
| |
|
09-15-2018, 10:36 AM
| #11 |
| RCC Addict  Join Date: Jul 2008 Location: Fox Valley WI
Posts: 1,691
|
I agree, OSRC. Something different was a good enough reason to get one for myself. I just started assembly this morning. |
|
| |
|
09-15-2018, 05:47 PM
| #12 | |
| RCC Addict Join Date: Feb 2016 Location: Princeton, North Carolina, USA
Posts: 1,499
| Quote:
| |
|
| |
|
09-15-2018, 05:55 PM
| #13 |
| RCC Addict Join Date: Nov 2010 Location: England
Posts: 1,603
|
I think he has shown the same photo twice. An earlier post has the plastic links to the rockers on the inside of the link mounts and the links to the centre of the link mounts, which i guess is the stock way. Thinking of getting one of these BOM's, but will be waiting a while yet.. Still loving my Ascender's. |
|
| |
|
09-15-2018, 06:07 PM
| #14 | |
| RCC Addict Join Date: Feb 2016 Location: Princeton, North Carolina, USA
Posts: 1,499
| Quote:
| |
|
| |
|
09-15-2018, 07:03 PM
| #15 | |||
| I wanna be Dave Join Date: Apr 2014 Location: North Carolina
Posts: 2,254
| Quote:
Quote:
Yes and yes. Screwing with you...  Quote:
To paraphrase Yoda: Do. Or do not. There is no think. https://youtu.be/BQ4yd2W50No | |||
|
| |
|
09-16-2018, 06:47 PM
| #16 |
| I wanna be Dave Join Date: Apr 2014 Location: North Carolina
Posts: 2,254
|
Heres a quick video I put together showing the difference in performance between the stock cantilever setup and the relocated setup: https://youtu.be/5GR7iH8bFKU It's such an easy mod, and the difference is night and day (as you can see). Last edited by new2rocks; 09-16-2018 at 08:37 PM. |
|
| |
|
09-16-2018, 11:40 PM
| #17 |
| RCC Addict Join Date: Feb 2016 Location: Princeton, North Carolina, USA
Posts: 1,499
|
Thanks for posting that! Pretty obviously superior. I'll be incorporating that into the build. |
|
| |
|
09-17-2018, 01:18 AM
| #18 | |
| Quarry Creeper Join Date: May 2017 Location: UK
Posts: 230
| Quote:
Yep, have done this to mine- thanks for the heads up! Miles better now Also interested in the battery mount, wondering if there is enough space to run a front mounted servo- already got a mount and still run 3s with where the motor is mounted.... Last edited by Old n ratty; 09-17-2018 at 03:54 AM. | |
|
| |
|
09-18-2018, 05:54 PM
| #19 |
| RCC Addict Join Date: Feb 2016 Location: Princeton, North Carolina, USA
Posts: 1,499
|
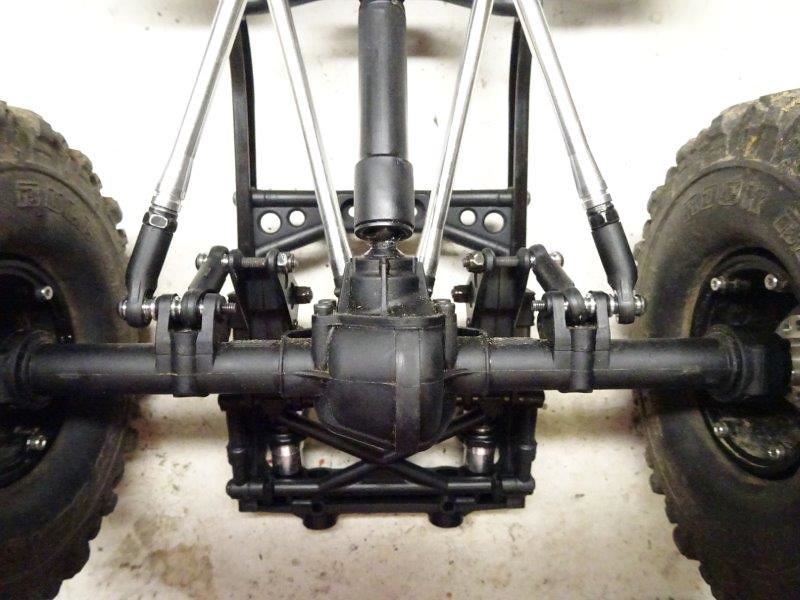
Here's an in-process perspective shot of David's suspension change. Appropriate here since I submit it be dubbed the N2RS mod (new2rocks spread) . I added the spacers because stability and I had some.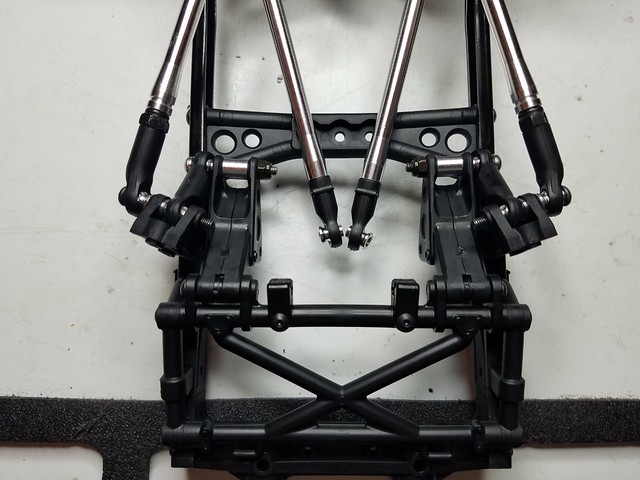 Last edited by 2mtech; 09-18-2018 at 08:02 PM. |
|
| |
|
09-18-2018, 06:39 PM
| #20 | |
| I wanna be Dave Join Date: Aug 2016 Location: Orange County, CA
Posts: 3,643
| Quote:
| |
|
| |
 |
 You dropped a BOM on me - Similar Threads
 | ||||
| Thread | Thread Starter | Forum | Replies | Last Post |
| bilinvic's Gmade GS02 BOM | bilinvic | G-Made Crawlers | 152 | 01-02-2022 05:32 PM |
| GS02 Bom | Old n ratty | G-Made Crawlers | 89 | 11-17-2018 01:53 AM |
| Now In Stock the NEW Gmade Korea GS02 BOM 1/10 4WD Ultimate Trail Truck Kit! | RPP Hobby | RPP Hobby | 0 | 08-24-2018 02:49 PM |
| |


 Linear Mode


