| |
 11-22-2008, 12:18 PM
| #1 |
| RCC Addict  Join Date: Aug 2005 Location: New Oxford PA
Posts: 1,290
|
Big_ern contacted me a while ago about making him a replica of my Toyota comp tuber and I graciously accepted so I figured I would post the progress here. Now this won't be a complete truck. he pretty much just needs the cage and the skins attached to it so once I'm done I'll let him complete the progress Not much to post yet but I did start the skins 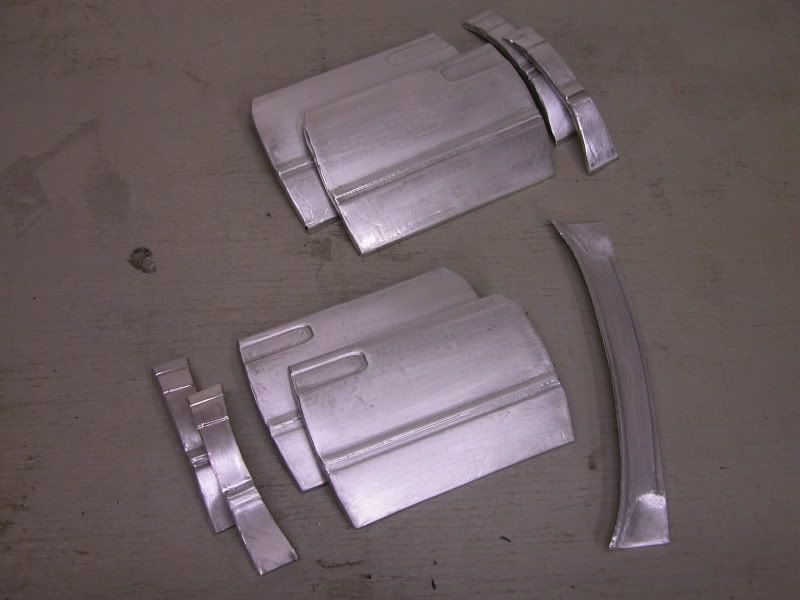 [/quote] [/quote]I'll be working on the cage tomorrow so i'll post up once i get that started Last edited by Metal Masher; 12-05-2008 at 10:29 PM. |

|  |
| Sponsored Links | |
| | |
|
11-22-2008, 07:06 PM
| #2 |
| 20K Club   Join Date: Jul 2004 Location: Sending illegals home one Hayabusa at a time.
Posts: 22,981
|
I always love your aluminum bodies. Posting for subscription....... |
|
| |
|
11-23-2008, 01:28 PM
| #3 |
| Rock Crawler Join Date: May 2008 Location: Mansfield, PA
Posts: 560
|
Amazing work as usual Metal Masher  |
|
| |
|
11-23-2008, 05:00 PM
| #4 |
| I wanna be Dave Join Date: May 2007 Location: Taylors Falls just hanging with the MNRCRC crew.
Posts: 7,843
|
Amazing that's just great work.
|
|
| |
|
11-24-2008, 05:40 AM
| #5 |
| RCC Addict Join Date: Aug 2005 Location: New Oxford PA
Posts: 1,290
|
Thanks guys. I got started on the chassis but didn't get much time to work on it.  I should have the basic cage done tonight. |
|
| |
|
11-24-2008, 09:20 PM
| #6 |
| RCC Addict Join Date: Aug 2005 Location: New Oxford PA
Posts: 1,290
|
I got more done on the cage. I've had some practice with my TIG so I figured i would use that for this build starting with the hoop I added the lower door bars 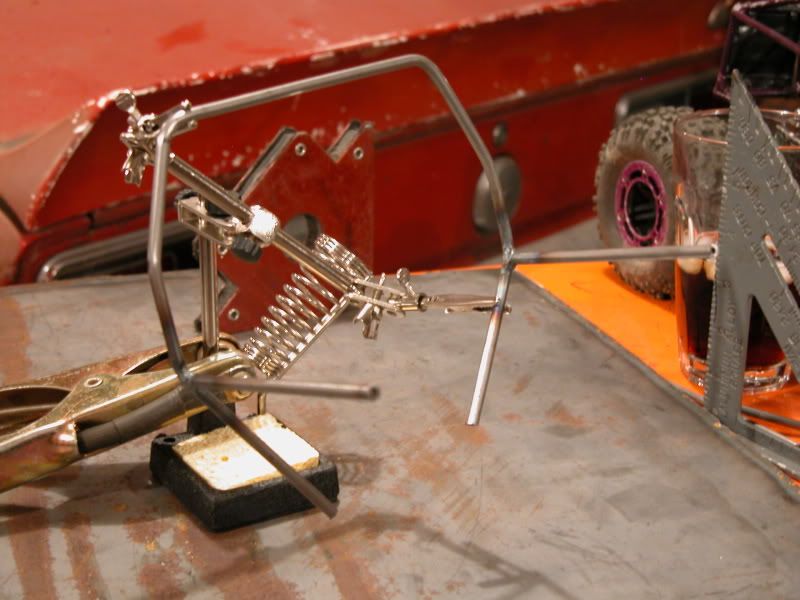 The welds came out pretty good 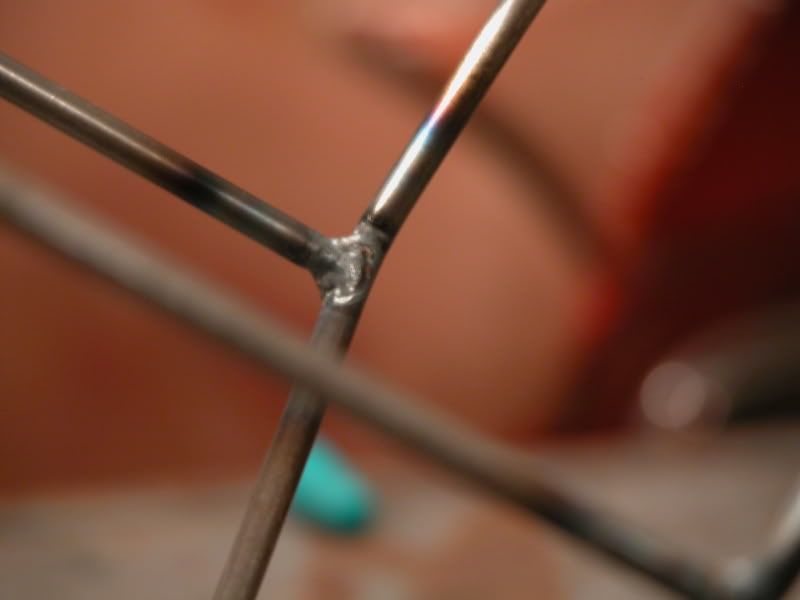 Then I added the forward cage bars 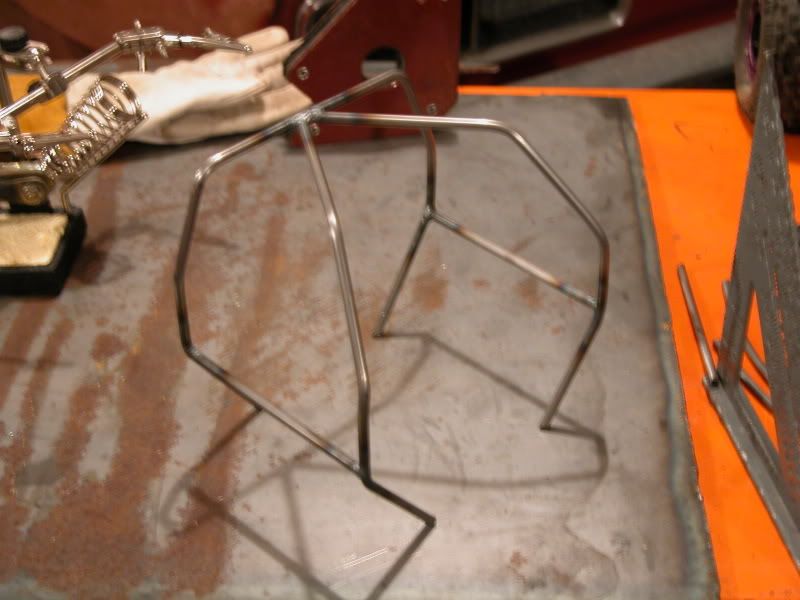 then the rest of the roof 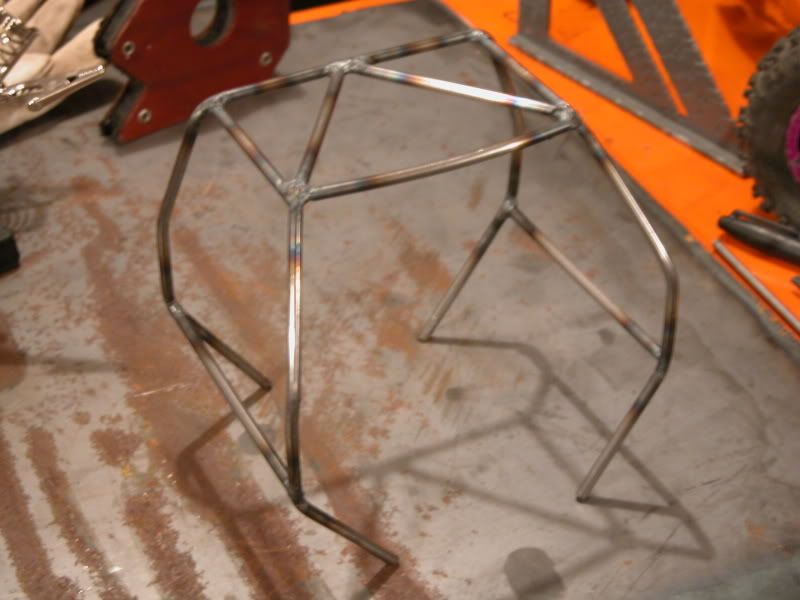 More tomorrow |
|
| |
|
11-25-2008, 12:53 AM
| #7 |
| Rock Stacker Join Date: Dec 2007 Location: Langley BC
Posts: 77
|
Great work so far Blake  Thanks for starting a build thread for it. Cool that you decided to tig it too. Now I'm going to have to get my friend who can tig as well to tig the next parts on my 1:1 so it can have some cool fab on it too You do awesome work. I'm really looking forward to it He is building a replica of my 1:1 toyota with a couple mods (dovenosed & boatsided) like his Comp Tuber hilux has. This is how it looked when I bought it:      This is how it looks now .jpg) .jpg) I have a brand new plastic hilux body from tamiya, but contacted blake to build me one of his sweet aluminum bodies so It can take some abuse like my 1:1 has Last edited by Big_Ern; 11-26-2008 at 02:15 AM. |
|
| |
|
11-25-2008, 07:55 AM
| #8 |
| Suck it up!  Join Date: Mar 2008 Location: Arkansas
Posts: 11,652
|
That is a really interesting cab mod on the 'yota. Is that your dry cleaning in the back? |
|
| |
|
11-25-2008, 09:32 AM
| #9 | |
| I wanna be Dave  Join Date: Oct 2006 Location: Martinsburg WV
Posts: 2,781
| Quote:
Are you the same guy that was making bodies out of pie-plates a couple years ago? | |
|
| |
|
11-25-2008, 02:32 PM
| #10 | |
| Rock Stacker Join Date: Dec 2007 Location: Langley BC
Posts: 77
|
Here's Metal Masher's "Comp tuber" build thread which has a little more detail on how he builds the skins: Comp tuber Quote:
| |
|
| |
|
11-26-2008, 05:41 AM
| #11 | |
| RCC Addict Join Date: Aug 2005 Location: New Oxford PA
Posts: 1,290
| Quote:
I might have been me but i've been making metal bodies since. I have 3 trucks now and some demo cars. more progress I got the forward bars and rad hoop done, added the door bars, sliders, and rear harness bar. 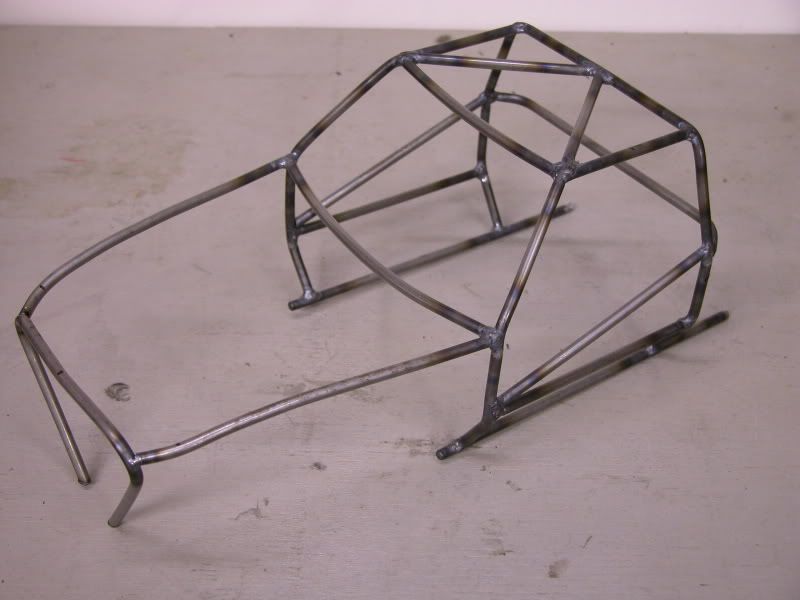 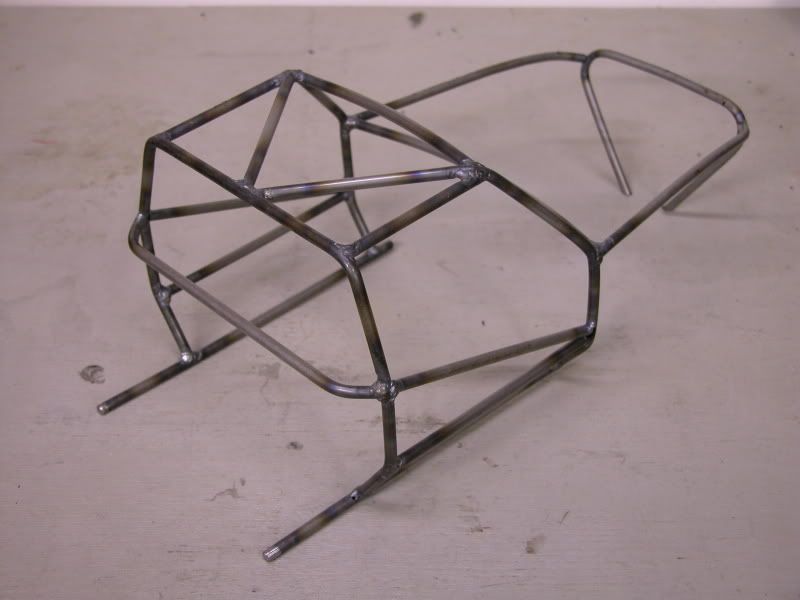 I still need the tabs for the panels, cross bar behind the seats and the mount for the mini bed. It's getting close! | |
|
| |
|
11-26-2008, 01:15 PM
| #12 |
| Rock Stacker Join Date: Dec 2007 Location: Langley BC
Posts: 77
|
Great work! That harness bar is bent exactly how I had in mind when I asked, I like how you tied the door bars in at the same point too.
|
|
| |
|
11-26-2008, 01:23 PM
| #13 |
| RCC Addict Join Date: Jun 2008 Location: Monroe, NC
Posts: 1,547
|
Looks awesome, can't wait to see the finished body. *SUBSCRIBED* Justin |
|
| |
|
11-26-2008, 03:53 PM
| #14 |
| Newbie Join Date: Aug 2007 Location: Long Grove, IA
Posts: 39
|
Your builds look great, I am assuming by the description of your forming you are using soft aluminum, O stock. we use that stuff to make helicopter parts and after they are formed we cook them and qwench them in cold water to heat treat them. we have an oven that goes to 950 degrees but i think even the oven on 450 for a few minutes would help to make them a little stronger. Just an idea, like i said they do look great.
|
|
| |
|
11-26-2008, 04:52 PM
| #15 |
| Newbie Join Date: Oct 2008 Location: joppa
Posts: 24
|
Love the build!! I need one of your chassis blake, i promise not to run it against you at the svsc comps .
|
|
| |
|
11-26-2008, 11:18 PM
| #16 | |||
| RCC Addict Join Date: Aug 2005 Location: New Oxford PA
Posts: 1,290
| Quote:
Quote:
Quote:
More progress. I added the tabs for the boatsides and the ones that hold the roof and doors in place. 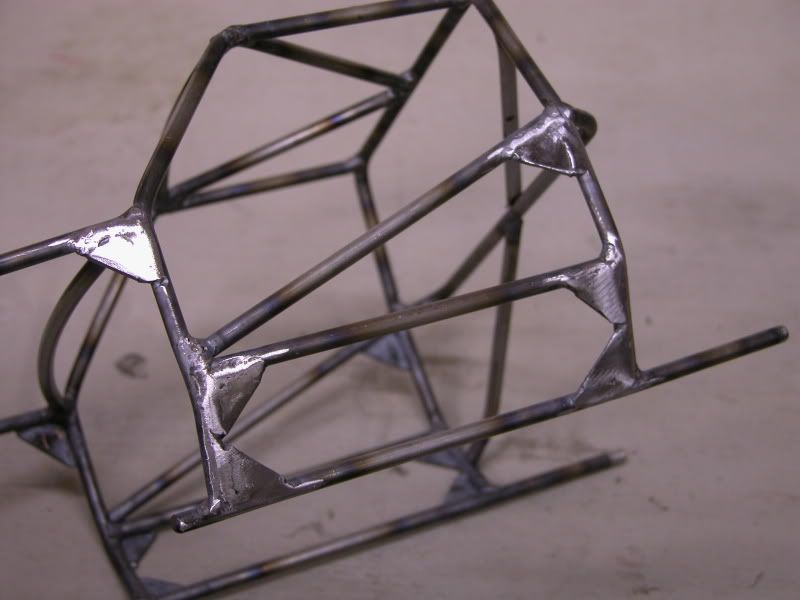 and the cross bar 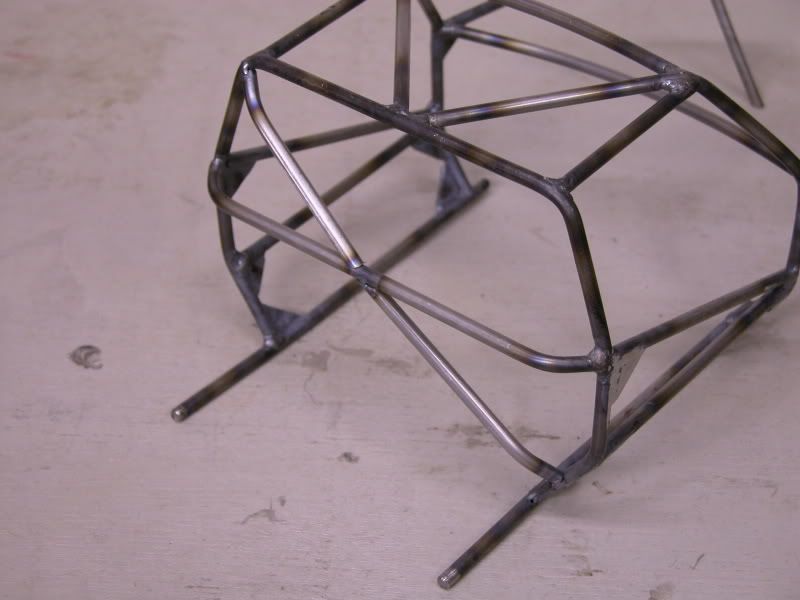 It's also looking like i'm going to go over all the welds again to clean them up. I did one and it came out much nicer 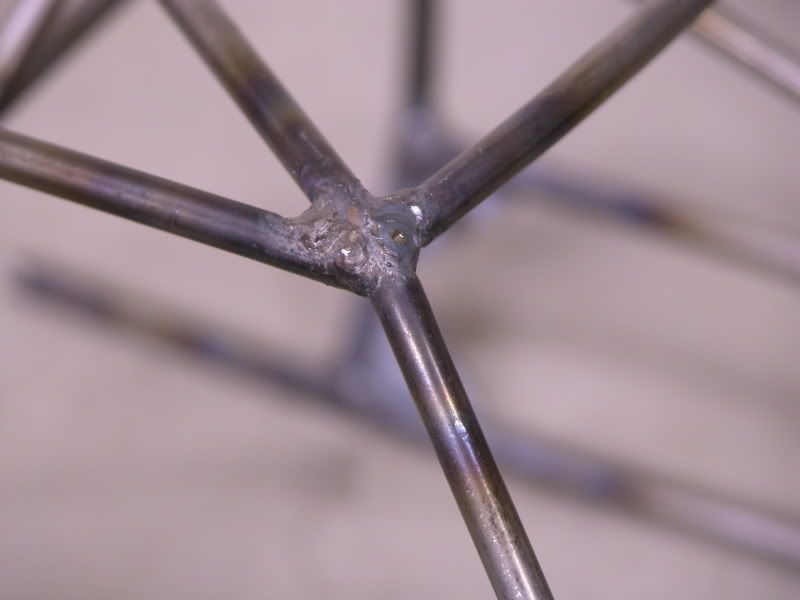 It's getting there! 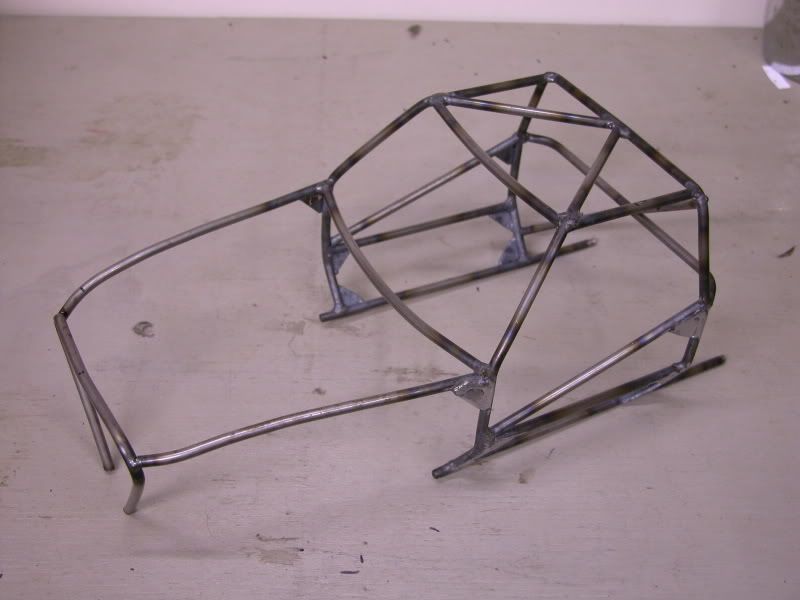 I still need the tabs for the front fenders, cowl and the mount for the mini bed. not much longer! | |||
|
| |
|
11-26-2008, 11:57 PM
| #17 |
| Rock Stacker Join Date: Oct 2007 Location: Maple Ridge,B.C.
Posts: 71
|
What are you goin to do with the bottom of the rad hoop? Very nice work Can wait to see it in person when it's finished. Your a lucky guy Ern. Last edited by rockrawler; 11-27-2008 at 12:04 AM. |
|
| |
|
11-27-2008, 12:06 AM
| #18 |
| Rock Crawler Join Date: Aug 2008 Location: B.C.Canada
Posts: 608
|
Cool project Killer work on those skins man!!! Hey Ern next time your in 'loops' ya gotta bring that up so me and Rich can check it out! |
|
| |
|
11-27-2008, 01:07 PM
| #19 | |
| Rock Crawler Join Date: May 2008 Location: Mansfield, PA
Posts: 560
| Quote:
As far as the tig welding goes, your welds look plenty strong... but it looks like you need to turn your heat way down. It also will help to use smaller diameter filler wire or just less filler. | |
|
| |
|
11-29-2008, 08:10 AM
| #20 | ||
| RCC Addict Join Date: Aug 2005 Location: New Oxford PA
Posts: 1,290
| Quote:
Quote:
I got a some progress on the mini bed. I figured it would be the most difficult part on the body and wanted to get it done before i want any further on the cage First I made some molds for the bed floor and back usind some styrene. 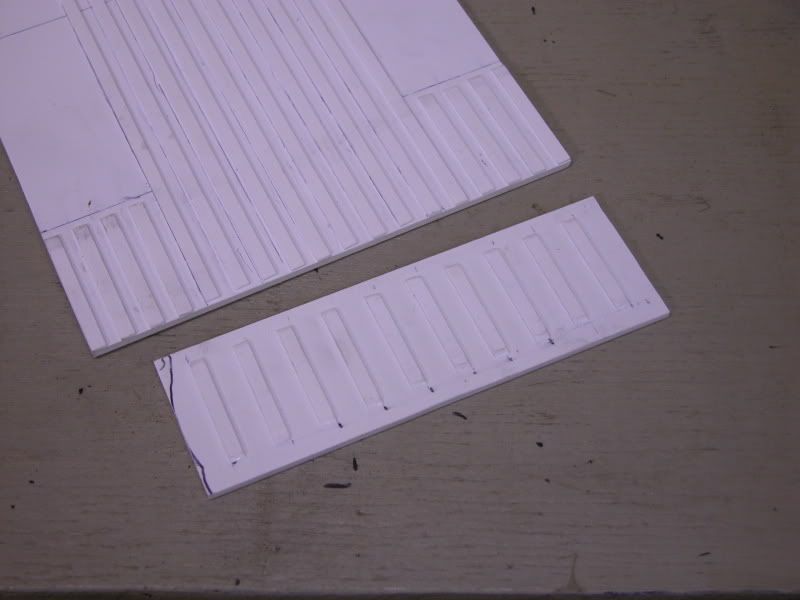 Then I molded the sections I needed for the bed 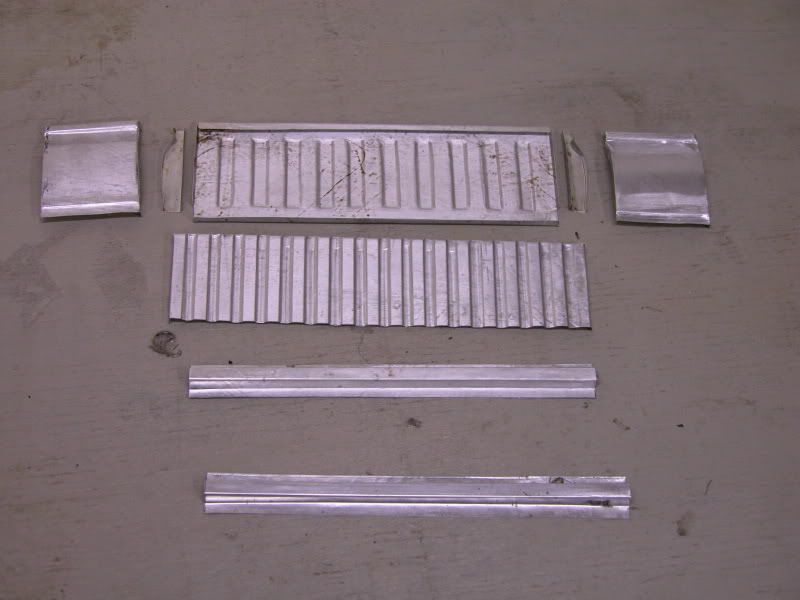 Next I added the filler panels to the bed sides 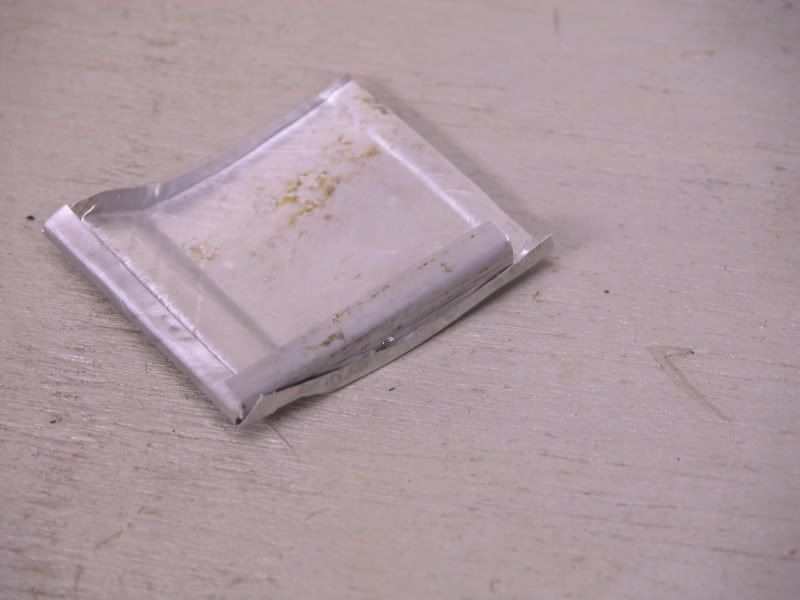 If you look in the pic of the real truck above you'll see that's exactly how the factory did it Next I punched holes in the floor for the fastening screws 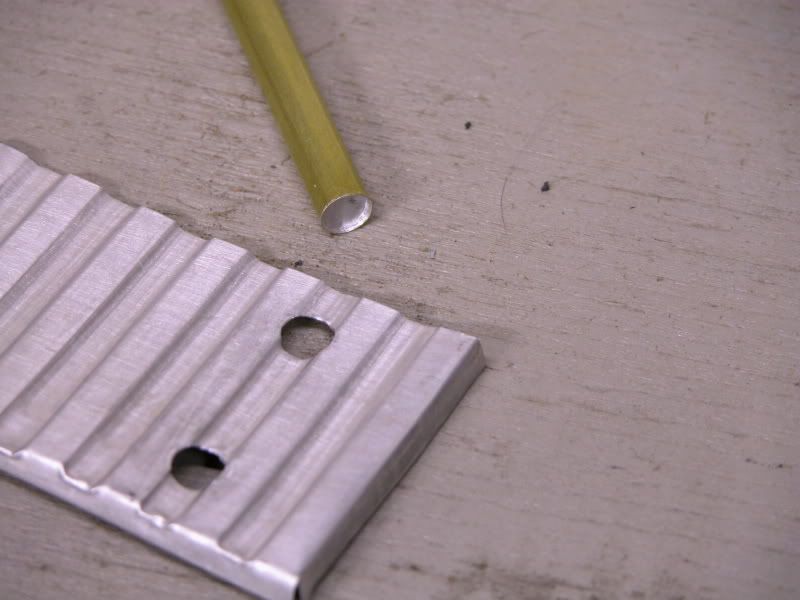 then I added the floor supports 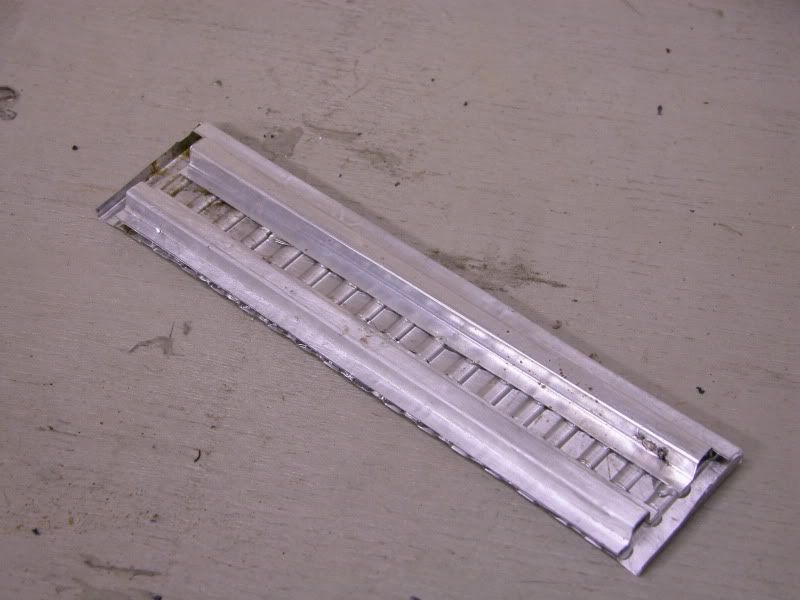 glued the back on 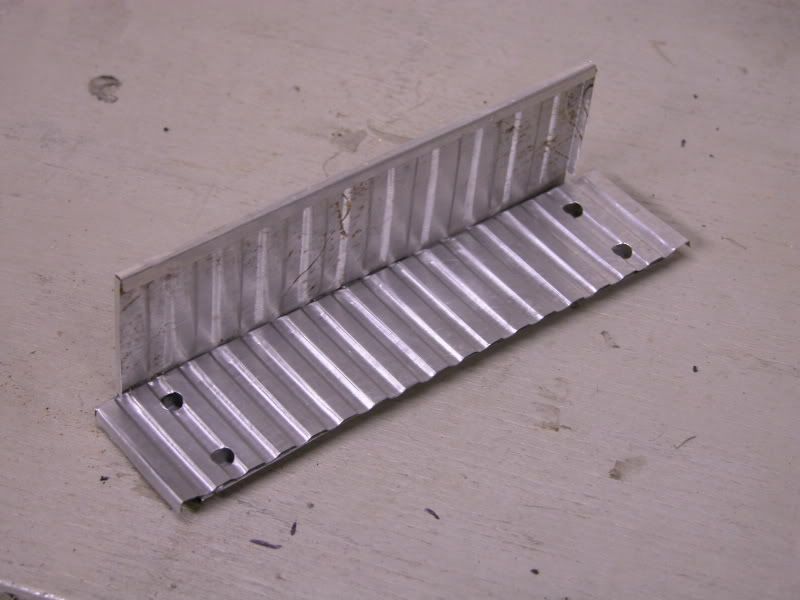 then the sides 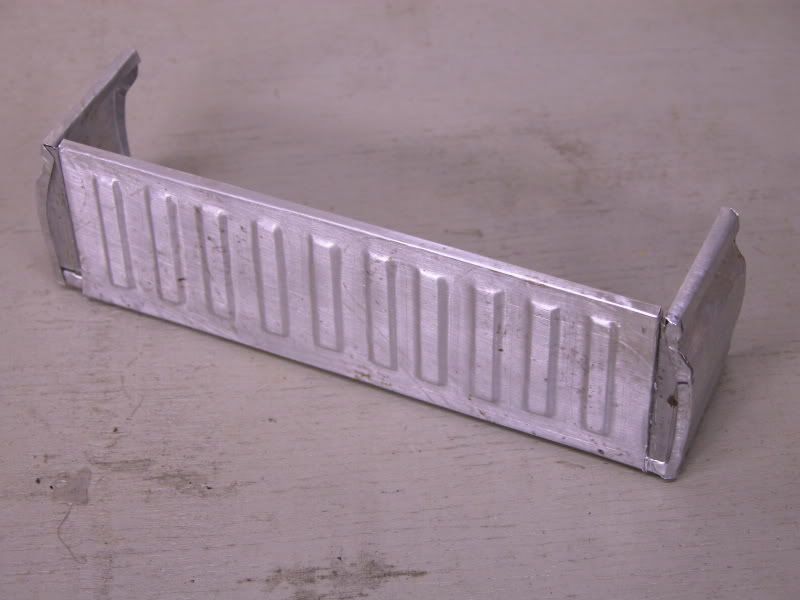 In all it tured out pretty good  even the seam looks factory 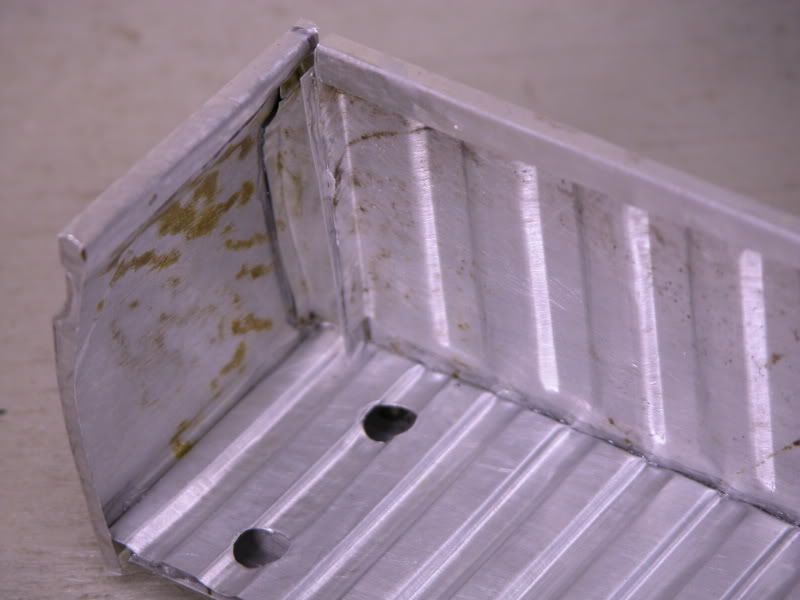 I'll be finishing the cage today. I'll post up the progress tonight. | ||
|
| |
 |
| |


 Linear Mode


