| |
 09-19-2011, 12:51 PM
| #1 | |
| Quarry Creeper Join Date: Dec 2009 Location: in front of you...
Posts: 248
|
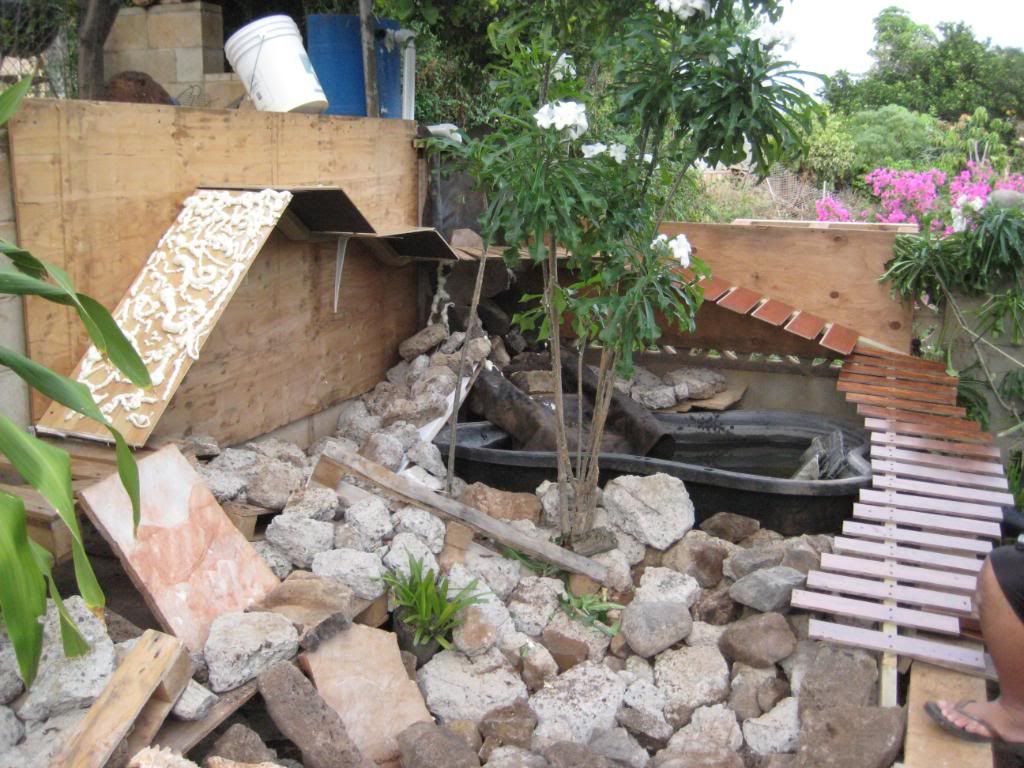
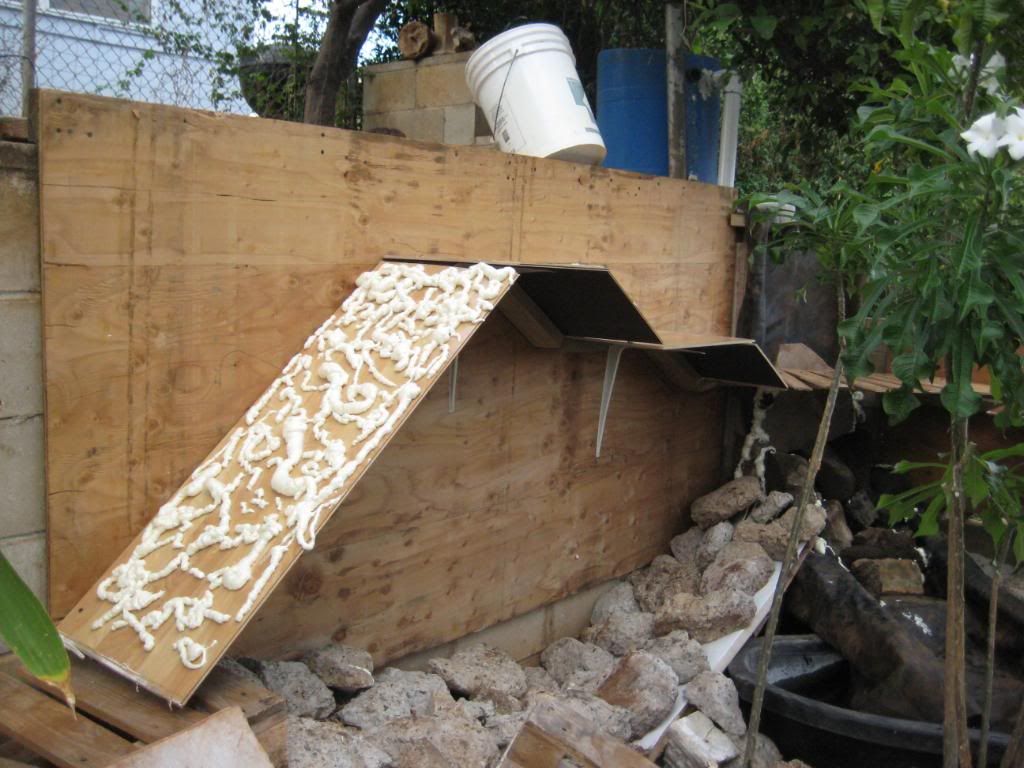
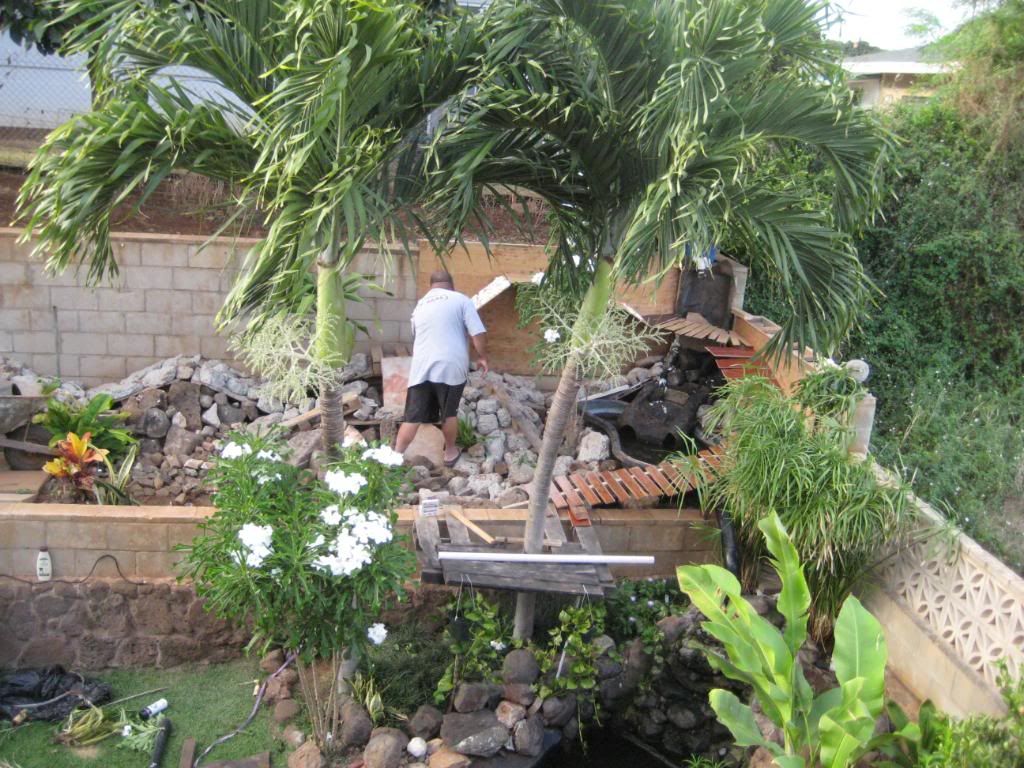
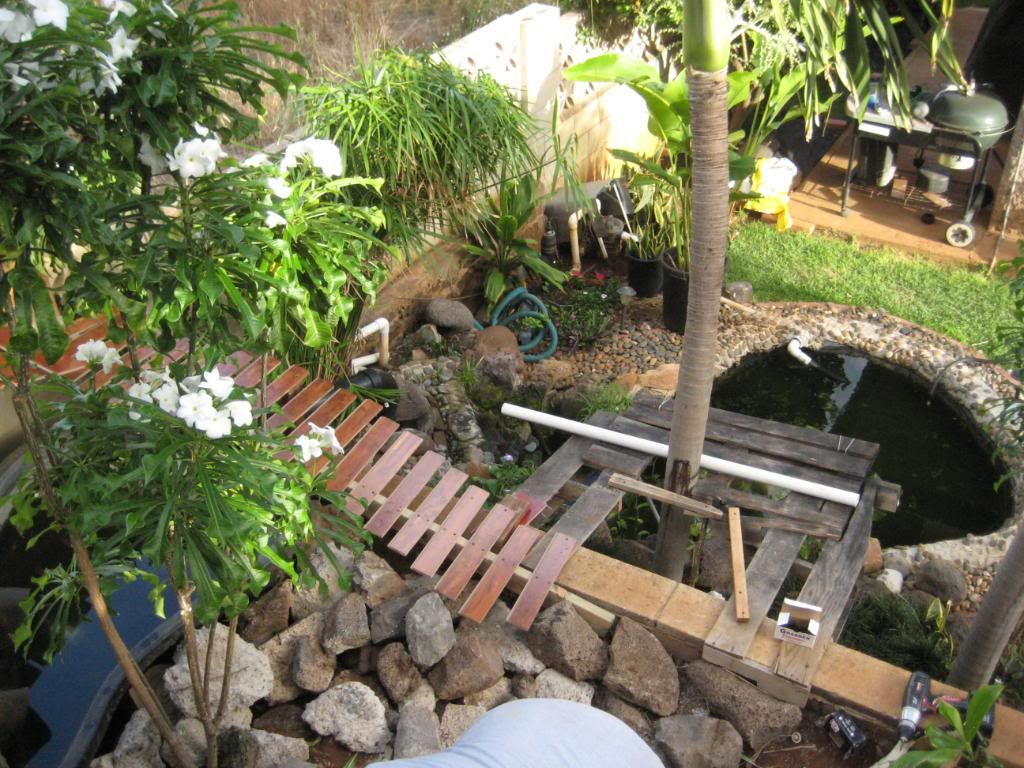
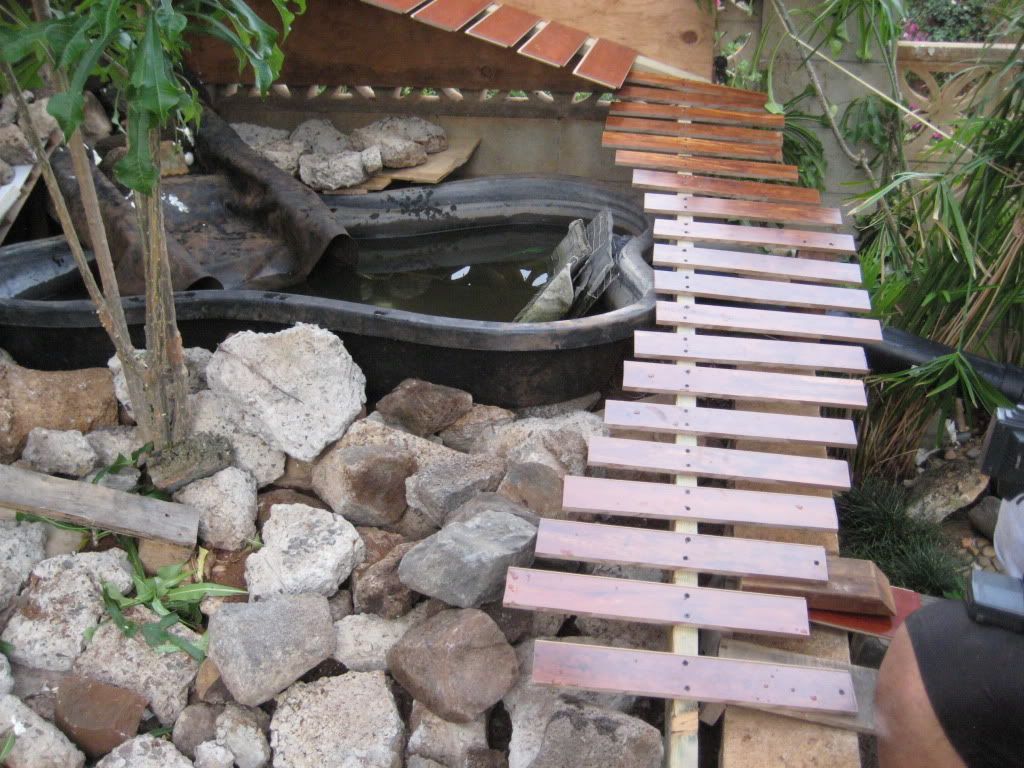
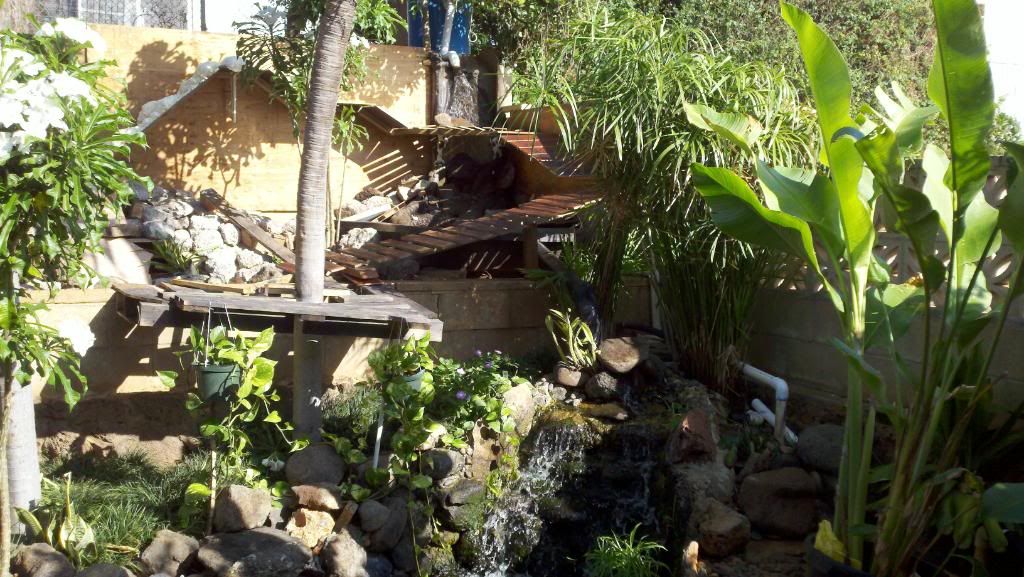
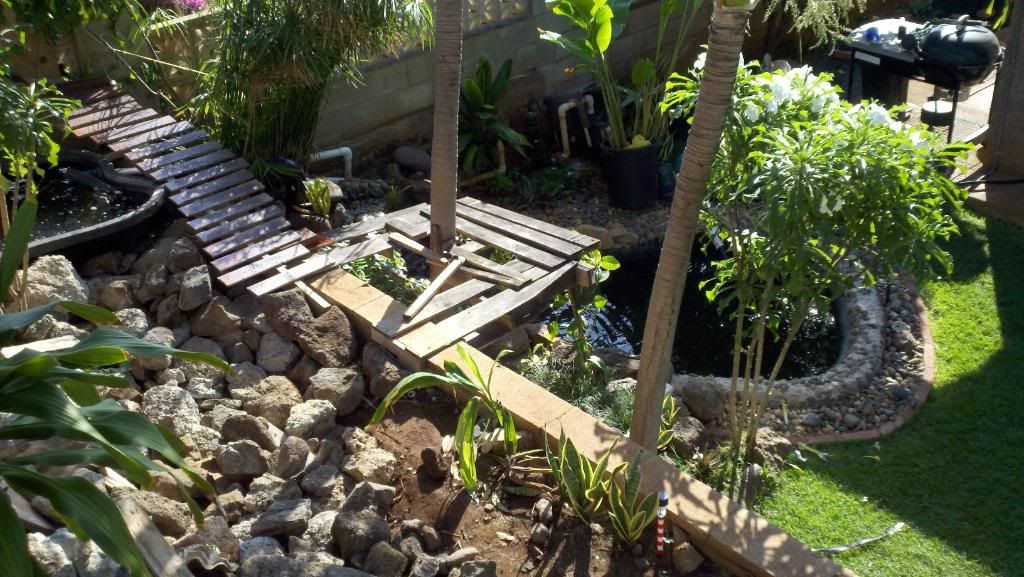
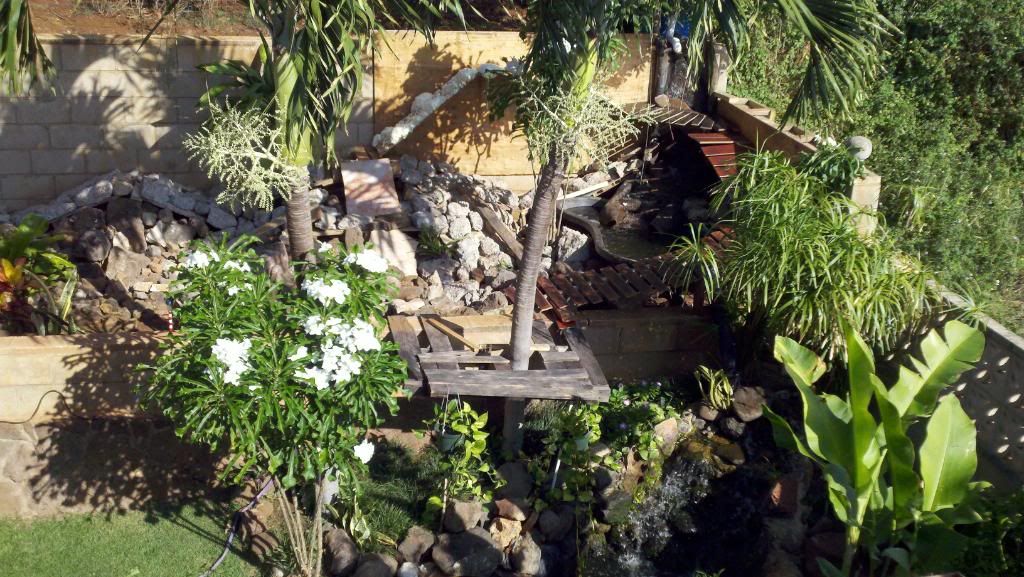
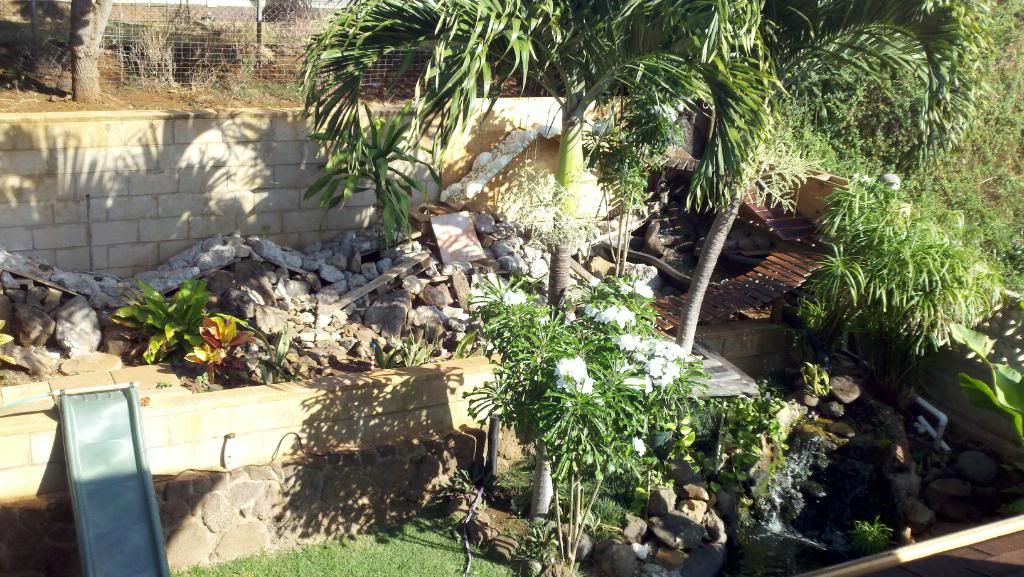
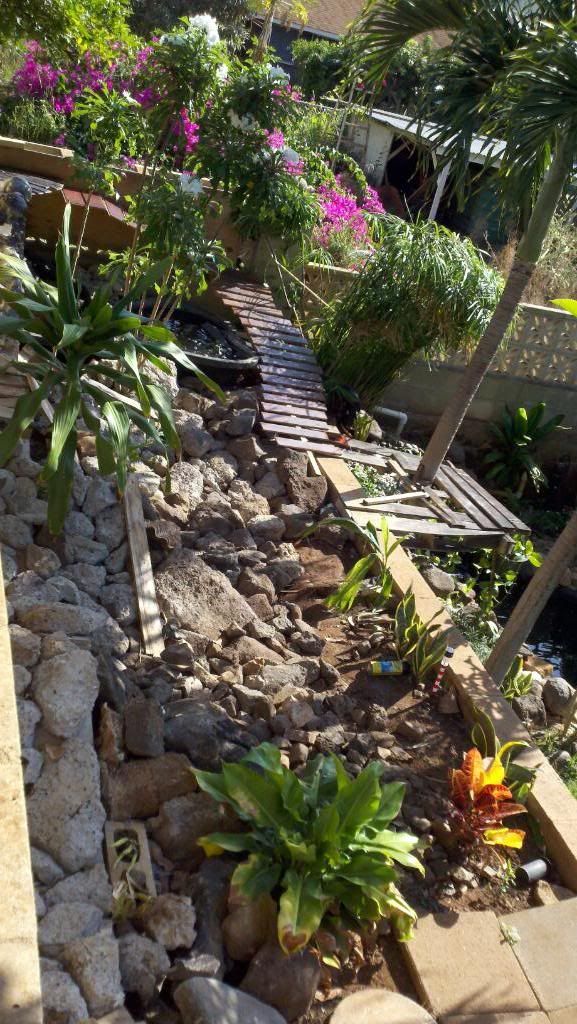
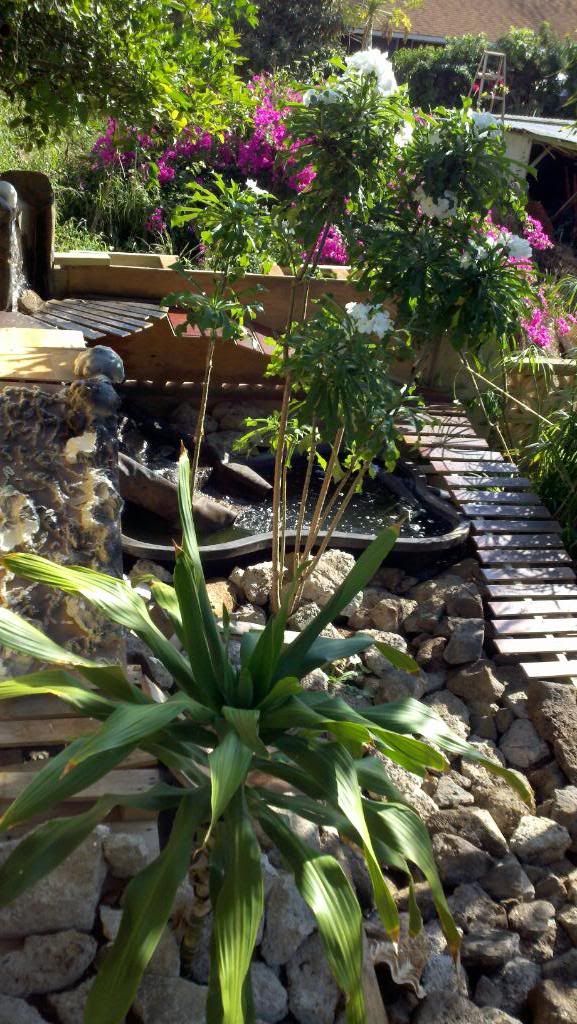
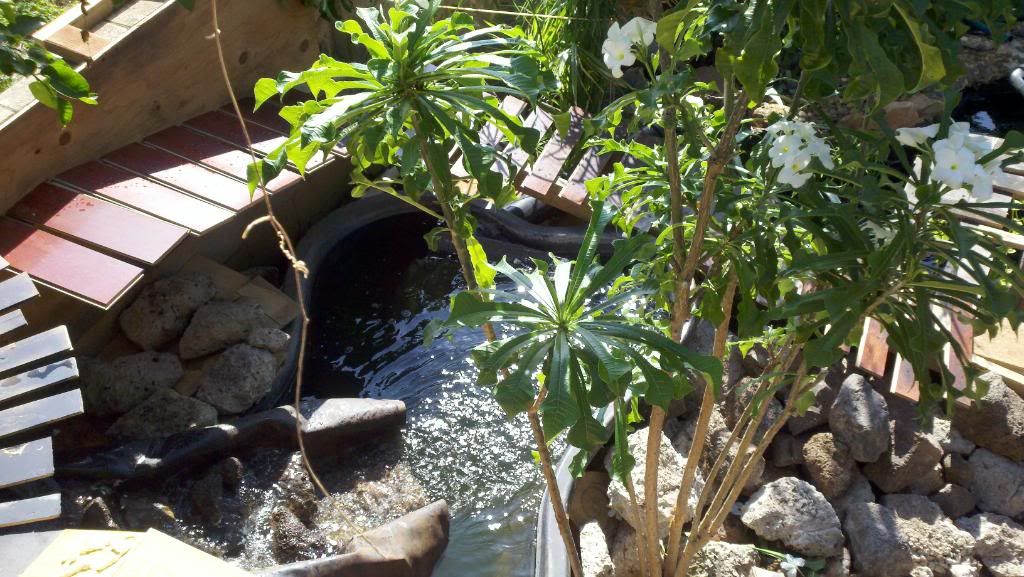
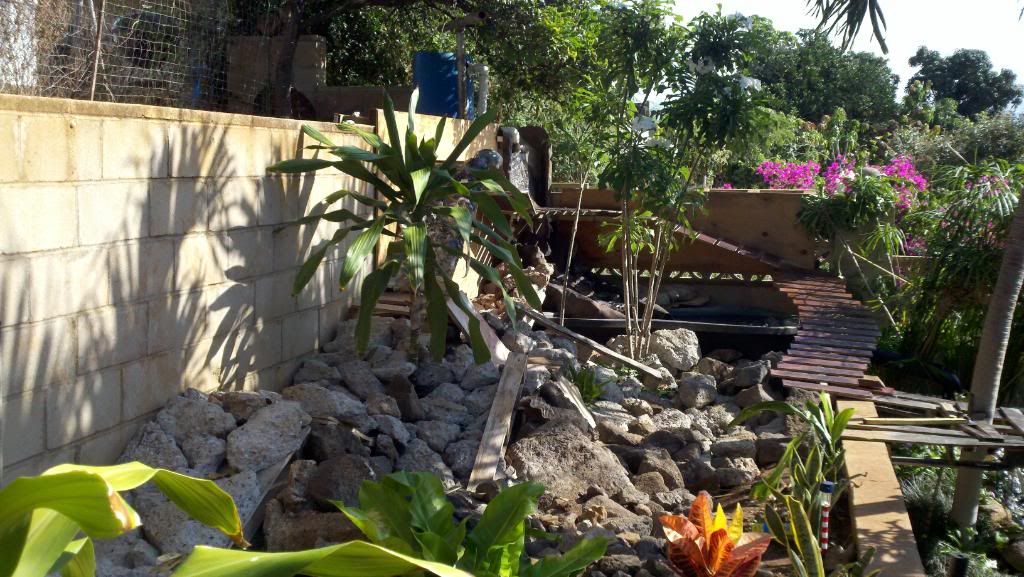
i been posting up different stuff here and there in various forums about the updates i made and stuff, but i figure i lump it all into one thread...hopefully the RCORV park forum gets started up soon so i can get more ideas for the build, and this thread can just be moved there later... anyway- to start off here's some old pics from old threads...sorry if some of the text doesnt make sense...i just quoted my old posts do i could lump them all together...so the context might be a bit off... from dec 2010: here's what me and chad (bigchad80 chads axial on the course...my wheely king is out of commission until my new axle comes in :( and my clod crawler is out until my servos come back from repair also...:( 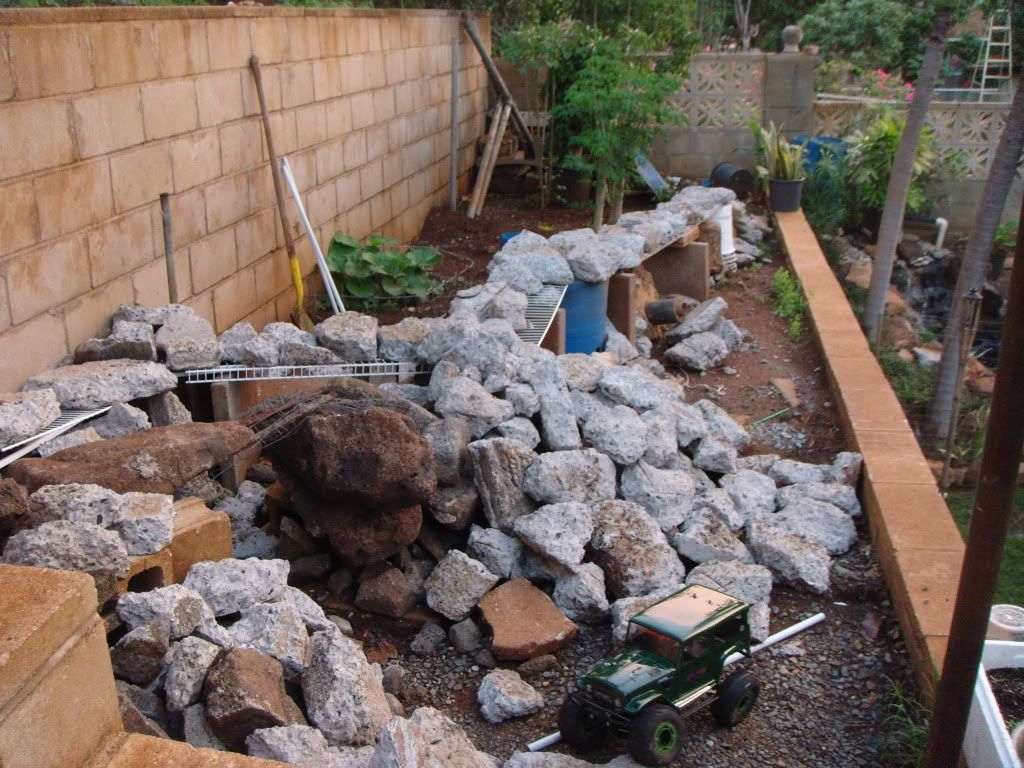  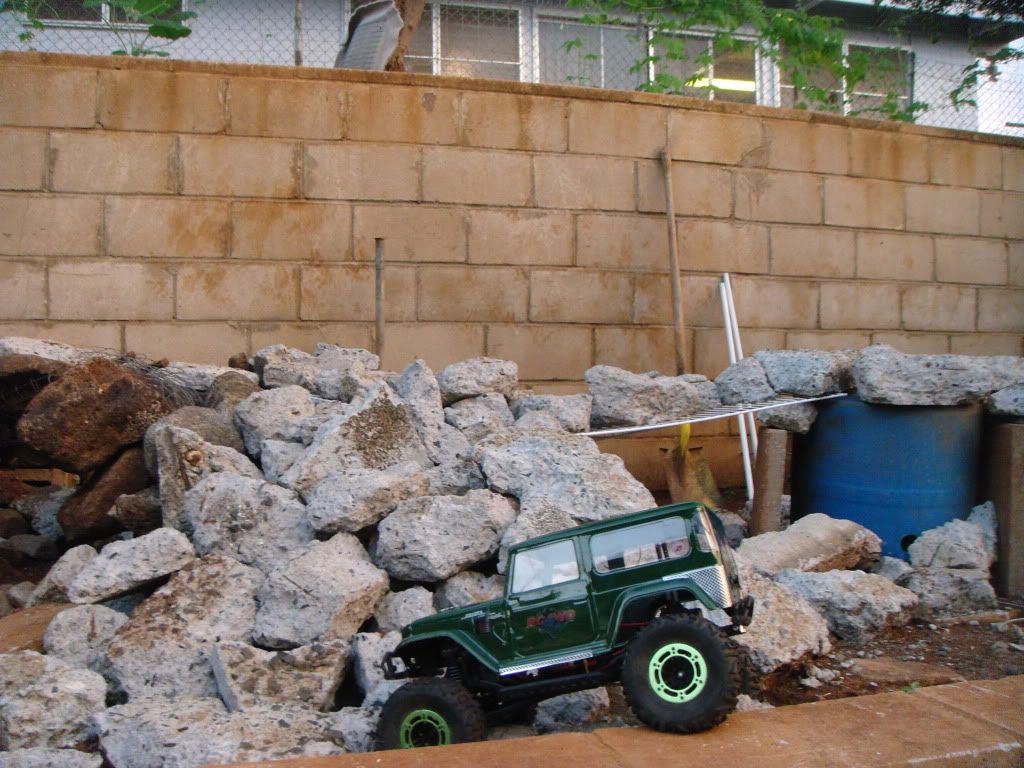 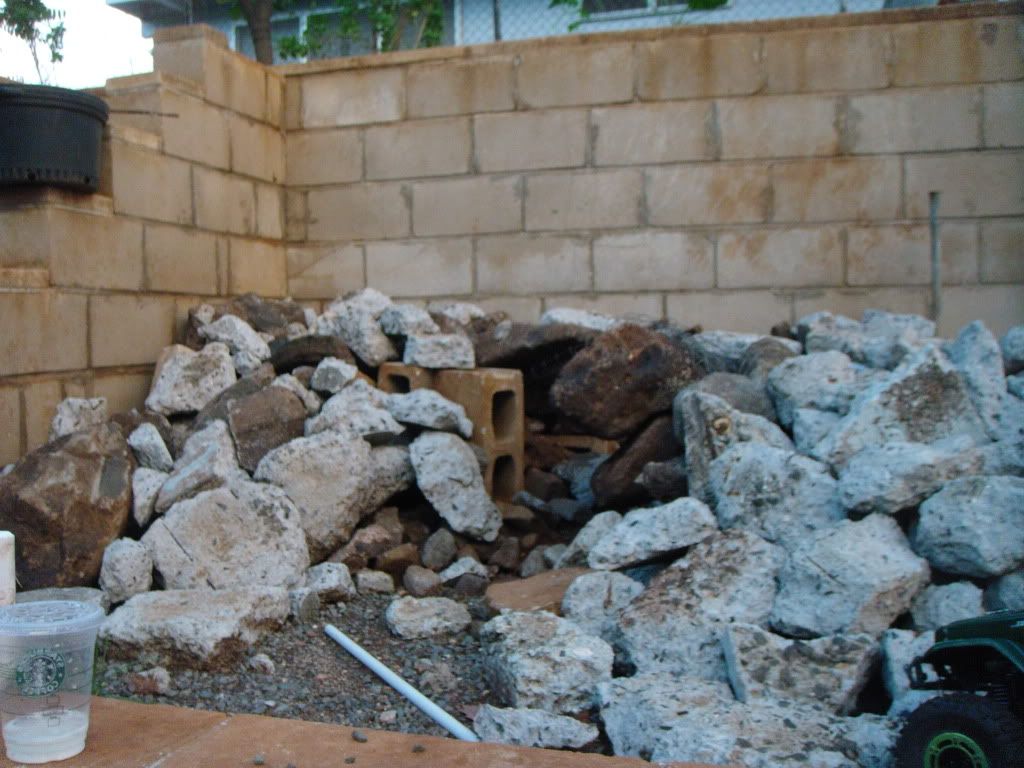 video here: http://www.youtube.com/watch?v=ghHidYS9RJ4 then july 2011: well, we updated it the past two days...we got some free pallets off craigslist and went to work...we also hooked up a spare pond pump and pond liners to get the waterfall/stream going...i need to get a little stronger pump so the stream current can be a bit stronger...sorry for some of the lighting- the bright sun and shadows when i took the pics and vid made the camera screen a bit hard to see at times... 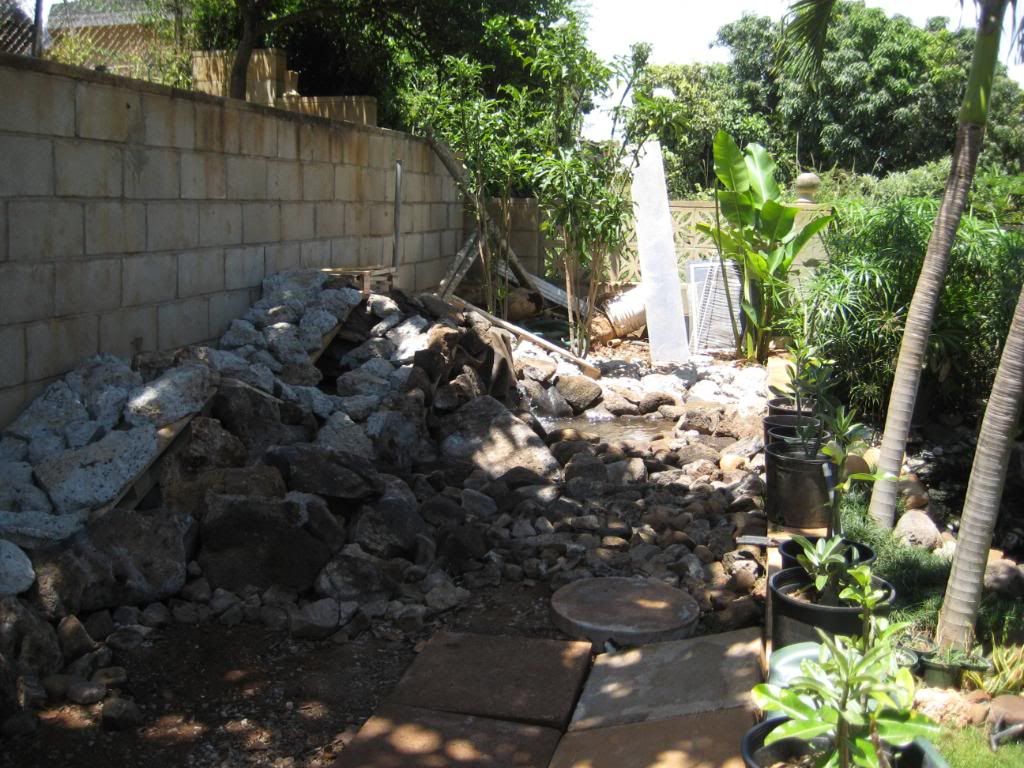 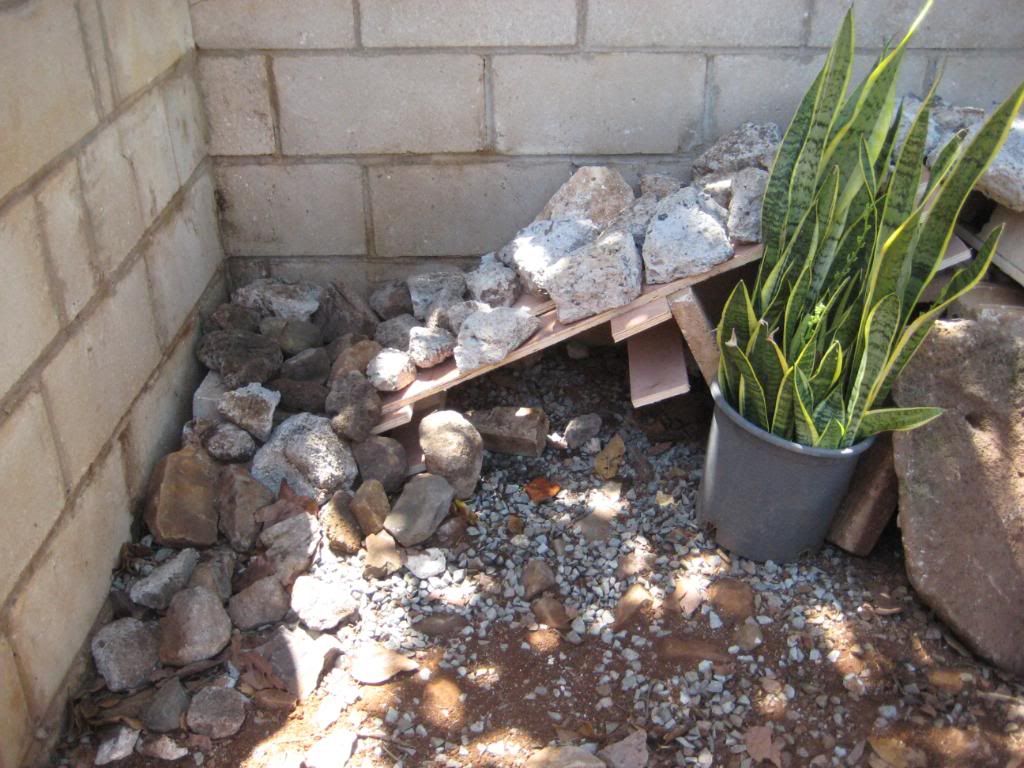 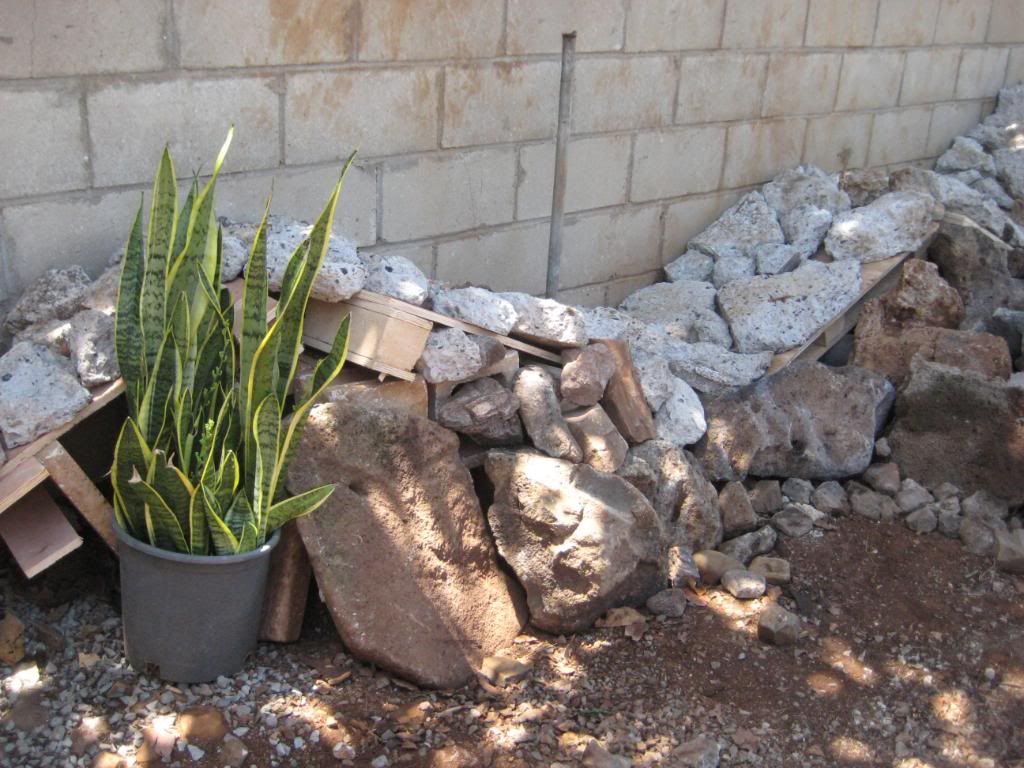 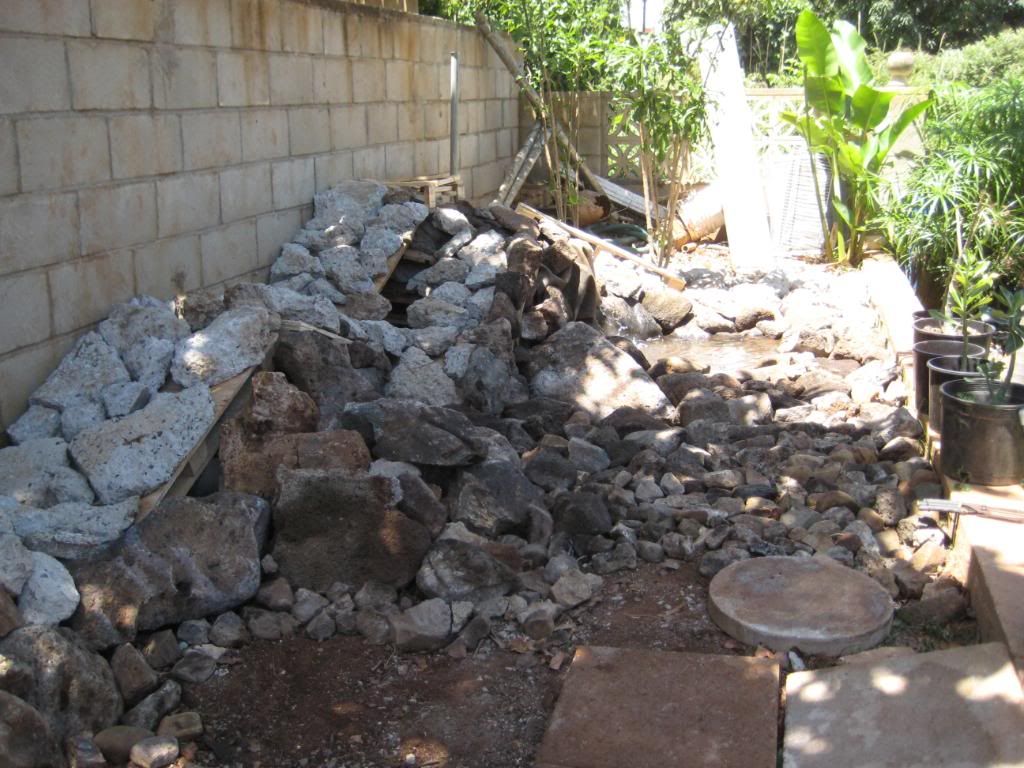 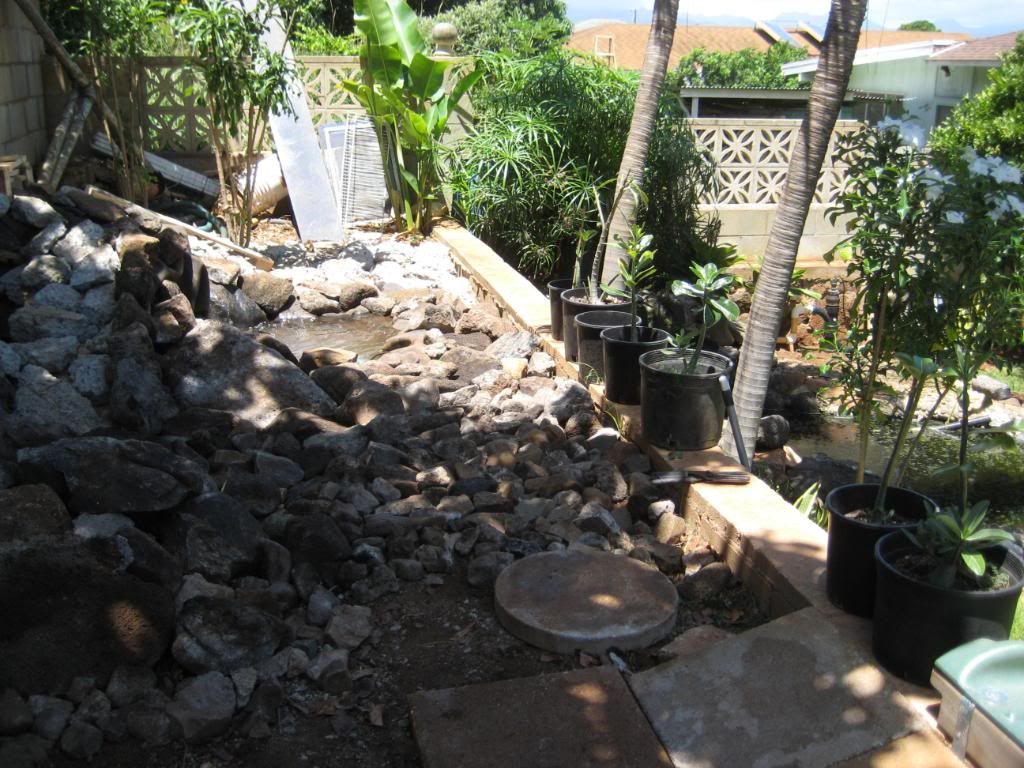 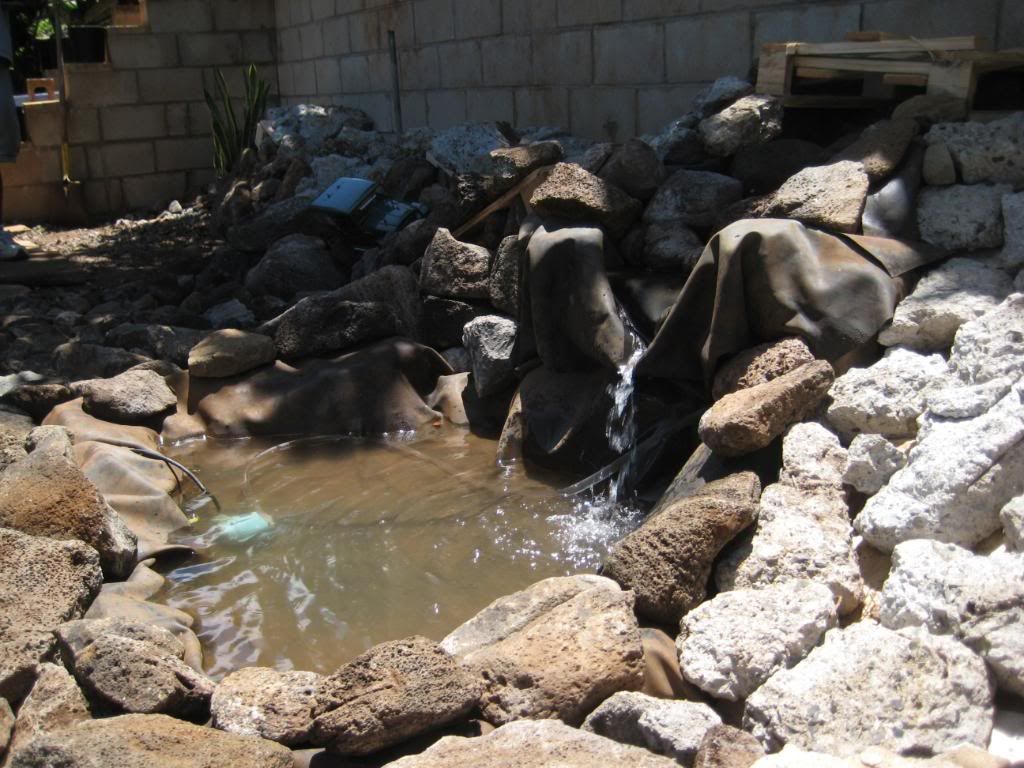 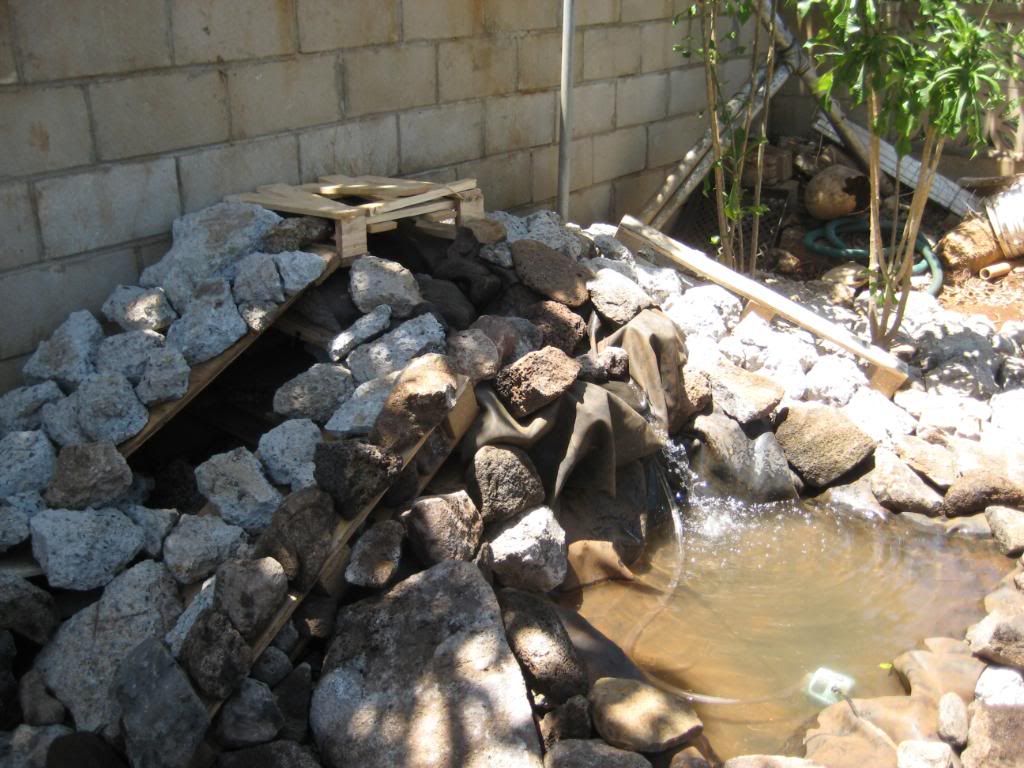  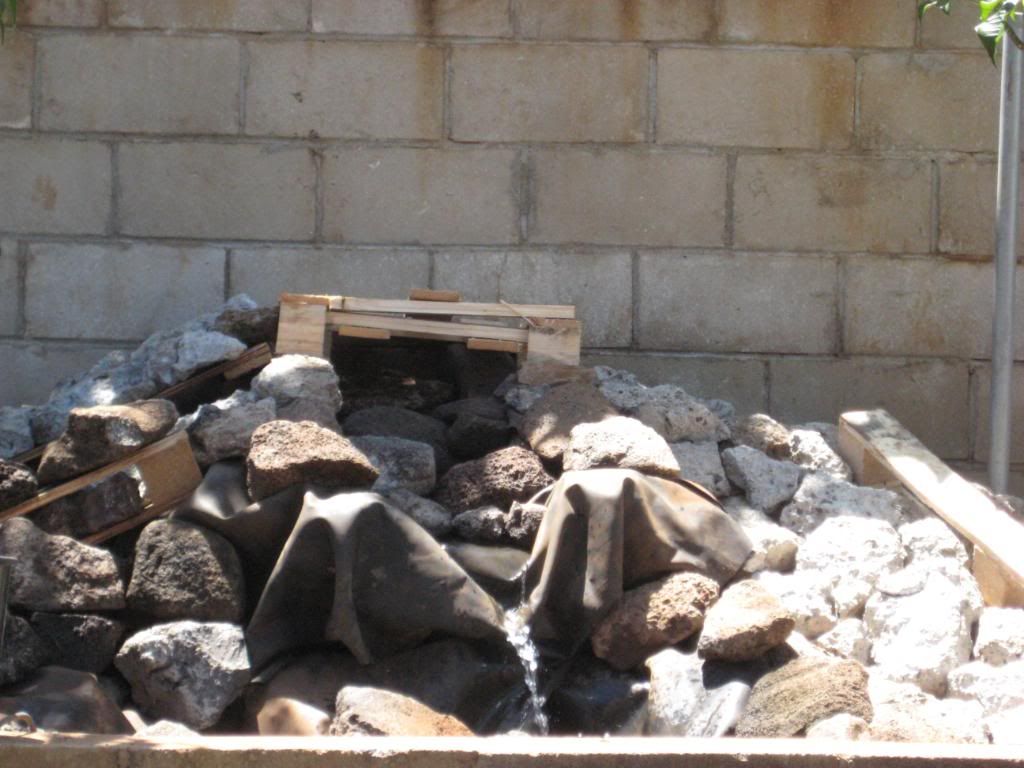 video here: http://www.youtube.com/watch?v=ODgbrhZ0yVY july 2011: instead of us relaxing and just playing today, we worked on it more...chad's bridge of death is still in progess, but i did get to erect (heh-heh) my "CLIFF OF DOOM"...we had one left over pallet, so i said why not make a cliff over the fish pond...better get the footing correct or off into the water (5 ft below) you drop...gf and her dad also got into it and helped us decorate the course with plants to make it look a bit better...the waterfall was also changed up a little... pics here: 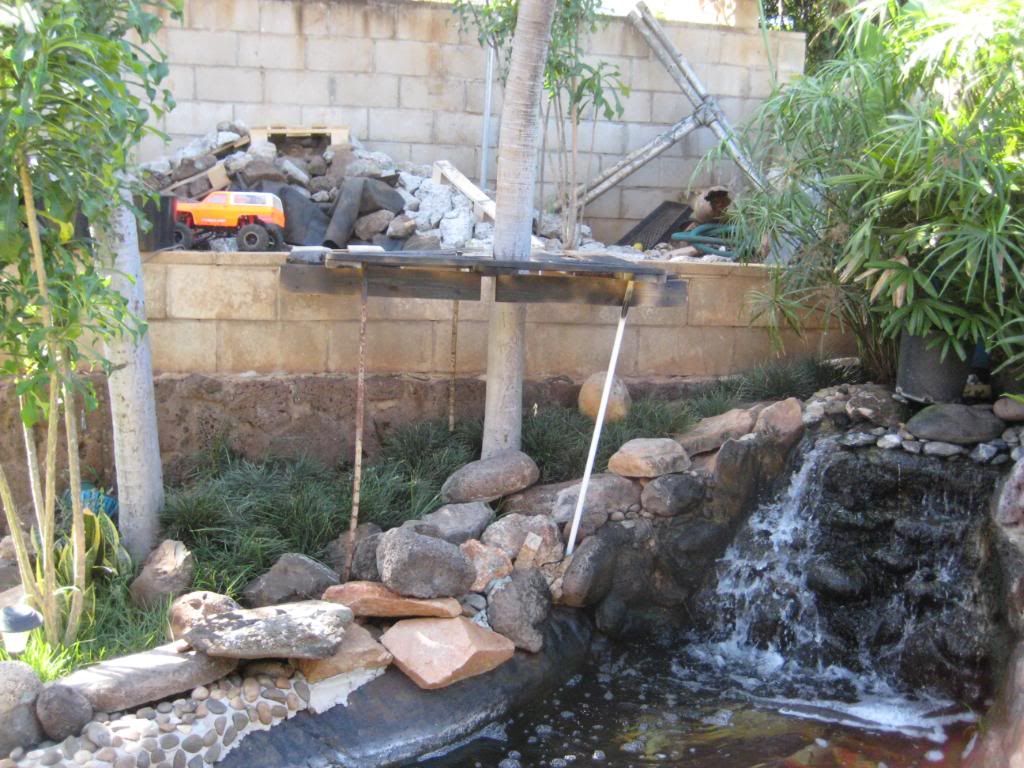 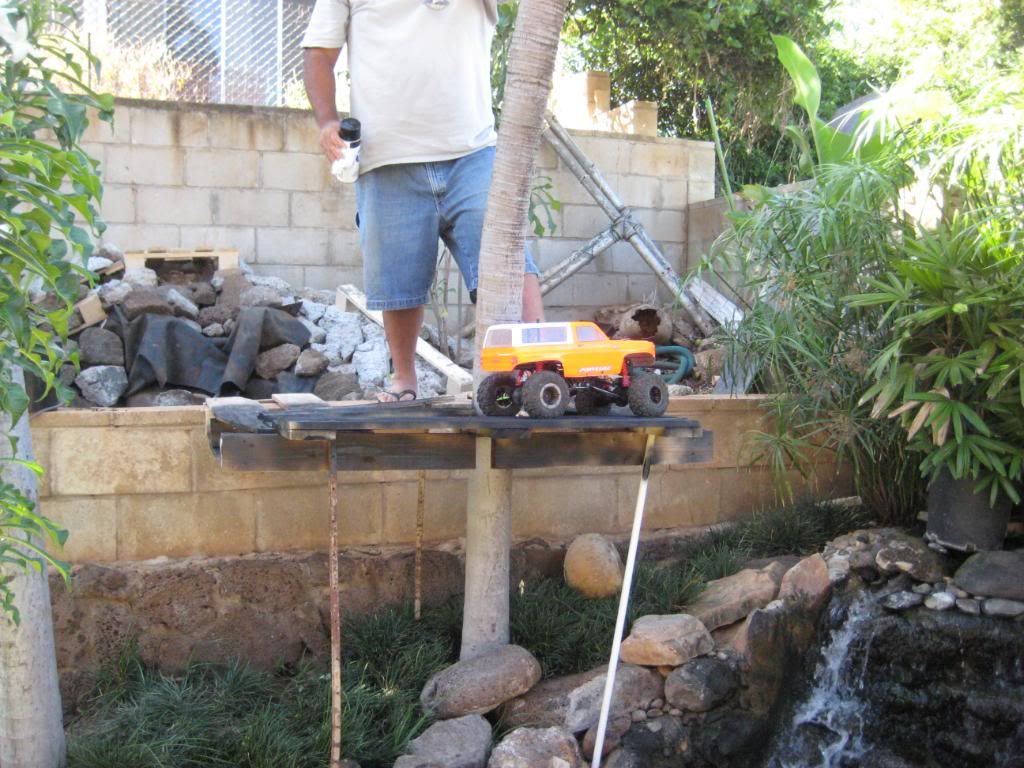 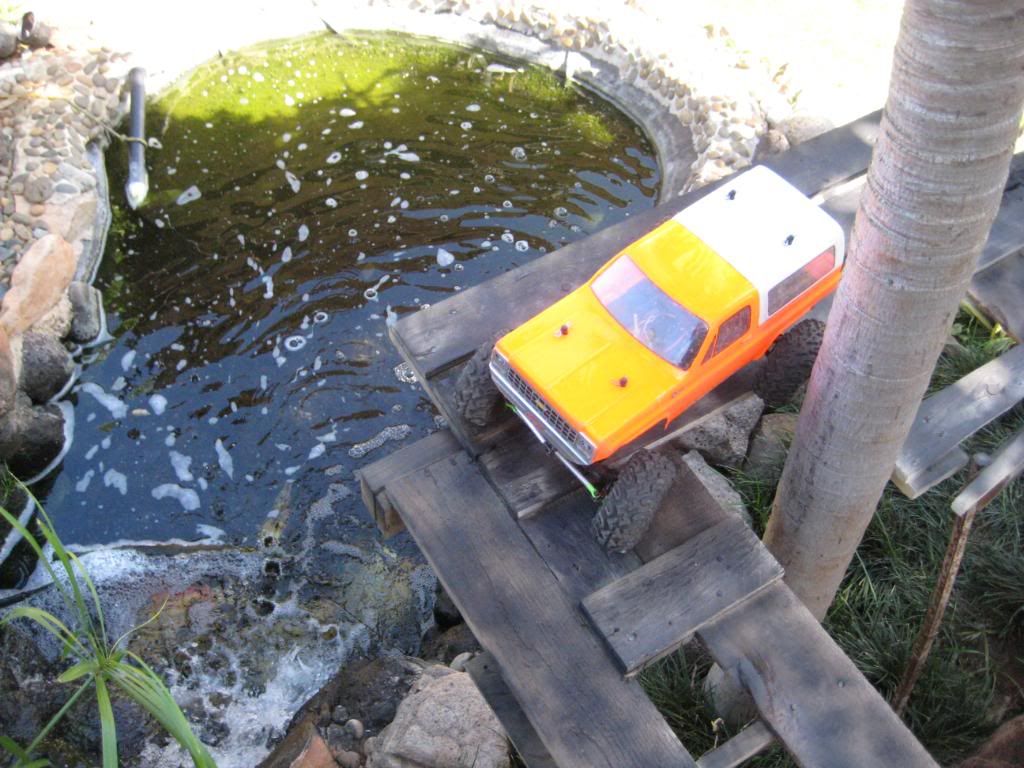  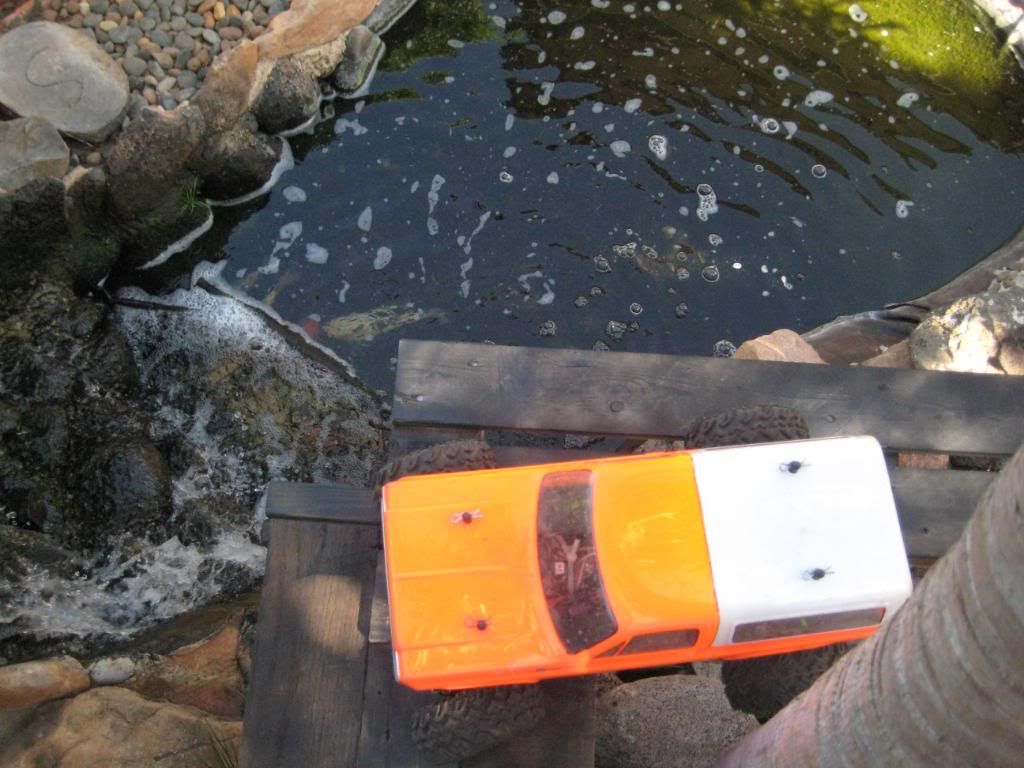 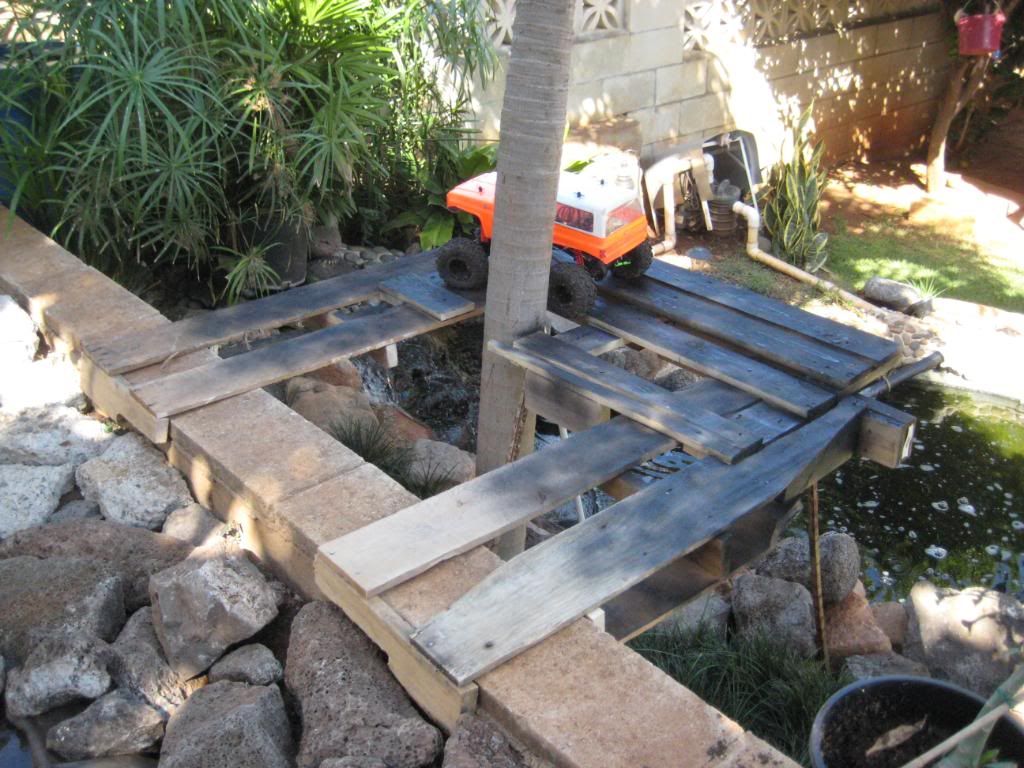 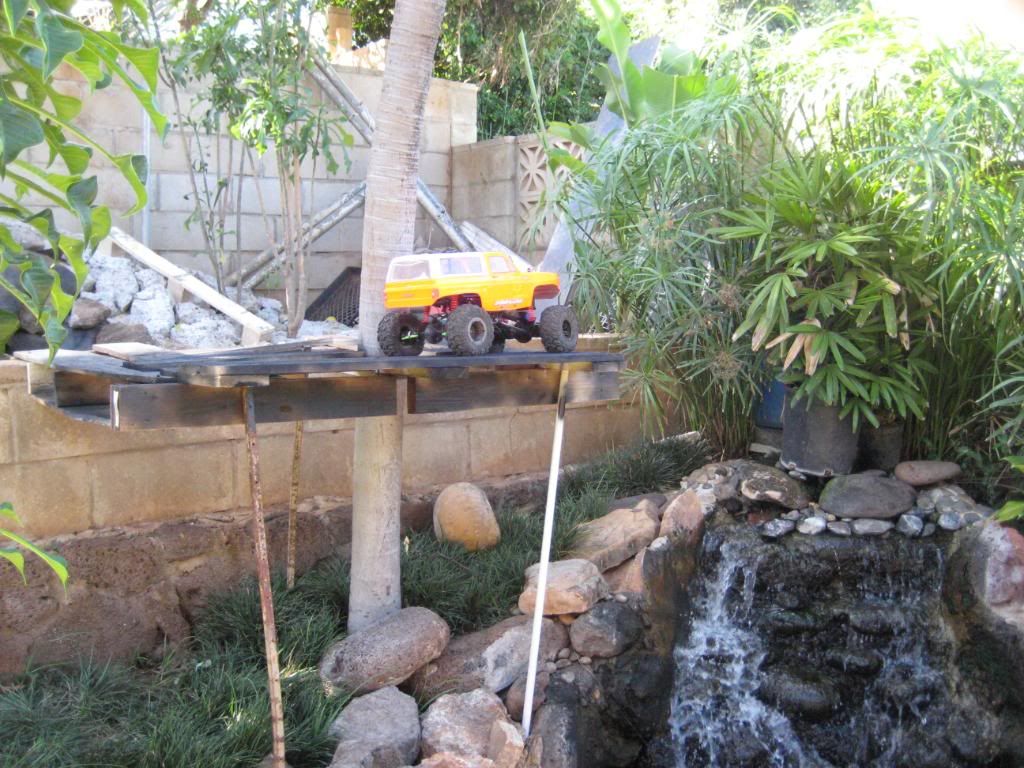 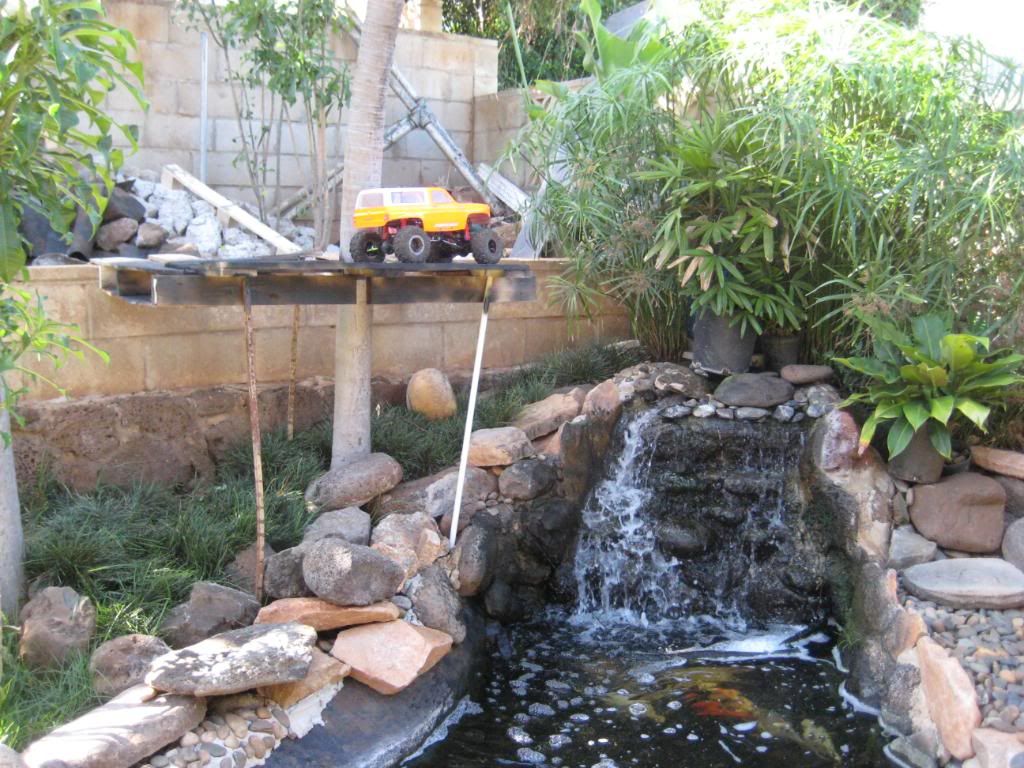 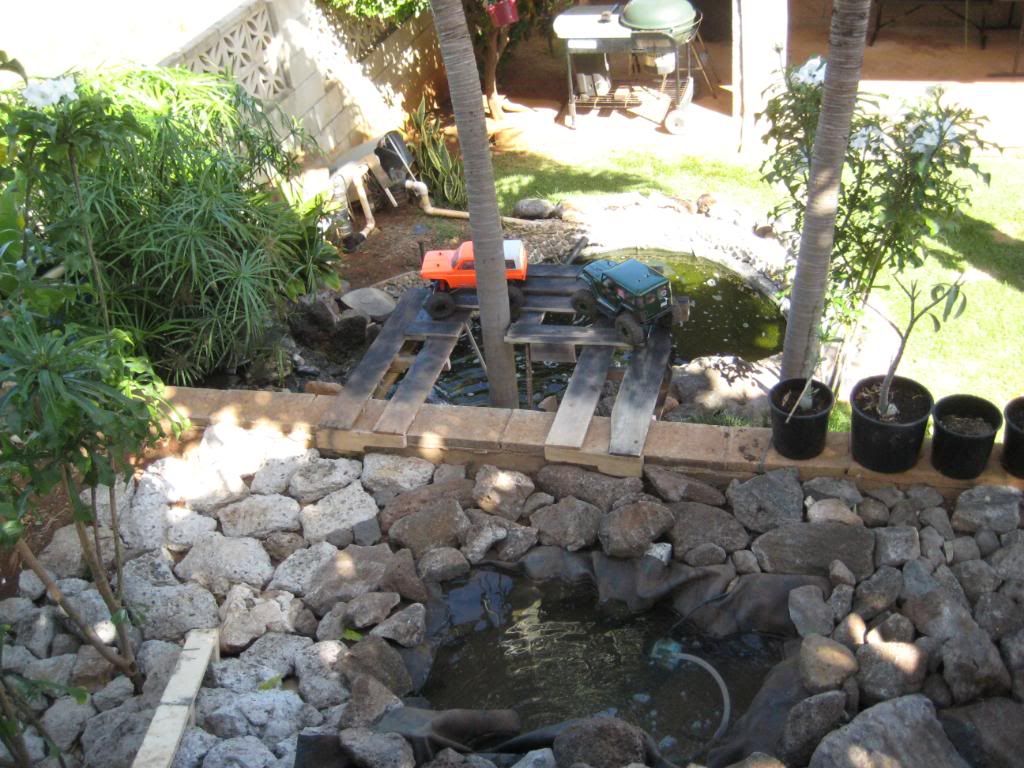 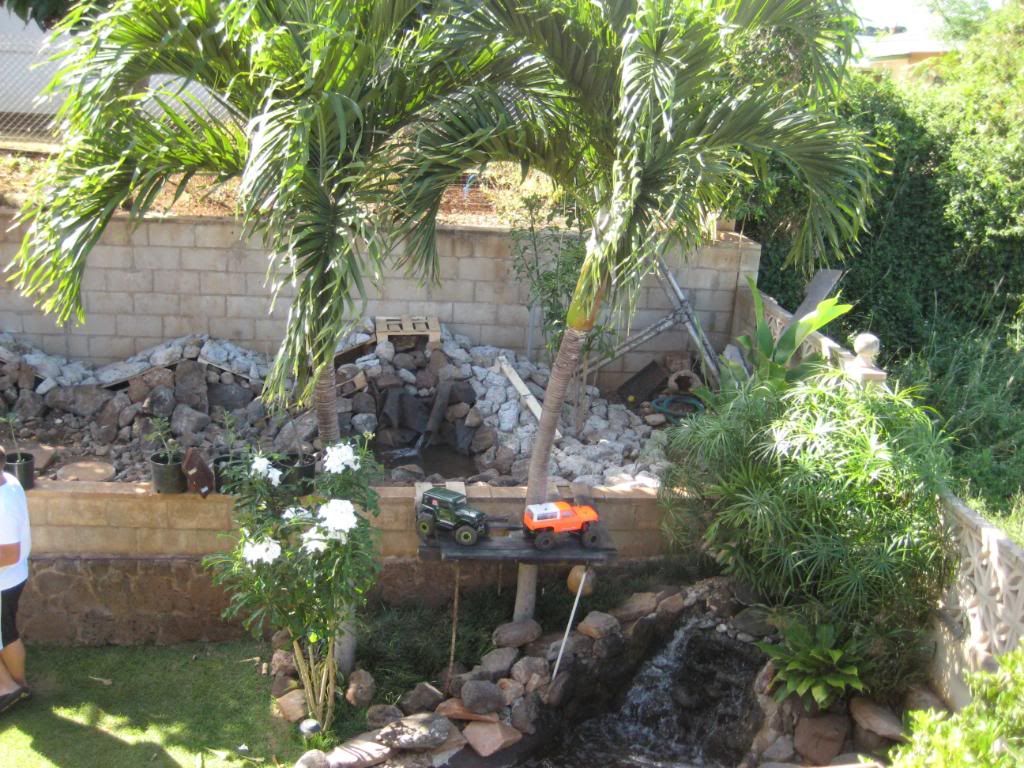 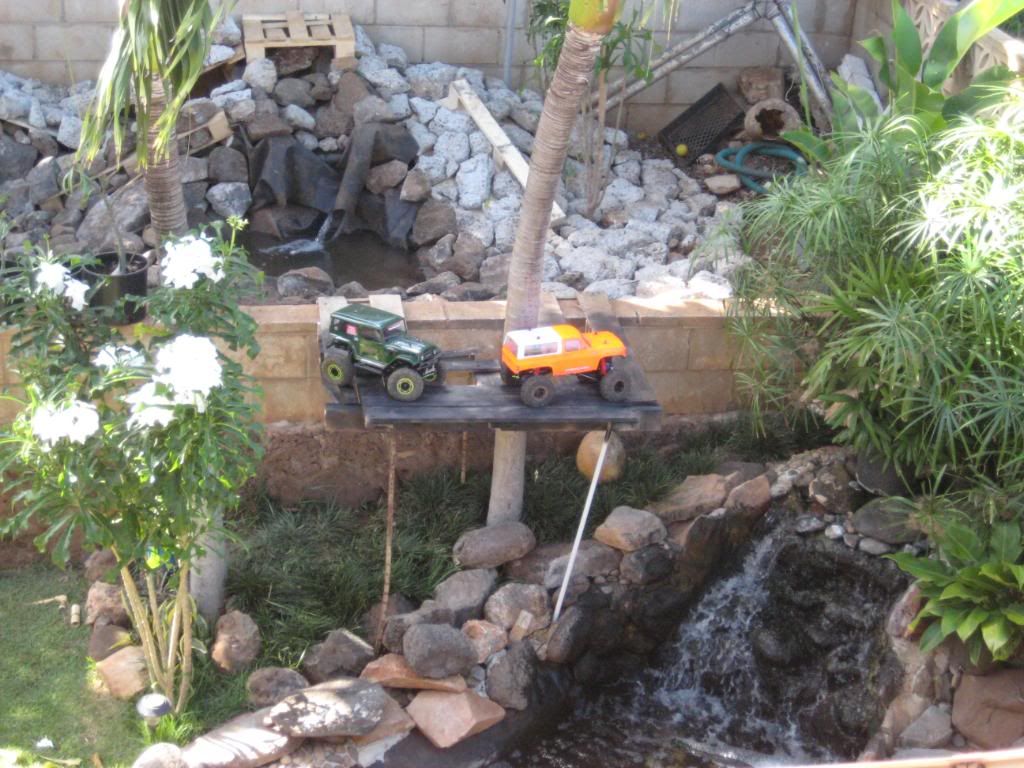 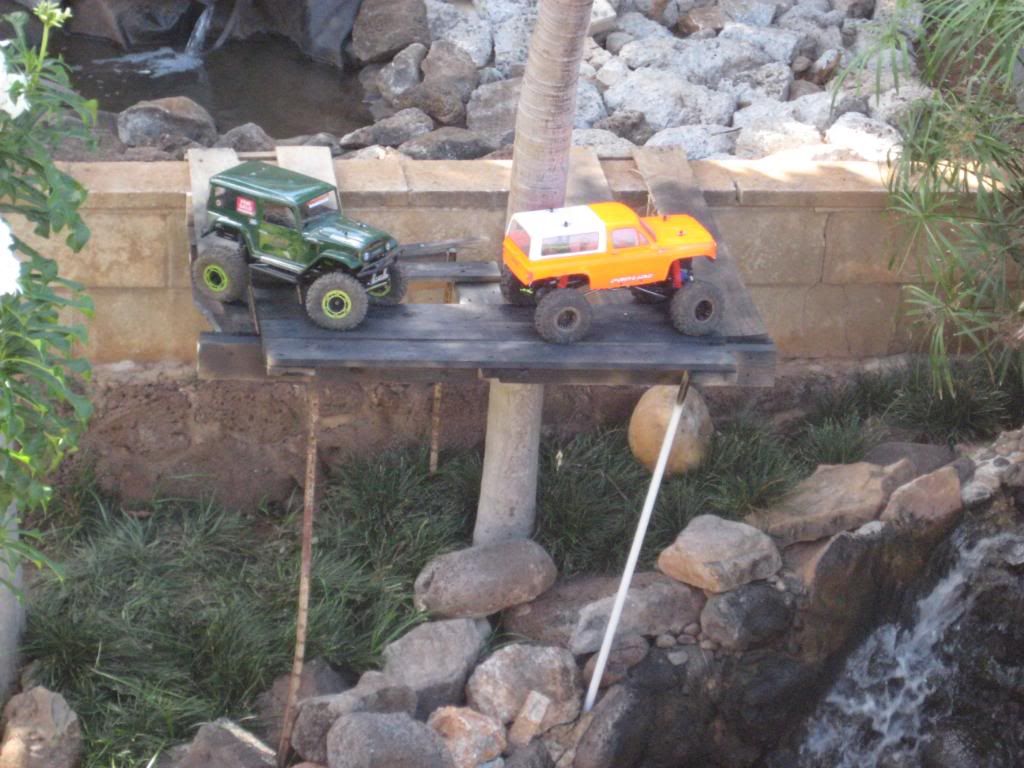  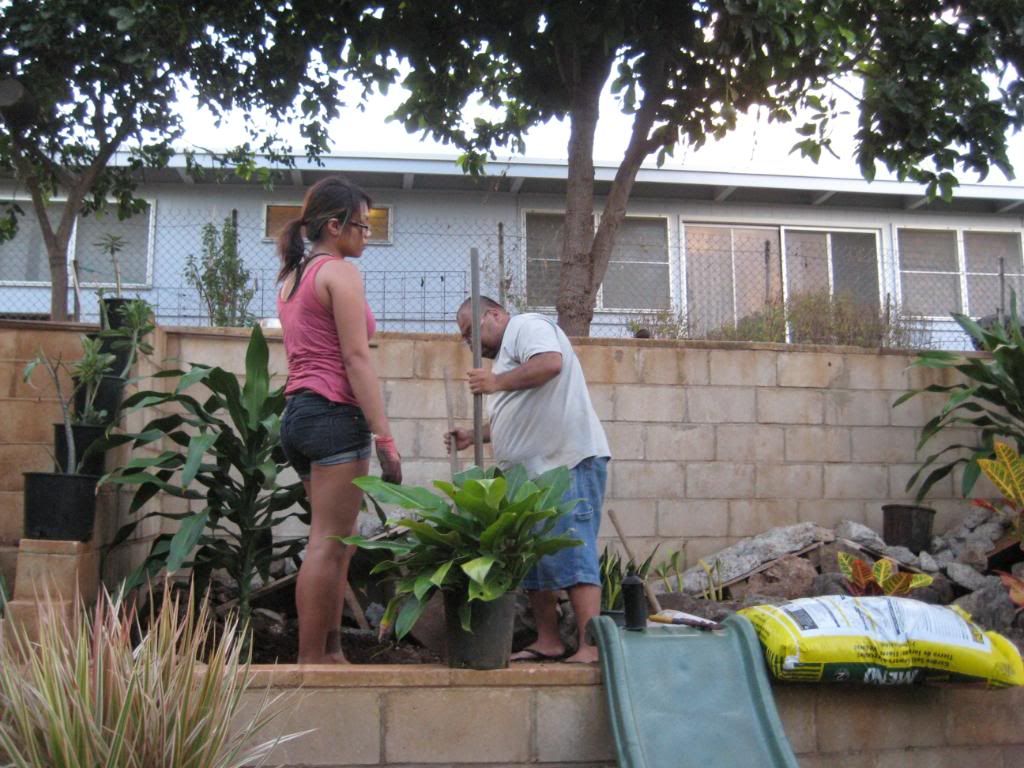 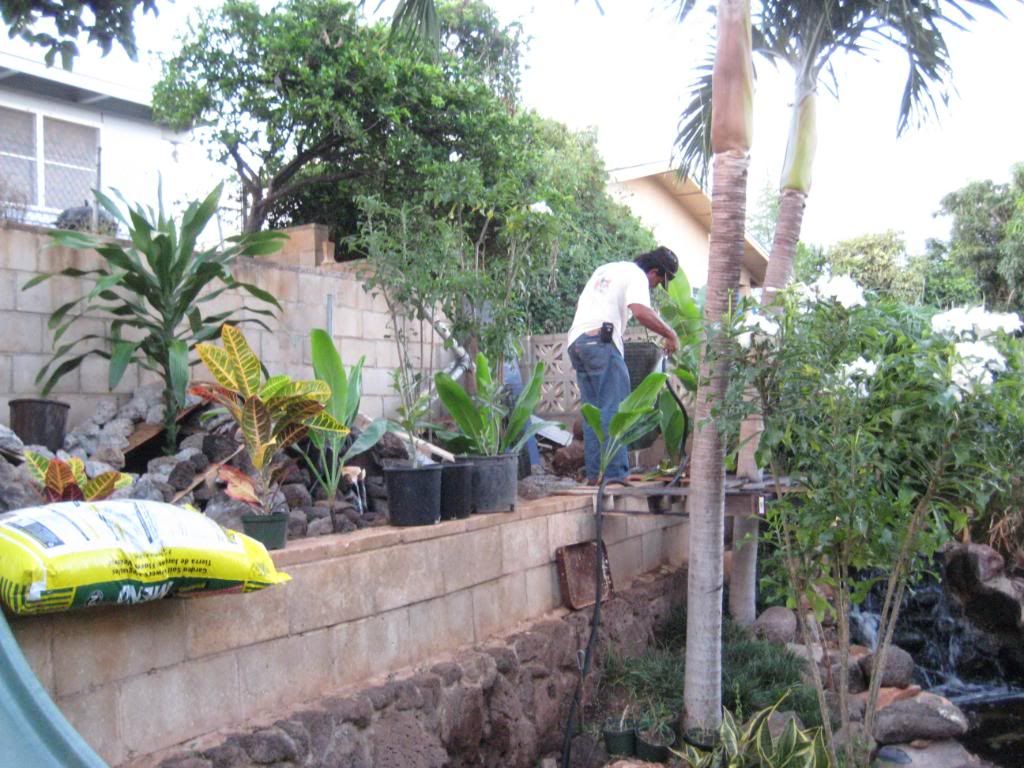 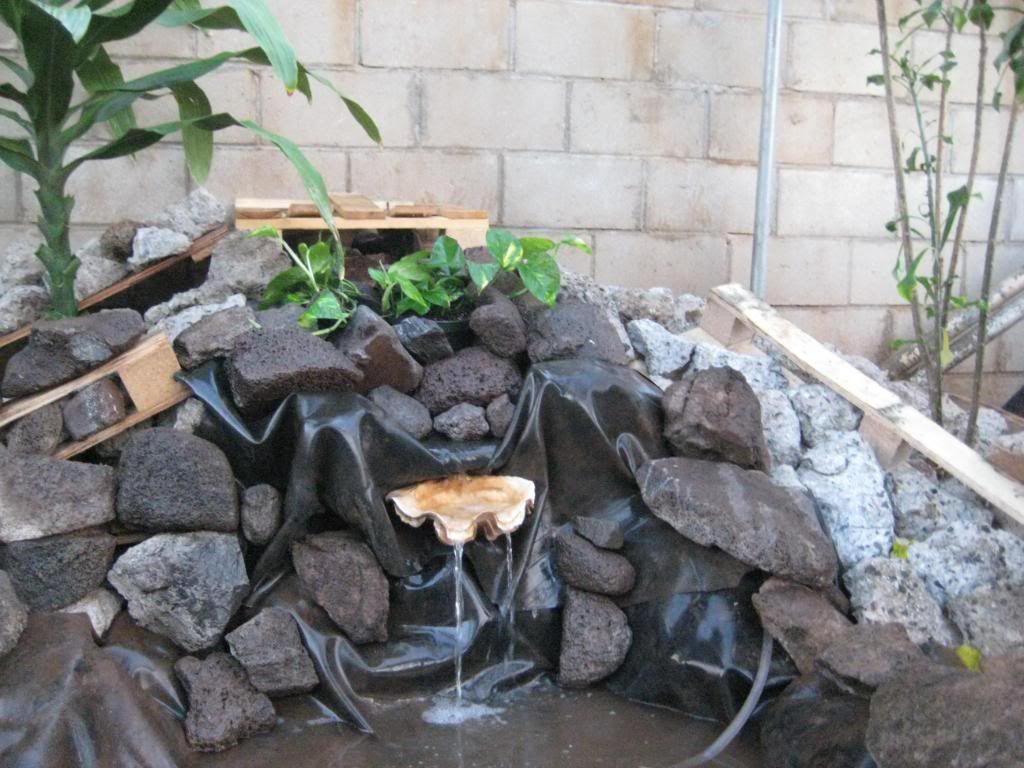 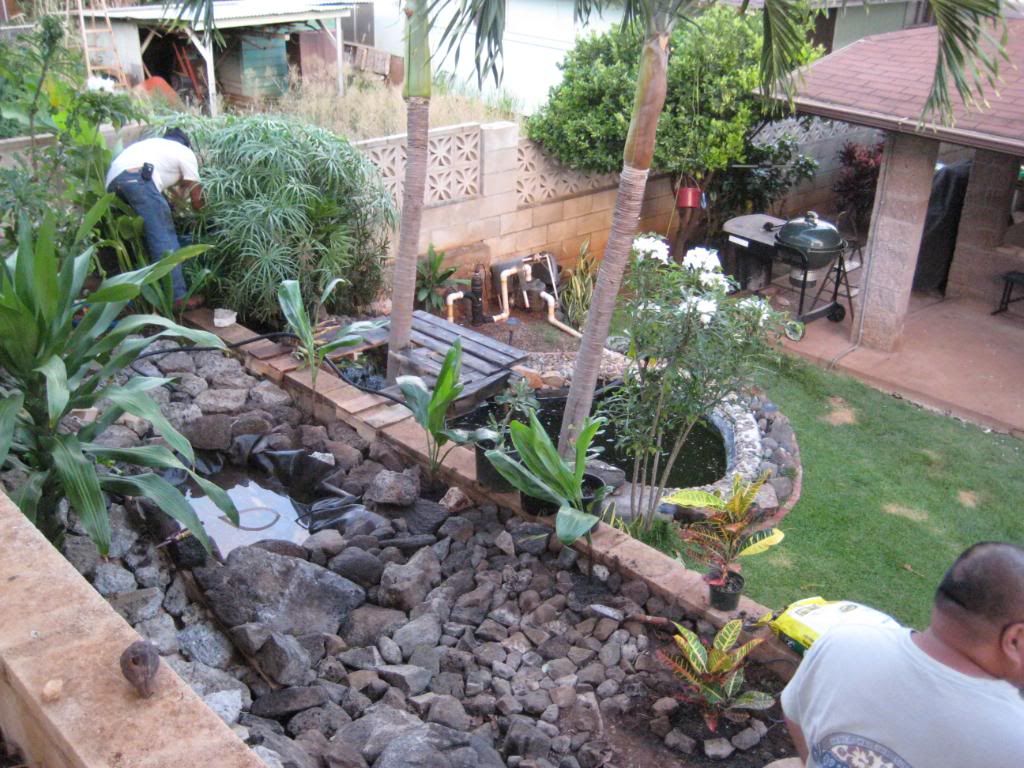 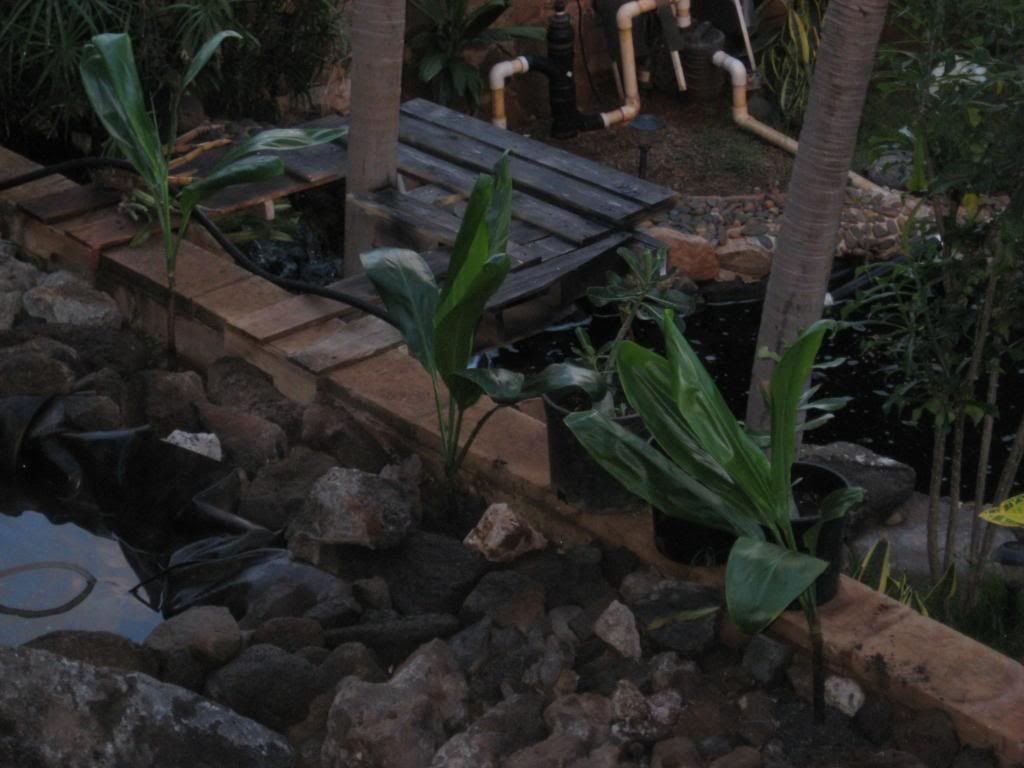 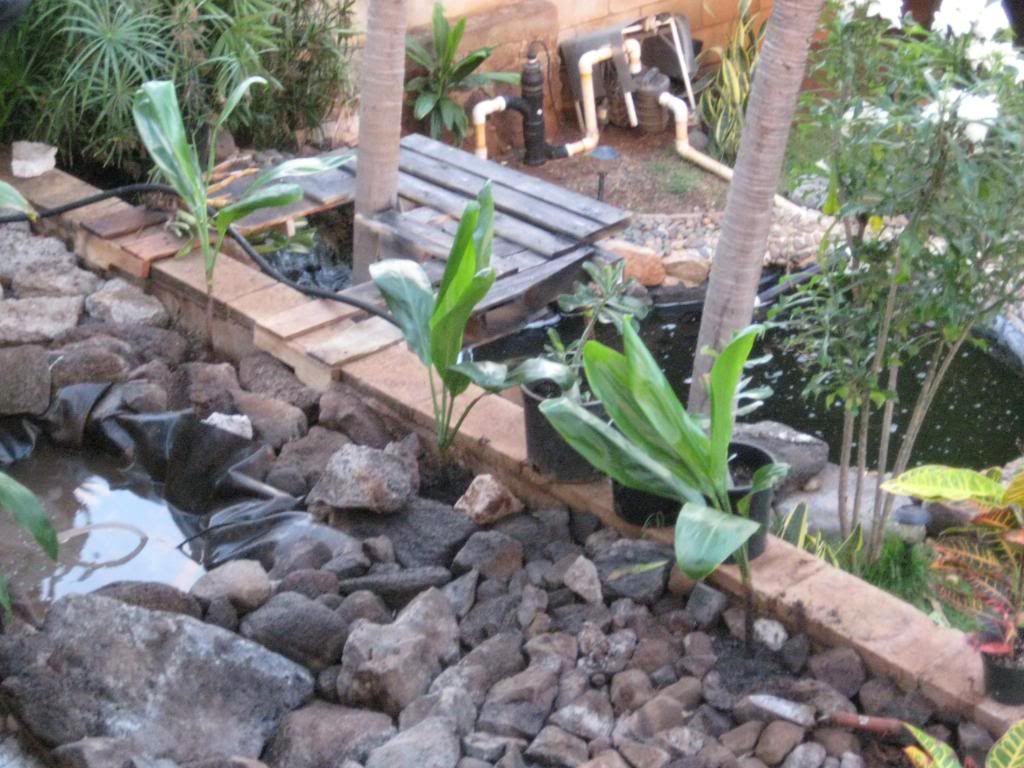 vids of me failing at making the cliff here (i did make it twice, but the video wasnt going at that time)...the laughter in the background is my daughter and a playmate playing on the slide we just put in... http://youtu.be/-NI6EqeQf4w http://www.youtube.com/watch?v=gGweTApvX9g http://www.youtube.com/watch?v=2CIX8XadWtQ http://www.youtube.com/watch?v=0u93iXWSpkw http://www.youtube.com/watch?v=HbKg2eQDKXY sorry for the youtube links...i dont know which tags to use so they can be viewed in the thread... july 2011: in the meantime, chad made his seesaw today...(vid has 720p as an option...i'm just playing with my new phone)... [video=youtube;c7exn34-Ca4]http://www.youtube.com/watch?v=c7exn34-Ca4[/video] [video=youtube;0zLYn1v5Yws]http://www.youtube.com/watch?v=0zLYn1v5Yws[/video] august 2011: i put it in my sig as well... old photos, but i'm thinking what else i can do to make my course a little more extreme...i already have my cliff over the waterfall, but its a bit easy now since i changed the setup of my truck...maybe wire bridge over the pond?!? gimme ideas RCORV enthusiasts! august 2011: Quote:
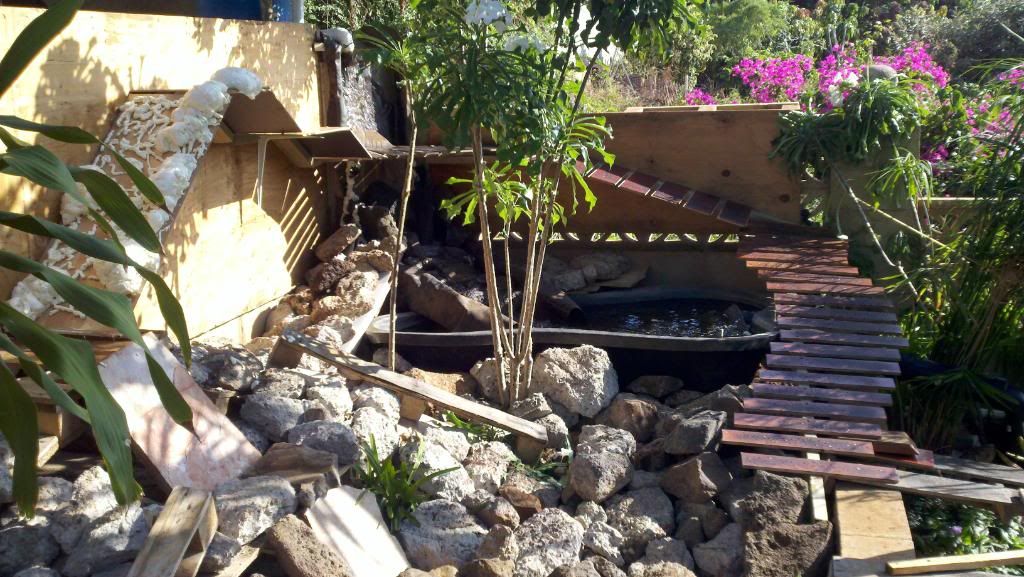
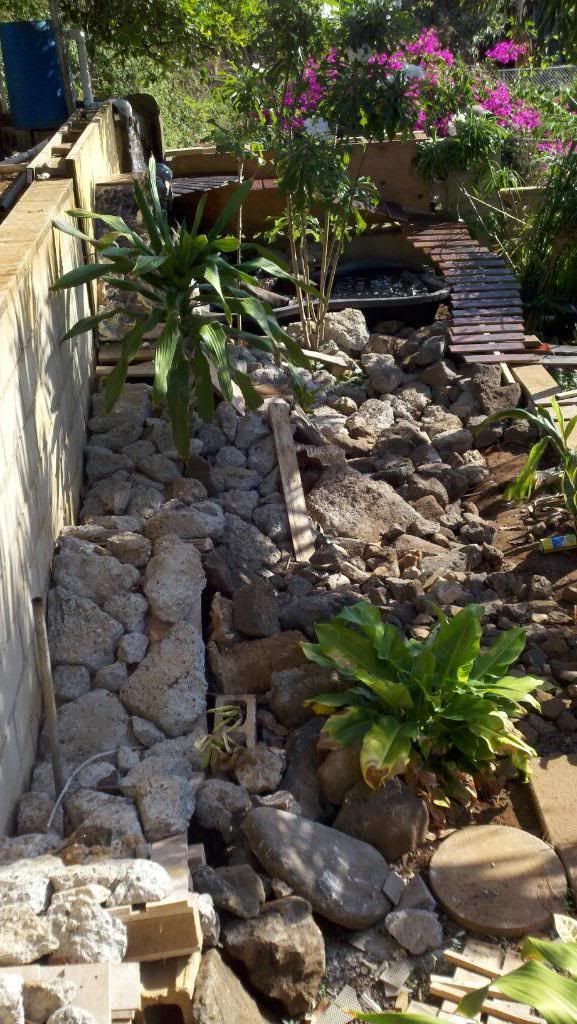
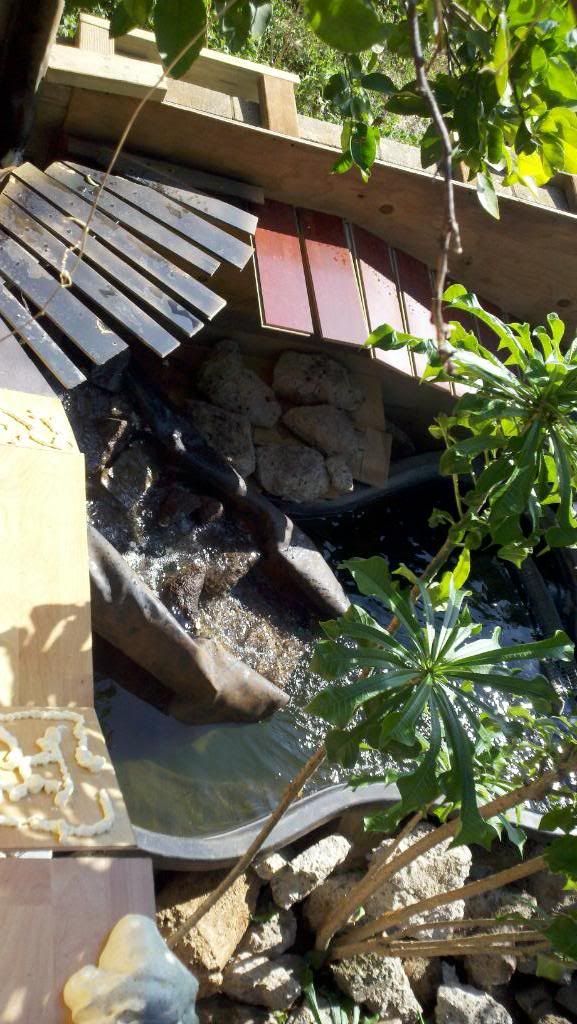
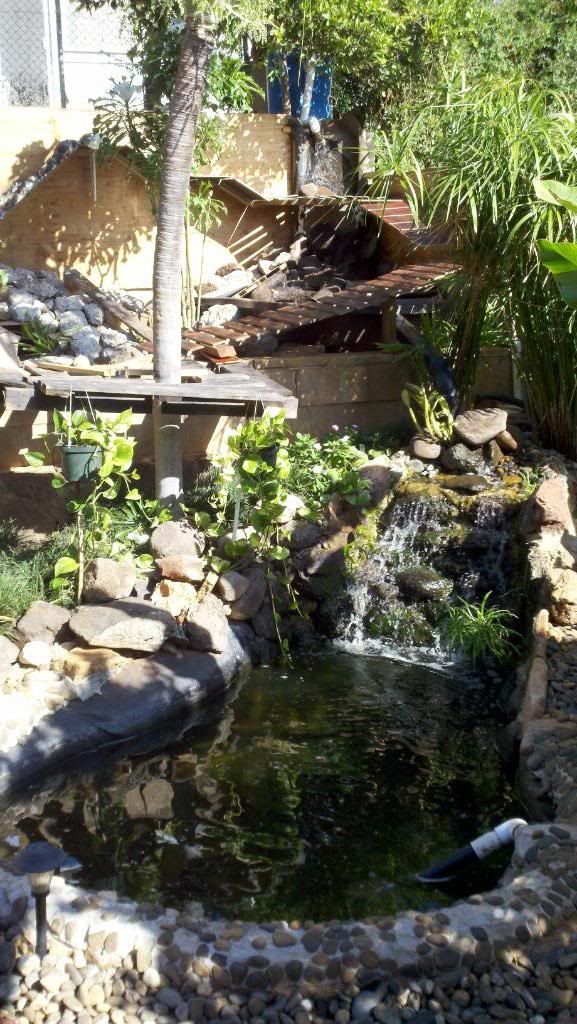
i also make a "rock" bridge where just 2 lines of rocks separate your truck from the flowing water...cant see it too well in this pic, but it's between the bridge and seashell (where are plants are)...i have since removed the plants from that spot...(actually, you can see it in the first pic also)... my truck used to have a hard time negotiating my cliff, since the holes in the platforms would just let a tire drop, and that was it...no getting out...i limited the suspension a bit and changed tires and although it's still a challenge, it's much easier than before...still a butt-clenching moment when i'm on it though, since my truck isnt waterproof...but to me, that's what makes it fun... and i'm also still awaiting more rocks to come available...the concrete rubble is too easy to get over... i also want to get a stronger pond pump for the top pond so the water flow is a bit stronger...i was thinking of plumbing in the water from the pond below, but to get it to flow back to where it's supposed to go would be a bit more work... september 2011: messing around with my crawler on the lower level pond... http://www.youtube.com/watch?v=DA_zyQh3b4U september 2011: update: we got a stronger pump for the 2nd level waterfall...so strong, that the medium sized rocks that was our steeping stones for the trucks now get pushed out of the way by the waterflow...so we had to use bigger rocks that we thought wouldnt move...and even then- they still moved...so we had to wedge the rocks in to keep things tight...a bit more challenging now since the waterflow can make your truck go for a swim... http://www.youtube.com/watch?v=DW0rIu05x_0 http://www.youtube.com/watch?v=CB9QFp9C9DQ http://www.youtube.com/watch?v=nqm4sI5KTxM we also got another pond liner, and will put it up on the second level...we're gonna eventually plumb it all in to the waterfall on the bottom, so the water will be one big closed system... 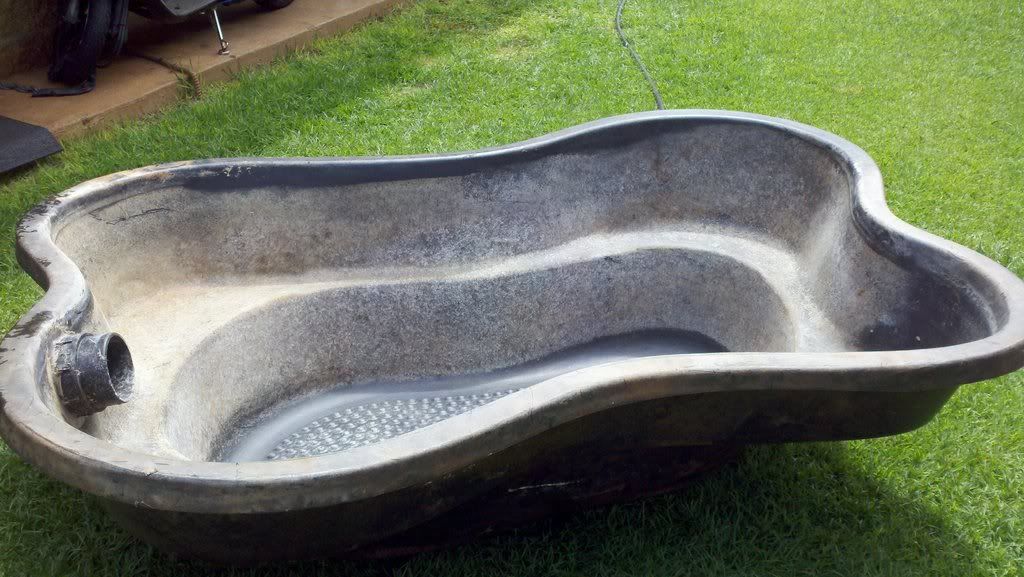 chad also wanted to make some "cliffside" roads along the wall, and have the water fall over it so the trucks go behind the waterfall- kinda like this: http://www.youtube.com/watch?v=GViu2XkKTYY and maybe enclose some parts so it goes through a "cave"...and at one point make another cliff and have it so the trucks also go in front of the waterfall...just all conjecture right now, but we'll keep you guys posted on the progress of it all... | |

|  |
| Sponsored Links | |
| | |
|
09-25-2011, 04:48 AM
| #2 |
| Quarry Creeper Join Date: Dec 2009 Location: in front of you...
Posts: 248
|
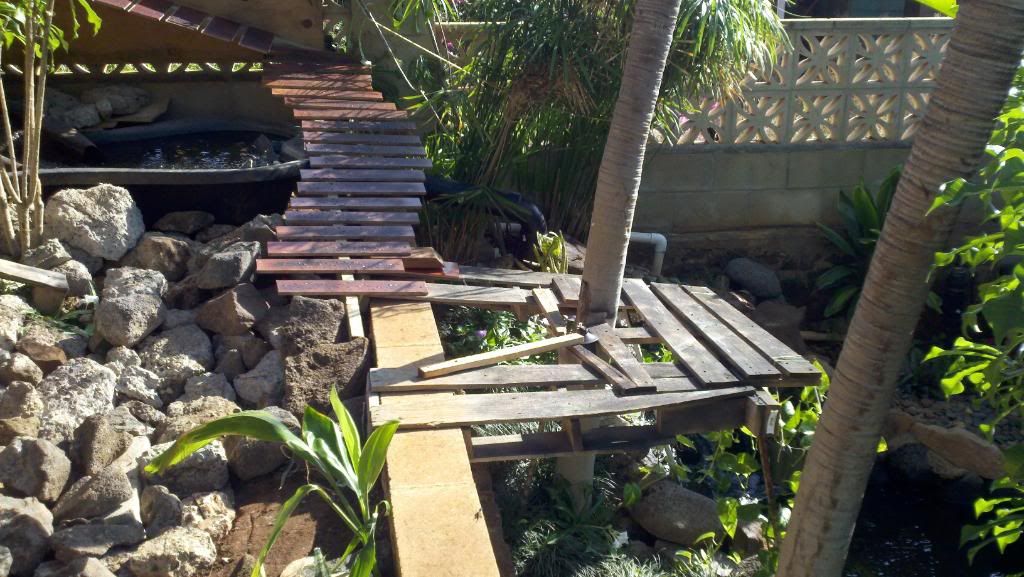
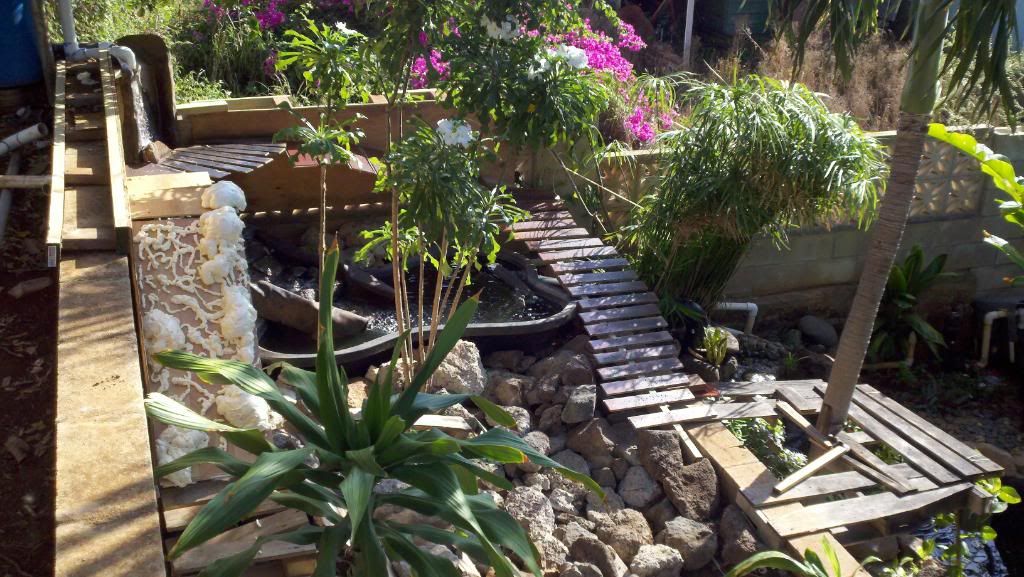
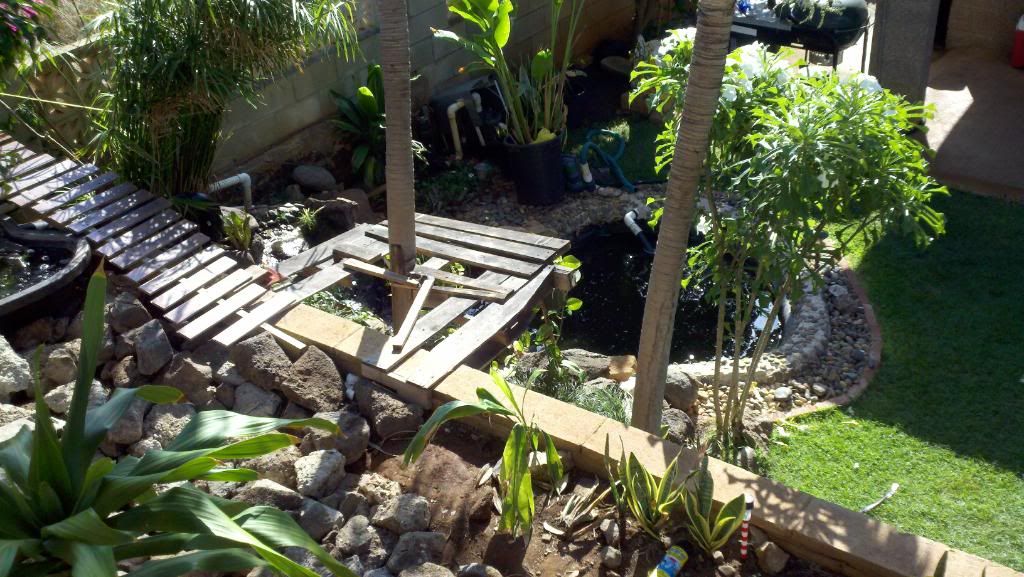
did some more work to the course today...started to install the second level pond...me and chad are out of shape...lol...thank goodness my gf's dad came and rescued us...he jumped in and did a lot of the brunt work...we worked till dark, and i dunno about my gf's dad, but me and chad are beat...;) 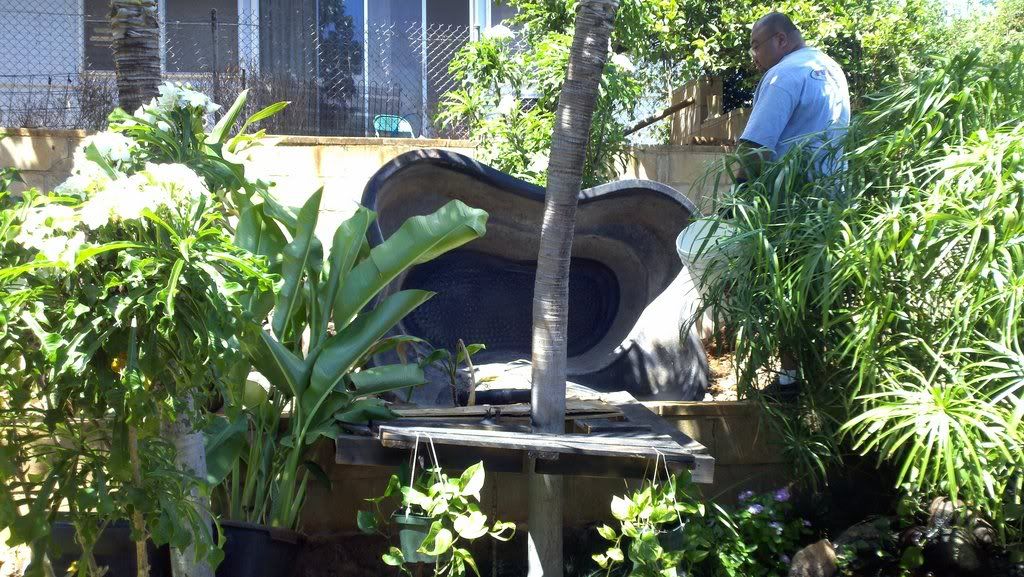 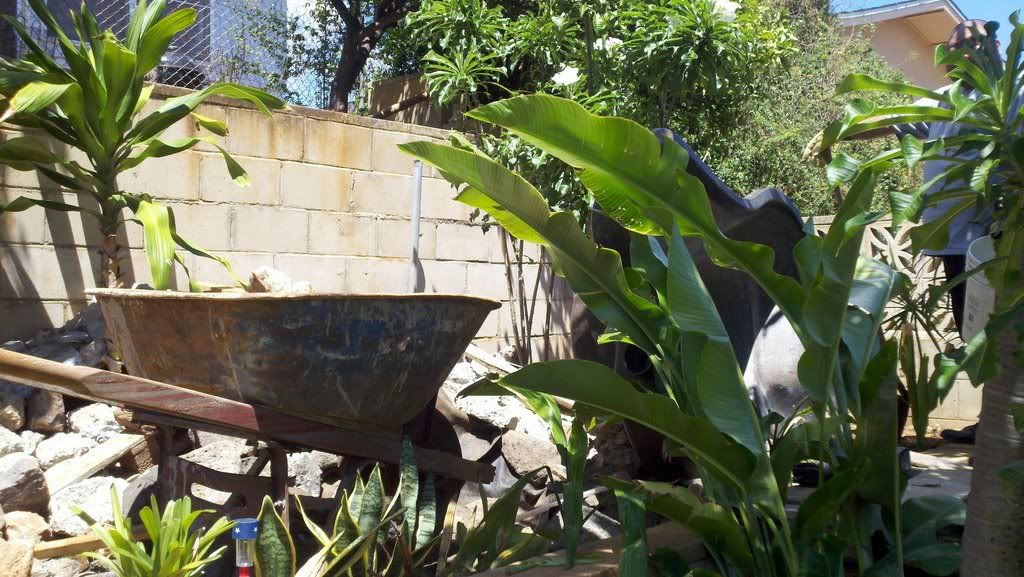 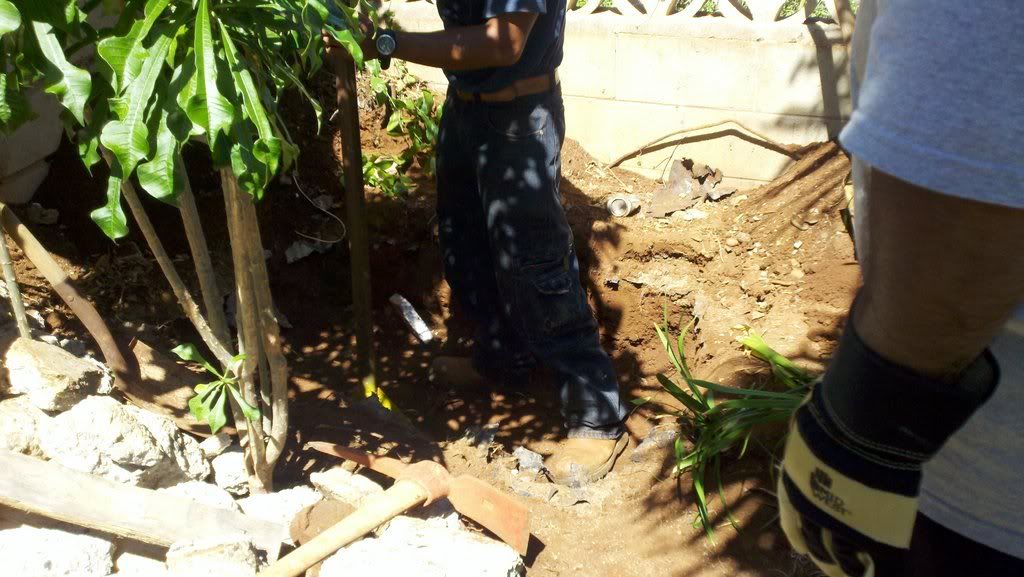 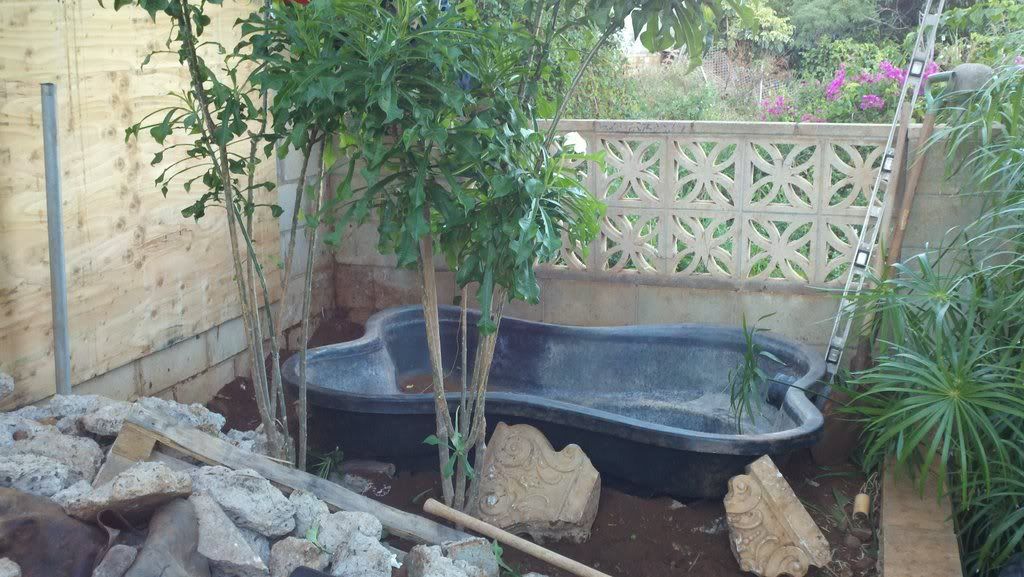 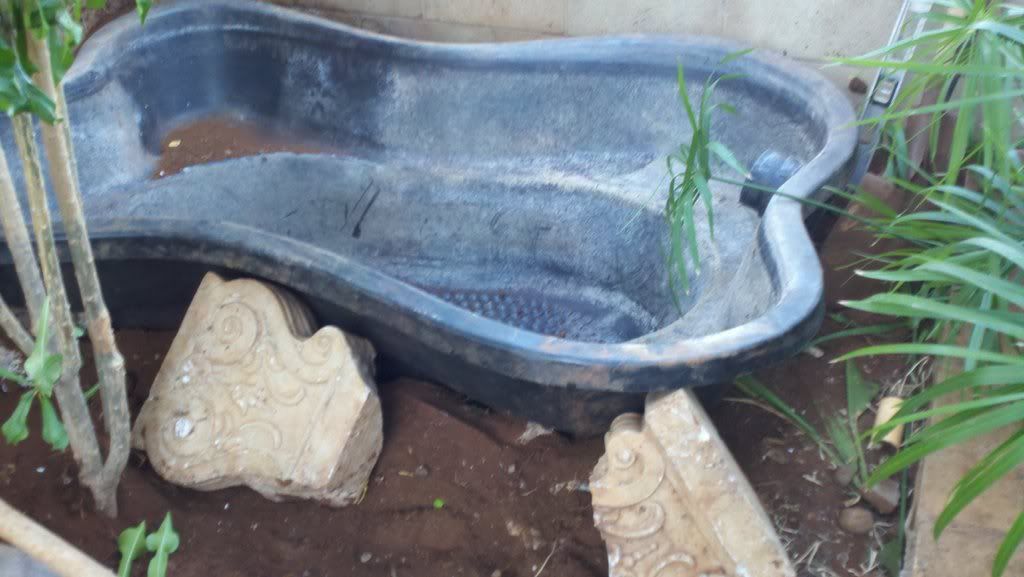 here's pics of the 4x8 sheet of plywood we setup to be the backbone for the "cliffside road"...we used 2x4s and made a brace for the plywood and designed it so it would "hook" over the lip of the tile wall...we thought of just anchoring 2x4s to the wall itself, but i didnt want to damage the wall any, in case we decide to change the layout or remove it all later...   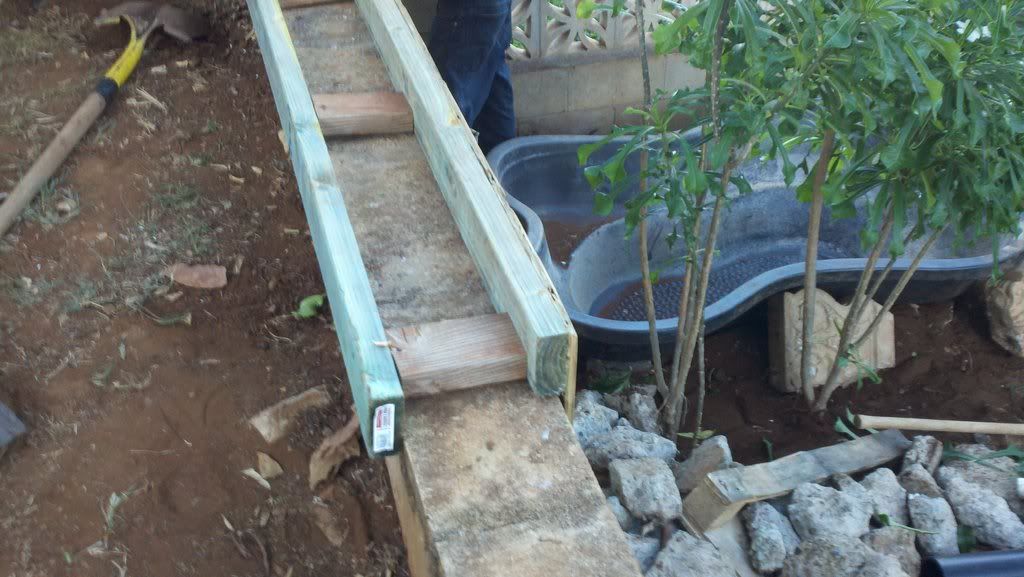 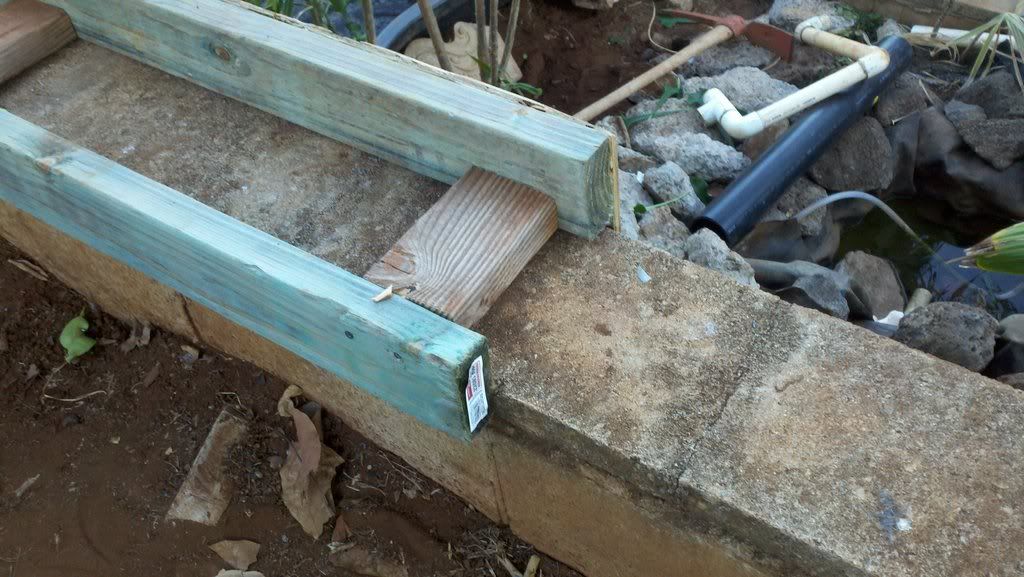 here's shots of it all together as of right now... 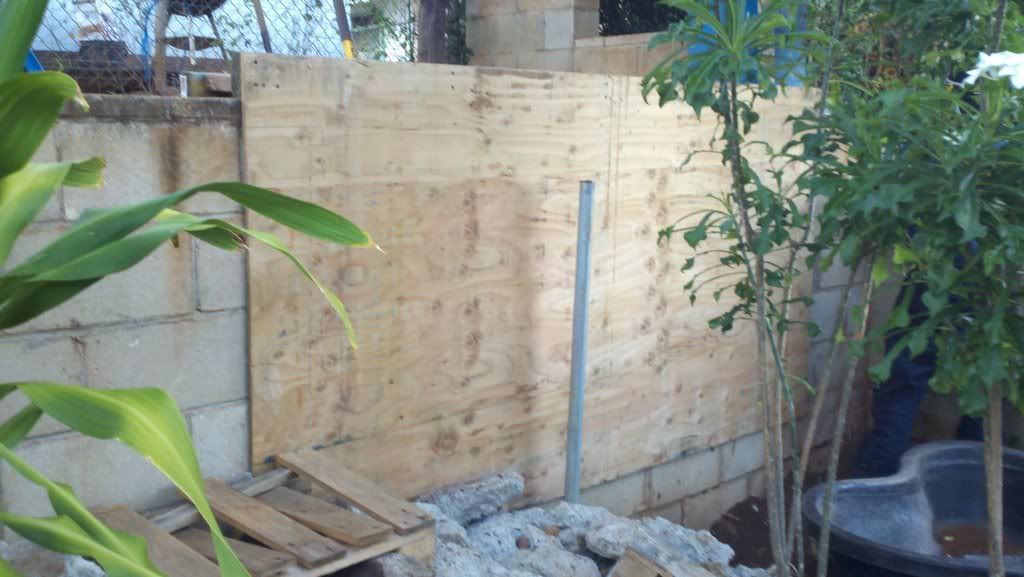 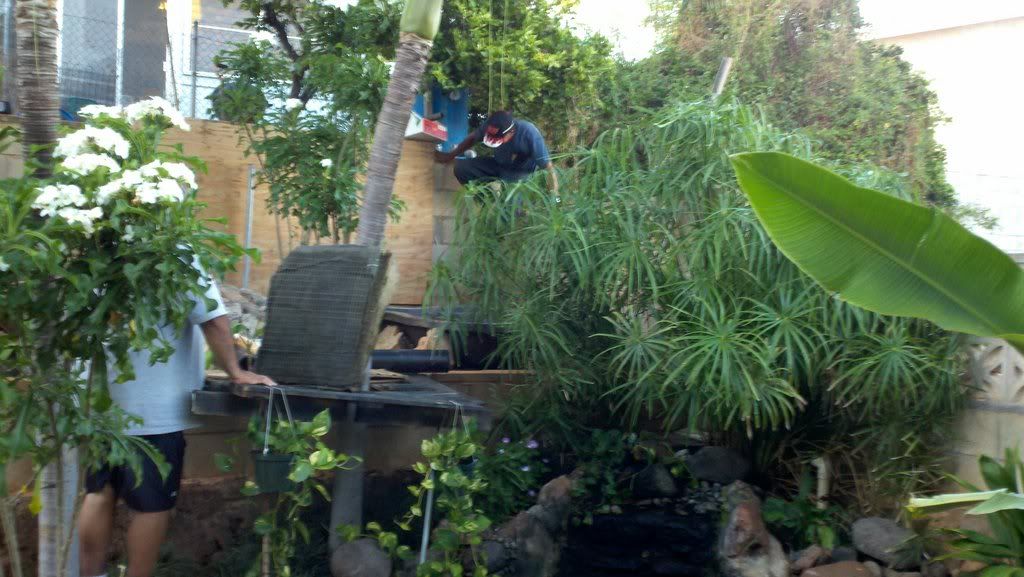 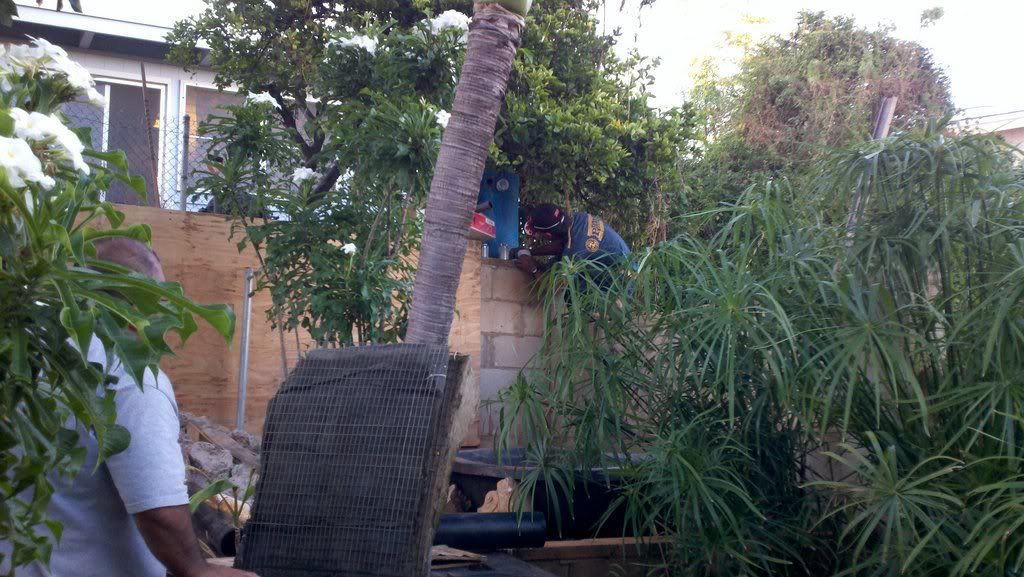 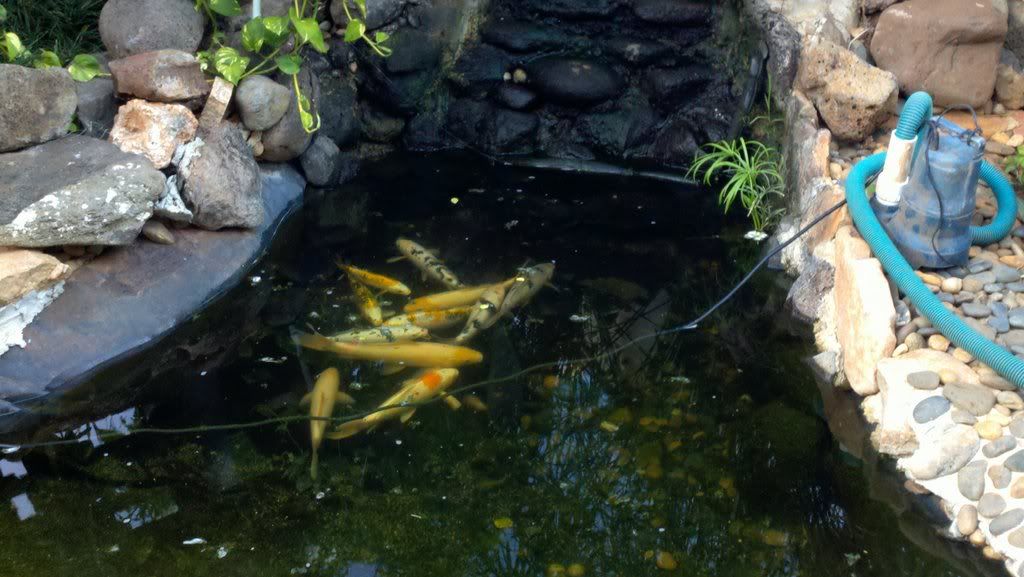 and some vids of how the main pond pump is plumbed in.... just us testing to see if the drain can keep up with the pump flow...we had to adjust the pond a bit, as it was filling faster than it was emptying...the second vid shows us just trying to put a temporary pipe in to keep the splashing down...in the end, there will be no pipe for the downspout- it'll be another rock waterfall, similar to what there is in the bottom fishpond...and the trucks will drive in front of it... http://www.youtube.com/watch?v=bgUtbdr1ZeQ http://www.youtube.com/watch?v=bWMIodX22q8 we were thinking to plumb the system to also drive the waterfall for the roads, but it would just added more complexity, so we decided to just use the second pump for that feature...so we didnt even work on that part yet... |
|
| |
|
09-25-2011, 09:49 AM
| #3 |
| Rock Crawler Join Date: Aug 2008 Location: Somewhere in the Sierras.
Posts: 655
|
That's beautiful!!! Strong work. Looks like a lot of fun!!! |
|
| |
|
10-23-2011, 03:27 AM
| #4 |
| Quarry Creeper Join Date: Dec 2009 Location: in front of you...
Posts: 248
|
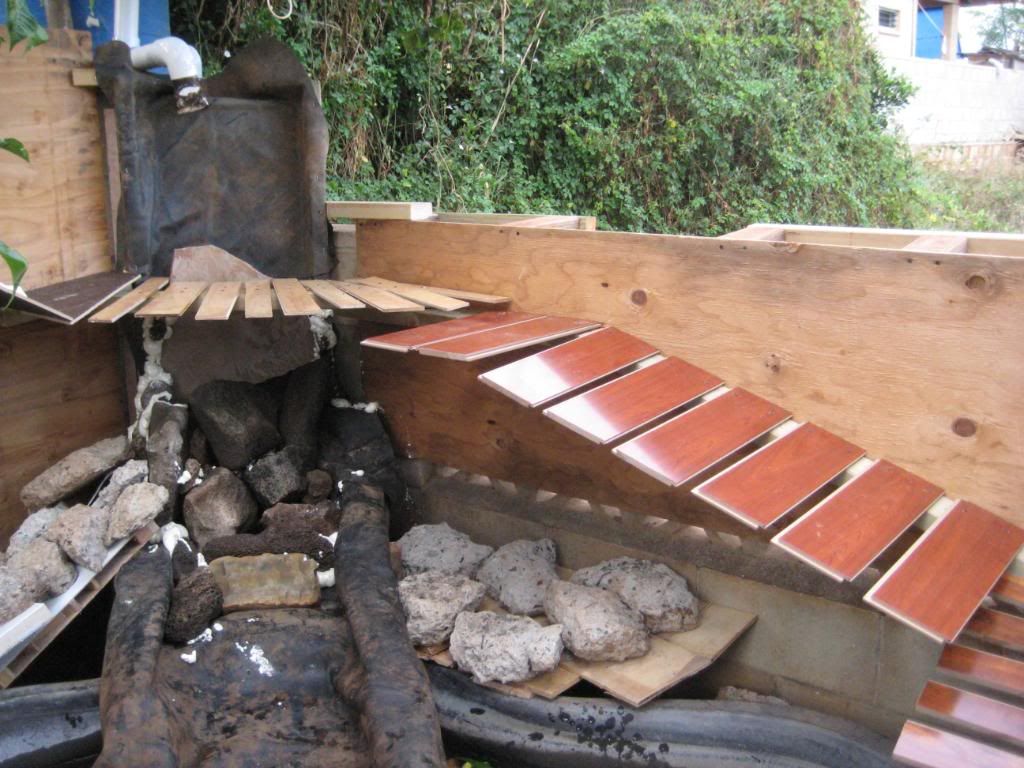
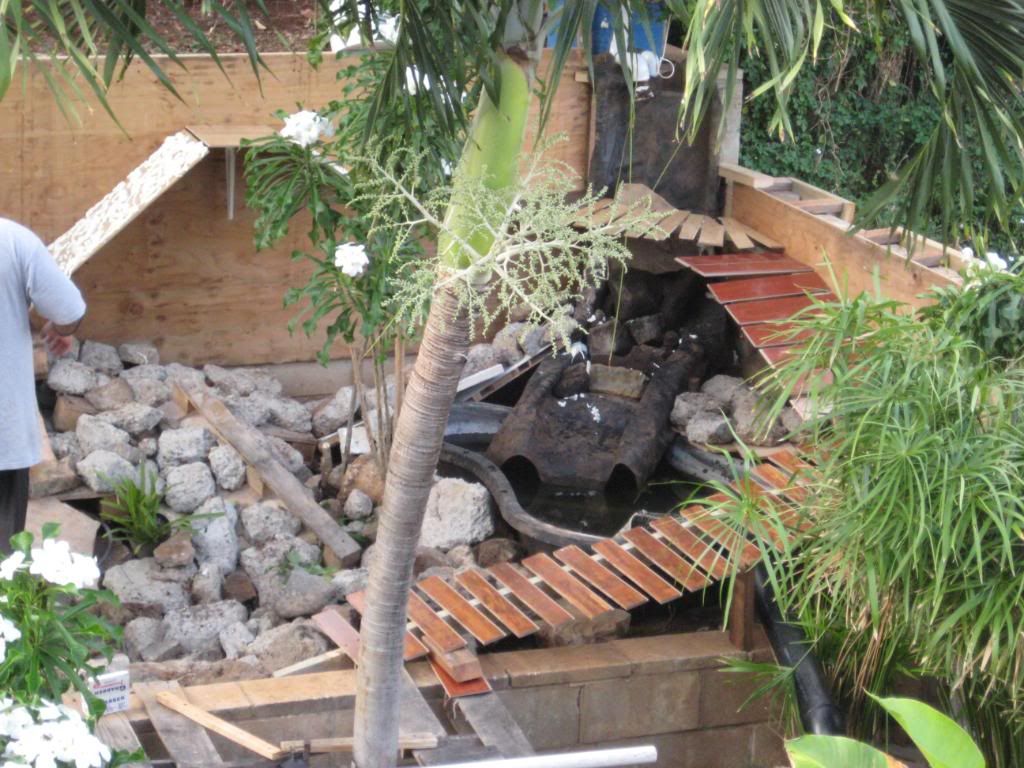
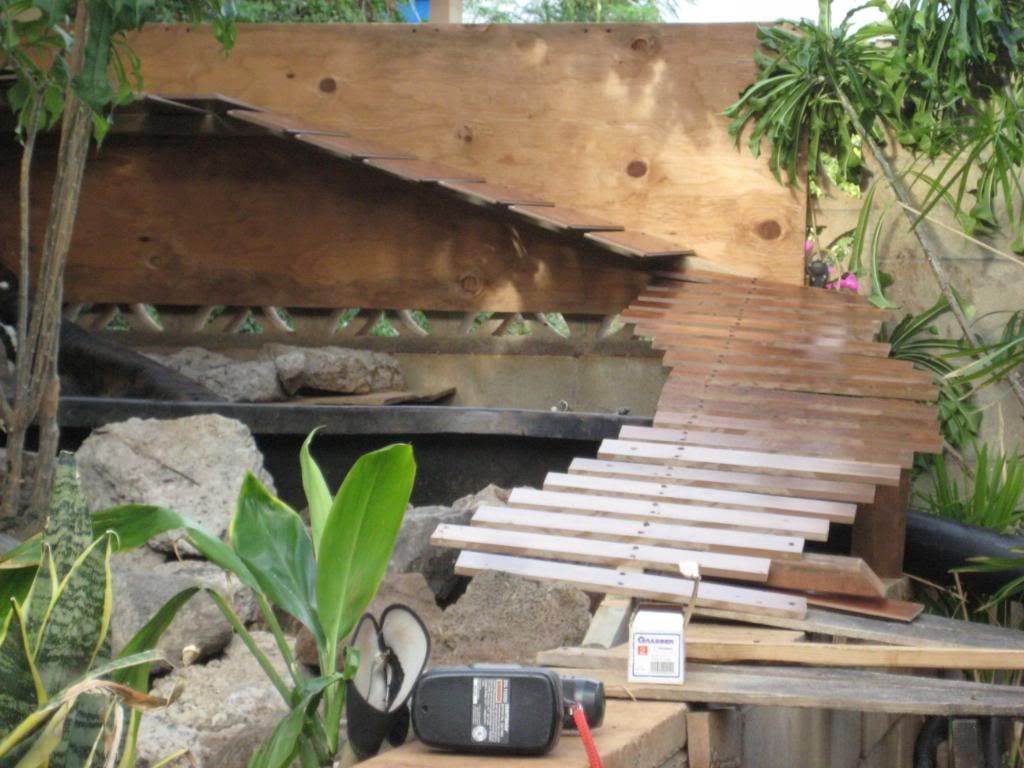
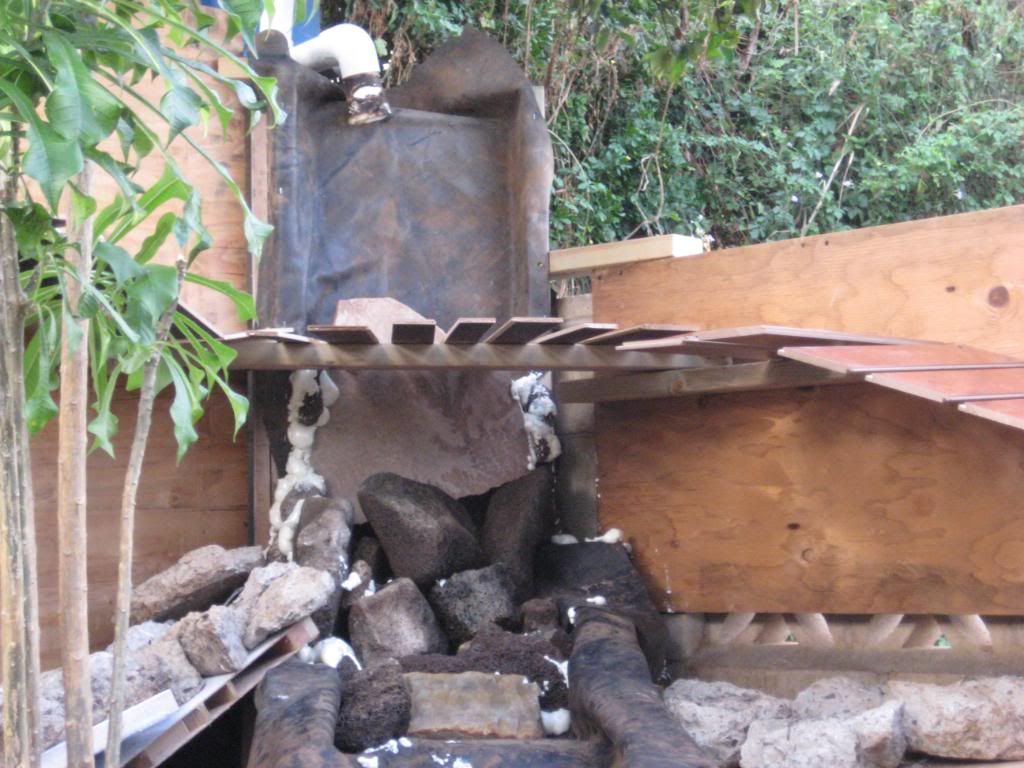
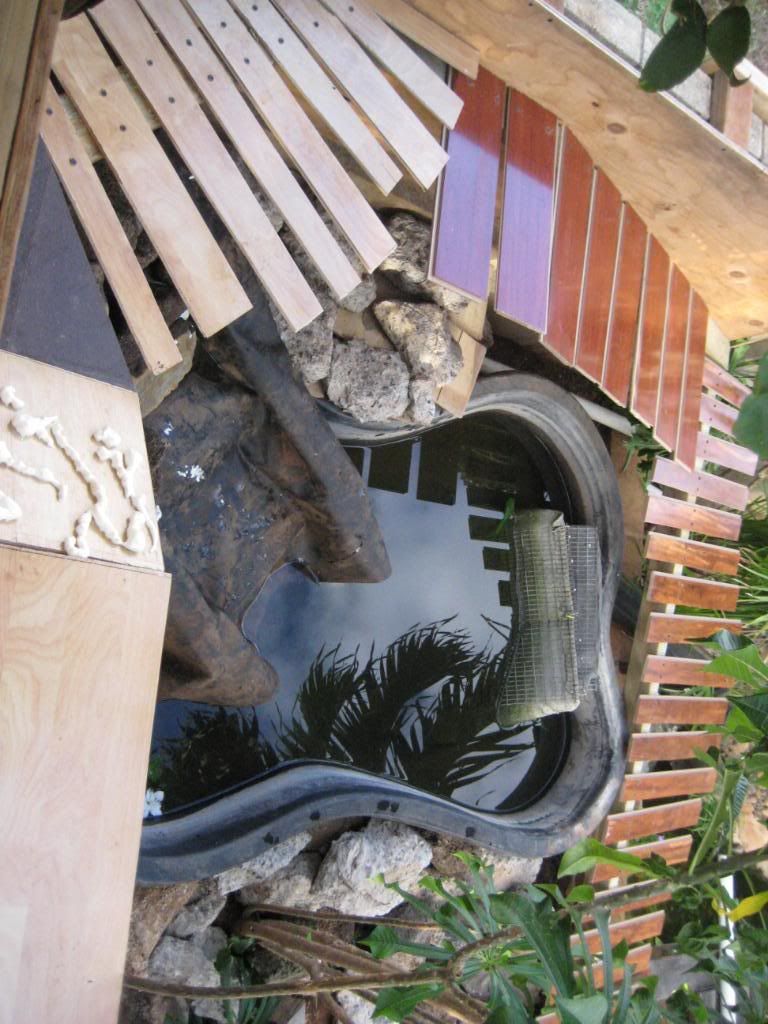
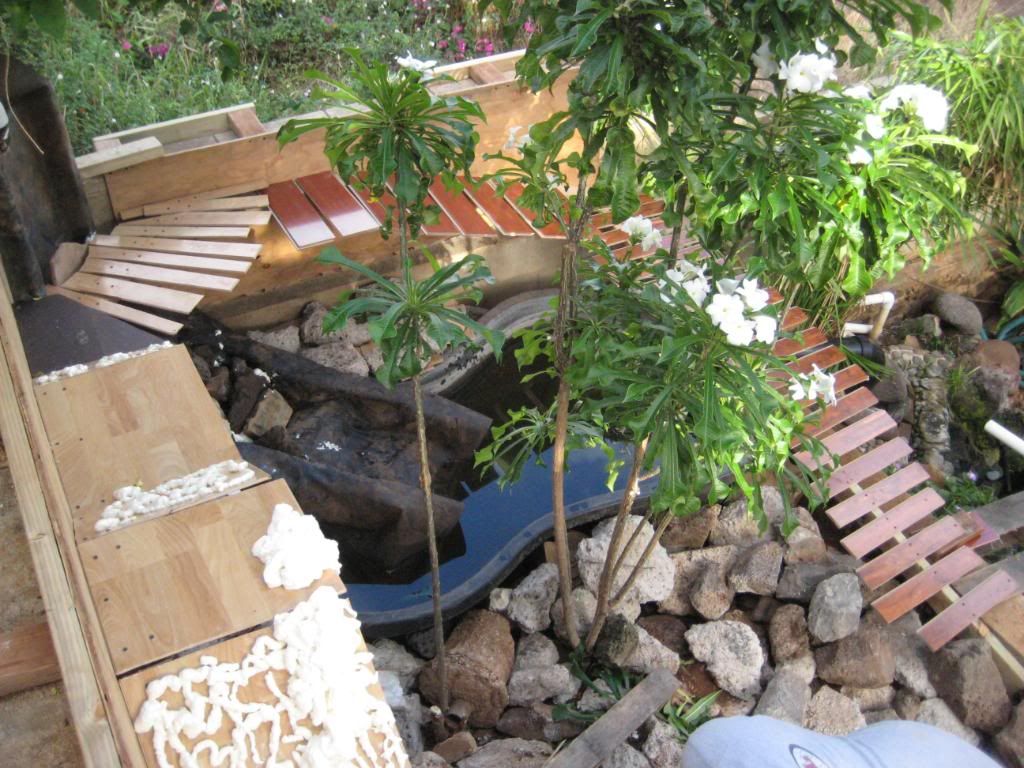
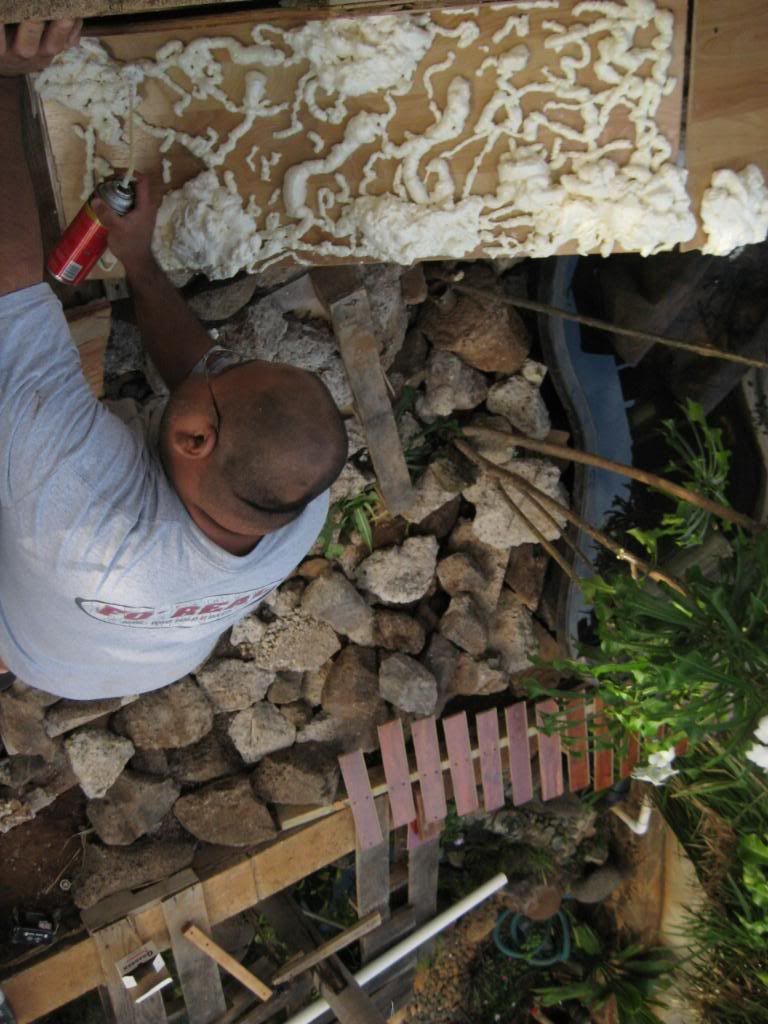
we got A LOT of work done on the course yesterday...got the back waterfall all connected and running...made the "cliffside roads" and rearranged the rocks around...just have to eventually make the "overfall" waterfall so the trucks can drive behind the waterfall...but that'll be a while later...need more bigger rocks to tie in the rear portion of the second level pond and first level... luckily preston gave us some laminate flooring scraps to use as parts of the road...they were pretty slick at first, but we sprayed some rubberized texture on them to give them a little grip...the initial cliff incline was too slippey, so we used some spray foam to give it texture...then chad went crazy and made large mounds, which made it a bit too difficult...so we sprayed texture on that and that made it more manageable, but still challenging... just have to paint the wood so it looks more like landscape instead of plywood... i'll let the pictures and videos do the talking... |
|
| |
|
10-23-2011, 03:32 AM
| #5 |
| Quarry Creeper Join Date: Dec 2009 Location: in front of you...
Posts: 248
|             |
|
| |
|
10-23-2011, 03:34 AM
| #6 |
| Quarry Creeper Join Date: Dec 2009 Location: in front of you...
Posts: 248
|            |
|
| |
|
10-23-2011, 03:34 AM
| #7 |
| Quarry Creeper Join Date: Dec 2009 Location: in front of you...
Posts: 248
|        |
|
| |
|
10-23-2011, 03:36 AM
| #8 |
| Quarry Creeper Join Date: Dec 2009 Location: in front of you...
Posts: 248
|
this vid showcases the latest changes...the rest are just vids chad took of the course... 2011 10 22 09 14 23 544 - YouTube MVI 1749 - YouTube MVI 1748 - YouTube MVI 1747 - YouTube 2011 10 22 09 21 35 172 - YouTube 2011 10 22 09 13 55 976 - YouTube 2011 10 22 09 01 27 899 - YouTube |
|
| |
|
10-23-2011, 03:40 AM
| #9 |
| Newbie Join Date: Sep 2011 Location: Metro D
Posts: 16
|
Lookin' good. I like all of the thought that is going into this build. The waterfall is an awesome touch!  |
|
| |
|
10-23-2011, 06:57 AM
| #10 |
| RCC Addict Join Date: Sep 2011 Location: Peoria, AZ
Posts: 1,168
|
X2 Mr. Moose it does look real good. Now all he need's is to put some lighting in their also to do some night crawling as well... |
|
| |
|
10-23-2011, 12:59 PM
| #11 | |
| Quarry Creeper Join Date: Dec 2009 Location: in front of you...
Posts: 248
| Quote:
lights...hmmmm...sounds like a good idea...we have one of those small solar powered lights on the course now...decent lighting for something so small (it's just 1 LED)...maybe pick up a few more and set up our trucks with lights on it to provide the rest... i'm still thinking what we can use to make the bottom of the roads look like a real cliff, vs. wood just hanging in space...we were thinking using chicken wire to line the bottom and spray it with foam to give it texture, but the foam is pricey and a can doesnt go very far... | |
|
| |
|
10-23-2011, 01:09 PM
| #12 | |
| Rock Crawler Join Date: Jun 2011 Location: San Diego
Posts: 698
| Quote:
| |
|
| |
|
10-23-2011, 01:56 PM
| #13 | |
| Quarry Creeper Join Date: Dec 2009 Location: in front of you...
Posts: 248
| Quote:
would it be easily applied in place? i need something that can stick to vertical surfaces...wouldnt work in my situation if it drips down too easily... and i'm worried about weight also...i dont want to put anymore weight on the platform if i dont need to... sorry for the questions-i have just basic experience working with cement (pouring foundation for a shed)... | |
|
| |
 |
| |


 Linear Mode


