| |
| |||||||
 |
| | LinkBack | Thread Tools | Display Modes |
 08-01-2007, 04:43 PM
| #1 |
| Newbie Join Date: Jul 2007 Location: Melbourne, Australlia
Posts: 27
| I have been curious about the rock crawling scene for a while and finally decided to take the plunge after seeing an advert for the Goliath crawler in the Aug. edition of RCCA. I had never heard of PTI previously but I liked the look of the truck so much I made note of it and spent the next few days trying to find out a bit more about it. This is when I discovered this forum. To be honest I was a little put off by some of the bad comments relating to the truck and almost ended up with a Wheelie King as that seems to be the flavour of the month. But after thinking about it a little more I decided to go with the Goliath just to be a little different and also because I preferred the Goliath chassis more then the Wheelie Kings plasticy looking variation. I might also add this was going to be my first electric R/C purchase in about 17 years as I have been running nitro ever since and am currently running a 1/5 scale gasser so this forum was a great help in helping me getting started. So armed with a little knowledge I ordered my Goliath along with a 55T motor and a Novak XRS speed control. I also got and additional Nomadio transceiver so I could use my existing Sensor radio along with a GD-600 reduction box, a couple of 10t pinions from RC4WD and 2 TowerPro high torque MG servos (thinking of 4WS in the future). My Goliath arrived and begun my build. I knew from reading previous posts that building the Goliath might require a little more work than other larger name kits on the market as some parts might require additional attention to get them to fit together and had also read about the missing parts that some builders have experienced. Unfortunately I was on of them as my build was cut short by the absence of the 2 input shafts. I double checked everything else and discovered I was also missing a long ball end, a couple of screws and 2 of my dog bones didnt have the pins centred. A quick email to PTI was all that was required to get these on the way to me but it also meant my build was going to be delayed by a week as I waited for these parts to arrive. Once all my parts arrived the truck went together quite well. Only problem areas were the 4 axel nuts which took a little work to get the 2 axle halfs to fit together nicely, 1 sheared bolt while mounting the transmission plates to the chassis rails and 2 of the 4 threaded cantilever mounting holes were tapped too large so the bolt would not bite into the chassis rails. Once everything was together I took it for a quick spin without the GD-600 gear reduction just to see how it went. I was surprised how fast it was even with the 55T motor and 10T pinion. Definitely requires a reduction as the motor just stalls when attempting to crawl over an obstacle so will fit it once I work out the best way to mount it. I gotta say I really like it so far and think im am hooked. I have ordered more parts so will attempt to stretch it out by a few inches and with a reduction box think it will perform nicely. Thanks all for all your great ideas as you have been a big help to me so far and without this knowledge I reckon the Goliath experience wouldnt be nearly as good as it has been so far. |

|  |
| Sponsored Links | |
| | |
|
08-01-2007, 05:12 PM
| #2 |
| I wanna be Dave  Join Date: Dec 2005 Location: Tax Nation
Posts: 2,289
|
Glad to see that people are using the info we post up  The Goliath is as good as any other truck on the market. They all have benifits and down falls. There are some mods on the way from PTI and from aftermarket that will make the Goliath a much better truck. I would suggest ditching the cants, I used to advocate keeping them but they realy do hurt the trucks performance. The other alternative would be using a revo setup like Skeeno. The Goliath is as good as any other truck on the market. They all have benifits and down falls. There are some mods on the way from PTI and from aftermarket that will make the Goliath a much better truck. I would suggest ditching the cants, I used to advocate keeping them but they realy do hurt the trucks performance. The other alternative would be using a revo setup like Skeeno.
|
|
| |
|
08-01-2007, 07:27 PM
| #3 |
| Rock Crawler Join Date: Jan 2006 Location: Bellaire, MI
Posts: 564
|
[quote=fetish;791906]I have been curious about the rock crawling scene for a while and finally decided to take the plunge after seeing an advert for the Goliath crawler in the Aug. edition of RCCA. I made the same mistake... The review of the truck was too good to be true... My Goliath arrived and begun my build. I knew from reading previous posts that building the Goliath might require a little more work than other larger name kits on the market as some parts might require additional attention to get them to fit together and had also read about the missing parts that some builders have experienced. Unfortunately I was on of them as my build was cut short by the absence of the 2 input shafts. I double checked everything else and discovered I was also missing a long ball end, a couple of screws and 2 of my dog bones didnt have the pins centred. I was missing the long ball stud as well, pins didn't fit into the dogbones either, just drilled the holes a little larger... Once all my parts arrived the truck went together quite well. Only problem areas were the 4 axel nuts which took a little work to get the 2 axle halfs to fit together nicely, 1 sheared bolt while mounting the transmission plates to the chassis rails and 2 of the 4 threaded cantilever mounting holes were tapped too large so the bolt would not bite into the chassis rails. Sheared a bolt in the same location as well... luckily I was able to get the broken part out with vise grips once I took the plate back off. Also, will say that it was nice to see them include spare hardware... you will need it. Once everything was together I took it for a quick spin without the GD-600 gear reduction just to see how it went. I was surprised how fast it was even with the 55T motor and 10T pinion. Definitely requires a reduction as the motor just stalls when attempting to crawl over an obstacle so will fit it once I work out the best way to mount it. Yep, this thing is not a crawler even with a lathe motor... Sucks you have to spend extra time and money on a GD to get the gearing correct on something that is a "rock crawler" out of the box... I gotta say I really like it so far and think im am hooked. I have ordered more parts so will attempt to stretch it out by a few inches and with a reduction box think it will perform nicely. Just stock up on spare ring and pinion gears, cvd's, ect... |
|
| |
|
08-02-2007, 01:56 AM
| #4 | |
| Pebble Pounder Join Date: Jun 2007 Location: Juneau, AK
Posts: 153
| Quote:
That is the exact same parts that I was missing and the dogbone pin not centered, I missed that when I contacted PTI, but I have not had any problems so far. I will admit that this truck has great potential, and the customer service at PTI is A+ I will post up pics of my PTI GRC sometime in the near future, but for now, trying to get my Wheely King ready for Nationals. I agree this forum is amazing. Great info within. | |
|
| |
|
08-02-2007, 08:24 PM
| #5 |
| Newbie Join Date: Jul 2007 Location: Melbourne, Australlia
Posts: 27
|
Thanks for your replies. Its funny as I have already begun my mod's and the thing hasn't even been outside yet I have ordered a full set of Traxxas upper and lower links as well as 2 drive shafts and a set of long Revo cants. Last night I worked on bracing the output shaft using 2 metal plates as suggested in the forum as I noticed a bit of play in it . Problem was this required the use of longer bolts so I had to move up a few sizes to a 4mm bolt diameter as I couldnt find a bolt longer than 25mm in stock size which forced me into re-drilling the axel upper link mounting holes as well as the ball ends (which is a real challenge due to ther small size) This mod will also allow me to raise the upper links on the axel end a little for better geometry. Hopefully the links will come in the next few days but in theb meantime I need to figure out how to mount up my GD600. So far my run time to build time ratio is about 1:25 ..lol |
|
| |
|
08-03-2007, 07:15 AM
| #6 |
| I wanna be Dave Join Date: Dec 2005 Location: Tax Nation
Posts: 2,289
|
if you were running cvd's I would say the GD will just bolt up. With Maxx shafts you have to trim the bottom off the GD to get it to fit.
|
|
| |
|
08-03-2007, 09:45 PM
| #7 |
| Rock Stacker Join Date: Jun 2007 Location: at the river
Posts: 50
|
SHOW! some PICS!!!!!!!!!
|
|
| |
|
08-04-2007, 04:41 AM
| #8 |
| Newbie Join Date: Jul 2007 Location: Melbourne, Australlia
Posts: 27
|
Ok heres some pics. Not much to see really as its currently back in pieces again while I perform a few mods. A few new arrival pics...  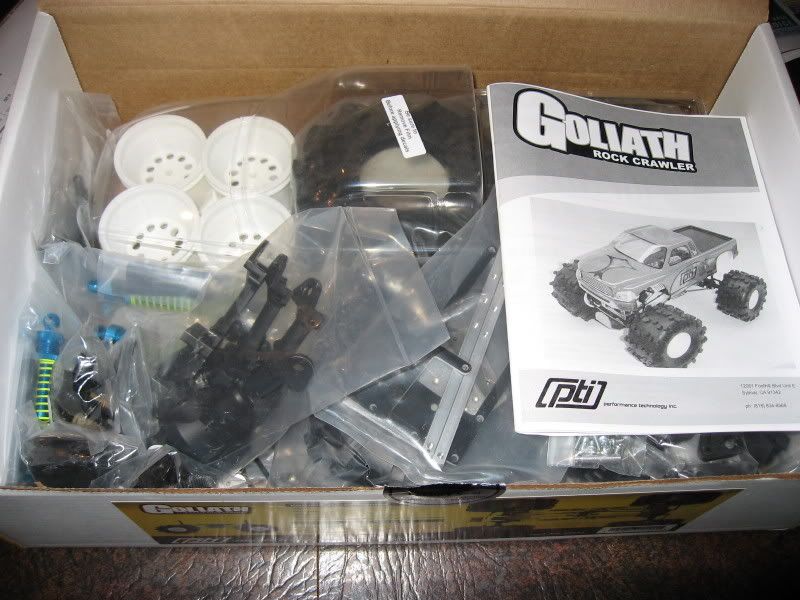 Chassis build. Pretty standard stuff at the moment. 55t motor Novak XRS speedy and a 1300mah Lipo. My bling side plates were a result of boredom while waiting on a few missing parts. 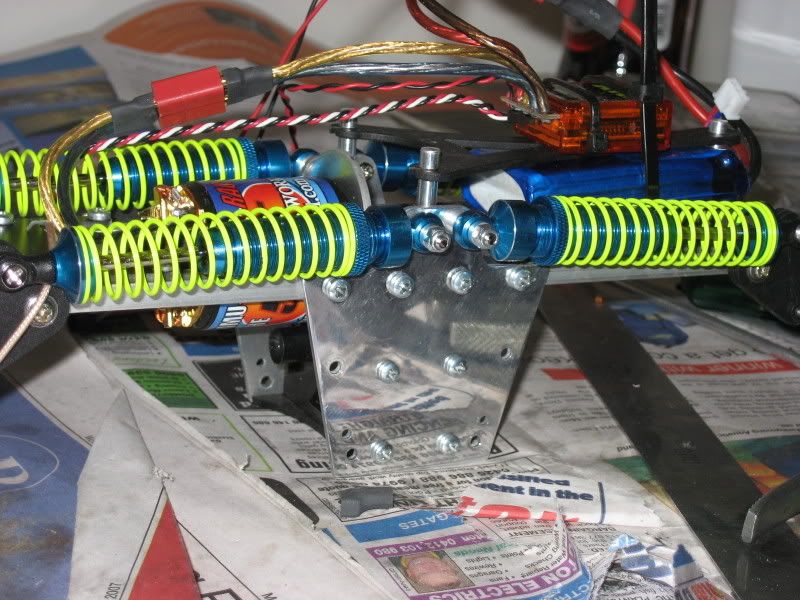 These pics show my input shaft bracing. A 4mm bolt was used to secure them in place which required additional drilling of the axle housing and ball ends. You can also see my second servo mount in the background that I fabricated tonight so I can run 4WS. Still need to add my Revo links and drive shafts for the stretch out to 12.5" 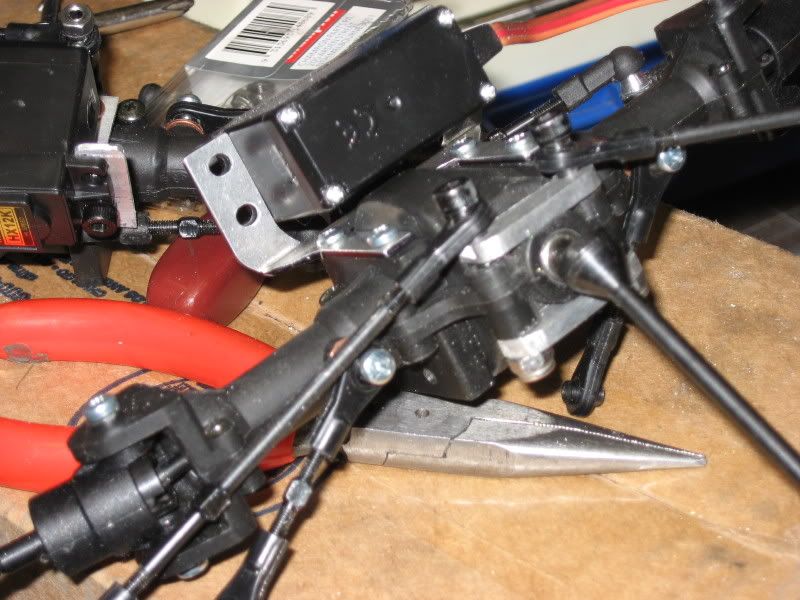 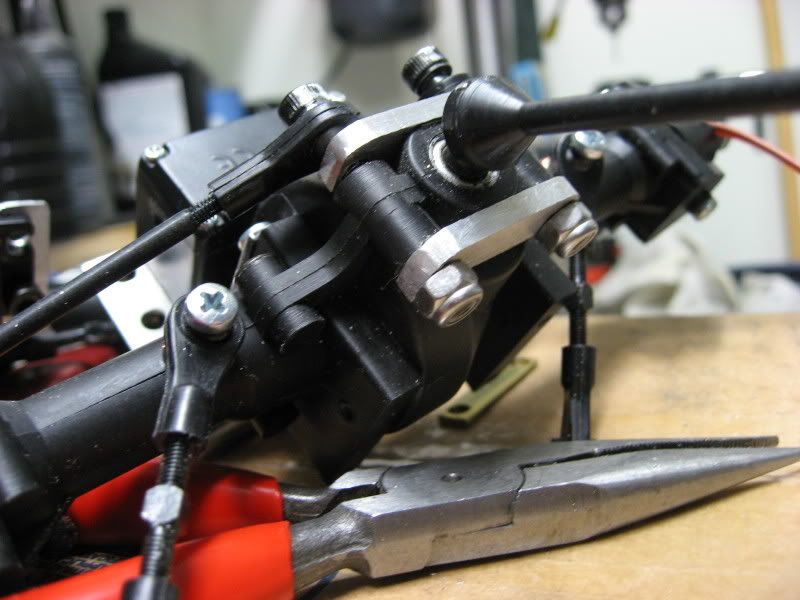 |
|
| |
|
08-05-2007, 01:32 AM
| #9 |
| Newbie Join Date: Apr 2005 Location: da west coast
Posts: 10
|
any more progress on the build? i got mine yesterday and finished the build early, early this morning. im already looking to do the stretch soon but living here in hawaii, the big island there's only 2 hobby shops on the whole island that i know of. and getting parts is not easy. i hate ordering online, i want the parts here and now. keep us posted on the build, i'd like to see what mods you do that ive never seen on the forum.
|
|
| |
|
08-06-2007, 02:58 AM
| #10 |
| Newbie Join Date: Jul 2007 Location: Melbourne, Australlia
Posts: 27
|
Heres a few more of my work in progress. Was going to wait until my new links arrived before I put it back together again but today I thought what the hell and decided to have another play to see what a difference the GD600 reduction gearbox would make. Unbelievable difference it makes too. Totally transforms the truck into a crawling beast! I am running a 10t and 18t pinions and its perfect. Can creep over any obstacle but still has decent speed on flat surfaces. I have read a lot of threads here where people are moving the lower links links out towards the wheels for better geometry so I came up with this idea. Not quite as radical as some others but still a nice improvement over stock. Just used some 2.5mm tubing cut to approx 8mm for the axles and 6mm for the side plates. 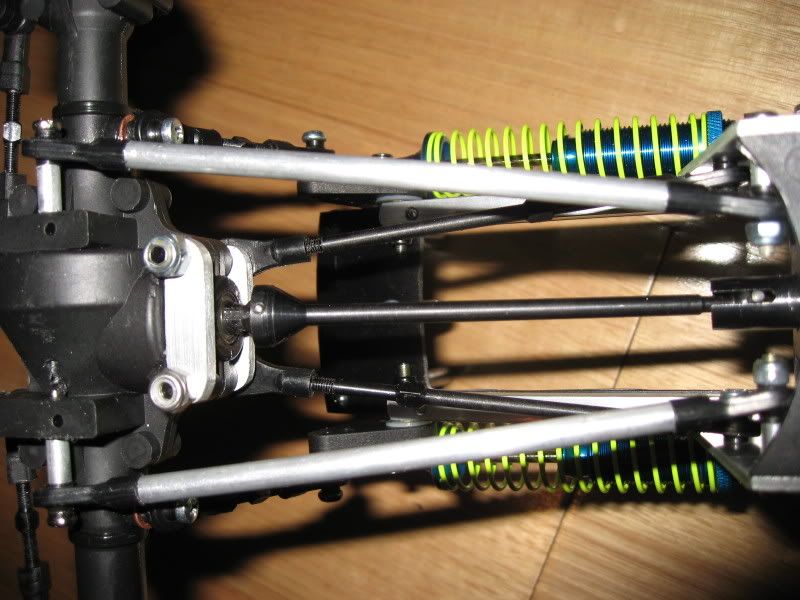 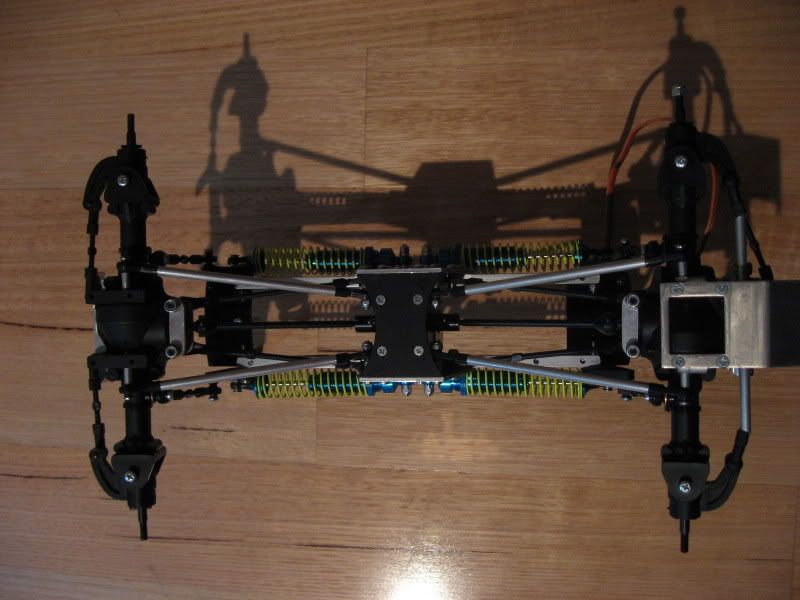 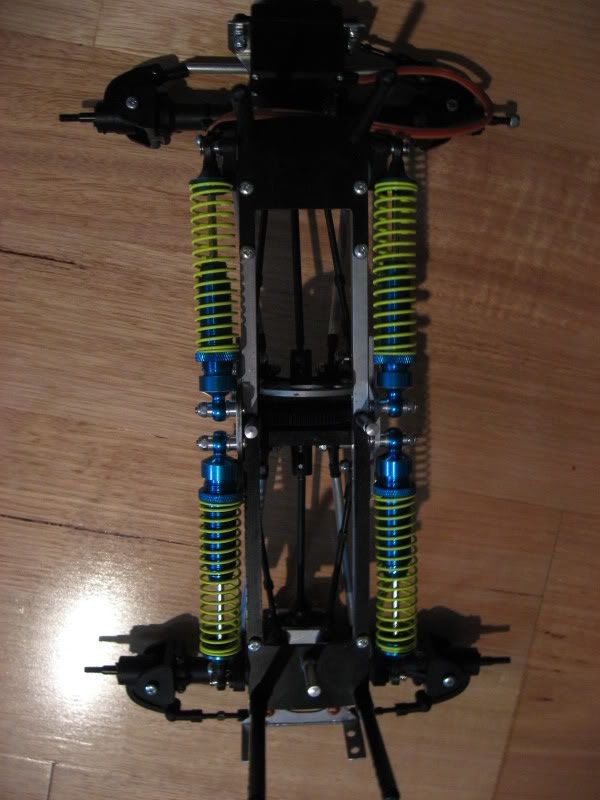 Here she is all painted up. As you can see my decal ability leaves a bit to be desired but is nice and colorful none the less so it should stand out on the rocks.  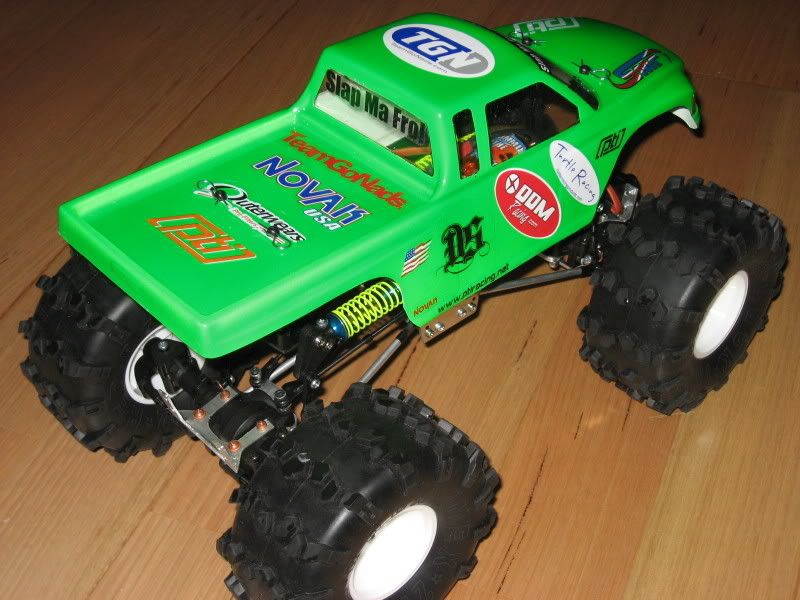 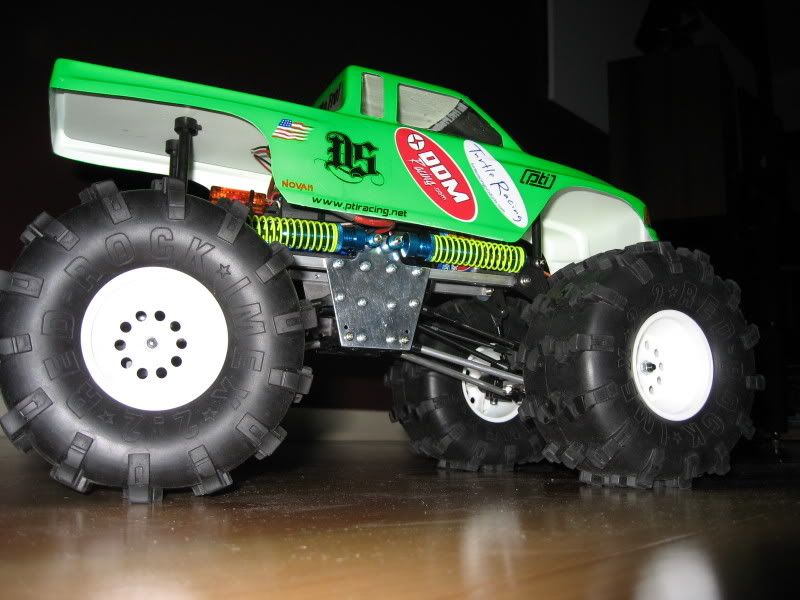 And heres a little course I made in the lounge tonight for a quick play. with a bit of weight up front it can climb real well. I also removed the tire foams to soften up the tires for better traction. 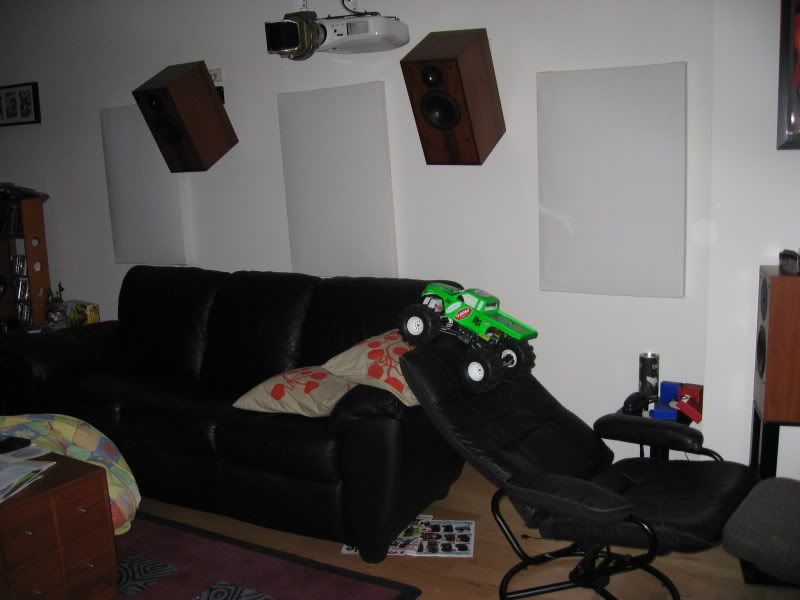 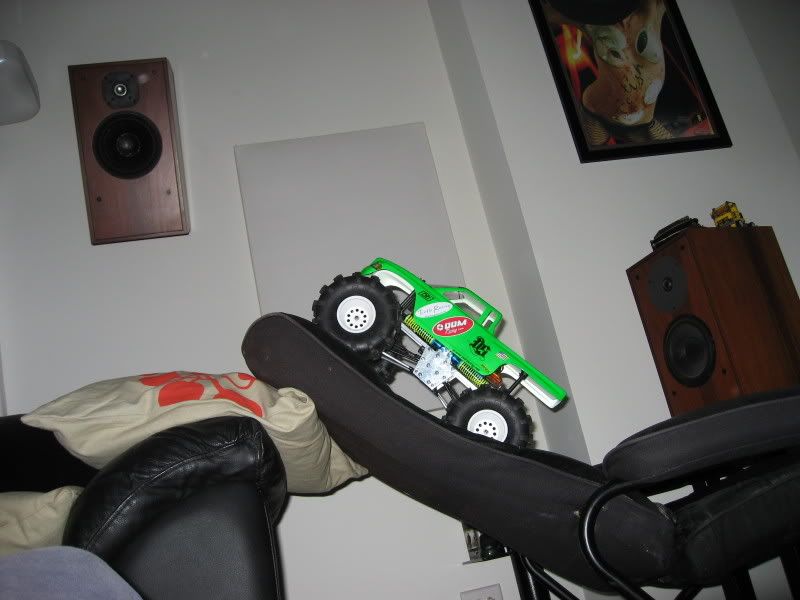 |
|
| |
|
08-09-2007, 10:41 AM
| #11 |
| Newbie Join Date: Aug 2007 Location: NH
Posts: 25
|
how are the bottom link monts holding up?
|
|
| |
|
08-09-2007, 01:05 PM
| #12 |
| Quarry Creeper Join Date: Apr 2007 Location: Kapahulu Safeway
Posts: 281
|
I like the home theater system better than the truck |
|
| |
|
08-09-2007, 02:29 PM
| #13 |
| I wanna be Dave Join Date: Dec 2005 Location: Tax Nation
Posts: 2,289
|
go ahead and order new rims becuase the stockers strip out fast and easy. If you go with something with a hex you can get aluminum hexs and never worry about it. Looks good
|
|
| |
|
08-09-2007, 04:30 PM
| #14 |
| Newbie Join Date: Jul 2007 Location: Melbourne, Australlia
Posts: 27
| Chepop so far so good with the bottom link extenders. There surprisingly stout and would take something pretty major to bend/rip out as the 2.5mm tubing bites into the axel a little stiffening the bolt by adding extra support. No not Totem speakers. There basically Sonus Faber clone's I built a few years back. Uses the same drivers and crossovers but housed in a different enclosure. Made up 7 for my HT. The strange lump in front of the projector is a Varimorph cinemascope anamorphic lens used on theatre projectors back in the 50's that enables me to run a full 2.35:1 screen aspect ratio. Sorry dont want to go off track as this isn't a home theatre forum but its another one of my hobbies I love playing around with. Thanks for the tip jetboat. I did make up some solid pins for the axels but your right there a pain to align and mount the rims and I already see signs of distress on one of my rims. What rims and axel extenders would you recommend me to use as I also would like to widen it up a little especially after I do the stretch. Oh and by the way I now have 4WS. Haven't set it up 100% just yet as I wanted to see if I liked it first but I must say it really helps me get around those obstacles a whole lot easier so think I will be keeping it. |
|
| |
|
08-10-2007, 12:42 AM
| #15 | |
| Pebble Pounder Join Date: Aug 2006 Location: Oregon City
Posts: 123
| Quote:
| |
|
| |
|
08-10-2007, 04:20 PM
| #16 |
| Rock Crawler Join Date: Jan 2006 Location: Bellaire, MI
Posts: 564
|
Ok you have had it for a week now, lets see the list of broken parts...
|
|
| |
|
08-11-2007, 02:43 AM
| #17 |
| Newbie Join Date: Jul 2007 Location: Melbourne, Australlia
Posts: 27
|
No broken parts yet. Been spending the last few says completing then 12.5" stretch. Went for a quick run and noticed a few good and bad things. The bad news is if you you plan to do a stretch and want to keep the stock cant setup then you must also buy the long Revo versions as using the stockers binds up the suspension due to the cant rod angle. Temporally got around this buy limiting the shock travel using some cable ties. Hopefully my 11mm bearings will arrive next week so I can install my Revo cants. Also due to the longer wheelbase it is not quite as nimble. Turns are now wider and I am finding the bottom skid is hanging up on more stuff than before. The benefit is the truck is more stable during ascending and descending. Hoping to test more tomorrow. |
|
| |
|
08-11-2007, 08:52 PM
| #18 |
| Newbie Join Date: Jul 2007 Location: Melbourne, Australlia
Posts: 27
| Well its finally done. Must say it wasn't quite as easy as I thought as I had a few dramas along the way which required some quick thinking. Firstly drilling out those T-Maxx yokes was a bit tricky as the material is strange and ended up ripping it out of my drill press vice as the drill grabbed too hard. Luckily it was all right. Speaking of yokes the packet came with 2 different sized pins. One was correct but the other was far too small so I ended up fabricating my own. I quickly realized the stock suspension doesn't work when you stretch out the links as it throws the cantilever rod off on an angle binding up the suspension. Being the impatient person I am I decided to change the suspension to a conventional setup rather than waiting for a few parts to arrive for my Revo cants which I was going to install. My first attempt was a disaster. Note to self never try and drill with a blunt bit. While drilling some holes in the side rails I ended up snapping the drill bit off in the rail which was a nightmare to try and remove. To make it worse my original mounting position gave me way too much ground clearance and the truck wobbled like a duck when moving...lol. I re-mounted a bit further back (30mm from the side plates) which dropped the ride height and gave me more stability. I also moved the shocks a bit further out towards the wheels. I also installed a 6v 4200mah pack from my Baja 5B and mounted it behind the front servo to provide some extra weight as well as powering my 2 servos. Going out soon to give it its first real test on the rocks.....wish me luck. 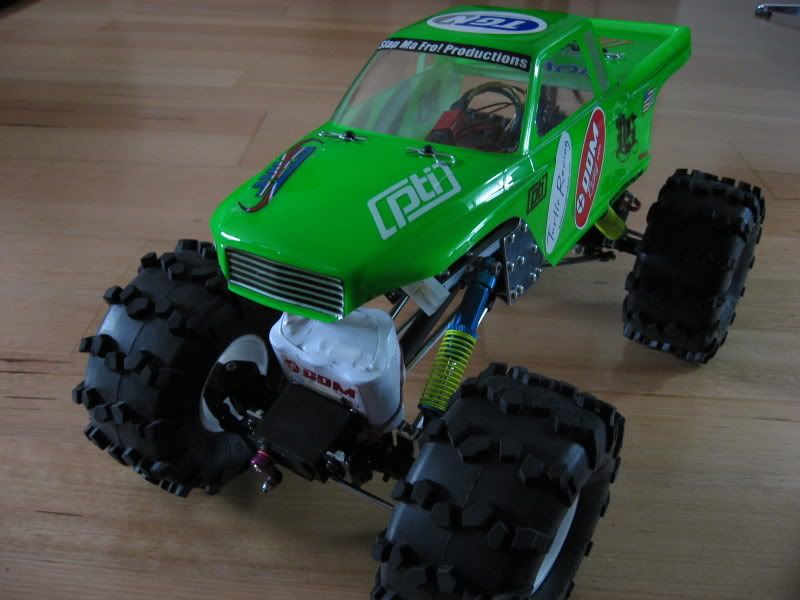 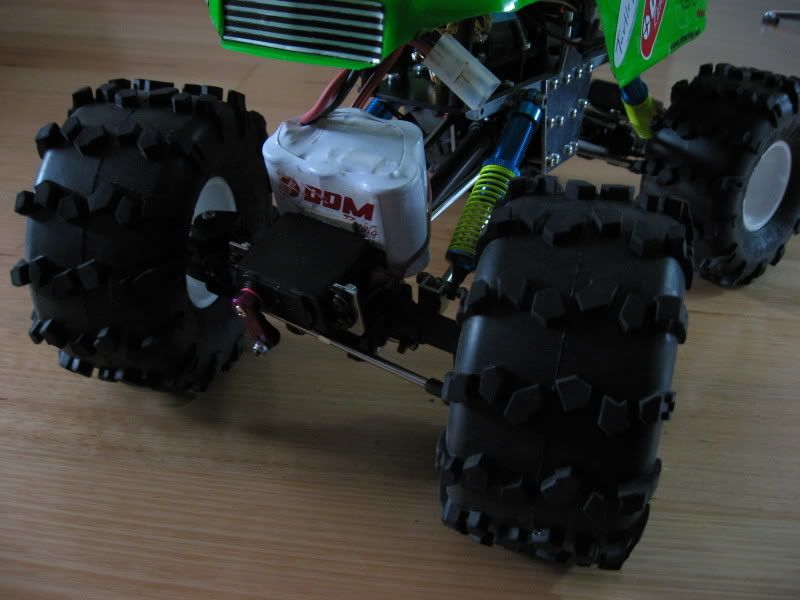 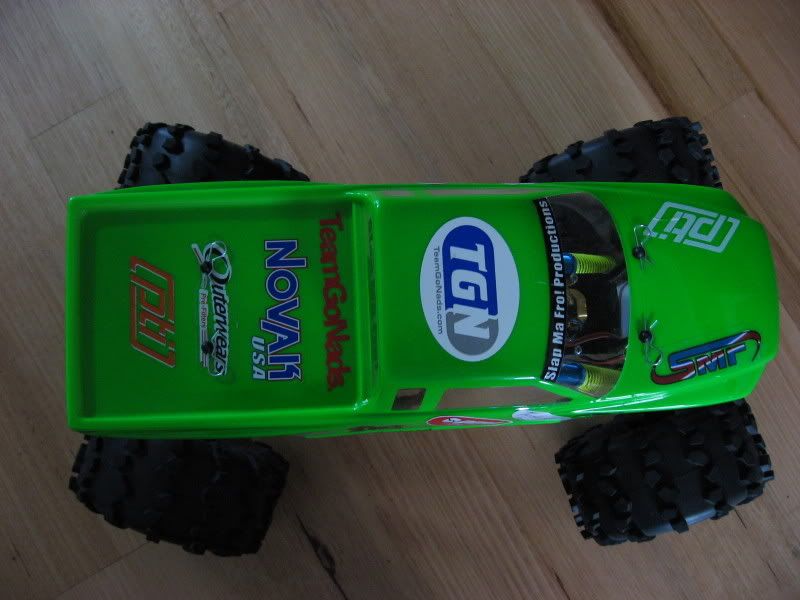 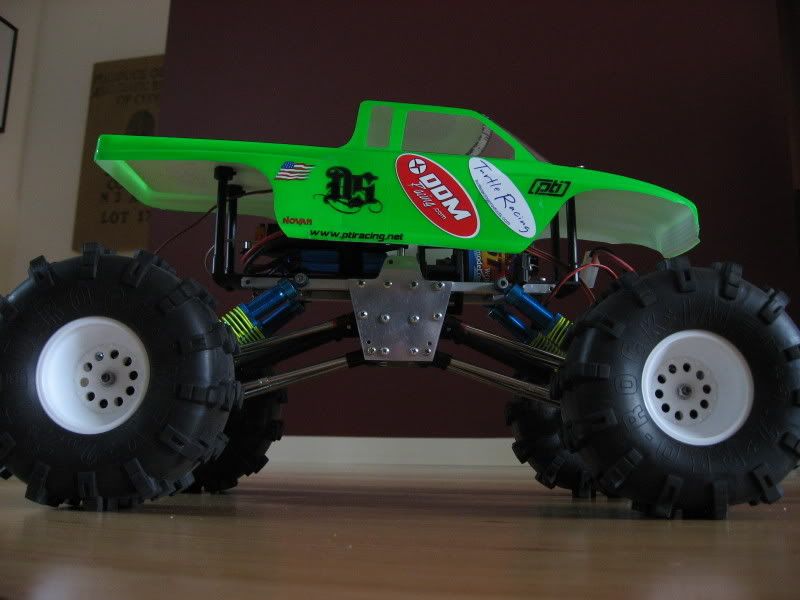 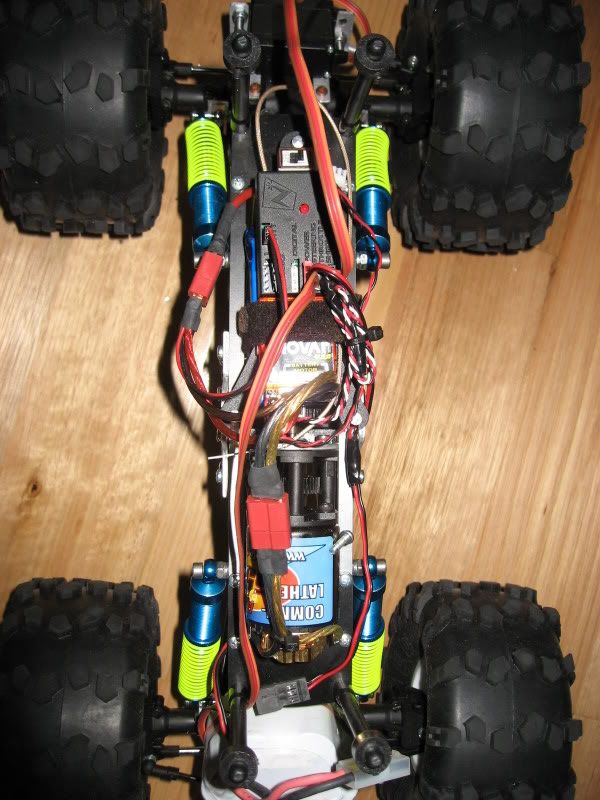 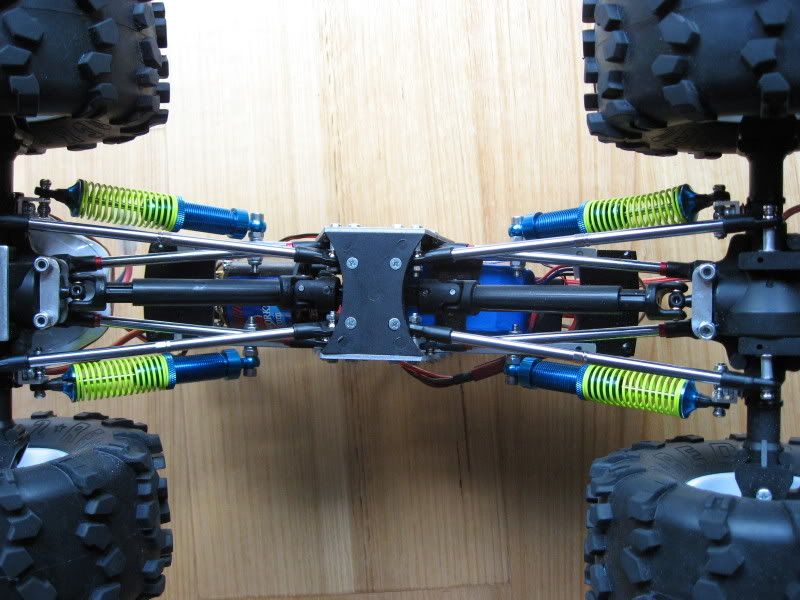 |
|
| |
|
08-12-2007, 08:42 AM
| #19 |
| I wanna be Dave Join Date: Dec 2005 Location: Tax Nation
Posts: 2,289
|
you will like the conventional shock setup! Just my opinion but I would loosed those shock adjustments, looks like you have the springs as tight as they go.
|
|
| |
|
08-12-2007, 03:48 PM
| #20 |
| Newbie Join Date: Jul 2007 Location: Melbourne, Australlia
Posts: 27
|
It's funny cos if I loosen the springs then the truck almost flops to one side. The stock springs appear to be too soft to support the chassis even thought im only running a 73g LiPo up there. Might have to find some stiffer springs. Did anyone else who switched over to this config have the same issues? If not do you think my link geometry is off? BTW. Finally found a screw I have been looking for ages. Can anyone spot it in my last round of pics? Hint: Magnetic fields are a b**ch...lol |
|
| |
|
| |


 Linear Mode


