| |
| |||||||
 |
| | LinkBack | Thread Tools | Display Modes |
 07-16-2010, 06:59 PM
| #1 |
| Rock Crawler  Join Date: Nov 2008 Location: Sunny Southwest Florida
Posts: 743
|
Hey Guys; Well I decided to build some Lexan Light Buckets for my Scaler Crawler and just wanted to share a small How2 on this build. It was very easy to do and only took about an hour or so to complete. So all you need is a piece of scrap lexan,glue,paint,and of coarse some LED lights. SO here we go,sit back and enjoy. Then go build something.l8r,w. So first thing is to measure out how big of a piece of lexan you will need for the job at hand. You want a piece BIG enough to cut from and have a little extra just in case. Also make as many as you need all at once so you can move right onto the next step right away.Here I cut the lexan from my sheet and made 4 of them at once. 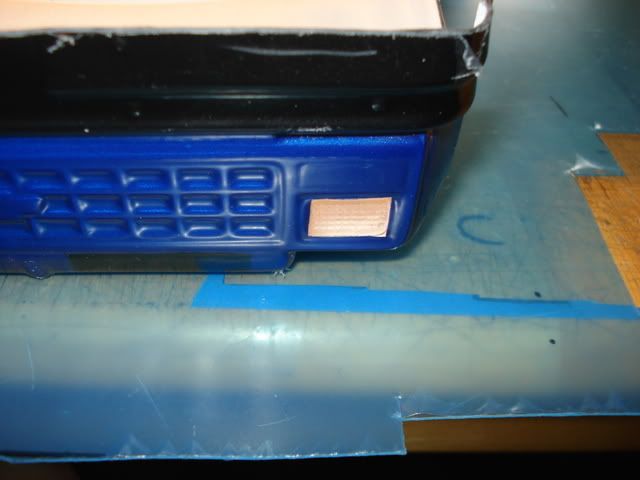 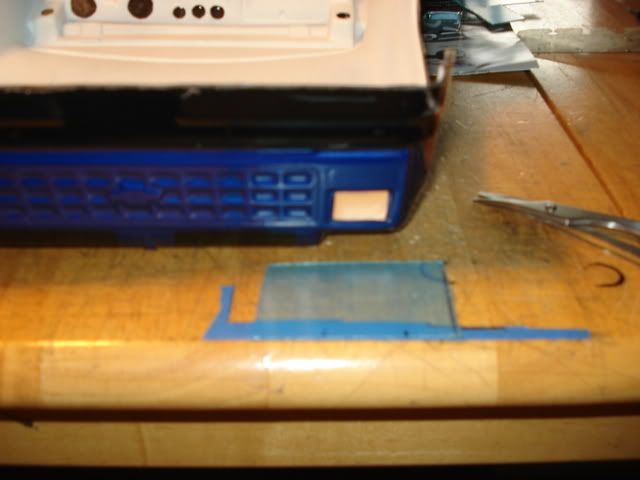 Next I cut it down and maked it for fold lines and for trimming. I wanted to make it just shallow enough so the LED will sit close to the clear area in the body. 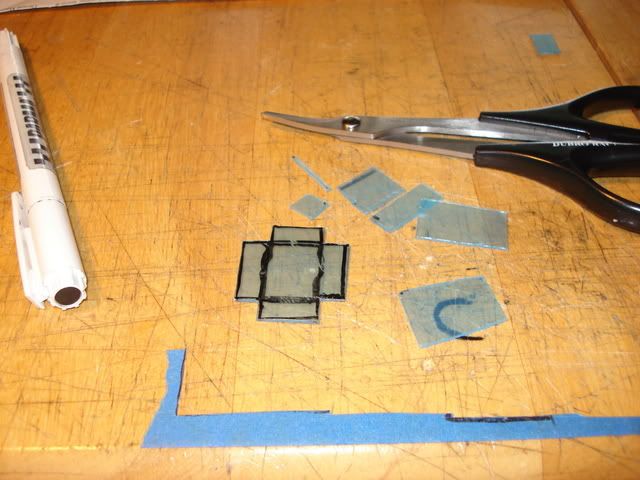 Next I fold along the lines with a strong item like a straight edge. I used a small plastic ruler here for these. Also if you warm the lexan up a bit it will be easier to fold. I layed these on the mag. light I have. The light bulb has vents on top and it puts out enough heat to warm it up in about 10 mins.So by the time I make all 4 of them I can start folding the first one since it is now nice and toasty. 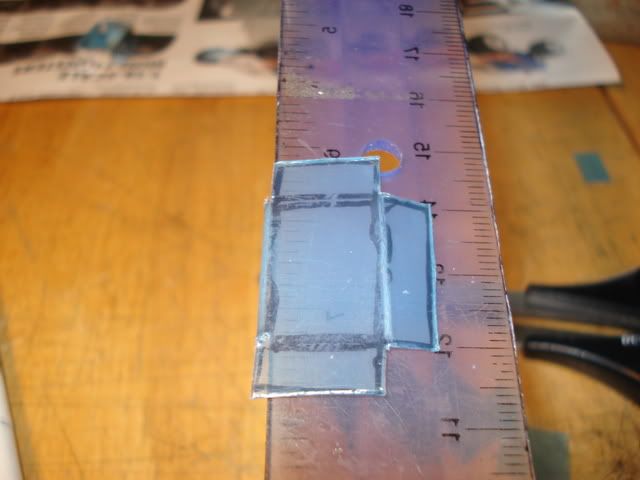 Here I took the prototype and made 4 copies of it.And I will keep it for future use. 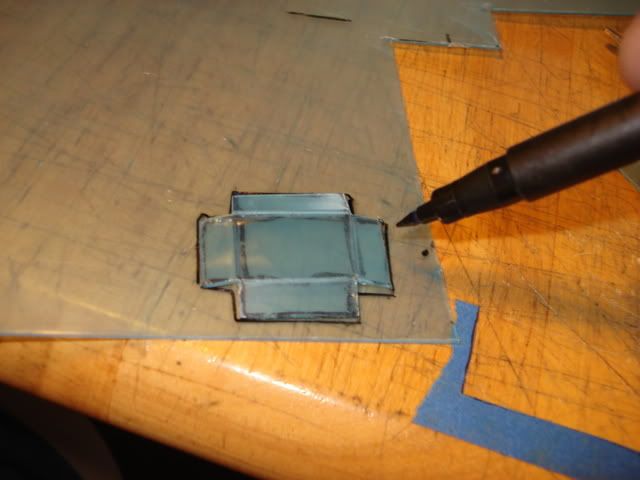 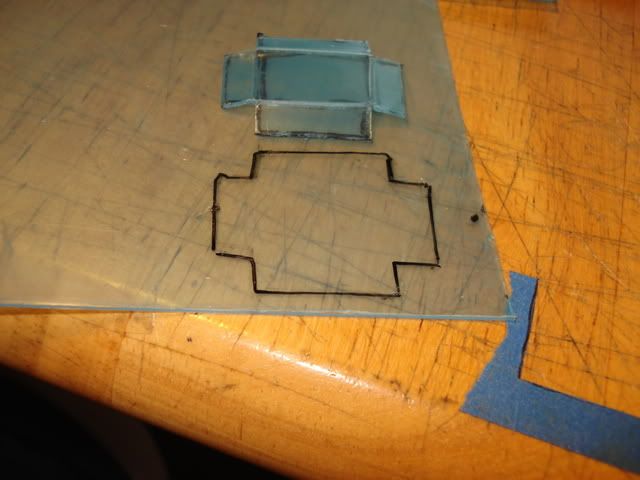 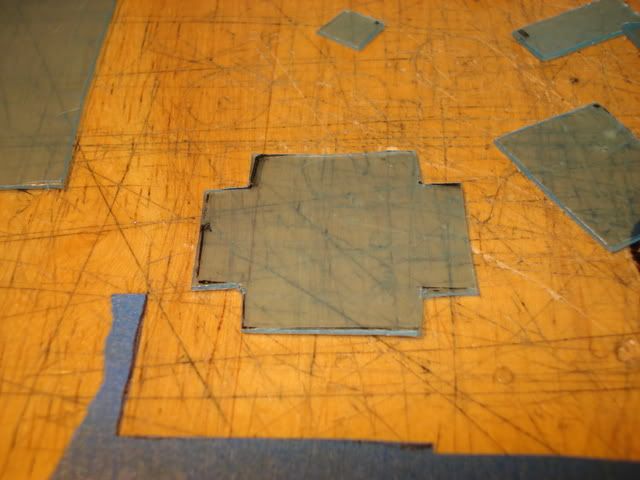 So now I have 4 light buckets all ready for paint. I am painting the with a Chrome paint and then backing them with black . 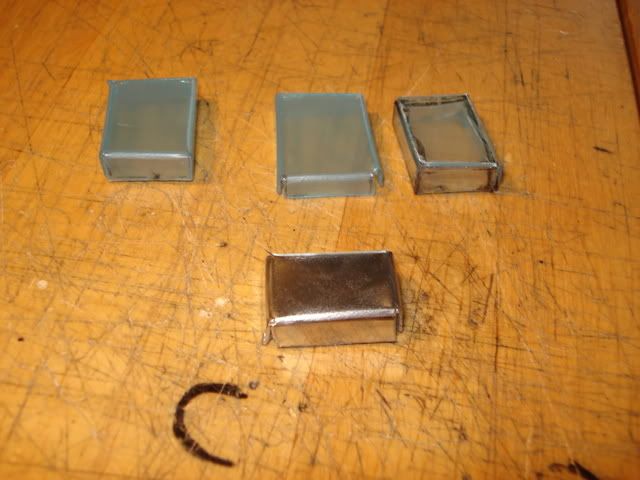 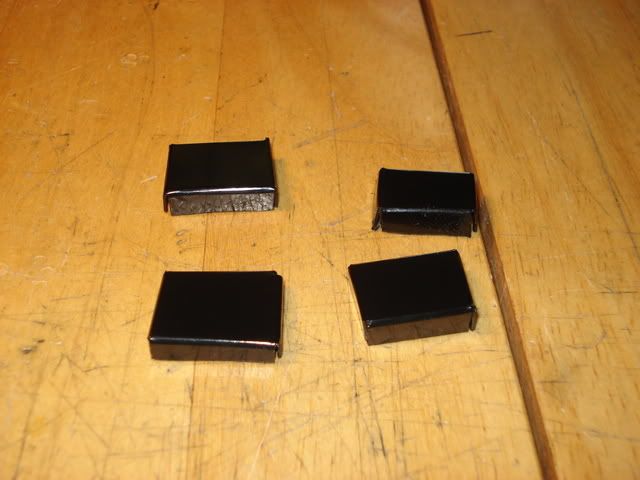 Here they are ready to have the protective cover pealed off and then to be installed into the rig. 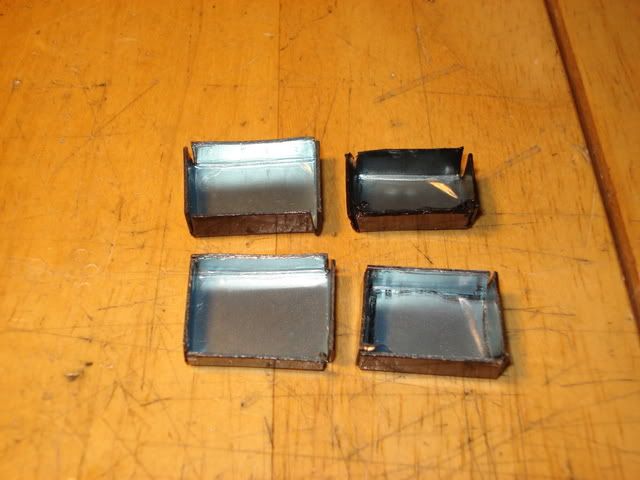 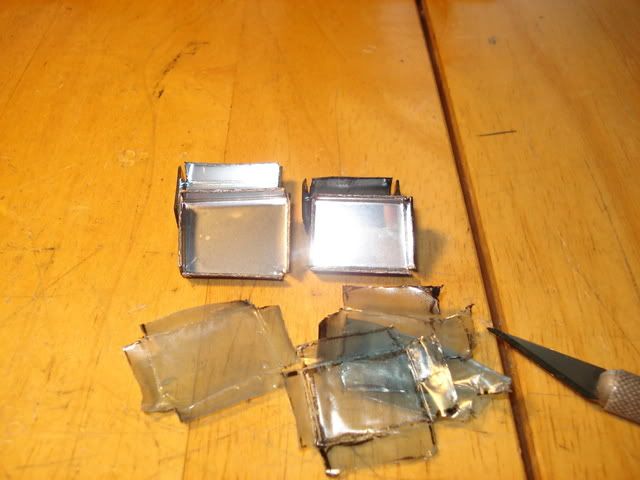 And now I will intall them using some hot glue and after that hardens I will add a layer of black RTV silicone to waterproof them and to black out the light on the backside. So all you see is the light coming from the front of the body and none of that glow from under the body. It seals it off nicely. Then I drill a small hole the size of the LED being used and glue it in place as well. Then route all your wires and glue them to the underside out of sight.  Tape in place till glue cools down or it will slide out of place. 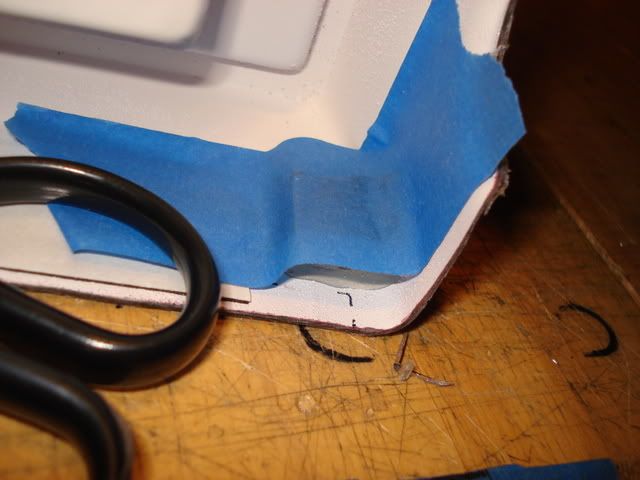 Peel off the tape when cooled and you are all done and ready to light them up. 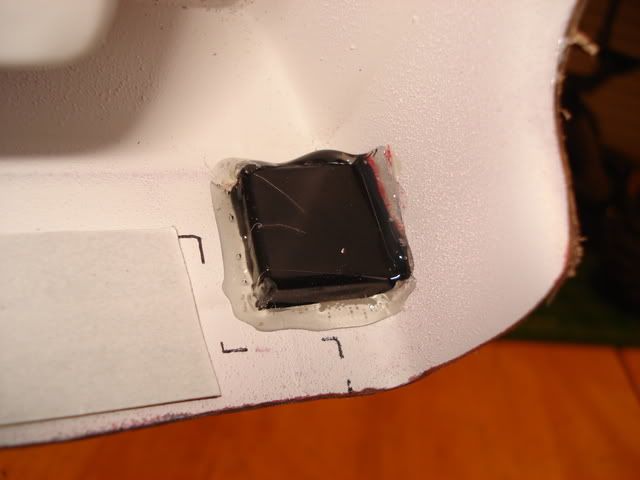 And when you are finished they will look like these on my AX-10 scaler crawler and here are some pics from my RC18R Niteline light bucket mod. 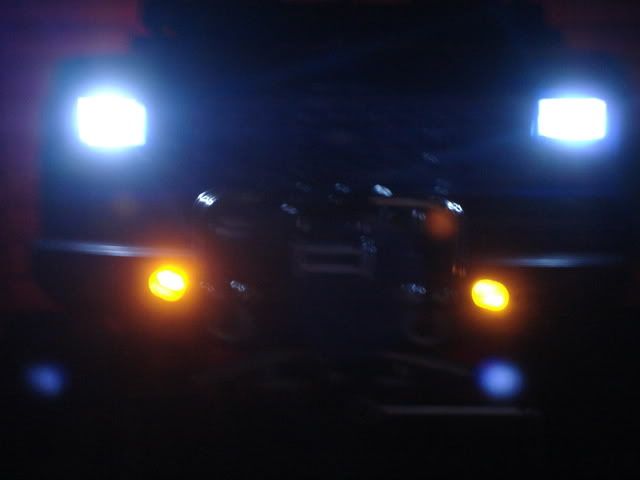  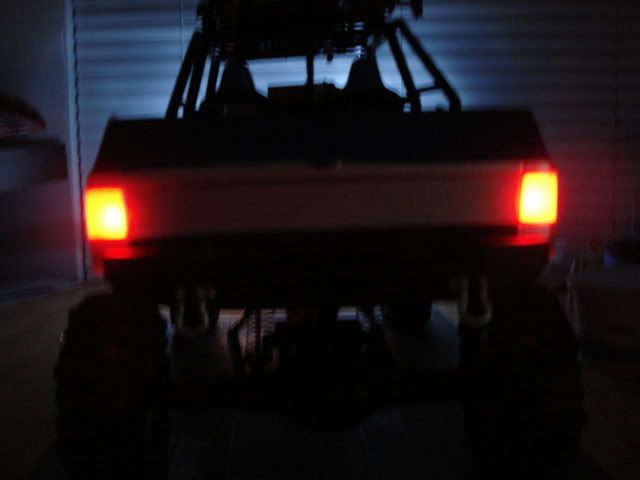 And when you add the stock sticker sheet light covers they look totally stock and all is concealed out of site. 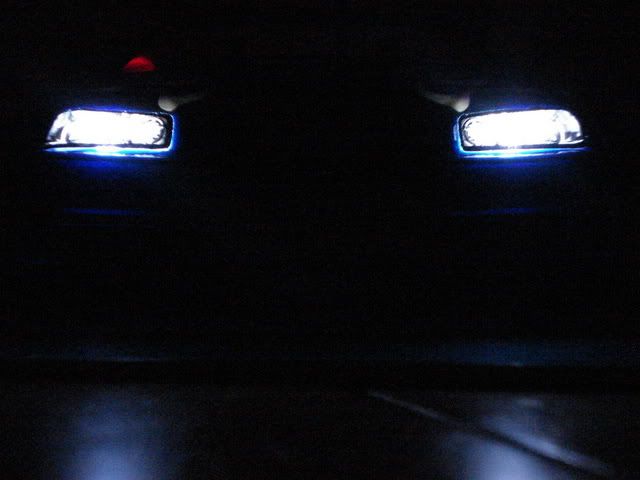 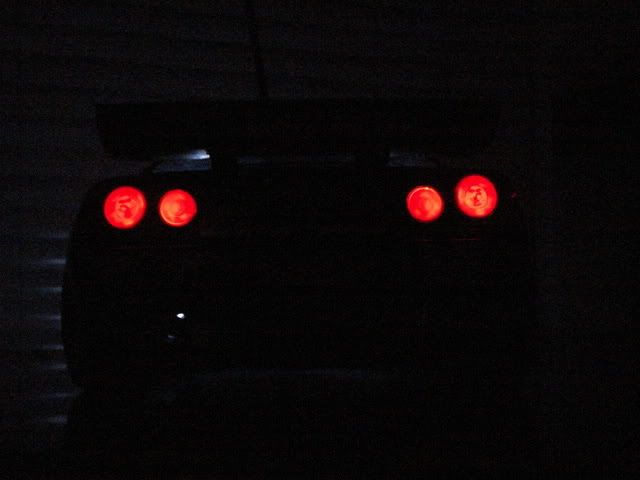 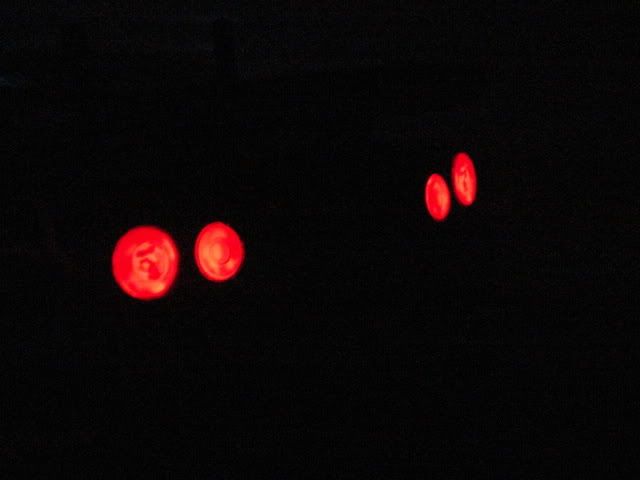 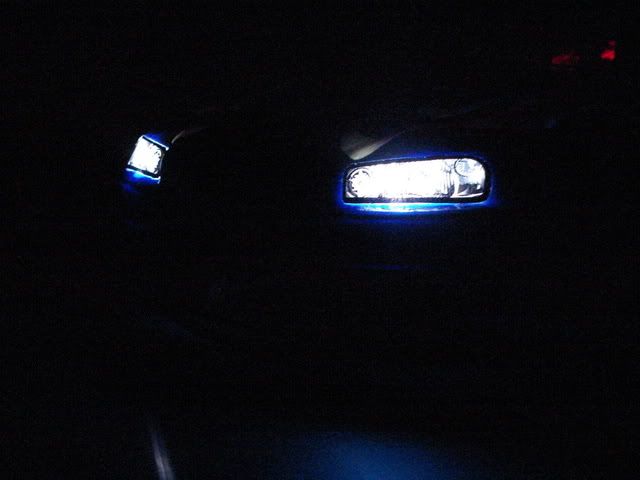 Just wanted to say a BIGTIME thanks to Bill over at Bill's Custom RC Lighting. His kits are the best and custom orders are no problem at all for him. Thanks again Bill. |

|  |
| Sponsored Links | |
| | |
|
07-16-2010, 07:13 PM
| #2 |
| Rock Crawler Join Date: Feb 2010 Location: Hayesville
Posts: 699
|
Very nice DIY what is the thickness of your lexan?
|
|
| |
|
07-18-2010, 10:52 AM
| #3 |
| Quarry Creeper Join Date: Apr 2010 Location: Southern Aroostook County
Posts: 299
|
TYVM for this how too, Im already puting it to use on my SCX 10  |
|
| |
|
07-18-2010, 02:15 PM
| #4 | |
| Rock Crawler Join Date: Nov 2008 Location: Sunny Southwest Florida
Posts: 743
| Quote:
I went a bit thick and grabbed some .06 lexan sheets.Thanks for the props fellas.Glad to help. | |
|
| |
|
07-18-2010, 02:44 PM
| #5 |
| Rock Crawler Join Date: Feb 2010 Location: Hayesville
Posts: 699
|
I am having a hell of a time trying to do the curve in a honcho headlight. Do you have any suggestions?
|
|
| |
|
01-30-2011, 12:43 PM
| #6 |
| Pebble Pounder Join Date: Oct 2005 Location: Sacramento
Posts: 170
|
Maybe you can apply a little heat since the lexan will become flexible then but very slow low heat! awesome tip to wrench buddy |
|
| |
|
01-30-2011, 12:54 PM
| #7 |
| Rock Crawler Join Date: Nov 2008 Location: Sunny Southwest Florida
Posts: 743
|
Thanks fellas for the props. Sav is right I would ley the lexan on top of a heat source just not to hot. I use my magnifyer lamp to heat items and decals to soften them up a bit.Glad I could help out a bit.
|
|
| |
|
01-30-2011, 12:58 PM
| #8 |
| Pebble Pounder Join Date: Oct 2005 Location: Sacramento
Posts: 170
|
Trust me when I say a little heat lol I found this out trying to rush it on my clod tuber it will warp pretty bad if you get it to hot |
|
| |
|
01-30-2011, 03:26 PM
| #9 |
| Quarry Creeper Join Date: Dec 2010 Location: orlando
Posts: 218
|
nice work!!! ghetto subscribed
|
|
| |
|
| |


 Linear Mode


