| |
 04-23-2007, 09:37 PM
| #1 |
| Picky Fab'r/Acetal Junky  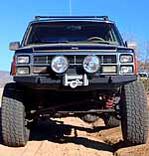 Join Date: Jul 2006 Location: Arizona Desert/AJ
Posts: 3,073
| EDIT........Ok, I just took a small leap in learning to help everyone out. Several people have been having issues opening or even receiving the templates through emails. I have uploaded the three PDF templates for this chassis and am now hosting them on my website. The address is: http://offroader5.freeservers.com/templates.html You must have Adobe Reader at the bare minimum or Adobe Acrobat on your computer to be able to read and open them. Hope this makes it easier for everyone who's interested in obtaining this chassis to build themselves  Any questions on the templates, just hit me with a PM and get to askin' When it all started...... I was looking and looking for which chassis to use for my WK crawler build. After all the looking...thoughts of going tuber...and as picky as I am....I just made my own. I decided on just the standard side plate chassis. I started by importing into CAD a jpeg of a shock tower design I liked, and then started expanding from there until I had something the correct size to be able to fit the pede tranny, have the right length, and an overall simple & different design. This is what I ended up with: (CLICK THE PICS TO SEE BIGGER ONES) Step one...take your CAD design and transfer it to a "sticky back" label material ala the laser jet. Step two...stick said template to a sheet of 3/16" black Delrin and then proceed to cut it out with....A JIGSAW   Step three...bolt the two pieces together and using a dremel's small drum sander mounted in a drill press, sand them smooth and even around the edges:   Step four...throw in some bling Axial green spreader bars for mock-up(the two on the bottom will end up replaced by the Delrin skid):   Step five...mock-up the pede to see if I measured and designed it wrong   Here's the wheels, (not so sure the tires though), that will be going on it:  Sooo...what do ya all think? Good start? Think the chassis will work well for shock placement and links? Last edited by Offroader5; 11-01-2007 at 10:30 PM. |

|  |
| Sponsored Links | |
| | |
|
04-23-2007, 09:43 PM
| #2 |
| RCC Addict Join Date: Nov 2005 Location: Utah
Posts: 1,530
|
Look's killer, kinda resembles that new Axial comin out
|
|
| |
|
04-23-2007, 09:51 PM
| #3 |
| Picky Fab'r/Acetal Junky Join Date: Jul 2006 Location: Arizona Desert/AJ
Posts: 3,073
|
Nooooooo, way different |
|
| |
|
04-23-2007, 09:54 PM
| #4 |
| 2006 2.2 National Champ   Join Date: Dec 2004 Location: Big Bear Lake
Posts: 8,328
|
Looks good so far, very minimalist. Are you going to brace the bottom of the chassis plates? |
|
| |
|
04-23-2007, 10:02 PM
| #5 | |
| Picky Fab'r/Acetal Junky Join Date: Jul 2006 Location: Arizona Desert/AJ
Posts: 3,073
| Quote:
| |
|
| |
|
04-23-2007, 10:12 PM
| #6 |
| Rock Stacker Join Date: Jan 2006 Location: CityofLostAngels
Posts: 96
|
Nice work! Cant wait to see how it progresses.....
|
|
| |
|
04-23-2007, 11:30 PM
| #7 |
| Quarry Creeper Join Date: Mar 2007 Location: AZ
Posts: 229
|
Looks good so far, hope to see updates on it soon.
|
|
| |
|
04-24-2007, 04:42 AM
| #8 |
| Rock Stacker Join Date: Apr 2007 Location: Riverside
Posts: 49
|
When will you make mine?? Just kidding! Looks great! |
|
| |
|
04-24-2007, 07:32 AM
| #9 |
| RCC Addict Join Date: Sep 2005 Location: Tempe, AZ
Posts: 1,262
| |
|
| |
|
04-24-2007, 08:47 AM
| #10 |
| Picky Fab'r/Acetal Junky Join Date: Jul 2006 Location: Arizona Desert/AJ
Posts: 3,073
|
Thanks guys. This came out way better than I thought it would using the jigsaw. I was about to pay a shop here local to have it CNC'd...but thought maybe I should give it a go and I am glad I did. I was thinking of calling this one Black Widow...and you'll see as the build progresses how this theme will play over the whole rig...hehehe The plan is to have a black and red color combo. All the spacers, links, any servo mounts, link mounts, shocks, knuckles, etc...will be either black or anodized red. I'm going to get the red rock rings for the Axial 2.2's also. Actually I wish I could get them in raw form so they would match the rest of the aluminum when I get it all ano'd. Last edited by Offroader5; 04-24-2007 at 11:41 AM. |
|
| |
|
04-24-2007, 03:40 PM
| #11 |
| Picky Fab'r/Acetal Junky Join Date: Jul 2006 Location: Arizona Desert/AJ
Posts: 3,073
|
Here's a sneak peak at my intention in regards to the lower chassis skid plate. It goes along with the Black Widow theme. The outer outline as you see it will be the 3/8" black delrin. The center hourglass design will have it's material removed (milled out) to a depth of 1/8" and a piece of 1/8" nylon will be cut to fit this depression as an inlay. After the nylon is cut to it's hourglass design, it will be dyed a deep red before I install it into the recess of the skid. When it's done, the surface between the two pieces should be flat and level. Just a snazzy way to add a little character to what could be a plain 'ol black skid.  Well, I can't get the image to show up for some reason...so you'll just have to click it |
|
| |
|
04-24-2007, 09:29 PM
| #12 |
| Pebble Pounder Join Date: Jan 2007 Location: Clovis
Posts: 158
|
looks very good. i am really impressed with this frame. im half tempted to ask you for permission to copy this bad boy. great job |
|
| |
|
04-24-2007, 10:08 PM
| #13 | |
| Picky Fab'r/Acetal Junky Join Date: Jul 2006 Location: Arizona Desert/AJ
Posts: 3,073
| Quote:
Only thing though....I am not sure how this chassis will perform yet. I would rather wait till I at least get it all together and try it before I start handing out a design that fails it's function. :-( I did some mock up tonight with links from my Revo and should be able to have a roller by this weekend if I can get my hands on some Revo shafts from the LHS. BTW...For those wondering the dimensions of the chassis plates: 6 5/8" length overall @ upper shock horns & 3 1/8" height overall @ center. Last edited by Offroader5; 04-24-2007 at 10:13 PM. | |
|
| |
|
04-25-2007, 11:12 AM
| #14 |
| Pebble Pounder Join Date: Jan 2007 Location: Clovis
Posts: 158
|
Thats cool, test it out and let us know how it works. The design is very promising and should be able to use any tranny. All that will need to be adjusted is the wideness of the frame and the tranny mounting holes.
|
|
| |
|
04-25-2007, 12:21 PM
| #15 |
| Quarry Creeper Join Date: Apr 2007 Location: Northern PA where the rocks grow wild
Posts: 418
|
great thinkin, i like it. I am curious to see how it performs. I am tryin to get ideas of a different chassis fer mine.......
|
|
| |
|
04-25-2007, 01:38 PM
| #16 | |
| Picky Fab'r/Acetal Junky Join Date: Jul 2006 Location: Arizona Desert/AJ
Posts: 3,073
| Quote:
On a side note...you can kinda tell in the side pic with the pede in it, that the chassis was designed so that if you wanted to, you could use the stock cross hole mounts on the pede's base to mount the tranny without a skid. The two lower mounts are spaced just right so that you could mount through the pede base straight through to the other side plate. | |
|
| |
|
04-26-2007, 11:29 AM
| #17 |
| Newbie Join Date: Jan 2007 Location: MESA
Posts: 44
|
I saw this thing the other day. It's surprisingly more rigid that it looks. When the belly plate is in place it will stiffen up even more. I think the way it sits now John's measured the weight of the chassis alone at 2 Oz. Light weight and rigid. Seems like it's gonna work real nice.
|
|
| |
|
04-27-2007, 10:07 PM
| #18 |
| Picky Fab'r/Acetal Junky Join Date: Jul 2006 Location: Arizona Desert/AJ
Posts: 3,073
|
Got a bit more done on this thing. I have the link lengths all figured out and their mount locations. The rod ends and all thread are only temporary...the links are going to be made of CF tube, 8-32 all thread, and Revo ends. Those pieces going from front to back down where the skid is supposed to be are also temporary so the chassis won't flex in the middle while it's still without the skid. The green stand off's across the top will be replaced with red ano'd versions, and I am going to have the shock bodies ano'd black, then get some red rings for the Axials. Also going to pick up some of the RC4WD alum steering knuckles and have those ano'd red. I'll also dye the spur gear red on the pede      Got the Revo shafts to fit the pede. Just a bit of clearance issues, but nothing a dremel couldn't handle. The one side juuuuuust fits with some trimming and an 84t spur. We'll see if I am happy with the 84t...if not I will end up having to use the smaller Maxx shafts later.     Well, that's it for now. Can't really go any further till I get the 3/8" delrin and 1/8" nylon to fab up the skid, except for maybe the servo's and their mounts. Need to start thinking about body posts and battery location too I suppose. BTW...as it sits in the pics and also with the pede and both complete Revo shafts...it weighs in at 3 lb. 1 oz. Last edited by Offroader5; 04-27-2007 at 10:15 PM. |
|
| |
|
04-27-2007, 10:36 PM
| #19 |
| Pebble Pounder Join Date: Jan 2007 Location: Clovis
Posts: 158
|
The more you get done, the more this rig impresses me! Very nice work. |
|
| |
|
04-27-2007, 11:09 PM
| #20 |
| Moderator Rule Breaker  Join Date: Feb 2004 Location: Austin, Tx
Posts: 5,970
|
Those 110mm or 120mm shocks ? Looks good man !
|
|
| |
 |
| |


 Linear Mode


