| |
 02-22-2010, 03:14 PM
| #1 |
| Pebble Pounder Join Date: Oct 2006 Location: SOCAL
Posts: 123
|
I want to share my build of a vintage Jugg. I figured it would belong in large scale since it isn't 2.2 but if the build is in the wrong place don't cry just move it. This build started because of a discovery in someones attic. Basically it belonged to my girlfriends dad and had been stored unbuilt for 12 years or so. I convinced him to let me build it! :-) I first built up the model to mock it out and get the driveline and electronics sorted out before I started the mods. I installed a novak crawler esc and two 55 turn novak motors. My intension was to have this be a slow mover due to the fact that it was going to be scale so I didn't want it going real fast so it could tip over. After experimenting with some pinions I ended up using some 11 tooth pinions. This thing has so much torque its amazing. You can set the throttle to barely on and it will move so slow yet would pull a kid in a wagon. Some of the pics are a little hazy cause I was having trouble with my camera. Here is a basically stock vintage Jugg. 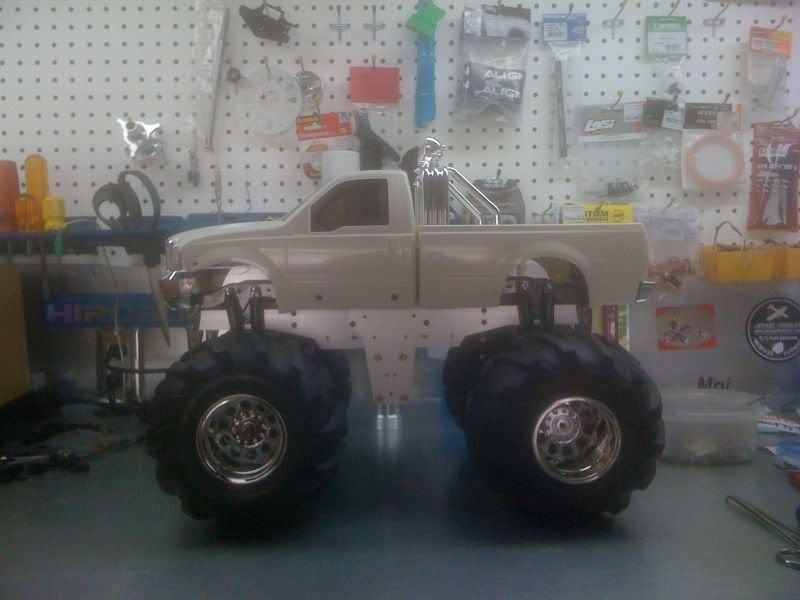 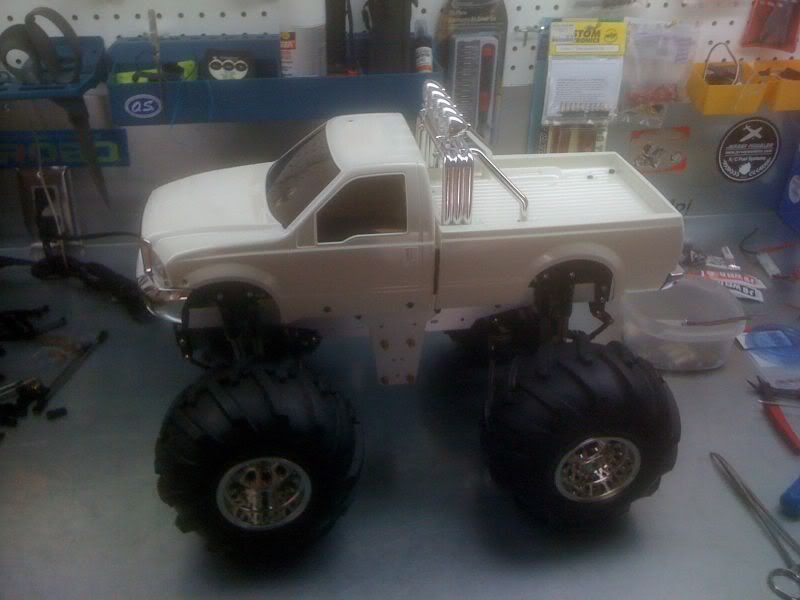 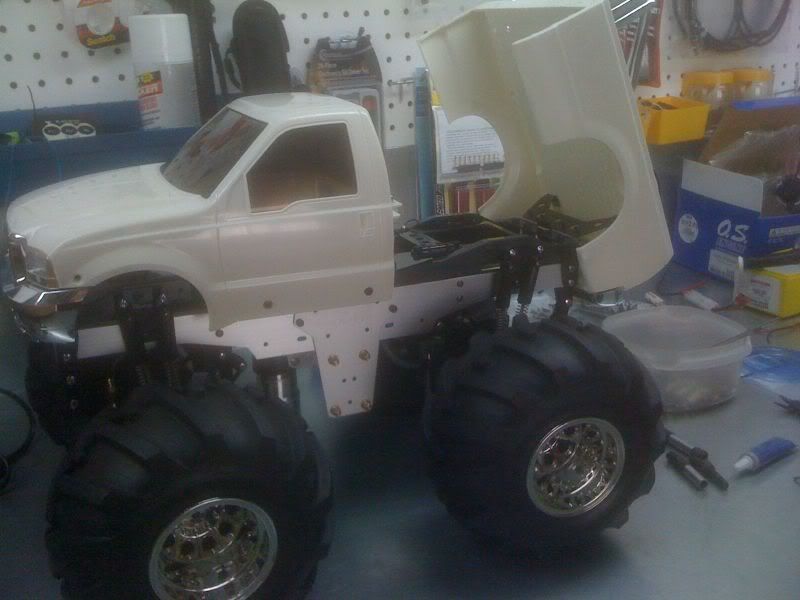 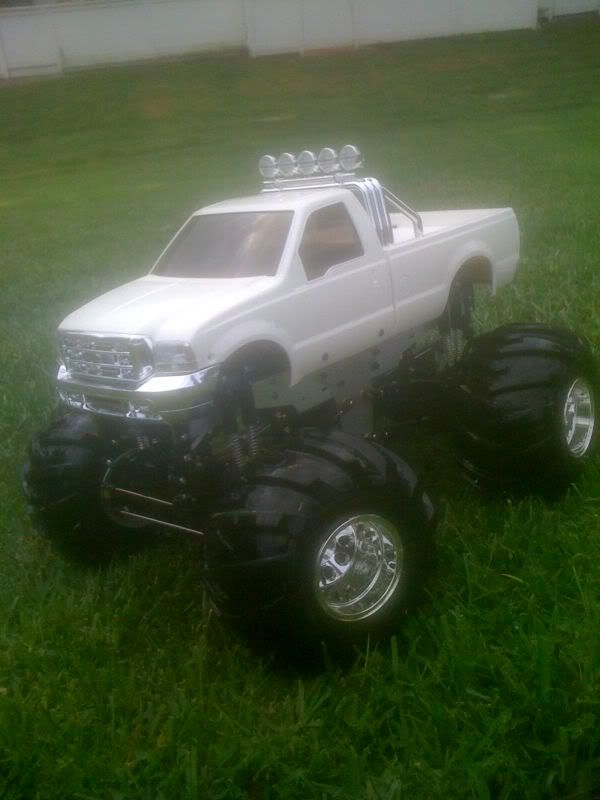 |

|  |
| Sponsored Links | |
| | |
|
02-22-2010, 03:19 PM
| #2 |
| Rock Crawler Join Date: Feb 2010 Location: Hayesville
Posts: 699
|
Is there anyway to adjust your pictures?
|
|
| |
|
02-22-2010, 03:27 PM
| #3 |
| Pebble Pounder Join Date: Oct 2006 Location: SOCAL
Posts: 123
|
So after I had everything mechanically working I started on the mods. This truck started life as a Jugg1 so I converted everything over to Jugg2. This consisted of different axle housings and gears, different tranny case and gears, beefed up driveline, and a blue anodized chassis. I also opted to replace every single bushing with ball bearings which I took the xtra step and used my greaser to pack them with quality lube. I wanted to do a complete light kit and also do a few body mods. The truck was going to be 2.4 so I shaved the antenna hole. Also I wanted some rear tail lights so I made a place for those but also shaved the previous indentions that are there from the factory. Here are some pics of that process.  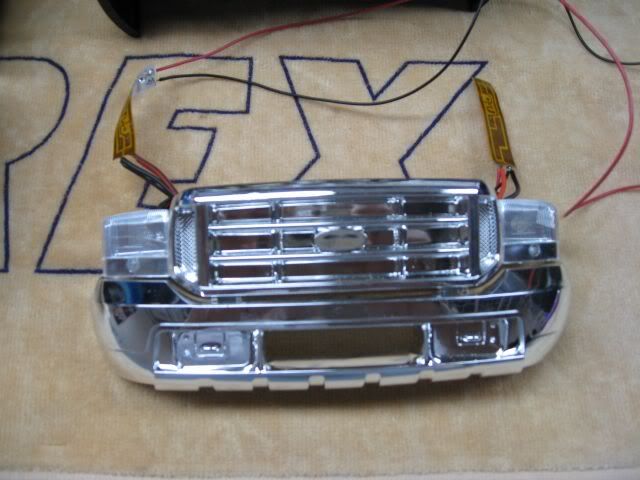 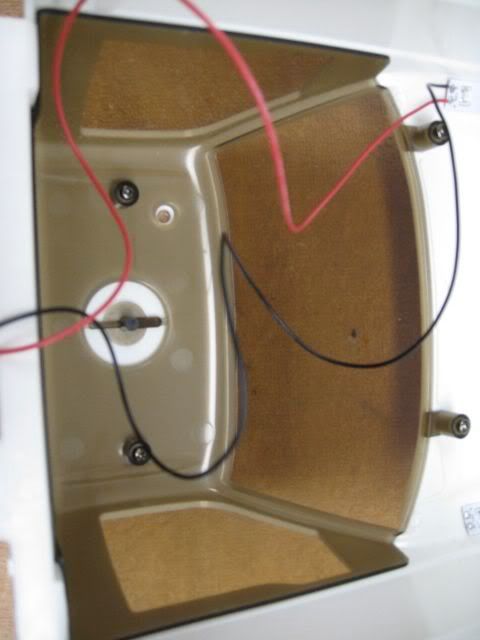 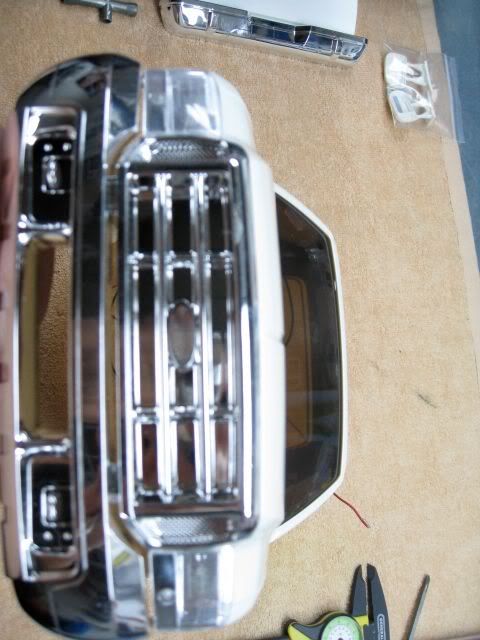 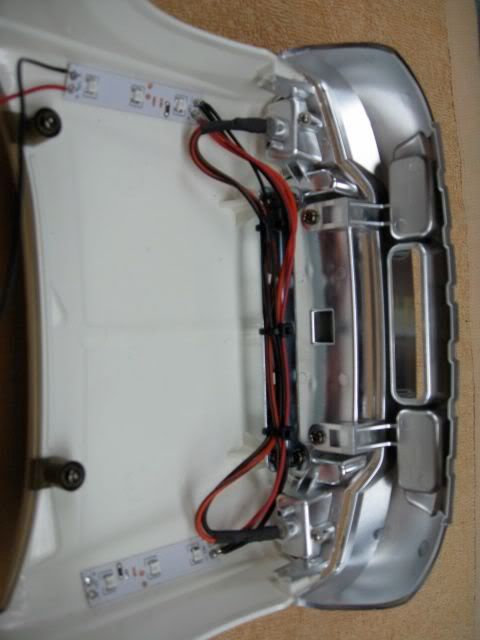 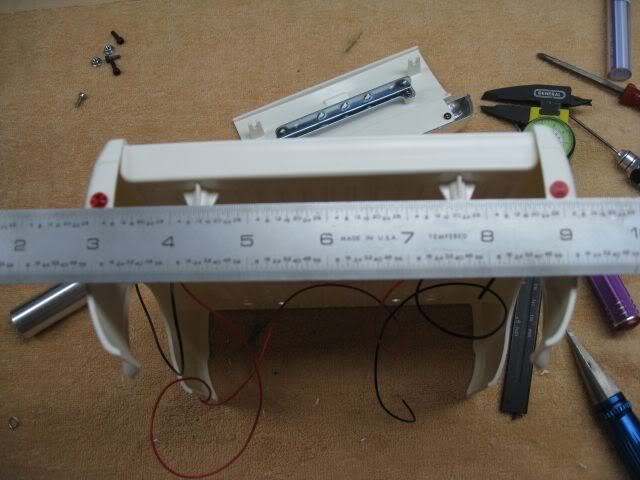 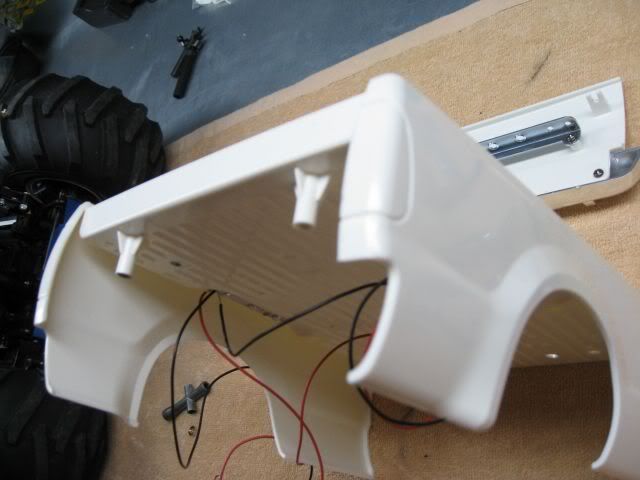 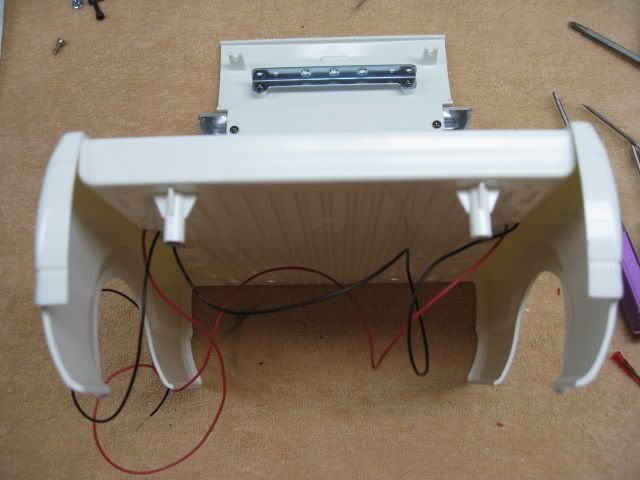 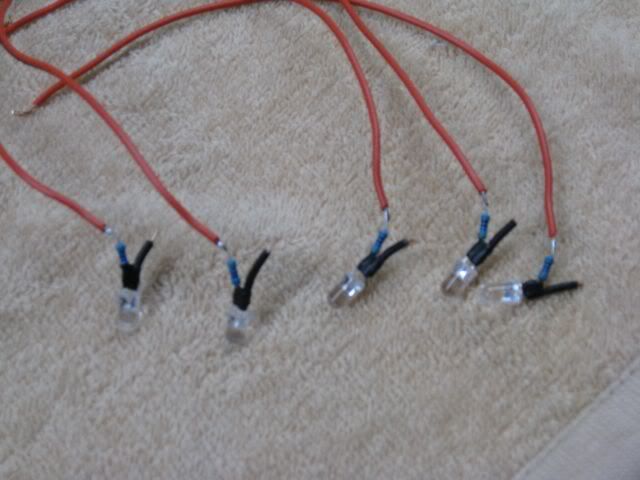 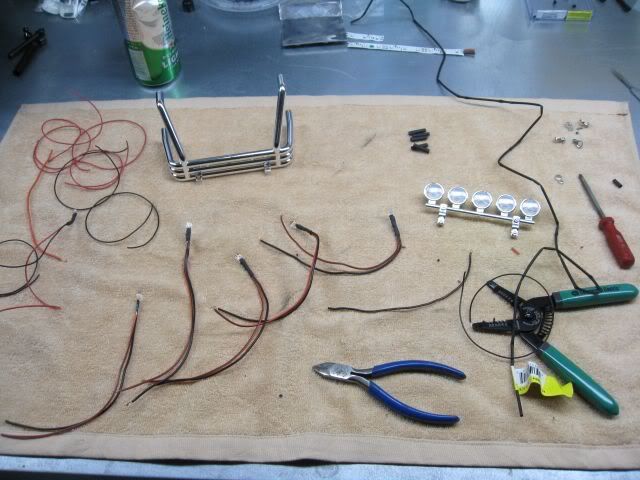 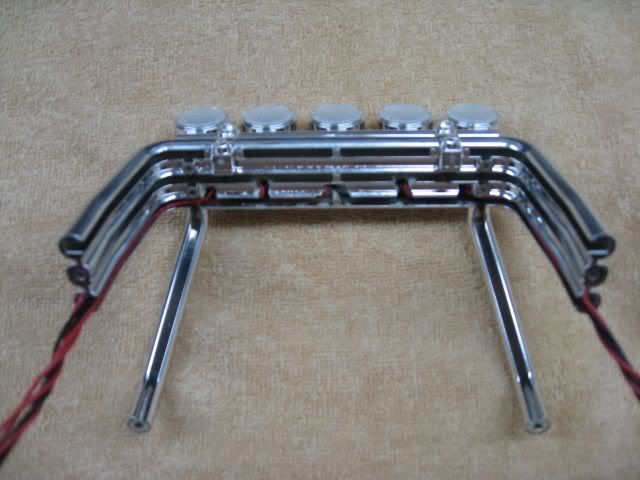  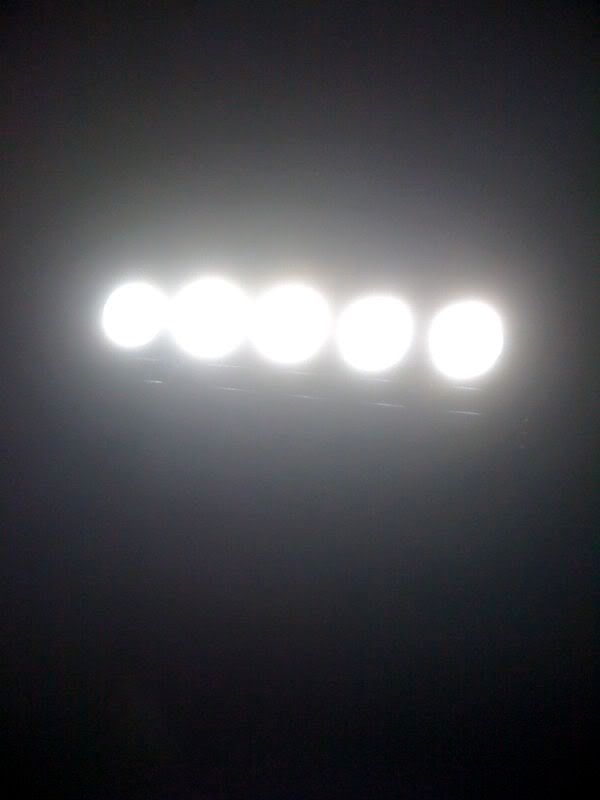  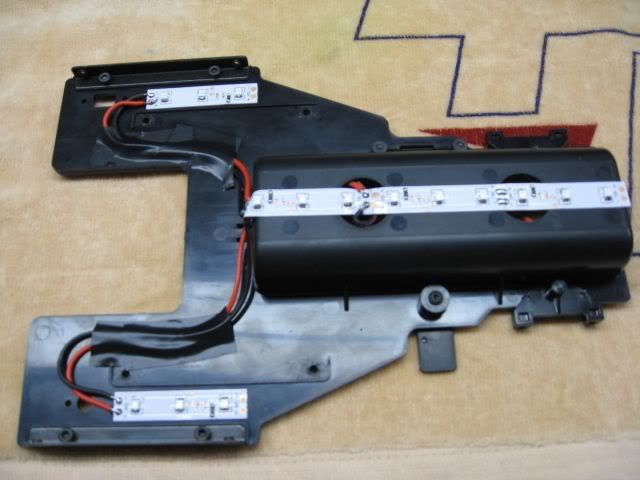 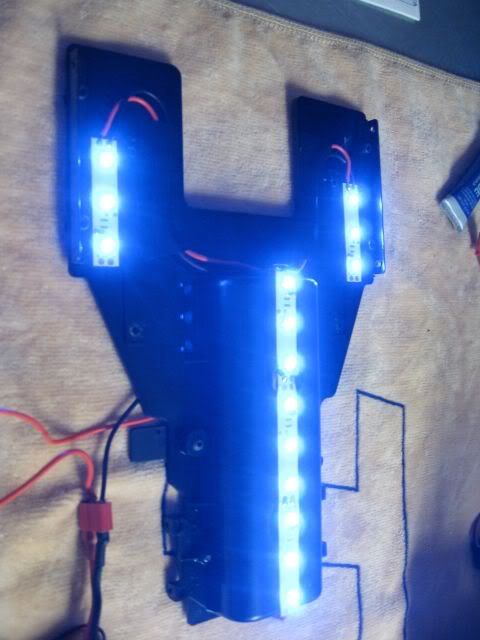 |
|
| |
|
02-22-2010, 03:30 PM
| #4 |
| Pebble Pounder Join Date: Oct 2006 Location: SOCAL
Posts: 123
|
sorry smokediver...like I said my camera was messed up so thats the way the photos were took. They are not all bad though so just hang tight. The end pics are the bomb!
|
|
| |
|
02-22-2010, 03:33 PM
| #5 |
| Pebble Pounder Join Date: Oct 2006 Location: SOCAL
Posts: 123
|
I have to say that I am a complete freak for hiding wires. My goal was to have all of the wiring be completely invisible when all said and done. Just note that the light bar took me at least 6 hours to complete. I could have gone a little faster but since this is a vintage kit I had zero room for error. So taking my time I managed my goal as you will see in the upcoming pics.
|
|
| |
|
02-22-2010, 03:46 PM
| #6 |
| Pebble Pounder Join Date: Oct 2006 Location: SOCAL
Posts: 123
|
After I finished my wiring and lite mock up it was time to tear it down again to prepare for paint. I would like to also point out that all of the lighting system is on 12v. I wanted all the lights to be nice and hella bright. I'm running dual battery packs to accomplish this. I'm using a small 850ma 3cell for the lights and a 7.4 2cell for the driveline. The undercarriage lights all came from a company called xerogear http://www.xerogear.com/ Their leds are designed for 12v and they literally hurt your eyes they are so bright. Also to take it up another notch they sell a module that you can put on a spare channel so you can control the lights via remote. You can use a variable dial or endpoints etc to adjust brightness to boot. You can use their modules on any sort of leds so I highly recommend them. Anyway here is some pics with paint and lighting effects.  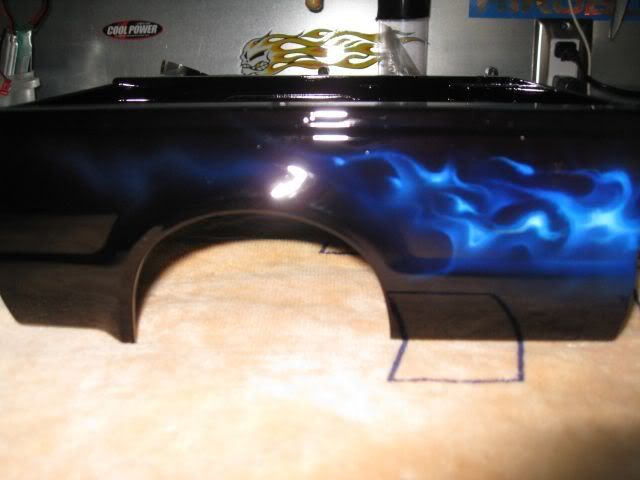 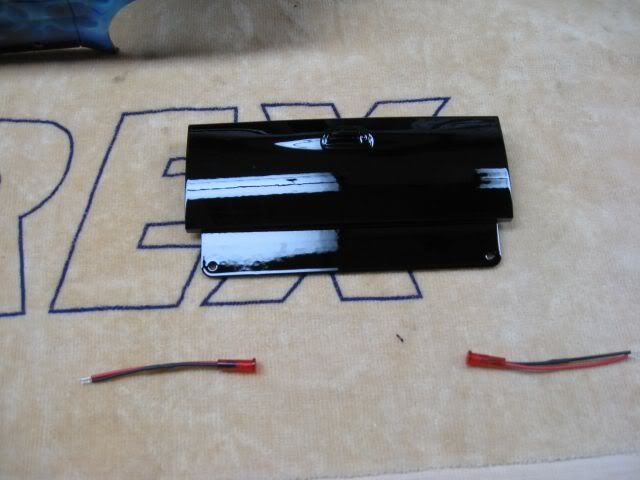 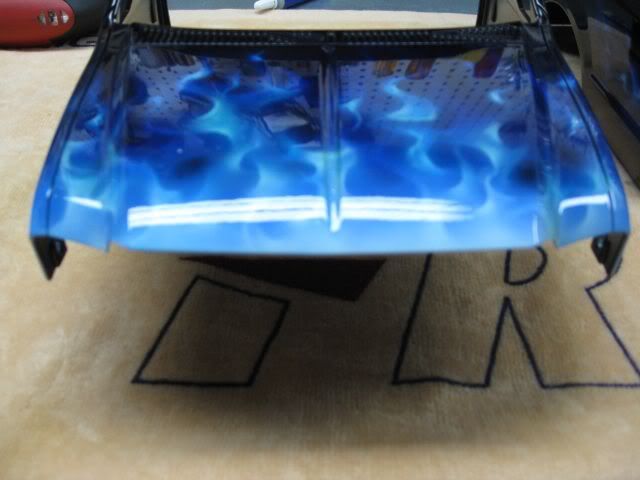 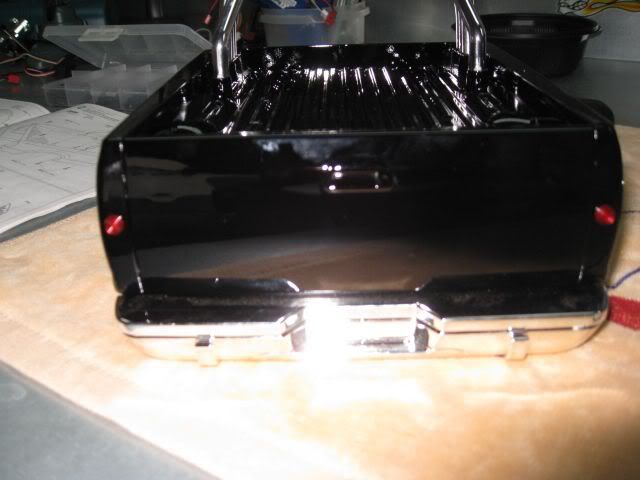  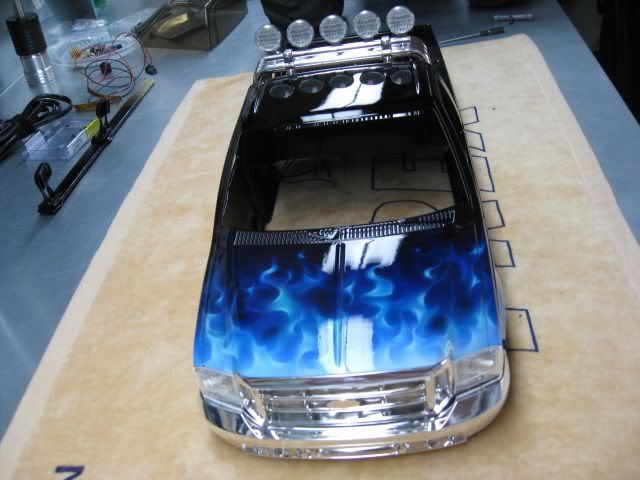 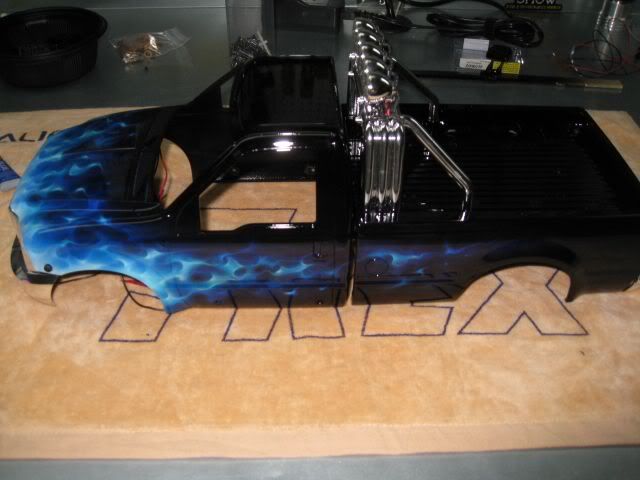 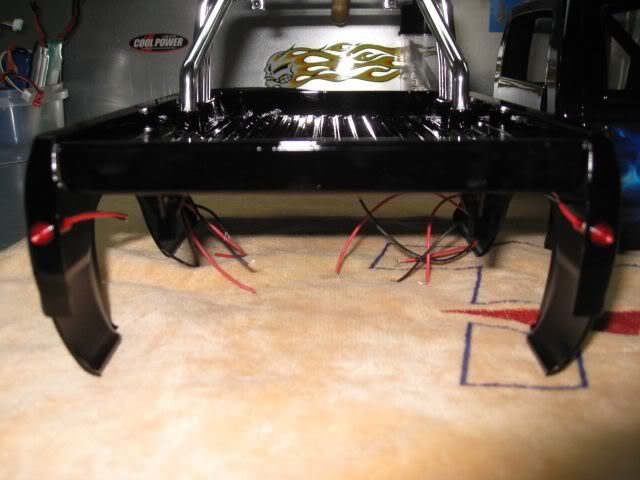 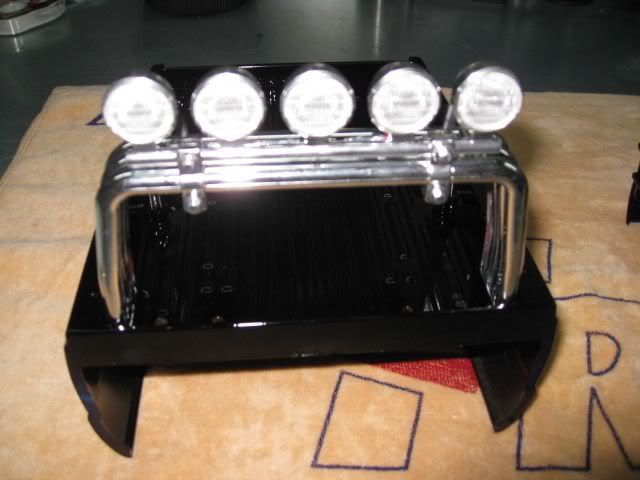 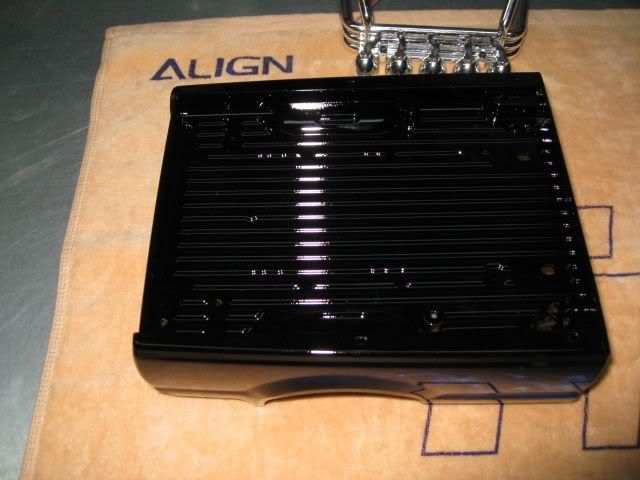 Last edited by hellacool; 02-23-2010 at 09:16 AM. |
|
| |
|
02-22-2010, 03:55 PM
| #7 |
| Pebble Pounder Join Date: Oct 2006 Location: SOCAL
Posts: 123
|
So this was a super fast build thread but only because I had my images archived. This build consumed on an estimate of 125 hours. I just quickly posted the images and gave you a few details about the build. I literally took this truck apart 10 to 15 times. Also I forgot to mention that I converted all the hardware to nice metric steel. One thing I hate more than wires is standard hardware in rc kits. So are you guys ready for the money shot??? Well here you are biotchezzz lOL!!! 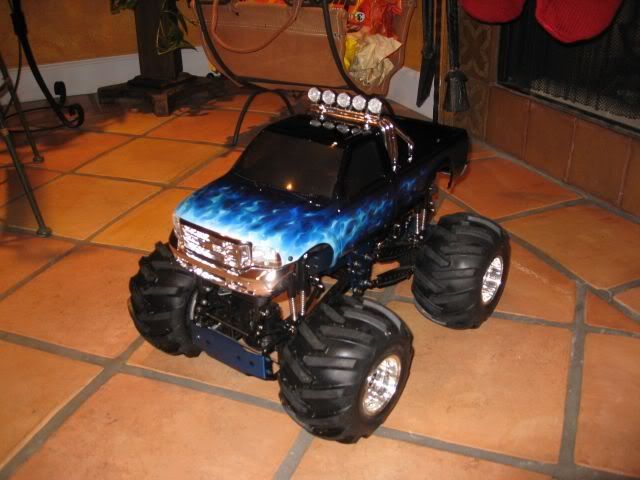 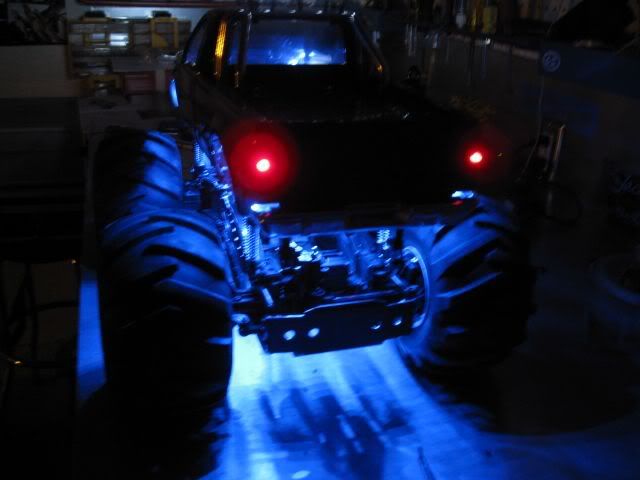 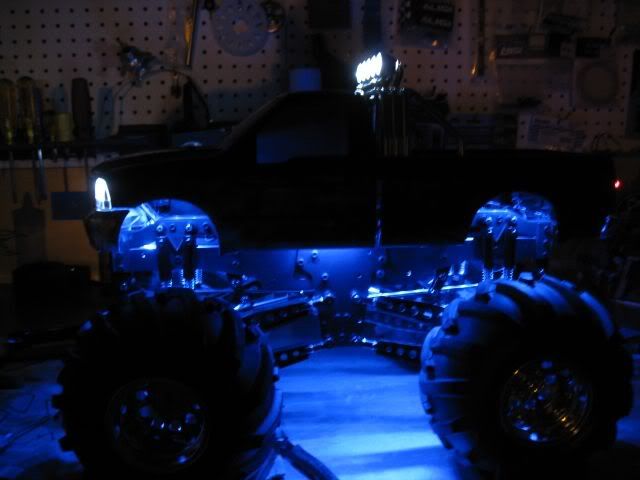 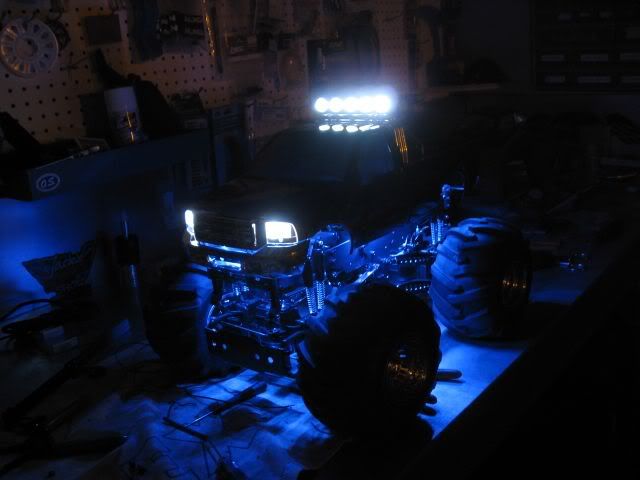 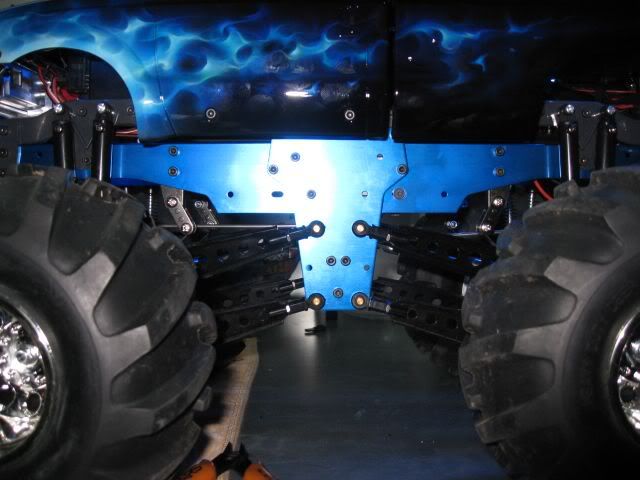 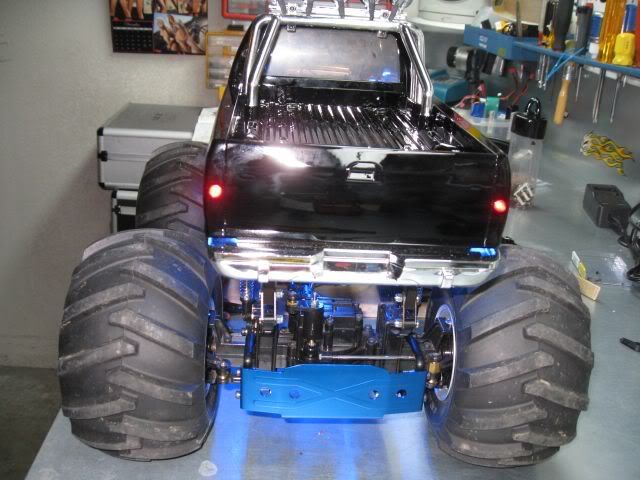 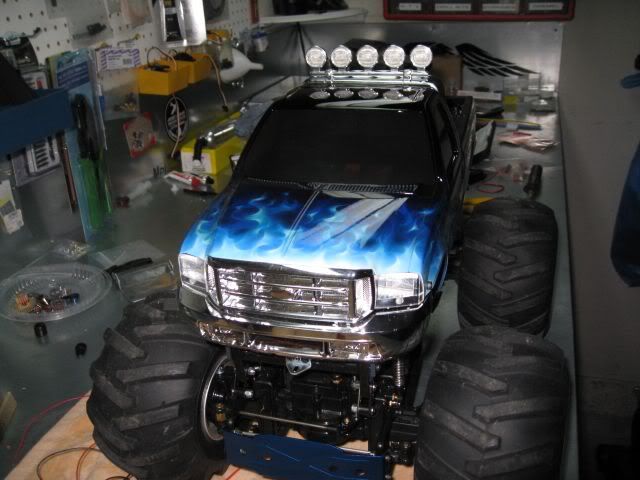 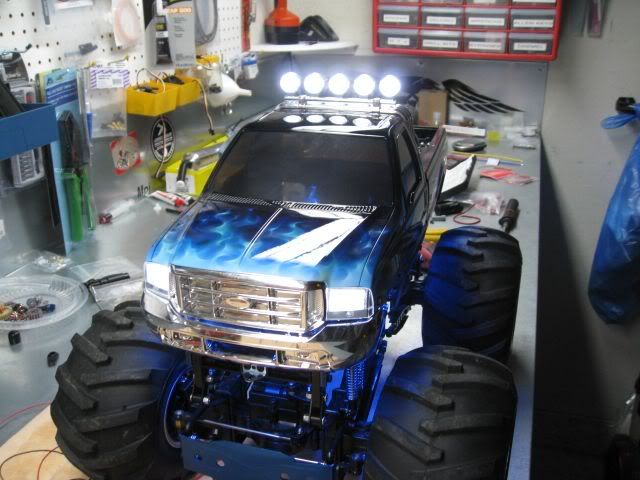 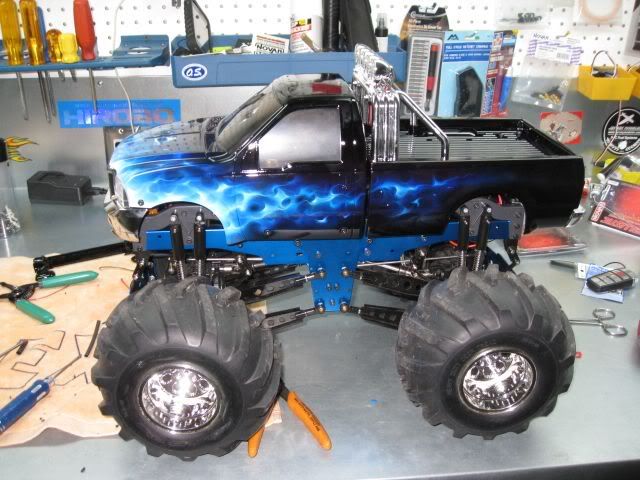 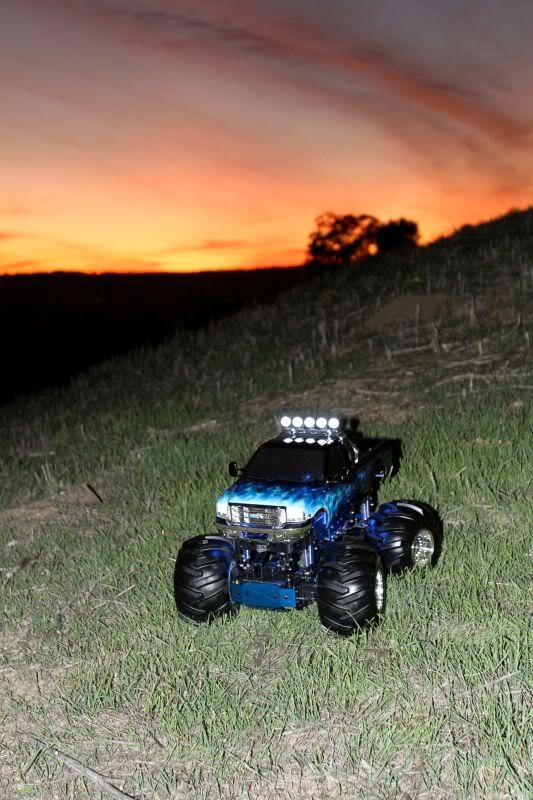 |
|
| |
|
02-22-2010, 04:09 PM
| #8 |
| Pebble Pounder Join Date: Oct 2006 Location: SOCAL
Posts: 123
|
So here is the real deal. The owner of this truck just assumed that I would be assembling the model for him. He had zero idea of the level I was going to take this model to. My master plan was to surprise him with it. A lot of time had gone past and he had pretty much stopped asking about his truck. I told him that I just hadn't gotten to it yet LOL!! Anyway we were all getting together on Christmas Eve 09 and I drove it up and bumped him in the back of the leg with the truck. He turned around and to his surprise this bad ass monster truck was at his feet. I surprised him to say the least!! LOL. Anyway the point is that some people out there are really good people and to do something selfless for someone that is truly deserving makes you feel good inside. The truck is now in his possession and the project is still very much alive. We actually want to use this as a tow rig for our real crawlers. I could use some help making a trailer if anyone has some guidance I would appreciate it. Thanks for looking!
|
|
| |
|
02-22-2010, 04:10 PM
| #9 |
| I wanna be Dave Join Date: Feb 2009 Location: Cowtown, USA
Posts: 2,780
|
This truck is sick! BTW, hit the enter key after each pic, before you post  . . |
|
| |
|
02-22-2010, 04:25 PM
| #10 |
| Pebble Pounder Join Date: Oct 2006 Location: SOCAL
Posts: 123
|
Thanks...will do in the future.
|
|
| |
|
02-22-2010, 04:29 PM
| #11 |
| Pebble Pounder Join Date: Oct 2006 Location: SOCAL
Posts: 123
|
Here is just a little video of the truck at night. The light coming in through the windows is fixed with some interior work since. http://www.youtube.com/watch?v=yWTo6zD8wTQ |
|
| |
|
02-23-2010, 07:42 AM
| #12 |
| Pebble Pounder Join Date: Jul 2009 Location: Calgary, Ab
Posts: 163
|
The paint is just unreal... wow!
|
|
| |
|
02-23-2010, 08:54 AM
| #13 |
| Quarry Creeper  Join Date: Jul 2009 Location: Cherokee, NC
Posts: 210
|
Cant see the video... Says its private...
|
|
| |
|
02-23-2010, 09:10 AM
| #14 |
| Pebble Pounder Join Date: Oct 2006 Location: SOCAL
Posts: 123
|
fixed the video link!
|
|
| |
|
02-23-2010, 03:13 PM
| #15 |
| Pebble Pounder Join Date: Aug 2009 Location: Glenwood Springs
Posts: 125
|
nice airbrush work bro. did you do it yourself?
|
|
| |
 |
| |


 Linear Mode


