| |
 01-20-2010, 08:47 AM
| #1 |
| Quarry Creeper Join Date: Nov 2008 Location: Orange
Posts: 221
|
Post up you pic. of your Micro COMP crawlers....not Scalers. I love seeing all the scalers ...but i think there should be 2 pic. threads ...one for comp and one for scalers..... |

|  |
| Sponsored Links | |
| | |
|
01-20-2010, 04:36 PM
| #2 |
| Rock Crawler Join Date: Aug 2009 Location: Sandy Oregon
Posts: 517
|  |
|
| |
|
01-20-2010, 06:36 PM
| #3 |
| Newbie Join Date: Apr 2007 Location: Boston
Posts: 41
|
That thing is so sick... how much for you to send me all the parts to make mine look like that?
|
|
| |
|
01-20-2010, 07:25 PM
| #4 | |
| Rock Crawler Join Date: Aug 2009 Location: Sandy Oregon
Posts: 517
| Quote:
Everything except the body is from the hardware store (wheel weights, axle tubes, internal weights) or hobby store (Mini-T Links, battery, truck) Have done a few more mods to it....new chassis, inboard shocks, articulation now is at 2/58 inches  Last edited by Dogbreath; 01-20-2010 at 07:28 PM. | |
|
| |
|
01-20-2010, 07:29 PM
| #5 |
| I wanna be Dave   Join Date: Feb 2005 Location: Burnsville
Posts: 3,096
|
My micro comp crawler...'The Pinch'
|
|
| |
|
01-21-2010, 11:35 AM
| #6 |
| Newbie Join Date: Aug 2007 Location: 3rd rock from the sun
Posts: 11
|
Here's mine, "The Rainmaker" Extended wheelbase (120mm), new links (lowers bent), extended drivetrain (aluminium tubing), shocks inverted and running in droop with return springs (front soft, rear medium), electronics shrinkwrapped, batterytray relocated for chassis support, micro deans connectors, battery mounted on the rear axle (velcro), tire inserts and rock rings removed, BWD rockrings in and out, 2mm lead small shots in tires (35 g front / each, 25 g rear / each).   |
|
| |
|
01-21-2010, 01:09 PM
| #7 |
| Rock Stacker Join Date: Dec 2008 Location: mission viejo
Posts: 75
|
ok this is what I did mine shock on front and rear from micro T rear shocks make lower the body shock mount top hole cut off and mounted inside hole Link made by mini-t ball cups cut 2mm load cover with 3mm alumium tube. lower link banted, all link made longer then stock so now weelbase is 113mm. Add 1mm thick washer each tire lock make 2mm total wider weelbase removed plactic cover for reciver taped and replaced all the hard wire to soft one and cut off If too long lipo from my little heliy 4#3 400mah make two of them togather mounted at rear (too big looking but run about 30 min) Add wight all 4 tire rim winding 200 trun front 150 trun rear thin copper wire, this make more wight then lead wire + change all steel ling that make 30g front eash tire 25g on rear, star cut inside form. Extend driveshaft front and rear with cabon tubeing. http://www.youtube.com/watch?v=EaYMe7JX9xE http://www.youtube.com/watch?v=G_yH4hQ6DAk 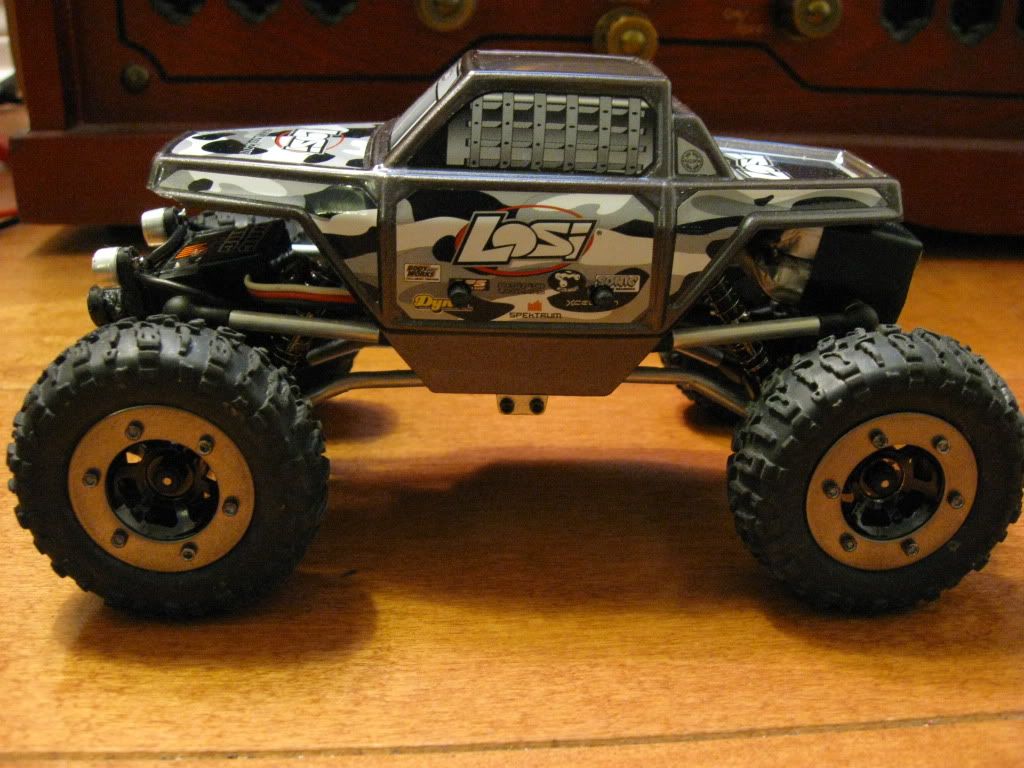 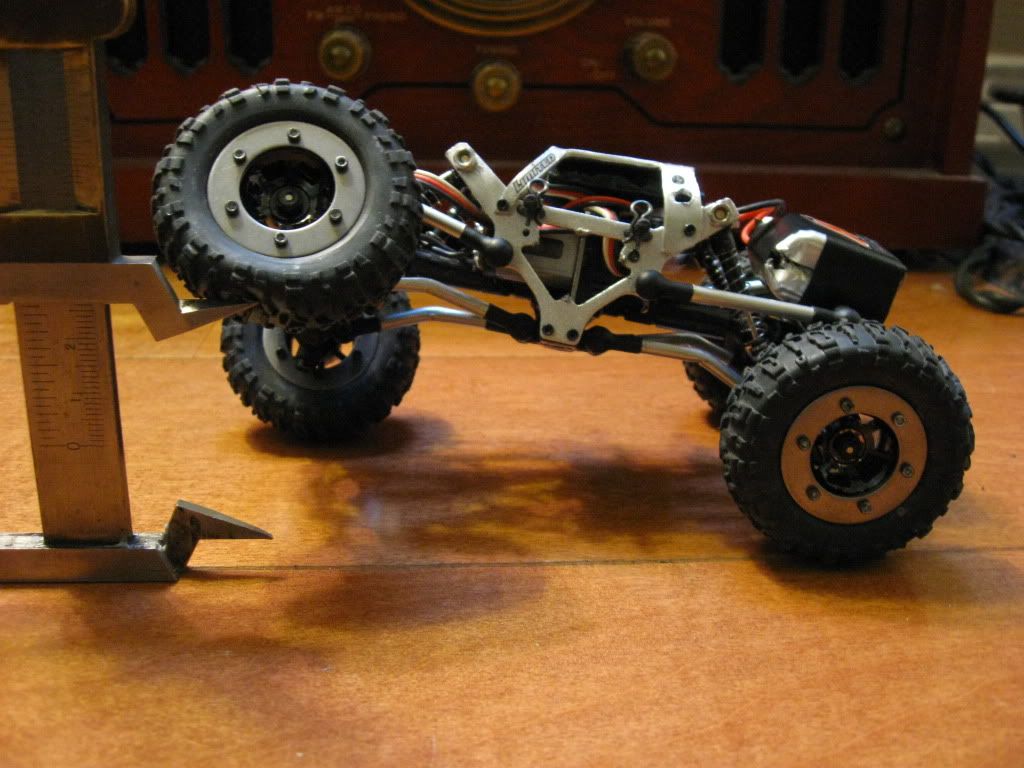   Last edited by ke6geu; 01-22-2010 at 01:57 AM. |
|
| |
|
01-21-2010, 01:55 PM
| #8 |
| Rock Stacker Join Date: Nov 2007 Location: Arvada
Posts: 74
|       |
|
| |
|
01-21-2010, 06:28 PM
| #9 |
| Newbie Join Date: Jan 2010 Location: Phoenixville
Posts: 6
|
My MiRC...  Side View...  |
|
| |
|
01-21-2010, 08:14 PM
| #10 |
| I wanna be Dave Join Date: May 2007 Location: Taylors Falls just hanging with the MNRCRC crew.
Posts: 7,843
|
Very nicely done  |
|
| |
|
01-21-2010, 11:18 PM
| #11 |
| Quarry Creeper Join Date: Aug 2009 Location: here
Posts: 344
|
ke6geu - I'm diggin the links. They are very nicely done. what tubing did you use? Did you extend the wheel base too? More specs on the whole thing if you could please.
|
|
| |
|
01-22-2010, 12:31 AM
| #12 |
| Pebble Pounder Join Date: Nov 2009 Location: The Great Northwest
Posts: 115
|
Wow, these rides are lookin awesome!!! If at all possible, for those of us who have to run on no-speed dial-up, could we keep the pics from bein huge (not a deal yet) and replies to cool rides please omit the pic of their ride..? I know, it sux, (and I ain't a mod or the original poster) but where I live, unless I pay $100/mo, I can't get h/s dial-up and so much is just unloadable.
|
|
| |
|
01-22-2010, 10:43 AM
| #13 |
| I wanna be Dave Join Date: Jun 2007 Location: Earth
Posts: 2,488
|
Here's mine |
|
| |
|
01-22-2010, 01:49 PM
| #14 | |
| I wanna be Dave Join Date: Dec 2009 Location: San Francisco
Posts: 2,236
| Quote:
| |
|
| |
|
01-22-2010, 03:04 PM
| #15 |
| Rock Stacker Join Date: Dec 2008 Location: mission viejo
Posts: 75
|
yes I did cut off because feed 3mm strong enough look better too. one bag has 14 long one and 2 short one, need 2bag to make all link. cut off 1mm longer then short one in the bag. extend driveshaft 7mm cabon tube used. here some more pic up hill test little over 50 dgree http://www.youtube.com/watch?v=z0K3sNUzc2Q at video toque twist make left front tire up a little so I did strach right rear shock spring to make correction   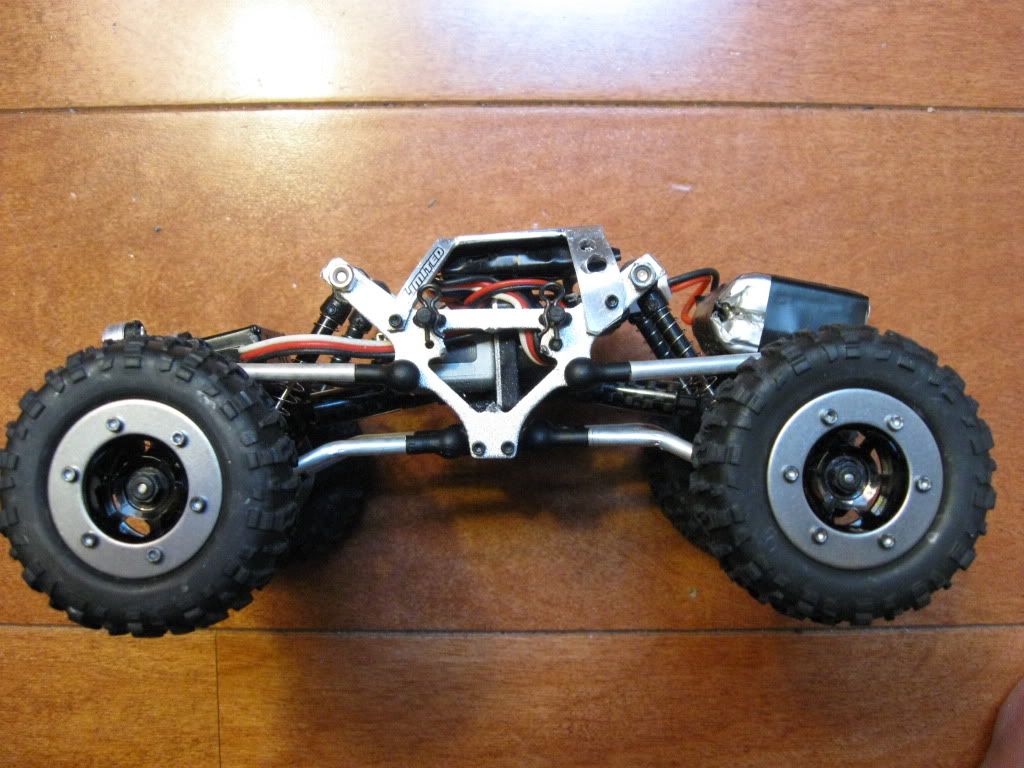 Last edited by ke6geu; 01-22-2010 at 05:23 PM. |
|
| |
|
01-22-2010, 10:29 PM
| #16 |
| Quarry Creeper Join Date: Aug 2009 Location: here
Posts: 344
|
Now I need to find 3mm aluminum tube.
|
|
| |
|
01-23-2010, 07:24 AM
| #17 |
| Rock Stacker Join Date: Dec 2008 Location: mission viejo
Posts: 75
|
everything you can find in any local habby shop. steel ring from http://www.billet-works.com/losi_mic..._crawler_parts |
|
| |
 |
| |


 Linear Mode


