| |
 01-08-2011, 09:41 AM
| #1 |
| Pebble Pounder Join Date: Dec 2010 Location: Jackson, Michigan
Posts: 136
| Most of it will prolly be Mesh paper mashed, maybe resined over to make it harder? Bed linered or stone spray bombed on color to start, maybe some foam step type cliff inclines here and there, all the way around will have 4-5" high thin mesh guard rail to keep the truck from falling or just look like your on a tight road on a canyon ( think IRT ) India Road truckers I wanna get the 2x4s and wood today so I can get the table leveled in the basement where we are gonna put it so I can start drawing on it and get the heights I want what where and what not. Btw: the truck is larger then scale in the pic its about half as big as it was the marker made it bigger 1" on my paper was 2 Ft in scale so my truck was 1/4" Long and a litle over 1/8" wide 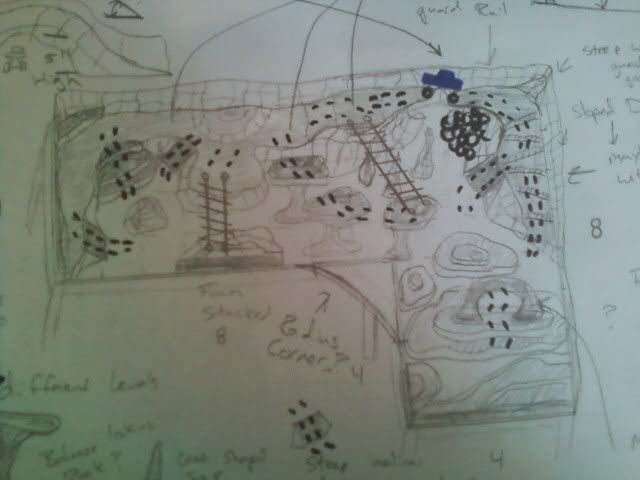 |

|  |
| Sponsored Links | |
| | |
|
01-08-2011, 08:30 PM
| #2 |
| Pebble Pounder Join Date: Dec 2010 Location: Jackson, Michigan
Posts: 136
|
I wouldnt call it good progress, but Im glad to have started it a day after I planned it. Had to move some stuff around for the space it was going in, didnt really start it til about 8pm . Tomorrow need to figure out which way the Longer part of the L is gonna go and make some temp legs, so I can measure for the real ones since the floor isnt level, and the table is gonna sit up over the ledge around the wall. 2x4s and 7/16 Osb, got some 1/4 Osb for the outer rail, to tie the hardware cloth into and for the upper canyon level to 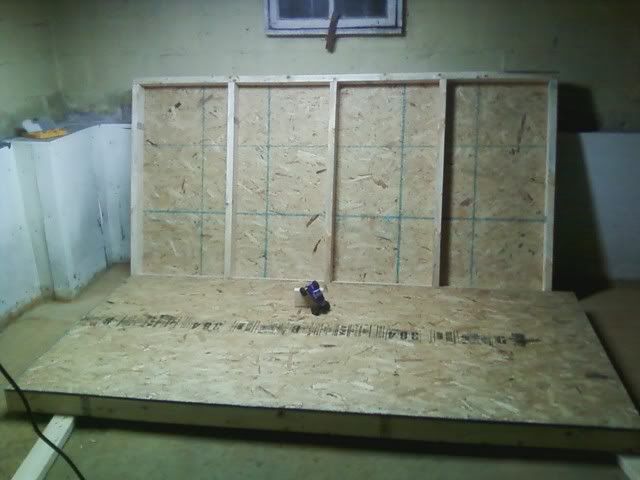 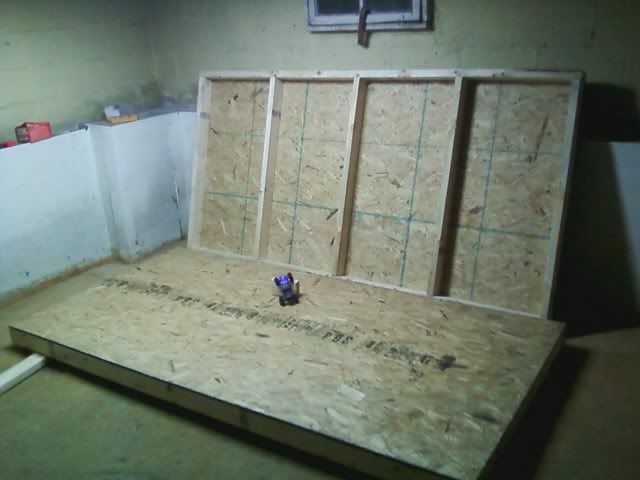 I think it should be fairly good sized |
|
| |
|
01-08-2011, 08:49 PM
| #3 |
| Newbie Join Date: Sep 2009 Location: middle of TN
Posts: 42
|
keep on! Im anxious to see how this turns out
|
|
| |
|
01-09-2011, 01:52 AM
| #4 |
| Rock Crawler Join Date: Mar 2008 Location: Grand Rapids
Posts: 918
|
looks quite ambitious. although i would advise against paper mache especially if you want to add resin later. i would just do a chickenwire mesh frame and then use fleese, resin that, then lay down some fiberglass mat, resin that, let it dry, bedline it, paint it, crawl. if you lay the fiberglass right it'll be strong enough to stand on  (why you would want to stand on it i do not know) (why you would want to stand on it i do not know)
|
|
| |
|
01-09-2011, 05:26 PM
| #5 |
| Pebble Pounder Join Date: Dec 2010 Location: Jackson, Michigan
Posts: 136
|
I was only going to paper mache the 90 steep canyon walls for looks to msimplify it, any where Id be crawling would have 1/4 osb under it with mesh on top ( braced ) or foam board. But Im still thinking about it though. I think this was just a "little" to big for the space it went in, i had to pull it out to add the splash board so i can have something to attach the upper levels to but I got it down was a pain though. its only 1/4 but once i had start adding the levels and the frame work it will tie it in alot better when its done youill see. Also hooked the tv from out in the garage down there, cant stand doing something without listening to the tv or a radio, its odd just working without anything else going on. Plus Ill build a workbench or two down there to accopmany it so alot of little projects can be down stairs rather then going outside to the barn. At first I thought it was gonna be big, but I drove the truck on it some and it makes you think its small, but I add some technical areas it will make it seem less big im sure, its just the turning radius that takes up space if I make the canyon cliffs 10" a thin wall up the splash wall plus wavey cuts along the inner edge I can make the turn at the corner ez plus you should be hanging over the edge alittle bit to = ) The back wall on the left is 20" off the table, Under the Window its 16" I figure I could build it up higher on the left, I wanted the thing to be 36" off the floor but there was a cement step all the way around the room 3ft up so I had to set it over it now its 45" to the top of the table, there goes the idea to sit in a chair Oh I also bought Heavy Duty adhesive, not only did I buy a bad tube that was clogged, but the gun I got to didnt even work = /, AND! I also left it on the cart got down the road to burgerking realized I forgot it, got back just in time before the cart dude took it back inside. 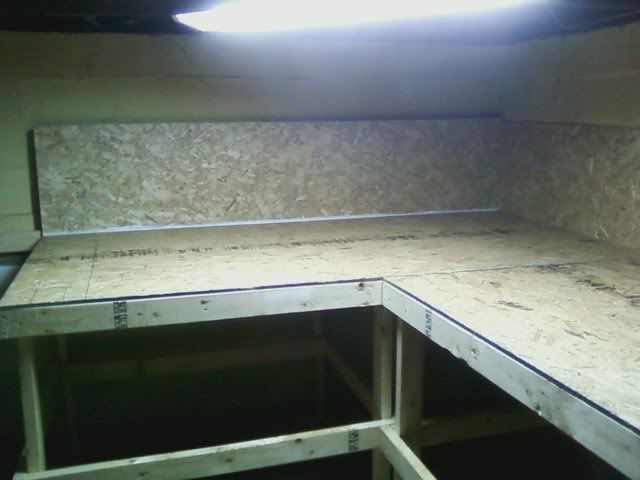 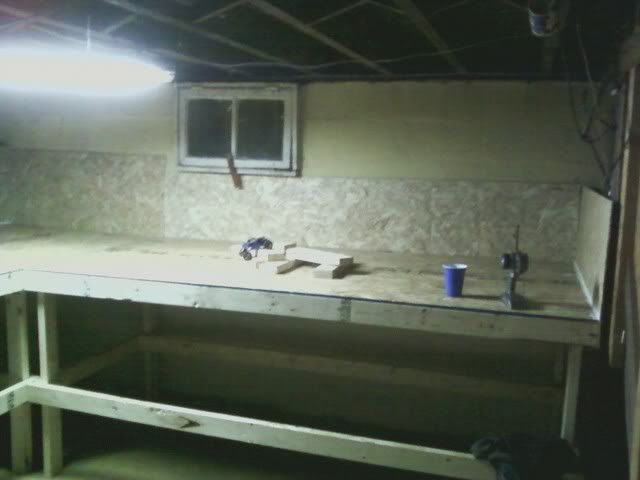 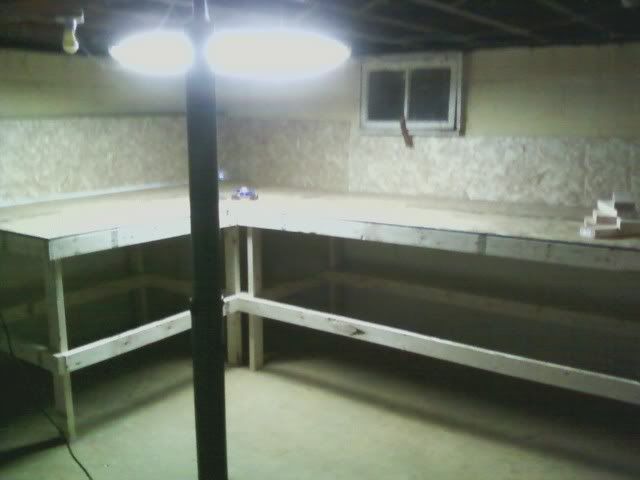 Again sorry for pics cell phone for the lose Last edited by Mav68erick; 01-09-2011 at 05:29 PM. |
|
| |
|
01-09-2011, 07:24 PM
| #6 | |
| Pebble Pounder Join Date: Jan 2011 Location: Warwickshire ( UK )
Posts: 143
| Quote:
| |
|
| |
|
01-10-2011, 03:12 AM
| #7 | |
| Pebble Pounder Join Date: Dec 2010 Location: Jackson, Michigan
Posts: 136
| Quote:
| |
|
| |
|
01-10-2011, 03:44 AM
| #8 | |
| Pebble Pounder Join Date: Jan 2011 Location: Warwickshire ( UK )
Posts: 143
| Quote:
quick question are you going to attach things to your backboards or just to the main boards ? | |
|
| |
|
01-10-2011, 12:55 PM
| #9 | |
| Pebble Pounder Join Date: Dec 2010 Location: Jackson, Michigan
Posts: 136
| Quote:
| |
|
| |
|
01-12-2011, 11:35 AM
| #10 |
| Quarry Creeper Join Date: May 2008 Location: South East Wisconsin
Posts: 240
|
I think it looks great so far...should be plenty large enough for multiple guys to have room to crawl at the same time.
|
|
| |
|
01-12-2011, 12:57 PM
| #11 |
| Pebble Pounder Join Date: Aug 2010 Location: The Divide
Posts: 104
|
Damn your going all out Really want to see this progress, might have to borrow some of your ideas |
|
| |
|
01-12-2011, 01:49 PM
| #12 |
| Quarry Creeper Join Date: Feb 2005 Location: Atlanta
Posts: 326
|
I love this. I just (like 2 hours ago) won a Micro Crawler on ebay. I also want to build a small indoor crawling area. I could probably get fit 2' x 4'
|
|
| |
|
01-12-2011, 02:45 PM
| #13 |
| Rock Crawler Join Date: Nov 2010 Location: roanoke
Posts: 865
|
Start with foam and that foam spray that expands, works good. |
|
| |
|
01-26-2011, 06:40 PM
| #14 |
| Pebble Pounder Join Date: Dec 2010 Location: Jackson, Michigan
Posts: 136
|
Well since im laid off for the week or two, prolly just the week. I got bored and went to buy a piece of the white foam and it was 50% off so I bought about 30 dollars worth 1 1/2 x 14 1/2 x 96" and some 3/4 thick as well. First I started off just stacking and making them smaller like the piece on the top level, then I was like well this looks ok but I want it thicker taller for more depth demension and more canyon realism, so I stacked two and then 2 smallers on the end, then I thought BIGGER! So I stacked 5 and carved a steep incline, I had to test it and keep carving to be able to get up it, It still tricky but theres no traction at all. Well after making the 3 foam pieces which was about 3-4 hrs of work I decieded I need to do frame work before I get a bunch of big obstacles and no real place to put them so I started the levels. My biggest issue atm is the white Foam! Its soft after I scribe snap I carve saw it with a seraded hobby say and it cleans it up good, then if u take a lighter you can shrink the edges. I bought some stone spray paint but it flaked off ez, so I got the bright Idea to clear over it to seal it, then just do another layer of stone after so if it flaked off you would see white. Well the foam shrank and reacted with the clear, maybe I sprayed to much but IT in fact! sealed the stone spray. Im thinking I just paper mache over the foam? and then stpone spray/Clear/Spray? I dont wanna do alot of carving work and just have the Spray, and most of all the foam flake off and have white crap all over, if it was in the snowy mountains I guess it looked cool but its makes a mess all over the truck! I also got some wire mesh to do canyon wall drops from one level to another, maybe a tunner through the big penisula in the center or a mid level under it. Its kinda hard to plan you gotta go one step at a time and just get an idea hold it up see if it looks good and just wing it. 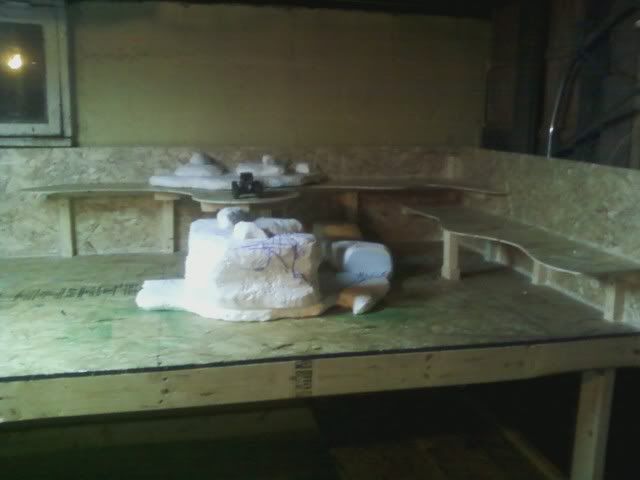 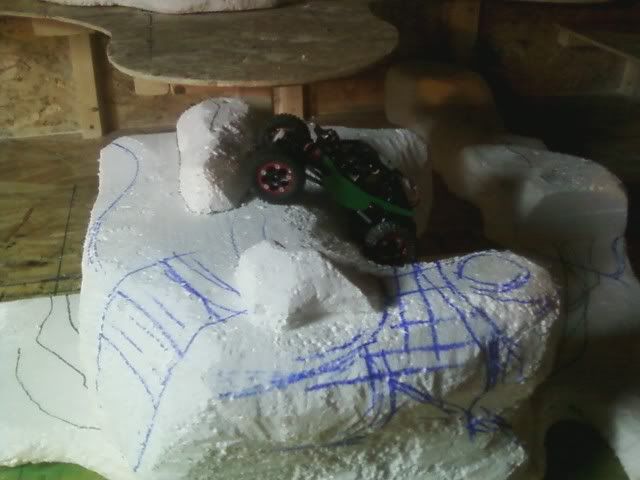 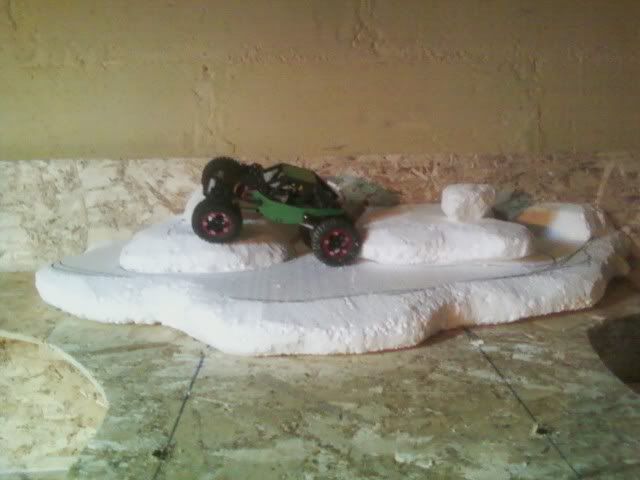 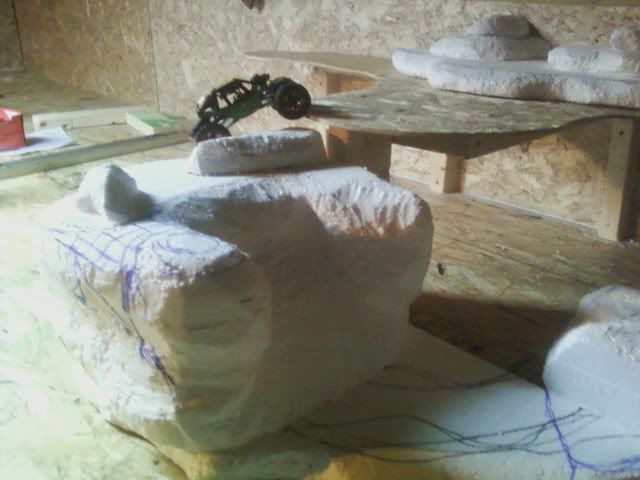 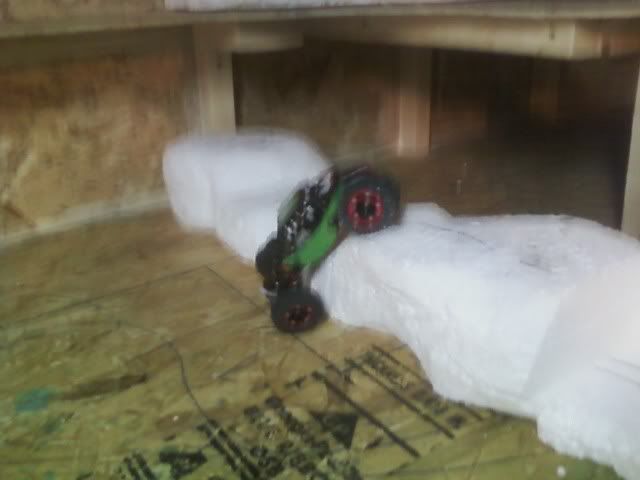 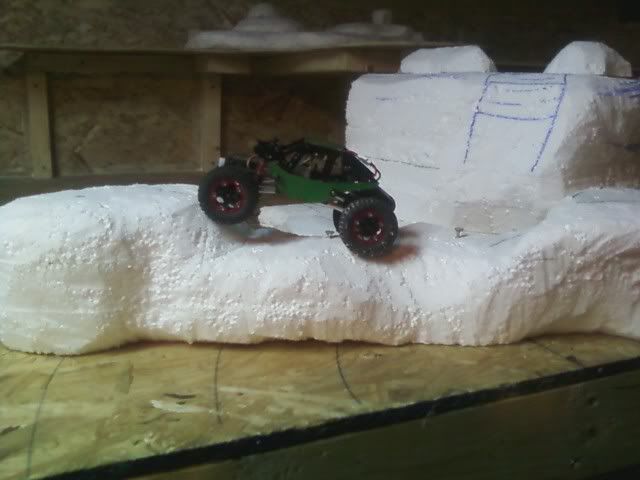 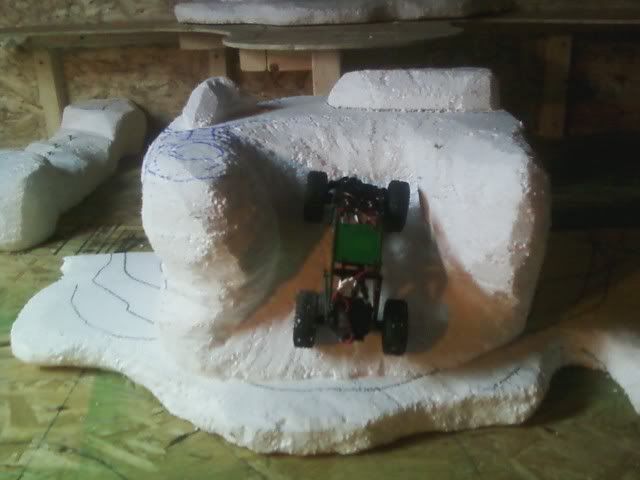 Enjoy the crappy phone pics |
|
| |
|
01-27-2011, 08:12 PM
| #15 |
| Newbie Join Date: Jan 2010 Location: mich.
Posts: 13
|
Man, Wish I lived closer so I could check this out. Along with your Camaro....
|
|
| |
|
01-27-2011, 09:15 PM
| #16 |
| Pebble Pounder Join Date: Dec 2010 Location: Jackson, Michigan
Posts: 136
|
Got a little more done today, but had a headache and stopped for a bit, went to go back and work on it got a phone call and yacked for over an hr. I still find my self designing while I go but its hard because until you do the mesh you can go with it in alot of different ways so its hard to visualize the end product its just a base, Still need to brace and rib the levels, either make them straight down walls or over hangs so you can drive under them. Trying to also picture one level under another with rock type pillar supports coming down that you can drive and squeeze around or arches/tunnels, but I mean once I start using mesh you can add onto that and what not to get some real cool shapes going. but I also gotta plan for skeletal support so it can hold it self together some. |
|
| |
|
01-29-2011, 04:14 PM
| #17 |
| Pebble Pounder Join Date: Dec 2010 Location: Jackson, Michigan
Posts: 136
|
did a test rock out of plaster a paris, did it over foam with only one layer of cheese cloth doubled over and sprayed it with my rock paint, looked ok not solid but stiff, took my heavy duty construction adhesive and glued the edge over the bottom where I cut it with a knife off my board. So today I did a small section of mess to do, I soon realize that 1. This is a pita 2. The cheese cloth absorbs so much water that the bottom of your container is left with alot of PoP and you dont get much done before you run out but... 3. It looks good, just takes while. I also discovered to make it a little stiffer and seal the plaster from cracking some I can use my construction adhesive and dab it here and there and brush it over it to add some what of a shell, Im gonna see if I can mix it with water like you do elmers for mache. Only could get 2 pics phone battery was low and wouldnt do nemore  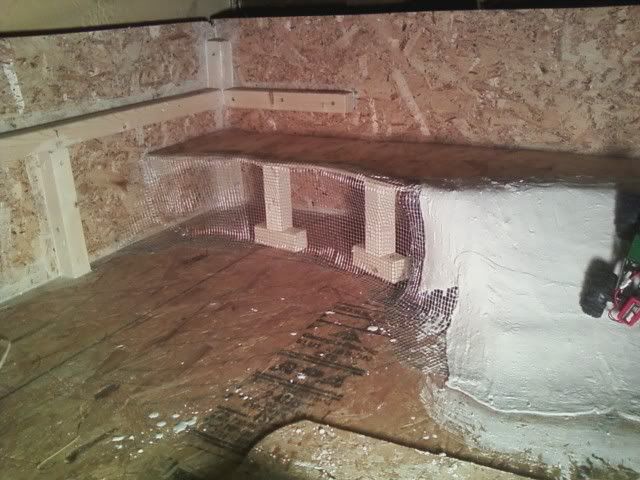 any seems I can just construction adhesive and blend out, the stuff sets up really hard to in less then a day, I really dunno if I like using the cheese cloth when I cut it its already folded once, then I fold it again, and when you dip it it gets stuck on it self so bad its really hard to get pulled apart, I may think about that rail road pre parised stuff to not drive me nuts, Or maybe Ill try paper towel like the rail roaders do and just do multi layers because at this rate Im not gonna wanna do much of it like this its slow! Edit: and I should prolly start at the bottom and work up, so the overlaps look like rippled rocks better = / |
|
| |
|
01-29-2011, 10:16 PM
| #18 |
| Rock Crawler Join Date: Dec 2005 Location: houston
Posts: 650
|
Looking great! I want to do something similar, but mine will have to be MUCH smaller. Keep the pics coming, maybe they'll inspire me to get off my butt and build a course. Great work!
|
|
| |
|
01-29-2011, 11:02 PM
| #19 |
| Pebble Pounder Join Date: Jan 2010 Location: Roswell
Posts: 177
|
Have you thought about using those buckets of pre-mixed cement or mortar? They are like $10-15 for a 5 gallon bucket. Just cover the foam with a thin layer and texture it how you like and it sets fast. I plan to use boxes and foam to build it up and cover it with this. I think that is what people are using on the courses I have seen that I like but I havn't really checked into it yet.
|
|
| |
|
01-30-2011, 07:44 AM
| #20 | |
| Pebble Pounder Join Date: Dec 2010 Location: Jackson, Michigan
Posts: 136
| Quote:
I did 2 test pieces, one of a small foam rock covered in cheese cloth plaster, and one I just brushed on the plaster, there definetly needs to be some reinforcing barrier on the styrofoam ( the white bally kind ) or it gives to much and the stuff flakes off. I also painted just a piece with my textured paint, it looked good but if you drove over it having links and tires spinning, it would look like crap in less then a battery run. I thought about cement or mortar something that hardened, the plastering isnt as bad if the plaster staid in the water maybe if I mixed more then 2-4 ounces of palster at a time, and did just a full pound to 1.75 cups of water it wouldnt suck as bad and then just mixed it with a drill mixer after every dip to get the plaster back in the water and off the bottom? Because about the time I did my fourth piece all it was was water soaked cheese cloth. But even though the bottom of the container had most the thick plaster didnt stop me from fingering it over spots that it needed or trying to fill grooves or cracks its just messy shit Ill upload my test rock in a bit Edit: Heres the Test Rock 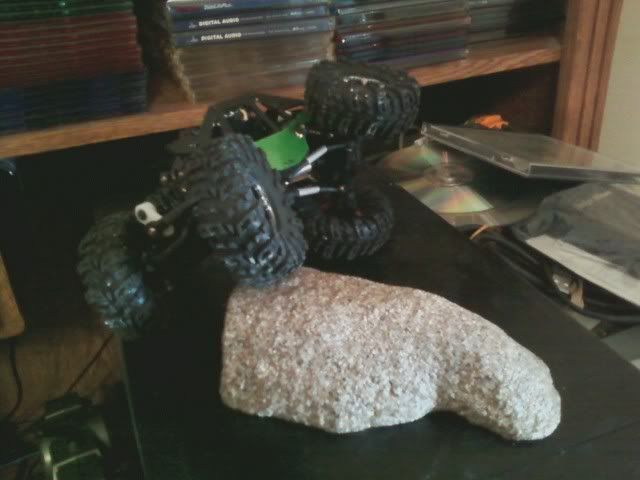 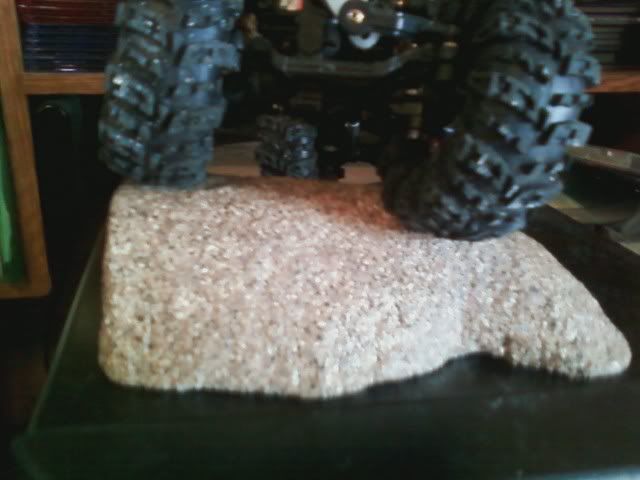 its got a flat end because it was supposed to go against the board, but now it just looks like it fell and snapped in half = ) Last edited by Mav68erick; 01-30-2011 at 08:35 AM. | |
|
| |
 |
| |


 Linear Mode


