| |
 04-12-2011, 02:03 PM
| #1 |
| Pebble Pounder Join Date: Jan 2010 Location: Sacramento
Posts: 99
|
From card stock to jeep in about a week. 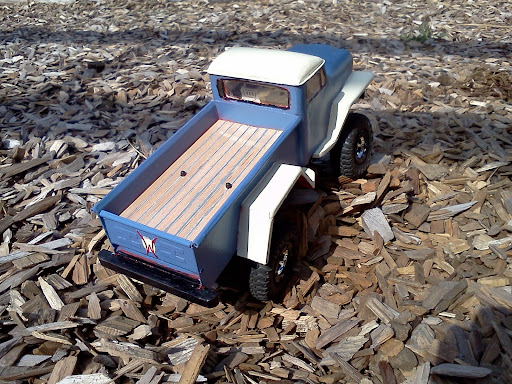 |

|  |
| Sponsored Links | |
| | |
|
04-12-2011, 02:09 PM
| #2 |
| Pebble Pounder Join Date: Jan 2010 Location: Sacramento
Posts: 99
|
When I saw this new micro crawler I couldn't wait to build a body for it. I started with just a sketch of the profile and a template for the mount.  |
|
| |
|
04-12-2011, 07:57 PM
| #3 |
| I wanna be Dave Join Date: May 2007 Location: Taylors Falls just hanging with the MNRCRC crew.
Posts: 7,843
|
Very cool build, will you be posting more picks? I'd love to see more. |
|
| |
|
04-12-2011, 08:53 PM
| #4 |
| Pebble Pounder Join Date: Jan 2010 Location: Sacramento
Posts: 99
|
Sure, after making the patterns I built the bed. I folded up the inside. Then I cut the rear side pannels. I folded the top edge out and used JB weld to atach the bedrails. The tail gate is folded around the same tubing at the top. The hole at the bottom is the same gage as the bed rails. The bottom of the gate is the next gage up so the gate opens. The bottom of the bed is 1/32" balsa with the metal between the planks painted on. I worked forward from there building the back and top of the cab from 1/4" balsa. Everything else is just poster board.  |
|
| |
|
04-13-2011, 09:35 AM
| #5 |
| I wanna be Dave  Join Date: Oct 2006 Location: Martinsburg WV
Posts: 2,781
|
Posterboard and balsa? Damn, thats pretty impressive. Nice job...
|
|
| |
|
04-13-2011, 12:11 PM
| #6 |
| Pebble Pounder Join Date: Jan 2010 Location: Sacramento
Posts: 99
|
There is a lot of wood in the cab. The doors are framed in balsa, the dash and hood transition are all balsa and the raised section for the battery had to be framed. The balsa is the weekest part of the truck but it worked well for shaping. If I did it again I would probably use styrene so I didn't have to blend out so much woodgrain. The rear fenders hang off a wide spot in the template for the mounting points. I decided to re-cut it so the front fenders are connected all the way across the hood. They are glued onto the wood that frames the doors. I went backand added construction paper on the inside of the connections for the rear fender so they would be stronger.  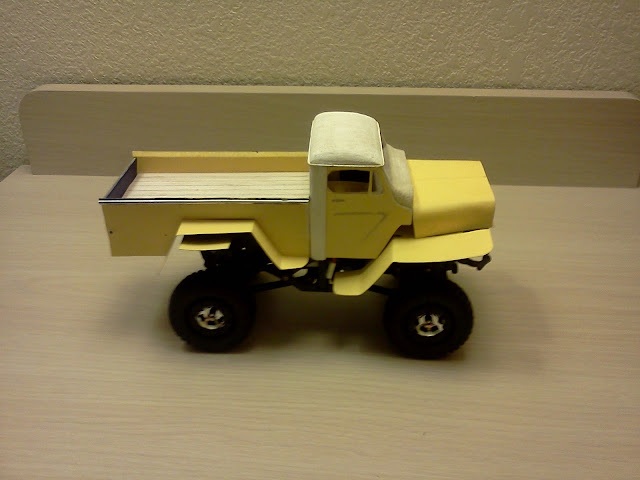 |
|
| |
|
04-13-2011, 01:43 PM
| #7 |
| Pebble Pounder Join Date: Jan 2010 Location: Sacramento
Posts: 99
|
The driver is Lego Buzz Lightyear. It was a figure wehad two of and my 6 year old thought it would be good. The original planwas to keepit all yellow so the interior and steering columb are yellow. Looks a little bright when it is all painted. I may need to cut it open and paint the interior at some point.  |
|
| |
|
04-13-2011, 02:47 PM
| #8 |
| Rock Crawler Join Date: Feb 2010 Location: Chapin, South Carolina
Posts: 666
|  That amazing work man. That amazing work man.
|
|
| |
|
04-13-2011, 05:02 PM
| #9 |
| Pebble Pounder Join Date: Jan 2010 Location: Sacramento
Posts: 99
|
I have to thank F-150 Highlift. My project was inspired largely by his. A lot of the techniques that made this possible I learned from reading about his projects. Uh oh!! another scratch willys!! His is 1.9 scale. It looks amazing and there are a lot of accesories for that scale. I love the micros. They are a low cost base for a project, don't take a lot of room to store and great for living room driving on a rainy day. They are also great for taking on trips. |
|
| |
|
04-13-2011, 09:38 PM
| #10 | |
| Rock Crawler Join Date: Jul 2009 Location: greeley
Posts: 545
| Quote:
| |
|
| |
|
04-13-2011, 10:21 PM
| #11 |
| Pebble Pounder Join Date: Jan 2010 Location: Sacramento
Posts: 99
| I masked each stripe then clear coated the bed. I glued it in before painting so I was a little worried that paint would bleed onto it around the tape. There is a little yellow poster board still showing now that it is painted. The bed is staying just like that. Glad you like it. |
|
| |
|
04-13-2011, 10:24 PM
| #12 |
| Pebble Pounder Join Date: Jan 2010 Location: Sacramento
Posts: 99
|
The under coat is rust red. I bought it to paint the fuel tank on a space shuttle I built last year.  |
|
| |
|
04-14-2011, 12:50 AM
| #13 |
| Quarry Creeper Join Date: Apr 2011 Location: North Alabama
Posts: 289
|
that is some mighty fine work you did. I never had any luck with balsa.
|
|
| |
|
04-14-2011, 09:49 PM
| #14 |
| Pebble Pounder Join Date: Jan 2010 Location: Sacramento
Posts: 99
|   |
|
| |
|
04-14-2011, 10:11 PM
| #15 |
| Newbie Join Date: Apr 2011 Location: peoria
Posts: 31
|
love the creativity man |
|
| |
|
04-16-2011, 07:05 PM
| #16 |
| Pebble Pounder Join Date: Jan 2010 Location: Sacramento
Posts: 99
|
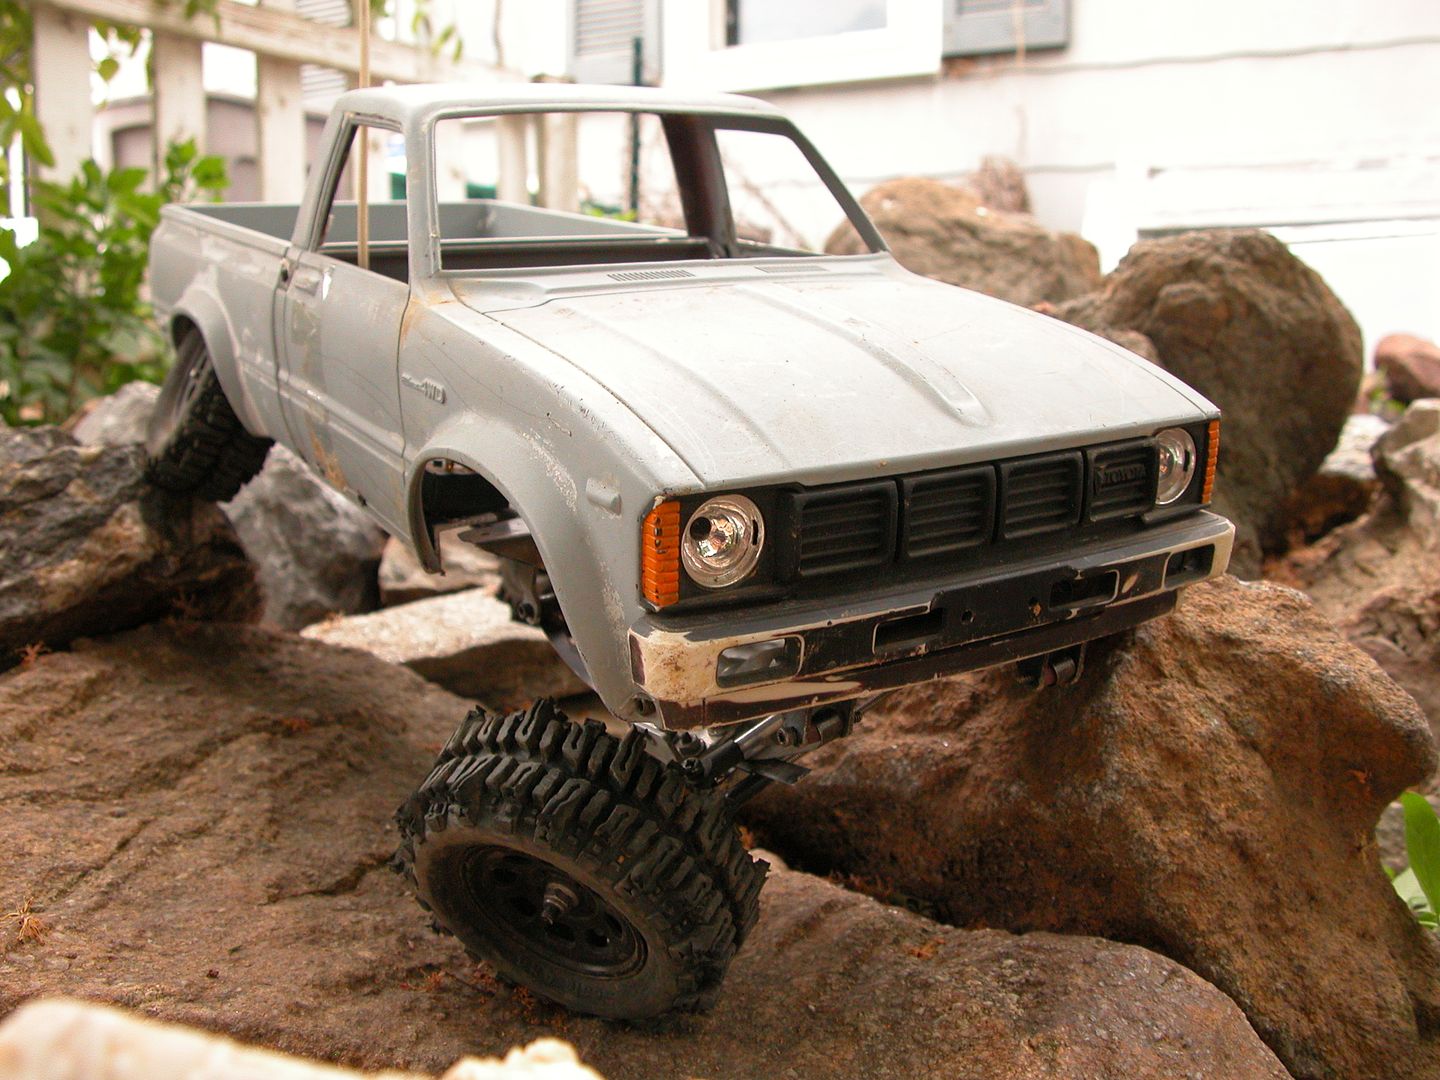
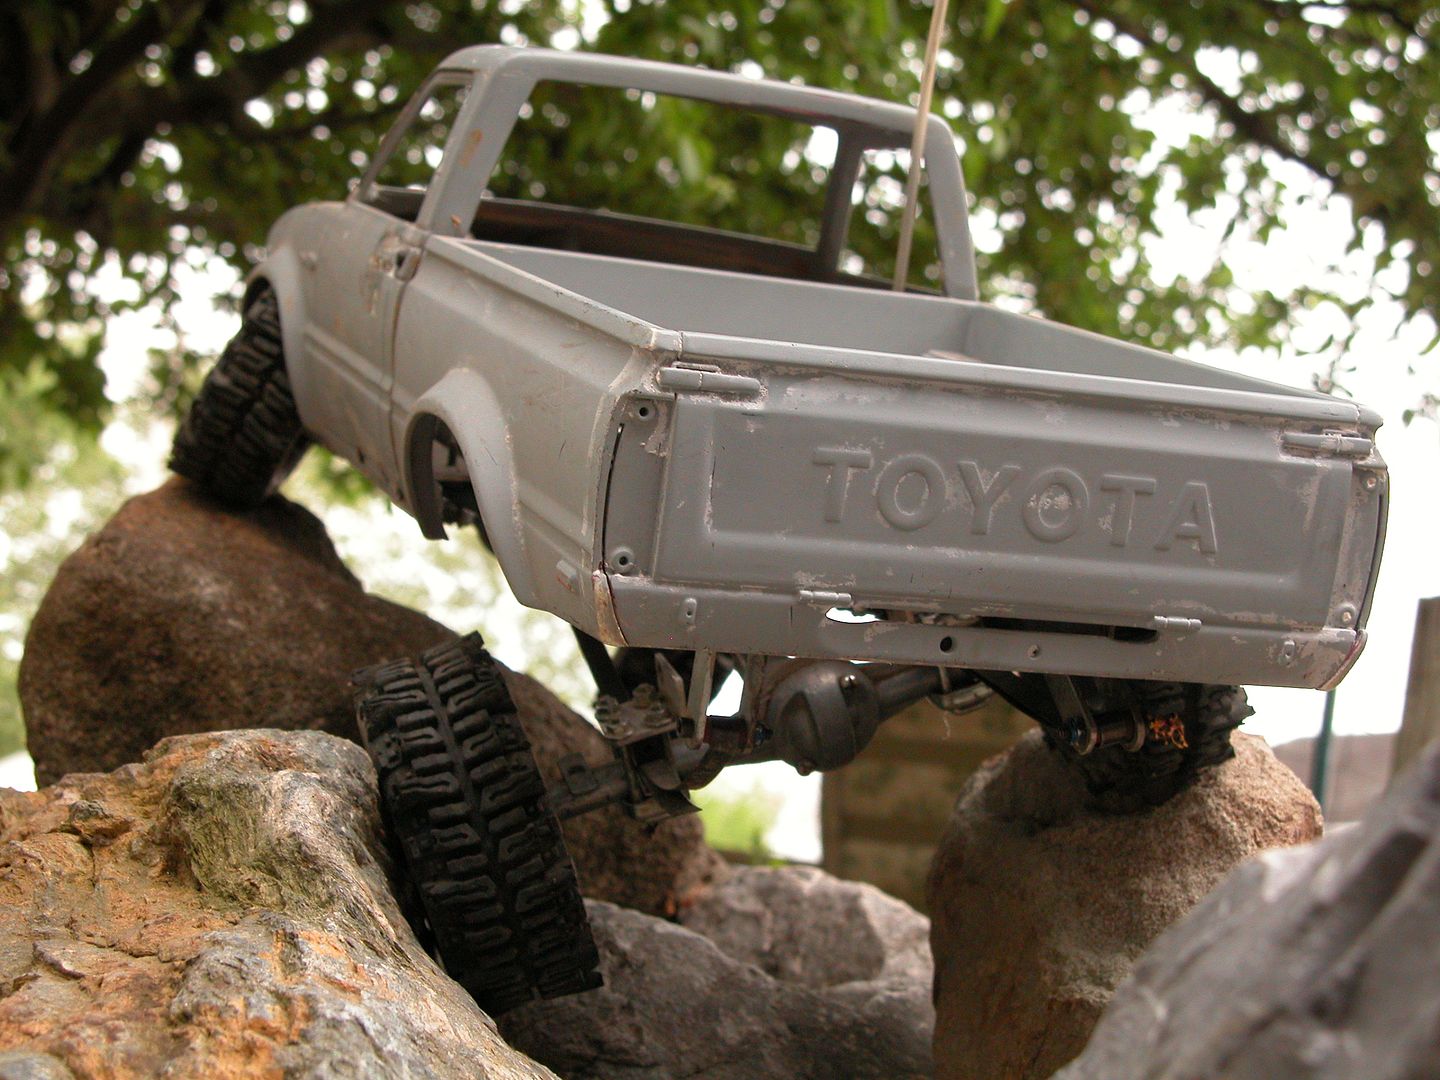
Last night and this morning I finished the chains on the tail gate. Yesterday I got the mirrors on. While I was waiting for the JB to dry I painted on some tail lights. I also added an engine compartment which looks cool and majorly stiffens the front bumper.    |
|
| |
|
04-19-2011, 05:29 PM
| #17 |
| Pebble Pounder Join Date: Jan 2010 Location: Sacramento
Posts: 99
|
I was trying to figure out what to do with my micro dessert truck. I saw the paper Bronco and had to do my Montero. I guess the Pajero is the same vehicle. I couldn't find it with the color option I have seen for some paper cars. Guess I will have to paint it. It is still a little rough and just sitting on the frame. I think I will make a mount out of some lexan packaging.   |
|
| |
|
04-22-2011, 10:03 PM
| #18 | |
| Pebble Pounder Join Date: Jan 2010 Location: Sacramento
Posts: 99
|
The Willy was fun. I wish I had time for this. I can't think of anything stronger than WOW without being obscene. Truly amazing. Not micro but made entirely out of aluminum. I am going to have to get some turkey pans and give this a shot with a micro. I got some flashing at ACE for $0.37 a foot, but it is to heavy for a body like the one below. Might make a good comp style chassis though. Quote:
Last edited by bouncingbabyboy; 04-28-2011 at 01:06 PM. | |
|
| |
|
04-22-2011, 10:05 PM
| #19 |
| Pebble Pounder Join Date: Jan 2010 Location: Sacramento
Posts: 99
|
Missed the quote at the bottom "Can you give me the info about where you sold your soul to the devil? That would be great, thanks."
|
|
| |
|
04-24-2011, 09:01 PM
| #20 |
| Pebble Pounder Join Date: Jan 2010 Location: Sacramento
Posts: 99
|
Just got my new rock crusher tires. I thought they were going to be larger than the stock tires. They are actually slightly smaller than the stock tires on the trekker. |
|
| |
 |
| |


 Linear Mode


