| |
| |||||||
 |
| | LinkBack | Thread Tools | Display Modes |
 06-24-2007, 02:23 PM
| #1 |
| RCC Addict Join Date: Mar 2007 Location: St. Louis (High Ridge)
Posts: 1,279
|
well, I have a couple of rigs now in the 14+ inch wb category, and wanted to try my hand and finding SOMETHING that would be long enough to actually put the wheels under the wells. I searched tower, and came up with a handfull of bodies that were long enough, and got parma's 1/8th gravedigger body which at 20.25" long gave me a little wiggle room. I have a friend with a vinyl graphics setup, and so we layed out graphics on the truck to get a feel for the look. I had already decided on a translucent red backed with gold, and He had seen something done on a 1:1 involving layers built up to change the color. with that in mind, and before everyone loses interest due to too many words, here come the pics. 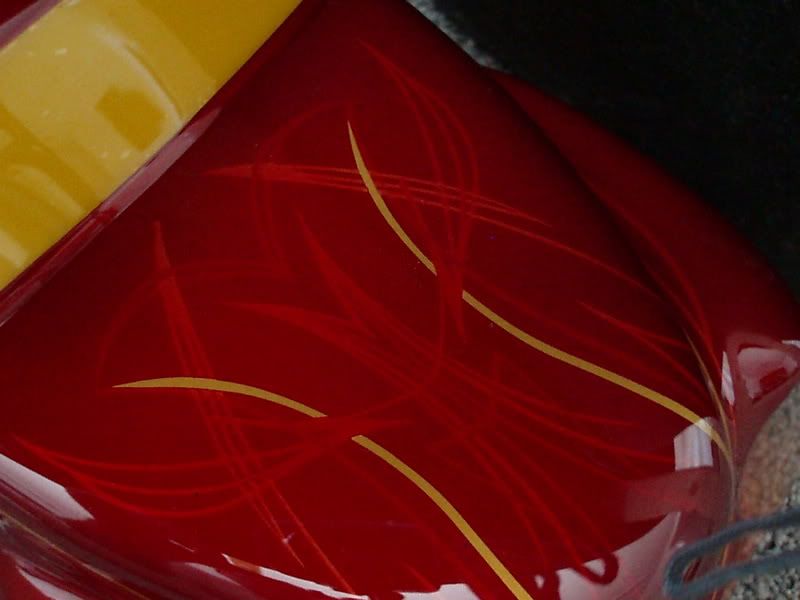 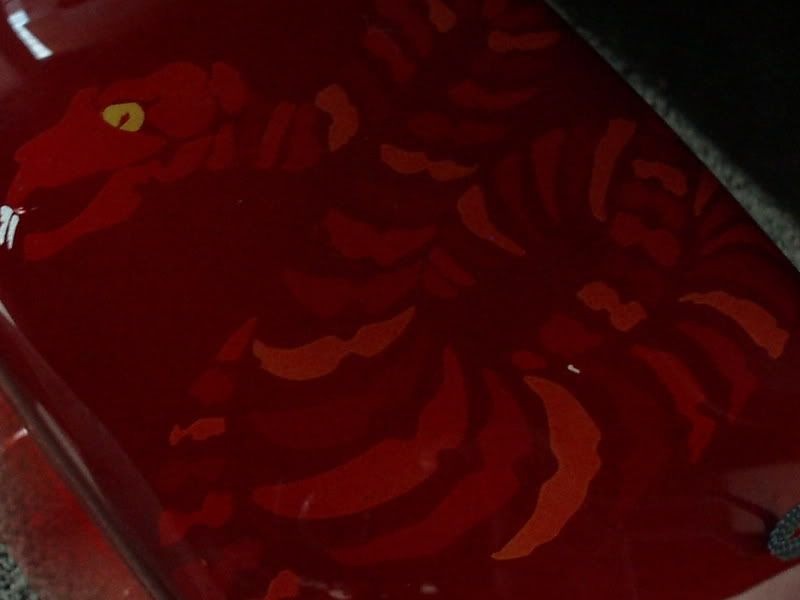 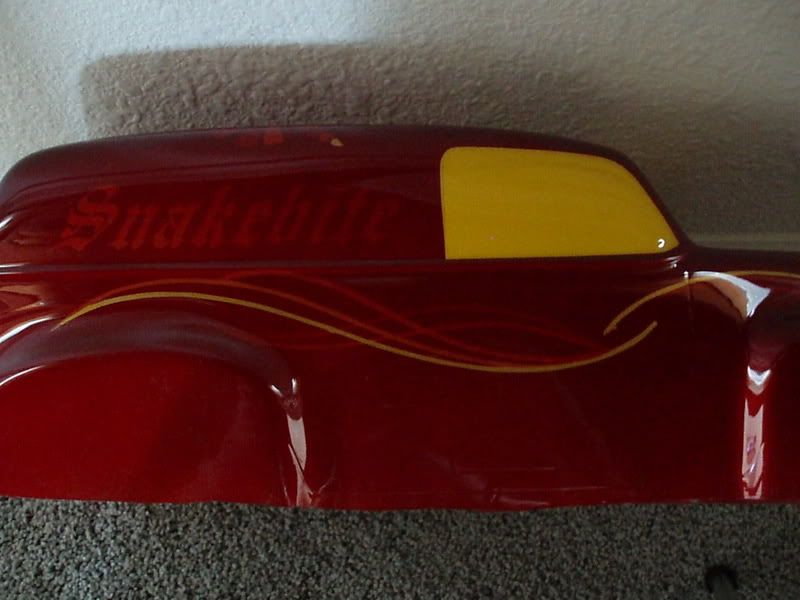 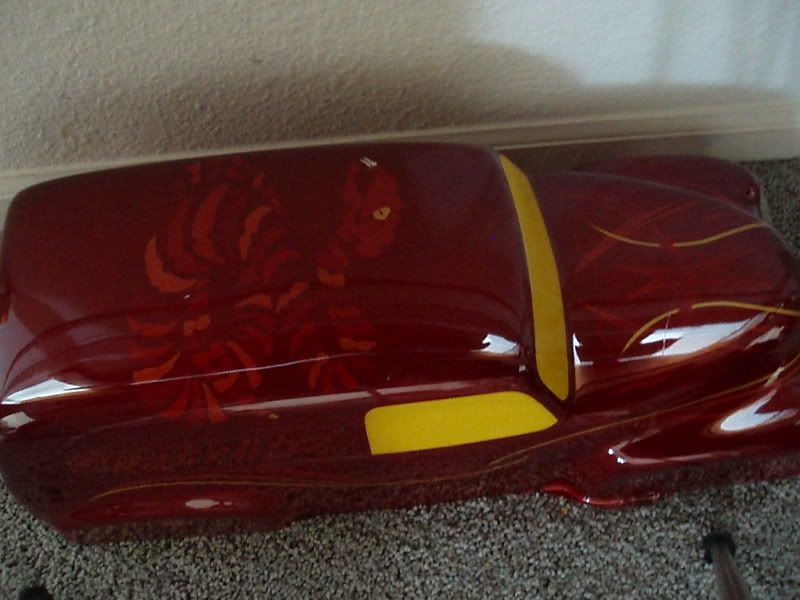 I had to take dark photos because all the camera would pick up are reflections. I used some of the vinyl to make about 8 masks on the back of a chunk of scrap lexan off the edge of the body. then i sprayed red, and peeled a mask, sprayed and peeled until I had about 8 layers, then backed it with gold, and backed the gold with silver. From that I found that my heavy trigger finger alowed about 4 or 5 layers of noticeable shades before just being red. so to do the body, I did one coat of translucent red from tamiya then dusted the body from about 3 feet away with the gold to give it a little metal flake. then did a second coat of red. I had labled the sections of graphic with a sharpie on the overspray film, this let me keep tack of what to cut off before the next coat. the lable ran from 4 to 0 with 0 being gold. so it became spray, cut, peel, repeat. when i got to the 0 layer, I peeled off the rest of the masking in the truck, and hit it with the gold backing. holding it to the light, you could still see the shadows of my fingers through it. Backing it with the silver ensures all possible light is relected in the paint, and not transfering through the body which makes it darker. Those are yellow window masks, the windows are still clear. |

|  |
| Sponsored Links | |
| | |
|
06-24-2007, 05:09 PM
| #2 |
| Quarry Creeper Join Date: Jul 2006 Location: Formula Off-Roading some hill
Posts: 277
|
The pinstrips are frigggin awesome  .How did ya do those ? tape , brush .How did ya do those ? tape , brush |
|
| |
|
06-24-2007, 05:22 PM
| #3 |
| RCC Addict Join Date: Mar 2007 Location: St. Louis (High Ridge)
Posts: 1,279
|
the pin stripes were one piece vinyl graphics, applied to teh inside of the truck using transfer tape. you can kinda see here, I labled the lines as to how many coats of red they would get. layer 4 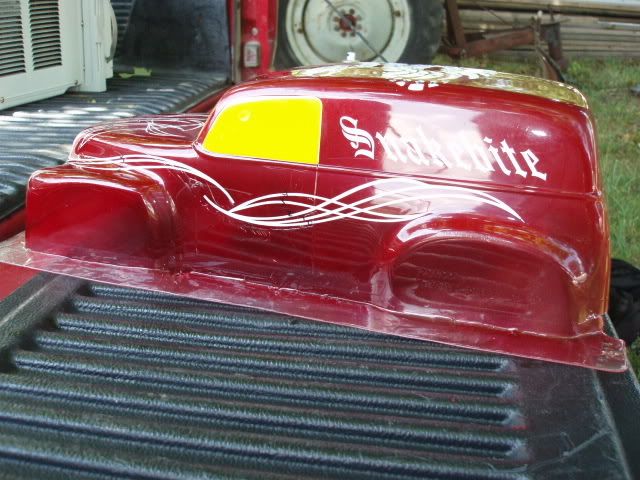 then I trimmed the vinyl with a fresh exacto every coat and would peel the next numbered layer off. layer 3 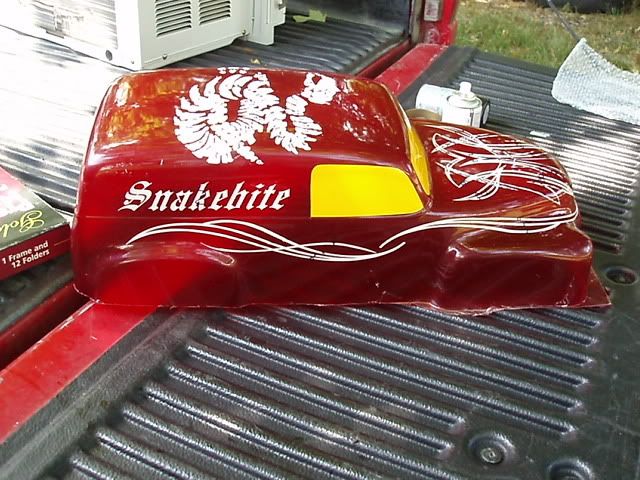 layer 2 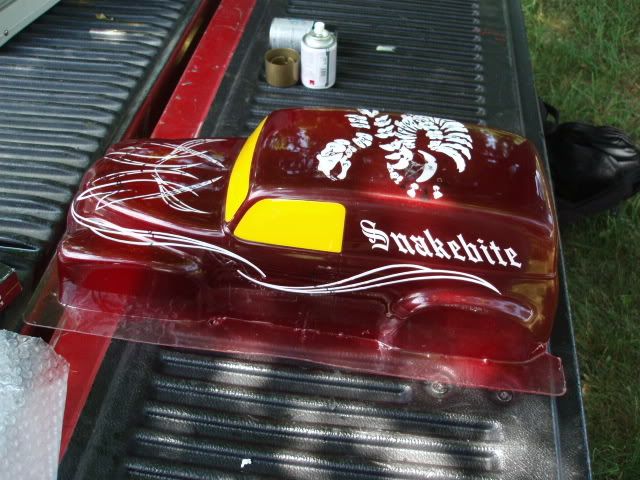 each time you can see the difference, adding layers of red. layer 1 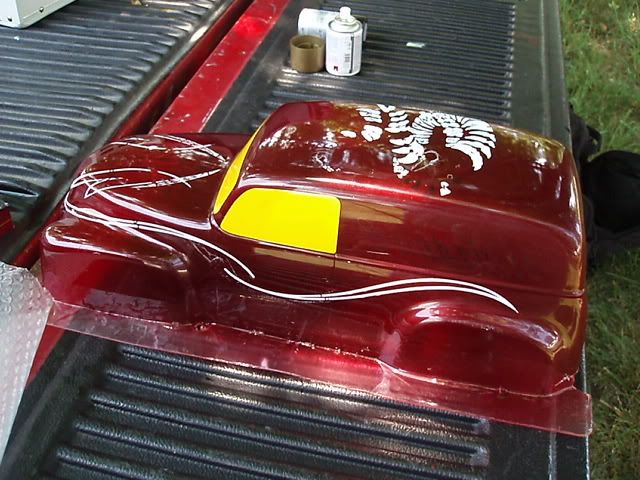 layer 0 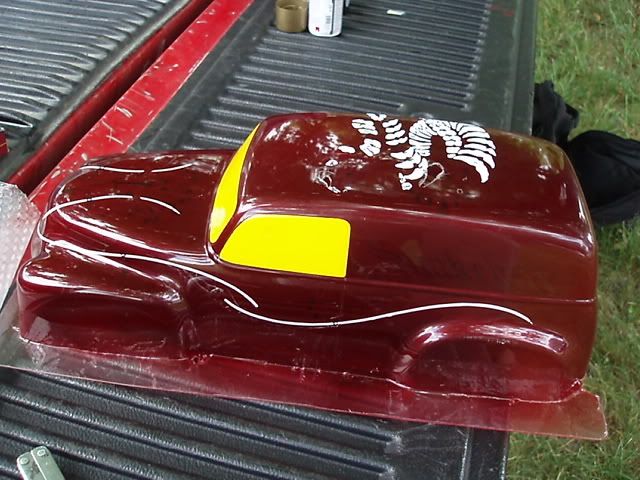 layer gold 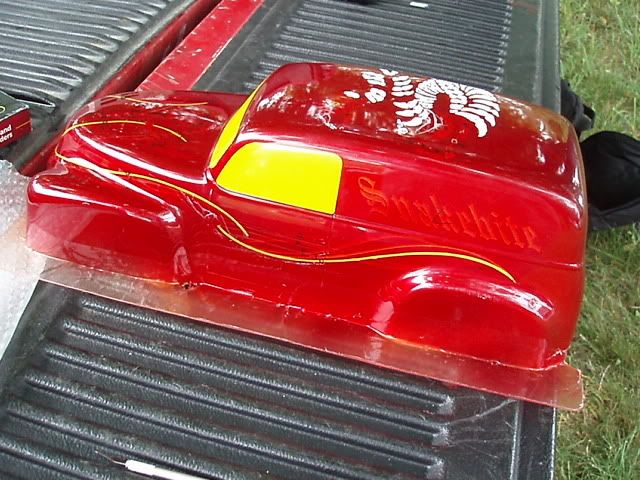 the entire thing was painted in about 2 hours this morning. All rattleball cans. the graphics took about 3 hours to come to a desision on and maybe 2 hours to cut out and apply to the truck. a second coat of gold, and a silver backing resulted in the finished look at teh top of the thread. |
|
| |
|
| |


 Linear Mode


