| |
| |||||||
 |
| | LinkBack | Thread Tools | Display Modes |
 02-06-2009, 10:21 AM
| #1 |
| I wanna be Dave Join Date: Jan 2009 Location: laying low
Posts: 2,508
|
Well I have been bit by the bug...I was gonna build a shafty but after doing all the numbers I figured I would go MOA for slightly higher cost...but for a very much more capable rig. I will be honest I have not really been following the RCcrawling for the last 5 years....I remember going to the local Kiwanis park (here in Utah) and seeing my first RC competition I had ever seen! that was at least 5 years ago...I really thought it looked fun..but I was into the full size crawlers at the time so I did not have the cash to start a new hobby...I started into RC helis last year...while they are fun to fly I was just not into it that much...so I started to look at rc crawlers again...after reading and asking many many questions I have decide to build a Bully axled, reign Chaos widemouth buggy I would like to thank all the forum people for such a great rccrawler resource..this place is great!! I would like to thank "just Zach" for all his help and guidance...and "Pinchflat" for hooking me up with the chassis... here are the specs... Reign Chaos Widemouth Chassis RC4WD Bully axles RC4WD Bully steering set-up 4" losi rock crawler shocks Texin FXR CC BEC Integy 55t lathe motors Tower Pro MG995(for $10 I figured I would atleast try them) Vanquish Products Dirty Harry Beadlocks (pure sexiness HB rover tires (white super soft) homemade stainless steel links with revo large ends 3s lipos CKRC BUG BODY DX3R and receiver the first thing I did was take the axles apart and thread lock them.. these axles are soooooo beefy..and the CNC work is great!! RC4WD did a great job on these axles...top notch  here is my homemade wheelbase jig with bully axles installed, integy 55t installed and the steering kit and towerpro servo.... I was lucky enough to have RC4wd send me some bullys axles WITH the newer style hubs already installed!!! thanks GUYS!! 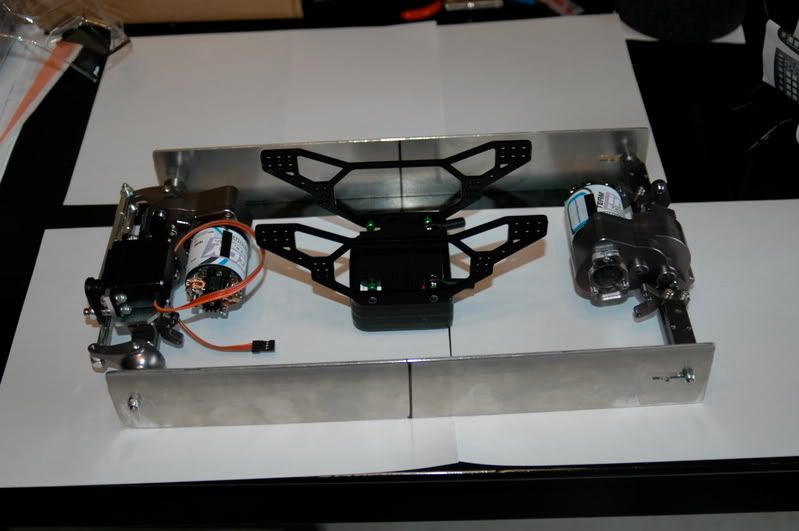 tower pro and RC4WD steering kit. 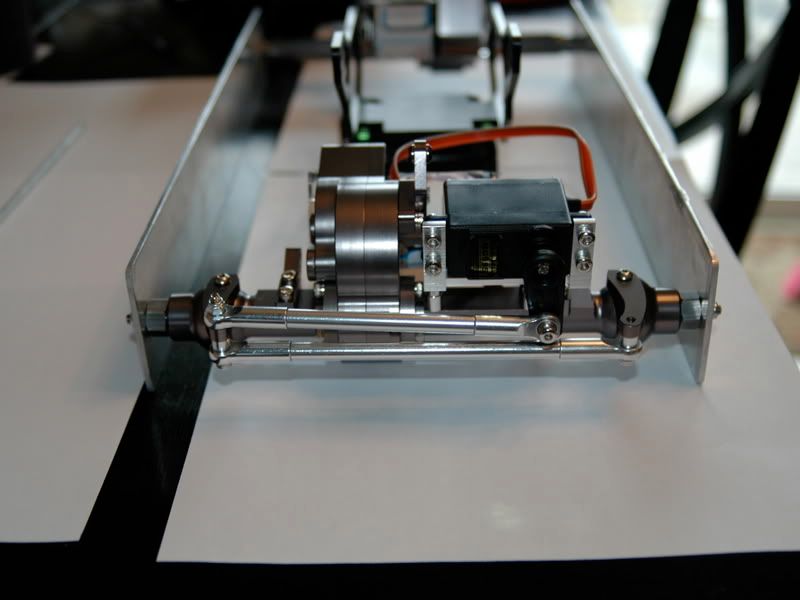 after lots of back and forth I decided to get the Vanquish products "dirty Harry" Beadlocks yes they are pricey...but they are PURE sex when you get them "in hand"   pile of goodies 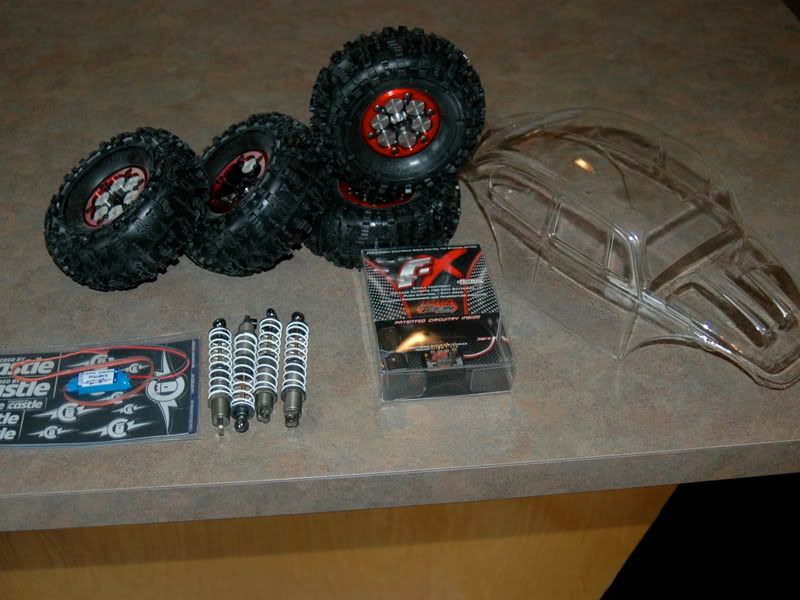 here are my dig parts..HS55 and radio shack sub micro switches  I'm gonna try to get the links built tonight so I can have this beast rolling....but the super large gear boxes on the bully axles do make for some control arm clearance issues so we will see what I can come up with....pretty sure I will end up with lower link that have 2 bends.....? If you guys have any tips or advice please offer it up!!! I'm new to building rc crawlers so I need any tips or advice you guys have! Last edited by 53 willys; 03-26-2009 at 07:27 PM. |

|  |
| Sponsored Links | |
| | |
|
02-06-2009, 01:38 PM
| #2 |
| Quarry Creeper Join Date: Nov 2007 Location: Bozeman, MT
Posts: 292
|
Very impressive list of parts - I would only recommend one small change - move the steering links above the knuckles & turn the servo arm 180 so it points up - this will eliminate the linkage getting caught on rocks - I did this on my MOA rig & it works great.
|
|
| |
|
02-06-2009, 04:34 PM
| #3 | |
| RCC Addict   Join Date: Jun 2005 Location: Prosser
Posts: 1,278
| Quote:
| |
|
| |
|
02-06-2009, 04:49 PM
| #4 |
| I wanna be Dave Join Date: Dec 2006 Location: In Cali.
Posts: 4,109
|
Great start. That servo will do okay with the BEC set at 6v. However, its not the best for centering. If you are really serious about compin the rig. Upgrade. |
|
| |
|
02-06-2009, 07:39 PM
| #5 |
| I wanna be Dave Join Date: Jan 2009 Location: laying low
Posts: 2,508
|
thanks guys...I had some tower pro servos on my heli and they did pretty good...that's one reason I ended up running the elcheapo steering servo...another thing was I ordered the cheap servos before I found all the mixed reviews on them. I did not really plan to compete full time at this time...mostly wanted it build to comp spec so I could at least try a few. yeah I bet I will end up upgrading the steering servo too...thanks fort all the input gents.... |
|
| |
|
02-09-2009, 09:47 AM
| #6 |
| I wanna be Dave Join Date: Jan 2009 Location: laying low
Posts: 2,508
|
ok here is what it looks like today.. I got all the mock-up control arms on....I keep screwing up my stainless trying to get the right lengths... probably gonna make some bent links to try and clear some of the gear boxes.. I moved the steering linkage up top of the steering arms and flip the servo horn. seems to move freely...but I dont really like how steep the steering link is..so I may put a small bend in it to help line it all up. 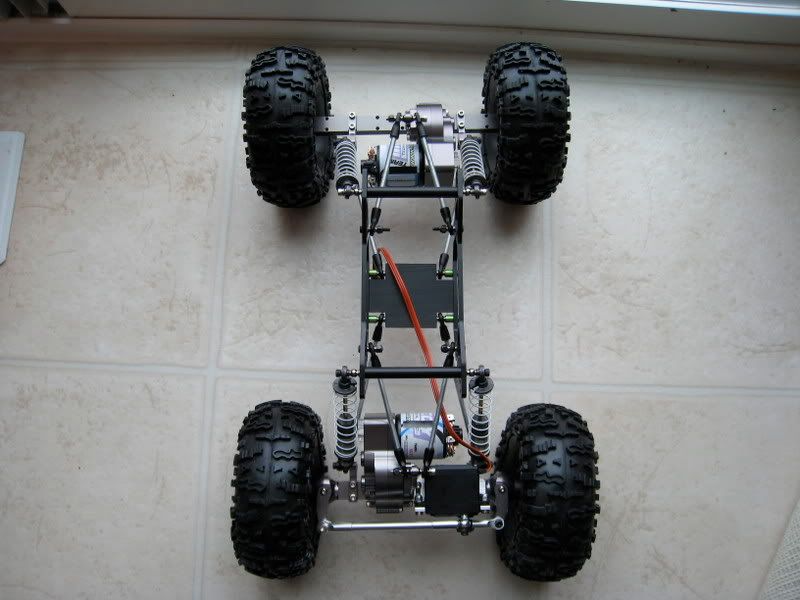 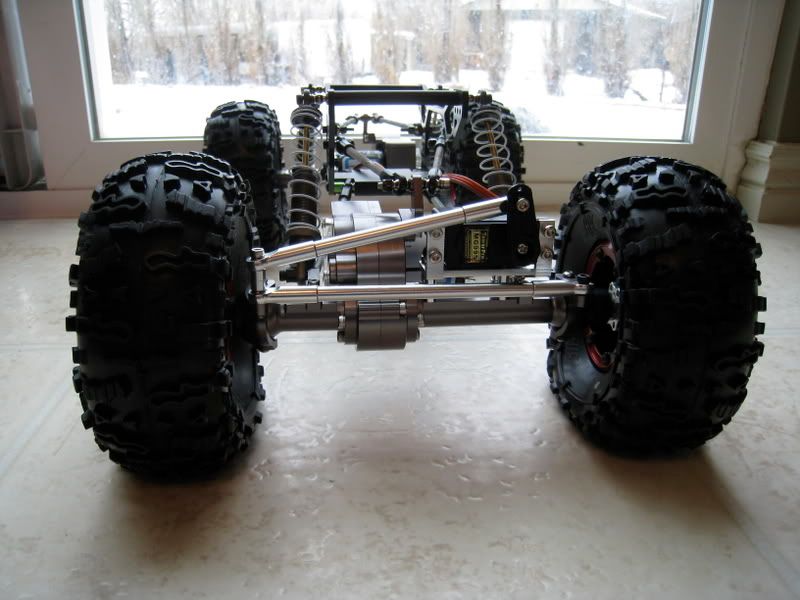 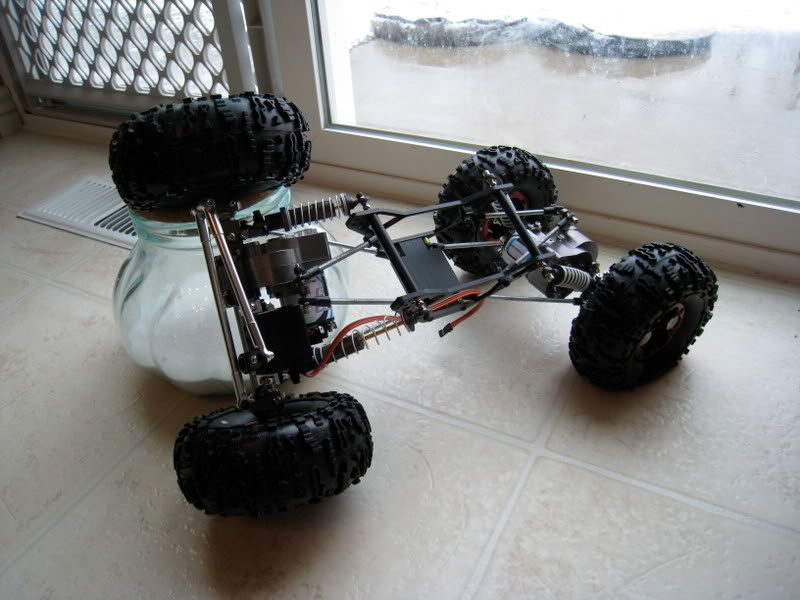 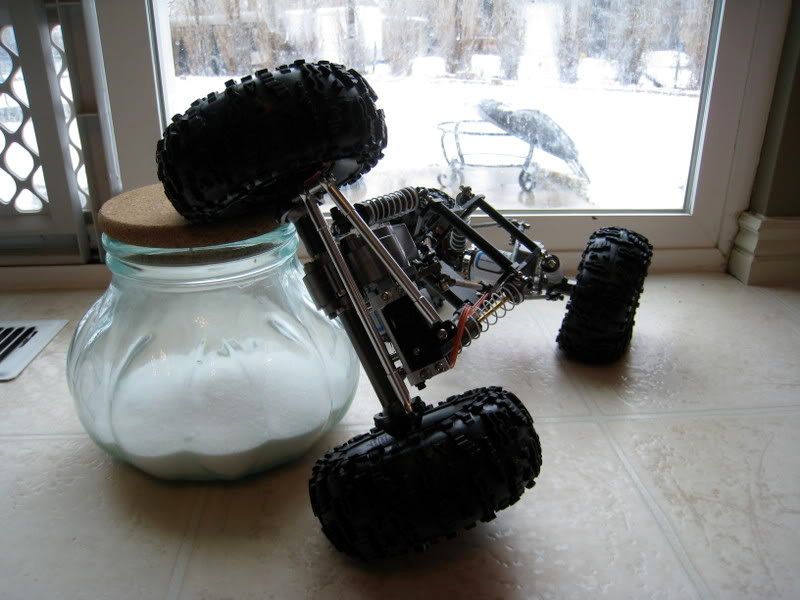 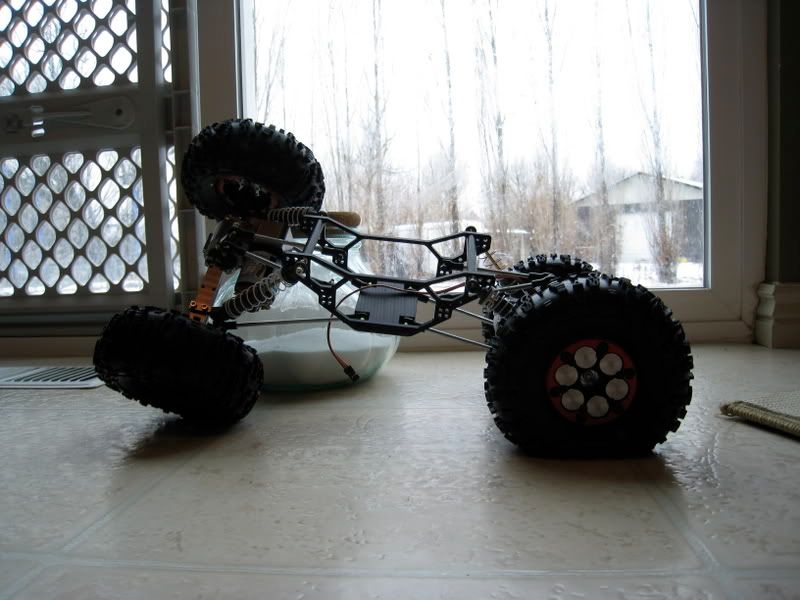 rubbing dust covers...  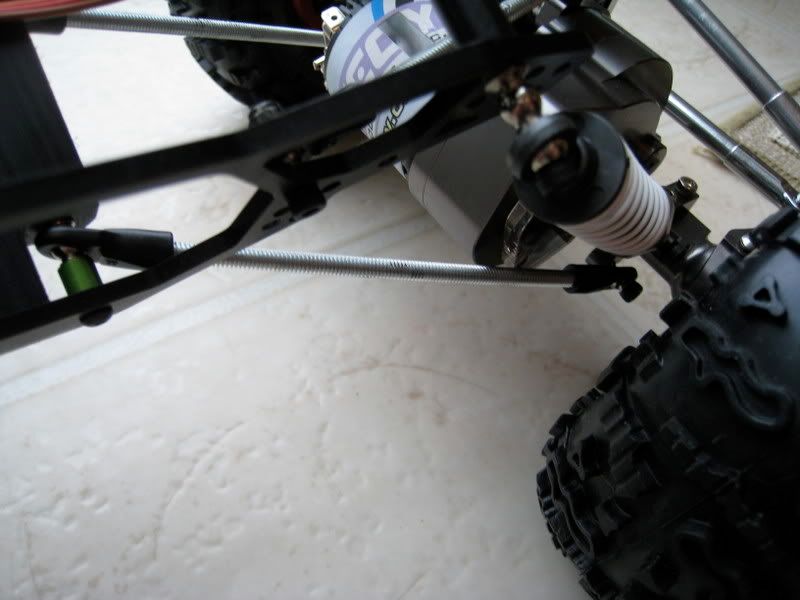 bug body thrown on just for fun... 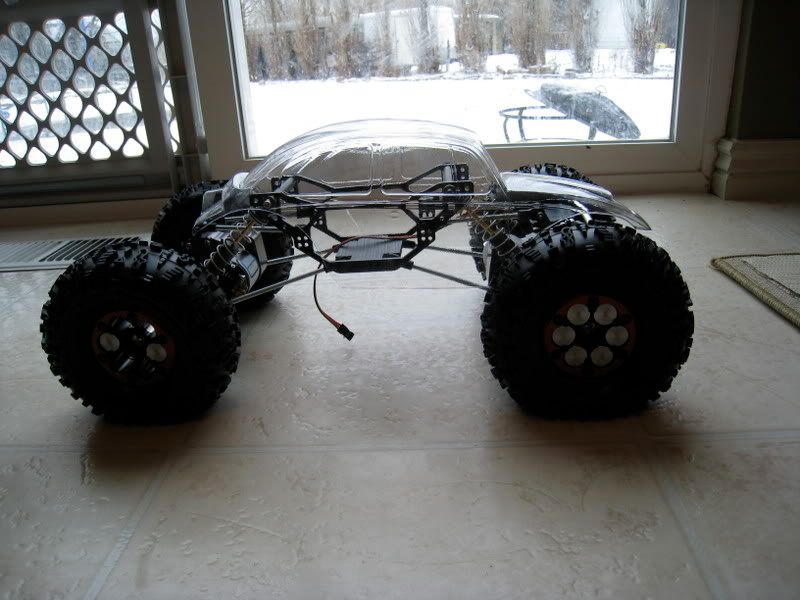 it getting close! I 'm working on a dig/electronics plate now... |
|
| |
|
02-09-2009, 10:08 AM
| #7 |
| Rock Crawler Join Date: Oct 2008 Location: Sandy, OR
Posts: 672
|
For the clearance issue between the axles and the lower links, I just used a 3mm X 4mm spacer and then used a dremel to lightly bevel the edge of the gear cover. Worked perfectly and I still get complete steering throw before the tire hits the lower link. Give it a try.
|
|
| |
|
02-09-2009, 10:11 AM
| #8 | |
| I wanna be Dave Join Date: Jan 2009 Location: laying low
Posts: 2,508
| Quote:
| |
|
| |
|
02-09-2009, 10:29 AM
| #9 | |
| Rock Crawler Join Date: Oct 2008 Location: Sandy, OR
Posts: 672
| Quote:
| |
|
| |
|
02-09-2009, 10:42 AM
| #10 | |
| I wanna be Dave Join Date: Jan 2009 Location: laying low
Posts: 2,508
| Quote:
| |
|
| |
|
02-09-2009, 11:28 AM
| #11 |
| RCC Addict Join Date: Jul 2008 Location: Sin City
Posts: 1,332
|
They are easier to set up in a backbone style but the 4 link works well. You will get some shock rub with a tall tire on the pro-comp rims even with the widest adapters but its ok. It shouldnt slow you down. The links dont need a double bend but you can if you like. The easiest way i found was to put it all in in the jig and use an old metal coat hanger to mock up the links, then you can straighten it back out to measure it and cut your links. You might end up ditching the dust cover if it rubs, i use a piece of duct tape on mine just to keep debris out. Make sure your shocks are wide enough at the top not to hit the geaboxes. On the losi shocks it can cause major leaks. You will love the bullys once you get them built though! |
|
| |
|
02-09-2009, 04:47 PM
| #12 |
| I wanna be Dave Join Date: Dec 2006 Location: In Cali.
Posts: 4,109
|
I set-up and Diablo chassis on my Bullies. I'll try and post pics of my links. I have a little rubbing, but nothing my Berg doesn't have too. 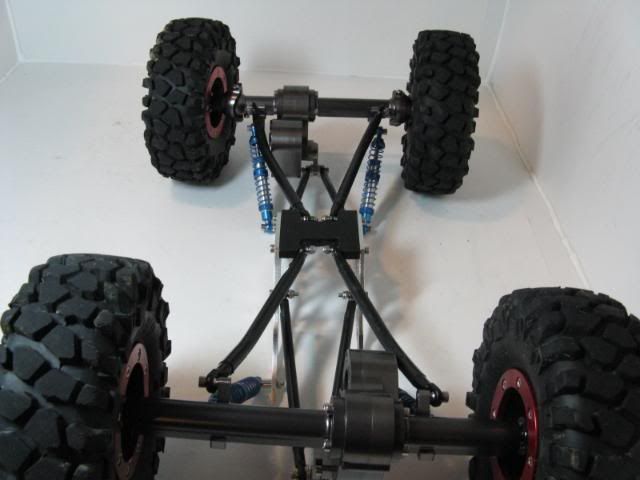 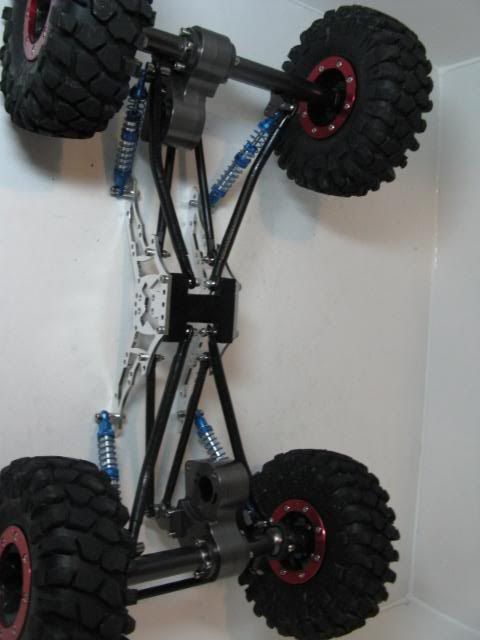 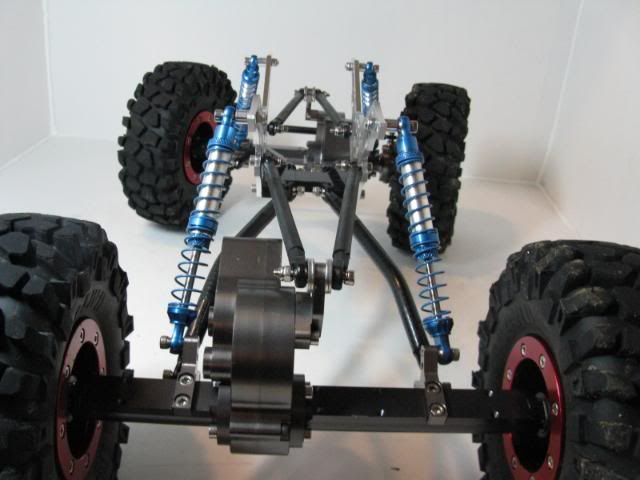 |
|
| |
|
02-09-2009, 04:48 PM
| #13 |
| I wanna be Dave Join Date: Dec 2006 Location: In Cali.
Posts: 4,109
|
Now that I think about it. Running lower bent links on the Bullies might be best.
|
|
| |
|
02-10-2009, 11:18 AM
| #14 |
| Quarry Creeper Join Date: Dec 2007 Location: Blue Jay
Posts: 210
|
Lookin sick brotha!!! Scott |
|
| |
|
02-10-2009, 12:30 PM
| #15 |
| RCC Addict Join Date: Oct 2008 Location: Alpine,CA
Posts: 1,258
|
Heres some shots of my clearance... None HAHA...... Check out my driverside upper rear link, yea half of it is ground away. 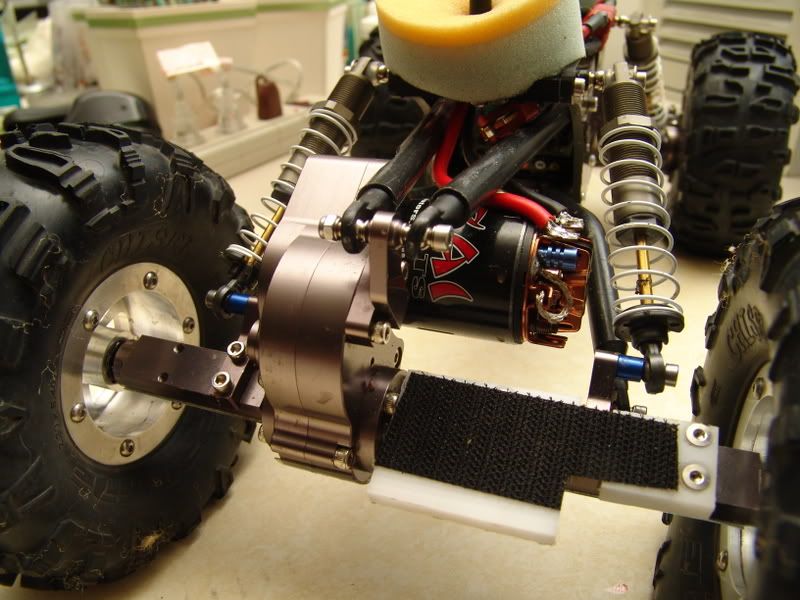 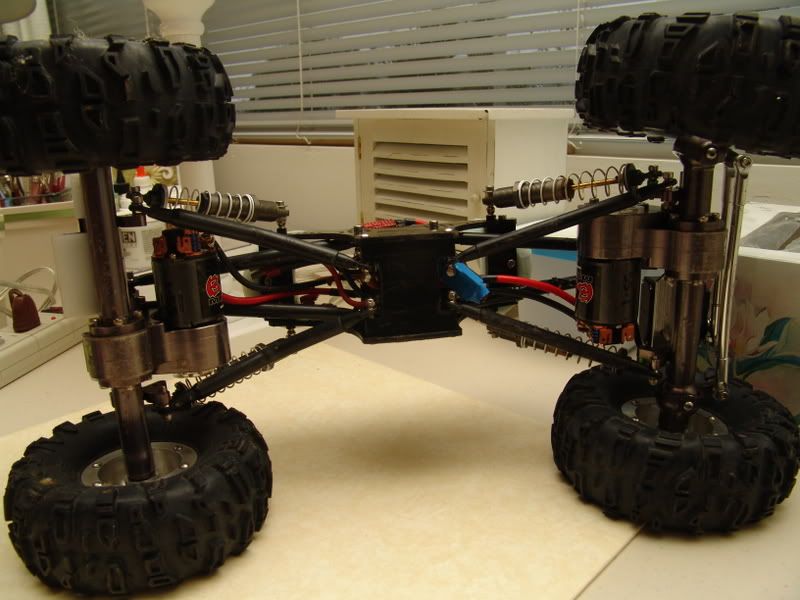 |
|
| |
|
02-10-2009, 12:55 PM
| #16 |
| Rock Crawler Join Date: Oct 2008 Location: Sandy, OR
Posts: 672
|
[quote=DiEzel;1613861]Heres some shots of my clearance... None HAHA...... Check out my driverside upper rear link, yea half of it is ground away. I didn't have that problem. But I didn't use 3/8" rod either. You might have to go to smaller rod and also get rid of a little bit of clocking. I also used some 3mm spacers on the inside of the chassis side to move that end in just a touch. I put some of the new Lunsford Grinder titanium lower links on my build. Works muy bueno! |
|
| |
|
02-10-2009, 03:16 PM
| #17 |
| I wanna be Dave Join Date: Dec 2006 Location: In Cali.
Posts: 4,109
|
3/8 is beefy. I used 5/16 lower and 1/4 top. Works great.
|
|
| |
|
02-15-2009, 12:36 PM
| #18 |
| I wanna be Dave Join Date: Jan 2009 Location: laying low
Posts: 2,508
|
great info and pics!! thanks guys! Here is where I am at as of today...I just finished my wiring. I took advice from lots of different builds on here.."just zach" berg build and "RockAddict75" berg build REALLY helped me out... I did the bullet soldered dig switches and ridged jumpers like "RockAddict75" it turned out pretty clean I think...maybe not as clean as his tho...I kinda had a hard time getting the headshrink on the ends..anyway I'm happy with the results..I also wired it with all black wire..I stole that idea from "just zach" just make sure you triple check all the connections..lol oh yeah...the dig and electronics plate was hand bent and build by me 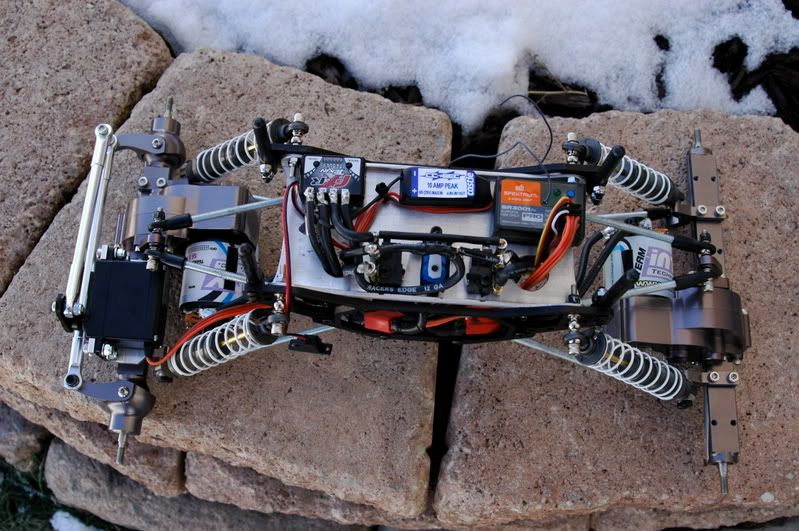 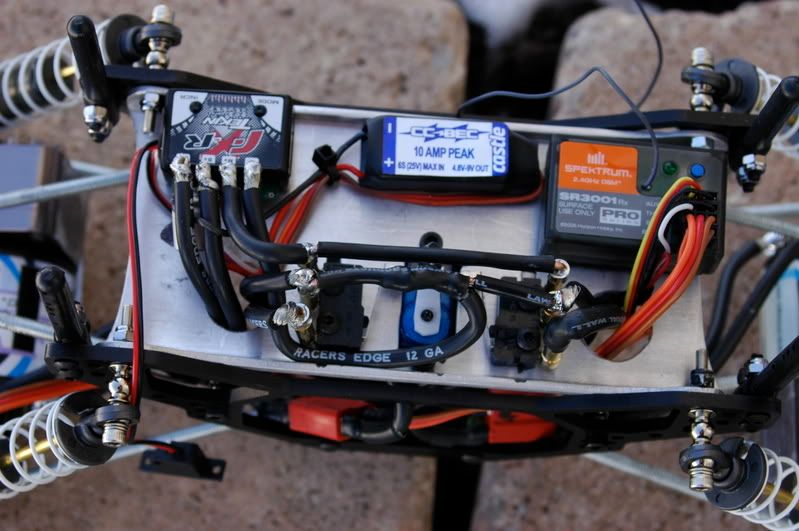 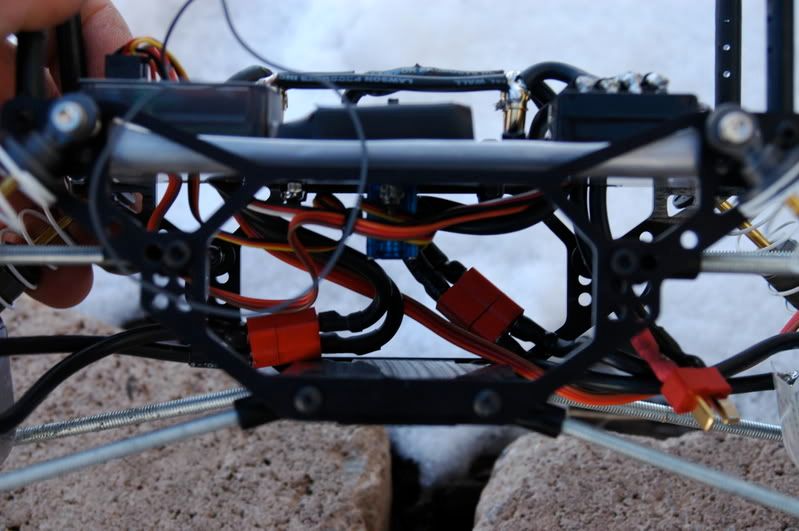 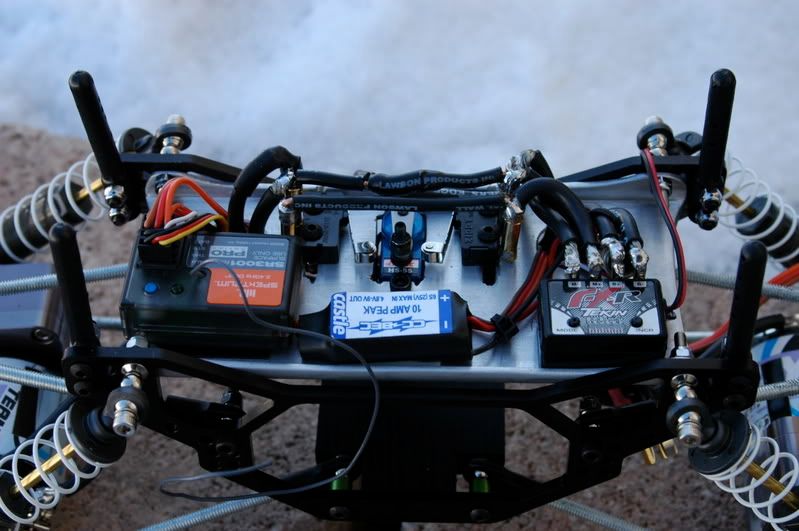 |
|
| |
|
02-15-2009, 01:55 PM
| #19 |
| MODERATOR   Join Date: Jul 2004 Location: Ohio
Posts: 18,928
|
My Reign RC alarm was going off! Nice truck so far. |
|
| |
|
02-15-2009, 02:05 PM
| #20 |
| Quarry Creeper Join Date: Aug 2006 Location: Baumholder
Posts: 477
|
Very nice looking rig, wires are cleaned up pretty good as well.
|
|
| |
|
| |


 Linear Mode


