| |
 02-01-2010, 08:58 PM
| #1 |
| Rock Crawler Join Date: Jul 2009 Location: waterville
Posts: 525
|
well after getting some info on these axles, i decided to jump on the moa band wagon. the plan: rs10 axles only. using losi rock claws wd40 treated( mega soft) mounted on hpi wheely king narrowed wheels w/ stock rover foams. 7.2 v banebots. small 2 cell lipo. and i would like to use a micro sidewinder for this build(not sure if it will work waiting on some input from castle on this one) if not the micro then a sidewinder. dig box. home made chassis. a cc bec. and some nice 3 racing tmaxx shocks,and do up another tq3 modded. im considering a tq4 maybe later down the road. so i can effectively benefit from the dual dig with the rear steer. locked out for now. i have had the axles for about a week now. just been waitng til i get some progress on this build before posting. this is going to be a slow build. no rush for me. winters still here so i have no motivation to finish it faster:-(. for starters. my hats off to redcat. these are much better then i expected. not knocking you redcat! ive owned nitor bb's and volcanoes when they were just starting out. so this isnt my first redcat ordeal. i love the axle clearance. with my rock claws on, they have more clearance then my axial with modified 5 3/4" hb rovers. the only thing i didn't like about these axles was the amount of steering and those awesome batwings:-P. okay well on with a few pics. this is what i have so far. tires, wheels, my dig setup, home made chassis. like i said not to much yet. as for the tires. i gave them a wd40 bath for a good 14 hours. super soft. since these wer so soft i took out the memories and substituted with my hb rover foams. they feel perfect. 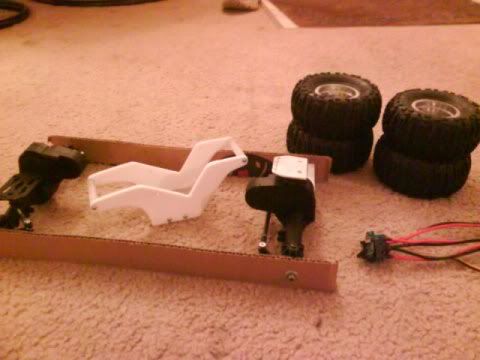 the first few things i did. steering not going to cut it for me, even with a dig. shaved some off the stoppers. did this just enough before having binding issues. started my 4 link plates. i was gonna go with a plate like most are running, but decided another route instead. with the new bracket. i ended up cutting down the the batwing and bolted it up to the new mount. you can see the servo plate i made. wanting a bta setup. not lookin so good yet. so far it looks like its gonna interfere with the links.gonna have to wait on this till i get the links on. 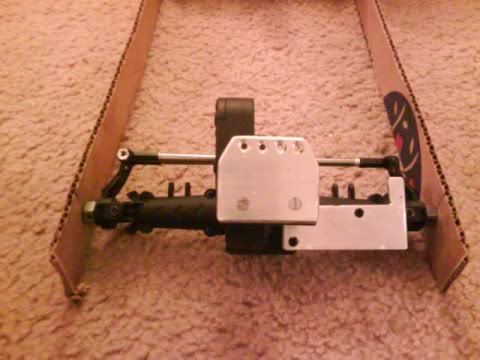 on to the chassis i built. pretty simple design. ill tell you. its hard finding usable cutting board around here. i searched high and low. i used 1/4 thick cutting board for the base and some really thin stuff for the side plates. had to double up on these. its actually a very rugged chassis. the only thing that will be going in here is the dig. 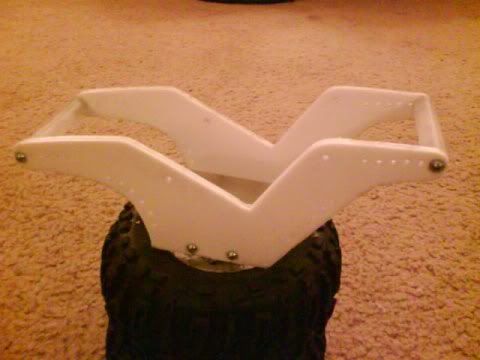 on to the dig. pretty simple. follow the thread in the berg section. hs55 servo. radio shack switches. i don't think they will hold up due to the 5 a raitng though. if they crap out, ill buy some better ones. 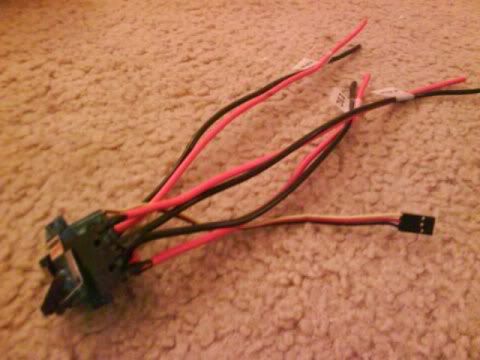 a very wide width! most likely due to my narrowed wheely king rims. i have them compared to my axial. the axial has 1/4 wheel spacers too with some wide hexes 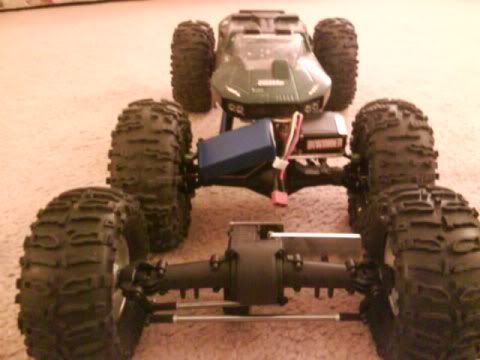 the main goal is to get it to being a roller, before i pickup the electronics.shouldn't be to long on that. hoping to pick up material to make the links and order up some shocks for it within the week. this is going to be a nice crawler. i figure ill only have about 200 into this build. be the cheapest one to date. im really hoping the micro sidewinder will fit the bill. for space savings. if not not biggy. i still have to make one more 4 link plate, as well as electronics brackets for the axles to keep the cog as low as i can get it.its gonna be a little bit before i post more progress. like to get a good little chunk done before posting updates. |

|  |
| Sponsored Links | |
| | |
|
02-01-2010, 09:43 PM
| #2 |
| RCC Addict Join Date: Jul 2009 Location: Blacksburg, VA
Posts: 1,882
|
I'll be watching this build for sure. Looks like you've got a good plan going. Can't wait to see the final product.
|
|
| |
|
02-01-2010, 09:43 PM
| #3 |
| Quarry Creeper Join Date: Sep 2009 Location: Scottsdale
Posts: 345
|
I am working on the same BTA setup. I am going to make a custum tie rod. The stock either hits the gear box or limits the downward travel of the stock links. From what I was looking at, the tie rod needs to be bent up to clear the links and then bent back down and back a little to clear the gear box. I am try to fab up a plate that runs along the entire top of the axle too with the servo mounted on the other side of the gear box from stock. I will post picts in a bit.
|
|
| |
|
02-01-2010, 10:08 PM
| #4 |
| Quarry Creeper Join Date: Sep 2009 Location: Scottsdale
Posts: 345
| |
|
| |
|
02-03-2010, 11:36 PM
| #5 | |
| Rock Crawler Join Date: Jul 2009 Location: waterville
Posts: 525
| Quote:
yeah theres alot to go around. ill figure it out. looks like you got a good start. i was thinking something a little similar to your set up. i've looked at it from alot of spots. just got every thing all in place for except shocks, so ill be on to figuring that out soon. it just bothers me to have the steering hardware in the front now these days. keep up the good work | |
|
| |
|
02-04-2010, 12:06 AM
| #6 |
| Rock Crawler Join Date: Jul 2009 Location: waterville
Posts: 525
|
okay i got updates. i wanted to do something a little different from the normal links i usually do. the usual is the brake line special  . not concerned about the size as i knew there was more then enough belly clearance. any ways heres the pics . not concerned about the size as i knew there was more then enough belly clearance. any ways heres the picsthe first stage. cut it out of cutting board 1cm by 1 cm thick 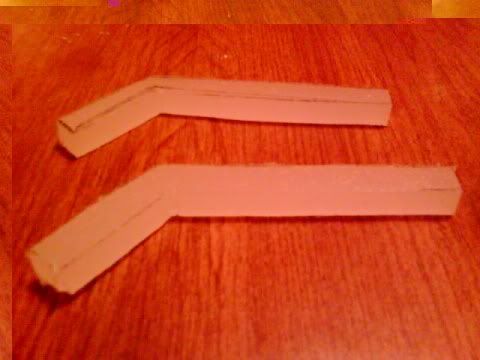 centering ends up for 4/40 threaded rod  threaded rod in place. cut the heads off. filed them down. 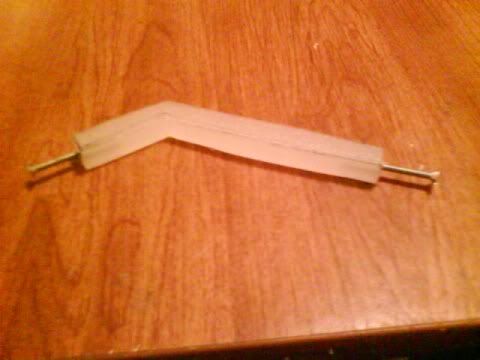 put on some junk mock up end links for fit 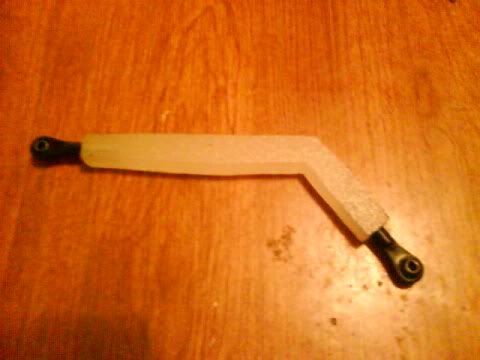 okay four links cut out equals 15 minutes. sanding and filing 4 to perfection, a good 8 hours 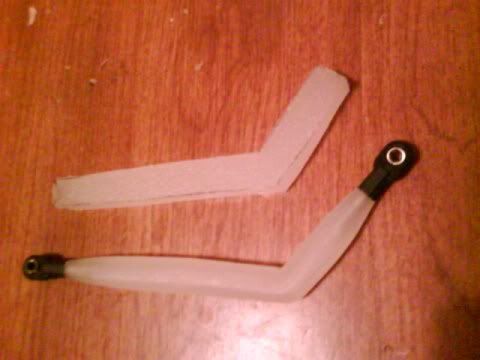 all most a complete roller.12.5" wb. the four link mounts work perfectly. as for the chassis. i got high hopes. it looks like it will work out good. ground clearance is impressive. a tad over 3.5" under the rear links and a tad under 3.25" under the front. im not to concerned about cog. with weighted wheels and every thing mounted on the axle besides the dig, i don't think it will be an issue. castle still hasn't responded to my question on the speedo yet. ill give them some more time. i have no problems buying another sidewinder, but id prefer if i can to use the micro. 4 inch shocks are on the look out. also im going to be making some brackets that will mount to the link mounts on the axle for the shocks. one thing for sure those banebots are gonna just barely fit. if not ill have to take a bit of the triangulation out of the lower links. we will see though. lots of stuff to do still.hardest part for me will be picking out a body for it. ill post more updates when i get some more good progress. 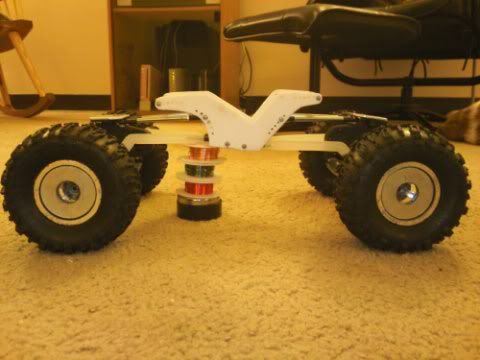 |
|
| |
|
02-04-2010, 05:19 AM
| #7 |
| Rock Crawler Join Date: Dec 2005 Location: Huntertown, In
Posts: 776
|
Very nice build man, Im really liken the chassis! The only concern I have would be the bend on the links being alittle week, if you search dogman links or look at alot of the bully/berg builds that use the dogman links, he has alittle extra material at the bend. Thats just my thoughts, Ill keep and eye on the build and how it works. Again very nice build.
|
|
| |
|
02-04-2010, 05:32 AM
| #8 |
| RCC Addict Join Date: Apr 2009 Location: Anderson
Posts: 1,332
|
Looking good! The micro should work fine along with those switches. Let me know if there is anyway that we can help you along the way! -Jason |
|
| |
|
02-04-2010, 11:39 AM
| #9 | ||
| Rock Crawler Join Date: Jul 2009 Location: waterville
Posts: 525
| Quote:
Quote:
and thanks to every one watching this build and every bodies input and thoughts are appreciated | ||
|
| |
|
02-04-2010, 12:00 PM
| #10 |
| RCC Addict Join Date: Jul 2009 Location: Blacksburg, VA
Posts: 1,882
|
I don't think you'll break those links easily...if anything they'll just bend in certain situations due to the angle of them. Kudos for trying something different.
|
|
| |
|
02-05-2010, 10:25 AM
| #11 | |
| Rock Crawler Join Date: Jul 2009 Location: waterville
Posts: 525
| Quote:
| |
|
| |
|
02-05-2010, 10:44 AM
| #12 |
| Rock Crawler Join Date: Jul 2009 Location: waterville
Posts: 525
|
no updates yet. i need to order some shocks for it. then it will be a complete roller. i have some plastic bodied t maxx shocks kicking around that ill use for mock up for now. ride height is alot more then my goal. its looking like 4 1/2'' in the rear and 4'' in the front.too high for my liking. ill have to limit them. a 3 1/2'' shock would be perfect but that just seems a bit short for my liking. parts ordering is on hold for right now due to the misses high demands for v day |
|
| |
|
02-18-2010, 08:17 PM
| #13 |
| Rock Crawler Join Date: Jul 2009 Location: waterville
Posts: 525
|
well, i have done a bit more work to my build. no pics yet. plan on posting some tomorrow. i got in my 390 banebots.got them really fast.good job banebots!  their site didn't say the length of them, so i was hoping they were the same length or very close specs as the 380's well i was wrong. boy these things are long. got them in though. required me to ditch my nylon links for some different ones. oh well. i still plan on trying to redo some tricky nylon ones in its final stages.my design measurements were to accommodate the 380's. i ended up getting the 390's because i preferred the specs of these motors, and because of the fact that they are proven performers in the cc, as well as the fact that they have enough torque to chew up plastic and metal gears in the cc. so torque shouldn't be a problem. got shocks on it. still need to make two more axle shock mounts to finish it off. i also ended up making a few small changes to the chassis design as well. got the dig mounted and hooked up. just needs the esc and receiver to finish it off as for electronics wise. electronic mounts are to come. the progress has been rather slow. its actually been nice outside, so ive been out running my shafty quite a bit. still not much rocks yet, but there has been plenty of very hard sanded snowbanks to play on. their site didn't say the length of them, so i was hoping they were the same length or very close specs as the 380's well i was wrong. boy these things are long. got them in though. required me to ditch my nylon links for some different ones. oh well. i still plan on trying to redo some tricky nylon ones in its final stages.my design measurements were to accommodate the 380's. i ended up getting the 390's because i preferred the specs of these motors, and because of the fact that they are proven performers in the cc, as well as the fact that they have enough torque to chew up plastic and metal gears in the cc. so torque shouldn't be a problem. got shocks on it. still need to make two more axle shock mounts to finish it off. i also ended up making a few small changes to the chassis design as well. got the dig mounted and hooked up. just needs the esc and receiver to finish it off as for electronics wise. electronic mounts are to come. the progress has been rather slow. its actually been nice outside, so ive been out running my shafty quite a bit. still not much rocks yet, but there has been plenty of very hard sanded snowbanks to play on. |
|
| |
|
02-19-2010, 06:38 PM
| #14 |
| Rock Crawler Join Date: Jul 2009 Location: waterville
Posts: 525
|
alright as promised the pics. 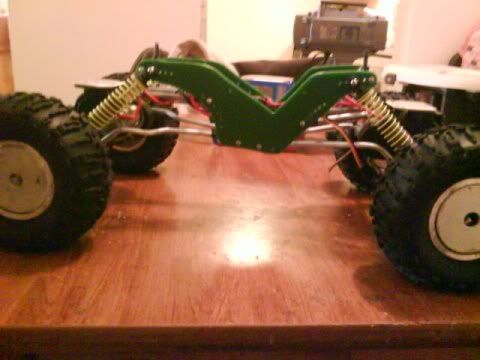 the chassis update. after i hooked the shocks up to it. i didnt care for how the back ones sat. i also felt that the ground clearance was a little much. 4.5'' in the rear and 4.25'' to the front. it sits at more suitable ride height now. 3.5'' in the rear and a tad under 3.25'' in the front. the chassis has been lengthened in the rear and shock mounting locations have been raised for a lower ride height. 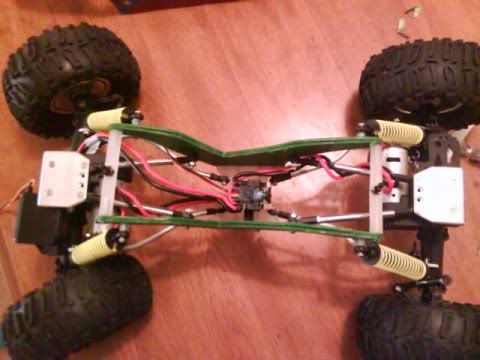 top view of the layout. i tried a different skid i made to help accommodate the 390's. i ditched it because i didnt like the width of it after. back to the original skid. took some material out of it so the bottom links would have less triangulation and allow more room for the motors. i redid my top braces. they are 2.5'' wide and the base is 2''. i needed to do this so the motors wouldnt bind on the shocks. 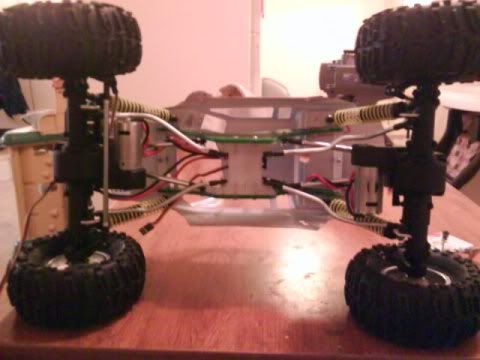 the belly of the beast. like i said i had to redo some links. this had to be done. the chassis would have to be 3'' plus wide for these puppies to fit with my other links. thats to wide for me. 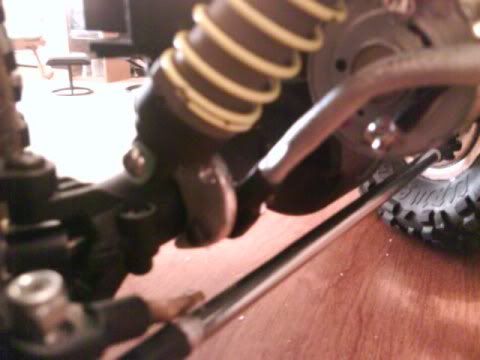 not much here. just the axle shock link mounts. made from 1/8'' aluminum. added 3 shock positions on them as well for better adjust ability. one bolt run through the link mount holding it on. lays tight against the axle. probably a little overkill, but better safe then sorry.still 2 more to go! 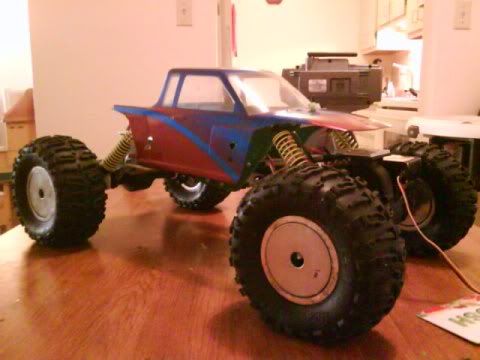 not the body its going to have in the end. one of my old beater bodies. it works for now. it actually doesnt look to bad on it. im sure you are all wondering what i did to the rims. since they are wheely king rims, narrowed and change in offset. they are washers. they fit perfectly into the dish of the wheel. i have various thicknesses.they range from 1oz up to 2oz a piece. i have 5.5 ounces in each front wheel and 3 ounces in each rear. i figure this would be a good starting point for testing.odd but they work very well. i might paint them. donno yet. least of my worries. 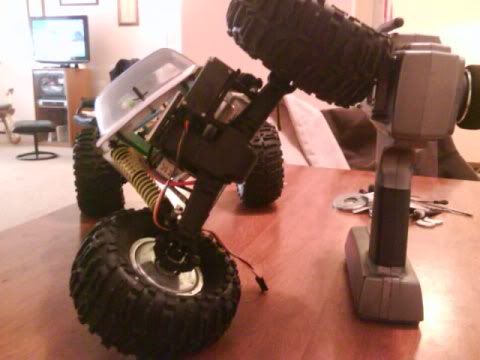 little flexing action. good flex. this is the max. im going to limit it a bit. not much more left to do. figured out my bta. just need to make a permanent steering link for it. its gonna have some funky bends in it to work. still sitting in the stock location.im also going to try and make some rear lockouts for it, so it will eliminate the need for a link to lock it out.other stuff as well. electronic mounts. the two shock mounts, esc, pick up a tx and rx for it, also a bec and she will be rolling under its own power. cant wait to see how it crawls. |
|
| |
|
02-19-2010, 08:10 PM
| #15 |
| RCC Addict Join Date: Jul 2009 Location: Blacksburg, VA
Posts: 1,882
|
Your skid totally looks invisible in the second pic haha. She's coming along nicely though. I'm diggin those shock mounts.
|
|
| |
|
02-20-2010, 01:58 PM
| #16 |
| Rock Crawler Join Date: Jul 2009 Location: waterville
Posts: 525
|
hey thanks comin out pretty good. i dont know about the green chassis plates though. oh well. the body will hide it. i made one lock out last night. works very well. plastic for now. im sure they will hold up just fine, but im lookin to go with aluminum ones. heres the pics 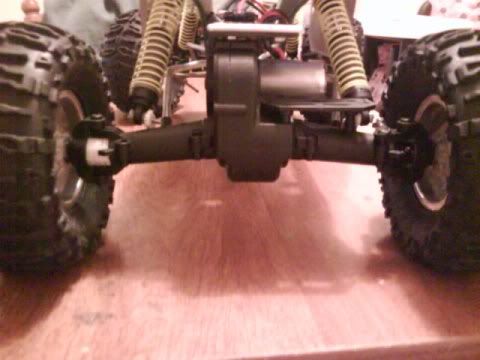 back view of the lockout on the left. fits right in there with no issues. 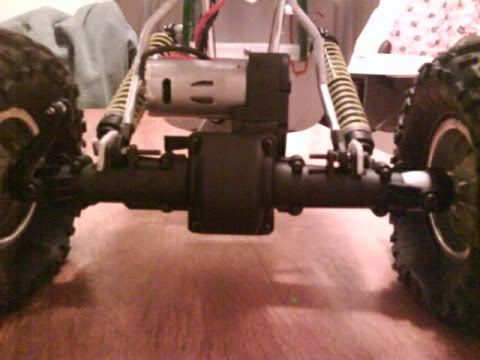 and a underside shot. it will be one less thing to get hung up thats for sure. i used my old axial knuckles, just incase i ever wanted to go back. why i would is beyond me but you never know. really easy mod. i cut the steering arm off it as well. i suppose these could also be cut for toe in or out if you wanted as well. i like this way much better then the link. one less thing to have in the way and the other is that there is really no specific spot to mount the lockout other then using one of the axle screw holes to tie into. |
|
| |
|
02-20-2010, 02:04 PM
| #17 |
| Rock Crawler Join Date: Dec 2005 Location: Huntertown, In
Posts: 776
|
I was looking into the same setup but in aluminum. But I have an idea that Im working on that will eliminate the knuckle similar to a berg lockout setup. What did you use? Delrin or PVC?
|
|
| |
|
02-20-2010, 02:11 PM
| #18 |
| Rock Crawler Join Date: Jul 2009 Location: waterville
Posts: 525
|
yeah in reality, if we could get a lock out like the axial ones, that would be perfect. but they have the knuckle bracket as part of the axle housing instead of a separate piece. im sure theres better ways of going about it, but it works for a cheap quick mod with out sacrificing parts. are you going to machine some? not familiar with the berg setup. as far as material plastic pvc. im gonna hit up home depot later next week and see about getting some aluminum to replace it.
|
|
| |
|
02-20-2010, 02:21 PM
| #19 |
| Rock Crawler Join Date: Dec 2005 Location: Huntertown, In
Posts: 776
|
Im looking to machine one that will slide over the axle and bolt to the Cs. Similar to the Axial style. I also have several other projects in the works that should goto production in the extremely near future!
|
|
| |
|
02-20-2010, 05:09 PM
| #20 |
| Rock Crawler Join Date: Jul 2009 Location: waterville
Posts: 525
|
that seems like a really good idea. look forward to seeing these parts when they are ready.
|
|
| |
 |
| |


 Linear Mode


