| |
| |||||||
 |
| | LinkBack | Thread Tools | Display Modes |
 03-12-2010, 10:01 PM
| #1 |
| Rock Crawler  Join Date: Jul 2008 Location: E. City
Posts: 883
|
So I recently put together a Proline Ambush CGR body with all the accessories. I wanted to add lights to the light bar and bumper and thought I would share. I picked up the 10 led slash light set from RC4WD since it was reasonably priced, had 10 lights and each pair was detatchable via plugs. I only had planned to use 7 and possibly 9 later on. 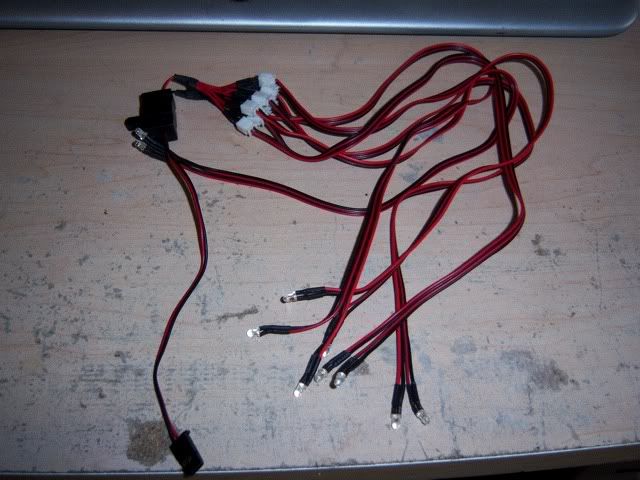 |

|  |
| Sponsored Links | |
| | |
|
03-12-2010, 10:30 PM
| #2 |
| Rock Crawler Join Date: Jul 2008 Location: E. City
Posts: 883
|
I drilled a 1/8 inch hole in the lights because I planned on inserting them in from the back. I didn't feel like soldering them all back together. 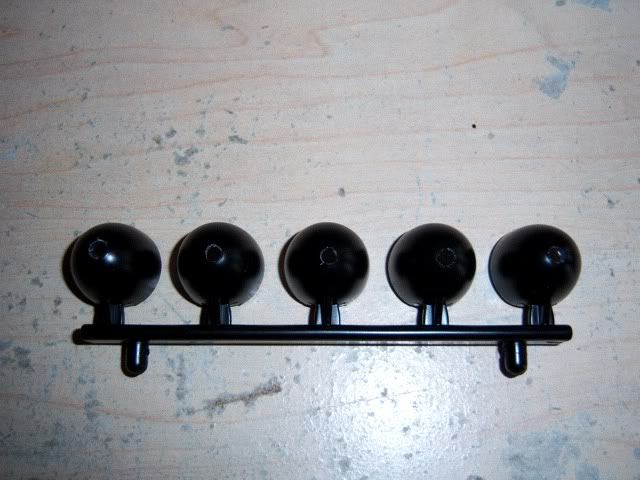 I seperated one led from a pair so I had 5 LEDs for the bar. I gave them a quick spray with some black paint so they would blend in. I also masked off the bulbs so that I could spray the backs of the bulbs so I didn't have light out the back of the led. 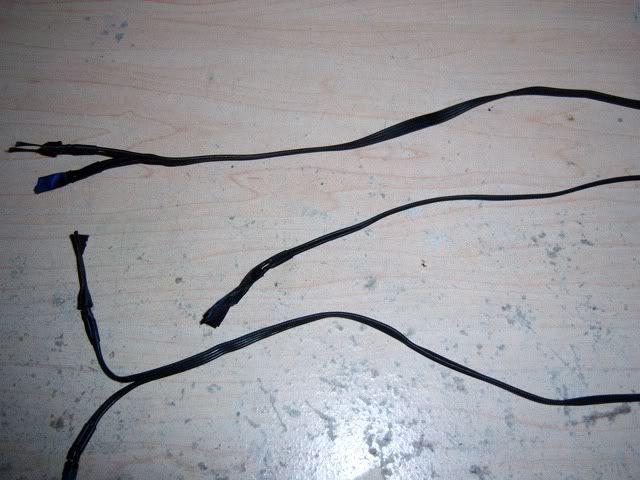 After a lot of consideration I decided how I wanted to route my wires. I cut down a empty bic pen and sprayed it black as well. This would hide the wires and later on I plan to further disguise it with a snorkel. I pulled the wires through the body and through the pen tube. 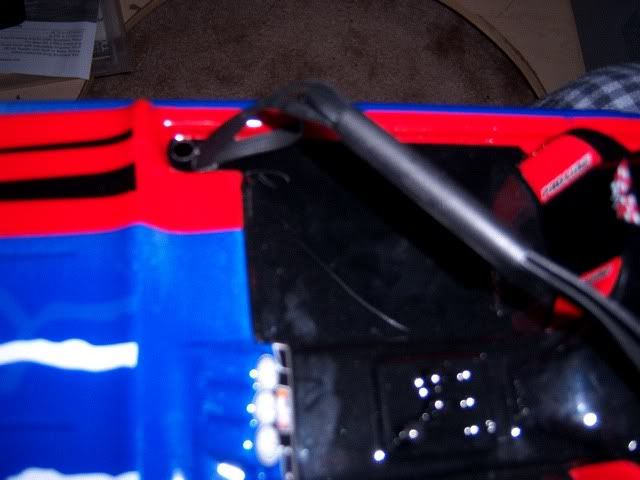 I routed the wires under the roof rack for concealment. I had to use my reamer to open up a few of the holes in the roof rack to pass the LEDs through. 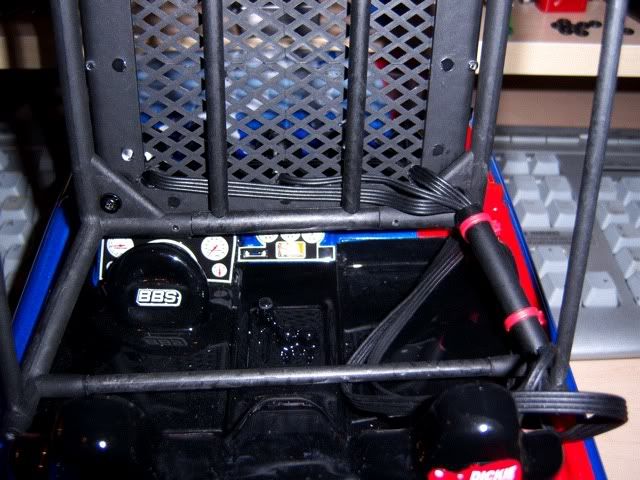 After pulling them through I mounted them in the light bar. I used a small dab of CA to hold them in. 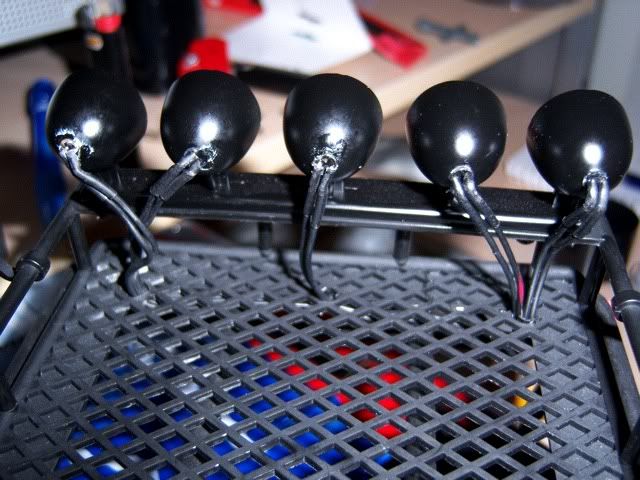 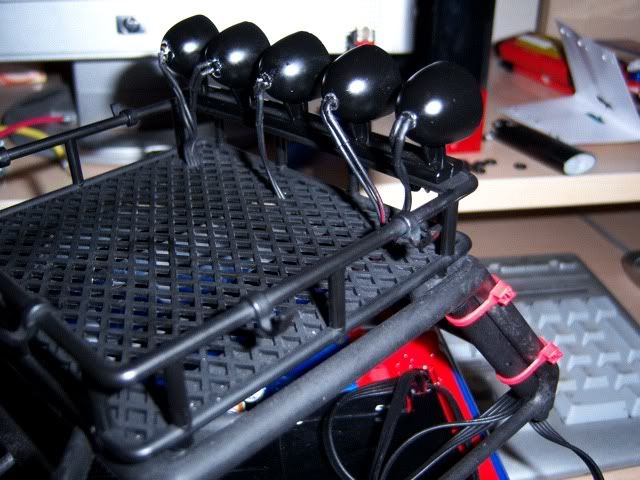 With the cage and pen tube mounted I ended up with a pretty clean result. I plan to paint a couple zip ties silver and put those on to look like hose clamps and again later on try to further hide it by incorperating it into a snorkel. 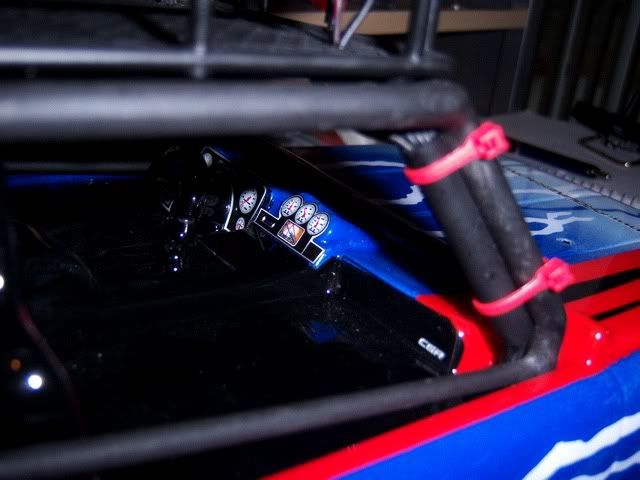 Here is how it looks lit up. 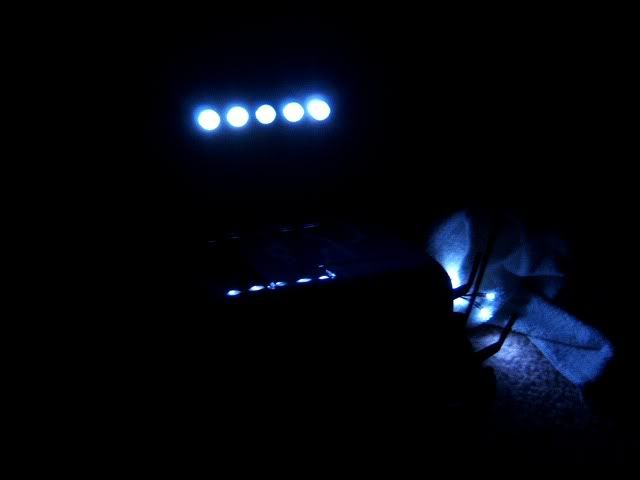 I also wanted to put two LEDs into the front bumper. The bulbs weren't quite the right size but I came up with a solution. 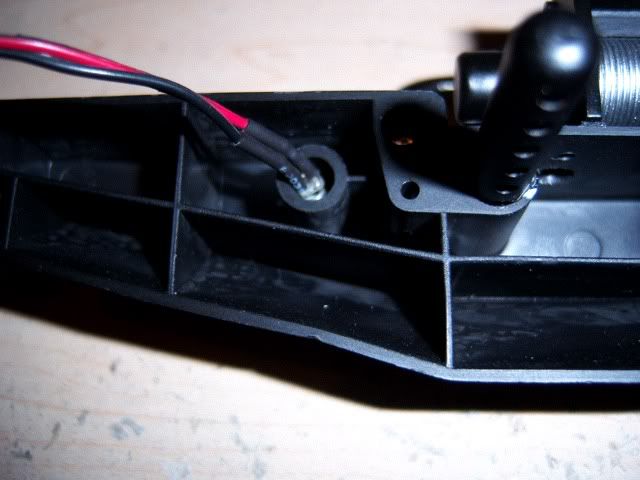 I cut a small section of some fuel tubing I had to use as a gasket if you will. Turned out perfect. I'll get a darker color later. 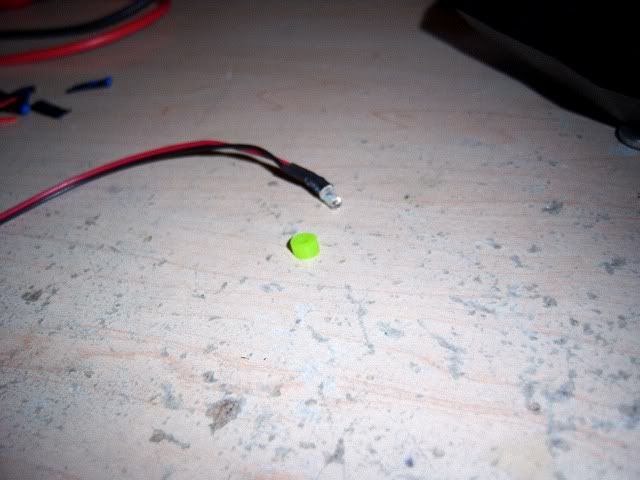 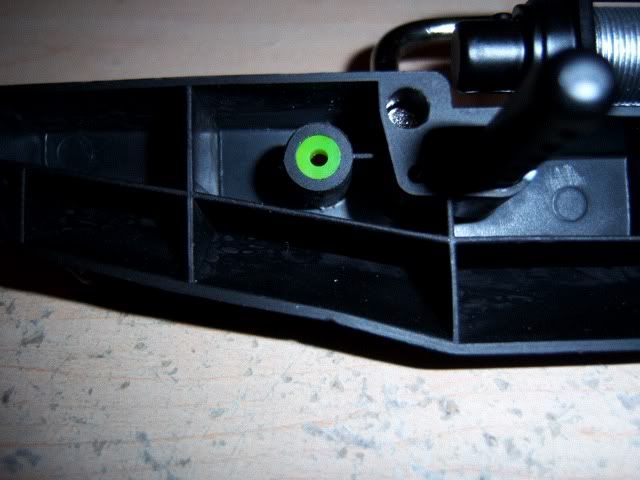 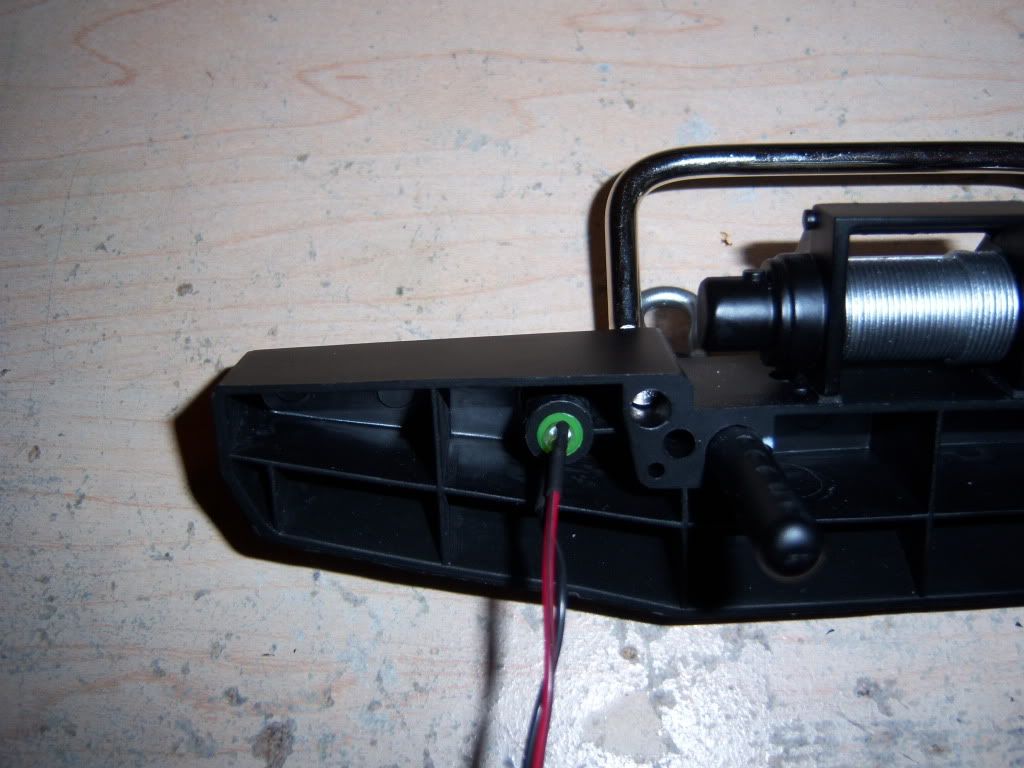 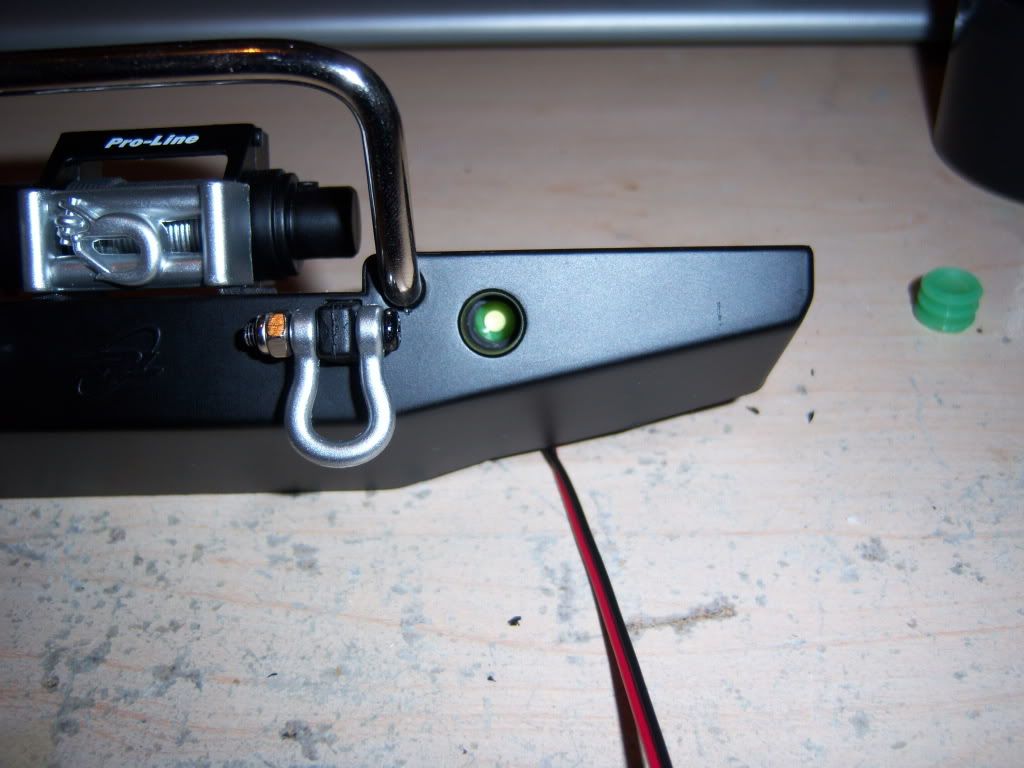 The led is just held in by the fuel tubing so I can remove the bumper when I need too. After a quick wire clean up with some servo tape I was done. 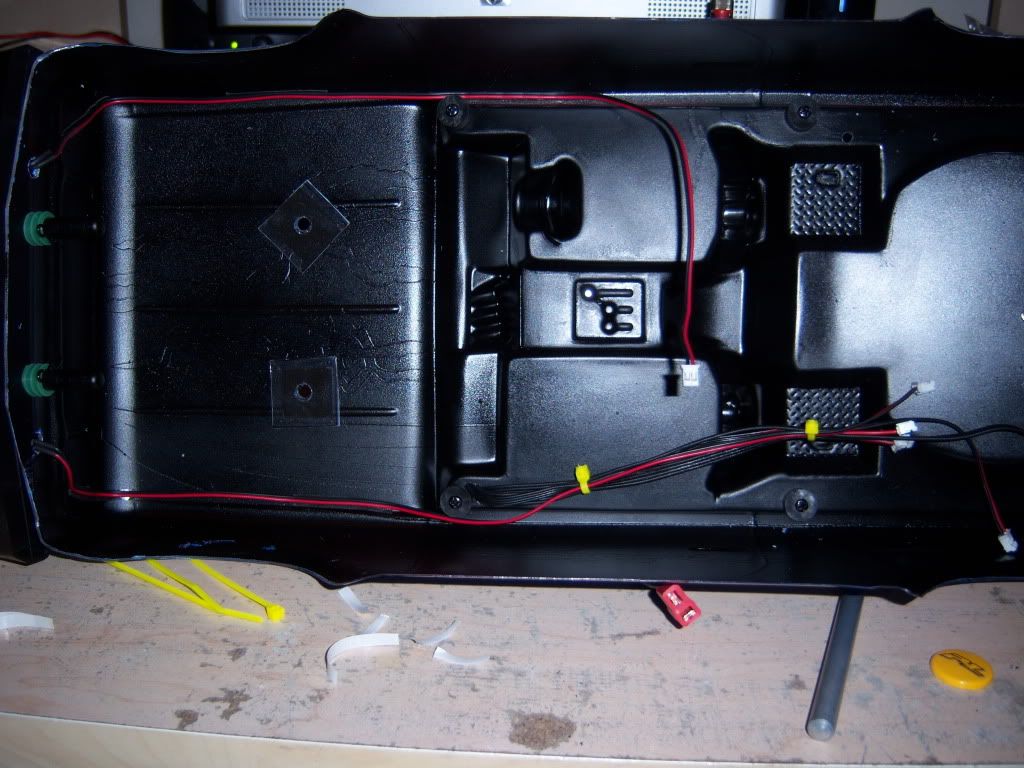  I still have two left over light housings that I would like to use but haven't really figured out where I want them yet. I would like to do some headlight buckets of some sort. I'll post up a pic of all the lights on tomorrow, wife took the camera. Anyway let me know what y'all think. Last edited by dont slow down; 03-14-2010 at 02:43 PM. |
|
| |
|
03-13-2010, 02:45 PM
| #3 |
| Pebble Pounder Join Date: Jan 2010 Location: VIRGINIA BEACH
Posts: 101
|
looks nice like the way you did it nice and neat
|
|
| |
|
03-13-2010, 08:00 PM
| #4 |
| Rock Crawler Join Date: Jul 2008 Location: E. City
Posts: 883
|
Thanks. Tried to keep it as clean as possible. Got a pic with them all lit up, I definatly want to do headlights as well. I need to figure out how to do it on a lexan body though. I'm not sure how I would actually mount them cleanly to the body. 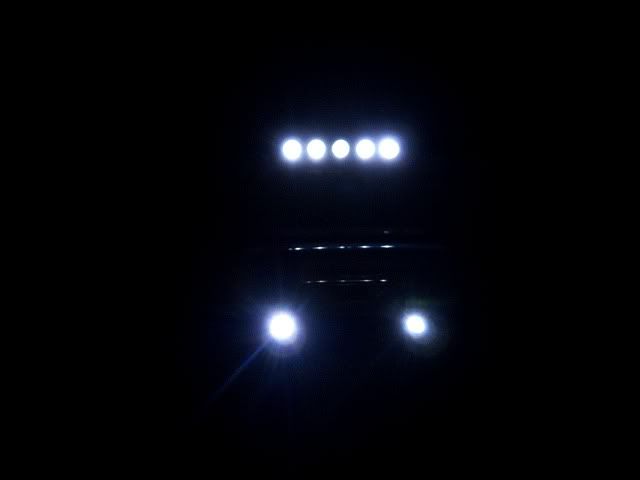 |
|
| |
|
03-14-2010, 09:17 AM
| #5 |
| Newbie Join Date: Aug 2009 Location: fox valley
Posts: 43
|
Nice write up, great idea for the bumper lites.
|
|
| |
|
03-15-2010, 01:50 PM
| #6 |
| Pebble Pounder Join Date: Dec 2009 Location: salina,ks
Posts: 151
|
for mounting the headlights to the lexan body drill a hole were you want the lights and put like a funnel type of thing with a hole at the back and put the led at the back of the funnel if i had a pic i could show you but i dont
|
|
| |
|
03-16-2010, 09:59 PM
| #7 |
| Quarry Creeper Join Date: Dec 2008 Location: Australia
Posts: 239
|
I had done this also  Couple tips from me, I scored the back of the lights with the soldering iron so it was easier to start drilling, also you can pry the lenses off to protect them while drilling edit: for headlights you can make a little box from styrene paint it silver on the inside insert your led, and hot glue it in. Last edited by Positronic; 03-16-2010 at 10:03 PM. |
|
| |
|
03-16-2010, 10:24 PM
| #8 |
| www.team3sixrc.com Join Date: Mar 2008 Location: Scalerville
Posts: 4,506
|
Looks good. I did the same thing on my CGR badlands Blazer build. well sorta. But the big issue that came about which i hate about the Proine light bars is how weak the platic is. as soon as ya roll it and you will roll it. they will brake off. I think someone here made a lightbar protector for the prolines. but i cant remember who. If your handy with brazing, you can make your own.
|
|
| |
|
03-17-2010, 05:02 AM
| #9 |
| Rock Crawler Join Date: Aug 2008 Location: Bristol Va.
Posts: 512
|
Hope they don't break too easy, I rolled mine 6-8 times Sunday and they didn't break (yet) I mounted them with a little give at the mount so it might help. Over look the crooked body mount, it's velcro and i got in a hurry to take the pic 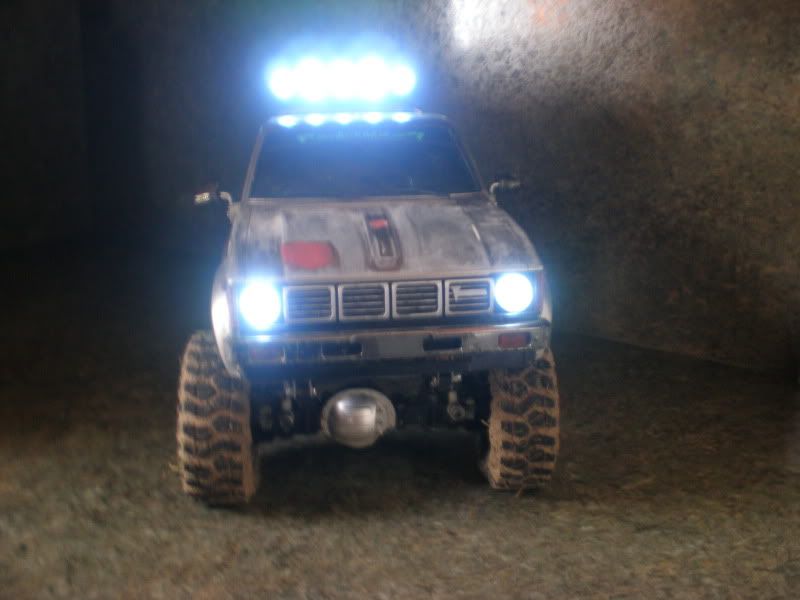 |
|
| |
|
03-17-2010, 08:32 AM
| #10 | |
| RCC Addict Join Date: Nov 2008 Location: Greece, sun, sea and rocks
Posts: 1,242
| Quote:
P/L-Light Guards | |
|
| |
|
03-19-2010, 08:12 AM
| #11 |
| Rock Crawler Join Date: Jul 2008 Location: E. City
Posts: 883
|
Nice work on the other trucks guys. I was surprised at how much this added to the truck as a whole. I'm not worried about rolling this truck over too much since this will mostly be a tow rig for my boat, it's not even a crawler. That is a cool light guard though, would look great on a desert truck. Still thinking about headlight buckets. Hadn't planned on headlights when I painted it so I will have to cut out holes for some buckets. I was thinking of turning the two spare Proline buckets I have into headlights but I'm wondering how I would mount them to the body. I might try the old cheap flashlight trick but again, how to mount them to the body cleanly, guess that's the problem with lexan bodies. I'll figure out something.
|
|
| |
|
03-19-2010, 05:56 PM
| #12 |
| Rock Crawler Join Date: Aug 2008 Location: Bristol Va.
Posts: 512
|
check out these headlight buckets http://www.scaleoffroad.de/pageID_6458632.html |
|
| |
|
03-25-2010, 06:53 AM
| #13 |
| Quarry Creeper Join Date: Nov 2009 Location: Australia
Posts: 240
|
On a previous model, (not a crawler as obviously seen in the pic!) I used reflectors from AA size Maglites. Fixing them to lexan works pretty well with something like Shoo Goo or hot glue. On the second mini, I simply jammed a whole heap of "Blu tak" or "UHU tak" in there cause the shape of the body just held it all in nicely.   |
|
| |
|
03-25-2010, 08:13 AM
| #14 | |
| RCC Addict Join Date: Sep 2008 Location: Philadelphia, PA
Posts: 1,048
| Quote:
lower profile than being up on top of the rack 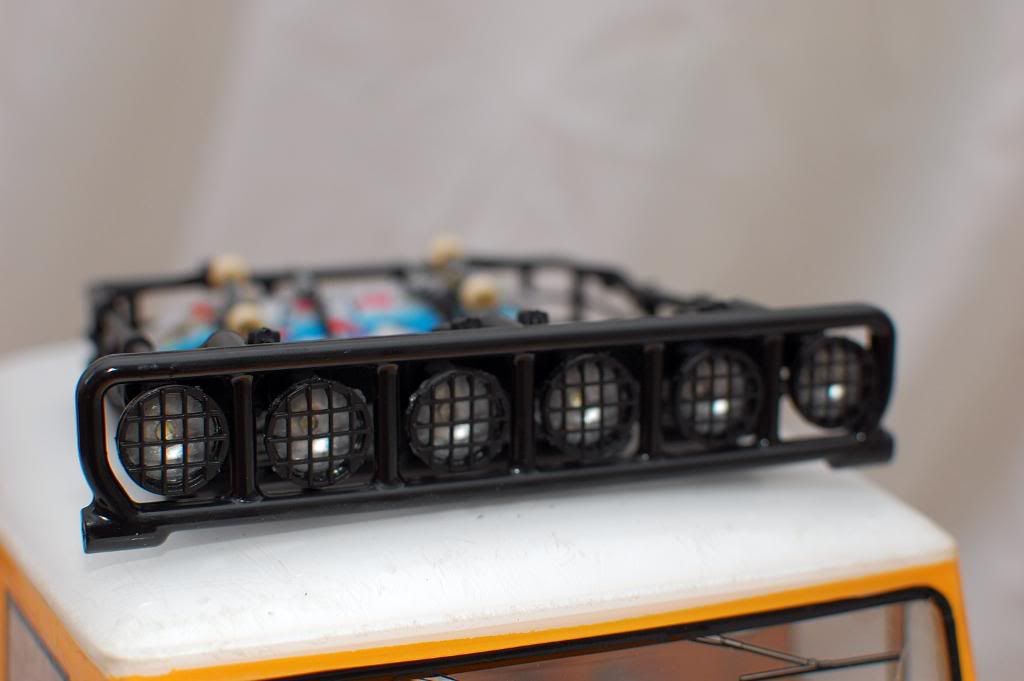 Wires semi-hidden under the ledge of the roof rack. The lightbar has to be ziptied since the Slash mounts are too wide to mount to the Tamiya FJ40 body.  lit up 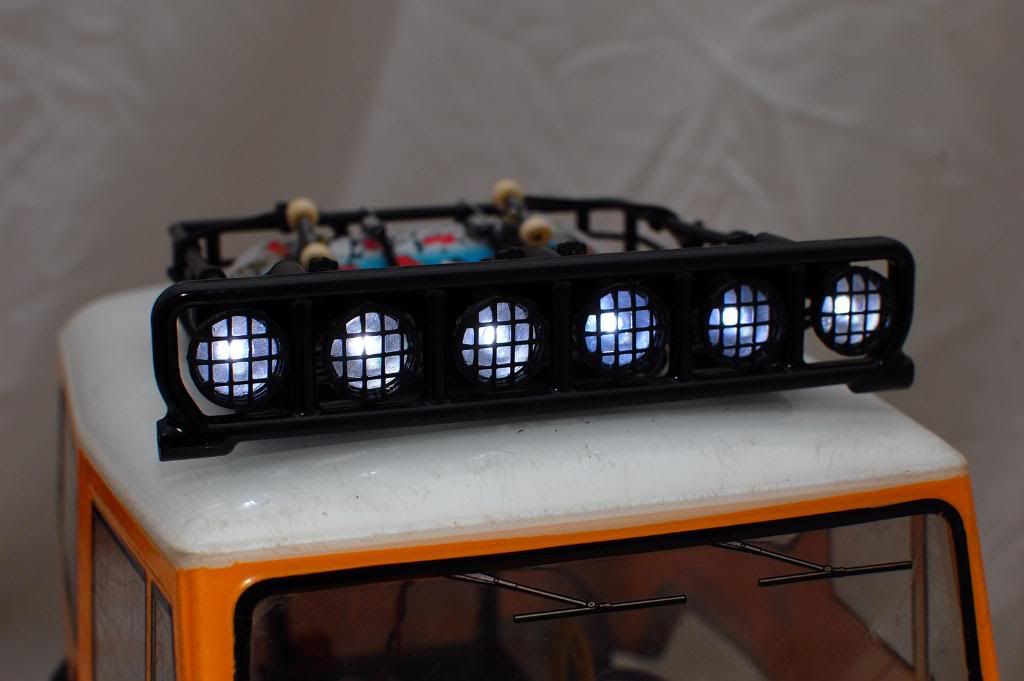 I had to paint the housings silver inside since it just came in all black. Edit: I see RPM now makes a narrow version with just 4 lights so it can be properly mounted to narrower bodies. Last edited by 860Crawler; 03-25-2010 at 08:25 AM. | |
|
| |
|
04-08-2010, 07:46 AM
| #15 |
| Rock Crawler Join Date: Aug 2008 Location: Wine Country
Posts: 899
|
Nice body, I have the same body.  I ended up using goo to hold the RPM light cans to the body front and rear. |
|
| |
|
04-10-2010, 12:19 PM
| #16 |
| Rock Crawler Join Date: Jul 2008 Location: E. City
Posts: 883
|
I like the fender flares, where did you get them?
|
|
| |
|
05-10-2010, 12:37 AM
| #17 | |
| Rock Stacker Join Date: Apr 2010 Location: De Soto, Ks
Posts: 82
| Quote:
thats mighty nice of them since I just cut the center out of that lightbar to make it a 4 light one lol. | |
|
| |
|
| |


 Linear Mode


