| |
| |||||||
 |
| | LinkBack | Thread Tools | Display Modes |
 12-04-2008, 01:08 PM
| #1 |
| Quarry Creeper Join Date: Sep 2008 Location: Petaluma
Posts: 282
|  I've been looking for the perfect fire extinguisher - but could only find have detailed plastic trinkets that really just looked like it came out of the 5 cent bubble machine. So - if you want something done right - you gatta do it yourself. Here's what I did. I helped working in a hospital. I started out with obtaining a few discarded glass med vials of different sizes. The best size was a Digoxin vial. I left the lable on but it does come off really easy for decals if you wanted. Maybe on the next version I'll try some new stuff. I then grabbed some epoxy and some red paint. 20 minute epoxy worked best.  before the fun starts - you'll need to cut some aluminum tube. I got the micro cutter and tube at Hobby Town USA. Although - you could get away tithout using a cutter by using a new blade exacto-knife and roll the blade on it - but using the cutter was easier and less chance for finger wound. You can cut the hose end too at this time since it will be the same size (you'll see the hose end part later).  you'll have to play with the dose of red paint to epoxy but for this first attempt - I used about 7 drops from the testers "engine red" paint and used just enough epoxy to fill the vial. Don't completely top it off - the tube placement will displace the rest of the glue to the top.  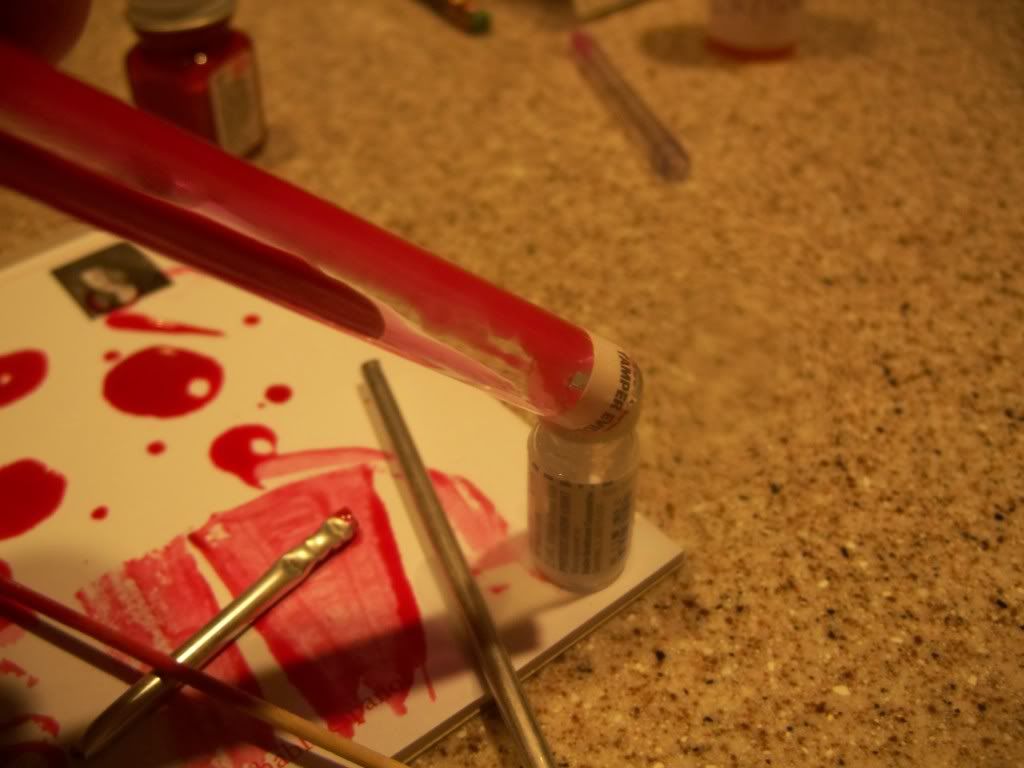 Once the vial is full - slip in the cut aluminum tube. *** let it float in slowly *** this is why the 20 minute epoxy worked the best. If you push it in - access epoxy runs out from the top - and then the tube sucks up epoxy and your left with having to try and fill it again. It's a messy process (take it from me or you'll have red epoxy all over the place). 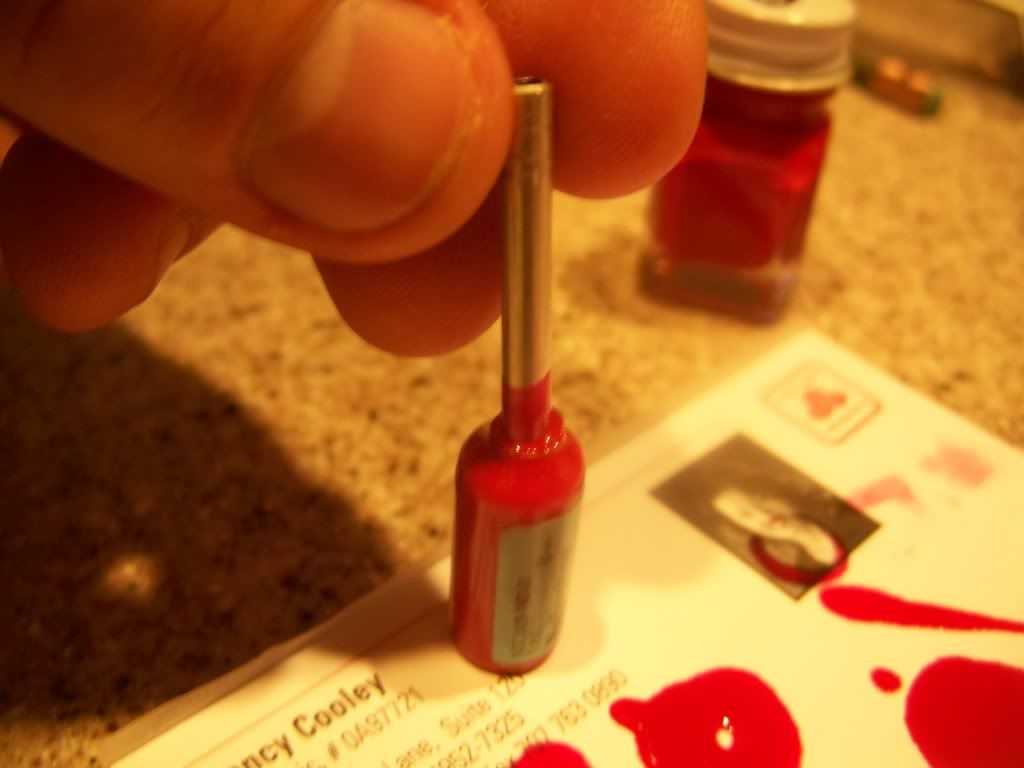 Once it's done, let it stand over night. You might have to support the tube to keep it in the middle by resting someing on it. Tooth pick leaning against it was enough pressure to keep it centered. It was best to do this stage at night before bed. In the morning - your set for the next part without screwing it up. 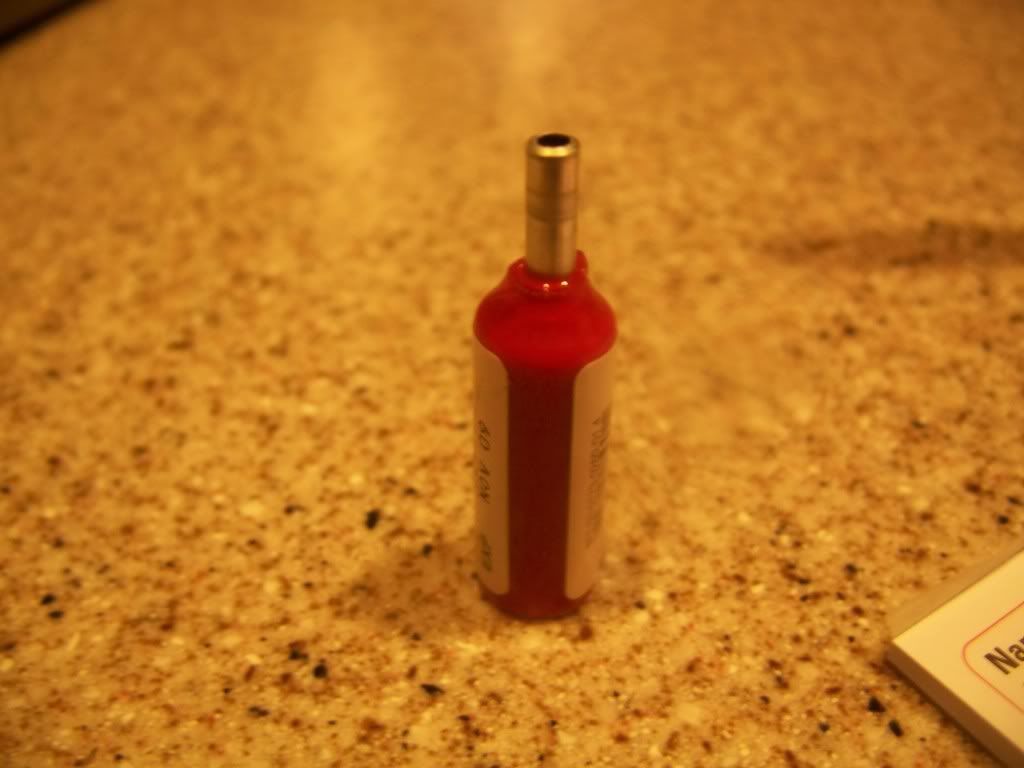 Next is drilling the aluminum rod to thread the next smaller tube through. I found if you use a file and notch the tube perpendicular to the tube length (horizontally) - the drill bit seats on the tube a bit better and doesn't fall off, making it easier to drill. Plan out where you'll drill in accordance to the label (if keeping it attached) so the right part of the label will show after it's mounted. 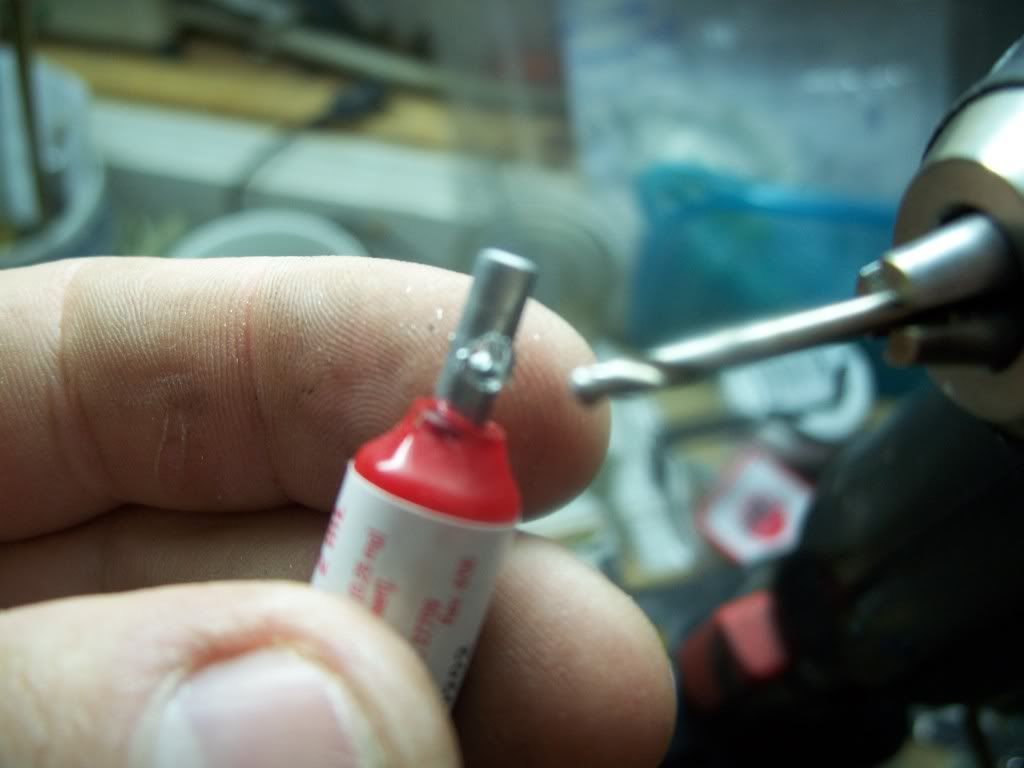 You might need to trim the burr a little off the tube after drilling but don't go crazy with trimming. Some of the burr helps to hold in the actuator tube. Now take the next size aluminum tube and thread it through the hole. Mark it's length - you don't need to be 100% precise. You can make the cut just by holding the exacto blade in your hand - it's that easy - but using the knife handle is safer. 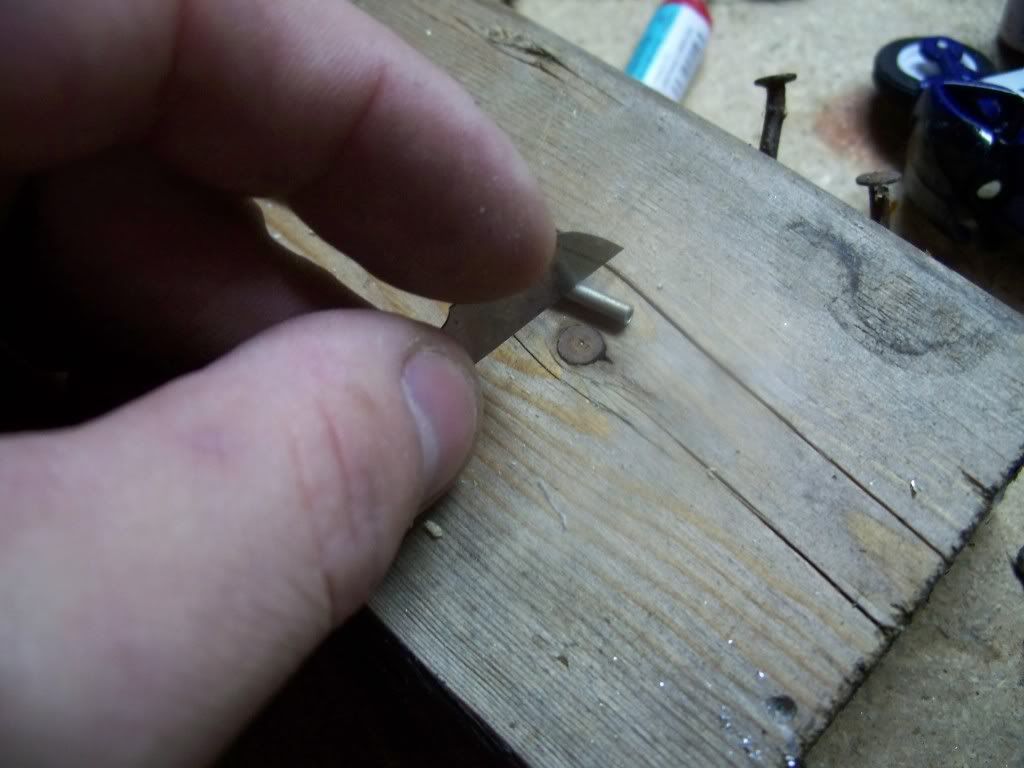 As long as your here - it's a good time to go ahead and cut the pressure meter ring. 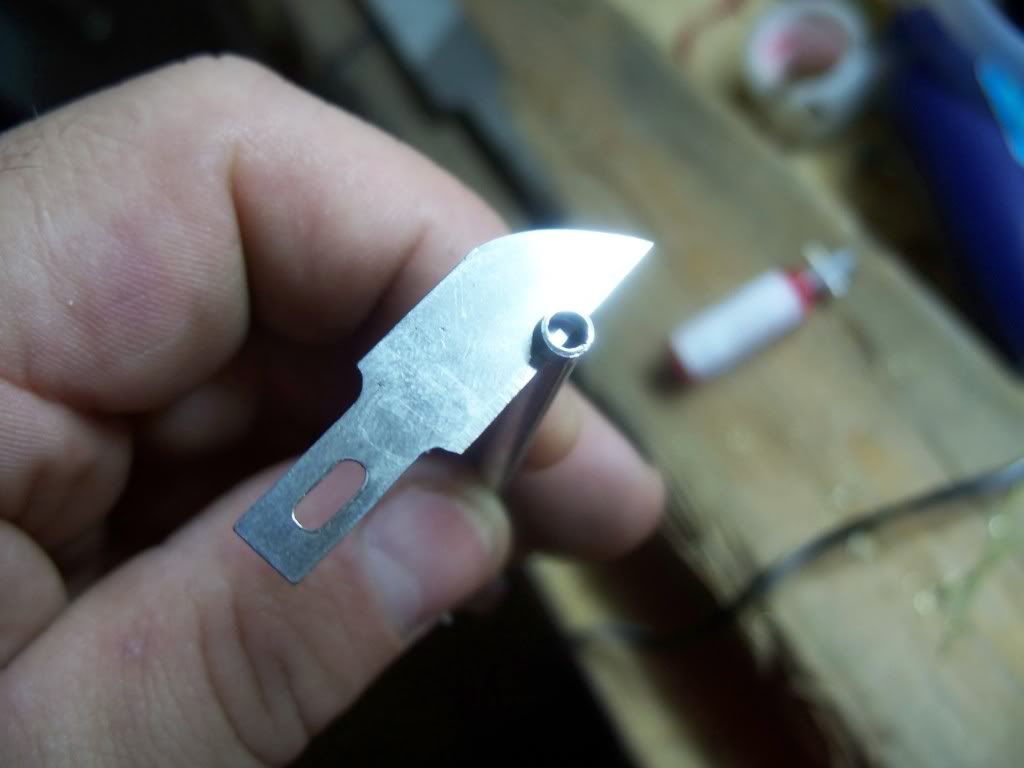 Now you can test fit one end into the hole to see if it's "about right". You can see the different sizes of the tubing used on the wood. 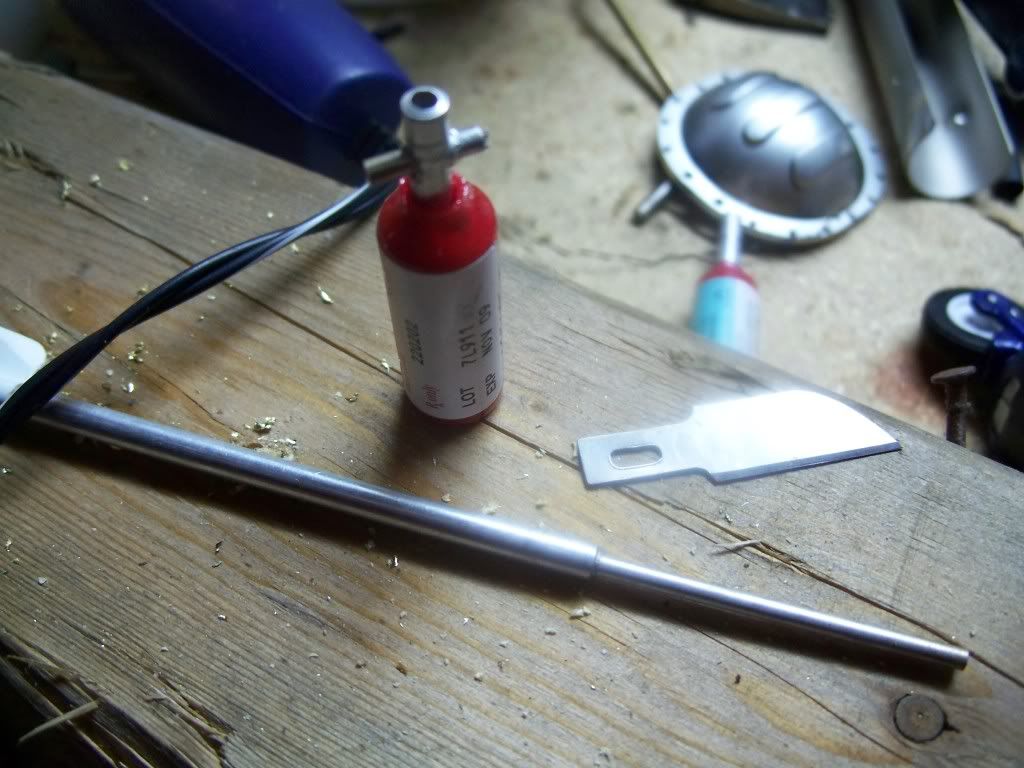 You'll need a fire hose - I used some wire insullation from an old light switch from "the junk drawer". (Never throw anything away theory). 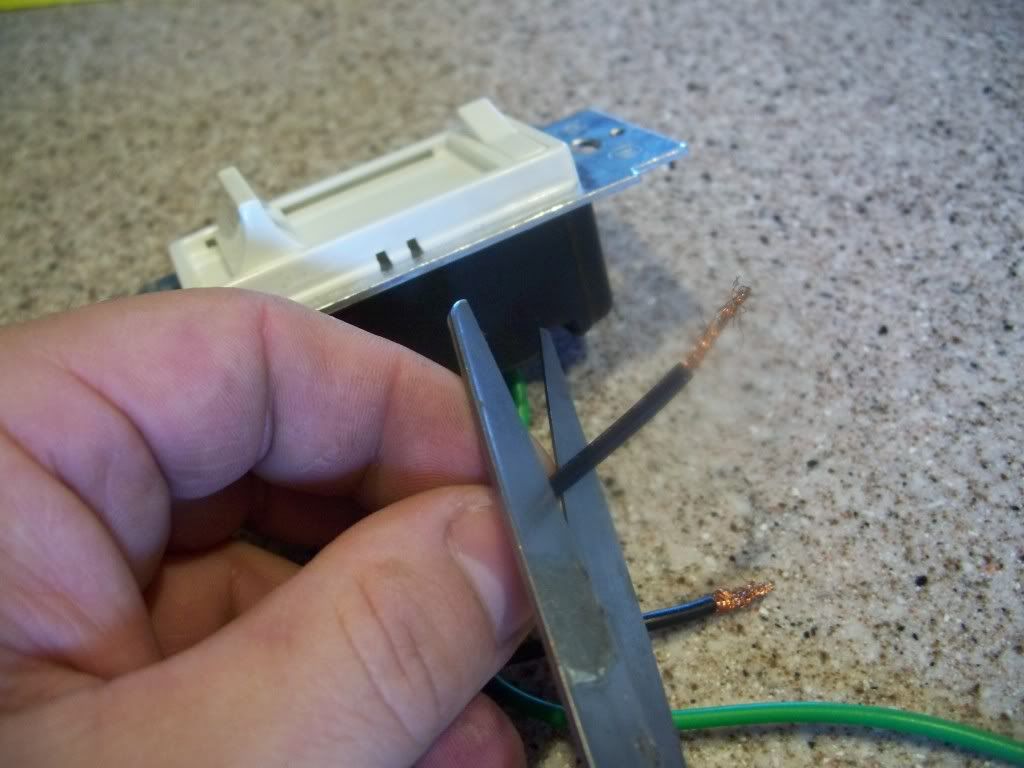 This was the perfect size. It would tightly fit the end of the aluminum nossle inside and all I needed to do was put a small phillips screw driver in the other end to open the lumin up a bit - this will make it easier to accept the fire extinguishers blow tip. The screwdriver is expanding the tube here. In the background - you can see the strap ties I'll use. They are for a scale railroad tie band. You could get them at the hobby store or find a small thin strap of metal.  Now install those two small pieces of aluminum tubing that you cut earler. You should have something that looks like this.  Now to make the extinguisher bands - as mentioned earlier - scale train supplies helped but you could make it out of anything. I used a pair of scissors - threaded the thin metal through the tip - and then bend the tip of the metal around (so it made a "v" angle). The scissors tip was use the right angle.  Now assemble the hose and the first extinguisher strap.  Now assemble the second strap. I made the fire hose extension short so only one strap would hold the hose.  Time for the pressure meter. What worked best for me (and added a little color) was the tamiya liquid thread lock. I had a lot left over after building the F350 (thread still in progress here: Petaluma F350 Build High Lift 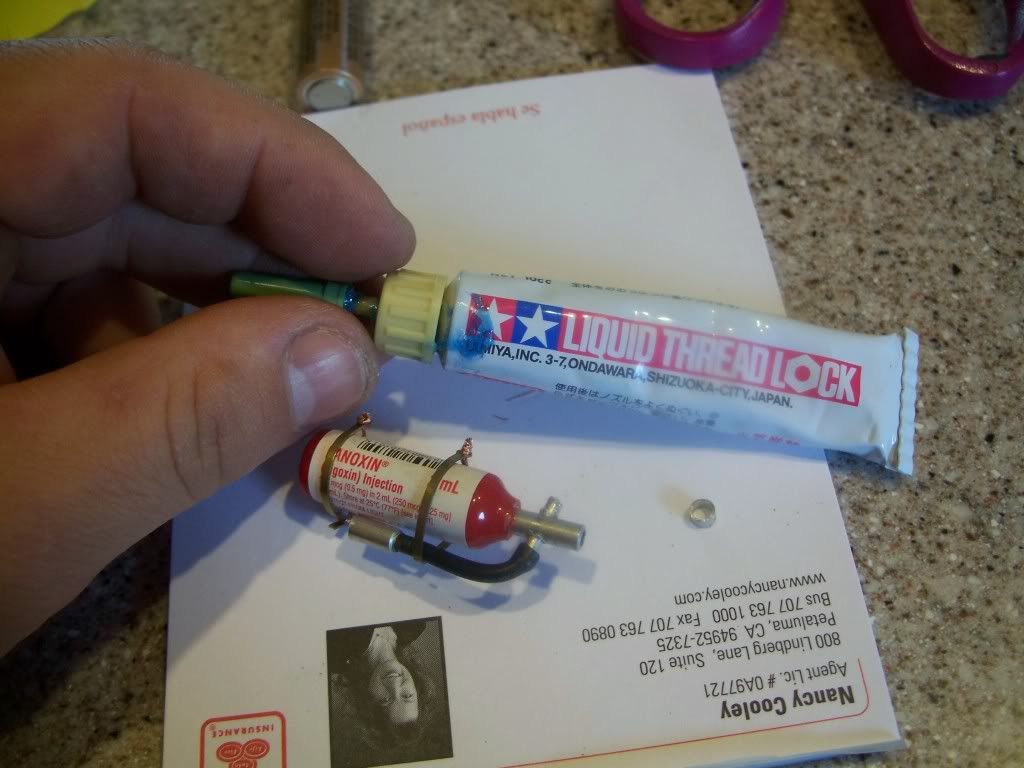 The liquid thread works as glue and hold that little ring in place very well. 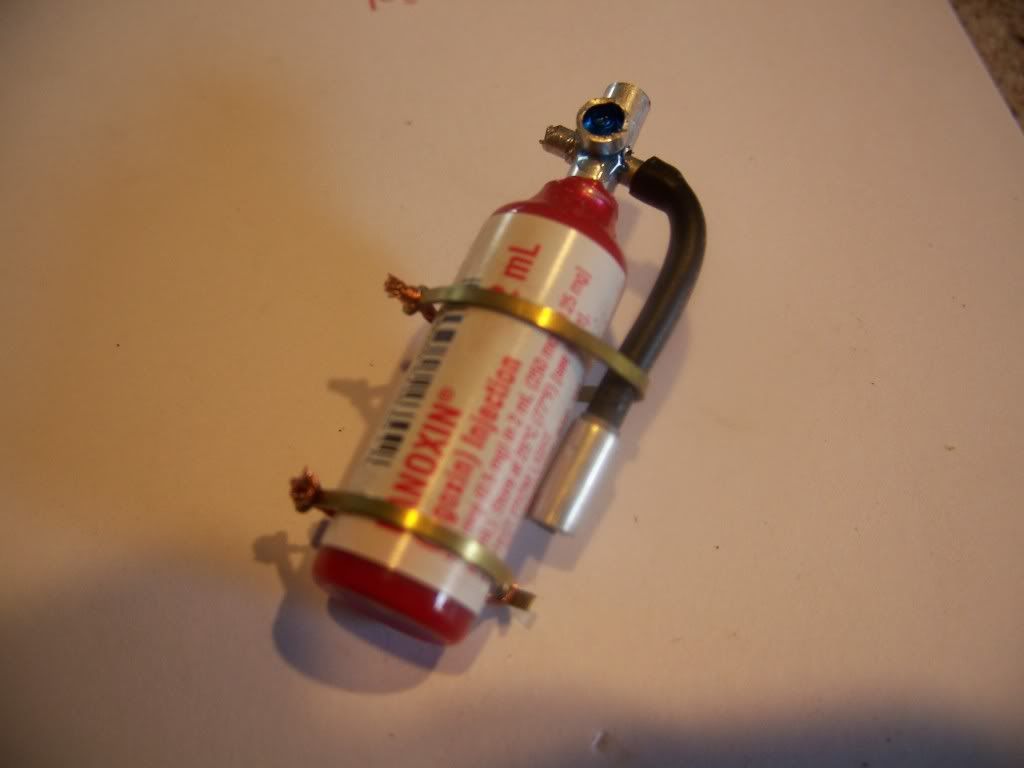 Since "this" extinguisher is getting mounted inside the bed on the soft top frame - I'n not adding the extinguisher handle for ease of mounting. So - for this one - it's done. 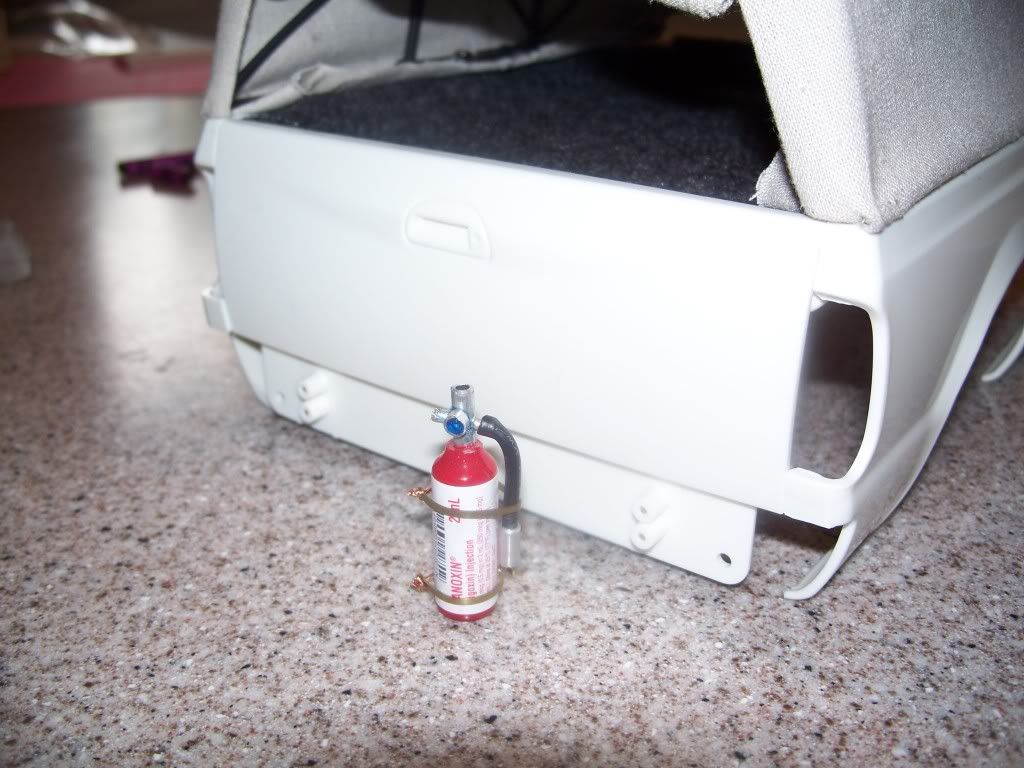 The soft top is easily pulled off and I'll be able to use the ext. straps to attach the ext. to the back of the soft top pole. Here's a pic so you can visualize the scale. Good luck on your build! 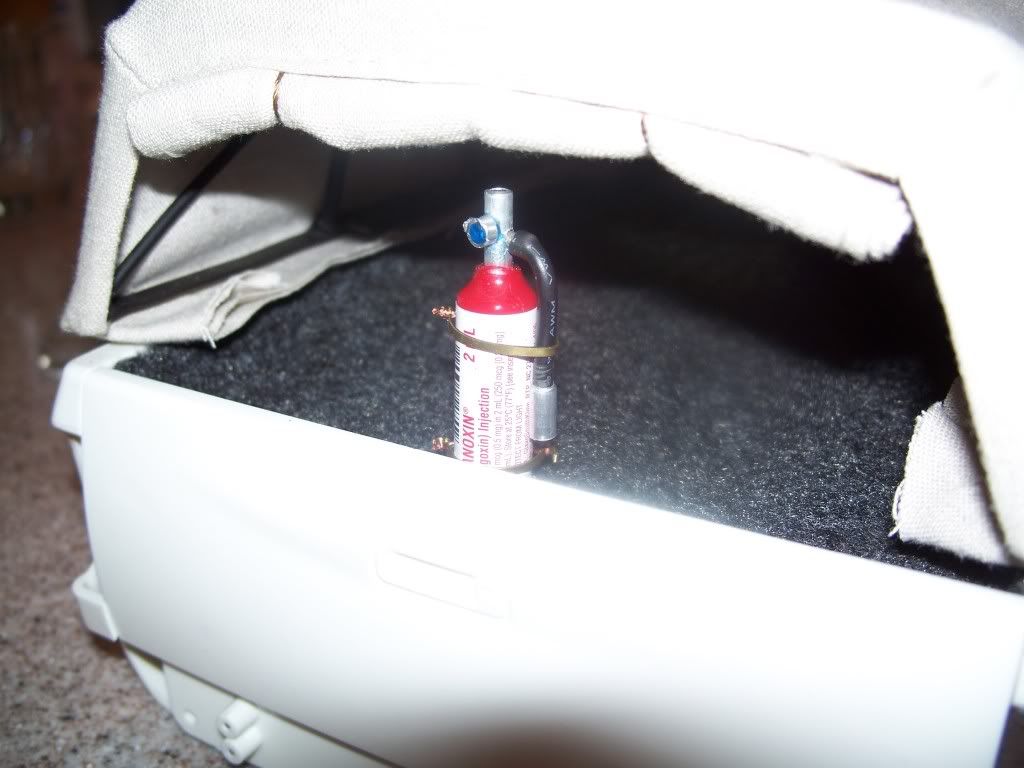 The soft op build and the roof rack are also listed in that build thread above. ** Last minute fix: Black paint to top to simulate a turning knob. Doh! Forgot to indicate how to turn the dang thing on in case of slow heart beats. 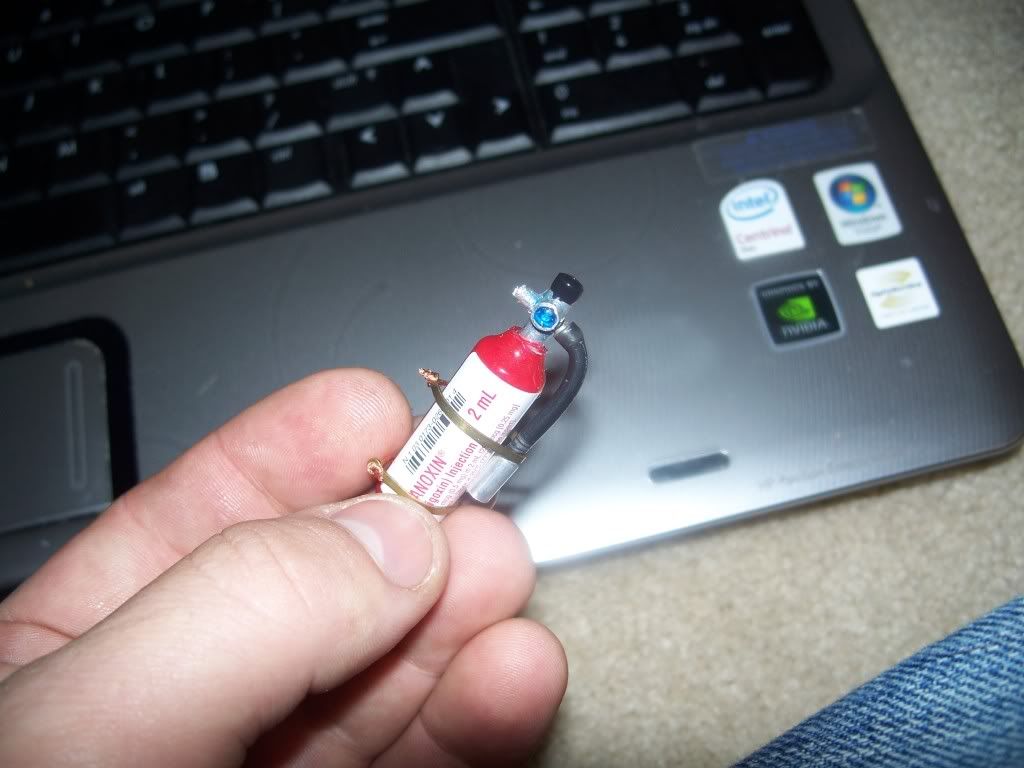 I decided to add the actuator handle afterall. Ugg - just can't put it down and say it's done. the handle isn't going to be seen, but at least I'll know it's complete. First - to make the handle by flattening the end of the tube to be cut. 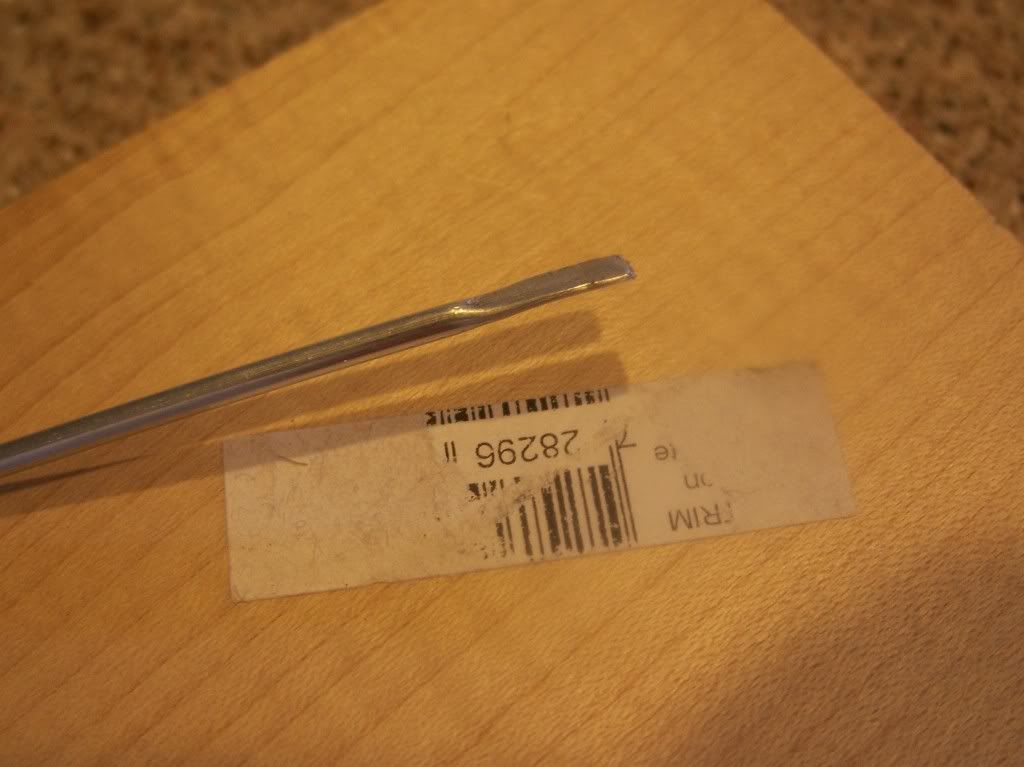 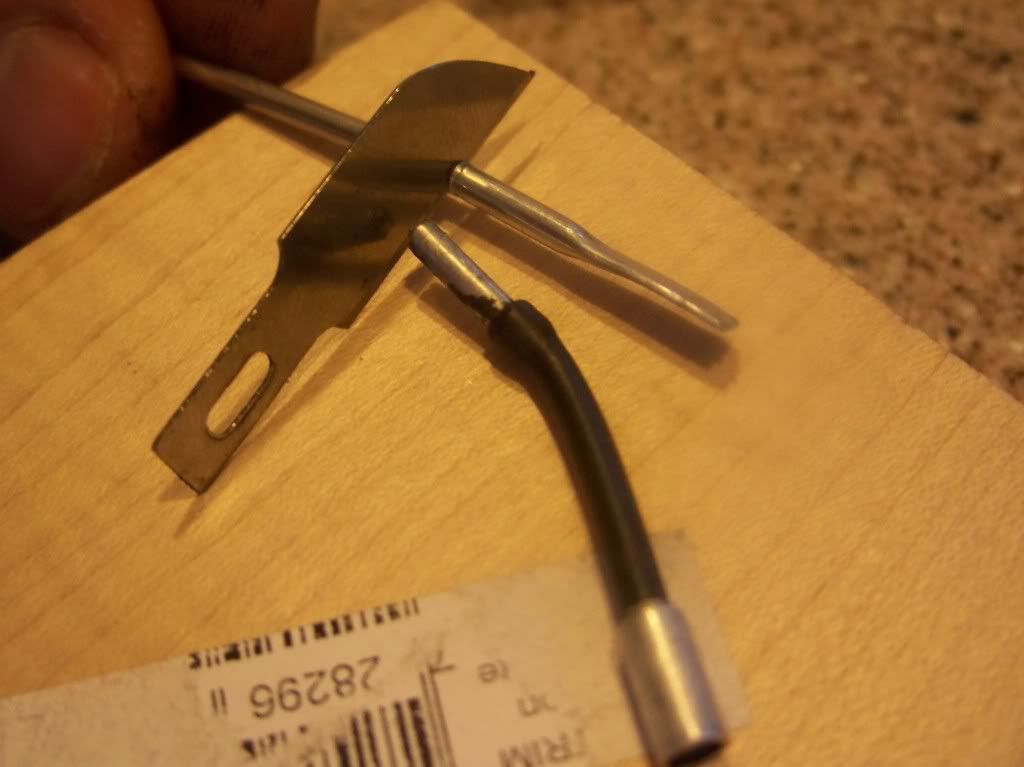 Thread through 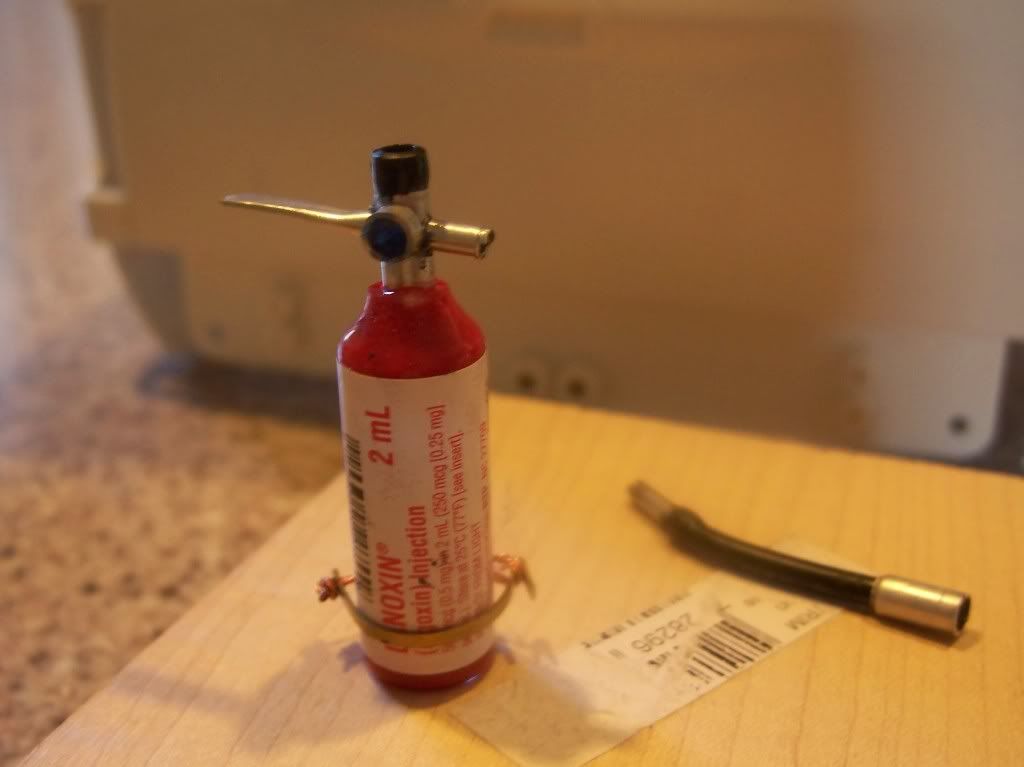 Bend down - and attach the other end of the hose. 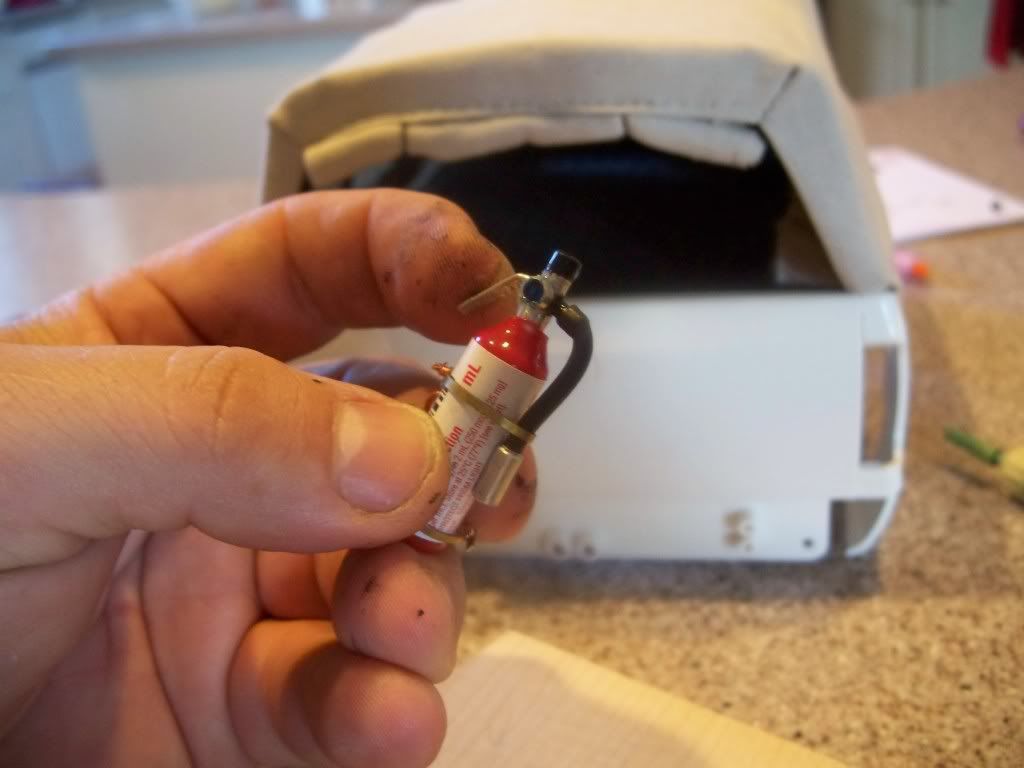 Ta da - done. One thing I noticed when changing the tube out - the black paint (after tipping up side down in the bottle to paint the tube top (faux handle) wasn't the best idea. The paint dripped down the inside and started to leech out the hole for the ext. hose tube. Peob. better to just paint the rim instead next time. 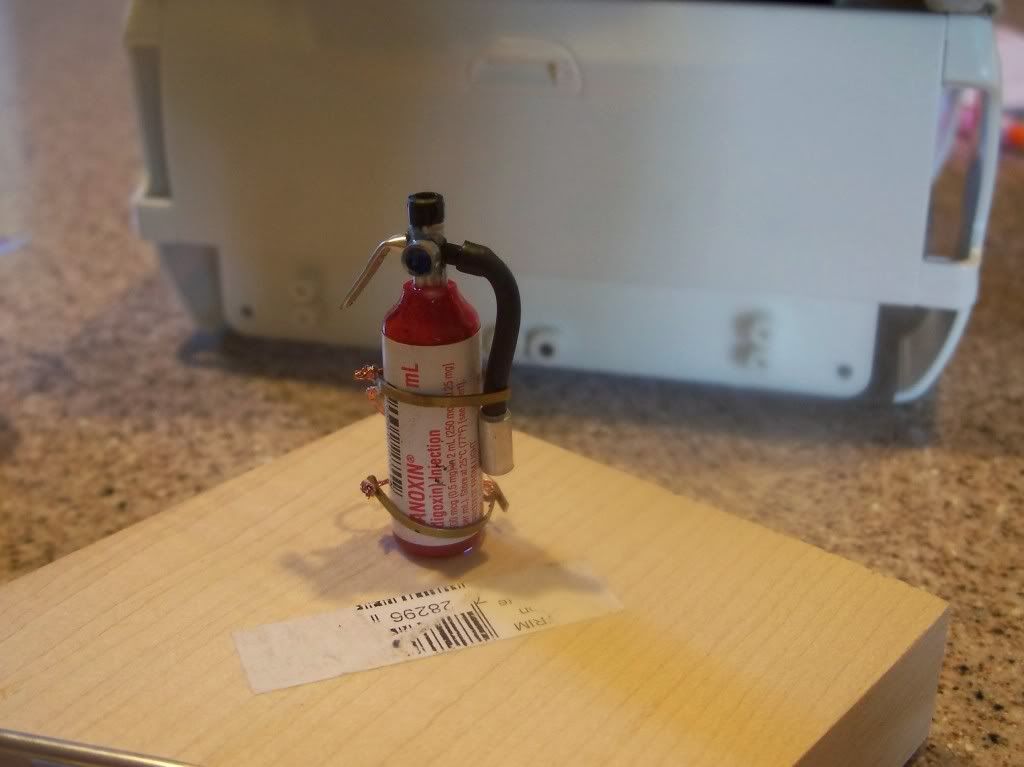 Last edited by FodigoDave; 02-17-2009 at 11:38 AM. Reason: added a handle |

|  |
| Sponsored Links | |
| | |
|
12-08-2008, 05:54 PM
| #2 |
| Quarry Creeper Join Date: Apr 2008 Location: The BoomBoom room
Posts: 408
|
That is freakin' cool!! Great job  |
|
| |
|
12-08-2008, 07:29 PM
| #3 |
| RCC Addict Join Date: Dec 2004 Location: HELL.....
Posts: 1,576
|
wow thats great work. very nice!
|
|
| |
|
12-08-2008, 09:22 PM
| #4 |
| Newbie Join Date: Mar 2008 Location: NoAL
Posts: 32
|
Nicest looking one I've seen. Great craftsmanship. And things like that are always more gratifying when you scratch build them.
|
|
| |
|
12-09-2008, 08:21 AM
| #5 |
| Newbie Join Date: Feb 2008 Location: Thailand
Posts: 27
|
wow |
|
| |
|
12-09-2008, 10:59 AM
| #6 |
| Pebble Pounder Join Date: Jun 2008 Location: nampa
Posts: 162
|
im going to sound rilly dumb but were did u get the jar thats the mainthing???????????
|
|
| |
|
12-09-2008, 02:09 PM
| #7 |
| Quarry Creeper Join Date: Sep 2008 Location: Petaluma
Posts: 282
|
Thanks for the kind words - you guys rock! Not a dumb question at all. I often wonder where others get their equipment too when they make stuff. I get the "jars" [vials] from my hospital. They are used and then discarded. The vials DON'T come around very often as these are very specific meds for not-so-often seen problems. After I use them, I give them a good rinse down as some of these carry salt as a preservitive and you wouldn't want salt crystals inside to mess up the painted epoxy. I'm thinking about making quite a few of these by the way (hint hint) as the vials come in. Would anyone be interested? Last edited by FodigoDave; 12-09-2008 at 02:41 PM. |
|
| |
|
12-09-2008, 02:21 PM
| #8 |
| I wanna be Dave Join Date: Oct 2008 Location: Sumter
Posts: 6,141
|
wow
|
|
| |
|
12-12-2008, 02:54 AM
| #9 |
| RCC Addict Join Date: Oct 2007 Location: Long Island-Land of one batch of rocks in Sag Harbor and at least one fellow crawler
Posts: 1,371
|
Wow!!! Great work my friend!
|
|
| |
|
12-14-2008, 07:30 AM
| #10 |
| Newbie Join Date: Oct 2008 Location: Sacramento
Posts: 42
|
Sweet! Nicely Done. If you decide to mass produce please let me know. |
|
| |
|
12-21-2008, 01:18 AM
| #11 |
| Quarry Creeper Join Date: Sep 2008 Location: Petaluma
Posts: 282
|
Moto The problem is actually getting the glass vials - nothing over the last three weeks. I'm still waiting and I've recruited a few extra nurses to help me out. Last edited by FodigoDave; 12-21-2008 at 07:12 PM. |
|
| |
|
12-26-2008, 09:11 PM
| #12 |
| Quarry Creeper Join Date: Sep 2008 Location: Petaluma
Posts: 282
|
I picked up a few more vials this week. My second try... (LOL) 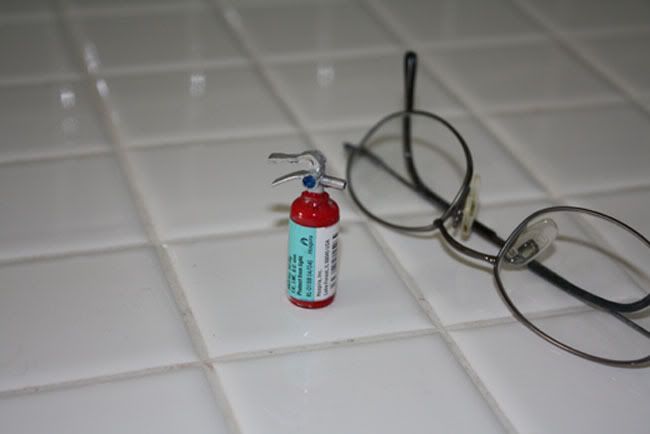 I blew up the third one, tried to dry it too close to the fire place |
|
| |
|
12-29-2008, 09:55 PM
| #13 |
| Quarry Creeper Join Date: Aug 2007 Location: Amarillo, TX
Posts: 486
|
Its just amazing how some of you modders can just think this stuff up..! Congrats..!
|
|
| |
|
12-31-2008, 04:17 PM
| #14 | |
| Quarry Creeper Join Date: Sep 2008 Location: Petaluma
Posts: 282
| Quote:
I Got a couple more vials in this week too Time to get the creative juices flowing 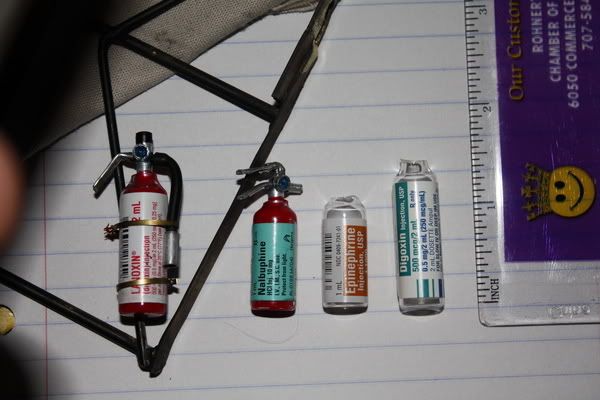 | |
|
| |
|
01-11-2009, 05:15 AM
| #15 |
| Newbie Join Date: Dec 2008 Location: Augsburg
Posts: 17
|
Hey, wow! Would like to have one ;) |
|
| |
|
01-16-2009, 02:02 AM
| #16 | |
| Quarry Creeper Join Date: Sep 2008 Location: Petaluma
Posts: 282
|
A new UPDATED VERSION COMING SOON. Hope to break it out of the mold this weekend for it's unvailing. The paint mixed epoxy takes several days to dry under normal conditions. Will have pics next week. Stay tuned. All I need now is to add a scale "pull pin" but that's impossible. Or is it.... Quote:
| |
|
| |
|
01-16-2009, 10:02 PM
| #17 |
| Quarry Creeper Join Date: Sep 2008 Location: Petaluma
Posts: 282
|
When building one for a friend, (since his rig was so nice) I first did some research on what a fire extinguisher really looks like so he would have a totally awesome accessory. Well, at least I was close from my first creations. I think I pretty much nailed it on this one. Took 2 weeks of fine detail to make sure the paint & glue was all in the right spots and not running all over - and found a few NEW areas of improvement on the detail that I missed going by memory earlier. No plastic parts here! 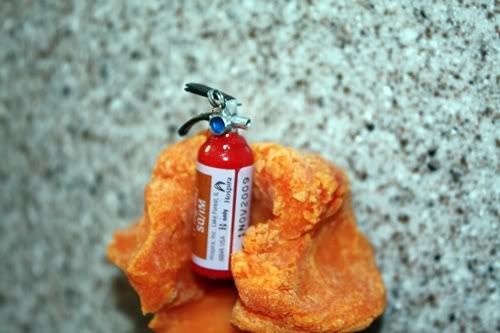 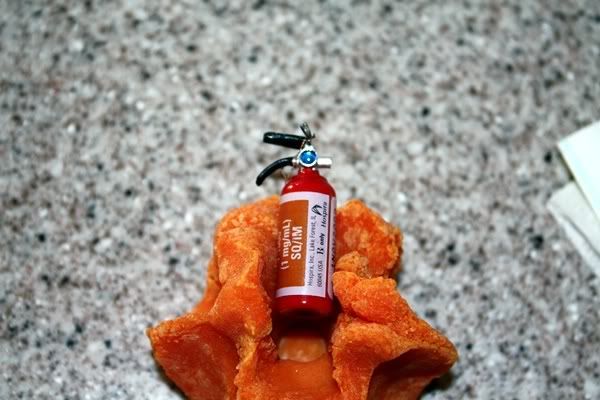 Hope you like it. Last edited by FodigoDave; 01-16-2009 at 10:07 PM. |
|
| |
|
01-17-2009, 03:25 AM
| #18 |
| Rock Crawler Join Date: Sep 2008 Location: Salem,Oregon
Posts: 662
|
all i can say is wow and i want one
|
|
| |
|
01-19-2009, 01:18 PM
| #19 |
| Quarry Creeper Join Date: Sep 2008 Location: Petaluma
Posts: 282
|
Hi Guys I purchased a VENDOR's permit |
|
| |
|
01-22-2009, 02:21 AM
| #20 |
| Pebble Pounder Join Date: Nov 2008 Location: in a cardboard box, maybe a castle
Posts: 148
|
Let me know when you are ready to start selling. I would like to get some for my scalers. Im a diabetic so the insulin bottles look good as nitro bottles for my r/c classic drag cars. The extinguishers are awesome looking. |
|
| |
|
| |


 Linear Mode


