| |
| |||||||
 |
| | LinkBack | Thread Tools | Display Modes |
 10-07-2011, 07:39 AM
| #1 |
| Rock Crawler Join Date: Mar 2010 Location: NRV
Posts: 958
|
I've been working on some scale structures for my RC ORV Park. I built a picnic table which got me thinking about making a camp scene. I searched eBay for those little display tents but they really are more like 1:6 scale. So, having spent more than a few nights in appalachian trail shelters. I decided to build one. I Googled some plans for one a long time ago and actually started to build a 1:1 but never got past the base platform. Anyway, I work in AutoCAD so I'm in the process of redesigning it @ 1:10 scale using standard Midwest Basswood strip sizes of 24" length. This will be a build thread & hopefully I'll generate a nice set of plans & turorial and try to sell them on vendor site. I'll plan to post some free plans of the picnic table so I can see if there is any interest. Here is what I'm shooting for to frame it out. not sure yet about siding & roof material but I'm open to suggestions: 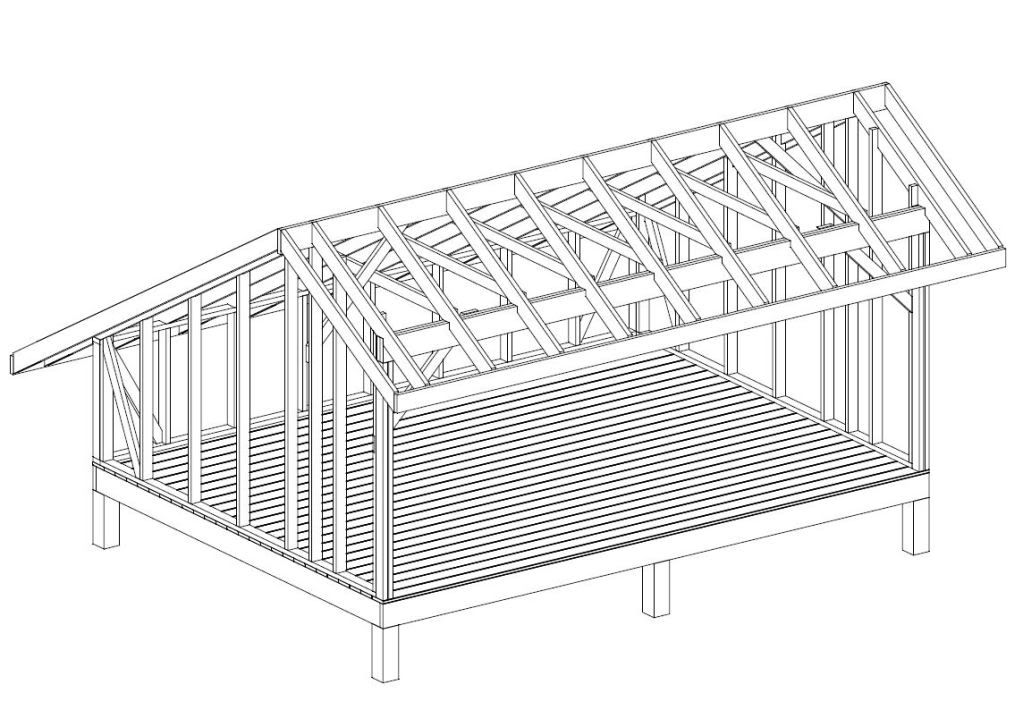 |

|  |
| Sponsored Links | |
| | |
|
10-07-2011, 07:41 AM
| #2 |
| Newbie Join Date: Oct 2011 Location: Baton Rouge
Posts: 2
|
This looks like it's gonna be awesome
|
|
| |
|
10-07-2011, 07:46 AM
| #3 | |
| MODERATOR   Join Date: Oct 2010 Location: RC Land
Posts: 3,185
| Quote:
 | |

| |
|
10-07-2011, 07:59 AM
| #4 |
| Rock Crawler Join Date: Mar 2010 Location: NRV
Posts: 958
|
I have designed it to be 12" x 18" so as to take advantage of 24" standard length basswood strips. Here is the start: Clean work bench (or as clean as it gets), fresh pile of wood, miter saw & I put the picnic table in the back so you get an idea of how that basswood strips look compared to regular 2x4s. 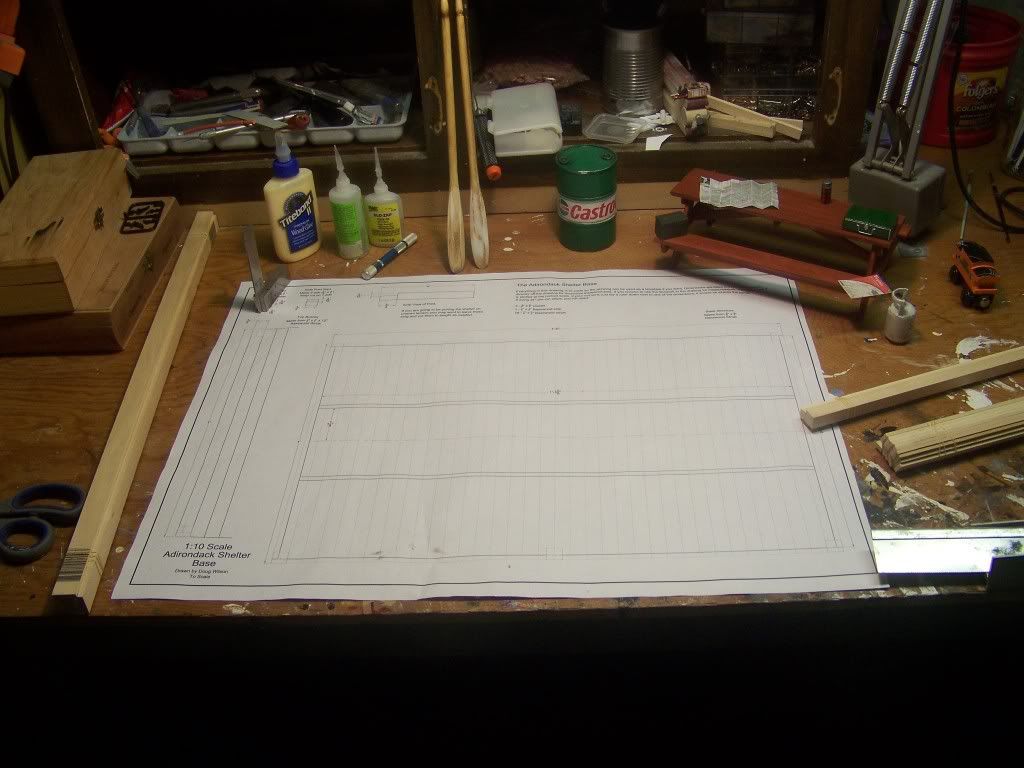 Close up of picnic table: 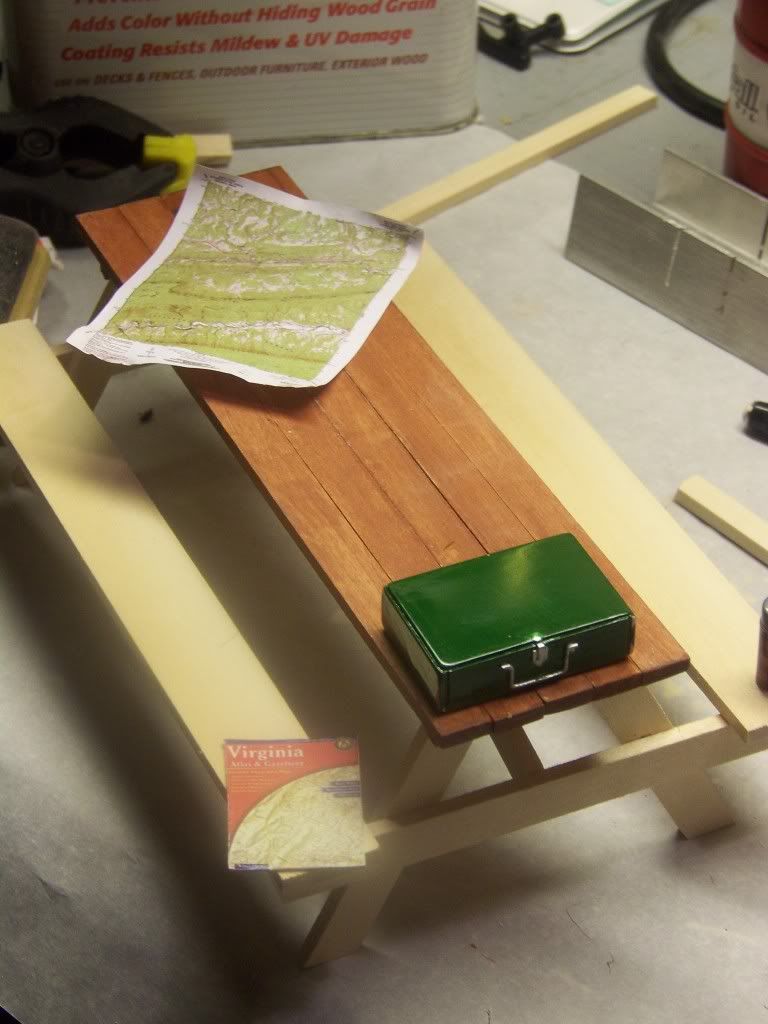 Last edited by DRW-FJ40; 10-07-2011 at 08:02 AM. |
|
| |
|
10-07-2011, 01:03 PM
| #5 |
| Quarry Creeper Join Date: Nov 2010 Location: weeki Wachee
Posts: 370
|
where did you get your wood from?
|
|
| |
|
10-07-2011, 06:53 PM
| #6 |
| RCC Addict Join Date: Jun 2008 Location: In the woods
Posts: 1,155
|
hurry up and get this thing built.cant wait to see it.and glad I am not the only one with a picnic table now. |
|
| |
|
10-08-2011, 12:33 PM
| #7 |
| Quarry Creeper Join Date: Nov 2010 Location: weeki Wachee
Posts: 370
|
this looks like something maybe you could use for the roof unless youre going to use shingles. i think this type of roof will give it more of a shelter look. Ribbed Roofing or Siding Sheet @ miniatures.com i was outside earlier and noticed the drawing for the shelter looked pretty close to my neighbors unwalled garage in his backyard. i think his is 30'x40' with a concrete floor and his roof peak is in the middle. i might have to scale it down to make my own with a concrete floor and everything next. |
|
| |
|
10-10-2011, 07:26 AM
| #8 | |
| Rock Crawler Join Date: Mar 2010 Location: NRV
Posts: 958
| Quote:
| |
|
| |
|
10-10-2011, 08:04 AM
| #9 |
| Rock Crawler Join Date: Mar 2010 Location: NRV
Posts: 958
|
I had a busy weekend. Actually camped in what was to be my 1:1 Adirondack shelter. I started it 8 years ago and never got to the stage of putting up walls. Had 3 kids & am just now starting to camp more so maybe I'll get back on it soon. 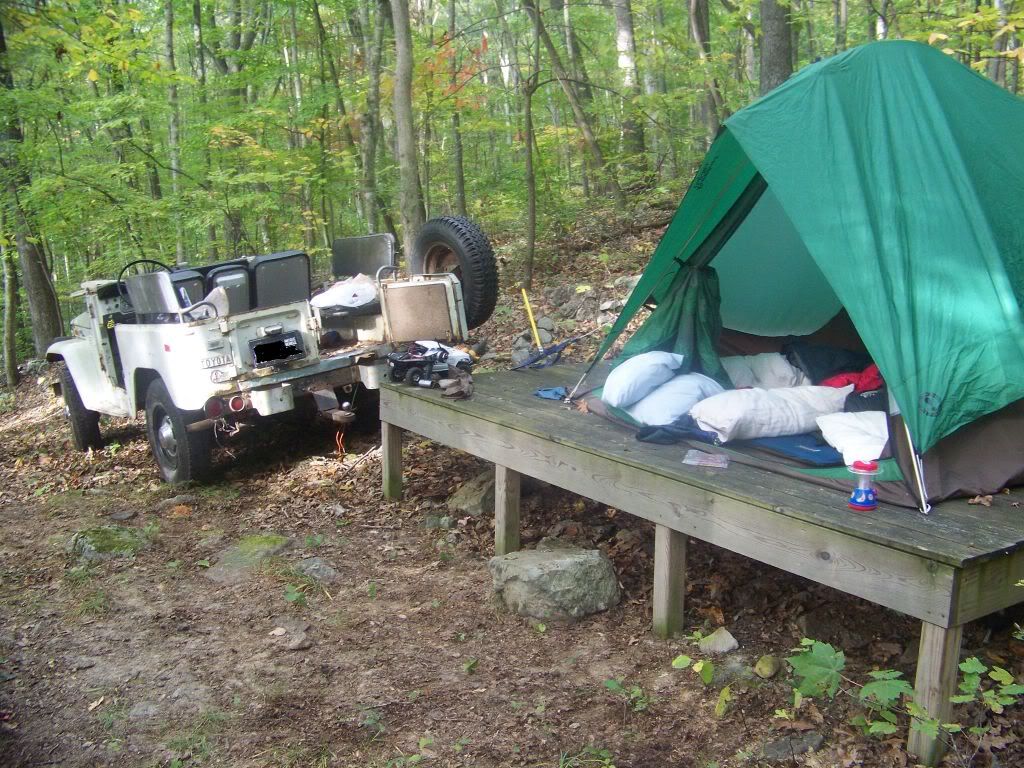 |
|
| |
|
10-10-2011, 08:12 AM
| #10 |
| Rock Crawler Join Date: Mar 2010 Location: NRV
Posts: 958
|
So back to mini world. The drawings worked out real nice. I couldn't find my scale & in an act of impatience to get started, I just started laying wood down on the plans & marking straight from there. Makes it easy (note to self) 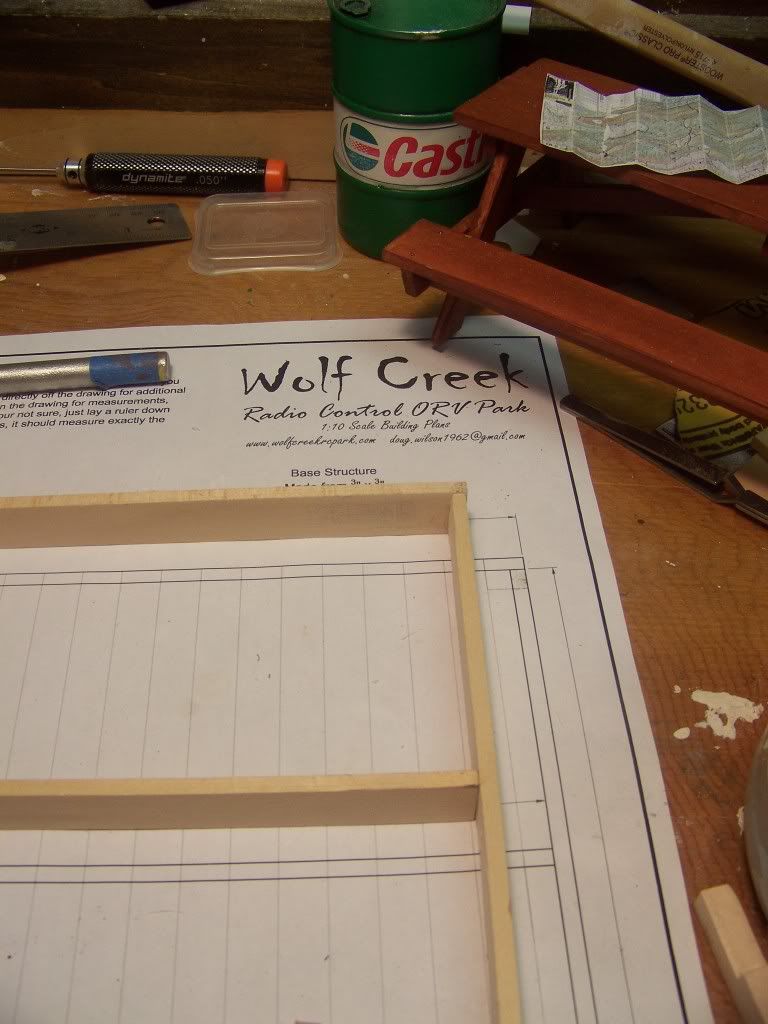 Basic frame went pretty quick. I started using CA glue but wanted to slow down the set time for this stage so I could go around & make sure all was square. I used Alien's tacky glue for this. 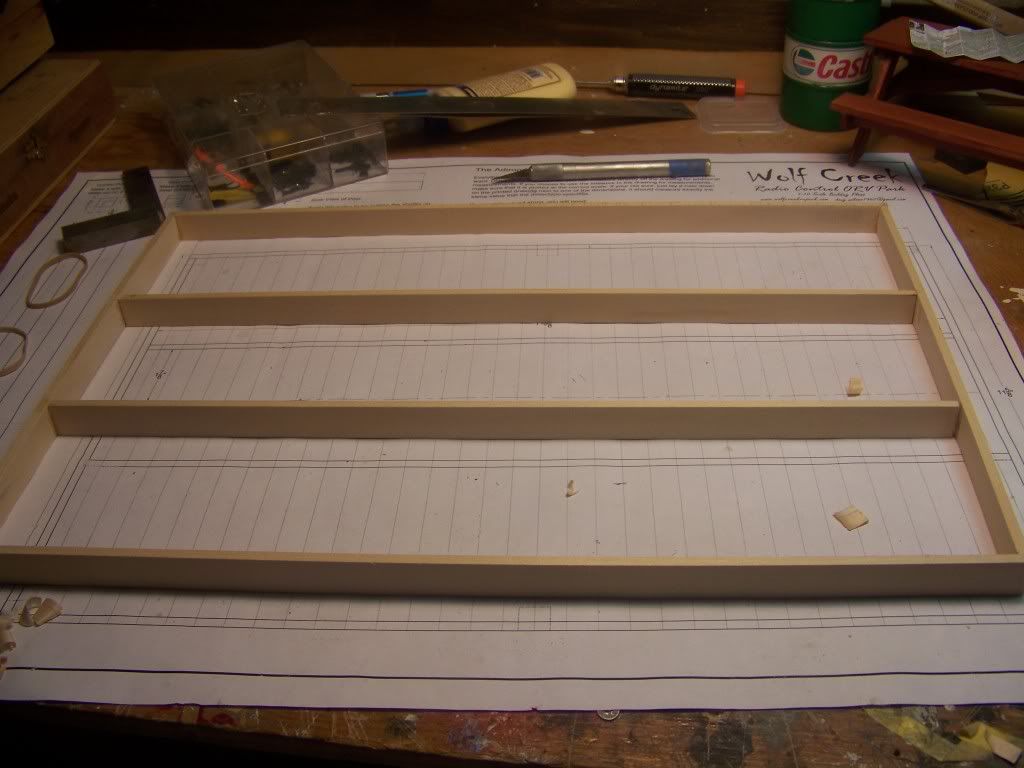 Next, the supporting legs. I went with 4" here & plan to cut them to fit when I decide where I'm going to put it. Used a razor saw to cut 3/8" & then Xacto knife to notch it out & clean up with 120 grit sandpaper. 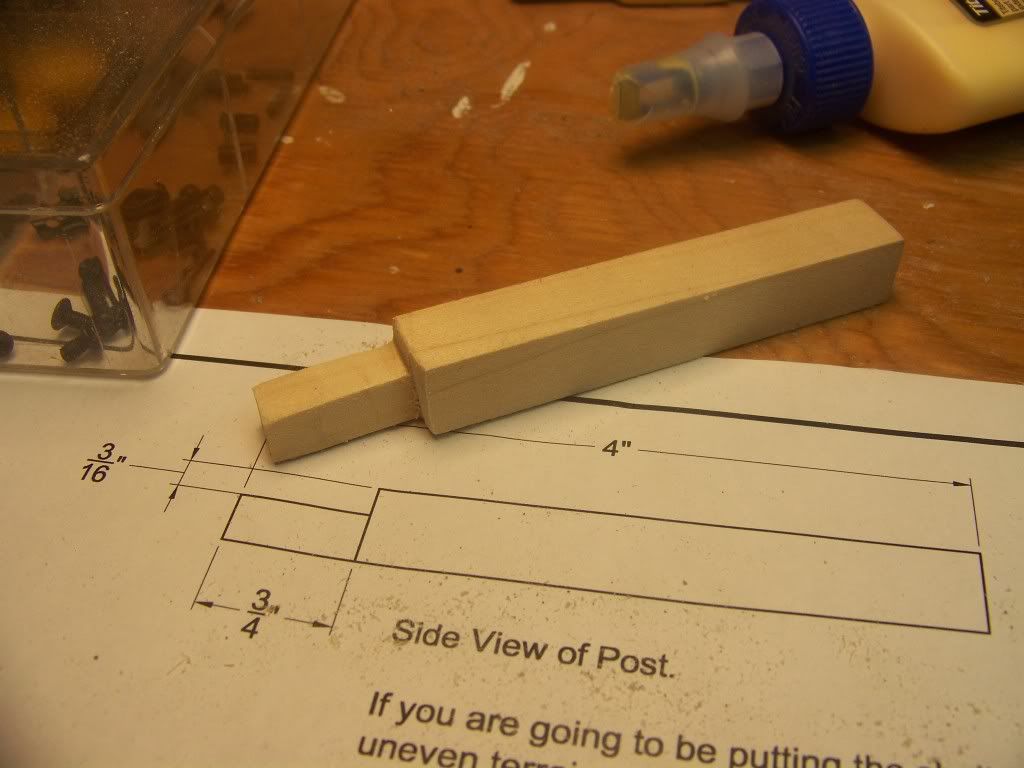 I used machinest squares to make sure the legs stayed square while the glue dried: 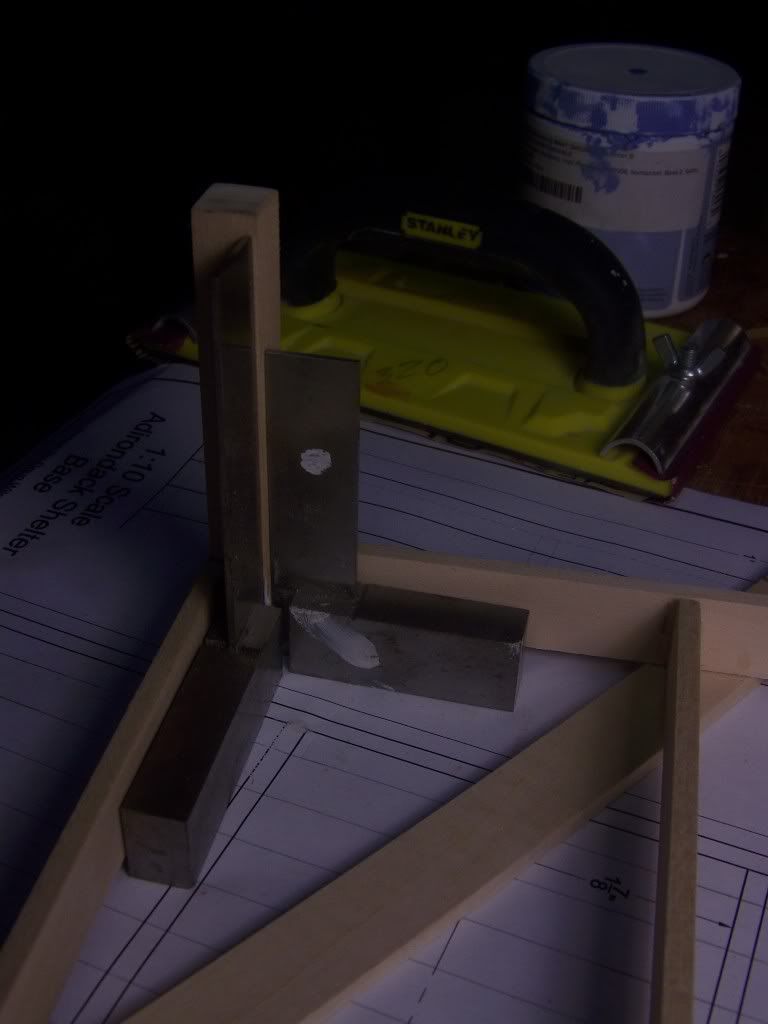 |
|
| |
|
10-10-2011, 08:27 AM
| #11 | |
| Rock Crawler Join Date: Mar 2010 Location: NRV
Posts: 958
| Quote:
I had thought about cedar shingles. I may do another one out of logs & do some stone work & use the shingle idea on that. | |
|
| |
|
10-11-2011, 01:01 PM
| #12 |
| Quarry Creeper Join Date: Nov 2010 Location: weeki Wachee
Posts: 370
|
Awesome, I'm glad you like it. I've been looking around a lot on the doll house sites and even found mortar for stone or brick walls. Never thought I would find myself shopping around and looking at doll houses. I guess got it from my grandfather who was always carving and painting wood soldiers and old tv show and cartoon character my favorite ones are his beetle bailey mopping a floor while whistling and John Paul Jones standing on a ships deck titled "We have not yet begun to fight", all hand carved.
|
|
| |
|
10-11-2011, 01:25 PM
| #13 |
| Rock Crawler Join Date: Mar 2010 Location: NRV
Posts: 958
|
Yea, my grandfather built houses & he was out of work during the depression & built my Dad's sister a really cool doll house. We played with it a bunch when I was a kid & I used to draw floor plans, etc. Here is one I built last winter, I don't have a picture after I finished the roof but... 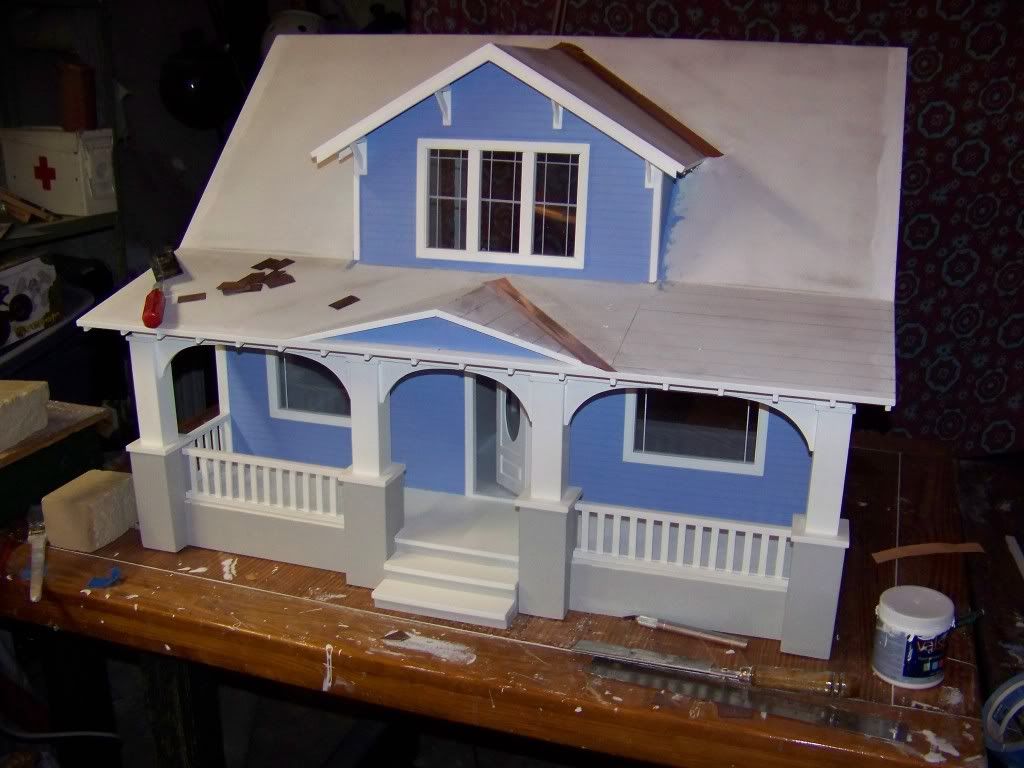 |
|
| |
|
10-11-2011, 01:28 PM
| #14 |
| Rock Crawler Join Date: Mar 2010 Location: NRV
Posts: 958
|
BTW, I just noticed in the lower right corner, a little paint can. That's a good little trick for wood models, go to Lowe's & you can get little containers of their brand of interior latex samples for around $3 a jar which is about all you need for small projects.
|
|
| |
|
10-12-2011, 11:24 PM
| #15 |
| Rock Crawler Join Date: May 2005 Location: Fort Wayne
Posts: 728
|
Looking real good so far! I like the picnic table! Been learning how to work with wood lately myself.
|
|
| |
|
10-13-2011, 07:07 AM
| #16 | |
| Rock Crawler Join Date: Mar 2010 Location: NRV
Posts: 958
| Quote:
| |
|
| |
|
10-14-2011, 08:23 AM
| #17 |
| Rock Crawler Join Date: Mar 2010 Location: NRV
Posts: 958
|
Little update. Legs on. They are a bit long but that's ok, I plan to fit them to a particular spot in my ORV Park. I designed the width to be exactly 12" so I could cut 24" stock in half. It's worth noting that basswood strips are exactly 24" so no room for slop. I'm used to the real thing where an 8' 2x4 is a little over. Thought we had mice in the basement, noticed a little Knawing on the wood frame but it turned out to be elk.  |
|
| |
|
10-15-2011, 09:31 AM
| #18 |
| Quarry Creeper Join Date: Nov 2010 Location: weeki Wachee
Posts: 370
|
That looks really good. I can't wait to start building.
|
|
| |
|
10-15-2011, 09:52 AM
| #19 |
| MODERATOR Join Date: Oct 2010 Location: RC Land
Posts: 3,185
|
If you haven't affixed the floor boards yet, a cool visual detail would be to put all the floor planking/boards down on the deck diagonally. The same as it would be done in a 1:1 construction for stength and code. Looks good so far! Gotta grab a salt lick block for the Elk so he stops chewing on your lumber. |
|
| |
|
10-17-2011, 07:15 AM
| #20 | ||
| Rock Crawler Join Date: Mar 2010 Location: NRV
Posts: 958
| Quote:
Looking good! I need to get drawing. You caught up with me fast. Quote:
Thanks for the salt tip, I've set a trap so... we'll see... 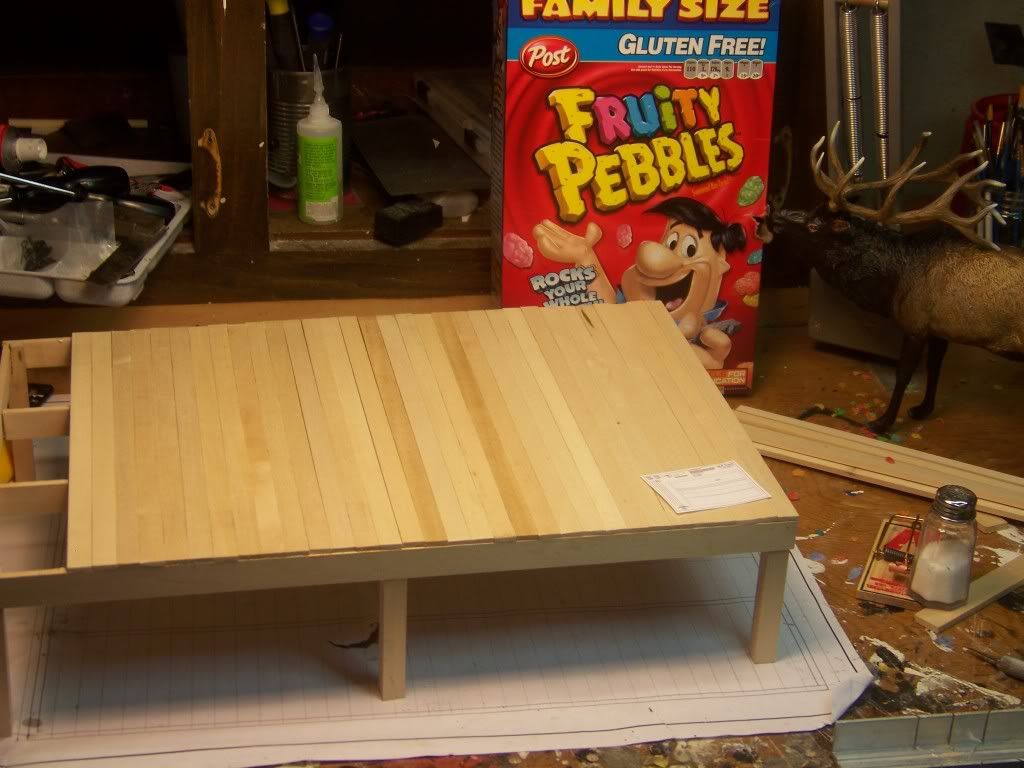 | ||
|
| |
|
| |


 Linear Mode


