| |
| |||||||
 |
| | LinkBack | Thread Tools | Display Modes |
 06-02-2006, 12:57 PM
| #1 |
| Rock Crawler Join Date: Jun 2005 Location: Safety Harbor
Posts: 588
|
I built this TLT for my son(got tired of him driving mine all the time).Took some cutting and thinking to get everything to fit but I think it turned out great.My son loves it! Performes really well. specs: cut tlt chassis center skid made out of a cutting board (Target $1.89),cut to 2 3/4' X 2 3/4".1/2" x 3/4" cut out of each corner to clear the link mounts and edges rounded so it doesn't get hung up 55t lathe 12t pinion pede tranny,locked 87t spur TLT axles,locked Stampede sliders(traxxas #1951-2 bags) Traxxas rod ends(#1942) Traxxas output yokes(#552 Links made with 6/32 treaded rod and 3/16 aluminum tubing maxx shocks w/ losi yellow springs(losa514 single narrowed front pede wheels with 3.75 oz of stick on lead weight on each rim.Reducer washers as rock rings.2 1/2" fender washers glued to the inside of the rim for a little extra weight TLT wideners from the Crawler Store Tq2 ,Novak XRS esc and Towerpro MG995 servo. HPI MX-1 body 10 3/4" wide 11"WB 3" center clearance pics... Cut chassis  skid  Tranny installed   rolling chassis    done.. 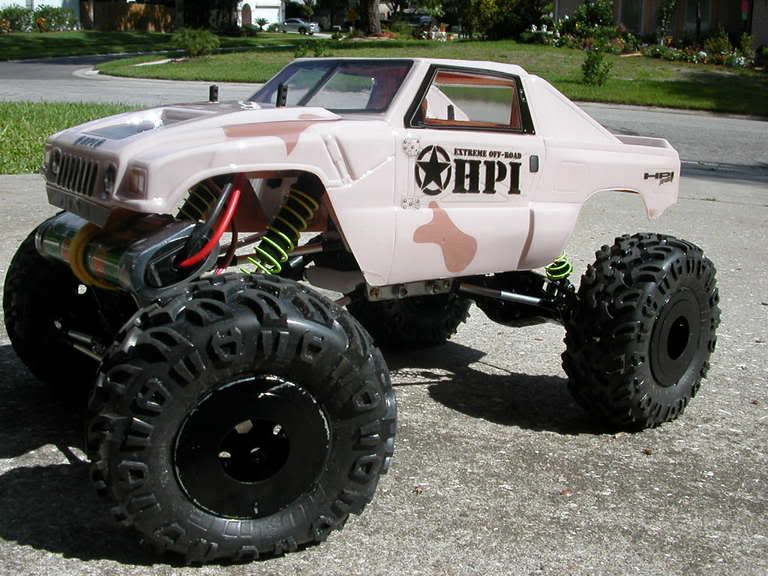 just a quick flex shot in the front yard 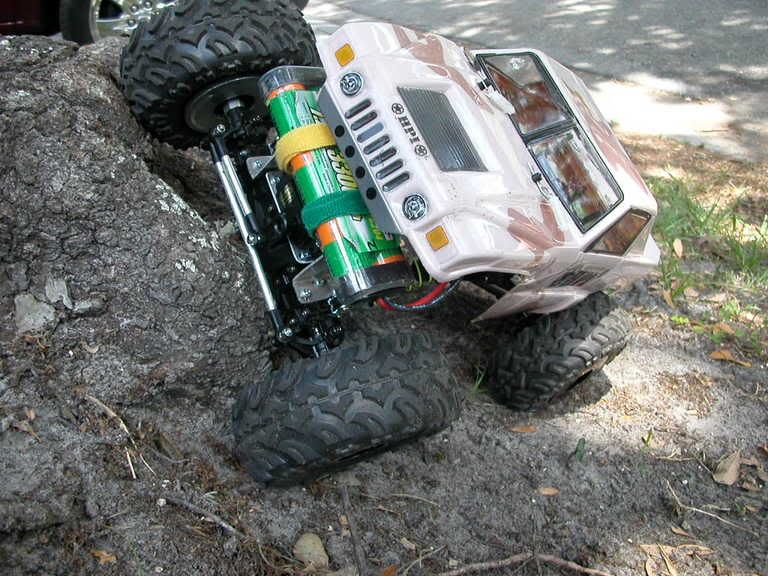 |

|  |
| Sponsored Links | |
| | |
|
06-02-2006, 01:02 PM
| #2 |
| I wanna be Dave Join Date: Sep 2005 Location: USA
Posts: 11,196
|
Looks good. Nice use of the stock chassis. I'd shorten the top links a little.
|
|
| |
|
06-02-2006, 01:47 PM
| #3 |
| Pebble Pounder Join Date: May 2005 Location: United States Of America
Posts: 157
|
Why did you lock out the rear like this?  Just courios . |
|
| |
|
06-02-2006, 02:03 PM
| #4 | ||
| Rock Crawler Join Date: Jun 2005 Location: Safety Harbor
Posts: 588
| Quote:
Quote:
| ||
|
| |
|
06-02-2006, 02:24 PM
| #5 |
| MODERATOR   Join Date: Jul 2004 Location: Ohio
Posts: 18,928
|
Keep the rear axle like it is, you get more clearance before things hit the driveshaft and yoke. The front axle should sit close to zero caster, or even laid back a little for the best steering. Good job! |
|
| |
|
06-02-2006, 02:32 PM
| #6 |
| RCC Addict Join Date: Jun 2004 Location: Bruiser Heaven!!!!
Posts: 1,463
|
looks really nice 72blazer and i may be at the next comp when we have one i hope rich |
|
| |
|
06-02-2006, 03:25 PM
| #7 |
| Rock Crawler Join Date: Sep 2005 Location: wyckoff, NJ
Posts: 639
|
looks really good, what did you use to cut the chassis?
|
|
| |
|
06-02-2006, 03:35 PM
| #8 | ||
| Rock Crawler Join Date: Jun 2005 Location: Safety Harbor
Posts: 588
| Quote:
Quote:
Rich,hope you make it to the next one,whenever that will be. Rob | ||
|
| |
|
06-02-2006, 04:06 PM
| #9 |
| Quarry Creeper  Join Date: Aug 2004 Location: Pacific
Posts: 492
|
Great job.Where did you buy the cutting board and do they have a thicker one other than the one you've used for your center skid?
|
|
| |
|
06-02-2006, 09:13 PM
| #10 |
| RCC Addict Join Date: Jun 2004 Location: Bruiser Heaven!!!!
Posts: 1,463
|
the cutting board u can get from wal-mart or a grocery store, and they are about 1/4" to 5/16" thick i think. rich |
|
| |
|
06-03-2006, 07:29 AM
| #11 |
| Quarry Creeper Join Date: Jun 2006 Location: Pinckney
Posts: 247
|
72Blazer, the rig looks great! You have given me plenty to think about, thanks. |
|
| |
|
06-03-2006, 04:07 PM
| #12 |
| Rock Crawler Join Date: Mar 2006 Location: Holiday, FL
Posts: 540
|
Hey Rob Do You Run Wheel Wieghts In Your Crawler And The Washer On The Inside Of The Rim Does It Go On The Bead Or The Back Of The Center |
|
| |
|
06-03-2006, 10:08 PM
| #13 | |
| Rock Crawler Join Date: Jun 2005 Location: Safety Harbor
Posts: 588
| Quote:
| |
|
| |
|
06-05-2006, 02:06 AM
| #14 |
| Pebble Pounder Join Date: Jan 2005 Location: Idaho
Posts: 97
|
Hows the steering with the axle tipped down like that. That negative caster would be really bad in a 1:1, but there's no speed here. Does it increase servo load? Nice build! |
|
| |
|
06-05-2006, 09:44 AM
| #15 | |
| Rock Crawler Join Date: Jun 2005 Location: Safety Harbor
Posts: 588
| Quote:
| |
|
| |
|
06-05-2006, 10:13 PM
| #16 |
| Pebble Pounder Join Date: May 2006 Location: Scottsdale
Posts: 180
|
what are you doing about driveshafts?
|
|
| |
|
06-06-2006, 12:33 AM
| #17 |
| Newbie Join Date: Mar 2006 Location: N.ZER in Auzzy
Posts: 25
|
Looking good mate, just wating on a tranny my self, how did you attach tha tranny to the white board?.
|
|
| |
|
06-06-2006, 09:10 AM
| #18 | |
| RCC Addict Join Date: Jun 2004 Location: Bruiser Heaven!!!!
Posts: 1,463
| Quote:
rich http://s32.photobucket.com/albums/d4...20tlt%20frame/ | |
|
| |
|
06-06-2006, 11:27 AM
| #19 | ||
| Rock Crawler Join Date: Jun 2005 Location: Safety Harbor
Posts: 588
| Quote:
Quote:
| ||
|
| |
|
09-24-2006, 01:55 PM
| #20 |
| Rock Crawler Join Date: Mar 2006 Location: Holiday, FL
Posts: 540
|
Look good
|
|
| |
|
| |


 Linear Mode


