| |
| |||||||
 |
| | LinkBack | Thread Tools | Display Modes |
 02-22-2005, 05:59 PM
| #1 |
| RCC Addict Join Date: Apr 2004 Location: Cincinnati Ohio
Posts: 1,673
|
I got my first Pajero in the mail today. I bought it knowing it was a fixer upper. The guy told me the chassis was unrepairable but I want to see if I can possibly fix it. This is the first Pajero I've ever owned or seen in real life, so I have no clue on hose these go together. So please bear with me here. First up, the top of the chassis. Here's a pic  It has a big crack running back and a chunk taken out around the gear. The cover plate that goes over it is still intact. I also have a set of better looking gears. Now, the underside. Heres a pic  You can see the crack, and also some of the "webbing" is cracked off around the sides, and the screw mounts are busted. This is what most concerns me. The cover that goes over the gears is still intact. Now, the spare parts that came with it. Heres a pic  On the right I know thats the drive shaft, which is severely bent, what looks like 2 spider gears, and the u joint. On the left I dont know what all those are. One looks like a motor mount that is hacked up, and 2 pinion gears for the motor? The rest I dont know. So. My questions are as follows. Do you think that I could fix the chassis with some backyard engineering and lots of JB weld? I just dont have the $35 for a new chassis right now. Do I have all the parts required to run this thing? Will that motor mount work? I dont see how it is to be installed. Maybe if someone could scan their manual and show me how the motor is installed that would be great. Can I use a 32p 8t pinion? I need to replace that bent up rear drive shaft. Are there any substitutes for this shaft like a revo or tmaxx shaft, or do I have to stick with the stock Pajero shaft? Thanks guys! |

|  |
| Sponsored Links | |
| | |
|
02-22-2005, 07:21 PM
| #2 |
| Rock Crawler Join Date: Jun 2004 Location: SW, Connecticut
Posts: 685
|
Not sure on some of those questions, but I'll see what I can remember (I had a pajero a few years ago) The chassis doesn't look that bad, as long as it isn't rubbing the gears and all of the covers fit. To fix the crack, you could fill the surrounding area with JB weld. The motor mount looks like the slots have been widened, some people do that to fit 12T pinions (stock, you can only run 16 or 20). To mount the motor mount, look at the big skinny gear covered with gray stuff in your first pic. That is the spur. The 3mm hole to the left and up of it (in the pic) is where the stub on the motor mount goes. It gets sandwiched between the chassis and the gear cover. The pinion and spur gears are Metric pitch. RRP makes metric pinions. Do not mount 48P pinions if you don't want your spur getting chewed up. In your last pic: On the right is a driveshaft, a spare yoke and what looks to be two spider gears. The bronze gears on the left look like pinions The white plastic parts on the left are a diff locker and what looks to be the side of the front diff. You can run a maxx shaft (there probibly isn't enough room for a revo) in the rear. I think all you need to do is drill through the out puts for the pin that comes with the sliders. Or you can use a setscrew which is what is used stock. Don't quote me on any of this, its been a while since I've owned one. Maybe Highmark can give you some better answers Last edited by CustomCrawler; 02-22-2005 at 07:43 PM. |
|
| |
|
02-22-2005, 07:28 PM
| #3 |
| RCC Addict Join Date: Apr 2004 Location: Cincinnati Ohio
Posts: 1,673
|
Sweet. I'll have to run to the store and get some extra JB weld then! That and some new screws, washers, and nuts to hold the gear covers on. I'll bring her in to the LHS and see what drive shaft works. I'd like to stick with the set screw setup untill I get more comfortable with the rig and then maybe I'll drill it out it I have problems with it. |
|
| |
|
02-22-2005, 08:31 PM
| #4 |
| PapaGriz Yo   Join Date: Apr 2004 Location: In the garage building the wife a crawler
Posts: 13,137
|
Mebbe this will hep Adam. It's a .pdf exploded view of the whole chassis w/ part numbers. http://www.tamiyausa.com/pdf/58324e.pdf Got the link here under exploded view. http://www.tamiyausa.com/product/ite...oduct-id=58324 It looks like a basket case but also looks like fun. Good luck. |
|
| |
|
02-22-2005, 08:36 PM
| #5 |
| RCC Addict Join Date: Nov 2004 Location: Redding, CA
Posts: 1,288
|
first thing i would do is clean that thing. |
|
| |
|
02-22-2005, 08:40 PM
| #6 |
| RCC Addict Join Date: Apr 2004 Location: Cincinnati Ohio
Posts: 1,673
|
lol...why? So it can get dirty again? I will clean it. But only around the areas where I will be JB welding. That and the gears will all be cleaned up and lubed. And man, the gears stink like dead animals! |
|
| |
|
02-23-2005, 10:29 PM
| #7 |
| RCC Addict Join Date: Apr 2004 Location: Cincinnati Ohio
Posts: 1,673
|
After looking through the manual, I realized that I'm missing some peices. Mainly, the shaft that runs through the spur gear and rests on the bearing supports on the chassis, which are missing. Parts "BD5" and either "G1" or "G2" The gear that attaches to the drive shaft has the shaft and bearing that rides on the supports. Attached is a pic to show you How can I get a hold of this shaft? Is there a "parts bag" that includes this? This is starting to suck. The guy I bought it from said it just needed a new chassis and was otherwise ready to run. Diddnt know it was missing parts. Also, since i only had one of those "G" parts to lock the diff, I went ahead and hot glue locked the front diff. It is now really tight, and there is now a whole lot of resistance in the front wheels when you turn them. I expected some, but it seems excessive. Not sure how to explain how much resistance there is, but you have to put it on the carpet and push down on it for the wheels to spin. Do I need to re-do the locker or is this normal since I used hot glue? |
|
| |
|
02-23-2005, 10:48 PM
| #8 |
| Quarry Creeper Join Date: Jan 2005 Location: Denver, CO
Posts: 388
|
I don't know about the front diff, or any of the other stuff. Using the stock gears you will have one hell of a time getting the rear wheels to work, I don't see any way of hooking that back up. But, you can do what I've done:   What I've done is: I bought a brand new rear differential, bevel gear, and a few assorted driveshafts off Ebay. Then I crammed the diff in the front diff spot. JB Welded the hell out of a brace for the bevel gear (after dremeling the hell out of the chassis). I then drilled a hole behind the battery holder to run the rear driveshaft through, i hooked both the driveshafts up to a locked Maxx differential (which I have no idea what it's gonna do to my ratio, I'll get a pede tranny in there, just working with what I got ;) ) and I'm gonna run that to my motor + GD600. BTW, I had to flip the rear axle over so the front and rear both rotate the same direction. I don't know how it will perform, or if it will work......but after I toasted the stock gears with a GD600 and grippy tires, I'm willing to try anything. BTW, This guy on ebay has all sorts of Tamiya parts for XB and XC chassis.....good prices too. |
|
| |
|
02-23-2005, 11:14 PM
| #9 |
| RCC Addict Join Date: Apr 2004 Location: Cincinnati Ohio
Posts: 1,673
|
Wow...thats a whole hell of a lot of hacking! I dont even fully understand what you did. Pics are hella blurry. You replaced the front diff with a maxx diff, drive shaft from that going to another max diff in the center, hook the motor somehow to the maxx diff in the center, and then from the center diff to the rear axle? Wow. I just want to get mine running, I dont think I'll do all that just yet. I want to know how it all works stock before I go doing anything crazy like that!
|
|
| |
|
02-24-2005, 04:53 AM
| #10 |
| Quarry Creeper 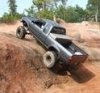 Join Date: Jan 2005 Location: Carlisle, KY
Posts: 327
|
I have never seen anyone make an entire Pajero out of JB Weld. |
|
| |
|
02-24-2005, 10:03 AM
| #11 |
| Quarry Creeper Join Date: Feb 2004
Posts: 373
|
Hey Adam ,If all ya Need is The Shaft for the Rear drive to go on Just Buy some Brass or aluminum Solid rod at the Hardware store and Cut to length them File the Flat spots on it .Easy.It ya Cant do it I can make ya One . I have 2 Jeros So...I can copy one for ya . Or Ya Could Call Tamiya And Order it .It would be easyer and Cheeper to make.
|
|
| |
|
02-24-2005, 10:45 AM
| #12 |
| RCC Addict Join Date: Apr 2004 Location: Cincinnati Ohio
Posts: 1,673
|
Yea, thats what I was planning on doing. So there are flat spots on it? Hard to tell from the manual. I understand this shaft is 5mmx60mm. Not sure where to find 5mm round stock. But, I did notice that my beat up old driveshaft for this Jero is exactly 5mm in diameter and a little over 60mm in length! Might have to cut it up if I can find a new drive shaft.
|
|
| |
|
02-25-2005, 08:27 PM
| #13 |
| Rock Stacker Join Date: Jan 2005 Location: Chattanooga
Posts: 86
|
I'm more of a 10th scale guy but damn you poeple have started to get me hooked on the 2.2 rigs too!!! Anyway a bit of help,or maybe just a thought! go to ebay and check this item out,not sure what shipping would be but its a thought! 5958703616
|
|
| |
|
02-25-2005, 09:26 PM
| #14 |
| RCC Addict Join Date: Apr 2004 Location: Cincinnati Ohio
Posts: 1,673
|
Thanks for looking out for me, but thats for a different Pajero, not the one I have. But I have found a chassis and all the parts I need to make this truck work. I'll post another thread when I get it running! |
|
| |
|
| |


 Linear Mode


