| |
 05-03-2010, 08:26 AM
| #1 |
| Newbie Join Date: Oct 2009 Location: Belgium
Posts: 43
|
Saw the cool things people where doing with their CC/XC's and had to have one myself... Ordered some hop-ups with it, ball-bearings, GPM Steering kit & black steering knuckels: 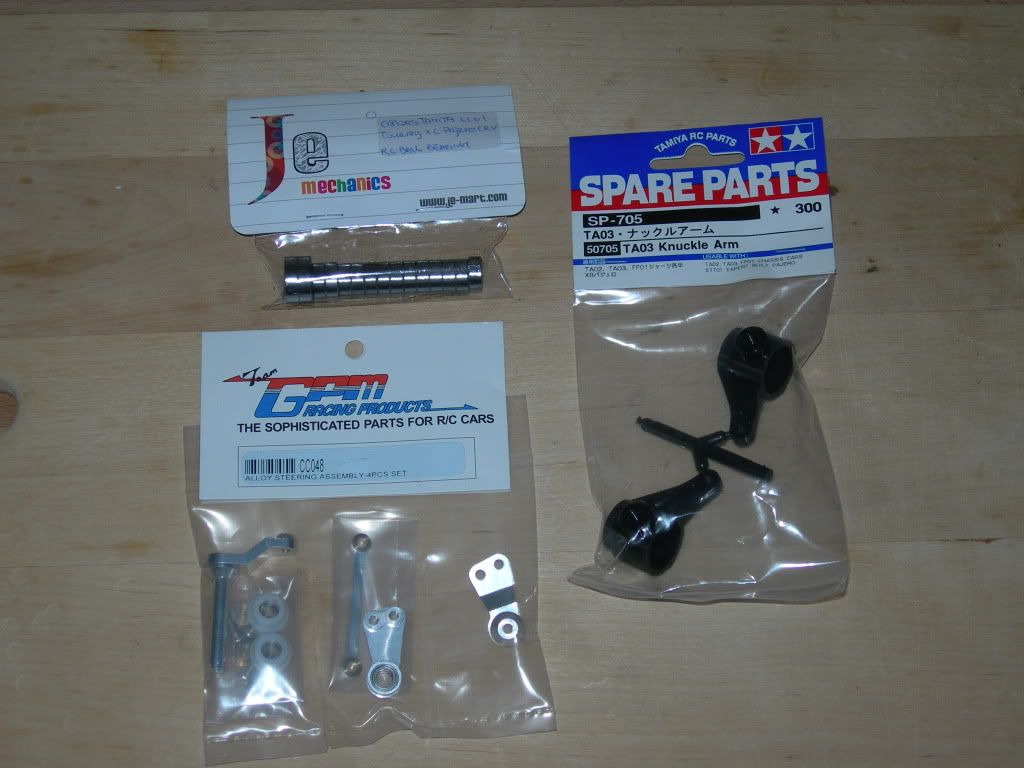 As well as some GPM cvd's: 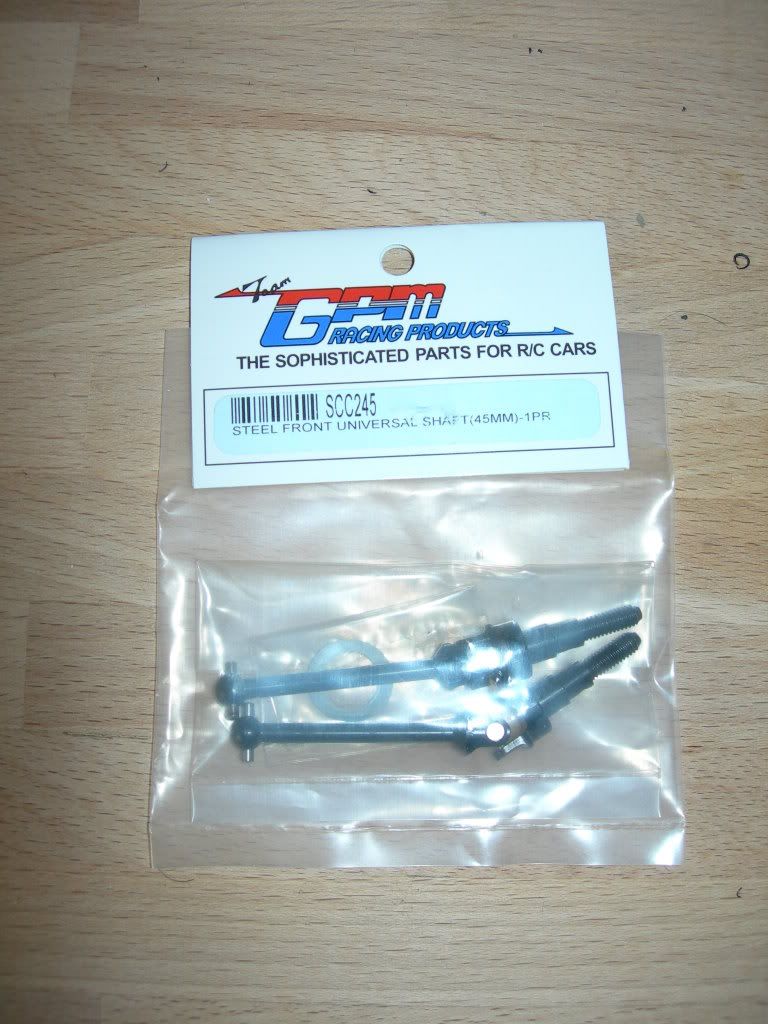 Steering set mounted: 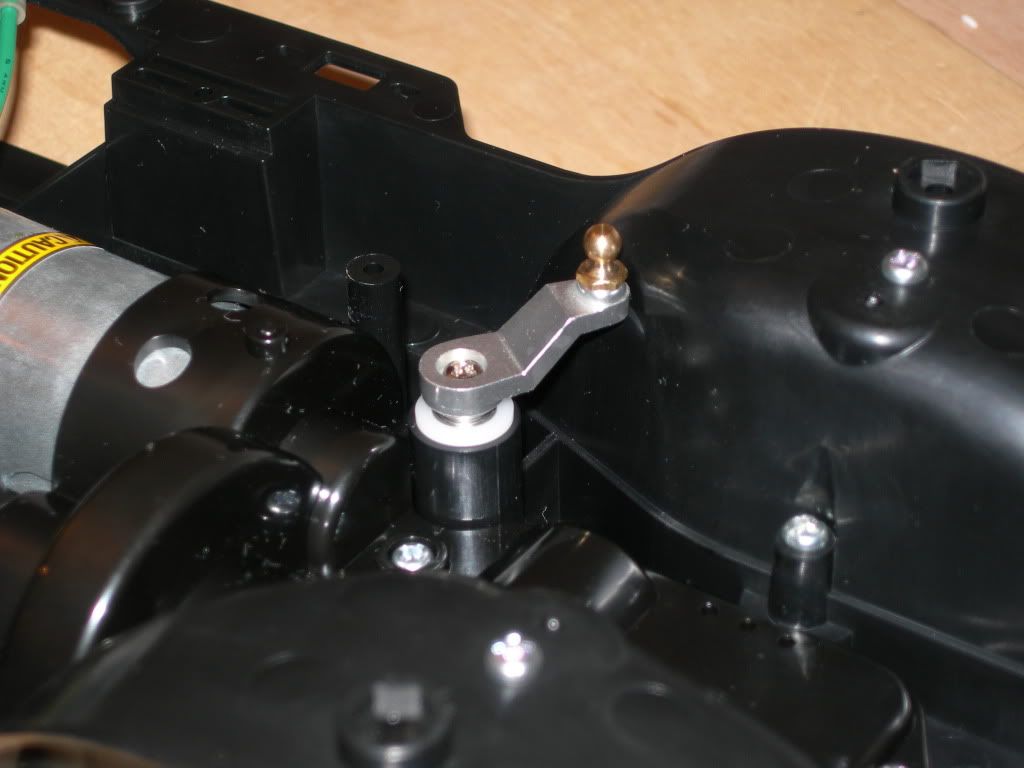 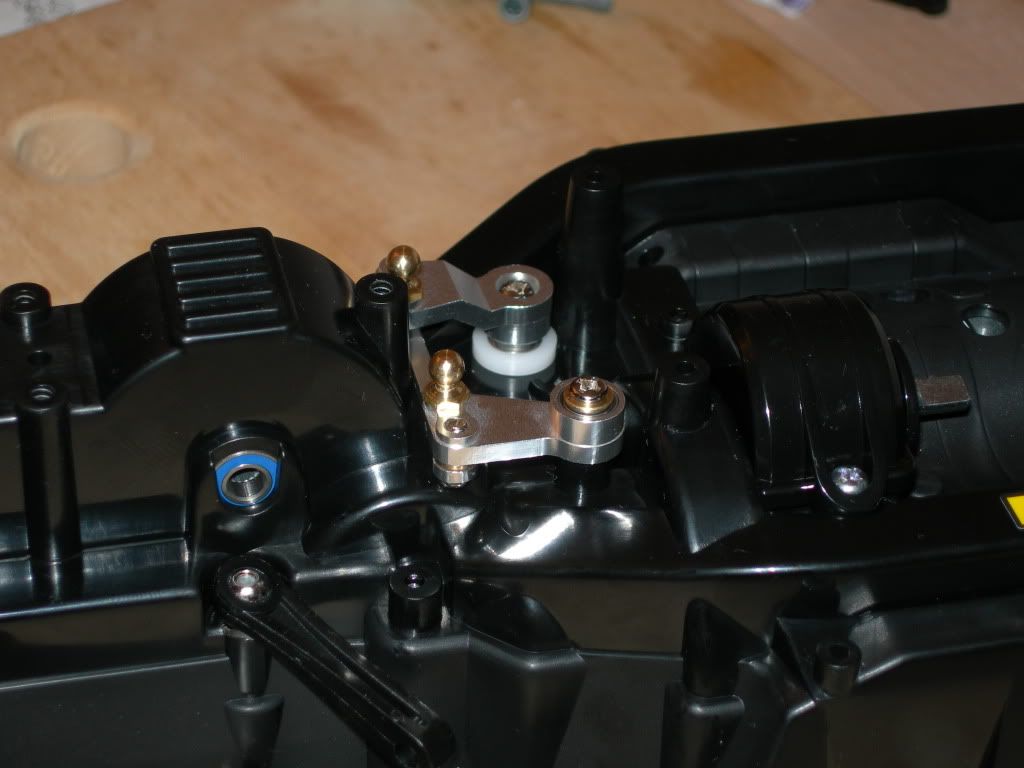 Unfortunately I notice a lot of slop in the steering set-up, will have to get this fixed (tips welcome of course Also popped in the CR-Tuned 35T motor I had lying around (is still way to fast) in combination with the standard ESC (for now): 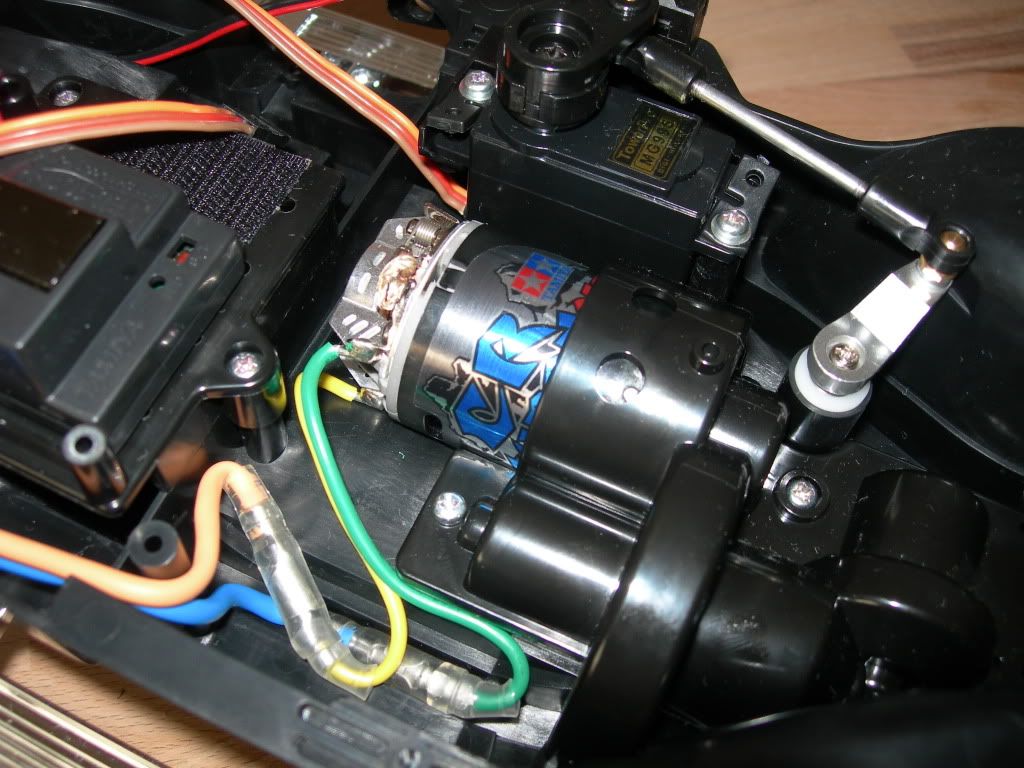 As a servo I've got a HS-625MG installed (got rid of the TowerPro from the picture)... still have to get me an alu servo-arm for it, at the moment the standard servo-saver is installed. Of course front & rear diffs are locked... Would like to get some other wheels/tyres, haven't decided which to get yet. Thinking about the 1.55 Mud Thrashers. Still has to get painted as well but can't decide on the colours, don't want the standard box-art look either... Last edited by Cornholio; 05-04-2010 at 05:15 AM. |

|  |
| Sponsored Links | |
| | |
|
05-03-2010, 01:27 PM
| #2 |
| Rock Crawler Join Date: Jan 2010 Location: Pacifica, CA.
Posts: 919
|
Looks good!  |
|
| |
|
05-04-2010, 11:26 AM
| #3 |
| Quarry Creeper Join Date: Jan 2008 Location: san jose
Posts: 293
|
nice setup
|
|
| |
|
05-05-2010, 06:45 AM
| #4 |
| Newbie Join Date: Oct 2009 Location: Belgium
Posts: 43
|
Thanks :-) Shaved my C-hubs as well... I think I've got all the free mods covered now. Next up is a higher-torque motor, another esc, a 4-link and some new wheels & tyres, as soon as there's budget available again :p Not happy with the GPM steering set, a LOT of slop, I can move my wheels 5 to 7 mm (without the servo-horn moving). Any help / tips to fix this are welcome... Last edited by Cornholio; 05-05-2010 at 06:50 AM. |
|
| |
|
05-05-2010, 11:06 PM
| #5 |
| Newbie Join Date: Oct 2009 Location: kansas city
Posts: 17
|
take it apart and make sure its put together right.. and use loctite. i say this cause it took me a time or two to get it right. and once i did everything had loosened up. after i secured everything its a 100% improvement..
|
|
| |
|
05-06-2010, 12:48 AM
| #6 | |
| Pebble Pounder  Join Date: Apr 2009 Location: Italy
Posts: 104
| Quote:
Use thread locker and check every screw is well tightened. I have only a few mm of slop in the wheel that is not directly connected to the main steering shaft. Mud Trashers are great tires!!! I think you are missing a couple smaller bearings in your set... EDIT: Like the one on the pinion shaft in this pic: 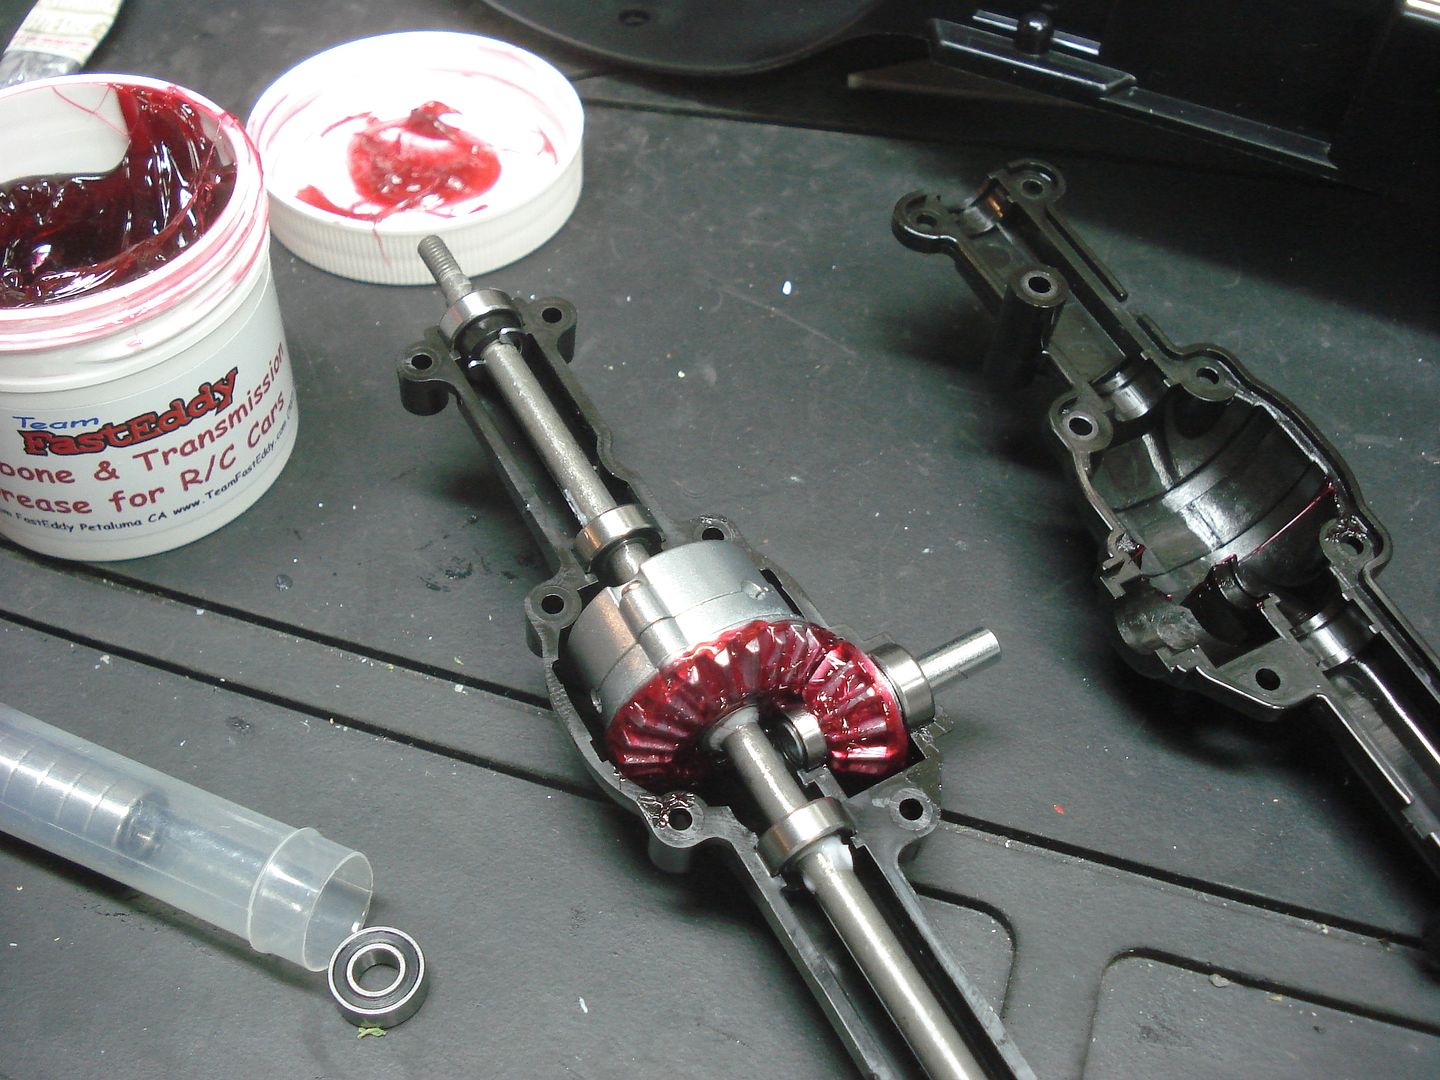 Last edited by tHeo; 05-06-2010 at 12:52 AM. | |
|
| |
|
05-10-2010, 09:51 AM
| #7 |
| Newbie Join Date: Oct 2009 Location: Belgium
Posts: 43
|
Haven't started taking the steering set apart yet... will get it done one of these days... Anyone has some good pictures of the assembled set, 'cause I remember there was no instruction with it so I "guessed" on how it should come together. Well, Mud Trashers where (and still are) my first choice And do you guys put foams in them...? All bearings where accounted for, the smaller ones where hidden in the bigger ones Ps: I always use threadlock where applicable Last edited by Cornholio; 05-10-2010 at 01:03 PM. |
|
| |
|
05-30-2010, 05:20 AM
| #8 |
| Newbie Join Date: Oct 2009 Location: Belgium
Posts: 43
|
Finally decided on the color's: 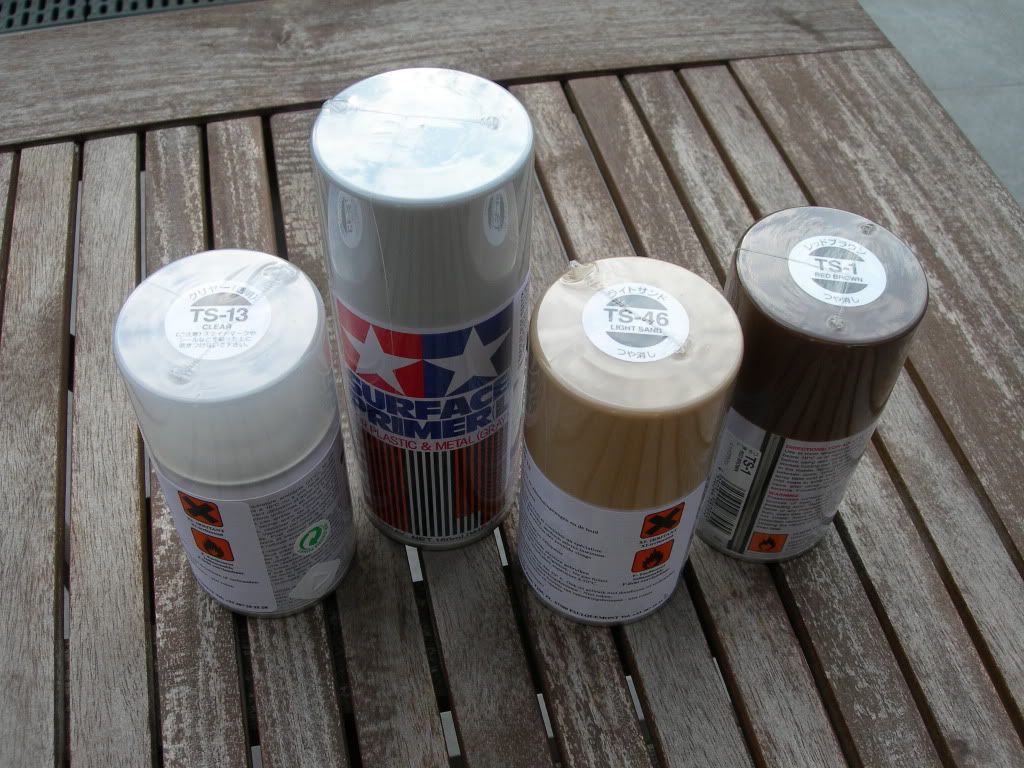 |
|
| |
|
06-01-2010, 08:46 PM
| #9 |
| RCC Addict Join Date: Mar 2007 Location: MS Gulf Coast
Posts: 1,949
|
How do you like the GPM steering mod? DOes it reduce the slop? Nice choice for color, I just painted mine light sand. |
|
| |
|
06-02-2010, 01:22 AM
| #10 |
| Newbie Join Date: Oct 2009 Location: Belgium
Posts: 43
|
Thanks, took me a while to choose... I wanted a retro look. Now I need to get it actually painted, that's going to be something else since I have zero painting-skills. I also made up my mind for a purpose for this car, this one will become a (capable) scale trail'er. About the GPM steering kit, as mentioned before, I have a lot of slop in it. But it might be a user error (I hope), will have to take it back out and check it... Could use some other tires as well, need to get into the classifieds |
|
| |
|
06-04-2010, 02:09 AM
| #11 |
| Newbie Join Date: Oct 2009 Location: Belgium
Posts: 43
|
Worked out some color schemes, can't really decide... What do you guys think? Option 1 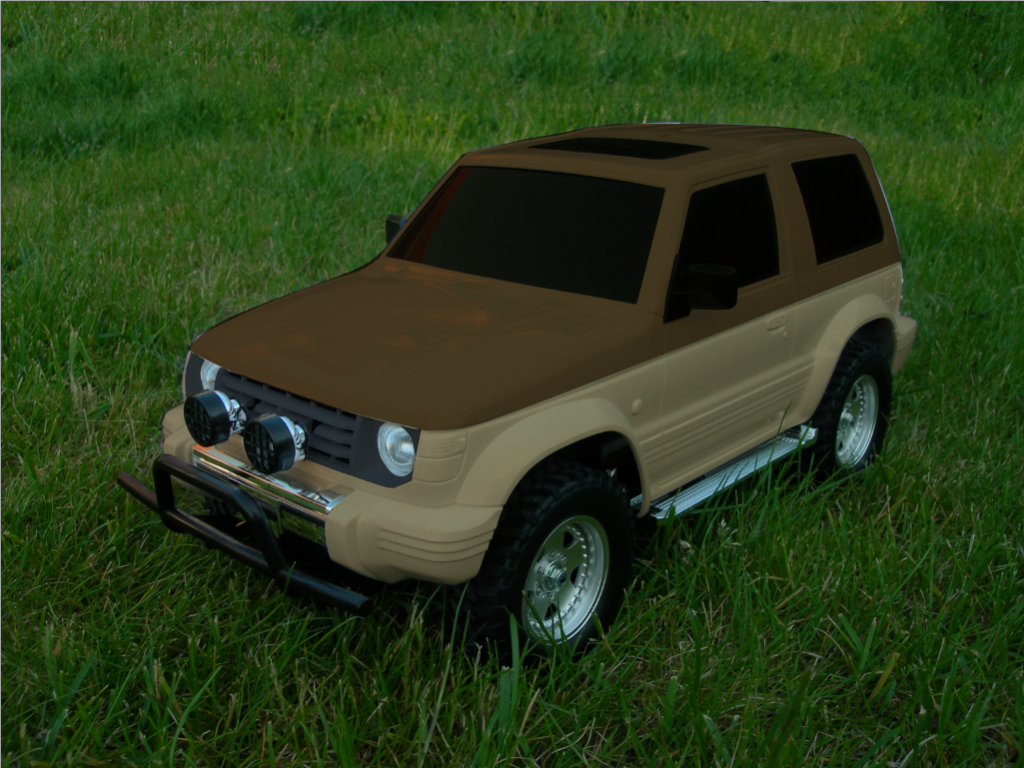 Option 2 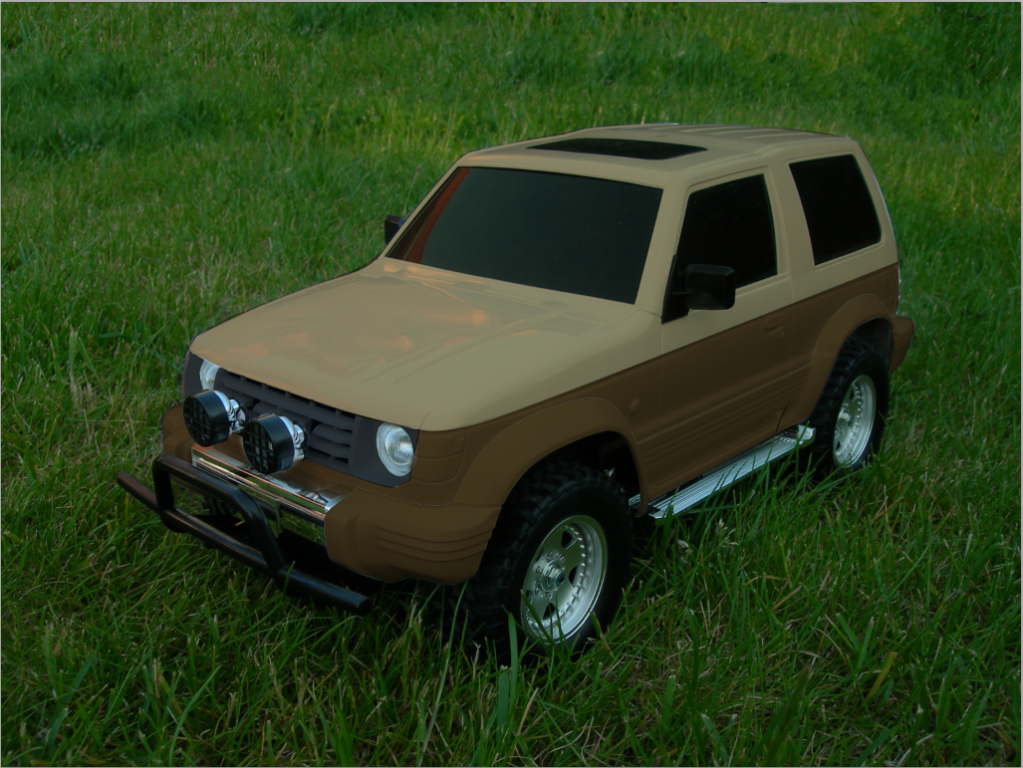 Option 3 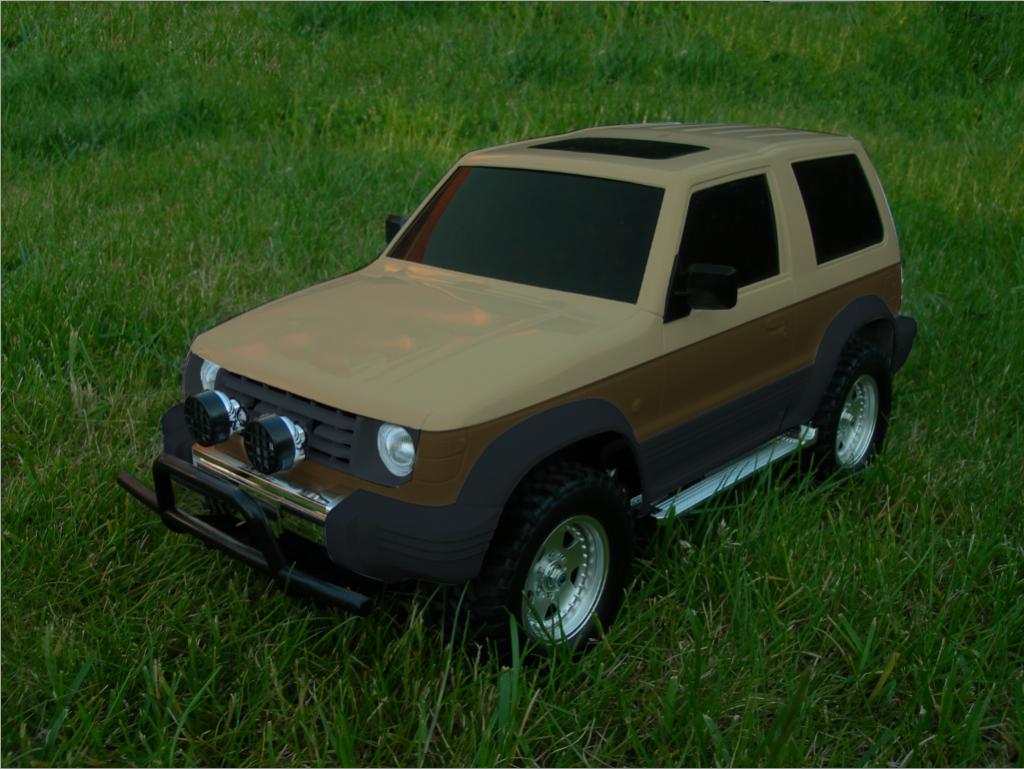 Option 4 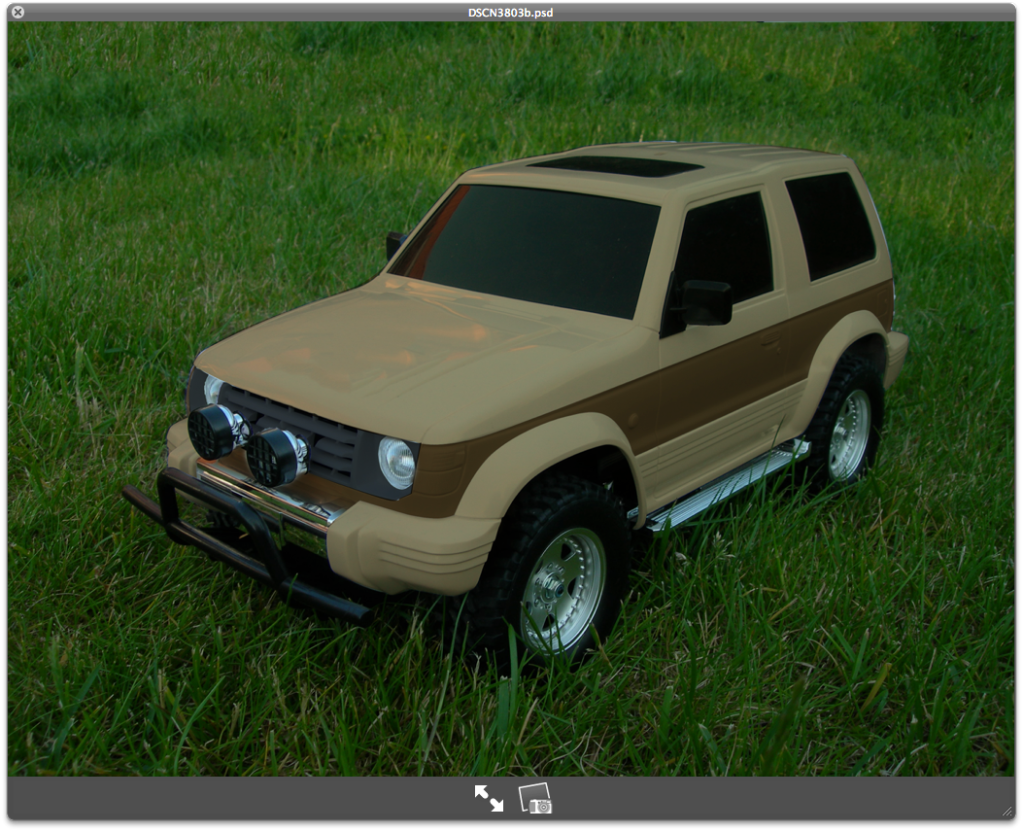 Option 5  Option 6 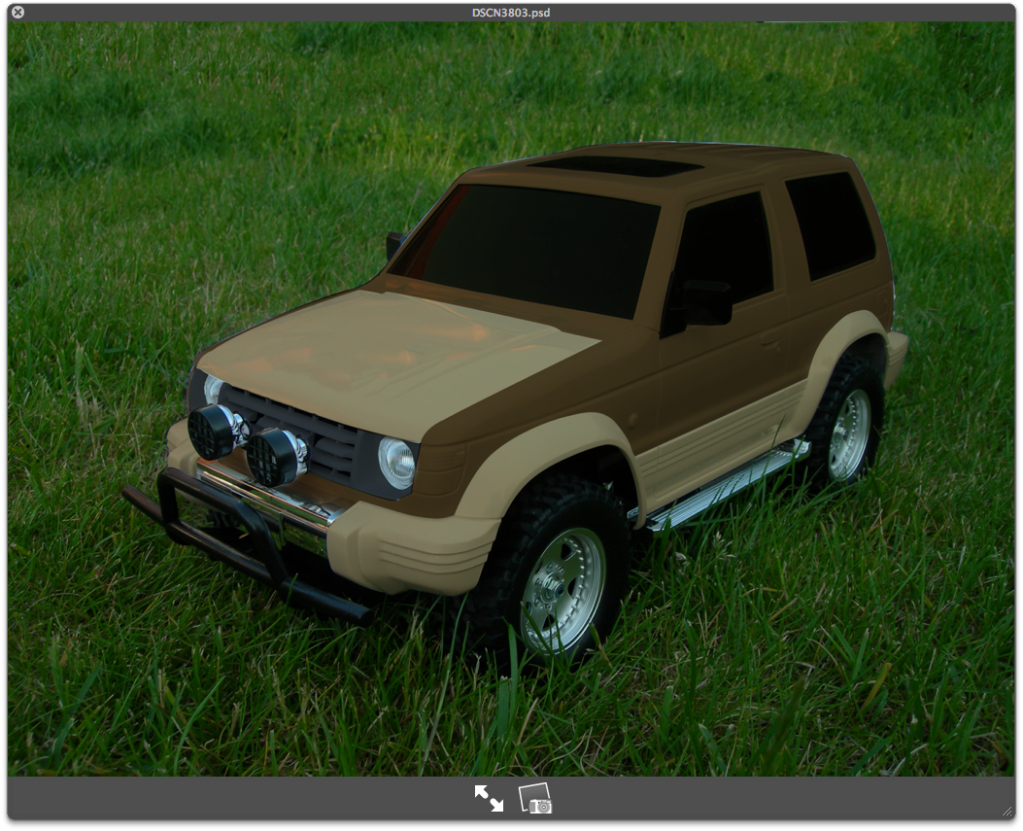 Of course all the lights, doorhandles, ... will get a color as well, will put black wheels under it and some scale stuff. Should eventually look as a trial'er Let me know what you think |
|
| |
|
06-04-2010, 07:59 AM
| #12 |
| Newbie Join Date: Sep 2009 Location: EU
Posts: 24
|
Opt 4
|
|
| |
|
06-04-2010, 10:36 AM
| #13 |
| Rock Stacker Join Date: Apr 2010 Location: Philadelphia
Posts: 69
|
I like #4 the best too. Fran |
|
| |
|
06-04-2010, 11:15 AM
| #14 |
| Newbie Join Date: Oct 2009 Location: Belgium
Posts: 43
|
I'm thinking nr 5 myself... |
|
| |
|
06-04-2010, 04:06 PM
| #15 |
| RCC Addict Join Date: Mar 2007 Location: MS Gulf Coast
Posts: 1,949
|
Yea I like 4 or 5. I was going to do mine similar to #5 but the roof would be flat black to match the rest of my black but I didn't get around to taping it off.
|
|
| |
|
06-08-2010, 02:19 PM
| #16 |
| Newbie Join Date: Oct 2009 Location: Belgium
Posts: 43
|
Okay, was about to start with the primer, but figured I don't need that ugly antenna hole in the roof so I want it closed. Only problem is that I haven't got a clue on how to do this (don't laugh, it's my first hardshell :p). I got a tube of Tamiya Putty, I suppose this does the trick but how should I do this? What are the steps?
|
|
| |
|
06-08-2010, 08:39 PM
| #17 |
| I wanna be Dave Join Date: Oct 2006 Location: Centered
Posts: 2,082
|
Subscribed...been thinking about picking up the Mog CC-01 so this may twist my arm just a bit more I dig option 3, the charcoal pops the rest of the body colors |
|
| |
|
06-08-2010, 09:28 PM
| #18 | |
| I wanna be Dave Join Date: Oct 2006 Location: Centered
Posts: 2,082
| Quote:
Squadron also makes a tool for this application which I picked up with the putty and I have to say, it made the job very easy: http://www3.towerhobbies.com/cgi-bin...?&I=LXFP40&P=7 I applied some putty to the flat blade of the tool, laid it on the cab, then used the angled blade to work it into the fill spot. The angled blade has a bit of a twist to it which makes it very easy to work the putty. I "sliced" off any excess with the flat blade, allowed it to dry and then sanded down any remaining putty. This was my first attempt at a hard body as well, and what I'll pass along to you is that when you think you're done sanding, go a bit more. I thought I had some really clean fills...smooth to the touch and even with the body, but as soon as you lay paint down, it's a different story You can of course go many, many steps into the painting and sanding process to help with getting clean fill lines, but that's all up to you. Good luck and enjoy! | |
|
| |
|
06-09-2010, 04:37 AM
| #19 |
| Newbie Join Date: Oct 2009 Location: Belgium
Posts: 43
|
Thanks, glad you like my build. You really should get one of these, there inexpensive and fun to play with Will keep your tips in mind... hopefully I'll have some spare time in the weekend to try it. |
|
| |
|
06-09-2010, 05:45 PM
| #20 |
| Newbie Join Date: Aug 2004
Posts: 29
|
I'd reverse the colors on number 4. I think it would look more appropriate...
|
|
| |
 |
| |


 Linear Mode


